# Installation
🤗 Diffusers is tested on Python 3.8+, PyTorch 1.7.0+, and Flax. Follow the installation instructions below for the deep learning library you are using:
- [PyTorch](https://pytorch.org/get-started/locally/) installation instructions
- [Flax](https://flax.readthedocs.io/en/latest/) installation instructions
## Install with pip
You should install 🤗 Diffusers in a [virtual environment](https://docs.python.org/3/library/venv.html).
If you're unfamiliar with Python virtual environments, take a look at this [guide](https://packaging.python.org/guides/installing-using-pip-and-virtual-environments/).
A virtual environment makes it easier to manage different projects and avoid compatibility issues between dependencies.
Start by creating a virtual environment in your project directory:
```bash
python -m venv .env
```
Activate the virtual environment:
```bash
source .env/bin/activate
```
You should also install 🤗 Transformers because 🤗 Diffusers relies on its models:
Note - PyTorch only supports Python 3.8 - 3.11 on Windows.
```bash
pip install diffusers["torch"] transformers
```
## Install with conda
After activating your virtual environment, with `conda` (maintained by the community):
```bash
conda install -c conda-forge diffusers
```
## Install from source
Before installing 🤗 Diffusers from source, make sure you have PyTorch and 🤗 Accelerate installed.
To install 🤗 Accelerate:
```bash
pip install accelerate
```
Then install 🤗 Diffusers from source:
```bash
pip install git+https://github.com/huggingface/diffusers
```
This command installs the bleeding edge `main` version rather than the latest `stable` version.
The `main` version is useful for staying up-to-date with the latest developments.
For instance, if a bug has been fixed since the last official release but a new release hasn't been rolled out yet.
However, this means the `main` version may not always be stable.
We strive to keep the `main` version operational, and most issues are usually resolved within a few hours or a day.
If you run into a problem, please open an [Issue](https://github.com/huggingface/diffusers/issues/new/choose) so we can fix it even sooner!
## Editable install
You will need an editable install if you'd like to:
* Use the `main` version of the source code.
* Contribute to 🤗 Diffusers and need to test changes in the code.
Clone the repository and install 🤗 Diffusers with the following commands:
```bash
git clone https://github.com/huggingface/diffusers.git
cd diffusers
```
```bash
pip install -e ".[torch]"
```
These commands will link the folder you cloned the repository to and your Python library paths.
Python will now look inside the folder you cloned to in addition to the normal library paths.
For example, if your Python packages are typically installed in `~/anaconda3/envs/main/lib/python3.10/site-packages/`, Python will also search the `~/diffusers/` folder you cloned to.
You must keep the `diffusers` folder if you want to keep using the library.
Now you can easily update your clone to the latest version of 🤗 Diffusers with the following command:
```bash
cd ~/diffusers/
git pull
```
Your Python environment will find the `main` version of 🤗 Diffusers on the next run.
## Cache
Model weights and files are downloaded from the Hub to a cache which is usually your home directory. You can change the cache location by specifying the `HF_HOME` or `HUGGINFACE_HUB_CACHE` environment variables or configuring the `cache_dir` parameter in methods like `from_pretrained()`.
Cached files allow you to run 🤗 Diffusers offline. To prevent 🤗 Diffusers from connecting to the internet, set the `HF_HUB_OFFLINE` environment variable to `True` and 🤗 Diffusers will only load previously downloaded files in the cache.
```shell
export HF_HUB_OFFLINE=True
```
For more details about managing and cleaning the cache, take a look at the [caching](https://huggingface.co/docs/huggingface_hub/guides/manage-cache) guide.
## Telemetry logging
Our library gathers telemetry information during `from_pretrained()` requests.
The data gathered includes the version of 🤗 Diffusers and PyTorch/Flax, the requested model or pipeline class,
and the path to a pretrained checkpoint if it is hosted on the Hugging Face Hub.
This usage data helps us debug issues and prioritize new features.
Telemetry is only sent when loading models and pipelines from the Hub,
and it is not collected if you're loading local files.
We understand that not everyone wants to share additional information,and we respect your privacy.
You can disable telemetry collection by setting the `DISABLE_TELEMETRY` environment variable from your terminal:
On Linux/MacOS:
```bash
export DISABLE_TELEMETRY=YES
```
On Windows:
```bash
set DISABLE_TELEMETRY=YES
```
# Quicktour
Diffusion models are trained to denoise random Gaussian noise step-by-step to generate a sample of interest, such as an image or audio. This has sparked a tremendous amount of interest in generative AI, and you have probably seen examples of diffusion generated images on the internet. 🧨 Diffusers is a library aimed at making diffusion models widely accessible to everyone.
Whether you're a developer or an everyday user, this quicktour will introduce you to 🧨 Diffusers and help you get up and generating quickly! There are three main components of the library to know about:
* The `DiffusionPipeline` is a high-level end-to-end class designed to rapidly generate samples from pretrained diffusion models for inference.
* Popular pretrained [model](./api/models) architectures and modules that can be used as building blocks for creating diffusion systems.
* Many different [schedulers](./api/schedulers/overview) - algorithms that control how noise is added for training, and how to generate denoised images during inference.
The quicktour will show you how to use the `DiffusionPipeline` for inference, and then walk you through how to combine a model and scheduler to replicate what's happening inside the `DiffusionPipeline`.
The quicktour is a simplified version of the introductory 🧨 Diffusers [notebook](https://colab.research.google.com/github/huggingface/notebooks/blob/main/diffusers/diffusers_intro.ipynb) to help you get started quickly. If you want to learn more about 🧨 Diffusers' goal, design philosophy, and additional details about its core API, check out the notebook!
Before you begin, make sure you have all the necessary libraries installed:
```py
# uncomment to install the necessary libraries in Colab
#!pip install --upgrade diffusers accelerate transformers
```
- [🤗 Accelerate](https://huggingface.co/docs/accelerate/index) speeds up model loading for inference and training.
- [🤗 Transformers](https://huggingface.co/docs/transformers/index) is required to run the most popular diffusion models, such as [Stable Diffusion](https://huggingface.co/docs/diffusers/api/pipelines/stable_diffusion/overview).
## DiffusionPipeline
The `DiffusionPipeline` is the easiest way to use a pretrained diffusion system for inference. It is an end-to-end system containing the model and the scheduler. You can use the `DiffusionPipeline` out-of-the-box for many tasks. Take a look at the table below for some supported tasks, and for a complete list of supported tasks, check out the [🧨 Diffusers Summary](./api/pipelines/overview#diffusers-summary) table.
| **Task** | **Description** | **Pipeline**
|------------------------------|--------------------------------------------------------------------------------------------------------------|-----------------|
| Unconditional Image Generation | generate an image from Gaussian noise | [unconditional_image_generation](./using-diffusers/unconditional_image_generation) |
| Text-Guided Image Generation | generate an image given a text prompt | [conditional_image_generation](./using-diffusers/conditional_image_generation) |
| Text-Guided Image-to-Image Translation | adapt an image guided by a text prompt | [img2img](./using-diffusers/img2img) |
| Text-Guided Image-Inpainting | fill the masked part of an image given the image, the mask and a text prompt | [inpaint](./using-diffusers/inpaint) |
| Text-Guided Depth-to-Image Translation | adapt parts of an image guided by a text prompt while preserving structure via depth estimation | [depth2img](./using-diffusers/depth2img) |
Start by creating an instance of a `DiffusionPipeline` and specify which pipeline checkpoint you would like to download.
You can use the `DiffusionPipeline` for any [checkpoint](https://huggingface.co/models?library=diffusers&sort=downloads) stored on the Hugging Face Hub.
In this quicktour, you'll load the [`stable-diffusion-v1-5`](https://huggingface.co/stable-diffusion-v1-5/stable-diffusion-v1-5) checkpoint for text-to-image generation.
For [Stable Diffusion](https://huggingface.co/CompVis/stable-diffusion) models, please carefully read the [license](https://huggingface.co/spaces/CompVis/stable-diffusion-license) first before running the model. 🧨 Diffusers implements a [`safety_checker`](https://github.com/huggingface/diffusers/blob/main/src/diffusers/pipelines/stable_diffusion/safety_checker.py) to prevent offensive or harmful content, but the model's improved image generation capabilities can still produce potentially harmful content.
Load the model with the `from_pretrained()` method:
```python
>>> from diffusers import DiffusionPipeline
>>> pipeline = DiffusionPipeline.from_pretrained("stable-diffusion-v1-5/stable-diffusion-v1-5", use_safetensors=True)
```
The `DiffusionPipeline` downloads and caches all modeling, tokenization, and scheduling components. You'll see that the Stable Diffusion pipeline is composed of the `UNet2DConditionModel` and `PNDMScheduler` among other things:
```py
>>> pipeline
StableDiffusionPipeline {
"_class_name": "StableDiffusionPipeline",
"_diffusers_version": "0.21.4",
...,
"scheduler": [
"diffusers",
"PNDMScheduler"
],
...,
"unet": [
"diffusers",
"UNet2DConditionModel"
],
"vae": [
"diffusers",
"AutoencoderKL"
]
}
```
We strongly recommend running the pipeline on a GPU because the model consists of roughly 1.4 billion parameters.
You can move the generator object to a GPU, just like you would in PyTorch:
```python
>>> pipeline.to("cuda")
```
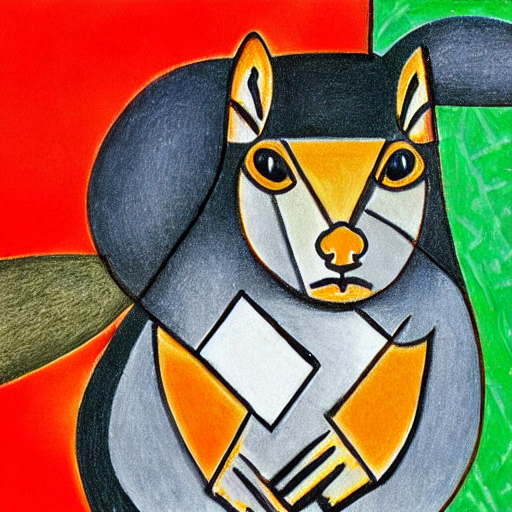
Now you can pass a text prompt to the `pipeline` to generate an image, and then access the denoised image. By default, the image output is wrapped in a [`PIL.Image`](https://pillow.readthedocs.io/en/stable/reference/Image.html?highlight=image#the-image-class) object.
```python
>>> image = pipeline("An image of a squirrel in Picasso style").images[0]
>>> image
```
Save the image by calling `save`:
```python
>>> image.save("image_of_squirrel_painting.png")
```
### Local pipeline
You can also use the pipeline locally. The only difference is you need to download the weights first:
```bash
!git lfs install
!git clone https://huggingface.co/stable-diffusion-v1-5/stable-diffusion-v1-5
```
Then load the saved weights into the pipeline:
```python
>>> pipeline = DiffusionPipeline.from_pretrained("./stable-diffusion-v1-5", use_safetensors=True)
```
Now, you can run the pipeline as you would in the section above.
### Swapping schedulers
Different schedulers come with different denoising speeds and quality trade-offs. The best way to find out which one works best for you is to try them out! One of the main features of 🧨 Diffusers is to allow you to easily switch between schedulers. For example, to replace the default `PNDMScheduler` with the `EulerDiscreteScheduler`, load it with the `from_config()` method:
```py
>>> from diffusers import EulerDiscreteScheduler
>>> pipeline = DiffusionPipeline.from_pretrained("stable-diffusion-v1-5/stable-diffusion-v1-5", use_safetensors=True)
>>> pipeline.scheduler = EulerDiscreteScheduler.from_config(pipeline.scheduler.config)
```
Try generating an image with the new scheduler and see if you notice a difference!
In the next section, you'll take a closer look at the components - the model and scheduler - that make up the `DiffusionPipeline` and learn how to use these components to generate an image of a cat.
## Models
Most models take a noisy sample, and at each timestep it predicts the *noise residual* (other models learn to predict the previous sample directly or the velocity or [`v-prediction`](https://github.com/huggingface/diffusers/blob/5e5ce13e2f89ac45a0066cb3f369462a3cf1d9ef/src/diffusers/schedulers/scheduling_ddim.py#L110)), the difference between a less noisy image and the input image. You can mix and match models to create other diffusion systems.
Models are initiated with the `from_pretrained()` method which also locally caches the model weights so it is faster the next time you load the model. For the quicktour, you'll load the `UNet2DModel`, a basic unconditional image generation model with a checkpoint trained on cat images:
```py
>>> from diffusers import UNet2DModel
>>> repo_id = "google/ddpm-cat-256"
>>> model = UNet2DModel.from_pretrained(repo_id, use_safetensors=True)
```
To access the model parameters, call `model.config`:
```py
>>> model.config
```
The model configuration is a 🧊 frozen 🧊 dictionary, which means those parameters can't be changed after the model is created. This is intentional and ensures that the parameters used to define the model architecture at the start remain the same, while other parameters can still be adjusted during inference.
Some of the most important parameters are:
* `sample_size`: the height and width dimension of the input sample.
* `in_channels`: the number of input channels of the input sample.
* `down_block_types` and `up_block_types`: the type of down- and upsampling blocks used to create the UNet architecture.
* `block_out_channels`: the number of output channels of the downsampling blocks; also used in reverse order for the number of input channels of the upsampling blocks.
* `layers_per_block`: the number of ResNet blocks present in each UNet block.
To use the model for inference, create the image shape with random Gaussian noise. It should have a `batch` axis because the model can receive multiple random noises, a `channel` axis corresponding to the number of input channels, and a `sample_size` axis for the height and width of the image:
```py
>>> import torch
>>> torch.manual_seed(0)
>>> noisy_sample = torch.randn(1, model.config.in_channels, model.config.sample_size, model.config.sample_size)
>>> noisy_sample.shape
torch.Size([1, 3, 256, 256])
```
For inference, pass the noisy image and a `timestep` to the model. The `timestep` indicates how noisy the input image is, with more noise at the beginning and less at the end. This helps the model determine its position in the diffusion process, whether it is closer to the start or the end. Use the `sample` method to get the model output:
```py
>>> with torch.no_grad():
... noisy_residual = model(sample=noisy_sample, timestep=2).sample
```
To generate actual examples though, you'll need a scheduler to guide the denoising process. In the next section, you'll learn how to couple a model with a scheduler.
## Schedulers
Schedulers manage going from a noisy sample to a less noisy sample given the model output - in this case, it is the `noisy_residual`.
🧨 Diffusers is a toolbox for building diffusion systems. While the `DiffusionPipeline` is a convenient way to get started with a pre-built diffusion system, you can also choose your own model and scheduler components separately to build a custom diffusion system.
For the quicktour, you'll instantiate the `DDPMScheduler` with its `from_config()` method:
```py
>>> from diffusers import DDPMScheduler
>>> scheduler = DDPMScheduler.from_pretrained(repo_id)
>>> scheduler
DDPMScheduler {
"_class_name": "DDPMScheduler",
"_diffusers_version": "0.21.4",
"beta_end": 0.02,
"beta_schedule": "linear",
"beta_start": 0.0001,
"clip_sample": true,
"clip_sample_range": 1.0,
"dynamic_thresholding_ratio": 0.995,
"num_train_timesteps": 1000,
"prediction_type": "epsilon",
"sample_max_value": 1.0,
"steps_offset": 0,
"thresholding": false,
"timestep_spacing": "leading",
"trained_betas": null,
"variance_type": "fixed_small"
}
```
💡 Unlike a model, a scheduler does not have trainable weights and is parameter-free!
Some of the most important parameters are:
* `num_train_timesteps`: the length of the denoising process or, in other words, the number of timesteps required to process random Gaussian noise into a data sample.
* `beta_schedule`: the type of noise schedule to use for inference and training.
* `beta_start` and `beta_end`: the start and end noise values for the noise schedule.
To predict a slightly less noisy image, pass the following to the scheduler's `step()` method: model output, `timestep`, and current `sample`.
```py
>>> less_noisy_sample = scheduler.step(model_output=noisy_residual, timestep=2, sample=noisy_sample).prev_sample
>>> less_noisy_sample.shape
torch.Size([1, 3, 256, 256])
```
The `less_noisy_sample` can be passed to the next `timestep` where it'll get even less noisy! Let's bring it all together now and visualize the entire denoising process.
First, create a function that postprocesses and displays the denoised image as a `PIL.Image`:
```py
>>> import PIL.Image
>>> import numpy as np
>>> def display_sample(sample, i):
... image_processed = sample.cpu().permute(0, 2, 3, 1)
... image_processed = (image_processed + 1.0) * 127.5
... image_processed = image_processed.numpy().astype(np.uint8)
... image_pil = PIL.Image.fromarray(image_processed[0])
... display(f"Image at step {i}")
... display(image_pil)
```
To speed up the denoising process, move the input and model to a GPU:
```py
>>> model.to("cuda")
>>> noisy_sample = noisy_sample.to("cuda")
```
Now create a denoising loop that predicts the residual of the less noisy sample, and computes the less noisy sample with the scheduler:
```py
>>> import tqdm
>>> sample = noisy_sample
>>> for i, t in enumerate(tqdm.tqdm(scheduler.timesteps)):
... # 1. predict noise residual
... with torch.no_grad():
... residual = model(sample, t).sample
... # 2. compute less noisy image and set x_t -> x_t-1
... sample = scheduler.step(residual, t, sample).prev_sample
... # 3. optionally look at image
... if (i + 1) % 50 == 0:
... display_sample(sample, i + 1)
```
Sit back and watch as a cat is generated from nothing but noise! 😻
## Next steps
Hopefully, you generated some cool images with 🧨 Diffusers in this quicktour! For your next steps, you can:
* Train or finetune a model to generate your own images in the [training](./tutorials/basic_training) tutorial.
* See example official and community [training or finetuning scripts](https://github.com/huggingface/diffusers/tree/main/examples#-diffusers-examples) for a variety of use cases.
* Learn more about loading, accessing, changing, and comparing schedulers in the [Using different Schedulers](./using-diffusers/schedulers) guide.
* Explore prompt engineering, speed and memory optimizations, and tips and tricks for generating higher-quality images with the [Stable Diffusion](./stable_diffusion) guide.
* Dive deeper into speeding up 🧨 Diffusers with guides on [optimized PyTorch on a GPU](./optimization/fp16), and inference guides for running [Stable Diffusion on Apple Silicon (M1/M2)](./optimization/mps) and [ONNX Runtime](./optimization/onnx).
# Community Projects
Welcome to Community Projects. This space is dedicated to showcasing the incredible work and innovative applications created by our vibrant community using the `diffusers` library.
This section aims to:
- Highlight diverse and inspiring projects built with `diffusers`
- Foster knowledge sharing within our community
- Provide real-world examples of how `diffusers` can be leveraged
Happy exploring, and thank you for being part of the Diffusers community!
Project Name
Description
dream-textures
Stable Diffusion built-in to Blender
HiDiffusion
Increases the resolution and speed of your diffusion model by only adding a single line of code
IC-Light
IC-Light is a project to manipulate the illumination of images
InstantID
InstantID : Zero-shot Identity-Preserving Generation in Seconds
IOPaint
Image inpainting tool powered by SOTA AI Model. Remove any unwanted object, defect, people from your pictures or erase and replace(powered by stable diffusion) any thing on your pictures.
Kohya
Gradio GUI for Kohya's Stable Diffusion trainers
MagicAnimate
MagicAnimate: Temporally Consistent Human Image Animation using Diffusion Model
OOTDiffusion
Outfitting Fusion based Latent Diffusion for Controllable Virtual Try-on
SD.Next
SD.Next: Advanced Implementation of Stable Diffusion and other Diffusion-based generative image models
stable-dreamfusion
Text-to-3D & Image-to-3D & Mesh Exportation with NeRF + Diffusion
StoryDiffusion
StoryDiffusion can create a magic story by generating consistent images and videos.
StreamDiffusion
A Pipeline-Level Solution for Real-Time Interactive Generation
Stable Diffusion Server
A server configured for Inpainting/Generation/img2img with one stable diffusion model
# Effective and efficient diffusion
Getting the `DiffusionPipeline` to generate images in a certain style or include what you want can be tricky. Often times, you have to run the `DiffusionPipeline` several times before you end up with an image you're happy with. But generating something out of nothing is a computationally intensive process, especially if you're running inference over and over again.
This is why it's important to get the most *computational* (speed) and *memory* (GPU vRAM) efficiency from the pipeline to reduce the time between inference cycles so you can iterate faster.
This tutorial walks you through how to generate faster and better with the `DiffusionPipeline`.
Begin by loading the [`stable-diffusion-v1-5/stable-diffusion-v1-5`](https://huggingface.co/stable-diffusion-v1-5/stable-diffusion-v1-5) model:
```python
from diffusers import DiffusionPipeline
model_id = "stable-diffusion-v1-5/stable-diffusion-v1-5"
pipeline = DiffusionPipeline.from_pretrained(model_id, use_safetensors=True)
```
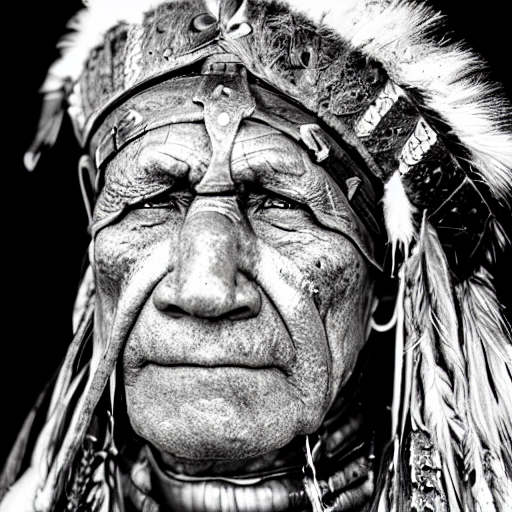
The example prompt you'll use is a portrait of an old warrior chief, but feel free to use your own prompt:
```python
prompt = "portrait photo of a old warrior chief"
```
## Speed
💡 If you don't have access to a GPU, you can use one for free from a GPU provider like [Colab](https://colab.research.google.com/)!
One of the simplest ways to speed up inference is to place the pipeline on a GPU the same way you would with any PyTorch module:
```python
pipeline = pipeline.to("cuda")
```
To make sure you can use the same image and improve on it, use a [`Generator`](https://pytorch.org/docs/stable/generated/torch.Generator.html) and set a seed for [reproducibility](./using-diffusers/reusing_seeds):
```python
import torch
generator = torch.Generator("cuda").manual_seed(0)
```
Now you can generate an image:
```python
image = pipeline(prompt, generator=generator).images[0]
image
```
This process took ~30 seconds on a T4 GPU (it might be faster if your allocated GPU is better than a T4). By default, the `DiffusionPipeline` runs inference with full `float32` precision for 50 inference steps. You can speed this up by switching to a lower precision like `float16` or running fewer inference steps.
Let's start by loading the model in `float16` and generate an image:
```python
import torch
pipeline = DiffusionPipeline.from_pretrained(model_id, torch_dtype=torch.float16, use_safetensors=True)
pipeline = pipeline.to("cuda")
generator = torch.Generator("cuda").manual_seed(0)
image = pipeline(prompt, generator=generator).images[0]
image
```
This time, it only took ~11 seconds to generate the image, which is almost 3x faster than before!
💡 We strongly suggest always running your pipelines in `float16`, and so far, we've rarely seen any degradation in output quality.
Another option is to reduce the number of inference steps. Choosing a more efficient scheduler could help decrease the number of steps without sacrificing output quality. You can find which schedulers are compatible with the current model in the `DiffusionPipeline` by calling the `compatibles` method:
```python
pipeline.scheduler.compatibles
[
diffusers.schedulers.scheduling_lms_discrete.LMSDiscreteScheduler,
diffusers.schedulers.scheduling_unipc_multistep.UniPCMultistepScheduler,
diffusers.schedulers.scheduling_k_dpm_2_discrete.KDPM2DiscreteScheduler,
diffusers.schedulers.scheduling_deis_multistep.DEISMultistepScheduler,
diffusers.schedulers.scheduling_euler_discrete.EulerDiscreteScheduler,
diffusers.schedulers.scheduling_dpmsolver_multistep.DPMSolverMultistepScheduler,
diffusers.schedulers.scheduling_ddpm.DDPMScheduler,
diffusers.schedulers.scheduling_dpmsolver_singlestep.DPMSolverSinglestepScheduler,
diffusers.schedulers.scheduling_k_dpm_2_ancestral_discrete.KDPM2AncestralDiscreteScheduler,
diffusers.utils.dummy_torch_and_torchsde_objects.DPMSolverSDEScheduler,
diffusers.schedulers.scheduling_heun_discrete.HeunDiscreteScheduler,
diffusers.schedulers.scheduling_pndm.PNDMScheduler,
diffusers.schedulers.scheduling_euler_ancestral_discrete.EulerAncestralDiscreteScheduler,
diffusers.schedulers.scheduling_ddim.DDIMScheduler,
]
```
The Stable Diffusion model uses the `PNDMScheduler` by default which usually requires ~50 inference steps, but more performant schedulers like `DPMSolverMultistepScheduler`, require only ~20 or 25 inference steps. Use the `from_config()` method to load a new scheduler:
```python
from diffusers import DPMSolverMultistepScheduler
pipeline.scheduler = DPMSolverMultistepScheduler.from_config(pipeline.scheduler.config)
```
Now set the `num_inference_steps` to 20:
```python
generator = torch.Generator("cuda").manual_seed(0)
image = pipeline(prompt, generator=generator, num_inference_steps=20).images[0]
image
```
Great, you've managed to cut the inference time to just 4 seconds! ⚡️
## Memory
The other key to improving pipeline performance is consuming less memory, which indirectly implies more speed, since you're often trying to maximize the number of images generated per second. The easiest way to see how many images you can generate at once is to try out different batch sizes until you get an `OutOfMemoryError` (OOM).
Create a function that'll generate a batch of images from a list of prompts and `Generators`. Make sure to assign each `Generator` a seed so you can reuse it if it produces a good result.
```python
def get_inputs(batch_size=1):
generator = [torch.Generator("cuda").manual_seed(i) for i in range(batch_size)]
prompts = batch_size * [prompt]
num_inference_steps = 20
return {"prompt": prompts, "generator": generator, "num_inference_steps": num_inference_steps}
```
Start with `batch_size=4` and see how much memory you've consumed:
```python
from diffusers.utils import make_image_grid
images = pipeline(**get_inputs(batch_size=4)).images
make_image_grid(images, 2, 2)
```
Unless you have a GPU with more vRAM, the code above probably returned an `OOM` error! Most of the memory is taken up by the cross-attention layers. Instead of running this operation in a batch, you can run it sequentially to save a significant amount of memory. All you have to do is configure the pipeline to use the `enable_attention_slicing()` function:
```python
pipeline.enable_attention_slicing()
```
Now try increasing the `batch_size` to 8!
```python
images = pipeline(**get_inputs(batch_size=8)).images
make_image_grid(images, rows=2, cols=4)
```
Whereas before you couldn't even generate a batch of 4 images, now you can generate a batch of 8 images at ~3.5 seconds per image! This is probably the fastest you can go on a T4 GPU without sacrificing quality.
## Quality
In the last two sections, you learned how to optimize the speed of your pipeline by using `fp16`, reducing the number of inference steps by using a more performant scheduler, and enabling attention slicing to reduce memory consumption. Now you're going to focus on how to improve the quality of generated images.
### Better checkpoints
The most obvious step is to use better checkpoints. The Stable Diffusion model is a good starting point, and since its official launch, several improved versions have also been released. However, using a newer version doesn't automatically mean you'll get better results. You'll still have to experiment with different checkpoints yourself, and do a little research (such as using [negative prompts](https://minimaxir.com/2022/11/stable-diffusion-negative-prompt/)) to get the best results.
As the field grows, there are more and more high-quality checkpoints finetuned to produce certain styles. Try exploring the [Hub](https://huggingface.co/models?library=diffusers&sort=downloads) and [Diffusers Gallery](https://huggingface.co/spaces/huggingface-projects/diffusers-gallery) to find one you're interested in!
### Better pipeline components
You can also try replacing the current pipeline components with a newer version. Let's try loading the latest [autoencoder](https://huggingface.co/stabilityai/stable-diffusion-2-1/tree/main/vae) from Stability AI into the pipeline, and generate some images:
```python
from diffusers import AutoencoderKL
vae = AutoencoderKL.from_pretrained("stabilityai/sd-vae-ft-mse", torch_dtype=torch.float16).to("cuda")
pipeline.vae = vae
images = pipeline(**get_inputs(batch_size=8)).images
make_image_grid(images, rows=2, cols=4)
```
### Better prompt engineering
The text prompt you use to generate an image is super important, so much so that it is called *prompt engineering*. Some considerations to keep during prompt engineering are:
- How is the image or similar images of the one I want to generate stored on the internet?
- What additional detail can I give that steers the model towards the style I want?
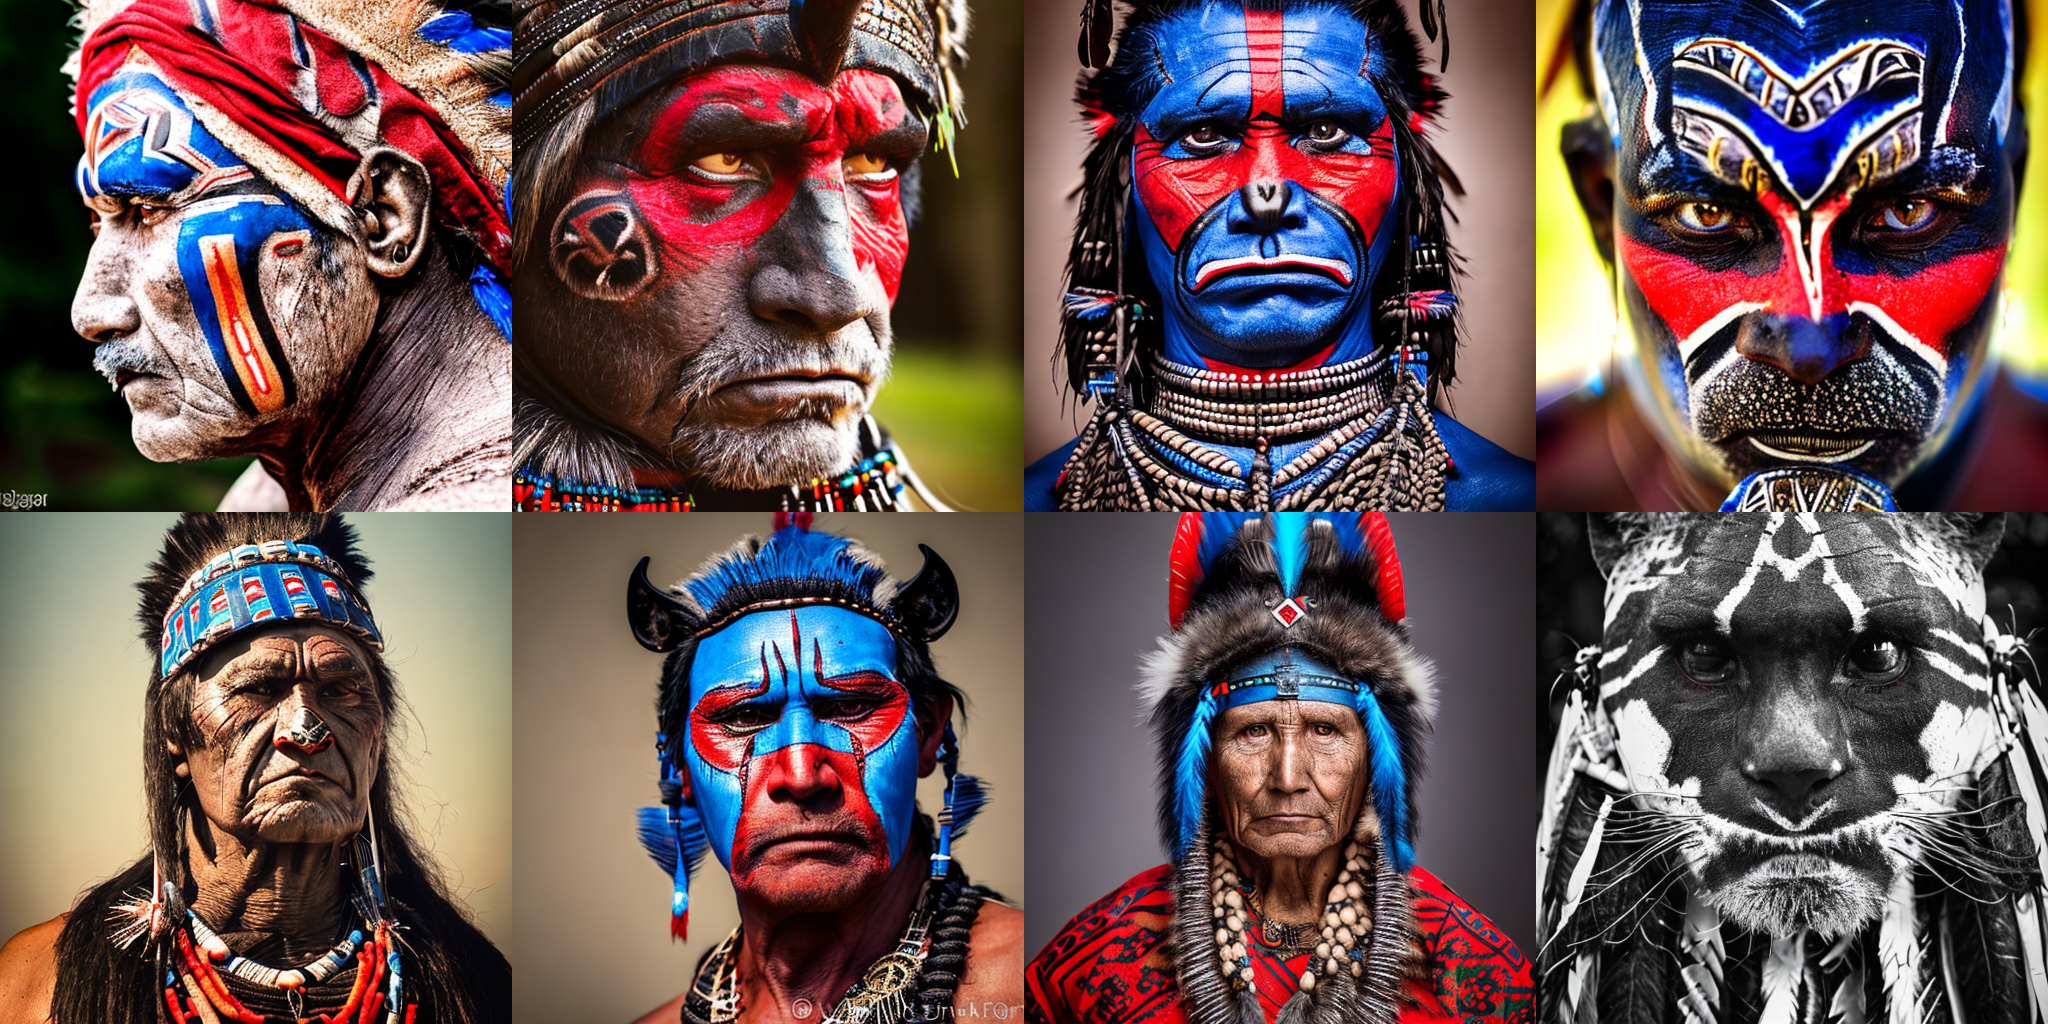
With this in mind, let's improve the prompt to include color and higher quality details:
```python
prompt += ", tribal panther make up, blue on red, side profile, looking away, serious eyes"
prompt += " 50mm portrait photography, hard rim lighting photography--beta --ar 2:3 --beta --upbeta"
```
Generate a batch of images with the new prompt:
```python
images = pipeline(**get_inputs(batch_size=8)).images
make_image_grid(images, rows=2, cols=4)
```
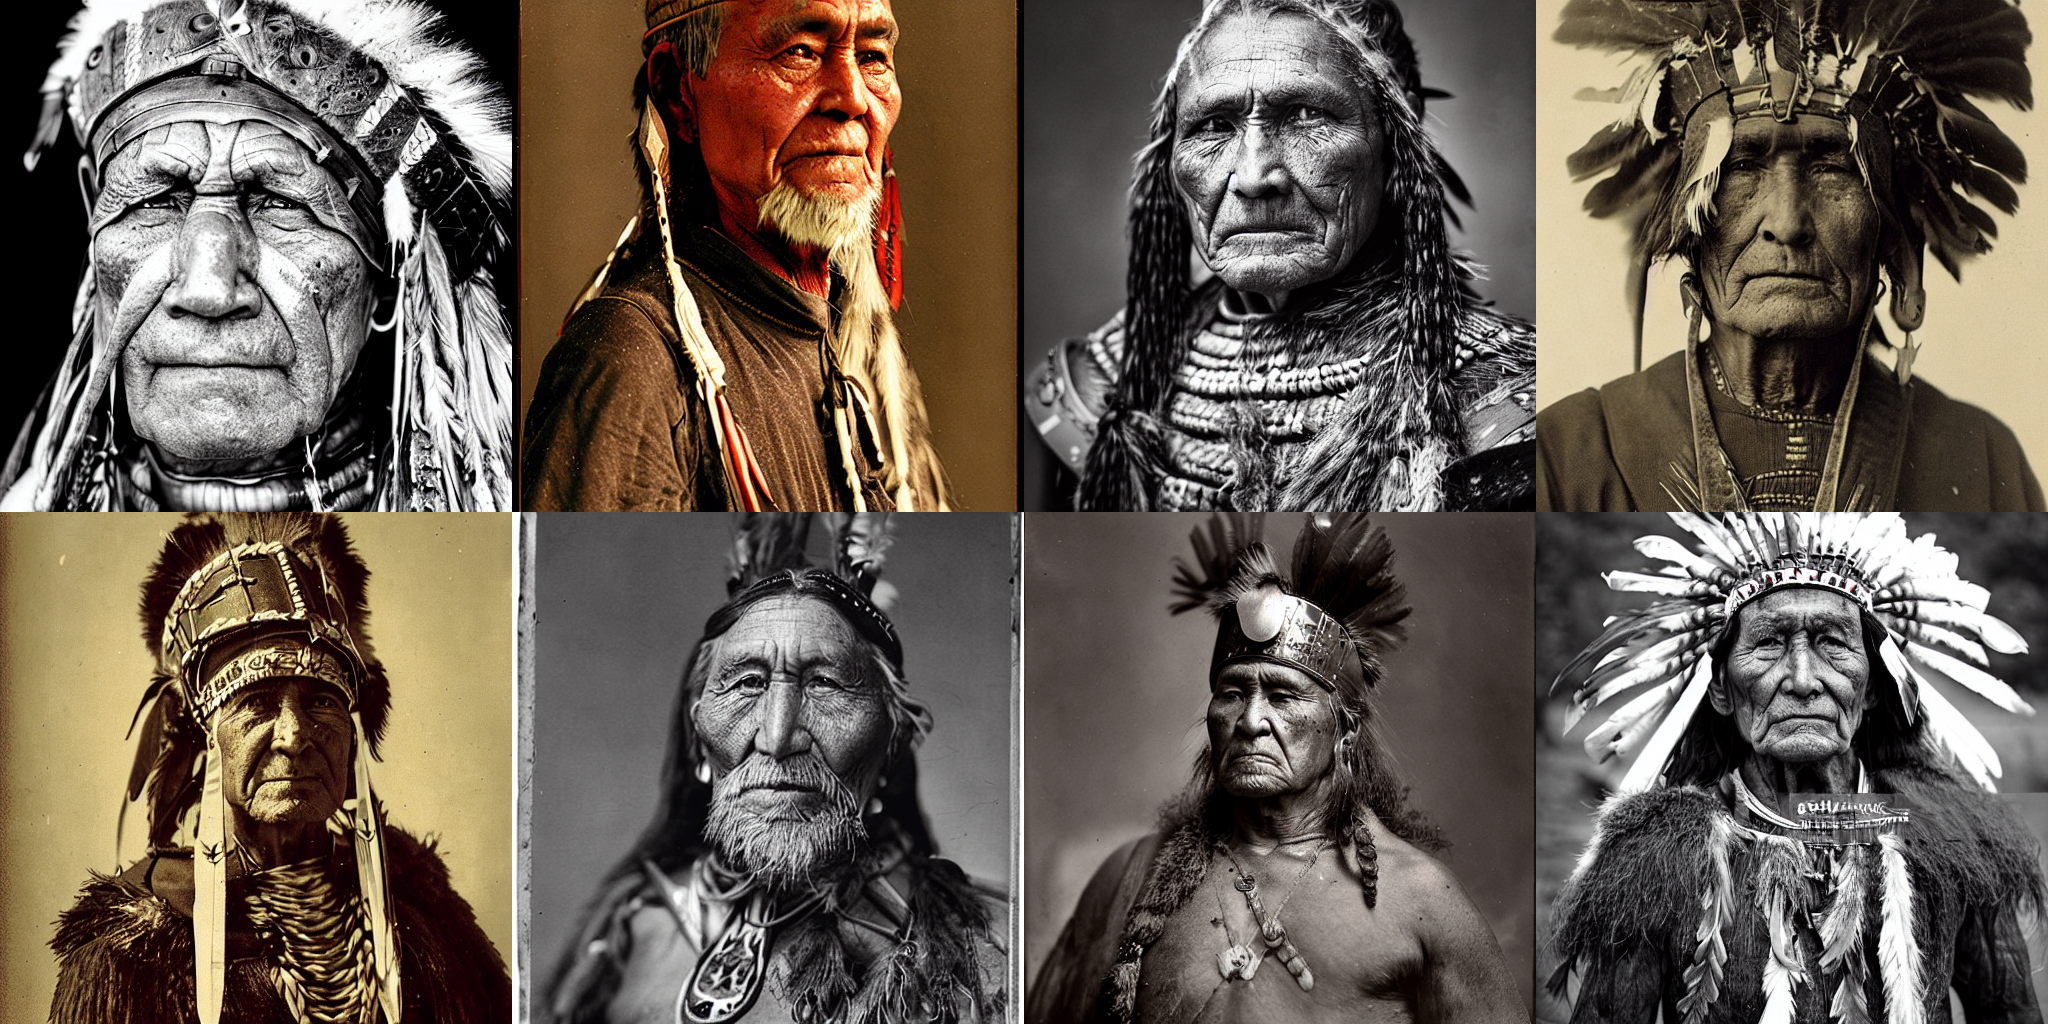
Pretty impressive! Let's tweak the second image - corresponding to the `Generator` with a seed of `1` - a bit more by adding some text about the age of the subject:
```python
prompts = [
"portrait photo of the oldest warrior chief, tribal panther make up, blue on red, side profile, looking away, serious eyes 50mm portrait photography, hard rim lighting photography--beta --ar 2:3 --beta --upbeta",
"portrait photo of an old warrior chief, tribal panther make up, blue on red, side profile, looking away, serious eyes 50mm portrait photography, hard rim lighting photography--beta --ar 2:3 --beta --upbeta",
"portrait photo of a warrior chief, tribal panther make up, blue on red, side profile, looking away, serious eyes 50mm portrait photography, hard rim lighting photography--beta --ar 2:3 --beta --upbeta",
"portrait photo of a young warrior chief, tribal panther make up, blue on red, side profile, looking away, serious eyes 50mm portrait photography, hard rim lighting photography--beta --ar 2:3 --beta --upbeta",
]
generator = [torch.Generator("cuda").manual_seed(1) for _ in range(len(prompts))]
images = pipeline(prompt=prompts, generator=generator, num_inference_steps=25).images
make_image_grid(images, 2, 2)
```
## Next steps
In this tutorial, you learned how to optimize a `DiffusionPipeline` for computational and memory efficiency as well as improving the quality of generated outputs. If you're interested in making your pipeline even faster, take a look at the following resources:
- Learn how [PyTorch 2.0](./optimization/torch2.0) and [`torch.compile`](https://pytorch.org/docs/stable/generated/torch.compile.html) can yield 5 - 300% faster inference speed. On an A100 GPU, inference can be up to 50% faster!
- If you can't use PyTorch 2, we recommend you install [xFormers](./optimization/xformers). Its memory-efficient attention mechanism works great with PyTorch 1.13.1 for faster speed and reduced memory consumption.
- Other optimization techniques, such as model offloading, are covered in [this guide](./optimization/fp16).
# Diffusers
🤗 Diffusers is the go-to library for state-of-the-art pretrained diffusion models for generating images, audio, and even 3D structures of molecules. Whether you're looking for a simple inference solution or want to train your own diffusion model, 🤗 Diffusers is a modular toolbox that supports both. Our library is designed with a focus on [usability over performance](conceptual/philosophy#usability-over-performance), [simple over easy](conceptual/philosophy#simple-over-easy), and [customizability over abstractions](conceptual/philosophy#tweakable-contributorfriendly-over-abstraction).
The library has three main components:
- State-of-the-art diffusion pipelines for inference with just a few lines of code. There are many pipelines in 🤗 Diffusers, check out the table in the pipeline [overview](api/pipelines/overview) for a complete list of available pipelines and the task they solve.
- Interchangeable [noise schedulers](api/schedulers/overview) for balancing trade-offs between generation speed and quality.
- Pretrained [models](api/models) that can be used as building blocks, and combined with schedulers, for creating your own end-to-end diffusion systems.
# Wuerstchen
The [Wuerstchen](https://hf.co/papers/2306.00637) model drastically reduces computational costs by compressing the latent space by 42x, without compromising image quality and accelerating inference. During training, Wuerstchen uses two models (VQGAN + autoencoder) to compress the latents, and then a third model (text-conditioned latent diffusion model) is conditioned on this highly compressed space to generate an image.
To fit the prior model into GPU memory and to speedup training, try enabling `gradient_accumulation_steps`, `gradient_checkpointing`, and `mixed_precision` respectively.
This guide explores the [train_text_to_image_prior.py](https://github.com/huggingface/diffusers/blob/main/examples/wuerstchen/text_to_image/train_text_to_image_prior.py) script to help you become more familiar with it, and how you can adapt it for your own use-case.
Before running the script, make sure you install the library from source:
```bash
git clone https://github.com/huggingface/diffusers
cd diffusers
pip install .
```
Then navigate to the example folder containing the training script and install the required dependencies for the script you're using:
```bash
cd examples/wuerstchen/text_to_image
pip install -r requirements.txt
```
🤗 Accelerate is a library for helping you train on multiple GPUs/TPUs or with mixed-precision. It'll automatically configure your training setup based on your hardware and environment. Take a look at the 🤗 Accelerate [Quick tour](https://huggingface.co/docs/accelerate/quicktour) to learn more.
Initialize an 🤗 Accelerate environment:
```bash
accelerate config
```
To setup a default 🤗 Accelerate environment without choosing any configurations:
```bash
accelerate config default
```
Or if your environment doesn't support an interactive shell, like a notebook, you can use:
```py
from accelerate.utils import write_basic_config
write_basic_config()
```
Lastly, if you want to train a model on your own dataset, take a look at the [Create a dataset for training](create_dataset) guide to learn how to create a dataset that works with the training script.
The following sections highlight parts of the training scripts that are important for understanding how to modify it, but it doesn't cover every aspect of the [script](https://github.com/huggingface/diffusers/blob/main/examples/wuerstchen/text_to_image/train_text_to_image_prior.py) in detail. If you're interested in learning more, feel free to read through the scripts and let us know if you have any questions or concerns.
## Script parameters
The training scripts provides many parameters to help you customize your training run. All of the parameters and their descriptions are found in the [`parse_args()`](https://github.com/huggingface/diffusers/blob/6e68c71503682c8693cb5b06a4da4911dfd655ee/examples/wuerstchen/text_to_image/train_text_to_image_prior.py#L192) function. It provides default values for each parameter, such as the training batch size and learning rate, but you can also set your own values in the training command if you'd like.
For example, to speedup training with mixed precision using the fp16 format, add the `--mixed_precision` parameter to the training command:
```bash
accelerate launch train_text_to_image_prior.py \
--mixed_precision="fp16"
```
Most of the parameters are identical to the parameters in the [Text-to-image](text2image#script-parameters) training guide, so let's dive right into the Wuerstchen training script!
## Training script
The training script is also similar to the [Text-to-image](text2image#training-script) training guide, but it's been modified to support Wuerstchen. This guide focuses on the code that is unique to the Wuerstchen training script.
The [`main()`](https://github.com/huggingface/diffusers/blob/6e68c71503682c8693cb5b06a4da4911dfd655ee/examples/wuerstchen/text_to_image/train_text_to_image_prior.py#L441) function starts by initializing the image encoder - an [EfficientNet](https://github.com/huggingface/diffusers/blob/main/examples/wuerstchen/text_to_image/modeling_efficient_net_encoder.py) - in addition to the usual scheduler and tokenizer.
```py
with ContextManagers(deepspeed_zero_init_disabled_context_manager()):
pretrained_checkpoint_file = hf_hub_download("dome272/wuerstchen", filename="model_v2_stage_b.pt")
state_dict = torch.load(pretrained_checkpoint_file, map_location="cpu")
image_encoder = EfficientNetEncoder()
image_encoder.load_state_dict(state_dict["effnet_state_dict"])
image_encoder.eval()
```
You'll also load the `WuerstchenPrior` model for optimization.
```py
prior = WuerstchenPrior.from_pretrained(args.pretrained_prior_model_name_or_path, subfolder="prior")
optimizer = optimizer_cls(
prior.parameters(),
lr=args.learning_rate,
betas=(args.adam_beta1, args.adam_beta2),
weight_decay=args.adam_weight_decay,
eps=args.adam_epsilon,
)
```
Next, you'll apply some [transforms](https://github.com/huggingface/diffusers/blob/65ef7a0c5c594b4f84092e328fbdd73183613b30/examples/wuerstchen/text_to_image/train_text_to_image_prior.py#L656) to the images and [tokenize](https://github.com/huggingface/diffusers/blob/65ef7a0c5c594b4f84092e328fbdd73183613b30/examples/wuerstchen/text_to_image/train_text_to_image_prior.py#L637) the captions:
```py
def preprocess_train(examples):
images = [image.convert("RGB") for image in examples[image_column]]
examples["effnet_pixel_values"] = [effnet_transforms(image) for image in images]
examples["text_input_ids"], examples["text_mask"] = tokenize_captions(examples)
return examples
```
Finally, the [training loop](https://github.com/huggingface/diffusers/blob/65ef7a0c5c594b4f84092e328fbdd73183613b30/examples/wuerstchen/text_to_image/train_text_to_image_prior.py#L656) handles compressing the images to latent space with the `EfficientNetEncoder`, adding noise to the latents, and predicting the noise residual with the `WuerstchenPrior` model.
```py
pred_noise = prior(noisy_latents, timesteps, prompt_embeds)
```
If you want to learn more about how the training loop works, check out the [Understanding pipelines, models and schedulers](../using-diffusers/write_own_pipeline) tutorial which breaks down the basic pattern of the denoising process.
## Launch the script
Once you’ve made all your changes or you’re okay with the default configuration, you’re ready to launch the training script! 🚀
Set the `DATASET_NAME` environment variable to the dataset name from the Hub. This guide uses the [Naruto BLIP captions](https://huggingface.co/datasets/lambdalabs/naruto-blip-captions) dataset, but you can create and train on your own datasets as well (see the [Create a dataset for training](create_dataset) guide).
To monitor training progress with Weights & Biases, add the `--report_to=wandb` parameter to the training command. You’ll also need to add the `--validation_prompt` to the training command to keep track of results. This can be really useful for debugging the model and viewing intermediate results.
```bash
export DATASET_NAME="lambdalabs/naruto-blip-captions"
accelerate launch train_text_to_image_prior.py \
--mixed_precision="fp16" \
--dataset_name=$DATASET_NAME \
--resolution=768 \
--train_batch_size=4 \
--gradient_accumulation_steps=4 \
--gradient_checkpointing \
--dataloader_num_workers=4 \
--max_train_steps=15000 \
--learning_rate=1e-05 \
--max_grad_norm=1 \
--checkpoints_total_limit=3 \
--lr_scheduler="constant" \
--lr_warmup_steps=0 \
--validation_prompts="A robot naruto, 4k photo" \
--report_to="wandb" \
--push_to_hub \
--output_dir="wuerstchen-prior-naruto-model"
```
Once training is complete, you can use your newly trained model for inference!
```py
import torch
from diffusers import AutoPipelineForText2Image
from diffusers.pipelines.wuerstchen import DEFAULT_STAGE_C_TIMESTEPS
pipeline = AutoPipelineForText2Image.from_pretrained("path/to/saved/model", torch_dtype=torch.float16).to("cuda")
caption = "A cute bird naruto holding a shield"
images = pipeline(
caption,
width=1024,
height=1536,
prior_timesteps=DEFAULT_STAGE_C_TIMESTEPS,
prior_guidance_scale=4.0,
num_images_per_prompt=2,
).images
```
## Next steps
Congratulations on training a Wuerstchen model! To learn more about how to use your new model, the following may be helpful:
- Take a look at the [Wuerstchen](../api/pipelines/wuerstchen#text-to-image-generation) API documentation to learn more about how to use the pipeline for text-to-image generation and its limitations.
# Distributed inference
On distributed setups, you can run inference across multiple GPUs with 🤗 [Accelerate](https://huggingface.co/docs/accelerate/index) or [PyTorch Distributed](https://pytorch.org/tutorials/beginner/dist_overview.html), which is useful for generating with multiple prompts in parallel.
This guide will show you how to use 🤗 Accelerate and PyTorch Distributed for distributed inference.
## 🤗 Accelerate
🤗 [Accelerate](https://huggingface.co/docs/accelerate/index) is a library designed to make it easy to train or run inference across distributed setups. It simplifies the process of setting up the distributed environment, allowing you to focus on your PyTorch code.
To begin, create a Python file and initialize an [accelerate.PartialState](https://huggingface.co/docs/accelerate/main/en/package_reference/state#accelerate.PartialState) to create a distributed environment; your setup is automatically detected so you don't need to explicitly define the `rank` or `world_size`. Move the `DiffusionPipeline` to `distributed_state.device` to assign a GPU to each process.
Now use the [split_between_processes](https://huggingface.co/docs/accelerate/main/en/package_reference/state#accelerate.PartialState.split_between_processes) utility as a context manager to automatically distribute the prompts between the number of processes.
```py
import torch
from accelerate import PartialState
from diffusers import DiffusionPipeline
pipeline = DiffusionPipeline.from_pretrained(
"stable-diffusion-v1-5/stable-diffusion-v1-5", torch_dtype=torch.float16, use_safetensors=True
)
distributed_state = PartialState()
pipeline.to(distributed_state.device)
with distributed_state.split_between_processes(["a dog", "a cat"]) as prompt:
result = pipeline(prompt).images[0]
result.save(f"result_{distributed_state.process_index}.png")
```
Use the `--num_processes` argument to specify the number of GPUs to use, and call `accelerate launch` to run the script:
```bash
accelerate launch run_distributed.py --num_processes=2
```
Refer to this minimal example [script](https://gist.github.com/sayakpaul/cfaebd221820d7b43fae638b4dfa01ba) for running inference across multiple GPUs. To learn more, take a look at the [Distributed Inference with 🤗 Accelerate](https://huggingface.co/docs/accelerate/en/usage_guides/distributed_inference#distributed-inference-with-accelerate) guide.
## PyTorch Distributed
PyTorch supports [`DistributedDataParallel`](https://pytorch.org/docs/stable/generated/torch.nn.parallel.DistributedDataParallel.html) which enables data parallelism.
To start, create a Python file and import `torch.distributed` and `torch.multiprocessing` to set up the distributed process group and to spawn the processes for inference on each GPU. You should also initialize a `DiffusionPipeline`:
```py
import torch
import torch.distributed as dist
import torch.multiprocessing as mp
from diffusers import DiffusionPipeline
sd = DiffusionPipeline.from_pretrained(
"stable-diffusion-v1-5/stable-diffusion-v1-5", torch_dtype=torch.float16, use_safetensors=True
)
```
You'll want to create a function to run inference; [`init_process_group`](https://pytorch.org/docs/stable/distributed.html?highlight=init_process_group#torch.distributed.init_process_group) handles creating a distributed environment with the type of backend to use, the `rank` of the current process, and the `world_size` or the number of processes participating. If you're running inference in parallel over 2 GPUs, then the `world_size` is 2.
Move the `DiffusionPipeline` to `rank` and use `get_rank` to assign a GPU to each process, where each process handles a different prompt:
```py
def run_inference(rank, world_size):
dist.init_process_group("nccl", rank=rank, world_size=world_size)
sd.to(rank)
if torch.distributed.get_rank() == 0:
prompt = "a dog"
elif torch.distributed.get_rank() == 1:
prompt = "a cat"
image = sd(prompt).images[0]
image.save(f"./{'_'.join(prompt)}.png")
```
To run the distributed inference, call [`mp.spawn`](https://pytorch.org/docs/stable/multiprocessing.html#torch.multiprocessing.spawn) to run the `run_inference` function on the number of GPUs defined in `world_size`:
```py
def main():
world_size = 2
mp.spawn(run_inference, args=(world_size,), nprocs=world_size, join=True)
if __name__ == "__main__":
main()
```
Once you've completed the inference script, use the `--nproc_per_node` argument to specify the number of GPUs to use and call `torchrun` to run the script:
```bash
torchrun run_distributed.py --nproc_per_node=2
```
> [!TIP]
> You can use `device_map` within a `DiffusionPipeline` to distribute its model-level components on multiple devices. Refer to the [Device placement](../tutorials/inference_with_big_models#device-placement) guide to learn more.
## Model sharding
Modern diffusion systems such as [Flux](../api/pipelines/flux) are very large and have multiple models. For example, [Flux.1-Dev](https://hf.co/black-forest-labs/FLUX.1-dev) is made up of two text encoders - [T5-XXL](https://hf.co/google/t5-v1_1-xxl) and [CLIP-L](https://hf.co/openai/clip-vit-large-patch14) - a [diffusion transformer](../api/models/flux_transformer), and a [VAE](../api/models/autoencoderkl). With a model this size, it can be challenging to run inference on consumer GPUs.
Model sharding is a technique that distributes models across GPUs when the models don't fit on a single GPU. The example below assumes two 16GB GPUs are available for inference.
Start by computing the text embeddings with the text encoders. Keep the text encoders on two GPUs by setting `device_map="balanced"`. The `balanced` strategy evenly distributes the model on all available GPUs. Use the `max_memory` parameter to allocate the maximum amount of memory for each text encoder on each GPU.
> [!TIP]
> **Only** load the text encoders for this step! The diffusion transformer and VAE are loaded in a later step to preserve memory.
```py
from diffusers import FluxPipeline
import torch
prompt = "a photo of a dog with cat-like look"
pipeline = FluxPipeline.from_pretrained(
"black-forest-labs/FLUX.1-dev",
transformer=None,
vae=None,
device_map="balanced",
max_memory={0: "16GB", 1: "16GB"},
torch_dtype=torch.bfloat16
)
with torch.no_grad():
print("Encoding prompts.")
prompt_embeds, pooled_prompt_embeds, text_ids = pipeline.encode_prompt(
prompt=prompt, prompt_2=None, max_sequence_length=512
)
```
Once the text embeddings are computed, remove them from the GPU to make space for the diffusion transformer.
```py
import gc
def flush():
gc.collect()
torch.cuda.empty_cache()
torch.cuda.reset_max_memory_allocated()
torch.cuda.reset_peak_memory_stats()
del pipeline.text_encoder
del pipeline.text_encoder_2
del pipeline.tokenizer
del pipeline.tokenizer_2
del pipeline
flush()
```
Load the diffusion transformer next which has 12.5B parameters. This time, set `device_map="auto"` to automatically distribute the model across two 16GB GPUs. The `auto` strategy is backed by [Accelerate](https://hf.co/docs/accelerate/index) and available as a part of the [Big Model Inference](https://hf.co/docs/accelerate/concept_guides/big_model_inference) feature. It starts by distributing a model across the fastest device first (GPU) before moving to slower devices like the CPU and hard drive if needed. The trade-off of storing model parameters on slower devices is slower inference latency.
```py
from diffusers import FluxTransformer2DModel
import torch
transformer = FluxTransformer2DModel.from_pretrained(
"black-forest-labs/FLUX.1-dev",
subfolder="transformer",
device_map="auto",
torch_dtype=torch.bfloat16
)
```
> [!TIP]
> At any point, you can try `print(pipeline.hf_device_map)` to see how the various models are distributed across devices. This is useful for tracking the device placement of the models. You can also try `print(transformer.hf_device_map)` to see how the transformer model is sharded across devices.
Add the transformer model to the pipeline for denoising, but set the other model-level components like the text encoders and VAE to `None` because you don't need them yet.
```py
pipeline = FluxPipeline.from_pretrained(
"black-forest-labs/FLUX.1-dev",
text_encoder=None,
text_encoder_2=None,
tokenizer=None,
tokenizer_2=None,
vae=None,
transformer=transformer,
torch_dtype=torch.bfloat16
)
print("Running denoising.")
height, width = 768, 1360
latents = pipeline(
prompt_embeds=prompt_embeds,
pooled_prompt_embeds=pooled_prompt_embeds,
num_inference_steps=50,
guidance_scale=3.5,
height=height,
width=width,
output_type="latent",
).images
```
Remove the pipeline and transformer from memory as they're no longer needed.
```py
del pipeline.transformer
del pipeline
flush()
```
Finally, decode the latents with the VAE into an image. The VAE is typically small enough to be loaded on a single GPU.
```py
from diffusers import AutoencoderKL
from diffusers.image_processor import VaeImageProcessor
import torch
vae = AutoencoderKL.from_pretrained(ckpt_id, subfolder="vae", torch_dtype=torch.bfloat16).to("cuda")
vae_scale_factor = 2 ** (len(vae.config.block_out_channels))
image_processor = VaeImageProcessor(vae_scale_factor=vae_scale_factor)
with torch.no_grad():
print("Running decoding.")
latents = FluxPipeline._unpack_latents(latents, height, width, vae_scale_factor)
latents = (latents / vae.config.scaling_factor) + vae.config.shift_factor
image = vae.decode(latents, return_dict=False)[0]
image = image_processor.postprocess(image, output_type="pil")
image[0].save("split_transformer.png")
```
By selectively loading and unloading the models you need at a given stage and sharding the largest models across multiple GPUs, it is possible to run inference with large models on consumer GPUs.
# CogVideoX
CogVideoX is a text-to-video generation model focused on creating more coherent videos aligned with a prompt. It achieves this using several methods.
- a 3D variational autoencoder that compresses videos spatially and temporally, improving compression rate and video accuracy.
- an expert transformer block to help align text and video, and a 3D full attention module for capturing and creating spatially and temporally accurate videos.
The actual test of the video instruction dimension found that CogVideoX has good effects on consistent theme, dynamic information, consistent background, object information, smooth motion, color, scene, appearance style, and temporal style but cannot achieve good results with human action, spatial relationship, and multiple objects.
Finetuning with Diffusers can help make up for these poor results.
## Data Preparation
The training scripts accepts data in two formats.
The first format is suited for small-scale training, and the second format uses a CSV format, which is more appropriate for streaming data for large-scale training. In the future, Diffusers will support the `` tag.
### Small format
Two files where one file contains line-separated prompts and another file contains line-separated paths to video data (the path to video files must be relative to the path you pass when specifying `--instance_data_root`). Let's take a look at an example to understand this better!
Assume you've specified `--instance_data_root` as `/dataset`, and that this directory contains the files: `prompts.txt` and `videos.txt`.
The `prompts.txt` file should contain line-separated prompts:
```
A black and white animated sequence featuring a rabbit, named Rabbity Ribfried, and an anthropomorphic goat in a musical, playful environment, showcasing their evolving interaction.
A black and white animated sequence on a ship's deck features a bulldog character, named Bully Bulldoger, showcasing exaggerated facial expressions and body language. The character progresses from confident to focused, then to strained and distressed, displaying a range of emotions as it navigates challenges. The ship's interior remains static in the background, with minimalistic details such as a bell and open door. The character's dynamic movements and changing expressions drive the narrative, with no camera movement to distract from its evolving reactions and physical gestures.
...
```
The `videos.txt` file should contain line-separate paths to video files. Note that the path should be _relative_ to the `--instance_data_root` directory.
```
videos/00000.mp4
videos/00001.mp4
...
```
Overall, this is how your dataset would look like if you ran the `tree` command on the dataset root directory:
```
/dataset
├── prompts.txt
├── videos.txt
├── videos
├── videos/00000.mp4
├── videos/00001.mp4
├── ...
```
When using this format, the `--caption_column` must be `prompts.txt` and `--video_column` must be `videos.txt`.
### Stream format
You could use a single CSV file. For the sake of this example, assume you have a `metadata.csv` file. The expected format is:
```
,
"""A black and white animated sequence featuring a rabbit, named Rabbity Ribfried, and an anthropomorphic goat in a musical, playful environment, showcasing their evolving interaction.""","""00000.mp4"""
"""A black and white animated sequence on a ship's deck features a bulldog character, named Bully Bulldoger, showcasing exaggerated facial expressions and body language. The character progresses from confident to focused, then to strained and distressed, displaying a range of emotions as it navigates challenges. The ship's interior remains static in the background, with minimalistic details such as a bell and open door. The character's dynamic movements and changing expressions drive the narrative, with no camera movement to distract from its evolving reactions and physical gestures.""","""00001.mp4"""
...
```
In this case, the `--instance_data_root` should be the location where the videos are stored and `--dataset_name` should be either a path to local folder or a [load_dataset](https://huggingface.co/docs/datasets/main/en/package_reference/loading_methods#datasets.load_dataset) compatible dataset hosted on the Hub. Assuming you have videos of Minecraft gameplay at `https://huggingface.co/datasets/my-awesome-username/minecraft-videos`, you would have to specify `my-awesome-username/minecraft-videos`.
When using this format, the `--caption_column` must be `` and `--video_column` must be ``.
You are not strictly restricted to the CSV format. Any format works as long as the `load_dataset` method supports the file format to load a basic `` and ``. The reason for going through these dataset organization gymnastics for loading video data is because `load_dataset` does not fully support all kinds of video formats.
> [!NOTE]
> CogVideoX works best with long and descriptive LLM-augmented prompts for video generation. We recommend pre-processing your videos by first generating a summary using a VLM and then augmenting the prompts with an LLM. To generate the above captions, we use [MiniCPM-V-26](https://huggingface.co/openbmb/MiniCPM-V-2_6) and [Llama-3.1-8B-Instruct](https://huggingface.co/meta-llama/Meta-Llama-3.1-8B-Instruct). A very barebones and no-frills example for this is available [here](https://gist.github.com/a-r-r-o-w/4dee20250e82f4e44690a02351324a4a). The official recommendation for augmenting prompts is [ChatGLM](https://huggingface.co/THUDM?search_models=chatglm) and a length of 50-100 words is considered good.
>![NOTE]
> It is expected that your dataset is already pre-processed. If not, some basic pre-processing can be done by playing with the following parameters:
> `--height`, `--width`, `--fps`, `--max_num_frames`, `--skip_frames_start` and `--skip_frames_end`.
> Presently, all videos in your dataset should contain the same number of video frames when using a training batch size > 1.
## Training
You need to setup your development environment by installing the necessary requirements. The following packages are required:
- Torch 2.0 or above based on the training features you are utilizing (might require latest or nightly versions for quantized/deepspeed training)
- `pip install diffusers transformers accelerate peft huggingface_hub` for all things modeling and training related
- `pip install datasets decord` for loading video training data
- `pip install bitsandbytes` for using 8-bit Adam or AdamW optimizers for memory-optimized training
- `pip install wandb` optionally for monitoring training logs
- `pip install deepspeed` optionally for [DeepSpeed](https://github.com/microsoft/DeepSpeed) training
- `pip install prodigyopt` optionally if you would like to use the Prodigy optimizer for training
To make sure you can successfully run the latest versions of the example scripts, we highly recommend **installing from source** and keeping the install up to date as we update the example scripts frequently and install some example-specific requirements. To do this, execute the following steps in a new virtual environment:
Before running the script, make sure you install the library from source:
```bash
git clone https://github.com/huggingface/diffusers
cd diffusers
pip install -e .
```
Then navigate to the example folder containing the training script and install the required dependencies for the script you're using:
- PyTorch
```bash
cd examples/cogvideo
pip install -r requirements.txt
```
And initialize an [🤗 Accelerate](https://github.com/huggingface/accelerate/) environment with:
```bash
accelerate config
```
Or for a default accelerate configuration without answering questions about your environment
```bash
accelerate config default
```
Or if your environment doesn't support an interactive shell (e.g., a notebook)
```python
from accelerate.utils import write_basic_config
write_basic_config()
```
When running `accelerate config`, if you use torch.compile, there can be dramatic speedups. The PEFT library is used as a backend for LoRA training, so make sure to have `peft>=0.6.0` installed in your environment.
If you would like to push your model to the Hub after training is completed with a neat model card, make sure you're logged in:
```bash
huggingface-cli login
# Alternatively, you could upload your model manually using:
# huggingface-cli upload my-cool-account-name/my-cool-lora-name /path/to/awesome/lora
```
Make sure your data is prepared as described in [Data Preparation](#data-preparation). When ready, you can begin training!
Assuming you are training on 50 videos of a similar concept, we have found 1500-2000 steps to work well. The official recommendation, however, is 100 videos with a total of 4000 steps. Assuming you are training on a single GPU with a `--train_batch_size` of `1`:
- 1500 steps on 50 videos would correspond to `30` training epochs
- 4000 steps on 100 videos would correspond to `40` training epochs
```bash
#!/bin/bash
GPU_IDS="0"
accelerate launch --gpu_ids $GPU_IDS examples/cogvideo/train_cogvideox_lora.py \
--pretrained_model_name_or_path THUDM/CogVideoX-2b \
--cache_dir \
--instance_data_root \
--dataset_name my-awesome-name/my-awesome-dataset \
--caption_column \
--video_column \
--id_token \
--validation_prompt " Spiderman swinging over buildings:::A panda, dressed in a small, red jacket and a tiny hat, sits on a wooden stool in a serene bamboo forest. The panda's fluffy paws strum a miniature acoustic guitar, producing soft, melodic tunes. Nearby, a few other pandas gather, watching curiously and some clapping in rhythm. Sunlight filters through the tall bamboo, casting a gentle glow on the scene. The panda's face is expressive, showing concentration and joy as it plays. The background includes a small, flowing stream and vibrant green foliage, enhancing the peaceful and magical atmosphere of this unique musical performance" \
--validation_prompt_separator ::: \
--num_validation_videos 1 \
--validation_epochs 10 \
--seed 42 \
--rank 64 \
--lora_alpha 64 \
--mixed_precision fp16 \
--output_dir /raid/aryan/cogvideox-lora \
--height 480 --width 720 --fps 8 --max_num_frames 49 --skip_frames_start 0 --skip_frames_end 0 \
--train_batch_size 1 \
--num_train_epochs 30 \
--checkpointing_steps 1000 \
--gradient_accumulation_steps 1 \
--learning_rate 1e-3 \
--lr_scheduler cosine_with_restarts \
--lr_warmup_steps 200 \
--lr_num_cycles 1 \
--enable_slicing \
--enable_tiling \
--optimizer Adam \
--adam_beta1 0.9 \
--adam_beta2 0.95 \
--max_grad_norm 1.0 \
--report_to wandb
```
To better track our training experiments, we're using the following flags in the command above:
* `--report_to wandb` will ensure the training runs are tracked on Weights and Biases. To use it, be sure to install `wandb` with `pip install wandb`.
* `validation_prompt` and `validation_epochs` to allow the script to do a few validation inference runs. This allows us to qualitatively check if the training is progressing as expected.
Setting the `` is not necessary. From some limited experimentation, we found it works better (as it resembles [Dreambooth](https://huggingface.co/docs/diffusers/en/training/dreambooth) training) than without. When provided, the `` is appended to the beginning of each prompt. So, if your `` was `"DISNEY"` and your prompt was `"Spiderman swinging over buildings"`, the effective prompt used in training would be `"DISNEY Spiderman swinging over buildings"`. When not provided, you would either be training without any additional token or could augment your dataset to apply the token where you wish before starting the training.
> [!NOTE]
> You can pass `--use_8bit_adam` to reduce the memory requirements of training.
> [!IMPORTANT]
> The following settings have been tested at the time of adding CogVideoX LoRA training support:
> - Our testing was primarily done on CogVideoX-2b. We will work on CogVideoX-5b and CogVideoX-5b-I2V soon
> - One dataset comprised of 70 training videos of resolutions `200 x 480 x 720` (F x H x W). From this, by using frame skipping in data preprocessing, we created two smaller 49-frame and 16-frame datasets for faster experimentation and because the maximum limit recommended by the CogVideoX team is 49 frames. Out of the 70 videos, we created three groups of 10, 25 and 50 videos. All videos were similar in nature of the concept being trained.
> - 25+ videos worked best for training new concepts and styles.
> - We found that it is better to train with an identifier token that can be specified as `--id_token`. This is similar to Dreambooth-like training but normal finetuning without such a token works too.
> - Trained concept seemed to work decently well when combined with completely unrelated prompts. We expect even better results if CogVideoX-5B is finetuned.
> - The original repository uses a `lora_alpha` of `1`. We found this not suitable in many runs, possibly due to difference in modeling backends and training settings. Our recommendation is to set to the `lora_alpha` to either `rank` or `rank // 2`.
> - If you're training on data whose captions generate bad results with the original model, a `rank` of 64 and above is good and also the recommendation by the team behind CogVideoX. If the generations are already moderately good on your training captions, a `rank` of 16/32 should work. We found that setting the rank too low, say `4`, is not ideal and doesn't produce promising results.
> - The authors of CogVideoX recommend 4000 training steps and 100 training videos overall to achieve the best result. While that might yield the best results, we found from our limited experimentation that 2000 steps and 25 videos could also be sufficient.
> - When using the Prodigy opitimizer for training, one can follow the recommendations from [this](https://huggingface.co/blog/sdxl_lora_advanced_script) blog. Prodigy tends to overfit quickly. From my very limited testing, I found a learning rate of `0.5` to be suitable in addition to `--prodigy_use_bias_correction`, `prodigy_safeguard_warmup` and `--prodigy_decouple`.
> - The recommended learning rate by the CogVideoX authors and from our experimentation with Adam/AdamW is between `1e-3` and `1e-4` for a dataset of 25+ videos.
>
> Note that our testing is not exhaustive due to limited time for exploration. Our recommendation would be to play around with the different knobs and dials to find the best settings for your data.
## Inference
Once you have trained a lora model, the inference can be done simply loading the lora weights into the `CogVideoXPipeline`.
```python
import torch
from diffusers import CogVideoXPipeline
from diffusers.utils import export_to_video
pipe = CogVideoXPipeline.from_pretrained("THUDM/CogVideoX-2b", torch_dtype=torch.float16)
# pipe.load_lora_weights("/path/to/lora/weights", adapter_name="cogvideox-lora") # Or,
pipe.load_lora_weights("my-awesome-hf-username/my-awesome-lora-name", adapter_name="cogvideox-lora") # If loading from the HF Hub
pipe.to("cuda")
# Assuming lora_alpha=32 and rank=64 for training. If different, set accordingly
pipe.set_adapters(["cogvideox-lora"], [32 / 64])
prompt = "A vast, shimmering ocean flows gracefully under a twilight sky, its waves undulating in a mesmerizing dance of blues and greens. The surface glints with the last rays of the setting sun, casting golden highlights that ripple across the water. Seagulls soar above, their cries blending with the gentle roar of the waves. The horizon stretches infinitely, where the ocean meets the sky in a seamless blend of hues. Close-ups reveal the intricate patterns of the waves, capturing the fluidity and dynamic beauty of the sea in motion."
frames = pipe(prompt, guidance_scale=6, use_dynamic_cfg=True).frames[0]
export_to_video(frames, "output.mp4", fps=8)
```
## Reduce memory usage
While testing using the diffusers library, all optimizations included in the diffusers library were enabled. This
scheme has not been tested for actual memory usage on devices outside of **NVIDIA A100 / H100** architectures.
Generally, this scheme can be adapted to all **NVIDIA Ampere architecture** and above devices. If optimizations are
disabled, memory consumption will multiply, with peak memory usage being about 3 times the value in the table.
However, speed will increase by about 3-4 times. You can selectively disable some optimizations, including:
```
pipe.enable_sequential_cpu_offload()
pipe.vae.enable_slicing()
pipe.vae.enable_tiling()
```
+ For multi-GPU inference, the `enable_sequential_cpu_offload()` optimization needs to be disabled.
+ Using INT8 models will slow down inference, which is done to accommodate lower-memory GPUs while maintaining minimal
video quality loss, though inference speed will significantly decrease.
+ The CogVideoX-2B model was trained in `FP16` precision, and all CogVideoX-5B models were trained in `BF16` precision.
We recommend using the precision in which the model was trained for inference.
+ [PytorchAO](https://github.com/pytorch/ao) and [Optimum-quanto](https://github.com/huggingface/optimum-quanto/) can be
used to quantize the text encoder, transformer, and VAE modules to reduce the memory requirements of CogVideoX. This
allows the model to run on free T4 Colabs or GPUs with smaller memory! Also, note that TorchAO quantization is fully
compatible with `torch.compile`, which can significantly improve inference speed. FP8 precision must be used on
devices with NVIDIA H100 and above, requiring source installation of `torch`, `torchao`, `diffusers`, and `accelerate`
Python packages. CUDA 12.4 is recommended.
+ The inference speed tests also used the above memory optimization scheme. Without memory optimization, inference speed
increases by about 10%. Only the `diffusers` version of the model supports quantization.
+ The model only supports English input; other languages can be translated into English for use via large model
refinement.
+ The memory usage of model fine-tuning is tested in an `8 * H100` environment, and the program automatically
uses `Zero 2` optimization. If a specific number of GPUs is marked in the table, that number or more GPUs must be used
for fine-tuning.
| **Attribute** | **CogVideoX-2B** | **CogVideoX-5B** |
| ------------------------------------ | ---------------------------------------------------------------------- | ---------------------------------------------------------------------- |
| **Model Name** | CogVideoX-2B | CogVideoX-5B |
| **Inference Precision** | FP16* (Recommended), BF16, FP32, FP8*, INT8, Not supported INT4 | BF16 (Recommended), FP16, FP32, FP8*, INT8, Not supported INT4 |
| **Single GPU Inference VRAM** | FP16: Using diffusers 12.5GB* INT8: Using diffusers with torchao 7.8GB* | BF16: Using diffusers 20.7GB* INT8: Using diffusers with torchao 11.4GB* |
| **Multi GPU Inference VRAM** | FP16: Using diffusers 10GB* | BF16: Using diffusers 15GB* |
| **Inference Speed** | Single A100: ~90 seconds, Single H100: ~45 seconds | Single A100: ~180 seconds, Single H100: ~90 seconds |
| **Fine-tuning Precision** | FP16 | BF16 |
| **Fine-tuning VRAM Consumption** | 47 GB (bs=1, LORA) 61 GB (bs=2, LORA) 62GB (bs=1, SFT) | 63 GB (bs=1, LORA) 80 GB (bs=2, LORA) 75GB (bs=1, SFT) |
# Custom Diffusion
[Custom Diffusion](https://huggingface.co/papers/2212.04488) is a training technique for personalizing image generation models. Like Textual Inversion, DreamBooth, and LoRA, Custom Diffusion only requires a few (~4-5) example images. This technique works by only training weights in the cross-attention layers, and it uses a special word to represent the newly learned concept. Custom Diffusion is unique because it can also learn multiple concepts at the same time.
If you're training on a GPU with limited vRAM, you should try enabling xFormers with `--enable_xformers_memory_efficient_attention` for faster training with lower vRAM requirements (16GB). To save even more memory, add `--set_grads_to_none` in the training argument to set the gradients to `None` instead of zero (this option can cause some issues, so if you experience any, try removing this parameter).
This guide will explore the [train_custom_diffusion.py](https://github.com/huggingface/diffusers/blob/main/examples/custom_diffusion/train_custom_diffusion.py) script to help you become more familiar with it, and how you can adapt it for your own use-case.
Before running the script, make sure you install the library from source:
```bash
git clone https://github.com/huggingface/diffusers
cd diffusers
pip install .
```
Navigate to the example folder with the training script and install the required dependencies:
```bash
cd examples/custom_diffusion
pip install -r requirements.txt
pip install clip-retrieval
```
🤗 Accelerate is a library for helping you train on multiple GPUs/TPUs or with mixed-precision. It'll automatically configure your training setup based on your hardware and environment. Take a look at the 🤗 Accelerate [Quick tour](https://huggingface.co/docs/accelerate/quicktour) to learn more.
Initialize an 🤗 Accelerate environment:
```bash
accelerate config
```
To setup a default 🤗 Accelerate environment without choosing any configurations:
```bash
accelerate config default
```
Or if your environment doesn't support an interactive shell, like a notebook, you can use:
```py
from accelerate.utils import write_basic_config
write_basic_config()
```
Lastly, if you want to train a model on your own dataset, take a look at the [Create a dataset for training](create_dataset) guide to learn how to create a dataset that works with the training script.
The following sections highlight parts of the training script that are important for understanding how to modify it, but it doesn't cover every aspect of the script in detail. If you're interested in learning more, feel free to read through the [script](https://github.com/huggingface/diffusers/blob/main/examples/custom_diffusion/train_custom_diffusion.py) and let us know if you have any questions or concerns.
## Script parameters
The training script contains all the parameters to help you customize your training run. These are found in the [`parse_args()`](https://github.com/huggingface/diffusers/blob/64603389da01082055a901f2883c4810d1144edb/examples/custom_diffusion/train_custom_diffusion.py#L319) function. The function comes with default values, but you can also set your own values in the training command if you'd like.
For example, to change the resolution of the input image:
```bash
accelerate launch train_custom_diffusion.py \
--resolution=256
```
Many of the basic parameters are described in the [DreamBooth](dreambooth#script-parameters) training guide, so this guide focuses on the parameters unique to Custom Diffusion:
- `--freeze_model`: freezes the key and value parameters in the cross-attention layer; the default is `crossattn_kv`, but you can set it to `crossattn` to train all the parameters in the cross-attention layer
- `--concepts_list`: to learn multiple concepts, provide a path to a JSON file containing the concepts
- `--modifier_token`: a special word used to represent the learned concept
- `--initializer_token`: a special word used to initialize the embeddings of the `modifier_token`
### Prior preservation loss
Prior preservation loss is a method that uses a model's own generated samples to help it learn how to generate more diverse images. Because these generated sample images belong to the same class as the images you provided, they help the model retain what it has learned about the class and how it can use what it already knows about the class to make new compositions.
Many of the parameters for prior preservation loss are described in the [DreamBooth](dreambooth#prior-preservation-loss) training guide.
### Regularization
Custom Diffusion includes training the target images with a small set of real images to prevent overfitting. As you can imagine, this can be easy to do when you're only training on a few images! Download 200 real images with `clip_retrieval`. The `class_prompt` should be the same category as the target images. These images are stored in `class_data_dir`.
```bash
python retrieve.py --class_prompt cat --class_data_dir real_reg/samples_cat --num_class_images 200
```
To enable regularization, add the following parameters:
- `--with_prior_preservation`: whether to use prior preservation loss
- `--prior_loss_weight`: controls the influence of the prior preservation loss on the model
- `--real_prior`: whether to use a small set of real images to prevent overfitting
```bash
accelerate launch train_custom_diffusion.py \
--with_prior_preservation \
--prior_loss_weight=1.0 \
--class_data_dir="./real_reg/samples_cat" \
--class_prompt="cat" \
--real_prior=True \
```
## Training script
A lot of the code in the Custom Diffusion training script is similar to the [DreamBooth](dreambooth#training-script) script. This guide instead focuses on the code that is relevant to Custom Diffusion.
The Custom Diffusion training script has two dataset classes:
- [`CustomDiffusionDataset`](https://github.com/huggingface/diffusers/blob/64603389da01082055a901f2883c4810d1144edb/examples/custom_diffusion/train_custom_diffusion.py#L165): preprocesses the images, class images, and prompts for training
- [`PromptDataset`](https://github.com/huggingface/diffusers/blob/64603389da01082055a901f2883c4810d1144edb/examples/custom_diffusion/train_custom_diffusion.py#L148): prepares the prompts for generating class images
Next, the `modifier_token` is [added to the tokenizer](https://github.com/huggingface/diffusers/blob/64603389da01082055a901f2883c4810d1144edb/examples/custom_diffusion/train_custom_diffusion.py#L811), converted to token ids, and the token embeddings are resized to account for the new `modifier_token`. Then the `modifier_token` embeddings are initialized with the embeddings of the `initializer_token`. All parameters in the text encoder are frozen, except for the token embeddings since this is what the model is trying to learn to associate with the concepts.
```py
params_to_freeze = itertools.chain(
text_encoder.text_model.encoder.parameters(),
text_encoder.text_model.final_layer_norm.parameters(),
text_encoder.text_model.embeddings.position_embedding.parameters(),
)
freeze_params(params_to_freeze)
```
Now you'll need to add the [Custom Diffusion weights](https://github.com/huggingface/diffusers/blob/64603389da01082055a901f2883c4810d1144edb/examples/custom_diffusion/train_custom_diffusion.py#L911C3-L911C3) to the attention layers. This is a really important step for getting the shape and size of the attention weights correct, and for setting the appropriate number of attention processors in each UNet block.
```py
st = unet.state_dict()
for name, _ in unet.attn_processors.items():
cross_attention_dim = None if name.endswith("attn1.processor") else unet.config.cross_attention_dim
if name.startswith("mid_block"):
hidden_size = unet.config.block_out_channels[-1]
elif name.startswith("up_blocks"):
block_id = int(name[len("up_blocks.")])
hidden_size = list(reversed(unet.config.block_out_channels))[block_id]
elif name.startswith("down_blocks"):
block_id = int(name[len("down_blocks.")])
hidden_size = unet.config.block_out_channels[block_id]
layer_name = name.split(".processor")[0]
weights = {
"to_k_custom_diffusion.weight": st[layer_name + ".to_k.weight"],
"to_v_custom_diffusion.weight": st[layer_name + ".to_v.weight"],
}
if train_q_out:
weights["to_q_custom_diffusion.weight"] = st[layer_name + ".to_q.weight"]
weights["to_out_custom_diffusion.0.weight"] = st[layer_name + ".to_out.0.weight"]
weights["to_out_custom_diffusion.0.bias"] = st[layer_name + ".to_out.0.bias"]
if cross_attention_dim is not None:
custom_diffusion_attn_procs[name] = attention_class(
train_kv=train_kv,
train_q_out=train_q_out,
hidden_size=hidden_size,
cross_attention_dim=cross_attention_dim,
).to(unet.device)
custom_diffusion_attn_procs[name].load_state_dict(weights)
else:
custom_diffusion_attn_procs[name] = attention_class(
train_kv=False,
train_q_out=False,
hidden_size=hidden_size,
cross_attention_dim=cross_attention_dim,
)
del st
unet.set_attn_processor(custom_diffusion_attn_procs)
custom_diffusion_layers = AttnProcsLayers(unet.attn_processors)
```
The [optimizer](https://github.com/huggingface/diffusers/blob/84cd9e8d01adb47f046b1ee449fc76a0c32dc4e2/examples/custom_diffusion/train_custom_diffusion.py#L982) is initialized to update the cross-attention layer parameters:
```py
optimizer = optimizer_class(
itertools.chain(text_encoder.get_input_embeddings().parameters(), custom_diffusion_layers.parameters())
if args.modifier_token is not None
else custom_diffusion_layers.parameters(),
lr=args.learning_rate,
betas=(args.adam_beta1, args.adam_beta2),
weight_decay=args.adam_weight_decay,
eps=args.adam_epsilon,
)
```
In the [training loop](https://github.com/huggingface/diffusers/blob/84cd9e8d01adb47f046b1ee449fc76a0c32dc4e2/examples/custom_diffusion/train_custom_diffusion.py#L1048), it is important to only update the embeddings for the concept you're trying to learn. This means setting the gradients of all the other token embeddings to zero:
```py
if args.modifier_token is not None:
if accelerator.num_processes > 1:
grads_text_encoder = text_encoder.module.get_input_embeddings().weight.grad
else:
grads_text_encoder = text_encoder.get_input_embeddings().weight.grad
index_grads_to_zero = torch.arange(len(tokenizer)) != modifier_token_id[0]
for i in range(len(modifier_token_id[1:])):
index_grads_to_zero = index_grads_to_zero & (
torch.arange(len(tokenizer)) != modifier_token_id[i]
)
grads_text_encoder.data[index_grads_to_zero, :] = grads_text_encoder.data[
index_grads_to_zero, :
].fill_(0)
```
## Launch the script
Once you’ve made all your changes or you’re okay with the default configuration, you’re ready to launch the training script! 🚀
In this guide, you'll download and use these example [cat images](https://www.cs.cmu.edu/~custom-diffusion/assets/data.zip). You can also create and use your own dataset if you want (see the [Create a dataset for training](create_dataset) guide).
Set the environment variable `MODEL_NAME` to a model id on the Hub or a path to a local model, `INSTANCE_DIR` to the path where you just downloaded the cat images to, and `OUTPUT_DIR` to where you want to save the model. You'll use `` as the special word to tie the newly learned embeddings to. The script creates and saves model checkpoints and a pytorch_custom_diffusion_weights.bin file to your repository.
To monitor training progress with Weights and Biases, add the `--report_to=wandb` parameter to the training command and specify a validation prompt with `--validation_prompt`. This is useful for debugging and saving intermediate results.
If you're training on human faces, the Custom Diffusion team has found the following parameters to work well:
- `--learning_rate=5e-6`
- `--max_train_steps` can be anywhere between 1000 and 2000
- `--freeze_model=crossattn`
- use at least 15-20 images to train with
```bash
export MODEL_NAME="CompVis/stable-diffusion-v1-4"
export OUTPUT_DIR="path-to-save-model"
export INSTANCE_DIR="./data/cat"
accelerate launch train_custom_diffusion.py \
--pretrained_model_name_or_path=$MODEL_NAME \
--instance_data_dir=$INSTANCE_DIR \
--output_dir=$OUTPUT_DIR \
--class_data_dir=./real_reg/samples_cat/ \
--with_prior_preservation \
--real_prior \
--prior_loss_weight=1.0 \
--class_prompt="cat" \
--num_class_images=200 \
--instance_prompt="photo of a cat" \
--resolution=512 \
--train_batch_size=2 \
--learning_rate=1e-5 \
--lr_warmup_steps=0 \
--max_train_steps=250 \
--scale_lr \
--hflip \
--modifier_token "" \
--validation_prompt=" cat sitting in a bucket" \
--report_to="wandb" \
--push_to_hub
```
Custom Diffusion can also learn multiple concepts if you provide a [JSON](https://github.com/adobe-research/custom-diffusion/blob/main/assets/concept_list.json) file with some details about each concept it should learn.
Run clip-retrieval to collect some real images to use for regularization:
```bash
pip install clip-retrieval
python retrieve.py --class_prompt {} --class_data_dir {} --num_class_images 200
```
Then you can launch the script:
```bash
export MODEL_NAME="CompVis/stable-diffusion-v1-4"
export OUTPUT_DIR="path-to-save-model"
accelerate launch train_custom_diffusion.py \
--pretrained_model_name_or_path=$MODEL_NAME \
--output_dir=$OUTPUT_DIR \
--concepts_list=./concept_list.json \
--with_prior_preservation \
--real_prior \
--prior_loss_weight=1.0 \
--resolution=512 \
--train_batch_size=2 \
--learning_rate=1e-5 \
--lr_warmup_steps=0 \
--max_train_steps=500 \
--num_class_images=200 \
--scale_lr \
--hflip \
--modifier_token "+" \
--push_to_hub
```
Once training is finished, you can use your new Custom Diffusion model for inference.
```py
import torch
from diffusers import DiffusionPipeline
pipeline = DiffusionPipeline.from_pretrained(
"CompVis/stable-diffusion-v1-4", torch_dtype=torch.float16,
).to("cuda")
pipeline.unet.load_attn_procs("path-to-save-model", weight_name="pytorch_custom_diffusion_weights.bin")
pipeline.load_textual_inversion("path-to-save-model", weight_name=".bin")
image = pipeline(
" cat sitting in a bucket",
num_inference_steps=100,
guidance_scale=6.0,
eta=1.0,
).images[0]
image.save("cat.png")
```
```py
import torch
from huggingface_hub.repocard import RepoCard
from diffusers import DiffusionPipeline
pipeline = DiffusionPipeline.from_pretrained("sayakpaul/custom-diffusion-cat-wooden-pot", torch_dtype=torch.float16).to("cuda")
pipeline.unet.load_attn_procs(model_id, weight_name="pytorch_custom_diffusion_weights.bin")
pipeline.load_textual_inversion(model_id, weight_name=".bin")
image = pipeline(
"the cat sculpture in the style of a wooden pot",
num_inference_steps=100,
guidance_scale=6.0,
eta=1.0,
).images[0]
image.save("multi-subject.png")
```
## Next steps
Congratulations on training a model with Custom Diffusion! 🎉 To learn more:
- Read the [Multi-Concept Customization of Text-to-Image Diffusion](https://www.cs.cmu.edu/~custom-diffusion/) blog post to learn more details about the experimental results from the Custom Diffusion team.
# ControlNet
[ControlNet](https://hf.co/papers/2302.05543) models are adapters trained on top of another pretrained model. It allows for a greater degree of control over image generation by conditioning the model with an additional input image. The input image can be a canny edge, depth map, human pose, and many more.
If you're training on a GPU with limited vRAM, you should try enabling the `gradient_checkpointing`, `gradient_accumulation_steps`, and `mixed_precision` parameters in the training command. You can also reduce your memory footprint by using memory-efficient attention with [xFormers](../optimization/xformers). JAX/Flax training is also supported for efficient training on TPUs and GPUs, but it doesn't support gradient checkpointing or xFormers. You should have a GPU with >30GB of memory if you want to train faster with Flax.
This guide will explore the [train_controlnet.py](https://github.com/huggingface/diffusers/blob/main/examples/controlnet/train_controlnet.py) training script to help you become familiar with it, and how you can adapt it for your own use-case.
Before running the script, make sure you install the library from source:
```bash
git clone https://github.com/huggingface/diffusers
cd diffusers
pip install .
```
Then navigate to the example folder containing the training script and install the required dependencies for the script you're using:
```bash
cd examples/controlnet
pip install -r requirements.txt
```
If you have access to a TPU, the Flax training script runs even faster! Let's run the training script on the [Google Cloud TPU VM](https://cloud.google.com/tpu/docs/run-calculation-jax). Create a single TPU v4-8 VM and connect to it:
```bash
ZONE=us-central2-b
TPU_TYPE=v4-8
VM_NAME=hg_flax
gcloud alpha compute tpus tpu-vm create $VM_NAME \
--zone $ZONE \
--accelerator-type $TPU_TYPE \
--version tpu-vm-v4-base
gcloud alpha compute tpus tpu-vm ssh $VM_NAME --zone $ZONE -- \
```
Install JAX 0.4.5:
```bash
pip install "jax[tpu]==0.4.5" -f https://storage.googleapis.com/jax-releases/libtpu_releases.html
```
Then install the required dependencies for the Flax script:
```bash
cd examples/controlnet
pip install -r requirements_flax.txt
```
🤗 Accelerate is a library for helping you train on multiple GPUs/TPUs or with mixed-precision. It'll automatically configure your training setup based on your hardware and environment. Take a look at the 🤗 Accelerate [Quick tour](https://huggingface.co/docs/accelerate/quicktour) to learn more.
Initialize an 🤗 Accelerate environment:
```bash
accelerate config
```
To setup a default 🤗 Accelerate environment without choosing any configurations:
```bash
accelerate config default
```
Or if your environment doesn't support an interactive shell, like a notebook, you can use:
```py
from accelerate.utils import write_basic_config
write_basic_config()
```
Lastly, if you want to train a model on your own dataset, take a look at the [Create a dataset for training](create_dataset) guide to learn how to create a dataset that works with the training script.
The following sections highlight parts of the training script that are important for understanding how to modify it, but it doesn't cover every aspect of the script in detail. If you're interested in learning more, feel free to read through the [script](https://github.com/huggingface/diffusers/blob/main/examples/controlnet/train_controlnet.py) and let us know if you have any questions or concerns.
## Script parameters
The training script provides many parameters to help you customize your training run. All of the parameters and their descriptions are found in the [`parse_args()`](https://github.com/huggingface/diffusers/blob/64603389da01082055a901f2883c4810d1144edb/examples/controlnet/train_controlnet.py#L231) function. This function provides default values for each parameter, such as the training batch size and learning rate, but you can also set your own values in the training command if you'd like.
For example, to speedup training with mixed precision using the fp16 format, add the `--mixed_precision` parameter to the training command:
```bash
accelerate launch train_controlnet.py \
--mixed_precision="fp16"
```
Many of the basic and important parameters are described in the [Text-to-image](text2image#script-parameters) training guide, so this guide just focuses on the relevant parameters for ControlNet:
- `--max_train_samples`: the number of training samples; this can be lowered for faster training, but if you want to stream really large datasets, you'll need to include this parameter and the `--streaming` parameter in your training command
- `--gradient_accumulation_steps`: number of update steps to accumulate before the backward pass; this allows you to train with a bigger batch size than your GPU memory can typically handle
### Min-SNR weighting
The [Min-SNR](https://huggingface.co/papers/2303.09556) weighting strategy can help with training by rebalancing the loss to achieve faster convergence. The training script supports predicting `epsilon` (noise) or `v_prediction`, but Min-SNR is compatible with both prediction types. This weighting strategy is only supported by PyTorch and is unavailable in the Flax training script.
Add the `--snr_gamma` parameter and set it to the recommended value of 5.0:
```bash
accelerate launch train_controlnet.py \
--snr_gamma=5.0
```
## Training script
As with the script parameters, a general walkthrough of the training script is provided in the [Text-to-image](text2image#training-script) training guide. Instead, this guide takes a look at the relevant parts of the ControlNet script.
The training script has a [`make_train_dataset`](https://github.com/huggingface/diffusers/blob/64603389da01082055a901f2883c4810d1144edb/examples/controlnet/train_controlnet.py#L582) function for preprocessing the dataset with image transforms and caption tokenization. You'll see that in addition to the usual caption tokenization and image transforms, the script also includes transforms for the conditioning image.
If you're streaming a dataset on a TPU, performance may be bottlenecked by the 🤗 Datasets library which is not optimized for images. To ensure maximum throughput, you're encouraged to explore other dataset formats like [WebDataset](https://webdataset.github.io/webdataset/), [TorchData](https://github.com/pytorch/data), and [TensorFlow Datasets](https://www.tensorflow.org/datasets/tfless_tfds).
```py
conditioning_image_transforms = transforms.Compose(
[
transforms.Resize(args.resolution, interpolation=transforms.InterpolationMode.BILINEAR),
transforms.CenterCrop(args.resolution),
transforms.ToTensor(),
]
)
```
Within the [`main()`](https://github.com/huggingface/diffusers/blob/64603389da01082055a901f2883c4810d1144edb/examples/controlnet/train_controlnet.py#L713) function, you'll find the code for loading the tokenizer, text encoder, scheduler and models. This is also where the ControlNet model is loaded either from existing weights or randomly initialized from a UNet:
```py
if args.controlnet_model_name_or_path:
logger.info("Loading existing controlnet weights")
controlnet = ControlNetModel.from_pretrained(args.controlnet_model_name_or_path)
else:
logger.info("Initializing controlnet weights from unet")
controlnet = ControlNetModel.from_unet(unet)
```
The [optimizer](https://github.com/huggingface/diffusers/blob/64603389da01082055a901f2883c4810d1144edb/examples/controlnet/train_controlnet.py#L871) is set up to update the ControlNet parameters:
```py
params_to_optimize = controlnet.parameters()
optimizer = optimizer_class(
params_to_optimize,
lr=args.learning_rate,
betas=(args.adam_beta1, args.adam_beta2),
weight_decay=args.adam_weight_decay,
eps=args.adam_epsilon,
)
```
Finally, in the [training loop](https://github.com/huggingface/diffusers/blob/64603389da01082055a901f2883c4810d1144edb/examples/controlnet/train_controlnet.py#L943), the conditioning text embeddings and image are passed to the down and mid-blocks of the ControlNet model:
```py
encoder_hidden_states = text_encoder(batch["input_ids"])[0]
controlnet_image = batch["conditioning_pixel_values"].to(dtype=weight_dtype)
down_block_res_samples, mid_block_res_sample = controlnet(
noisy_latents,
timesteps,
encoder_hidden_states=encoder_hidden_states,
controlnet_cond=controlnet_image,
return_dict=False,
)
```
If you want to learn more about how the training loop works, check out the [Understanding pipelines, models and schedulers](../using-diffusers/write_own_pipeline) tutorial which breaks down the basic pattern of the denoising process.
## Launch the script
Now you're ready to launch the training script! 🚀
This guide uses the [fusing/fill50k](https://huggingface.co/datasets/fusing/fill50k) dataset, but remember, you can create and use your own dataset if you want (see the [Create a dataset for training](create_dataset) guide).
Set the environment variable `MODEL_NAME` to a model id on the Hub or a path to a local model and `OUTPUT_DIR` to where you want to save the model.
Download the following images to condition your training with:
```bash
wget https://huggingface.co/datasets/huggingface/documentation-images/resolve/main/diffusers/controlnet_training/conditioning_image_1.png
wget https://huggingface.co/datasets/huggingface/documentation-images/resolve/main/diffusers/controlnet_training/conditioning_image_2.png
```
One more thing before you launch the script! Depending on the GPU you have, you may need to enable certain optimizations to train a ControlNet. The default configuration in this script requires ~38GB of vRAM. If you're training on more than one GPU, add the `--multi_gpu` parameter to the `accelerate launch` command.
On a 16GB GPU, you can use bitsandbytes 8-bit optimizer and gradient checkpointing to optimize your training run. Install bitsandbytes:
```py
pip install bitsandbytes
```
Then, add the following parameter to your training command:
```bash
accelerate launch train_controlnet.py \
--gradient_checkpointing \
--use_8bit_adam \
```
On a 12GB GPU, you'll need bitsandbytes 8-bit optimizer, gradient checkpointing, xFormers, and set the gradients to `None` instead of zero to reduce your memory-usage.
```bash
accelerate launch train_controlnet.py \
--use_8bit_adam \
--gradient_checkpointing \
--enable_xformers_memory_efficient_attention \
--set_grads_to_none \
```
On a 8GB GPU, you'll need to use [DeepSpeed](https://www.deepspeed.ai/) to offload some of the tensors from the vRAM to either the CPU or NVME to allow training with less GPU memory.
Run the following command to configure your 🤗 Accelerate environment:
```bash
accelerate config
```
During configuration, confirm that you want to use DeepSpeed stage 2. Now it should be possible to train on under 8GB vRAM by combining DeepSpeed stage 2, fp16 mixed precision, and offloading the model parameters and the optimizer state to the CPU. The drawback is that this requires more system RAM (~25 GB). See the [DeepSpeed documentation](https://huggingface.co/docs/accelerate/usage_guides/deepspeed) for more configuration options. Your configuration file should look something like:
```bash
compute_environment: LOCAL_MACHINE
deepspeed_config:
gradient_accumulation_steps: 4
offload_optimizer_device: cpu
offload_param_device: cpu
zero3_init_flag: false
zero_stage: 2
distributed_type: DEEPSPEED
```
You should also change the default Adam optimizer to DeepSpeed’s optimized version of Adam [`deepspeed.ops.adam.DeepSpeedCPUAdam`](https://deepspeed.readthedocs.io/en/latest/optimizers.html#adam-cpu) for a substantial speedup. Enabling `DeepSpeedCPUAdam` requires your system’s CUDA toolchain version to be the same as the one installed with PyTorch.
bitsandbytes 8-bit optimizers don’t seem to be compatible with DeepSpeed at the moment.
That's it! You don't need to add any additional parameters to your training command.
```bash
export MODEL_DIR="stable-diffusion-v1-5/stable-diffusion-v1-5"
export OUTPUT_DIR="path/to/save/model"
accelerate launch train_controlnet.py \
--pretrained_model_name_or_path=$MODEL_DIR \
--output_dir=$OUTPUT_DIR \
--dataset_name=fusing/fill50k \
--resolution=512 \
--learning_rate=1e-5 \
--validation_image "./conditioning_image_1.png" "./conditioning_image_2.png" \
--validation_prompt "red circle with blue background" "cyan circle with brown floral background" \
--train_batch_size=1 \
--gradient_accumulation_steps=4 \
--push_to_hub
```
With Flax, you can [profile your code](https://jax.readthedocs.io/en/latest/profiling.html) by adding the `--profile_steps==5` parameter to your training command. Install the Tensorboard profile plugin:
```bash
pip install tensorflow tensorboard-plugin-profile
tensorboard --logdir runs/fill-circle-100steps-20230411_165612/
```
Then you can inspect the profile at [http://localhost:6006/#profile](http://localhost:6006/#profile).
If you run into version conflicts with the plugin, try uninstalling and reinstalling all versions of TensorFlow and Tensorboard. The debugging functionality of the profile plugin is still experimental, and not all views are fully functional. The `trace_viewer` cuts off events after 1M, which can result in all your device traces getting lost if for example, you profile the compilation step by accident.
```bash
python3 train_controlnet_flax.py \
--pretrained_model_name_or_path=$MODEL_DIR \
--output_dir=$OUTPUT_DIR \
--dataset_name=fusing/fill50k \
--resolution=512 \
--learning_rate=1e-5 \
--validation_image "./conditioning_image_1.png" "./conditioning_image_2.png" \
--validation_prompt "red circle with blue background" "cyan circle with brown floral background" \
--validation_steps=1000 \
--train_batch_size=2 \
--revision="non-ema" \
--from_pt \
--report_to="wandb" \
--tracker_project_name=$HUB_MODEL_ID \
--num_train_epochs=11 \
--push_to_hub \
--hub_model_id=$HUB_MODEL_ID
```
Once training is complete, you can use your newly trained model for inference!
```py
from diffusers import StableDiffusionControlNetPipeline, ControlNetModel
from diffusers.utils import load_image
import torch
controlnet = ControlNetModel.from_pretrained("path/to/controlnet", torch_dtype=torch.float16)
pipeline = StableDiffusionControlNetPipeline.from_pretrained(
"path/to/base/model", controlnet=controlnet, torch_dtype=torch.float16
).to("cuda")
control_image = load_image("./conditioning_image_1.png")
prompt = "pale golden rod circle with old lace background"
generator = torch.manual_seed(0)
image = pipeline(prompt, num_inference_steps=20, generator=generator, image=control_image).images[0]
image.save("./output.png")
```
## Stable Diffusion XL
Stable Diffusion XL (SDXL) is a powerful text-to-image model that generates high-resolution images, and it adds a second text-encoder to its architecture. Use the [`train_controlnet_sdxl.py`](https://github.com/huggingface/diffusers/blob/main/examples/controlnet/train_controlnet_sdxl.py) script to train a ControlNet adapter for the SDXL model.
The SDXL training script is discussed in more detail in the [SDXL training](sdxl) guide.
## Next steps
Congratulations on training your own ControlNet! To learn more about how to use your new model, the following guides may be helpful:
- Learn how to [use a ControlNet](../using-diffusers/controlnet) for inference on a variety of tasks.
# Unconditional image generation
Unconditional image generation models are not conditioned on text or images during training. It only generates images that resemble its training data distribution.
This guide will explore the [train_unconditional.py](https://github.com/huggingface/diffusers/blob/main/examples/unconditional_image_generation/train_unconditional.py) training script to help you become familiar with it, and how you can adapt it for your own use-case.
Before running the script, make sure you install the library from source:
```bash
git clone https://github.com/huggingface/diffusers
cd diffusers
pip install .
```
Then navigate to the example folder containing the training script and install the required dependencies:
```bash
cd examples/unconditional_image_generation
pip install -r requirements.txt
```
🤗 Accelerate is a library for helping you train on multiple GPUs/TPUs or with mixed-precision. It'll automatically configure your training setup based on your hardware and environment. Take a look at the 🤗 Accelerate [Quick tour](https://huggingface.co/docs/accelerate/quicktour) to learn more.
Initialize an 🤗 Accelerate environment:
```bash
accelerate config
```
To setup a default 🤗 Accelerate environment without choosing any configurations:
```bash
accelerate config default
```
Or if your environment doesn't support an interactive shell like a notebook, you can use:
```py
from accelerate.utils import write_basic_config
write_basic_config()
```
Lastly, if you want to train a model on your own dataset, take a look at the [Create a dataset for training](create_dataset) guide to learn how to create a dataset that works with the training script.
## Script parameters
The following sections highlight parts of the training script that are important for understanding how to modify it, but it doesn't cover every aspect of the script in detail. If you're interested in learning more, feel free to read through the [script](https://github.com/huggingface/diffusers/blob/main/examples/unconditional_image_generation/train_unconditional.py) and let us know if you have any questions or concerns.
The training script provides many parameters to help you customize your training run. All of the parameters and their descriptions are found in the [`parse_args()`](https://github.com/huggingface/diffusers/blob/096f84b05f9514fae9f185cbec0a4d38fbad9919/examples/unconditional_image_generation/train_unconditional.py#L55) function. It provides default values for each parameter, such as the training batch size and learning rate, but you can also set your own values in the training command if you'd like.
For example, to speedup training with mixed precision using the bf16 format, add the `--mixed_precision` parameter to the training command:
```bash
accelerate launch train_unconditional.py \
--mixed_precision="bf16"
```
Some basic and important parameters to specify include:
- `--dataset_name`: the name of the dataset on the Hub or a local path to the dataset to train on
- `--output_dir`: where to save the trained model
- `--push_to_hub`: whether to push the trained model to the Hub
- `--checkpointing_steps`: frequency of saving a checkpoint as the model trains; this is useful if training is interrupted, you can continue training from that checkpoint by adding `--resume_from_checkpoint` to your training command
Bring your dataset, and let the training script handle everything else!
## Training script
The code for preprocessing the dataset and the training loop is found in the [`main()`](https://github.com/huggingface/diffusers/blob/096f84b05f9514fae9f185cbec0a4d38fbad9919/examples/unconditional_image_generation/train_unconditional.py#L275) function. If you need to adapt the training script, this is where you'll need to make your changes.
The `train_unconditional` script [initializes a `UNet2DModel`](https://github.com/huggingface/diffusers/blob/096f84b05f9514fae9f185cbec0a4d38fbad9919/examples/unconditional_image_generation/train_unconditional.py#L356) if you don't provide a model configuration. You can configure the UNet here if you'd like:
```py
model = UNet2DModel(
sample_size=args.resolution,
in_channels=3,
out_channels=3,
layers_per_block=2,
block_out_channels=(128, 128, 256, 256, 512, 512),
down_block_types=(
"DownBlock2D",
"DownBlock2D",
"DownBlock2D",
"DownBlock2D",
"AttnDownBlock2D",
"DownBlock2D",
),
up_block_types=(
"UpBlock2D",
"AttnUpBlock2D",
"UpBlock2D",
"UpBlock2D",
"UpBlock2D",
"UpBlock2D",
),
)
```
Next, the script initializes a [scheduler](https://github.com/huggingface/diffusers/blob/096f84b05f9514fae9f185cbec0a4d38fbad9919/examples/unconditional_image_generation/train_unconditional.py#L418) and [optimizer](https://github.com/huggingface/diffusers/blob/096f84b05f9514fae9f185cbec0a4d38fbad9919/examples/unconditional_image_generation/train_unconditional.py#L429):
```py
# Initialize the scheduler
accepts_prediction_type = "prediction_type" in set(inspect.signature(DDPMScheduler.__init__).parameters.keys())
if accepts_prediction_type:
noise_scheduler = DDPMScheduler(
num_train_timesteps=args.ddpm_num_steps,
beta_schedule=args.ddpm_beta_schedule,
prediction_type=args.prediction_type,
)
else:
noise_scheduler = DDPMScheduler(num_train_timesteps=args.ddpm_num_steps, beta_schedule=args.ddpm_beta_schedule)
# Initialize the optimizer
optimizer = torch.optim.AdamW(
model.parameters(),
lr=args.learning_rate,
betas=(args.adam_beta1, args.adam_beta2),
weight_decay=args.adam_weight_decay,
eps=args.adam_epsilon,
)
```
Then it [loads a dataset](https://github.com/huggingface/diffusers/blob/096f84b05f9514fae9f185cbec0a4d38fbad9919/examples/unconditional_image_generation/train_unconditional.py#L451) and you can specify how to [preprocess](https://github.com/huggingface/diffusers/blob/096f84b05f9514fae9f185cbec0a4d38fbad9919/examples/unconditional_image_generation/train_unconditional.py#L455) it:
```py
dataset = load_dataset("imagefolder", data_dir=args.train_data_dir, cache_dir=args.cache_dir, split="train")
augmentations = transforms.Compose(
[
transforms.Resize(args.resolution, interpolation=transforms.InterpolationMode.BILINEAR),
transforms.CenterCrop(args.resolution) if args.center_crop else transforms.RandomCrop(args.resolution),
transforms.RandomHorizontalFlip() if args.random_flip else transforms.Lambda(lambda x: x),
transforms.ToTensor(),
transforms.Normalize([0.5], [0.5]),
]
)
```
Finally, the [training loop](https://github.com/huggingface/diffusers/blob/096f84b05f9514fae9f185cbec0a4d38fbad9919/examples/unconditional_image_generation/train_unconditional.py#L540) handles everything else such as adding noise to the images, predicting the noise residual, calculating the loss, saving checkpoints at specified steps, and saving and pushing the model to the Hub. If you want to learn more about how the training loop works, check out the [Understanding pipelines, models and schedulers](../using-diffusers/write_own_pipeline) tutorial which breaks down the basic pattern of the denoising process.
## Launch the script
Once you've made all your changes or you're okay with the default configuration, you're ready to launch the training script! 🚀
A full training run takes 2 hours on 4xV100 GPUs.
```bash
accelerate launch train_unconditional.py \
--dataset_name="huggan/flowers-102-categories" \
--output_dir="ddpm-ema-flowers-64" \
--mixed_precision="fp16" \
--push_to_hub
```
If you're training with more than one GPU, add the `--multi_gpu` parameter to the training command:
```bash
accelerate launch --multi_gpu train_unconditional.py \
--dataset_name="huggan/flowers-102-categories" \
--output_dir="ddpm-ema-flowers-64" \
--mixed_precision="fp16" \
--push_to_hub
```
The training script creates and saves a checkpoint file in your repository. Now you can load and use your trained model for inference:
```py
from diffusers import DiffusionPipeline
import torch
pipeline = DiffusionPipeline.from_pretrained("anton-l/ddpm-butterflies-128").to("cuda")
image = pipeline().images[0]
```
# Reinforcement learning training with DDPO
You can fine-tune Stable Diffusion on a reward function via reinforcement learning with the 🤗 TRL library and 🤗 Diffusers. This is done with the Denoising Diffusion Policy Optimization (DDPO) algorithm introduced by Black et al. in [Training Diffusion Models with Reinforcement Learning](https://arxiv.org/abs/2305.13301), which is implemented in 🤗 TRL with the [DDPOTrainer](https://huggingface.co/docs/trl/main/en/ddpo_trainer#trl.DDPOTrainer).
For more information, check out the [DDPOTrainer](https://huggingface.co/docs/trl/main/en/ddpo_trainer#trl.DDPOTrainer) API reference and the [Finetune Stable Diffusion Models with DDPO via TRL](https://huggingface.co/blog/trl-ddpo) blog post.
# InstructPix2Pix
[InstructPix2Pix](https://hf.co/papers/2211.09800) is a Stable Diffusion model trained to edit images from human-provided instructions. For example, your prompt can be "turn the clouds rainy" and the model will edit the input image accordingly. This model is conditioned on the text prompt (or editing instruction) and the input image.
This guide will explore the [train_instruct_pix2pix.py](https://github.com/huggingface/diffusers/blob/main/examples/instruct_pix2pix/train_instruct_pix2pix.py) training script to help you become familiar with it, and how you can adapt it for your own use case.
Before running the script, make sure you install the library from source:
```bash
git clone https://github.com/huggingface/diffusers
cd diffusers
pip install .
```
Then navigate to the example folder containing the training script and install the required dependencies for the script you're using:
```bash
cd examples/instruct_pix2pix
pip install -r requirements.txt
```
🤗 Accelerate is a library for helping you train on multiple GPUs/TPUs or with mixed-precision. It'll automatically configure your training setup based on your hardware and environment. Take a look at the 🤗 Accelerate [Quick tour](https://huggingface.co/docs/accelerate/quicktour) to learn more.
Initialize an 🤗 Accelerate environment:
```bash
accelerate config
```
To setup a default 🤗 Accelerate environment without choosing any configurations:
```bash
accelerate config default
```
Or if your environment doesn't support an interactive shell, like a notebook, you can use:
```py
from accelerate.utils import write_basic_config
write_basic_config()
```
Lastly, if you want to train a model on your own dataset, take a look at the [Create a dataset for training](create_dataset) guide to learn how to create a dataset that works with the training script.
The following sections highlight parts of the training script that are important for understanding how to modify it, but it doesn't cover every aspect of the script in detail. If you're interested in learning more, feel free to read through the [script](https://github.com/huggingface/diffusers/blob/main/examples/instruct_pix2pix/train_instruct_pix2pix.py) and let us know if you have any questions or concerns.
## Script parameters
The training script has many parameters to help you customize your training run. All of the parameters and their descriptions are found in the [`parse_args()`](https://github.com/huggingface/diffusers/blob/64603389da01082055a901f2883c4810d1144edb/examples/instruct_pix2pix/train_instruct_pix2pix.py#L65) function. Default values are provided for most parameters that work pretty well, but you can also set your own values in the training command if you'd like.
For example, to increase the resolution of the input image:
```bash
accelerate launch train_instruct_pix2pix.py \
--resolution=512 \
```
Many of the basic and important parameters are described in the [Text-to-image](text2image#script-parameters) training guide, so this guide just focuses on the relevant parameters for InstructPix2Pix:
- `--original_image_column`: the original image before the edits are made
- `--edited_image_column`: the image after the edits are made
- `--edit_prompt_column`: the instructions to edit the image
- `--conditioning_dropout_prob`: the dropout probability for the edited image and edit prompts during training which enables classifier-free guidance (CFG) for one or both conditioning inputs
## Training script
The dataset preprocessing code and training loop are found in the [`main()`](https://github.com/huggingface/diffusers/blob/64603389da01082055a901f2883c4810d1144edb/examples/instruct_pix2pix/train_instruct_pix2pix.py#L374) function. This is where you'll make your changes to the training script to adapt it for your own use-case.
As with the script parameters, a walkthrough of the training script is provided in the [Text-to-image](text2image#training-script) training guide. Instead, this guide takes a look at the InstructPix2Pix relevant parts of the script.
The script begins by modifying the [number of input channels](https://github.com/huggingface/diffusers/blob/64603389da01082055a901f2883c4810d1144edb/examples/instruct_pix2pix/train_instruct_pix2pix.py#L445) in the first convolutional layer of the UNet to account for InstructPix2Pix's additional conditioning image:
```py
in_channels = 8
out_channels = unet.conv_in.out_channels
unet.register_to_config(in_channels=in_channels)
with torch.no_grad():
new_conv_in = nn.Conv2d(
in_channels, out_channels, unet.conv_in.kernel_size, unet.conv_in.stride, unet.conv_in.padding
)
new_conv_in.weight.zero_()
new_conv_in.weight[:, :4, :, :].copy_(unet.conv_in.weight)
unet.conv_in = new_conv_in
```
These UNet parameters are [updated](https://github.com/huggingface/diffusers/blob/64603389da01082055a901f2883c4810d1144edb/examples/instruct_pix2pix/train_instruct_pix2pix.py#L545C1-L551C6) by the optimizer:
```py
optimizer = optimizer_cls(
unet.parameters(),
lr=args.learning_rate,
betas=(args.adam_beta1, args.adam_beta2),
weight_decay=args.adam_weight_decay,
eps=args.adam_epsilon,
)
```
Next, the edited images and edit instructions are [preprocessed](https://github.com/huggingface/diffusers/blob/64603389da01082055a901f2883c4810d1144edb/examples/instruct_pix2pix/train_instruct_pix2pix.py#L624) and [tokenized](https://github.com/huggingface/diffusers/blob/64603389da01082055a901f2883c4810d1144edb/examples/instruct_pix2pix/train_instruct_pix2pix.py#L610C24-L610C24). It is important the same image transformations are applied to the original and edited images.
```py
def preprocess_train(examples):
preprocessed_images = preprocess_images(examples)
original_images, edited_images = preprocessed_images.chunk(2)
original_images = original_images.reshape(-1, 3, args.resolution, args.resolution)
edited_images = edited_images.reshape(-1, 3, args.resolution, args.resolution)
examples["original_pixel_values"] = original_images
examples["edited_pixel_values"] = edited_images
captions = list(examples[edit_prompt_column])
examples["input_ids"] = tokenize_captions(captions)
return examples
```
Finally, in the [training loop](https://github.com/huggingface/diffusers/blob/64603389da01082055a901f2883c4810d1144edb/examples/instruct_pix2pix/train_instruct_pix2pix.py#L730), it starts by encoding the edited images into latent space:
```py
latents = vae.encode(batch["edited_pixel_values"].to(weight_dtype)).latent_dist.sample()
latents = latents * vae.config.scaling_factor
```
Then, the script applies dropout to the original image and edit instruction embeddings to support CFG. This is what enables the model to modulate the influence of the edit instruction and original image on the edited image.
```py
encoder_hidden_states = text_encoder(batch["input_ids"])[0]
original_image_embeds = vae.encode(batch["original_pixel_values"].to(weight_dtype)).latent_dist.mode()
if args.conditioning_dropout_prob is not None:
random_p = torch.rand(bsz, device=latents.device, generator=generator)
prompt_mask = random_p < 2 * args.conditioning_dropout_prob
prompt_mask = prompt_mask.reshape(bsz, 1, 1)
null_conditioning = text_encoder(tokenize_captions([""]).to(accelerator.device))[0]
encoder_hidden_states = torch.where(prompt_mask, null_conditioning, encoder_hidden_states)
image_mask_dtype = original_image_embeds.dtype
image_mask = 1 - (
(random_p >= args.conditioning_dropout_prob).to(image_mask_dtype)
* (random_p < 3 * args.conditioning_dropout_prob).to(image_mask_dtype)
)
image_mask = image_mask.reshape(bsz, 1, 1, 1)
original_image_embeds = image_mask * original_image_embeds
```
That's pretty much it! Aside from the differences described here, the rest of the script is very similar to the [Text-to-image](text2image#training-script) training script, so feel free to check it out for more details. If you want to learn more about how the training loop works, check out the [Understanding pipelines, models and schedulers](../using-diffusers/write_own_pipeline) tutorial which breaks down the basic pattern of the denoising process.
## Launch the script
Once you're happy with the changes to your script or if you're okay with the default configuration, you're ready to launch the training script! 🚀
This guide uses the [fusing/instructpix2pix-1000-samples](https://huggingface.co/datasets/fusing/instructpix2pix-1000-samples) dataset, which is a smaller version of the [original dataset](https://huggingface.co/datasets/timbrooks/instructpix2pix-clip-filtered). You can also create and use your own dataset if you'd like (see the [Create a dataset for training](create_dataset) guide).
Set the `MODEL_NAME` environment variable to the name of the model (can be a model id on the Hub or a path to a local model), and the `DATASET_ID` to the name of the dataset on the Hub. The script creates and saves all the components (feature extractor, scheduler, text encoder, UNet, etc.) to a subfolder in your repository.
For better results, try longer training runs with a larger dataset. We've only tested this training script on a smaller-scale dataset.
To monitor training progress with Weights and Biases, add the `--report_to=wandb` parameter to the training command and specify a validation image with `--val_image_url` and a validation prompt with `--validation_prompt`. This can be really useful for debugging the model.
If you’re training on more than one GPU, add the `--multi_gpu` parameter to the `accelerate launch` command.
```bash
accelerate launch --mixed_precision="fp16" train_instruct_pix2pix.py \
--pretrained_model_name_or_path=$MODEL_NAME \
--dataset_name=$DATASET_ID \
--enable_xformers_memory_efficient_attention \
--resolution=256 \
--random_flip \
--train_batch_size=4 \
--gradient_accumulation_steps=4 \
--gradient_checkpointing \
--max_train_steps=15000 \
--checkpointing_steps=5000 \
--checkpoints_total_limit=1 \
--learning_rate=5e-05 \
--max_grad_norm=1 \
--lr_warmup_steps=0 \
--conditioning_dropout_prob=0.05 \
--mixed_precision=fp16 \
--seed=42 \
--push_to_hub
```
After training is finished, you can use your new InstructPix2Pix for inference:
```py
import PIL
import requests
import torch
from diffusers import StableDiffusionInstructPix2PixPipeline
from diffusers.utils import load_image
pipeline = StableDiffusionInstructPix2PixPipeline.from_pretrained("your_cool_model", torch_dtype=torch.float16).to("cuda")
generator = torch.Generator("cuda").manual_seed(0)
image = load_image("https://huggingface.co/datasets/sayakpaul/sample-datasets/resolve/main/test_pix2pix_4.png")
prompt = "add some ducks to the lake"
num_inference_steps = 20
image_guidance_scale = 1.5
guidance_scale = 10
edited_image = pipeline(
prompt,
image=image,
num_inference_steps=num_inference_steps,
image_guidance_scale=image_guidance_scale,
guidance_scale=guidance_scale,
generator=generator,
).images[0]
edited_image.save("edited_image.png")
```
You should experiment with different `num_inference_steps`, `image_guidance_scale`, and `guidance_scale` values to see how they affect inference speed and quality. The guidance scale parameters are especially impactful because they control how much the original image and edit instructions affect the edited image.
## Stable Diffusion XL
Stable Diffusion XL (SDXL) is a powerful text-to-image model that generates high-resolution images, and it adds a second text-encoder to its architecture. Use the [`train_instruct_pix2pix_sdxl.py`](https://github.com/huggingface/diffusers/blob/main/examples/instruct_pix2pix/train_instruct_pix2pix_sdxl.py) script to train a SDXL model to follow image editing instructions.
The SDXL training script is discussed in more detail in the [SDXL training](sdxl) guide.
## Next steps
Congratulations on training your own InstructPix2Pix model! 🥳 To learn more about the model, it may be helpful to:
- Read the [Instruction-tuning Stable Diffusion with InstructPix2Pix](https://huggingface.co/blog/instruction-tuning-sd) blog post to learn more about some experiments we've done with InstructPix2Pix, dataset preparation, and results for different instructions.
# Kandinsky 2.2
This script is experimental, and it's easy to overfit and run into issues like catastrophic forgetting. Try exploring different hyperparameters to get the best results on your dataset.
Kandinsky 2.2 is a multilingual text-to-image model capable of producing more photorealistic images. The model includes an image prior model for creating image embeddings from text prompts, and a decoder model that generates images based on the prior model's embeddings. That's why you'll find two separate scripts in Diffusers for Kandinsky 2.2, one for training the prior model and one for training the decoder model. You can train both models separately, but to get the best results, you should train both the prior and decoder models.
Depending on your GPU, you may need to enable `gradient_checkpointing` (⚠️ not supported for the prior model!), `mixed_precision`, and `gradient_accumulation_steps` to help fit the model into memory and to speedup training. You can reduce your memory-usage even more by enabling memory-efficient attention with [xFormers](../optimization/xformers) (version [v0.0.16](https://github.com/huggingface/diffusers/issues/2234#issuecomment-1416931212) fails for training on some GPUs so you may need to install a development version instead).
This guide explores the [train_text_to_image_prior.py](https://github.com/huggingface/diffusers/blob/main/examples/kandinsky2_2/text_to_image/train_text_to_image_prior.py) and the [train_text_to_image_decoder.py](https://github.com/huggingface/diffusers/blob/main/examples/kandinsky2_2/text_to_image/train_text_to_image_decoder.py) scripts to help you become more familiar with it, and how you can adapt it for your own use-case.
Before running the scripts, make sure you install the library from source:
```bash
git clone https://github.com/huggingface/diffusers
cd diffusers
pip install .
```
Then navigate to the example folder containing the training script and install the required dependencies for the script you're using:
```bash
cd examples/kandinsky2_2/text_to_image
pip install -r requirements.txt
```
🤗 Accelerate is a library for helping you train on multiple GPUs/TPUs or with mixed-precision. It'll automatically configure your training setup based on your hardware and environment. Take a look at the 🤗 Accelerate [Quick tour](https://huggingface.co/docs/accelerate/quicktour) to learn more.
Initialize an 🤗 Accelerate environment:
```bash
accelerate config
```
To setup a default 🤗 Accelerate environment without choosing any configurations:
```bash
accelerate config default
```
Or if your environment doesn't support an interactive shell, like a notebook, you can use:
```py
from accelerate.utils import write_basic_config
write_basic_config()
```
Lastly, if you want to train a model on your own dataset, take a look at the [Create a dataset for training](create_dataset) guide to learn how to create a dataset that works with the training script.
The following sections highlight parts of the training scripts that are important for understanding how to modify it, but it doesn't cover every aspect of the scripts in detail. If you're interested in learning more, feel free to read through the scripts and let us know if you have any questions or concerns.
## Script parameters
The training scripts provides many parameters to help you customize your training run. All of the parameters and their descriptions are found in the [`parse_args()`](https://github.com/huggingface/diffusers/blob/6e68c71503682c8693cb5b06a4da4911dfd655ee/examples/kandinsky2_2/text_to_image/train_text_to_image_prior.py#L190) function. The training scripts provides default values for each parameter, such as the training batch size and learning rate, but you can also set your own values in the training command if you'd like.
For example, to speedup training with mixed precision using the fp16 format, add the `--mixed_precision` parameter to the training command:
```bash
accelerate launch train_text_to_image_prior.py \
--mixed_precision="fp16"
```
Most of the parameters are identical to the parameters in the [Text-to-image](text2image#script-parameters) training guide, so let's get straight to a walkthrough of the Kandinsky training scripts!
### Min-SNR weighting
The [Min-SNR](https://huggingface.co/papers/2303.09556) weighting strategy can help with training by rebalancing the loss to achieve faster convergence. The training script supports predicting `epsilon` (noise) or `v_prediction`, but Min-SNR is compatible with both prediction types. This weighting strategy is only supported by PyTorch and is unavailable in the Flax training script.
Add the `--snr_gamma` parameter and set it to the recommended value of 5.0:
```bash
accelerate launch train_text_to_image_prior.py \
--snr_gamma=5.0
```
## Training script
The training script is also similar to the [Text-to-image](text2image#training-script) training guide, but it's been modified to support training the prior and decoder models. This guide focuses on the code that is unique to the Kandinsky 2.2 training scripts.
The [`main()`](https://github.com/huggingface/diffusers/blob/6e68c71503682c8693cb5b06a4da4911dfd655ee/examples/kandinsky2_2/text_to_image/train_text_to_image_prior.py#L441) function contains the code for preparing the dataset and training the model.
One of the main differences you'll notice right away is that the training script also loads a [CLIPImageProcessor](https://huggingface.co/docs/transformers/main/en/model_doc/clip#transformers.CLIPImageProcessor) - in addition to a scheduler and tokenizer - for preprocessing images and a [CLIPVisionModelWithProjection](https://huggingface.co/docs/transformers/main/en/model_doc/clip#transformers.CLIPVisionModelWithProjection) model for encoding the images:
```py
noise_scheduler = DDPMScheduler(beta_schedule="squaredcos_cap_v2", prediction_type="sample")
image_processor = CLIPImageProcessor.from_pretrained(
args.pretrained_prior_model_name_or_path, subfolder="image_processor"
)
tokenizer = CLIPTokenizer.from_pretrained(args.pretrained_prior_model_name_or_path, subfolder="tokenizer")
with ContextManagers(deepspeed_zero_init_disabled_context_manager()):
image_encoder = CLIPVisionModelWithProjection.from_pretrained(
args.pretrained_prior_model_name_or_path, subfolder="image_encoder", torch_dtype=weight_dtype
).eval()
text_encoder = CLIPTextModelWithProjection.from_pretrained(
args.pretrained_prior_model_name_or_path, subfolder="text_encoder", torch_dtype=weight_dtype
).eval()
```
Kandinsky uses a `PriorTransformer` to generate the image embeddings, so you'll want to setup the optimizer to learn the prior mode's parameters.
```py
prior = PriorTransformer.from_pretrained(args.pretrained_prior_model_name_or_path, subfolder="prior")
prior.train()
optimizer = optimizer_cls(
prior.parameters(),
lr=args.learning_rate,
betas=(args.adam_beta1, args.adam_beta2),
weight_decay=args.adam_weight_decay,
eps=args.adam_epsilon,
)
```
Next, the input captions are tokenized, and images are [preprocessed](https://github.com/huggingface/diffusers/blob/6e68c71503682c8693cb5b06a4da4911dfd655ee/examples/kandinsky2_2/text_to_image/train_text_to_image_prior.py#L632) by the [CLIPImageProcessor](https://huggingface.co/docs/transformers/main/en/model_doc/clip#transformers.CLIPImageProcessor):
```py
def preprocess_train(examples):
images = [image.convert("RGB") for image in examples[image_column]]
examples["clip_pixel_values"] = image_processor(images, return_tensors="pt").pixel_values
examples["text_input_ids"], examples["text_mask"] = tokenize_captions(examples)
return examples
```
Finally, the [training loop](https://github.com/huggingface/diffusers/blob/6e68c71503682c8693cb5b06a4da4911dfd655ee/examples/kandinsky2_2/text_to_image/train_text_to_image_prior.py#L718) converts the input images into latents, adds noise to the image embeddings, and makes a prediction:
```py
model_pred = prior(
noisy_latents,
timestep=timesteps,
proj_embedding=prompt_embeds,
encoder_hidden_states=text_encoder_hidden_states,
attention_mask=text_mask,
).predicted_image_embedding
```
If you want to learn more about how the training loop works, check out the [Understanding pipelines, models and schedulers](../using-diffusers/write_own_pipeline) tutorial which breaks down the basic pattern of the denoising process.
The [`main()`](https://github.com/huggingface/diffusers/blob/6e68c71503682c8693cb5b06a4da4911dfd655ee/examples/kandinsky2_2/text_to_image/train_text_to_image_decoder.py#L440) function contains the code for preparing the dataset and training the model.
Unlike the prior model, the decoder initializes a `VQModel` to decode the latents into images and it uses a `UNet2DConditionModel`:
```py
with ContextManagers(deepspeed_zero_init_disabled_context_manager()):
vae = VQModel.from_pretrained(
args.pretrained_decoder_model_name_or_path, subfolder="movq", torch_dtype=weight_dtype
).eval()
image_encoder = CLIPVisionModelWithProjection.from_pretrained(
args.pretrained_prior_model_name_or_path, subfolder="image_encoder", torch_dtype=weight_dtype
).eval()
unet = UNet2DConditionModel.from_pretrained(args.pretrained_decoder_model_name_or_path, subfolder="unet")
```
Next, the script includes several image transforms and a [preprocessing](https://github.com/huggingface/diffusers/blob/6e68c71503682c8693cb5b06a4da4911dfd655ee/examples/kandinsky2_2/text_to_image/train_text_to_image_decoder.py#L622) function for applying the transforms to the images and returning the pixel values:
```py
def preprocess_train(examples):
images = [image.convert("RGB") for image in examples[image_column]]
examples["pixel_values"] = [train_transforms(image) for image in images]
examples["clip_pixel_values"] = image_processor(images, return_tensors="pt").pixel_values
return examples
```
Lastly, the [training loop](https://github.com/huggingface/diffusers/blob/6e68c71503682c8693cb5b06a4da4911dfd655ee/examples/kandinsky2_2/text_to_image/train_text_to_image_decoder.py#L706) handles converting the images to latents, adding noise, and predicting the noise residual.
If you want to learn more about how the training loop works, check out the [Understanding pipelines, models and schedulers](../using-diffusers/write_own_pipeline) tutorial which breaks down the basic pattern of the denoising process.
```py
model_pred = unet(noisy_latents, timesteps, None, added_cond_kwargs=added_cond_kwargs).sample[:, :4]
```
## Launch the script
Once you’ve made all your changes or you’re okay with the default configuration, you’re ready to launch the training script! 🚀
You'll train on the [Naruto BLIP captions](https://huggingface.co/datasets/lambdalabs/naruto-blip-captions) dataset to generate your own Naruto characters, but you can also create and train on your own dataset by following the [Create a dataset for training](create_dataset) guide. Set the environment variable `DATASET_NAME` to the name of the dataset on the Hub or if you're training on your own files, set the environment variable `TRAIN_DIR` to a path to your dataset.
If you’re training on more than one GPU, add the `--multi_gpu` parameter to the `accelerate launch` command.
To monitor training progress with Weights & Biases, add the `--report_to=wandb` parameter to the training command. You’ll also need to add the `--validation_prompt` to the training command to keep track of results. This can be really useful for debugging the model and viewing intermediate results.
```bash
export DATASET_NAME="lambdalabs/naruto-blip-captions"
accelerate launch --mixed_precision="fp16" train_text_to_image_prior.py \
--dataset_name=$DATASET_NAME \
--resolution=768 \
--train_batch_size=1 \
--gradient_accumulation_steps=4 \
--max_train_steps=15000 \
--learning_rate=1e-05 \
--max_grad_norm=1 \
--checkpoints_total_limit=3 \
--lr_scheduler="constant" \
--lr_warmup_steps=0 \
--validation_prompts="A robot naruto, 4k photo" \
--report_to="wandb" \
--push_to_hub \
--output_dir="kandi2-prior-naruto-model"
```
```bash
export DATASET_NAME="lambdalabs/naruto-blip-captions"
accelerate launch --mixed_precision="fp16" train_text_to_image_decoder.py \
--dataset_name=$DATASET_NAME \
--resolution=768 \
--train_batch_size=1 \
--gradient_accumulation_steps=4 \
--gradient_checkpointing \
--max_train_steps=15000 \
--learning_rate=1e-05 \
--max_grad_norm=1 \
--checkpoints_total_limit=3 \
--lr_scheduler="constant" \
--lr_warmup_steps=0 \
--validation_prompts="A robot naruto, 4k photo" \
--report_to="wandb" \
--push_to_hub \
--output_dir="kandi2-decoder-naruto-model"
```
Once training is finished, you can use your newly trained model for inference!
```py
from diffusers import AutoPipelineForText2Image, DiffusionPipeline
import torch
prior_pipeline = DiffusionPipeline.from_pretrained(output_dir, torch_dtype=torch.float16)
prior_components = {"prior_" + k: v for k,v in prior_pipeline.components.items()}
pipeline = AutoPipelineForText2Image.from_pretrained("kandinsky-community/kandinsky-2-2-decoder", **prior_components, torch_dtype=torch.float16)
pipe.enable_model_cpu_offload()
prompt="A robot naruto, 4k photo"
image = pipeline(prompt=prompt, negative_prompt=negative_prompt).images[0]
```
Feel free to replace `kandinsky-community/kandinsky-2-2-decoder` with your own trained decoder checkpoint!
```py
from diffusers import AutoPipelineForText2Image
import torch
pipeline = AutoPipelineForText2Image.from_pretrained("path/to/saved/model", torch_dtype=torch.float16)
pipeline.enable_model_cpu_offload()
prompt="A robot naruto, 4k photo"
image = pipeline(prompt=prompt).images[0]
```
For the decoder model, you can also perform inference from a saved checkpoint which can be useful for viewing intermediate results. In this case, load the checkpoint into the UNet:
```py
from diffusers import AutoPipelineForText2Image, UNet2DConditionModel
unet = UNet2DConditionModel.from_pretrained("path/to/saved/model" + "/checkpoint-/unet")
pipeline = AutoPipelineForText2Image.from_pretrained("kandinsky-community/kandinsky-2-2-decoder", unet=unet, torch_dtype=torch.float16)
pipeline.enable_model_cpu_offload()
image = pipeline(prompt="A robot naruto, 4k photo").images[0]
```
## Next steps
Congratulations on training a Kandinsky 2.2 model! To learn more about how to use your new model, the following guides may be helpful:
- Read the [Kandinsky](../using-diffusers/kandinsky) guide to learn how to use it for a variety of different tasks (text-to-image, image-to-image, inpainting, interpolation), and how it can be combined with a ControlNet.
- Check out the [DreamBooth](dreambooth) and [LoRA](lora) training guides to learn how to train a personalized Kandinsky model with just a few example images. These two training techniques can even be combined!
# Textual Inversion
[Textual Inversion](https://hf.co/papers/2208.01618) is a training technique for personalizing image generation models with just a few example images of what you want it to learn. This technique works by learning and updating the text embeddings (the new embeddings are tied to a special word you must use in the prompt) to match the example images you provide.
If you're training on a GPU with limited vRAM, you should try enabling the `gradient_checkpointing` and `mixed_precision` parameters in the training command. You can also reduce your memory footprint by using memory-efficient attention with [xFormers](../optimization/xformers). JAX/Flax training is also supported for efficient training on TPUs and GPUs, but it doesn't support gradient checkpointing or xFormers. With the same configuration and setup as PyTorch, the Flax training script should be at least ~70% faster!
This guide will explore the [textual_inversion.py](https://github.com/huggingface/diffusers/blob/main/examples/textual_inversion/textual_inversion.py) script to help you become more familiar with it, and how you can adapt it for your own use-case.
Before running the script, make sure you install the library from source:
```bash
git clone https://github.com/huggingface/diffusers
cd diffusers
pip install .
```
Navigate to the example folder with the training script and install the required dependencies for the script you're using:
```bash
cd examples/textual_inversion
pip install -r requirements.txt
```
```bash
cd examples/textual_inversion
pip install -r requirements_flax.txt
```
🤗 Accelerate is a library for helping you train on multiple GPUs/TPUs or with mixed-precision. It'll automatically configure your training setup based on your hardware and environment. Take a look at the 🤗 Accelerate [Quick tour](https://huggingface.co/docs/accelerate/quicktour) to learn more.
Initialize an 🤗 Accelerate environment:
```bash
accelerate config
```
To setup a default 🤗 Accelerate environment without choosing any configurations:
```bash
accelerate config default
```
Or if your environment doesn't support an interactive shell, like a notebook, you can use:
```py
from accelerate.utils import write_basic_config
write_basic_config()
```
Lastly, if you want to train a model on your own dataset, take a look at the [Create a dataset for training](create_dataset) guide to learn how to create a dataset that works with the training script.
The following sections highlight parts of the training script that are important for understanding how to modify it, but it doesn't cover every aspect of the script in detail. If you're interested in learning more, feel free to read through the [script](https://github.com/huggingface/diffusers/blob/main/examples/textual_inversion/textual_inversion.py) and let us know if you have any questions or concerns.
## Script parameters
The training script has many parameters to help you tailor the training run to your needs. All of the parameters and their descriptions are listed in the [`parse_args()`](https://github.com/huggingface/diffusers/blob/839c2a5ece0af4e75530cb520d77bc7ed8acf474/examples/textual_inversion/textual_inversion.py#L176) function. Where applicable, Diffusers provides default values for each parameter such as the training batch size and learning rate, but feel free to change these values in the training command if you'd like.
For example, to increase the number of gradient accumulation steps above the default value of 1:
```bash
accelerate launch textual_inversion.py \
--gradient_accumulation_steps=4
```
Some other basic and important parameters to specify include:
- `--pretrained_model_name_or_path`: the name of the model on the Hub or a local path to the pretrained model
- `--train_data_dir`: path to a folder containing the training dataset (example images)
- `--output_dir`: where to save the trained model
- `--push_to_hub`: whether to push the trained model to the Hub
- `--checkpointing_steps`: frequency of saving a checkpoint as the model trains; this is useful if for some reason training is interrupted, you can continue training from that checkpoint by adding `--resume_from_checkpoint` to your training command
- `--num_vectors`: the number of vectors to learn the embeddings with; increasing this parameter helps the model learn better but it comes with increased training costs
- `--placeholder_token`: the special word to tie the learned embeddings to (you must use the word in your prompt for inference)
- `--initializer_token`: a single-word that roughly describes the object or style you're trying to train on
- `--learnable_property`: whether you're training the model to learn a new "style" (for example, Van Gogh's painting style) or "object" (for example, your dog)
## Training script
Unlike some of the other training scripts, textual_inversion.py has a custom dataset class, [`TextualInversionDataset`](https://github.com/huggingface/diffusers/blob/b81c69e489aad3a0ba73798c459a33990dc4379c/examples/textual_inversion/textual_inversion.py#L487) for creating a dataset. You can customize the image size, placeholder token, interpolation method, whether to crop the image, and more. If you need to change how the dataset is created, you can modify `TextualInversionDataset`.
Next, you'll find the dataset preprocessing code and training loop in the [`main()`](https://github.com/huggingface/diffusers/blob/839c2a5ece0af4e75530cb520d77bc7ed8acf474/examples/textual_inversion/textual_inversion.py#L573) function.
The script starts by loading the [tokenizer](https://github.com/huggingface/diffusers/blob/b81c69e489aad3a0ba73798c459a33990dc4379c/examples/textual_inversion/textual_inversion.py#L616), [scheduler and model](https://github.com/huggingface/diffusers/blob/b81c69e489aad3a0ba73798c459a33990dc4379c/examples/textual_inversion/textual_inversion.py#L622):
```py
# Load tokenizer
if args.tokenizer_name:
tokenizer = CLIPTokenizer.from_pretrained(args.tokenizer_name)
elif args.pretrained_model_name_or_path:
tokenizer = CLIPTokenizer.from_pretrained(args.pretrained_model_name_or_path, subfolder="tokenizer")
# Load scheduler and models
noise_scheduler = DDPMScheduler.from_pretrained(args.pretrained_model_name_or_path, subfolder="scheduler")
text_encoder = CLIPTextModel.from_pretrained(
args.pretrained_model_name_or_path, subfolder="text_encoder", revision=args.revision
)
vae = AutoencoderKL.from_pretrained(args.pretrained_model_name_or_path, subfolder="vae", revision=args.revision)
unet = UNet2DConditionModel.from_pretrained(
args.pretrained_model_name_or_path, subfolder="unet", revision=args.revision
)
```
The special [placeholder token](https://github.com/huggingface/diffusers/blob/b81c69e489aad3a0ba73798c459a33990dc4379c/examples/textual_inversion/textual_inversion.py#L632) is added next to the tokenizer, and the embedding is readjusted to account for the new token.
Then, the script [creates a dataset](https://github.com/huggingface/diffusers/blob/b81c69e489aad3a0ba73798c459a33990dc4379c/examples/textual_inversion/textual_inversion.py#L716) from the `TextualInversionDataset`:
```py
train_dataset = TextualInversionDataset(
data_root=args.train_data_dir,
tokenizer=tokenizer,
size=args.resolution,
placeholder_token=(" ".join(tokenizer.convert_ids_to_tokens(placeholder_token_ids))),
repeats=args.repeats,
learnable_property=args.learnable_property,
center_crop=args.center_crop,
set="train",
)
train_dataloader = torch.utils.data.DataLoader(
train_dataset, batch_size=args.train_batch_size, shuffle=True, num_workers=args.dataloader_num_workers
)
```
Finally, the [training loop](https://github.com/huggingface/diffusers/blob/b81c69e489aad3a0ba73798c459a33990dc4379c/examples/textual_inversion/textual_inversion.py#L784) handles everything else from predicting the noisy residual to updating the embedding weights of the special placeholder token.
If you want to learn more about how the training loop works, check out the [Understanding pipelines, models and schedulers](../using-diffusers/write_own_pipeline) tutorial which breaks down the basic pattern of the denoising process.
## Launch the script
Once you've made all your changes or you're okay with the default configuration, you're ready to launch the training script! 🚀
For this guide, you'll download some images of a [cat toy](https://huggingface.co/datasets/diffusers/cat_toy_example) and store them in a directory. But remember, you can create and use your own dataset if you want (see the [Create a dataset for training](create_dataset) guide).
```py
from huggingface_hub import snapshot_download
local_dir = "./cat"
snapshot_download(
"diffusers/cat_toy_example", local_dir=local_dir, repo_type="dataset", ignore_patterns=".gitattributes"
)
```
Set the environment variable `MODEL_NAME` to a model id on the Hub or a path to a local model, and `DATA_DIR` to the path where you just downloaded the cat images to. The script creates and saves the following files to your repository:
- `learned_embeds.bin`: the learned embedding vectors corresponding to your example images
- `token_identifier.txt`: the special placeholder token
- `type_of_concept.txt`: the type of concept you're training on (either "object" or "style")
A full training run takes ~1 hour on a single V100 GPU.
One more thing before you launch the script. If you're interested in following along with the training process, you can periodically save generated images as training progresses. Add the following parameters to the training command:
```bash
--validation_prompt="A train"
--num_validation_images=4
--validation_steps=100
```
```bash
export MODEL_NAME="stable-diffusion-v1-5/stable-diffusion-v1-5"
export DATA_DIR="./cat"
accelerate launch textual_inversion.py \
--pretrained_model_name_or_path=$MODEL_NAME \
--train_data_dir=$DATA_DIR \
--learnable_property="object" \
--placeholder_token="" \
--initializer_token="toy" \
--resolution=512 \
--train_batch_size=1 \
--gradient_accumulation_steps=4 \
--max_train_steps=3000 \
--learning_rate=5.0e-04 \
--scale_lr \
--lr_scheduler="constant" \
--lr_warmup_steps=0 \
--output_dir="textual_inversion_cat" \
--push_to_hub
```
```bash
export MODEL_NAME="duongna/stable-diffusion-v1-4-flax"
export DATA_DIR="./cat"
python textual_inversion_flax.py \
--pretrained_model_name_or_path=$MODEL_NAME \
--train_data_dir=$DATA_DIR \
--learnable_property="object" \
--placeholder_token="" \
--initializer_token="toy" \
--resolution=512 \
--train_batch_size=1 \
--max_train_steps=3000 \
--learning_rate=5.0e-04 \
--scale_lr \
--output_dir="textual_inversion_cat" \
--push_to_hub
```
After training is complete, you can use your newly trained model for inference like:
```py
from diffusers import StableDiffusionPipeline
import torch
pipeline = StableDiffusionPipeline.from_pretrained("stable-diffusion-v1-5/stable-diffusion-v1-5", torch_dtype=torch.float16).to("cuda")
pipeline.load_textual_inversion("sd-concepts-library/cat-toy")
image = pipeline("A train", num_inference_steps=50).images[0]
image.save("cat-train.png")
```
Flax doesn't support the `load_textual_inversion()` method, but the textual_inversion_flax.py script [saves](https://github.com/huggingface/diffusers/blob/c0f058265161178f2a88849e92b37ffdc81f1dcc/examples/textual_inversion/textual_inversion_flax.py#L636C2-L636C2) the learned embeddings as a part of the model after training. This means you can use the model for inference like any other Flax model:
```py
import jax
import numpy as np
from flax.jax_utils import replicate
from flax.training.common_utils import shard
from diffusers import FlaxStableDiffusionPipeline
model_path = "path-to-your-trained-model"
pipeline, params = FlaxStableDiffusionPipeline.from_pretrained(model_path, dtype=jax.numpy.bfloat16)
prompt = "A train"
prng_seed = jax.random.PRNGKey(0)
num_inference_steps = 50
num_samples = jax.device_count()
prompt = num_samples * [prompt]
prompt_ids = pipeline.prepare_inputs(prompt)
# shard inputs and rng
params = replicate(params)
prng_seed = jax.random.split(prng_seed, jax.device_count())
prompt_ids = shard(prompt_ids)
images = pipeline(prompt_ids, params, prng_seed, num_inference_steps, jit=True).images
images = pipeline.numpy_to_pil(np.asarray(images.reshape((num_samples,) + images.shape[-3:])))
image.save("cat-train.png")
```
## Next steps
Congratulations on training your own Textual Inversion model! 🎉 To learn more about how to use your new model, the following guides may be helpful:
- Learn how to [load Textual Inversion embeddings](../using-diffusers/loading_adapters) and also use them as negative embeddings.
- Learn how to use [Textual Inversion](textual_inversion_inference) for inference with Stable Diffusion 1/2 and Stable Diffusion XL.
# Text-to-image
The text-to-image script is experimental, and it's easy to overfit and run into issues like catastrophic forgetting. Try exploring different hyperparameters to get the best results on your dataset.
Text-to-image models like Stable Diffusion are conditioned to generate images given a text prompt.
Training a model can be taxing on your hardware, but if you enable `gradient_checkpointing` and `mixed_precision`, it is possible to train a model on a single 24GB GPU. If you're training with larger batch sizes or want to train faster, it's better to use GPUs with more than 30GB of memory. You can reduce your memory footprint by enabling memory-efficient attention with [xFormers](../optimization/xformers). JAX/Flax training is also supported for efficient training on TPUs and GPUs, but it doesn't support gradient checkpointing, gradient accumulation or xFormers. A GPU with at least 30GB of memory or a TPU v3 is recommended for training with Flax.
This guide will explore the [train_text_to_image.py](https://github.com/huggingface/diffusers/blob/main/examples/text_to_image/train_text_to_image.py) training script to help you become familiar with it, and how you can adapt it for your own use-case.
Before running the script, make sure you install the library from source:
```bash
git clone https://github.com/huggingface/diffusers
cd diffusers
pip install .
```
Then navigate to the example folder containing the training script and install the required dependencies for the script you're using:
```bash
cd examples/text_to_image
pip install -r requirements.txt
```
```bash
cd examples/text_to_image
pip install -r requirements_flax.txt
```
🤗 Accelerate is a library for helping you train on multiple GPUs/TPUs or with mixed-precision. It'll automatically configure your training setup based on your hardware and environment. Take a look at the 🤗 Accelerate [Quick tour](https://huggingface.co/docs/accelerate/quicktour) to learn more.
Initialize an 🤗 Accelerate environment:
```bash
accelerate config
```
To setup a default 🤗 Accelerate environment without choosing any configurations:
```bash
accelerate config default
```
Or if your environment doesn't support an interactive shell, like a notebook, you can use:
```py
from accelerate.utils import write_basic_config
write_basic_config()
```
Lastly, if you want to train a model on your own dataset, take a look at the [Create a dataset for training](create_dataset) guide to learn how to create a dataset that works with the training script.
## Script parameters
The following sections highlight parts of the training script that are important for understanding how to modify it, but it doesn't cover every aspect of the script in detail. If you're interested in learning more, feel free to read through the [script](https://github.com/huggingface/diffusers/blob/main/examples/text_to_image/train_text_to_image.py) and let us know if you have any questions or concerns.
The training script provides many parameters to help you customize your training run. All of the parameters and their descriptions are found in the [`parse_args()`](https://github.com/huggingface/diffusers/blob/8959c5b9dec1c94d6ba482c94a58d2215c5fd026/examples/text_to_image/train_text_to_image.py#L193) function. This function provides default values for each parameter, such as the training batch size and learning rate, but you can also set your own values in the training command if you'd like.
For example, to speedup training with mixed precision using the fp16 format, add the `--mixed_precision` parameter to the training command:
```bash
accelerate launch train_text_to_image.py \
--mixed_precision="fp16"
```
Some basic and important parameters include:
- `--pretrained_model_name_or_path`: the name of the model on the Hub or a local path to the pretrained model
- `--dataset_name`: the name of the dataset on the Hub or a local path to the dataset to train on
- `--image_column`: the name of the image column in the dataset to train on
- `--caption_column`: the name of the text column in the dataset to train on
- `--output_dir`: where to save the trained model
- `--push_to_hub`: whether to push the trained model to the Hub
- `--checkpointing_steps`: frequency of saving a checkpoint as the model trains; this is useful if for some reason training is interrupted, you can continue training from that checkpoint by adding `--resume_from_checkpoint` to your training command
### Min-SNR weighting
The [Min-SNR](https://huggingface.co/papers/2303.09556) weighting strategy can help with training by rebalancing the loss to achieve faster convergence. The training script supports predicting `epsilon` (noise) or `v_prediction`, but Min-SNR is compatible with both prediction types. This weighting strategy is only supported by PyTorch and is unavailable in the Flax training script.
Add the `--snr_gamma` parameter and set it to the recommended value of 5.0:
```bash
accelerate launch train_text_to_image.py \
--snr_gamma=5.0
```
You can compare the loss surfaces for different `snr_gamma` values in this [Weights and Biases](https://wandb.ai/sayakpaul/text2image-finetune-minsnr) report. For smaller datasets, the effects of Min-SNR may not be as obvious compared to larger datasets.
## Training script
The dataset preprocessing code and training loop are found in the [`main()`](https://github.com/huggingface/diffusers/blob/8959c5b9dec1c94d6ba482c94a58d2215c5fd026/examples/text_to_image/train_text_to_image.py#L490) function. If you need to adapt the training script, this is where you'll need to make your changes.
The `train_text_to_image` script starts by [loading a scheduler](https://github.com/huggingface/diffusers/blob/8959c5b9dec1c94d6ba482c94a58d2215c5fd026/examples/text_to_image/train_text_to_image.py#L543) and tokenizer. You can choose to use a different scheduler here if you want:
```py
noise_scheduler = DDPMScheduler.from_pretrained(args.pretrained_model_name_or_path, subfolder="scheduler")
tokenizer = CLIPTokenizer.from_pretrained(
args.pretrained_model_name_or_path, subfolder="tokenizer", revision=args.revision
)
```
Then the script [loads the UNet](https://github.com/huggingface/diffusers/blob/8959c5b9dec1c94d6ba482c94a58d2215c5fd026/examples/text_to_image/train_text_to_image.py#L619) model:
```py
load_model = UNet2DConditionModel.from_pretrained(input_dir, subfolder="unet")
model.register_to_config(**load_model.config)
model.load_state_dict(load_model.state_dict())
```
Next, the text and image columns of the dataset need to be preprocessed. The [`tokenize_captions`](https://github.com/huggingface/diffusers/blob/8959c5b9dec1c94d6ba482c94a58d2215c5fd026/examples/text_to_image/train_text_to_image.py#L724) function handles tokenizing the inputs, and the [`train_transforms`](https://github.com/huggingface/diffusers/blob/8959c5b9dec1c94d6ba482c94a58d2215c5fd026/examples/text_to_image/train_text_to_image.py#L742) function specifies the type of transforms to apply to the image. Both of these functions are bundled into `preprocess_train`:
```py
def preprocess_train(examples):
images = [image.convert("RGB") for image in examples[image_column]]
examples["pixel_values"] = [train_transforms(image) for image in images]
examples["input_ids"] = tokenize_captions(examples)
return examples
```
Lastly, the [training loop](https://github.com/huggingface/diffusers/blob/8959c5b9dec1c94d6ba482c94a58d2215c5fd026/examples/text_to_image/train_text_to_image.py#L878) handles everything else. It encodes images into latent space, adds noise to the latents, computes the text embeddings to condition on, updates the model parameters, and saves and pushes the model to the Hub. If you want to learn more about how the training loop works, check out the [Understanding pipelines, models and schedulers](../using-diffusers/write_own_pipeline) tutorial which breaks down the basic pattern of the denoising process.
## Launch the script
Once you've made all your changes or you're okay with the default configuration, you're ready to launch the training script! 🚀
Let's train on the [Naruto BLIP captions](https://huggingface.co/datasets/lambdalabs/naruto-blip-captions) dataset to generate your own Naruto characters. Set the environment variables `MODEL_NAME` and `dataset_name` to the model and the dataset (either from the Hub or a local path). If you're training on more than one GPU, add the `--multi_gpu` parameter to the `accelerate launch` command.
To train on a local dataset, set the `TRAIN_DIR` and `OUTPUT_DIR` environment variables to the path of the dataset and where to save the model to.
```bash
export MODEL_NAME="stable-diffusion-v1-5/stable-diffusion-v1-5"
export dataset_name="lambdalabs/naruto-blip-captions"
accelerate launch --mixed_precision="fp16" train_text_to_image.py \
--pretrained_model_name_or_path=$MODEL_NAME \
--dataset_name=$dataset_name \
--use_ema \
--resolution=512 --center_crop --random_flip \
--train_batch_size=1 \
--gradient_accumulation_steps=4 \
--gradient_checkpointing \
--max_train_steps=15000 \
--learning_rate=1e-05 \
--max_grad_norm=1 \
--enable_xformers_memory_efficient_attention \
--lr_scheduler="constant" --lr_warmup_steps=0 \
--output_dir="sd-naruto-model" \
--push_to_hub
```
Training with Flax can be faster on TPUs and GPUs thanks to [@duongna211](https://github.com/duongna21). Flax is more efficient on a TPU, but GPU performance is also great.
Set the environment variables `MODEL_NAME` and `dataset_name` to the model and the dataset (either from the Hub or a local path).
To train on a local dataset, set the `TRAIN_DIR` and `OUTPUT_DIR` environment variables to the path of the dataset and where to save the model to.
```bash
export MODEL_NAME="stable-diffusion-v1-5/stable-diffusion-v1-5"
export dataset_name="lambdalabs/naruto-blip-captions"
python train_text_to_image_flax.py \
--pretrained_model_name_or_path=$MODEL_NAME \
--dataset_name=$dataset_name \
--resolution=512 --center_crop --random_flip \
--train_batch_size=1 \
--max_train_steps=15000 \
--learning_rate=1e-05 \
--max_grad_norm=1 \
--output_dir="sd-naruto-model" \
--push_to_hub
```
Once training is complete, you can use your newly trained model for inference:
```py
from diffusers import StableDiffusionPipeline
import torch
pipeline = StableDiffusionPipeline.from_pretrained("path/to/saved_model", torch_dtype=torch.float16, use_safetensors=True).to("cuda")
image = pipeline(prompt="yoda").images[0]
image.save("yoda-naruto.png")
```
```py
import jax
import numpy as np
from flax.jax_utils import replicate
from flax.training.common_utils import shard
from diffusers import FlaxStableDiffusionPipeline
pipeline, params = FlaxStableDiffusionPipeline.from_pretrained("path/to/saved_model", dtype=jax.numpy.bfloat16)
prompt = "yoda naruto"
prng_seed = jax.random.PRNGKey(0)
num_inference_steps = 50
num_samples = jax.device_count()
prompt = num_samples * [prompt]
prompt_ids = pipeline.prepare_inputs(prompt)
# shard inputs and rng
params = replicate(params)
prng_seed = jax.random.split(prng_seed, jax.device_count())
prompt_ids = shard(prompt_ids)
images = pipeline(prompt_ids, params, prng_seed, num_inference_steps, jit=True).images
images = pipeline.numpy_to_pil(np.asarray(images.reshape((num_samples,) + images.shape[-3:])))
image.save("yoda-naruto.png")
```
## Next steps
Congratulations on training your own text-to-image model! To learn more about how to use your new model, the following guides may be helpful:
- Learn how to [load LoRA weights](../using-diffusers/loading_adapters#LoRA) for inference if you trained your model with LoRA.
- Learn more about how certain parameters like guidance scale or techniques such as prompt weighting can help you control inference in the [Text-to-image](../using-diffusers/conditional_image_generation) task guide.
# Create a dataset for training
There are many datasets on the [Hub](https://huggingface.co/datasets?task_categories=task_categories:text-to-image&sort=downloads) to train a model on, but if you can't find one you're interested in or want to use your own, you can create a dataset with the 🤗 [Datasets](hf.co/docs/datasets) library. The dataset structure depends on the task you want to train your model on. The most basic dataset structure is a directory of images for tasks like unconditional image generation. Another dataset structure may be a directory of images and a text file containing their corresponding text captions for tasks like text-to-image generation.
This guide will show you two ways to create a dataset to finetune on:
- provide a folder of images to the `--train_data_dir` argument
- upload a dataset to the Hub and pass the dataset repository id to the `--dataset_name` argument
💡 Learn more about how to create an image dataset for training in the [Create an image dataset](https://huggingface.co/docs/datasets/image_dataset) guide.
## Provide a dataset as a folder
For unconditional generation, you can provide your own dataset as a folder of images. The training script uses the [`ImageFolder`](https://huggingface.co/docs/datasets/en/image_dataset#imagefolder) builder from 🤗 Datasets to automatically build a dataset from the folder. Your directory structure should look like:
```bash
data_dir/xxx.png
data_dir/xxy.png
data_dir/[...]/xxz.png
```
Pass the path to the dataset directory to the `--train_data_dir` argument, and then you can start training:
```bash
accelerate launch train_unconditional.py \
--train_data_dir \
```
## Upload your data to the Hub
💡 For more details and context about creating and uploading a dataset to the Hub, take a look at the [Image search with 🤗 Datasets](https://huggingface.co/blog/image-search-datasets) post.
Start by creating a dataset with the [`ImageFolder`](https://huggingface.co/docs/datasets/image_load#imagefolder) feature, which creates an `image` column containing the PIL-encoded images.
You can use the `data_dir` or `data_files` parameters to specify the location of the dataset. The `data_files` parameter supports mapping specific files to dataset splits like `train` or `test`:
```python
from datasets import load_dataset
# example 1: local folder
dataset = load_dataset("imagefolder", data_dir="path_to_your_folder")
# example 2: local files (supported formats are tar, gzip, zip, xz, rar, zstd)
dataset = load_dataset("imagefolder", data_files="path_to_zip_file")
# example 3: remote files (supported formats are tar, gzip, zip, xz, rar, zstd)
dataset = load_dataset(
"imagefolder",
data_files="https://download.microsoft.com/download/3/E/1/3E1C3F21-ECDB-4869-8368-6DEBA77B919F/kagglecatsanddogs_3367a.zip",
)
# example 4: providing several splits
dataset = load_dataset(
"imagefolder", data_files={"train": ["path/to/file1", "path/to/file2"], "test": ["path/to/file3", "path/to/file4"]}
)
```
Then use the [push_to_hub](https://huggingface.co/docs/datasets/main/en/package_reference/main_classes#datasets.Dataset.push_to_hub) method to upload the dataset to the Hub:
```python
# assuming you have ran the huggingface-cli login command in a terminal
dataset.push_to_hub("name_of_your_dataset")
# if you want to push to a private repo, simply pass private=True:
dataset.push_to_hub("name_of_your_dataset", private=True)
```
Now the dataset is available for training by passing the dataset name to the `--dataset_name` argument:
```bash
accelerate launch --mixed_precision="fp16" train_text_to_image.py \
--pretrained_model_name_or_path="stable-diffusion-v1-5/stable-diffusion-v1-5" \
--dataset_name="name_of_your_dataset" \
```
## Next steps
Now that you've created a dataset, you can plug it into the `train_data_dir` (if your dataset is local) or `dataset_name` (if your dataset is on the Hub) arguments of a training script.
For your next steps, feel free to try and use your dataset to train a model for [unconditional generation](unconditional_training) or [text-to-image generation](text2image)!
# Overview
🤗 Diffusers provides a collection of training scripts for you to train your own diffusion models. You can find all of our training scripts in [diffusers/examples](https://github.com/huggingface/diffusers/tree/main/examples).
Each training script is:
- **Self-contained**: the training script does not depend on any local files, and all packages required to run the script are installed from the `requirements.txt` file.
- **Easy-to-tweak**: the training scripts are an example of how to train a diffusion model for a specific task and won't work out-of-the-box for every training scenario. You'll likely need to adapt the training script for your specific use-case. To help you with that, we've fully exposed the data preprocessing code and the training loop so you can modify it for your own use.
- **Beginner-friendly**: the training scripts are designed to be beginner-friendly and easy to understand, rather than including the latest state-of-the-art methods to get the best and most competitive results. Any training methods we consider too complex are purposefully left out.
- **Single-purpose**: each training script is expressly designed for only one task to keep it readable and understandable.
Our current collection of training scripts include:
| Training | SDXL-support | LoRA-support | Flax-support |
|---|---|---|---|
| [unconditional image generation](https://github.com/huggingface/diffusers/tree/main/examples/unconditional_image_generation) [![Open In Colab](https://colab.research.google.com/assets/colab-badge.svg)](https://colab.research.google.com/github/huggingface/notebooks/blob/main/diffusers/training_example.ipynb) | | | |
| [text-to-image](https://github.com/huggingface/diffusers/tree/main/examples/text_to_image) | 👍 | 👍 | 👍 |
| [textual inversion](https://github.com/huggingface/diffusers/tree/main/examples/textual_inversion) [![Open In Colab](https://colab.research.google.com/assets/colab-badge.svg)](https://colab.research.google.com/github/huggingface/notebooks/blob/main/diffusers/sd_textual_inversion_training.ipynb) | | | 👍 |
| [DreamBooth](https://github.com/huggingface/diffusers/tree/main/examples/dreambooth) [![Open In Colab](https://colab.research.google.com/assets/colab-badge.svg)](https://colab.research.google.com/github/huggingface/notebooks/blob/main/diffusers/sd_dreambooth_training.ipynb) | 👍 | 👍 | 👍 |
| [ControlNet](https://github.com/huggingface/diffusers/tree/main/examples/controlnet) | 👍 | | 👍 |
| [InstructPix2Pix](https://github.com/huggingface/diffusers/tree/main/examples/instruct_pix2pix) | 👍 | | |
| [Custom Diffusion](https://github.com/huggingface/diffusers/tree/main/examples/custom_diffusion) | | | |
| [T2I-Adapters](https://github.com/huggingface/diffusers/tree/main/examples/t2i_adapter) | 👍 | | |
| [Kandinsky 2.2](https://github.com/huggingface/diffusers/tree/main/examples/kandinsky2_2/text_to_image) | | 👍 | |
| [Wuerstchen](https://github.com/huggingface/diffusers/tree/main/examples/wuerstchen/text_to_image) | | 👍 | |
These examples are **actively** maintained, so please feel free to open an issue if they aren't working as expected. If you feel like another training example should be included, you're more than welcome to start a [Feature Request](https://github.com/huggingface/diffusers/issues/new?assignees=&labels=&template=feature_request.md&title=) to discuss your feature idea with us and whether it meets our criteria of being self-contained, easy-to-tweak, beginner-friendly, and single-purpose.
## Install
Make sure you can successfully run the latest versions of the example scripts by installing the library from source in a new virtual environment:
```bash
git clone https://github.com/huggingface/diffusers
cd diffusers
pip install .
```
Then navigate to the folder of the training script (for example, [DreamBooth](https://github.com/huggingface/diffusers/tree/main/examples/dreambooth)) and install the `requirements.txt` file. Some training scripts have a specific requirement file for SDXL, LoRA or Flax. If you're using one of these scripts, make sure you install its corresponding requirements file.
```bash
cd examples/dreambooth
pip install -r requirements.txt
# to train SDXL with DreamBooth
pip install -r requirements_sdxl.txt
```
To speedup training and reduce memory-usage, we recommend:
- using PyTorch 2.0 or higher to automatically use [scaled dot product attention](../optimization/torch2.0#scaled-dot-product-attention) during training (you don't need to make any changes to the training code)
- installing [xFormers](../optimization/xformers) to enable memory-efficient attention
# LoRA
This is experimental and the API may change in the future.
[LoRA (Low-Rank Adaptation of Large Language Models)](https://hf.co/papers/2106.09685) is a popular and lightweight training technique that significantly reduces the number of trainable parameters. It works by inserting a smaller number of new weights into the model and only these are trained. This makes training with LoRA much faster, memory-efficient, and produces smaller model weights (a few hundred MBs), which are easier to store and share. LoRA can also be combined with other training techniques like DreamBooth to speedup training.
LoRA is very versatile and supported for [DreamBooth](https://github.com/huggingface/diffusers/blob/main/examples/dreambooth/train_dreambooth_lora.py), [Kandinsky 2.2](https://github.com/huggingface/diffusers/blob/main/examples/kandinsky2_2/text_to_image/train_text_to_image_lora_decoder.py), [Stable Diffusion XL](https://github.com/huggingface/diffusers/blob/main/examples/text_to_image/train_text_to_image_lora_sdxl.py), [text-to-image](https://github.com/huggingface/diffusers/blob/main/examples/text_to_image/train_text_to_image_lora.py), and [Wuerstchen](https://github.com/huggingface/diffusers/blob/main/examples/wuerstchen/text_to_image/train_text_to_image_lora_prior.py).
This guide will explore the [train_text_to_image_lora.py](https://github.com/huggingface/diffusers/blob/main/examples/text_to_image/train_text_to_image_lora.py) script to help you become more familiar with it, and how you can adapt it for your own use-case.
Before running the script, make sure you install the library from source:
```bash
git clone https://github.com/huggingface/diffusers
cd diffusers
pip install .
```
Navigate to the example folder with the training script and install the required dependencies for the script you're using:
```bash
cd examples/text_to_image
pip install -r requirements.txt
```
```bash
cd examples/text_to_image
pip install -r requirements_flax.txt
```
🤗 Accelerate is a library for helping you train on multiple GPUs/TPUs or with mixed-precision. It'll automatically configure your training setup based on your hardware and environment. Take a look at the 🤗 Accelerate [Quick tour](https://huggingface.co/docs/accelerate/quicktour) to learn more.
Initialize an 🤗 Accelerate environment:
```bash
accelerate config
```
To setup a default 🤗 Accelerate environment without choosing any configurations:
```bash
accelerate config default
```
Or if your environment doesn't support an interactive shell, like a notebook, you can use:
```py
from accelerate.utils import write_basic_config
write_basic_config()
```
Lastly, if you want to train a model on your own dataset, take a look at the [Create a dataset for training](create_dataset) guide to learn how to create a dataset that works with the training script.
The following sections highlight parts of the training script that are important for understanding how to modify it, but it doesn't cover every aspect of the script in detail. If you're interested in learning more, feel free to read through the [script](https://github.com/huggingface/diffusers/blob/main/examples/text_to_image/text_to_image_lora.py) and let us know if you have any questions or concerns.
## Script parameters
The training script has many parameters to help you customize your training run. All of the parameters and their descriptions are found in the [`parse_args()`](https://github.com/huggingface/diffusers/blob/dd9a5caf61f04d11c0fa9f3947b69ab0010c9a0f/examples/text_to_image/train_text_to_image_lora.py#L85) function. Default values are provided for most parameters that work pretty well, but you can also set your own values in the training command if you'd like.
For example, to increase the number of epochs to train:
```bash
accelerate launch train_text_to_image_lora.py \
--num_train_epochs=150 \
```
Many of the basic and important parameters are described in the [Text-to-image](text2image#script-parameters) training guide, so this guide just focuses on the LoRA relevant parameters:
- `--rank`: the inner dimension of the low-rank matrices to train; a higher rank means more trainable parameters
- `--learning_rate`: the default learning rate is 1e-4, but with LoRA, you can use a higher learning rate
## Training script
The dataset preprocessing code and training loop are found in the [`main()`](https://github.com/huggingface/diffusers/blob/dd9a5caf61f04d11c0fa9f3947b69ab0010c9a0f/examples/text_to_image/train_text_to_image_lora.py#L371) function, and if you need to adapt the training script, this is where you'll make your changes.
As with the script parameters, a walkthrough of the training script is provided in the [Text-to-image](text2image#training-script) training guide. Instead, this guide takes a look at the LoRA relevant parts of the script.
Diffusers uses `~peft.LoraConfig` from the [PEFT](https://hf.co/docs/peft) library to set up the parameters of the LoRA adapter such as the rank, alpha, and which modules to insert the LoRA weights into. The adapter is added to the UNet, and only the LoRA layers are filtered for optimization in `lora_layers`.
```py
unet_lora_config = LoraConfig(
r=args.rank,
lora_alpha=args.rank,
init_lora_weights="gaussian",
target_modules=["to_k", "to_q", "to_v", "to_out.0"],
)
unet.add_adapter(unet_lora_config)
lora_layers = filter(lambda p: p.requires_grad, unet.parameters())
```
Diffusers also supports finetuning the text encoder with LoRA from the [PEFT](https://hf.co/docs/peft) library when necessary such as finetuning Stable Diffusion XL (SDXL). The `~peft.LoraConfig` is used to configure the parameters of the LoRA adapter which are then added to the text encoder, and only the LoRA layers are filtered for training.
```py
text_lora_config = LoraConfig(
r=args.rank,
lora_alpha=args.rank,
init_lora_weights="gaussian",
target_modules=["q_proj", "k_proj", "v_proj", "out_proj"],
)
text_encoder_one.add_adapter(text_lora_config)
text_encoder_two.add_adapter(text_lora_config)
text_lora_parameters_one = list(filter(lambda p: p.requires_grad, text_encoder_one.parameters()))
text_lora_parameters_two = list(filter(lambda p: p.requires_grad, text_encoder_two.parameters()))
```
The [optimizer](https://github.com/huggingface/diffusers/blob/e4b8f173b97731686e290b2eb98e7f5df2b1b322/examples/text_to_image/train_text_to_image_lora.py#L529) is initialized with the `lora_layers` because these are the only weights that'll be optimized:
```py
optimizer = optimizer_cls(
lora_layers,
lr=args.learning_rate,
betas=(args.adam_beta1, args.adam_beta2),
weight_decay=args.adam_weight_decay,
eps=args.adam_epsilon,
)
```
Aside from setting up the LoRA layers, the training script is more or less the same as train_text_to_image.py!
## Launch the script
Once you've made all your changes or you're okay with the default configuration, you're ready to launch the training script! 🚀
Let's train on the [Naruto BLIP captions](https://huggingface.co/datasets/lambdalabs/naruto-blip-captions) dataset to generate your own Naruto characters. Set the environment variables `MODEL_NAME` and `DATASET_NAME` to the model and dataset respectively. You should also specify where to save the model in `OUTPUT_DIR`, and the name of the model to save to on the Hub with `HUB_MODEL_ID`. The script creates and saves the following files to your repository:
- saved model checkpoints
- `pytorch_lora_weights.safetensors` (the trained LoRA weights)
If you're training on more than one GPU, add the `--multi_gpu` parameter to the `accelerate launch` command.
A full training run takes ~5 hours on a 2080 Ti GPU with 11GB of VRAM.
```bash
export MODEL_NAME="stable-diffusion-v1-5/stable-diffusion-v1-5"
export OUTPUT_DIR="/sddata/finetune/lora/naruto"
export HUB_MODEL_ID="naruto-lora"
export DATASET_NAME="lambdalabs/naruto-blip-captions"
accelerate launch --mixed_precision="fp16" train_text_to_image_lora.py \
--pretrained_model_name_or_path=$MODEL_NAME \
--dataset_name=$DATASET_NAME \
--dataloader_num_workers=8 \
--resolution=512 \
--center_crop \
--random_flip \
--train_batch_size=1 \
--gradient_accumulation_steps=4 \
--max_train_steps=15000 \
--learning_rate=1e-04 \
--max_grad_norm=1 \
--lr_scheduler="cosine" \
--lr_warmup_steps=0 \
--output_dir=${OUTPUT_DIR} \
--push_to_hub \
--hub_model_id=${HUB_MODEL_ID} \
--report_to=wandb \
--checkpointing_steps=500 \
--validation_prompt="A naruto with blue eyes." \
--seed=1337
```
Once training has been completed, you can use your model for inference:
```py
from diffusers import AutoPipelineForText2Image
import torch
pipeline = AutoPipelineForText2Image.from_pretrained("stable-diffusion-v1-5/stable-diffusion-v1-5", torch_dtype=torch.float16).to("cuda")
pipeline.load_lora_weights("path/to/lora/model", weight_name="pytorch_lora_weights.safetensors")
image = pipeline("A naruto with blue eyes").images[0]
```
## Next steps
Congratulations on training a new model with LoRA! To learn more about how to use your new model, the following guides may be helpful:
- Learn how to [load different LoRA formats](../using-diffusers/loading_adapters#LoRA) trained using community trainers like Kohya and TheLastBen.
- Learn how to use and [combine multiple LoRA's](../tutorials/using_peft_for_inference) with PEFT for inference.
# Stable Diffusion XL
This script is experimental, and it's easy to overfit and run into issues like catastrophic forgetting. Try exploring different hyperparameters to get the best results on your dataset.
[Stable Diffusion XL (SDXL)](https://hf.co/papers/2307.01952) is a larger and more powerful iteration of the Stable Diffusion model, capable of producing higher resolution images.
SDXL's UNet is 3x larger and the model adds a second text encoder to the architecture. Depending on the hardware available to you, this can be very computationally intensive and it may not run on a consumer GPU like a Tesla T4. To help fit this larger model into memory and to speedup training, try enabling `gradient_checkpointing`, `mixed_precision`, and `gradient_accumulation_steps`. You can reduce your memory-usage even more by enabling memory-efficient attention with [xFormers](../optimization/xformers) and using [bitsandbytes'](https://github.com/TimDettmers/bitsandbytes) 8-bit optimizer.
This guide will explore the [train_text_to_image_sdxl.py](https://github.com/huggingface/diffusers/blob/main/examples/text_to_image/train_text_to_image_sdxl.py) training script to help you become more familiar with it, and how you can adapt it for your own use-case.
Before running the script, make sure you install the library from source:
```bash
git clone https://github.com/huggingface/diffusers
cd diffusers
pip install .
```
Then navigate to the example folder containing the training script and install the required dependencies for the script you're using:
```bash
cd examples/text_to_image
pip install -r requirements_sdxl.txt
```
🤗 Accelerate is a library for helping you train on multiple GPUs/TPUs or with mixed-precision. It'll automatically configure your training setup based on your hardware and environment. Take a look at the 🤗 Accelerate [Quick tour](https://huggingface.co/docs/accelerate/quicktour) to learn more.
Initialize an 🤗 Accelerate environment:
```bash
accelerate config
```
To setup a default 🤗 Accelerate environment without choosing any configurations:
```bash
accelerate config default
```
Or if your environment doesn't support an interactive shell, like a notebook, you can use:
```py
from accelerate.utils import write_basic_config
write_basic_config()
```
Lastly, if you want to train a model on your own dataset, take a look at the [Create a dataset for training](create_dataset) guide to learn how to create a dataset that works with the training script.
## Script parameters
The following sections highlight parts of the training script that are important for understanding how to modify it, but it doesn't cover every aspect of the script in detail. If you're interested in learning more, feel free to read through the [script](https://github.com/huggingface/diffusers/blob/main/examples/text_to_image/train_text_to_image_sdxl.py) and let us know if you have any questions or concerns.
The training script provides many parameters to help you customize your training run. All of the parameters and their descriptions are found in the [`parse_args()`](https://github.com/huggingface/diffusers/blob/aab6de22c33cc01fb7bc81c0807d6109e2c998c9/examples/text_to_image/train_text_to_image_sdxl.py#L129) function. This function provides default values for each parameter, such as the training batch size and learning rate, but you can also set your own values in the training command if you'd like.
For example, to speedup training with mixed precision using the bf16 format, add the `--mixed_precision` parameter to the training command:
```bash
accelerate launch train_text_to_image_sdxl.py \
--mixed_precision="bf16"
```
Most of the parameters are identical to the parameters in the [Text-to-image](text2image#script-parameters) training guide, so you'll focus on the parameters that are relevant to training SDXL in this guide.
- `--pretrained_vae_model_name_or_path`: path to a pretrained VAE; the SDXL VAE is known to suffer from numerical instability, so this parameter allows you to specify a better [VAE](https://huggingface.co/madebyollin/sdxl-vae-fp16-fix)
- `--proportion_empty_prompts`: the proportion of image prompts to replace with empty strings
- `--timestep_bias_strategy`: where (earlier vs. later) in the timestep to apply a bias, which can encourage the model to either learn low or high frequency details
- `--timestep_bias_multiplier`: the weight of the bias to apply to the timestep
- `--timestep_bias_begin`: the timestep to begin applying the bias
- `--timestep_bias_end`: the timestep to end applying the bias
- `--timestep_bias_portion`: the proportion of timesteps to apply the bias to
### Min-SNR weighting
The [Min-SNR](https://huggingface.co/papers/2303.09556) weighting strategy can help with training by rebalancing the loss to achieve faster convergence. The training script supports predicting either `epsilon` (noise) or `v_prediction`, but Min-SNR is compatible with both prediction types. This weighting strategy is only supported by PyTorch and is unavailable in the Flax training script.
Add the `--snr_gamma` parameter and set it to the recommended value of 5.0:
```bash
accelerate launch train_text_to_image_sdxl.py \
--snr_gamma=5.0
```
## Training script
The training script is also similar to the [Text-to-image](text2image#training-script) training guide, but it's been modified to support SDXL training. This guide will focus on the code that is unique to the SDXL training script.
It starts by creating functions to [tokenize the prompts](https://github.com/huggingface/diffusers/blob/aab6de22c33cc01fb7bc81c0807d6109e2c998c9/examples/text_to_image/train_text_to_image_sdxl.py#L478) to calculate the prompt embeddings, and to compute the image embeddings with the [VAE](https://github.com/huggingface/diffusers/blob/aab6de22c33cc01fb7bc81c0807d6109e2c998c9/examples/text_to_image/train_text_to_image_sdxl.py#L519). Next, you'll a function to [generate the timesteps weights](https://github.com/huggingface/diffusers/blob/aab6de22c33cc01fb7bc81c0807d6109e2c998c9/examples/text_to_image/train_text_to_image_sdxl.py#L531) depending on the number of timesteps and the timestep bias strategy to apply.
Within the [`main()`](https://github.com/huggingface/diffusers/blob/aab6de22c33cc01fb7bc81c0807d6109e2c998c9/examples/text_to_image/train_text_to_image_sdxl.py#L572) function, in addition to loading a tokenizer, the script loads a second tokenizer and text encoder because the SDXL architecture uses two of each:
```py
tokenizer_one = AutoTokenizer.from_pretrained(
args.pretrained_model_name_or_path, subfolder="tokenizer", revision=args.revision, use_fast=False
)
tokenizer_two = AutoTokenizer.from_pretrained(
args.pretrained_model_name_or_path, subfolder="tokenizer_2", revision=args.revision, use_fast=False
)
text_encoder_cls_one = import_model_class_from_model_name_or_path(
args.pretrained_model_name_or_path, args.revision
)
text_encoder_cls_two = import_model_class_from_model_name_or_path(
args.pretrained_model_name_or_path, args.revision, subfolder="text_encoder_2"
)
```
The [prompt and image embeddings](https://github.com/huggingface/diffusers/blob/aab6de22c33cc01fb7bc81c0807d6109e2c998c9/examples/text_to_image/train_text_to_image_sdxl.py#L857) are computed first and kept in memory, which isn't typically an issue for a smaller dataset, but for larger datasets it can lead to memory problems. If this is the case, you should save the pre-computed embeddings to disk separately and load them into memory during the training process (see this [PR](https://github.com/huggingface/diffusers/pull/4505) for more discussion about this topic).
```py
text_encoders = [text_encoder_one, text_encoder_two]
tokenizers = [tokenizer_one, tokenizer_two]
compute_embeddings_fn = functools.partial(
encode_prompt,
text_encoders=text_encoders,
tokenizers=tokenizers,
proportion_empty_prompts=args.proportion_empty_prompts,
caption_column=args.caption_column,
)
train_dataset = train_dataset.map(compute_embeddings_fn, batched=True, new_fingerprint=new_fingerprint)
train_dataset = train_dataset.map(
compute_vae_encodings_fn,
batched=True,
batch_size=args.train_batch_size * accelerator.num_processes * args.gradient_accumulation_steps,
new_fingerprint=new_fingerprint_for_vae,
)
```
After calculating the embeddings, the text encoder, VAE, and tokenizer are deleted to free up some memory:
```py
del text_encoders, tokenizers, vae
gc.collect()
torch.cuda.empty_cache()
```
Finally, the [training loop](https://github.com/huggingface/diffusers/blob/aab6de22c33cc01fb7bc81c0807d6109e2c998c9/examples/text_to_image/train_text_to_image_sdxl.py#L943) takes care of the rest. If you chose to apply a timestep bias strategy, you'll see the timestep weights are calculated and added as noise:
```py
weights = generate_timestep_weights(args, noise_scheduler.config.num_train_timesteps).to(
model_input.device
)
timesteps = torch.multinomial(weights, bsz, replacement=True).long()
noisy_model_input = noise_scheduler.add_noise(model_input, noise, timesteps)
```
If you want to learn more about how the training loop works, check out the [Understanding pipelines, models and schedulers](../using-diffusers/write_own_pipeline) tutorial which breaks down the basic pattern of the denoising process.
## Launch the script
Once you’ve made all your changes or you’re okay with the default configuration, you’re ready to launch the training script! 🚀
Let’s train on the [Naruto BLIP captions](https://huggingface.co/datasets/lambdalabs/naruto-blip-captions) dataset to generate your own Naruto characters. Set the environment variables `MODEL_NAME` and `DATASET_NAME` to the model and the dataset (either from the Hub or a local path). You should also specify a VAE other than the SDXL VAE (either from the Hub or a local path) with `VAE_NAME` to avoid numerical instabilities.
To monitor training progress with Weights & Biases, add the `--report_to=wandb` parameter to the training command. You’ll also need to add the `--validation_prompt` and `--validation_epochs` to the training command to keep track of results. This can be really useful for debugging the model and viewing intermediate results.
```bash
export MODEL_NAME="stabilityai/stable-diffusion-xl-base-1.0"
export VAE_NAME="madebyollin/sdxl-vae-fp16-fix"
export DATASET_NAME="lambdalabs/naruto-blip-captions"
accelerate launch train_text_to_image_sdxl.py \
--pretrained_model_name_or_path=$MODEL_NAME \
--pretrained_vae_model_name_or_path=$VAE_NAME \
--dataset_name=$DATASET_NAME \
--enable_xformers_memory_efficient_attention \
--resolution=512 \
--center_crop \
--random_flip \
--proportion_empty_prompts=0.2 \
--train_batch_size=1 \
--gradient_accumulation_steps=4 \
--gradient_checkpointing \
--max_train_steps=10000 \
--use_8bit_adam \
--learning_rate=1e-06 \
--lr_scheduler="constant" \
--lr_warmup_steps=0 \
--mixed_precision="fp16" \
--report_to="wandb" \
--validation_prompt="a cute Sundar Pichai creature" \
--validation_epochs 5 \
--checkpointing_steps=5000 \
--output_dir="sdxl-naruto-model" \
--push_to_hub
```
After you've finished training, you can use your newly trained SDXL model for inference!
```py
from diffusers import DiffusionPipeline
import torch
pipeline = DiffusionPipeline.from_pretrained("path/to/your/model", torch_dtype=torch.float16).to("cuda")
prompt = "A naruto with green eyes and red legs."
image = pipeline(prompt, num_inference_steps=30, guidance_scale=7.5).images[0]
image.save("naruto.png")
```
[PyTorch XLA](https://pytorch.org/xla) allows you to run PyTorch on XLA devices such as TPUs, which can be faster. The initial warmup step takes longer because the model needs to be compiled and optimized. However, subsequent calls to the pipeline on an input **with the same length** as the original prompt are much faster because it can reuse the optimized graph.
```py
from diffusers import DiffusionPipeline
import torch
import torch_xla.core.xla_model as xm
device = xm.xla_device()
pipeline = DiffusionPipeline.from_pretrained("stabilityai/stable-diffusion-xl-base-1.0").to(device)
prompt = "A naruto with green eyes and red legs."
start = time()
image = pipeline(prompt, num_inference_steps=inference_steps).images[0]
print(f'Compilation time is {time()-start} sec')
image.save("naruto.png")
start = time()
image = pipeline(prompt, num_inference_steps=inference_steps).images[0]
print(f'Inference time is {time()-start} sec after compilation')
```
## Next steps
Congratulations on training a SDXL model! To learn more about how to use your new model, the following guides may be helpful:
- Read the [Stable Diffusion XL](../using-diffusers/sdxl) guide to learn how to use it for a variety of different tasks (text-to-image, image-to-image, inpainting), how to use it's refiner model, and the different types of micro-conditionings.
- Check out the [DreamBooth](dreambooth) and [LoRA](lora) training guides to learn how to train a personalized SDXL model with just a few example images. These two training techniques can even be combined!
# Latent Consistency Distillation
[Latent Consistency Models (LCMs)](https://hf.co/papers/2310.04378) are able to generate high-quality images in just a few steps, representing a big leap forward because many pipelines require at least 25+ steps. LCMs are produced by applying the latent consistency distillation method to any Stable Diffusion model. This method works by applying *one-stage guided distillation* to the latent space, and incorporating a *skipping-step* method to consistently skip timesteps to accelerate the distillation process (refer to section 4.1, 4.2, and 4.3 of the paper for more details).
If you're training on a GPU with limited vRAM, try enabling `gradient_checkpointing`, `gradient_accumulation_steps`, and `mixed_precision` to reduce memory-usage and speedup training. You can reduce your memory-usage even more by enabling memory-efficient attention with [xFormers](../optimization/xformers) and [bitsandbytes'](https://github.com/TimDettmers/bitsandbytes) 8-bit optimizer.
This guide will explore the [train_lcm_distill_sd_wds.py](https://github.com/huggingface/diffusers/blob/main/examples/consistency_distillation/train_lcm_distill_sd_wds.py) script to help you become more familiar with it, and how you can adapt it for your own use-case.
Before running the script, make sure you install the library from source:
```bash
git clone https://github.com/huggingface/diffusers
cd diffusers
pip install .
```
Then navigate to the example folder containing the training script and install the required dependencies for the script you're using:
```bash
cd examples/consistency_distillation
pip install -r requirements.txt
```
🤗 Accelerate is a library for helping you train on multiple GPUs/TPUs or with mixed-precision. It'll automatically configure your training setup based on your hardware and environment. Take a look at the 🤗 Accelerate [Quick tour](https://huggingface.co/docs/accelerate/quicktour) to learn more.
Initialize an 🤗 Accelerate environment (try enabling `torch.compile` to significantly speedup training):
```bash
accelerate config
```
To setup a default 🤗 Accelerate environment without choosing any configurations:
```bash
accelerate config default
```
Or if your environment doesn't support an interactive shell, like a notebook, you can use:
```py
from accelerate.utils import write_basic_config
write_basic_config()
```
Lastly, if you want to train a model on your own dataset, take a look at the [Create a dataset for training](create_dataset) guide to learn how to create a dataset that works with the training script.
## Script parameters
The following sections highlight parts of the training script that are important for understanding how to modify it, but it doesn't cover every aspect of the script in detail. If you're interested in learning more, feel free to read through the [script](https://github.com/huggingface/diffusers/blob/main/examples/consistency_distillation/train_lcm_distill_sd_wds.py) and let us know if you have any questions or concerns.
The training script provides many parameters to help you customize your training run. All of the parameters and their descriptions are found in the [`parse_args()`](https://github.com/huggingface/diffusers/blob/3b37488fa3280aed6a95de044d7a42ffdcb565ef/examples/consistency_distillation/train_lcm_distill_sd_wds.py#L419) function. This function provides default values for each parameter, such as the training batch size and learning rate, but you can also set your own values in the training command if you'd like.
For example, to speedup training with mixed precision using the fp16 format, add the `--mixed_precision` parameter to the training command:
```bash
accelerate launch train_lcm_distill_sd_wds.py \
--mixed_precision="fp16"
```
Most of the parameters are identical to the parameters in the [Text-to-image](text2image#script-parameters) training guide, so you'll focus on the parameters that are relevant to latent consistency distillation in this guide.
- `--pretrained_teacher_model`: the path to a pretrained latent diffusion model to use as the teacher model
- `--pretrained_vae_model_name_or_path`: path to a pretrained VAE; the SDXL VAE is known to suffer from numerical instability, so this parameter allows you to specify an alternative VAE (like this [VAE]((https://huggingface.co/madebyollin/sdxl-vae-fp16-fix)) by madebyollin which works in fp16)
- `--w_min` and `--w_max`: the minimum and maximum guidance scale values for guidance scale sampling
- `--num_ddim_timesteps`: the number of timesteps for DDIM sampling
- `--loss_type`: the type of loss (L2 or Huber) to calculate for latent consistency distillation; Huber loss is generally preferred because it's more robust to outliers
- `--huber_c`: the Huber loss parameter
## Training script
The training script starts by creating a dataset class - [`Text2ImageDataset`](https://github.com/huggingface/diffusers/blob/3b37488fa3280aed6a95de044d7a42ffdcb565ef/examples/consistency_distillation/train_lcm_distill_sd_wds.py#L141) - for preprocessing the images and creating a training dataset.
```py
def transform(example):
image = example["image"]
image = TF.resize(image, resolution, interpolation=transforms.InterpolationMode.BILINEAR)
c_top, c_left, _, _ = transforms.RandomCrop.get_params(image, output_size=(resolution, resolution))
image = TF.crop(image, c_top, c_left, resolution, resolution)
image = TF.to_tensor(image)
image = TF.normalize(image, [0.5], [0.5])
example["image"] = image
return example
```
For improved performance on reading and writing large datasets stored in the cloud, this script uses the [WebDataset](https://github.com/webdataset/webdataset) format to create a preprocessing pipeline to apply transforms and create a dataset and dataloader for training. Images are processed and fed to the training loop without having to download the full dataset first.
```py
processing_pipeline = [
wds.decode("pil", handler=wds.ignore_and_continue),
wds.rename(image="jpg;png;jpeg;webp", text="text;txt;caption", handler=wds.warn_and_continue),
wds.map(filter_keys({"image", "text"})),
wds.map(transform),
wds.to_tuple("image", "text"),
]
```
In the [`main()`](https://github.com/huggingface/diffusers/blob/3b37488fa3280aed6a95de044d7a42ffdcb565ef/examples/consistency_distillation/train_lcm_distill_sd_wds.py#L768) function, all the necessary components like the noise scheduler, tokenizers, text encoders, and VAE are loaded. The teacher UNet is also loaded here and then you can create a student UNet from the teacher UNet. The student UNet is updated by the optimizer during training.
```py
teacher_unet = UNet2DConditionModel.from_pretrained(
args.pretrained_teacher_model, subfolder="unet", revision=args.teacher_revision
)
unet = UNet2DConditionModel(**teacher_unet.config)
unet.load_state_dict(teacher_unet.state_dict(), strict=False)
unet.train()
```
Now you can create the [optimizer](https://github.com/huggingface/diffusers/blob/3b37488fa3280aed6a95de044d7a42ffdcb565ef/examples/consistency_distillation/train_lcm_distill_sd_wds.py#L979) to update the UNet parameters:
```py
optimizer = optimizer_class(
unet.parameters(),
lr=args.learning_rate,
betas=(args.adam_beta1, args.adam_beta2),
weight_decay=args.adam_weight_decay,
eps=args.adam_epsilon,
)
```
Create the [dataset](https://github.com/huggingface/diffusers/blob/3b37488fa3280aed6a95de044d7a42ffdcb565ef/examples/consistency_distillation/train_lcm_distill_sd_wds.py#L994):
```py
dataset = Text2ImageDataset(
train_shards_path_or_url=args.train_shards_path_or_url,
num_train_examples=args.max_train_samples,
per_gpu_batch_size=args.train_batch_size,
global_batch_size=args.train_batch_size * accelerator.num_processes,
num_workers=args.dataloader_num_workers,
resolution=args.resolution,
shuffle_buffer_size=1000,
pin_memory=True,
persistent_workers=True,
)
train_dataloader = dataset.train_dataloader
```
Next, you're ready to setup the [training loop](https://github.com/huggingface/diffusers/blob/3b37488fa3280aed6a95de044d7a42ffdcb565ef/examples/consistency_distillation/train_lcm_distill_sd_wds.py#L1049) and implement the latent consistency distillation method (see Algorithm 1 in the paper for more details). This section of the script takes care of adding noise to the latents, sampling and creating a guidance scale embedding, and predicting the original image from the noise.
```py
pred_x_0 = predicted_origin(
noise_pred,
start_timesteps,
noisy_model_input,
noise_scheduler.config.prediction_type,
alpha_schedule,
sigma_schedule,
)
model_pred = c_skip_start * noisy_model_input + c_out_start * pred_x_0
```
It gets the [teacher model predictions](https://github.com/huggingface/diffusers/blob/3b37488fa3280aed6a95de044d7a42ffdcb565ef/examples/consistency_distillation/train_lcm_distill_sd_wds.py#L1172) and the [LCM predictions](https://github.com/huggingface/diffusers/blob/3b37488fa3280aed6a95de044d7a42ffdcb565ef/examples/consistency_distillation/train_lcm_distill_sd_wds.py#L1209) next, calculates the loss, and then backpropagates it to the LCM.
```py
if args.loss_type == "l2":
loss = F.mse_loss(model_pred.float(), target.float(), reduction="mean")
elif args.loss_type == "huber":
loss = torch.mean(
torch.sqrt((model_pred.float() - target.float()) ** 2 + args.huber_c**2) - args.huber_c
)
```
If you want to learn more about how the training loop works, check out the [Understanding pipelines, models and schedulers tutorial](../using-diffusers/write_own_pipeline) which breaks down the basic pattern of the denoising process.
## Launch the script
Now you're ready to launch the training script and start distilling!
For this guide, you'll use the `--train_shards_path_or_url` to specify the path to the [Conceptual Captions 12M](https://github.com/google-research-datasets/conceptual-12m) dataset stored on the Hub [here](https://huggingface.co/datasets/laion/conceptual-captions-12m-webdataset). Set the `MODEL_DIR` environment variable to the name of the teacher model and `OUTPUT_DIR` to where you want to save the model.
```bash
export MODEL_DIR="stable-diffusion-v1-5/stable-diffusion-v1-5"
export OUTPUT_DIR="path/to/saved/model"
accelerate launch train_lcm_distill_sd_wds.py \
--pretrained_teacher_model=$MODEL_DIR \
--output_dir=$OUTPUT_DIR \
--mixed_precision=fp16 \
--resolution=512 \
--learning_rate=1e-6 --loss_type="huber" --ema_decay=0.95 --adam_weight_decay=0.0 \
--max_train_steps=1000 \
--max_train_samples=4000000 \
--dataloader_num_workers=8 \
--train_shards_path_or_url="pipe:curl -L -s https://huggingface.co/datasets/laion/conceptual-captions-12m-webdataset/resolve/main/data/{00000..01099}.tar?download=true" \
--validation_steps=200 \
--checkpointing_steps=200 --checkpoints_total_limit=10 \
--train_batch_size=12 \
--gradient_checkpointing --enable_xformers_memory_efficient_attention \
--gradient_accumulation_steps=1 \
--use_8bit_adam \
--resume_from_checkpoint=latest \
--report_to=wandb \
--seed=453645634 \
--push_to_hub
```
Once training is complete, you can use your new LCM for inference.
```py
from diffusers import UNet2DConditionModel, DiffusionPipeline, LCMScheduler
import torch
unet = UNet2DConditionModel.from_pretrained("your-username/your-model", torch_dtype=torch.float16, variant="fp16")
pipeline = DiffusionPipeline.from_pretrained("stable-diffusion-v1-5/stable-diffusion-v1-5", unet=unet, torch_dtype=torch.float16, variant="fp16")
pipeline.scheduler = LCMScheduler.from_config(pipe.scheduler.config)
pipeline.to("cuda")
prompt = "sushi rolls in the form of panda heads, sushi platter"
image = pipeline(prompt, num_inference_steps=4, guidance_scale=1.0).images[0]
```
## LoRA
LoRA is a training technique for significantly reducing the number of trainable parameters. As a result, training is faster and it is easier to store the resulting weights because they are a lot smaller (~100MBs). Use the [train_lcm_distill_lora_sd_wds.py](https://github.com/huggingface/diffusers/blob/main/examples/consistency_distillation/train_lcm_distill_lora_sd_wds.py) or [train_lcm_distill_lora_sdxl.wds.py](https://github.com/huggingface/diffusers/blob/main/examples/consistency_distillation/train_lcm_distill_lora_sdxl_wds.py) script to train with LoRA.
The LoRA training script is discussed in more detail in the [LoRA training](lora) guide.
## Stable Diffusion XL
Stable Diffusion XL (SDXL) is a powerful text-to-image model that generates high-resolution images, and it adds a second text-encoder to its architecture. Use the [train_lcm_distill_sdxl_wds.py](https://github.com/huggingface/diffusers/blob/main/examples/consistency_distillation/train_lcm_distill_sdxl_wds.py) script to train a SDXL model with LoRA.
The SDXL training script is discussed in more detail in the [SDXL training](sdxl) guide.
## Next steps
Congratulations on distilling a LCM model! To learn more about LCM, the following may be helpful:
- Learn how to use [LCMs for inference](../using-diffusers/lcm) for text-to-image, image-to-image, and with LoRA checkpoints.
- Read the [SDXL in 4 steps with Latent Consistency LoRAs](https://huggingface.co/blog/lcm_lora) blog post to learn more about SDXL LCM-LoRA's for super fast inference, quality comparisons, benchmarks, and more.
# T2I-Adapter
[T2I-Adapter](https://hf.co/papers/2302.08453) is a lightweight adapter model that provides an additional conditioning input image (line art, canny, sketch, depth, pose) to better control image generation. It is similar to a ControlNet, but it is a lot smaller (~77M parameters and ~300MB file size) because its only inserts weights into the UNet instead of copying and training it.
The T2I-Adapter is only available for training with the Stable Diffusion XL (SDXL) model.
This guide will explore the [train_t2i_adapter_sdxl.py](https://github.com/huggingface/diffusers/blob/main/examples/t2i_adapter/train_t2i_adapter_sdxl.py) training script to help you become familiar with it, and how you can adapt it for your own use-case.
Before running the script, make sure you install the library from source:
```bash
git clone https://github.com/huggingface/diffusers
cd diffusers
pip install .
```
Then navigate to the example folder containing the training script and install the required dependencies for the script you're using:
```bash
cd examples/t2i_adapter
pip install -r requirements.txt
```
🤗 Accelerate is a library for helping you train on multiple GPUs/TPUs or with mixed-precision. It'll automatically configure your training setup based on your hardware and environment. Take a look at the 🤗 Accelerate [Quick tour](https://huggingface.co/docs/accelerate/quicktour) to learn more.
Initialize an 🤗 Accelerate environment:
```bash
accelerate config
```
To setup a default 🤗 Accelerate environment without choosing any configurations:
```bash
accelerate config default
```
Or if your environment doesn't support an interactive shell, like a notebook, you can use:
```py
from accelerate.utils import write_basic_config
write_basic_config()
```
Lastly, if you want to train a model on your own dataset, take a look at the [Create a dataset for training](create_dataset) guide to learn how to create a dataset that works with the training script.
The following sections highlight parts of the training script that are important for understanding how to modify it, but it doesn't cover every aspect of the script in detail. If you're interested in learning more, feel free to read through the [script](https://github.com/huggingface/diffusers/blob/main/examples/t2i_adapter/train_t2i_adapter_sdxl.py) and let us know if you have any questions or concerns.
## Script parameters
The training script provides many parameters to help you customize your training run. All of the parameters and their descriptions are found in the [`parse_args()`](https://github.com/huggingface/diffusers/blob/aab6de22c33cc01fb7bc81c0807d6109e2c998c9/examples/t2i_adapter/train_t2i_adapter_sdxl.py#L233) function. It provides default values for each parameter, such as the training batch size and learning rate, but you can also set your own values in the training command if you'd like.
For example, to activate gradient accumulation, add the `--gradient_accumulation_steps` parameter to the training command:
```bash
accelerate launch train_t2i_adapter_sdxl.py \
----gradient_accumulation_steps=4
```
Many of the basic and important parameters are described in the [Text-to-image](text2image#script-parameters) training guide, so this guide just focuses on the relevant T2I-Adapter parameters:
- `--pretrained_vae_model_name_or_path`: path to a pretrained VAE; the SDXL VAE is known to suffer from numerical instability, so this parameter allows you to specify a better [VAE](https://huggingface.co/madebyollin/sdxl-vae-fp16-fix)
- `--crops_coords_top_left_h` and `--crops_coords_top_left_w`: height and width coordinates to include in SDXL's crop coordinate embeddings
- `--conditioning_image_column`: the column of the conditioning images in the dataset
- `--proportion_empty_prompts`: the proportion of image prompts to replace with empty strings
## Training script
As with the script parameters, a walkthrough of the training script is provided in the [Text-to-image](text2image#training-script) training guide. Instead, this guide takes a look at the T2I-Adapter relevant parts of the script.
The training script begins by preparing the dataset. This incudes [tokenizing](https://github.com/huggingface/diffusers/blob/aab6de22c33cc01fb7bc81c0807d6109e2c998c9/examples/t2i_adapter/train_t2i_adapter_sdxl.py#L674) the prompt and [applying transforms](https://github.com/huggingface/diffusers/blob/aab6de22c33cc01fb7bc81c0807d6109e2c998c9/examples/t2i_adapter/train_t2i_adapter_sdxl.py#L714) to the images and conditioning images.
```py
conditioning_image_transforms = transforms.Compose(
[
transforms.Resize(args.resolution, interpolation=transforms.InterpolationMode.BILINEAR),
transforms.CenterCrop(args.resolution),
transforms.ToTensor(),
]
)
```
Within the [`main()`](https://github.com/huggingface/diffusers/blob/aab6de22c33cc01fb7bc81c0807d6109e2c998c9/examples/t2i_adapter/train_t2i_adapter_sdxl.py#L770) function, the T2I-Adapter is either loaded from a pretrained adapter or it is randomly initialized:
```py
if args.adapter_model_name_or_path:
logger.info("Loading existing adapter weights.")
t2iadapter = T2IAdapter.from_pretrained(args.adapter_model_name_or_path)
else:
logger.info("Initializing t2iadapter weights.")
t2iadapter = T2IAdapter(
in_channels=3,
channels=(320, 640, 1280, 1280),
num_res_blocks=2,
downscale_factor=16,
adapter_type="full_adapter_xl",
)
```
The [optimizer](https://github.com/huggingface/diffusers/blob/aab6de22c33cc01fb7bc81c0807d6109e2c998c9/examples/t2i_adapter/train_t2i_adapter_sdxl.py#L952) is initialized for the T2I-Adapter parameters:
```py
params_to_optimize = t2iadapter.parameters()
optimizer = optimizer_class(
params_to_optimize,
lr=args.learning_rate,
betas=(args.adam_beta1, args.adam_beta2),
weight_decay=args.adam_weight_decay,
eps=args.adam_epsilon,
)
```
Lastly, in the [training loop](https://github.com/huggingface/diffusers/blob/aab6de22c33cc01fb7bc81c0807d6109e2c998c9/examples/t2i_adapter/train_t2i_adapter_sdxl.py#L1086), the adapter conditioning image and the text embeddings are passed to the UNet to predict the noise residual:
```py
t2iadapter_image = batch["conditioning_pixel_values"].to(dtype=weight_dtype)
down_block_additional_residuals = t2iadapter(t2iadapter_image)
down_block_additional_residuals = [
sample.to(dtype=weight_dtype) for sample in down_block_additional_residuals
]
model_pred = unet(
inp_noisy_latents,
timesteps,
encoder_hidden_states=batch["prompt_ids"],
added_cond_kwargs=batch["unet_added_conditions"],
down_block_additional_residuals=down_block_additional_residuals,
).sample
```
If you want to learn more about how the training loop works, check out the [Understanding pipelines, models and schedulers](../using-diffusers/write_own_pipeline) tutorial which breaks down the basic pattern of the denoising process.
## Launch the script
Now you’re ready to launch the training script! 🚀
For this example training, you'll use the [fusing/fill50k](https://huggingface.co/datasets/fusing/fill50k) dataset. You can also create and use your own dataset if you want (see the [Create a dataset for training](https://moon-ci-docs.huggingface.co/docs/diffusers/pr_5512/en/training/create_dataset) guide).
Set the environment variable `MODEL_DIR` to a model id on the Hub or a path to a local model and `OUTPUT_DIR` to where you want to save the model.
Download the following images to condition your training with:
```bash
wget https://huggingface.co/datasets/huggingface/documentation-images/resolve/main/diffusers/controlnet_training/conditioning_image_1.png
wget https://huggingface.co/datasets/huggingface/documentation-images/resolve/main/diffusers/controlnet_training/conditioning_image_2.png
```
To monitor training progress with Weights & Biases, add the `--report_to=wandb` parameter to the training command. You'll also need to add the `--validation_image`, `--validation_prompt`, and `--validation_steps` to the training command to keep track of results. This can be really useful for debugging the model and viewing intermediate results.
```bash
export MODEL_DIR="stabilityai/stable-diffusion-xl-base-1.0"
export OUTPUT_DIR="path to save model"
accelerate launch train_t2i_adapter_sdxl.py \
--pretrained_model_name_or_path=$MODEL_DIR \
--output_dir=$OUTPUT_DIR \
--dataset_name=fusing/fill50k \
--mixed_precision="fp16" \
--resolution=1024 \
--learning_rate=1e-5 \
--max_train_steps=15000 \
--validation_image "./conditioning_image_1.png" "./conditioning_image_2.png" \
--validation_prompt "red circle with blue background" "cyan circle with brown floral background" \
--validation_steps=100 \
--train_batch_size=1 \
--gradient_accumulation_steps=4 \
--report_to="wandb" \
--seed=42 \
--push_to_hub
```
Once training is complete, you can use your T2I-Adapter for inference:
```py
from diffusers import StableDiffusionXLAdapterPipeline, T2IAdapter, EulerAncestralDiscreteSchedulerTest
from diffusers.utils import load_image
import torch
adapter = T2IAdapter.from_pretrained("path/to/adapter", torch_dtype=torch.float16)
pipeline = StableDiffusionXLAdapterPipeline.from_pretrained(
"stabilityai/stable-diffusion-xl-base-1.0", adapter=adapter, torch_dtype=torch.float16
)
pipeline.scheduler = EulerAncestralDiscreteSchedulerTest.from_config(pipe.scheduler.config)
pipeline.enable_xformers_memory_efficient_attention()
pipeline.enable_model_cpu_offload()
control_image = load_image("./conditioning_image_1.png")
prompt = "pale golden rod circle with old lace background"
generator = torch.manual_seed(0)
image = pipeline(
prompt, image=control_image, generator=generator
).images[0]
image.save("./output.png")
```
## Next steps
Congratulations on training a T2I-Adapter model! 🎉 To learn more:
- Read the [Efficient Controllable Generation for SDXL with T2I-Adapters](https://huggingface.co/blog/t2i-sdxl-adapters) blog post to learn more details about the experimental results from the T2I-Adapter team.
# DreamBooth
[DreamBooth](https://huggingface.co/papers/2208.12242) is a training technique that updates the entire diffusion model by training on just a few images of a subject or style. It works by associating a special word in the prompt with the example images.
If you're training on a GPU with limited vRAM, you should try enabling the `gradient_checkpointing` and `mixed_precision` parameters in the training command. You can also reduce your memory footprint by using memory-efficient attention with [xFormers](../optimization/xformers). JAX/Flax training is also supported for efficient training on TPUs and GPUs, but it doesn't support gradient checkpointing or xFormers. You should have a GPU with >30GB of memory if you want to train faster with Flax.
This guide will explore the [train_dreambooth.py](https://github.com/huggingface/diffusers/blob/main/examples/dreambooth/train_dreambooth.py) script to help you become more familiar with it, and how you can adapt it for your own use-case.
Before running the script, make sure you install the library from source:
```bash
git clone https://github.com/huggingface/diffusers
cd diffusers
pip install .
```
Navigate to the example folder with the training script and install the required dependencies for the script you're using:
```bash
cd examples/dreambooth
pip install -r requirements.txt
```
```bash
cd examples/dreambooth
pip install -r requirements_flax.txt
```
🤗 Accelerate is a library for helping you train on multiple GPUs/TPUs or with mixed-precision. It'll automatically configure your training setup based on your hardware and environment. Take a look at the 🤗 Accelerate [Quick tour](https://huggingface.co/docs/accelerate/quicktour) to learn more.
Initialize an 🤗 Accelerate environment:
```bash
accelerate config
```
To setup a default 🤗 Accelerate environment without choosing any configurations:
```bash
accelerate config default
```
Or if your environment doesn't support an interactive shell, like a notebook, you can use:
```py
from accelerate.utils import write_basic_config
write_basic_config()
```
Lastly, if you want to train a model on your own dataset, take a look at the [Create a dataset for training](create_dataset) guide to learn how to create a dataset that works with the training script.
The following sections highlight parts of the training script that are important for understanding how to modify it, but it doesn't cover every aspect of the script in detail. If you're interested in learning more, feel free to read through the [script](https://github.com/huggingface/diffusers/blob/main/examples/dreambooth/train_dreambooth.py) and let us know if you have any questions or concerns.
## Script parameters
DreamBooth is very sensitive to training hyperparameters, and it is easy to overfit. Read the [Training Stable Diffusion with Dreambooth using 🧨 Diffusers](https://huggingface.co/blog/dreambooth) blog post for recommended settings for different subjects to help you choose the appropriate hyperparameters.
The training script offers many parameters for customizing your training run. All of the parameters and their descriptions are found in the [`parse_args()`](https://github.com/huggingface/diffusers/blob/072e00897a7cf4302c347a63ec917b4b8add16d4/examples/dreambooth/train_dreambooth.py#L228) function. The parameters are set with default values that should work pretty well out-of-the-box, but you can also set your own values in the training command if you'd like.
For example, to train in the bf16 format:
```bash
accelerate launch train_dreambooth.py \
--mixed_precision="bf16"
```
Some basic and important parameters to know and specify are:
- `--pretrained_model_name_or_path`: the name of the model on the Hub or a local path to the pretrained model
- `--instance_data_dir`: path to a folder containing the training dataset (example images)
- `--instance_prompt`: the text prompt that contains the special word for the example images
- `--train_text_encoder`: whether to also train the text encoder
- `--output_dir`: where to save the trained model
- `--push_to_hub`: whether to push the trained model to the Hub
- `--checkpointing_steps`: frequency of saving a checkpoint as the model trains; this is useful if for some reason training is interrupted, you can continue training from that checkpoint by adding `--resume_from_checkpoint` to your training command
### Min-SNR weighting
The [Min-SNR](https://huggingface.co/papers/2303.09556) weighting strategy can help with training by rebalancing the loss to achieve faster convergence. The training script supports predicting `epsilon` (noise) or `v_prediction`, but Min-SNR is compatible with both prediction types. This weighting strategy is only supported by PyTorch and is unavailable in the Flax training script.
Add the `--snr_gamma` parameter and set it to the recommended value of 5.0:
```bash
accelerate launch train_dreambooth.py \
--snr_gamma=5.0
```
### Prior preservation loss
Prior preservation loss is a method that uses a model's own generated samples to help it learn how to generate more diverse images. Because these generated sample images belong to the same class as the images you provided, they help the model retain what it has learned about the class and how it can use what it already knows about the class to make new compositions.
- `--with_prior_preservation`: whether to use prior preservation loss
- `--prior_loss_weight`: controls the influence of the prior preservation loss on the model
- `--class_data_dir`: path to a folder containing the generated class sample images
- `--class_prompt`: the text prompt describing the class of the generated sample images
```bash
accelerate launch train_dreambooth.py \
--with_prior_preservation \
--prior_loss_weight=1.0 \
--class_data_dir="path/to/class/images" \
--class_prompt="text prompt describing class"
```
### Train text encoder
To improve the quality of the generated outputs, you can also train the text encoder in addition to the UNet. This requires additional memory and you'll need a GPU with at least 24GB of vRAM. If you have the necessary hardware, then training the text encoder produces better results, especially when generating images of faces. Enable this option by:
```bash
accelerate launch train_dreambooth.py \
--train_text_encoder
```
## Training script
DreamBooth comes with its own dataset classes:
- [`DreamBoothDataset`](https://github.com/huggingface/diffusers/blob/072e00897a7cf4302c347a63ec917b4b8add16d4/examples/dreambooth/train_dreambooth.py#L604): preprocesses the images and class images, and tokenizes the prompts for training
- [`PromptDataset`](https://github.com/huggingface/diffusers/blob/072e00897a7cf4302c347a63ec917b4b8add16d4/examples/dreambooth/train_dreambooth.py#L738): generates the prompt embeddings to generate the class images
If you enabled [prior preservation loss](https://github.com/huggingface/diffusers/blob/072e00897a7cf4302c347a63ec917b4b8add16d4/examples/dreambooth/train_dreambooth.py#L842), the class images are generated here:
```py
sample_dataset = PromptDataset(args.class_prompt, num_new_images)
sample_dataloader = torch.utils.data.DataLoader(sample_dataset, batch_size=args.sample_batch_size)
sample_dataloader = accelerator.prepare(sample_dataloader)
pipeline.to(accelerator.device)
for example in tqdm(
sample_dataloader, desc="Generating class images", disable=not accelerator.is_local_main_process
):
images = pipeline(example["prompt"]).images
```
Next is the [`main()`](https://github.com/huggingface/diffusers/blob/072e00897a7cf4302c347a63ec917b4b8add16d4/examples/dreambooth/train_dreambooth.py#L799) function which handles setting up the dataset for training and the training loop itself. The script loads the [tokenizer](https://github.com/huggingface/diffusers/blob/072e00897a7cf4302c347a63ec917b4b8add16d4/examples/dreambooth/train_dreambooth.py#L898), [scheduler and models](https://github.com/huggingface/diffusers/blob/072e00897a7cf4302c347a63ec917b4b8add16d4/examples/dreambooth/train_dreambooth.py#L912C1-L912C1):
```py
# Load the tokenizer
if args.tokenizer_name:
tokenizer = AutoTokenizer.from_pretrained(args.tokenizer_name, revision=args.revision, use_fast=False)
elif args.pretrained_model_name_or_path:
tokenizer = AutoTokenizer.from_pretrained(
args.pretrained_model_name_or_path,
subfolder="tokenizer",
revision=args.revision,
use_fast=False,
)
# Load scheduler and models
noise_scheduler = DDPMScheduler.from_pretrained(args.pretrained_model_name_or_path, subfolder="scheduler")
text_encoder = text_encoder_cls.from_pretrained(
args.pretrained_model_name_or_path, subfolder="text_encoder", revision=args.revision
)
if model_has_vae(args):
vae = AutoencoderKL.from_pretrained(
args.pretrained_model_name_or_path, subfolder="vae", revision=args.revision
)
else:
vae = None
unet = UNet2DConditionModel.from_pretrained(
args.pretrained_model_name_or_path, subfolder="unet", revision=args.revision
)
```
Then, it's time to [create the training dataset](https://github.com/huggingface/diffusers/blob/072e00897a7cf4302c347a63ec917b4b8add16d4/examples/dreambooth/train_dreambooth.py#L1073) and DataLoader from `DreamBoothDataset`:
```py
train_dataset = DreamBoothDataset(
instance_data_root=args.instance_data_dir,
instance_prompt=args.instance_prompt,
class_data_root=args.class_data_dir if args.with_prior_preservation else None,
class_prompt=args.class_prompt,
class_num=args.num_class_images,
tokenizer=tokenizer,
size=args.resolution,
center_crop=args.center_crop,
encoder_hidden_states=pre_computed_encoder_hidden_states,
class_prompt_encoder_hidden_states=pre_computed_class_prompt_encoder_hidden_states,
tokenizer_max_length=args.tokenizer_max_length,
)
train_dataloader = torch.utils.data.DataLoader(
train_dataset,
batch_size=args.train_batch_size,
shuffle=True,
collate_fn=lambda examples: collate_fn(examples, args.with_prior_preservation),
num_workers=args.dataloader_num_workers,
)
```
Lastly, the [training loop](https://github.com/huggingface/diffusers/blob/072e00897a7cf4302c347a63ec917b4b8add16d4/examples/dreambooth/train_dreambooth.py#L1151) takes care of the remaining steps such as converting images to latent space, adding noise to the input, predicting the noise residual, and calculating the loss.
If you want to learn more about how the training loop works, check out the [Understanding pipelines, models and schedulers](../using-diffusers/write_own_pipeline) tutorial which breaks down the basic pattern of the denoising process.
## Launch the script
You're now ready to launch the training script! 🚀
For this guide, you'll download some images of a [dog](https://huggingface.co/datasets/diffusers/dog-example) and store them in a directory. But remember, you can create and use your own dataset if you want (see the [Create a dataset for training](create_dataset) guide).
```py
from huggingface_hub import snapshot_download
local_dir = "./dog"
snapshot_download(
"diffusers/dog-example",
local_dir=local_dir,
repo_type="dataset",
ignore_patterns=".gitattributes",
)
```
Set the environment variable `MODEL_NAME` to a model id on the Hub or a path to a local model, `INSTANCE_DIR` to the path where you just downloaded the dog images to, and `OUTPUT_DIR` to where you want to save the model. You'll use `sks` as the special word to tie the training to.
If you're interested in following along with the training process, you can periodically save generated images as training progresses. Add the following parameters to the training command:
```bash
--validation_prompt="a photo of a sks dog"
--num_validation_images=4
--validation_steps=100
```
One more thing before you launch the script! Depending on the GPU you have, you may need to enable certain optimizations to train DreamBooth.
On a 16GB GPU, you can use bitsandbytes 8-bit optimizer and gradient checkpointing to help you train a DreamBooth model. Install bitsandbytes:
```py
pip install bitsandbytes
```
Then, add the following parameter to your training command:
```bash
accelerate launch train_dreambooth.py \
--gradient_checkpointing \
--use_8bit_adam \
```
On a 12GB GPU, you'll need bitsandbytes 8-bit optimizer, gradient checkpointing, xFormers, and set the gradients to `None` instead of zero to reduce your memory-usage.
```bash
accelerate launch train_dreambooth.py \
--use_8bit_adam \
--gradient_checkpointing \
--enable_xformers_memory_efficient_attention \
--set_grads_to_none \
```
On a 8GB GPU, you'll need [DeepSpeed](https://www.deepspeed.ai/) to offload some of the tensors from the vRAM to either the CPU or NVME to allow training with less GPU memory.
Run the following command to configure your 🤗 Accelerate environment:
```bash
accelerate config
```
During configuration, confirm that you want to use DeepSpeed. Now it should be possible to train on under 8GB vRAM by combining DeepSpeed stage 2, fp16 mixed precision, and offloading the model parameters and the optimizer state to the CPU. The drawback is that this requires more system RAM (~25 GB). See the [DeepSpeed documentation](https://huggingface.co/docs/accelerate/usage_guides/deepspeed) for more configuration options.
You should also change the default Adam optimizer to DeepSpeed’s optimized version of Adam [`deepspeed.ops.adam.DeepSpeedCPUAdam`](https://deepspeed.readthedocs.io/en/latest/optimizers.html#adam-cpu) for a substantial speedup. Enabling `DeepSpeedCPUAdam` requires your system’s CUDA toolchain version to be the same as the one installed with PyTorch.
bitsandbytes 8-bit optimizers don’t seem to be compatible with DeepSpeed at the moment.
That's it! You don't need to add any additional parameters to your training command.
```bash
export MODEL_NAME="stable-diffusion-v1-5/stable-diffusion-v1-5"
export INSTANCE_DIR="./dog"
export OUTPUT_DIR="path_to_saved_model"
accelerate launch train_dreambooth.py \
--pretrained_model_name_or_path=$MODEL_NAME \
--instance_data_dir=$INSTANCE_DIR \
--output_dir=$OUTPUT_DIR \
--instance_prompt="a photo of sks dog" \
--resolution=512 \
--train_batch_size=1 \
--gradient_accumulation_steps=1 \
--learning_rate=5e-6 \
--lr_scheduler="constant" \
--lr_warmup_steps=0 \
--max_train_steps=400 \
--push_to_hub
```
```bash
export MODEL_NAME="duongna/stable-diffusion-v1-4-flax"
export INSTANCE_DIR="./dog"
export OUTPUT_DIR="path-to-save-model"
python train_dreambooth_flax.py \
--pretrained_model_name_or_path=$MODEL_NAME \
--instance_data_dir=$INSTANCE_DIR \
--output_dir=$OUTPUT_DIR \
--instance_prompt="a photo of sks dog" \
--resolution=512 \
--train_batch_size=1 \
--learning_rate=5e-6 \
--max_train_steps=400 \
--push_to_hub
```
Once training is complete, you can use your newly trained model for inference!
Can't wait to try your model for inference before training is complete? 🤭 Make sure you have the latest version of 🤗 Accelerate installed.
```py
from diffusers import DiffusionPipeline, UNet2DConditionModel
from transformers import CLIPTextModel
import torch
unet = UNet2DConditionModel.from_pretrained("path/to/model/checkpoint-100/unet")
# if you have trained with `--args.train_text_encoder` make sure to also load the text encoder
text_encoder = CLIPTextModel.from_pretrained("path/to/model/checkpoint-100/checkpoint-100/text_encoder")
pipeline = DiffusionPipeline.from_pretrained(
"stable-diffusion-v1-5/stable-diffusion-v1-5", unet=unet, text_encoder=text_encoder, dtype=torch.float16,
).to("cuda")
image = pipeline("A photo of sks dog in a bucket", num_inference_steps=50, guidance_scale=7.5).images[0]
image.save("dog-bucket.png")
```
```py
from diffusers import DiffusionPipeline
import torch
pipeline = DiffusionPipeline.from_pretrained("path_to_saved_model", torch_dtype=torch.float16, use_safetensors=True).to("cuda")
image = pipeline("A photo of sks dog in a bucket", num_inference_steps=50, guidance_scale=7.5).images[0]
image.save("dog-bucket.png")
```
```py
import jax
import numpy as np
from flax.jax_utils import replicate
from flax.training.common_utils import shard
from diffusers import FlaxStableDiffusionPipeline
pipeline, params = FlaxStableDiffusionPipeline.from_pretrained("path-to-your-trained-model", dtype=jax.numpy.bfloat16)
prompt = "A photo of sks dog in a bucket"
prng_seed = jax.random.PRNGKey(0)
num_inference_steps = 50
num_samples = jax.device_count()
prompt = num_samples * [prompt]
prompt_ids = pipeline.prepare_inputs(prompt)
# shard inputs and rng
params = replicate(params)
prng_seed = jax.random.split(prng_seed, jax.device_count())
prompt_ids = shard(prompt_ids)
images = pipeline(prompt_ids, params, prng_seed, num_inference_steps, jit=True).images
images = pipeline.numpy_to_pil(np.asarray(images.reshape((num_samples,) + images.shape[-3:])))
image.save("dog-bucket.png")
```
## LoRA
LoRA is a training technique for significantly reducing the number of trainable parameters. As a result, training is faster and it is easier to store the resulting weights because they are a lot smaller (~100MBs). Use the [train_dreambooth_lora.py](https://github.com/huggingface/diffusers/blob/main/examples/dreambooth/train_dreambooth_lora.py) script to train with LoRA.
The LoRA training script is discussed in more detail in the [LoRA training](lora) guide.
## Stable Diffusion XL
Stable Diffusion XL (SDXL) is a powerful text-to-image model that generates high-resolution images, and it adds a second text-encoder to its architecture. Use the [train_dreambooth_lora_sdxl.py](https://github.com/huggingface/diffusers/blob/main/examples/dreambooth/train_dreambooth_lora_sdxl.py) script to train a SDXL model with LoRA.
The SDXL training script is discussed in more detail in the [SDXL training](sdxl) guide.
## DeepFloyd IF
DeepFloyd IF is a cascading pixel diffusion model with three stages. The first stage generates a base image and the second and third stages progressively upscales the base image into a high-resolution 1024x1024 image. Use the [train_dreambooth_lora.py](https://github.com/huggingface/diffusers/blob/main/examples/dreambooth/train_dreambooth_lora.py) or [train_dreambooth.py](https://github.com/huggingface/diffusers/blob/main/examples/dreambooth/train_dreambooth.py) scripts to train a DeepFloyd IF model with LoRA or the full model.
DeepFloyd IF uses predicted variance, but the Diffusers training scripts uses predicted error so the trained DeepFloyd IF models are switched to a fixed variance schedule. The training scripts will update the scheduler config of the fully trained model for you. However, when you load the saved LoRA weights you must also update the pipeline's scheduler config.
```py
from diffusers import DiffusionPipeline
pipe = DiffusionPipeline.from_pretrained("DeepFloyd/IF-I-XL-v1.0", use_safetensors=True)
pipe.load_lora_weights("")
# Update scheduler config to fixed variance schedule
pipe.scheduler = pipe.scheduler.__class__.from_config(pipe.scheduler.config, variance_type="fixed_small")
```
The stage 2 model requires additional validation images to upscale. You can download and use a downsized version of the training images for this.
```py
from huggingface_hub import snapshot_download
local_dir = "./dog_downsized"
snapshot_download(
"diffusers/dog-example-downsized",
local_dir=local_dir,
repo_type="dataset",
ignore_patterns=".gitattributes",
)
```
The code samples below provide a brief overview of how to train a DeepFloyd IF model with a combination of DreamBooth and LoRA. Some important parameters to note are:
* `--resolution=64`, a much smaller resolution is required because DeepFloyd IF is a pixel diffusion model and to work on uncompressed pixels, the input images must be smaller
* `--pre_compute_text_embeddings`, compute the text embeddings ahead of time to save memory because the [T5Model](https://huggingface.co/docs/transformers/main/en/model_doc/t5#transformers.T5Model) can take up a lot of memory
* `--tokenizer_max_length=77`, you can use a longer default text length with T5 as the text encoder but the default model encoding procedure uses a shorter text length
* `--text_encoder_use_attention_mask`, to pass the attention mask to the text encoder
Training stage 1 of DeepFloyd IF with LoRA and DreamBooth requires ~28GB of memory.
```bash
export MODEL_NAME="DeepFloyd/IF-I-XL-v1.0"
export INSTANCE_DIR="dog"
export OUTPUT_DIR="dreambooth_dog_lora"
accelerate launch train_dreambooth_lora.py \
--report_to wandb \
--pretrained_model_name_or_path=$MODEL_NAME \
--instance_data_dir=$INSTANCE_DIR \
--output_dir=$OUTPUT_DIR \
--instance_prompt="a sks dog" \
--resolution=64 \
--train_batch_size=4 \
--gradient_accumulation_steps=1 \
--learning_rate=5e-6 \
--scale_lr \
--max_train_steps=1200 \
--validation_prompt="a sks dog" \
--validation_epochs=25 \
--checkpointing_steps=100 \
--pre_compute_text_embeddings \
--tokenizer_max_length=77 \
--text_encoder_use_attention_mask
```
For stage 2 of DeepFloyd IF with LoRA and DreamBooth, pay attention to these parameters:
* `--validation_images`, the images to upscale during validation
* `--class_labels_conditioning=timesteps`, to additionally conditional the UNet as needed in stage 2
* `--learning_rate=1e-6`, a lower learning rate is used compared to stage 1
* `--resolution=256`, the expected resolution for the upscaler
```bash
export MODEL_NAME="DeepFloyd/IF-II-L-v1.0"
export INSTANCE_DIR="dog"
export OUTPUT_DIR="dreambooth_dog_upscale"
export VALIDATION_IMAGES="dog_downsized/image_1.png dog_downsized/image_2.png dog_downsized/image_3.png dog_downsized/image_4.png"
python train_dreambooth_lora.py \
--report_to wandb \
--pretrained_model_name_or_path=$MODEL_NAME \
--instance_data_dir=$INSTANCE_DIR \
--output_dir=$OUTPUT_DIR \
--instance_prompt="a sks dog" \
--resolution=256 \
--train_batch_size=4 \
--gradient_accumulation_steps=1 \
--learning_rate=1e-6 \
--max_train_steps=2000 \
--validation_prompt="a sks dog" \
--validation_epochs=100 \
--checkpointing_steps=500 \
--pre_compute_text_embeddings \
--tokenizer_max_length=77 \
--text_encoder_use_attention_mask \
--validation_images $VALIDATION_IMAGES \
--class_labels_conditioning=timesteps
```
For stage 1 of DeepFloyd IF with DreamBooth, pay attention to these parameters:
* `--skip_save_text_encoder`, to skip saving the full T5 text encoder with the finetuned model
* `--use_8bit_adam`, to use 8-bit Adam optimizer to save memory due to the size of the optimizer state when training the full model
* `--learning_rate=1e-7`, a really low learning rate should be used for full model training otherwise the model quality is degraded (you can use a higher learning rate with a larger batch size)
Training with 8-bit Adam and a batch size of 4, the full model can be trained with ~48GB of memory.
```bash
export MODEL_NAME="DeepFloyd/IF-I-XL-v1.0"
export INSTANCE_DIR="dog"
export OUTPUT_DIR="dreambooth_if"
accelerate launch train_dreambooth.py \
--pretrained_model_name_or_path=$MODEL_NAME \
--instance_data_dir=$INSTANCE_DIR \
--output_dir=$OUTPUT_DIR \
--instance_prompt="a photo of sks dog" \
--resolution=64 \
--train_batch_size=4 \
--gradient_accumulation_steps=1 \
--learning_rate=1e-7 \
--max_train_steps=150 \
--validation_prompt "a photo of sks dog" \
--validation_steps 25 \
--text_encoder_use_attention_mask \
--tokenizer_max_length 77 \
--pre_compute_text_embeddings \
--use_8bit_adam \
--set_grads_to_none \
--skip_save_text_encoder \
--push_to_hub
```
For stage 2 of DeepFloyd IF with DreamBooth, pay attention to these parameters:
* `--learning_rate=5e-6`, use a lower learning rate with a smaller effective batch size
* `--resolution=256`, the expected resolution for the upscaler
* `--train_batch_size=2` and `--gradient_accumulation_steps=6`, to effectively train on images wiht faces requires larger batch sizes
```bash
export MODEL_NAME="DeepFloyd/IF-II-L-v1.0"
export INSTANCE_DIR="dog"
export OUTPUT_DIR="dreambooth_dog_upscale"
export VALIDATION_IMAGES="dog_downsized/image_1.png dog_downsized/image_2.png dog_downsized/image_3.png dog_downsized/image_4.png"
accelerate launch train_dreambooth.py \
--report_to wandb \
--pretrained_model_name_or_path=$MODEL_NAME \
--instance_data_dir=$INSTANCE_DIR \
--output_dir=$OUTPUT_DIR \
--instance_prompt="a sks dog" \
--resolution=256 \
--train_batch_size=2 \
--gradient_accumulation_steps=6 \
--learning_rate=5e-6 \
--max_train_steps=2000 \
--validation_prompt="a sks dog" \
--validation_steps=150 \
--checkpointing_steps=500 \
--pre_compute_text_embeddings \
--tokenizer_max_length=77 \
--text_encoder_use_attention_mask \
--validation_images $VALIDATION_IMAGES \
--class_labels_conditioning timesteps \
--push_to_hub
```
### Training tips
Training the DeepFloyd IF model can be challenging, but here are some tips that we've found helpful:
- LoRA is sufficient for training the stage 1 model because the model's low resolution makes representing finer details difficult regardless.
- For common or simple objects, you don't necessarily need to finetune the upscaler. Make sure the prompt passed to the upscaler is adjusted to remove the new token from the instance prompt. For example, if your stage 1 prompt is "a sks dog" then your stage 2 prompt should be "a dog".
- For finer details like faces, fully training the stage 2 upscaler is better than training the stage 2 model with LoRA. It also helps to use lower learning rates with larger batch sizes.
- Lower learning rates should be used to train the stage 2 model.
- The `DDPMScheduler` works better than the DPMSolver used in the training scripts.
## Next steps
Congratulations on training your DreamBooth model! To learn more about how to use your new model, the following guide may be helpful:
- Learn how to [load a DreamBooth](../using-diffusers/loading_adapters) model for inference if you trained your model with LoRA.
# Adapt a model to a new task
Many diffusion systems share the same components, allowing you to adapt a pretrained model for one task to an entirely different task.
This guide will show you how to adapt a pretrained text-to-image model for inpainting by initializing and modifying the architecture of a pretrained `UNet2DConditionModel`.
## Configure UNet2DConditionModel parameters
A `UNet2DConditionModel` by default accepts 4 channels in the [input sample](https://huggingface.co/docs/diffusers/v0.16.0/en/api/models#diffusers.UNet2DConditionModel.in_channels). For example, load a pretrained text-to-image model like [`stable-diffusion-v1-5/stable-diffusion-v1-5`](https://huggingface.co/stable-diffusion-v1-5/stable-diffusion-v1-5) and take a look at the number of `in_channels`:
```py
from diffusers import StableDiffusionPipeline
pipeline = StableDiffusionPipeline.from_pretrained("stable-diffusion-v1-5/stable-diffusion-v1-5", use_safetensors=True)
pipeline.unet.config["in_channels"]
4
```
Inpainting requires 9 channels in the input sample. You can check this value in a pretrained inpainting model like [`runwayml/stable-diffusion-inpainting`](https://huggingface.co/runwayml/stable-diffusion-inpainting):
```py
from diffusers import StableDiffusionPipeline
pipeline = StableDiffusionPipeline.from_pretrained("runwayml/stable-diffusion-inpainting", use_safetensors=True)
pipeline.unet.config["in_channels"]
9
```
To adapt your text-to-image model for inpainting, you'll need to change the number of `in_channels` from 4 to 9.
Initialize a `UNet2DConditionModel` with the pretrained text-to-image model weights, and change `in_channels` to 9. Changing the number of `in_channels` means you need to set `ignore_mismatched_sizes=True` and `low_cpu_mem_usage=False` to avoid a size mismatch error because the shape is different now.
```py
from diffusers import UNet2DConditionModel
model_id = "stable-diffusion-v1-5/stable-diffusion-v1-5"
unet = UNet2DConditionModel.from_pretrained(
model_id,
subfolder="unet",
in_channels=9,
low_cpu_mem_usage=False,
ignore_mismatched_sizes=True,
use_safetensors=True,
)
```
The pretrained weights of the other components from the text-to-image model are initialized from their checkpoints, but the input channel weights (`conv_in.weight`) of the `unet` are randomly initialized. It is important to finetune the model for inpainting because otherwise the model returns noise.
# AutoPipeline
Diffusers provides many pipelines for basic tasks like generating images, videos, audio, and inpainting. On top of these, there are specialized pipelines for adapters and features like upscaling, super-resolution, and more. Different pipeline classes can even use the same checkpoint because they share the same pretrained model! With so many different pipelines, it can be overwhelming to know which pipeline class to use.
The [AutoPipeline](../api/pipelines/auto_pipeline) class is designed to simplify the variety of pipelines in Diffusers. It is a generic *task-first* pipeline that lets you focus on a task (`AutoPipelineForText2Image`, `AutoPipelineForImage2Image`, and `AutoPipelineForInpainting`) without needing to know the specific pipeline class. The [AutoPipeline](../api/pipelines/auto_pipeline) automatically detects the correct pipeline class to use.
For example, let's use the [dreamlike-art/dreamlike-photoreal-2.0](https://hf.co/dreamlike-art/dreamlike-photoreal-2.0) checkpoint.
Under the hood, [AutoPipeline](../api/pipelines/auto_pipeline):
1. Detects a `"stable-diffusion"` class from the [model_index.json](https://hf.co/dreamlike-art/dreamlike-photoreal-2.0/blob/main/model_index.json) file.
2. Depending on the task you're interested in, it loads the `StableDiffusionPipeline`, `StableDiffusionImg2ImgPipeline`, or `StableDiffusionInpaintPipeline`. Any parameter (`strength`, `num_inference_steps`, etc.) you would pass to these specific pipelines can also be passed to the [AutoPipeline](../api/pipelines/auto_pipeline).
```py
from diffusers import AutoPipelineForText2Image
import torch
pipe_txt2img = AutoPipelineForText2Image.from_pretrained(
"dreamlike-art/dreamlike-photoreal-2.0", torch_dtype=torch.float16, use_safetensors=True
).to("cuda")
prompt = "cinematic photo of Godzilla eating sushi with a cat in a izakaya, 35mm photograph, film, professional, 4k, highly detailed"
generator = torch.Generator(device="cpu").manual_seed(37)
image = pipe_txt2img(prompt, generator=generator).images[0]
image
```
```py
from diffusers import AutoPipelineForImage2Image
from diffusers.utils import load_image
import torch
pipe_img2img = AutoPipelineForImage2Image.from_pretrained(
"dreamlike-art/dreamlike-photoreal-2.0", torch_dtype=torch.float16, use_safetensors=True
).to("cuda")
init_image = load_image("https://huggingface.co/datasets/huggingface/documentation-images/resolve/main/diffusers/autopipeline-text2img.png")
prompt = "cinematic photo of Godzilla eating burgers with a cat in a fast food restaurant, 35mm photograph, film, professional, 4k, highly detailed"
generator = torch.Generator(device="cpu").manual_seed(53)
image = pipe_img2img(prompt, image=init_image, generator=generator).images[0]
image
```
Notice how the [dreamlike-art/dreamlike-photoreal-2.0](https://hf.co/dreamlike-art/dreamlike-photoreal-2.0) checkpoint is used for both text-to-image and image-to-image tasks? To save memory and avoid loading the checkpoint twice, use the `from_pipe()` method.
```py
pipe_img2img = AutoPipelineForImage2Image.from_pipe(pipe_txt2img).to("cuda")
image = pipeline(prompt, image=init_image, generator=generator).images[0]
image
```
You can learn more about the `from_pipe()` method in the [Reuse a pipeline](../using-diffusers/loading#reuse-a-pipeline) guide.
```py
from diffusers import AutoPipelineForInpainting
from diffusers.utils import load_image
import torch
pipeline = AutoPipelineForInpainting.from_pretrained(
"stabilityai/stable-diffusion-xl-base-1.0", torch_dtype=torch.float16, use_safetensors=True
).to("cuda")
init_image = load_image("https://huggingface.co/datasets/huggingface/documentation-images/resolve/main/diffusers/autopipeline-img2img.png")
mask_image = load_image("https://huggingface.co/datasets/huggingface/documentation-images/resolve/main/diffusers/autopipeline-mask.png")
prompt = "cinematic photo of a owl, 35mm photograph, film, professional, 4k, highly detailed"
generator = torch.Generator(device="cpu").manual_seed(38)
image = pipeline(prompt, image=init_image, mask_image=mask_image, generator=generator, strength=0.4).images[0]
image
```
## Unsupported checkpoints
The [AutoPipeline](../api/pipelines/auto_pipeline) supports [Stable Diffusion](../api/pipelines/stable_diffusion/overview), [Stable Diffusion XL](../api/pipelines/stable_diffusion/stable_diffusion_xl), [ControlNet](../api/pipelines/controlnet), [Kandinsky 2.1](../api/pipelines/kandinsky.md), [Kandinsky 2.2](../api/pipelines/kandinsky_v22), and [DeepFloyd IF](../api/pipelines/deepfloyd_if) checkpoints.
If you try to load an unsupported checkpoint, you'll get an error.
```py
from diffusers import AutoPipelineForImage2Image
import torch
pipeline = AutoPipelineForImage2Image.from_pretrained(
"openai/shap-e-img2img", torch_dtype=torch.float16, use_safetensors=True
)
"ValueError: AutoPipeline can't find a pipeline linked to ShapEImg2ImgPipeline for None"
```
# Working with big models
A modern diffusion model, like [Stable Diffusion XL (SDXL)](../using-diffusers/sdxl), is not just a single model, but a collection of multiple models. SDXL has four different model-level components:
* A variational autoencoder (VAE)
* Two text encoders
* A UNet for denoising
Usually, the text encoders and the denoiser are much larger compared to the VAE.
As models get bigger and better, it’s possible your model is so big that even a single copy won’t fit in memory. But that doesn’t mean it can’t be loaded. If you have more than one GPU, there is more memory available to store your model. In this case, it’s better to split your model checkpoint into several smaller *checkpoint shards*.
When a text encoder checkpoint has multiple shards, like [T5-xxl for SD3](https://huggingface.co/stabilityai/stable-diffusion-3-medium-diffusers/tree/main/text_encoder_3), it is automatically handled by the [Transformers](https://huggingface.co/docs/transformers/index) library as it is a required dependency of Diffusers when using the `StableDiffusion3Pipeline`. More specifically, Transformers will automatically handle the loading of multiple shards within the requested model class and get it ready so that inference can be performed.
The denoiser checkpoint can also have multiple shards and supports inference thanks to the [Accelerate](https://huggingface.co/docs/accelerate/index) library.
> [!TIP]
> Refer to the [Handling big models for inference](https://huggingface.co/docs/accelerate/main/en/concept_guides/big_model_inference) guide for general guidance when working with big models that are hard to fit into memory.
For example, let's save a sharded checkpoint for the [SDXL UNet](https://huggingface.co/stabilityai/stable-diffusion-xl-base-1.0/tree/main/unet):
```python
from diffusers import UNet2DConditionModel
unet = UNet2DConditionModel.from_pretrained(
"stabilityai/stable-diffusion-xl-base-1.0", subfolder="unet"
)
unet.save_pretrained("sdxl-unet-sharded", max_shard_size="5GB")
```
The size of the fp32 variant of the SDXL UNet checkpoint is ~10.4GB. Set the `max_shard_size` parameter to 5GB to create 3 shards. After saving, you can load them in `StableDiffusionXLPipeline`:
```python
from diffusers import UNet2DConditionModel, StableDiffusionXLPipeline
import torch
unet = UNet2DConditionModel.from_pretrained(
"sayakpaul/sdxl-unet-sharded", torch_dtype=torch.float16
)
pipeline = StableDiffusionXLPipeline.from_pretrained(
"stabilityai/stable-diffusion-xl-base-1.0", unet=unet, torch_dtype=torch.float16
).to("cuda")
image = pipeline("a cute dog running on the grass", num_inference_steps=30).images[0]
image.save("dog.png")
```
If placing all the model-level components on the GPU at once is not feasible, use `enable_model_cpu_offload()` to help you:
```diff
- pipeline.to("cuda")
+ pipeline.enable_model_cpu_offload()
```
In general, we recommend sharding when a checkpoint is more than 5GB (in fp32).
## Device placement
On distributed setups, you can run inference across multiple GPUs with Accelerate.
> [!WARNING]
> This feature is experimental and its APIs might change in the future.
With Accelerate, you can use the `device_map` to determine how to distribute the models of a pipeline across multiple devices. This is useful in situations where you have more than one GPU.
For example, if you have two 8GB GPUs, then using `enable_model_cpu_offload()` may not work so well because:
* it only works on a single GPU
* a single model might not fit on a single GPU (`enable_sequential_cpu_offload()` might work but it will be extremely slow and it is also limited to a single GPU)
To make use of both GPUs, you can use the "balanced" device placement strategy which splits the models across all available GPUs.
> [!WARNING]
> Only the "balanced" strategy is supported at the moment, and we plan to support additional mapping strategies in the future.
```diff
from diffusers import DiffusionPipeline
import torch
pipeline = DiffusionPipeline.from_pretrained(
- "stable-diffusion-v1-5/stable-diffusion-v1-5", torch_dtype=torch.float16, use_safetensors=True,
+ "stable-diffusion-v1-5/stable-diffusion-v1-5", torch_dtype=torch.float16, use_safetensors=True, device_map="balanced"
)
image = pipeline("a dog").images[0]
image
```
You can also pass a dictionary to enforce the maximum GPU memory that can be used on each device:
```diff
from diffusers import DiffusionPipeline
import torch
max_memory = {0:"1GB", 1:"1GB"}
pipeline = DiffusionPipeline.from_pretrained(
"stable-diffusion-v1-5/stable-diffusion-v1-5",
torch_dtype=torch.float16,
use_safetensors=True,
device_map="balanced",
+ max_memory=max_memory
)
image = pipeline("a dog").images[0]
image
```
If a device is not present in `max_memory`, then it will be completely ignored and will not participate in the device placement.
By default, Diffusers uses the maximum memory of all devices. If the models don't fit on the GPUs, they are offloaded to the CPU. If the CPU doesn't have enough memory, then you might see an error. In that case, you could defer to using `enable_sequential_cpu_offload()` and `enable_model_cpu_offload()`.
Call `reset_device_map()` to reset the `device_map` of a pipeline. This is also necessary if you want to use methods like `to()`, `enable_sequential_cpu_offload()`, and `enable_model_cpu_offload()` on a pipeline that was device-mapped.
```py
pipeline.reset_device_map()
```
Once a pipeline has been device-mapped, you can also access its device map via `hf_device_map`:
```py
print(pipeline.hf_device_map)
```
An example device map would look like so:
```bash
{'unet': 1, 'vae': 1, 'safety_checker': 0, 'text_encoder': 0}
```
# Accelerate inference of text-to-image diffusion models
Diffusion models are slower than their GAN counterparts because of the iterative and sequential reverse diffusion process. There are several techniques that can address this limitation such as progressive timestep distillation ([LCM LoRA](../using-diffusers/inference_with_lcm_lora)), model compression ([SSD-1B](https://huggingface.co/segmind/SSD-1B)), and reusing adjacent features of the denoiser ([DeepCache](../optimization/deepcache)).
However, you don't necessarily need to use these techniques to speed up inference. With PyTorch 2 alone, you can accelerate the inference latency of text-to-image diffusion pipelines by up to 3x. This tutorial will show you how to progressively apply the optimizations found in PyTorch 2 to reduce inference latency. You'll use the [Stable Diffusion XL (SDXL)](../using-diffusers/sdxl) pipeline in this tutorial, but these techniques are applicable to other text-to-image diffusion pipelines too.
Make sure you're using the latest version of Diffusers:
```bash
pip install -U diffusers
```
Then upgrade the other required libraries too:
```bash
pip install -U transformers accelerate peft
```
Install [PyTorch nightly](https://pytorch.org/) to benefit from the latest and fastest kernels:
```bash
pip3 install --pre torch --index-url https://download.pytorch.org/whl/nightly/cu121
```
> [!TIP]
> The results reported below are from a 80GB 400W A100 with its clock rate set to the maximum.
> If you're interested in the full benchmarking code, take a look at [huggingface/diffusion-fast](https://github.com/huggingface/diffusion-fast).
## Baseline
Let's start with a baseline. Disable reduced precision and the [`scaled_dot_product_attention` (SDPA)](../optimization/torch2.0#scaled-dot-product-attention) function which is automatically used by Diffusers:
```python
from diffusers import StableDiffusionXLPipeline
# Load the pipeline in full-precision and place its model components on CUDA.
pipe = StableDiffusionXLPipeline.from_pretrained(
"stabilityai/stable-diffusion-xl-base-1.0"
).to("cuda")
# Run the attention ops without SDPA.
pipe.unet.set_default_attn_processor()
pipe.vae.set_default_attn_processor()
prompt = "Astronaut in a jungle, cold color palette, muted colors, detailed, 8k"
image = pipe(prompt, num_inference_steps=30).images[0]
```
This default setup takes 7.36 seconds.
## bfloat16
Enable the first optimization, reduced precision or more specifically bfloat16. There are several benefits of using reduced precision:
* Using a reduced numerical precision (such as float16 or bfloat16) for inference doesn’t affect the generation quality but significantly improves latency.
* The benefits of using bfloat16 compared to float16 are hardware dependent, but modern GPUs tend to favor bfloat16.
* bfloat16 is much more resilient when used with quantization compared to float16, but more recent versions of the quantization library ([torchao](https://github.com/pytorch-labs/ao)) we used don't have numerical issues with float16.
```python
from diffusers import StableDiffusionXLPipeline
import torch
pipe = StableDiffusionXLPipeline.from_pretrained(
"stabilityai/stable-diffusion-xl-base-1.0", torch_dtype=torch.bfloat16
).to("cuda")
# Run the attention ops without SDPA.
pipe.unet.set_default_attn_processor()
pipe.vae.set_default_attn_processor()
prompt = "Astronaut in a jungle, cold color palette, muted colors, detailed, 8k"
image = pipe(prompt, num_inference_steps=30).images[0]
```
bfloat16 reduces the latency from 7.36 seconds to 4.63 seconds.
In our later experiments with float16, recent versions of torchao do not incur numerical problems from float16.
Take a look at the [Speed up inference](../optimization/fp16) guide to learn more about running inference with reduced precision.
## SDPA
Attention blocks are intensive to run. But with PyTorch's [`scaled_dot_product_attention`](../optimization/torch2.0#scaled-dot-product-attention) function, it is a lot more efficient. This function is used by default in Diffusers so you don't need to make any changes to the code.
```python
from diffusers import StableDiffusionXLPipeline
import torch
pipe = StableDiffusionXLPipeline.from_pretrained(
"stabilityai/stable-diffusion-xl-base-1.0", torch_dtype=torch.bfloat16
).to("cuda")
prompt = "Astronaut in a jungle, cold color palette, muted colors, detailed, 8k"
image = pipe(prompt, num_inference_steps=30).images[0]
```
Scaled dot product attention improves the latency from 4.63 seconds to 3.31 seconds.
## torch.compile
PyTorch 2 includes `torch.compile` which uses fast and optimized kernels. In Diffusers, the UNet and VAE are usually compiled because these are the most compute-intensive modules. First, configure a few compiler flags (refer to the [full list](https://github.com/pytorch/pytorch/blob/main/torch/_inductor/config.py) for more options):
```python
from diffusers import StableDiffusionXLPipeline
import torch
torch._inductor.config.conv_1x1_as_mm = True
torch._inductor.config.coordinate_descent_tuning = True
torch._inductor.config.epilogue_fusion = False
torch._inductor.config.coordinate_descent_check_all_directions = True
```
It is also important to change the UNet and VAE's memory layout to "channels_last" when compiling them to ensure maximum speed.
```python
pipe.unet.to(memory_format=torch.channels_last)
pipe.vae.to(memory_format=torch.channels_last)
```
Now compile and perform inference:
```python
# Compile the UNet and VAE.
pipe.unet = torch.compile(pipe.unet, mode="max-autotune", fullgraph=True)
pipe.vae.decode = torch.compile(pipe.vae.decode, mode="max-autotune", fullgraph=True)
prompt = "Astronaut in a jungle, cold color palette, muted colors, detailed, 8k"
# First call to `pipe` is slow, subsequent ones are faster.
image = pipe(prompt, num_inference_steps=30).images[0]
```
`torch.compile` offers different backends and modes. For maximum inference speed, use "max-autotune" for the inductor backend. “max-autotune” uses CUDA graphs and optimizes the compilation graph specifically for latency. CUDA graphs greatly reduces the overhead of launching GPU operations by using a mechanism to launch multiple GPU operations through a single CPU operation.
Using SDPA attention and compiling both the UNet and VAE cuts the latency from 3.31 seconds to 2.54 seconds.
> [!TIP]
> From PyTorch 2.3.1, you can control the caching behavior of `torch.compile()`. This is particularly beneficial for compilation modes like `"max-autotune"` which performs a grid-search over several compilation flags to find the optimal configuration. Learn more in the [Compile Time Caching in torch.compile](https://pytorch.org/tutorials/recipes/torch_compile_caching_tutorial.html) tutorial.
### Prevent graph breaks
Specifying `fullgraph=True` ensures there are no graph breaks in the underlying model to take full advantage of `torch.compile` without any performance degradation. For the UNet and VAE, this means changing how you access the return variables.
```diff
- latents = unet(
- latents, timestep=timestep, encoder_hidden_states=prompt_embeds
-).sample
+ latents = unet(
+ latents, timestep=timestep, encoder_hidden_states=prompt_embeds, return_dict=False
+)[0]
```
### Remove GPU sync after compilation
During the iterative reverse diffusion process, the `step()` function is [called](https://github.com/huggingface/diffusers/blob/1d686bac8146037e97f3fd8c56e4063230f71751/src/diffusers/pipelines/stable_diffusion_xl/pipeline_stable_diffusion_xl.py#L1228) on the scheduler each time after the denoiser predicts the less noisy latent embeddings. Inside `step()`, the `sigmas` variable is [indexed](https://github.com/huggingface/diffusers/blob/1d686bac8146037e97f3fd8c56e4063230f71751/src/diffusers/schedulers/scheduling_euler_discrete.py#L476) which when placed on the GPU, causes a communication sync between the CPU and GPU. This introduces latency and it becomes more evident when the denoiser has already been compiled.
But if the `sigmas` array always [stays on the CPU](https://github.com/huggingface/diffusers/blob/35a969d297cba69110d175ee79c59312b9f49e1e/src/diffusers/schedulers/scheduling_euler_discrete.py#L240), the CPU and GPU sync doesn’t occur and you don't get any latency. In general, any CPU and GPU communication sync should be none or be kept to a bare minimum because it can impact inference latency.
## Combine the attention block's projection matrices
The UNet and VAE in SDXL use Transformer-like blocks which consists of attention blocks and feed-forward blocks.
In an attention block, the input is projected into three sub-spaces using three different projection matrices – Q, K, and V. These projections are performed separately on the input. But we can horizontally combine the projection matrices into a single matrix and perform the projection in one step. This increases the size of the matrix multiplications of the input projections and improves the impact of quantization.
You can combine the projection matrices with just a single line of code:
```python
pipe.fuse_qkv_projections()
```
This provides a minor improvement from 2.54 seconds to 2.52 seconds.
Support for `fuse_qkv_projections()` is limited and experimental. It's not available for many non-Stable Diffusion pipelines such as [Kandinsky](../using-diffusers/kandinsky). You can refer to this [PR](https://github.com/huggingface/diffusers/pull/6179) to get an idea about how to enable this for the other pipelines.
## Dynamic quantization
You can also use the ultra-lightweight PyTorch quantization library, [torchao](https://github.com/pytorch-labs/ao) (commit SHA `54bcd5a10d0abbe7b0c045052029257099f83fd9`), to apply [dynamic int8 quantization](https://pytorch.org/tutorials/recipes/recipes/dynamic_quantization.html) to the UNet and VAE. Quantization adds additional conversion overhead to the model that is hopefully made up for by faster matmuls (dynamic quantization). If the matmuls are too small, these techniques may degrade performance.
First, configure all the compiler tags:
```python
from diffusers import StableDiffusionXLPipeline
import torch
# Notice the two new flags at the end.
torch._inductor.config.conv_1x1_as_mm = True
torch._inductor.config.coordinate_descent_tuning = True
torch._inductor.config.epilogue_fusion = False
torch._inductor.config.coordinate_descent_check_all_directions = True
torch._inductor.config.force_fuse_int_mm_with_mul = True
torch._inductor.config.use_mixed_mm = True
```
Certain linear layers in the UNet and VAE don’t benefit from dynamic int8 quantization. You can filter out those layers with the [`dynamic_quant_filter_fn`](https://github.com/huggingface/diffusion-fast/blob/0f169640b1db106fe6a479f78c1ed3bfaeba3386/utils/pipeline_utils.py#L16) shown below.
```python
def dynamic_quant_filter_fn(mod, *args):
return (
isinstance(mod, torch.nn.Linear)
and mod.in_features > 16
and (mod.in_features, mod.out_features)
not in [
(1280, 640),
(1920, 1280),
(1920, 640),
(2048, 1280),
(2048, 2560),
(2560, 1280),
(256, 128),
(2816, 1280),
(320, 640),
(512, 1536),
(512, 256),
(512, 512),
(640, 1280),
(640, 1920),
(640, 320),
(640, 5120),
(640, 640),
(960, 320),
(960, 640),
]
)
def conv_filter_fn(mod, *args):
return (
isinstance(mod, torch.nn.Conv2d) and mod.kernel_size == (1, 1) and 128 in [mod.in_channels, mod.out_channels]
)
```
Finally, apply all the optimizations discussed so far:
```python
# SDPA + bfloat16.
pipe = StableDiffusionXLPipeline.from_pretrained(
"stabilityai/stable-diffusion-xl-base-1.0", torch_dtype=torch.bfloat16
).to("cuda")
# Combine attention projection matrices.
pipe.fuse_qkv_projections()
# Change the memory layout.
pipe.unet.to(memory_format=torch.channels_last)
pipe.vae.to(memory_format=torch.channels_last)
```
Since dynamic quantization is only limited to the linear layers, convert the appropriate pointwise convolution layers into linear layers to maximize its benefit.
```python
from torchao import swap_conv2d_1x1_to_linear
swap_conv2d_1x1_to_linear(pipe.unet, conv_filter_fn)
swap_conv2d_1x1_to_linear(pipe.vae, conv_filter_fn)
```
Apply dynamic quantization:
```python
from torchao import apply_dynamic_quant
apply_dynamic_quant(pipe.unet, dynamic_quant_filter_fn)
apply_dynamic_quant(pipe.vae, dynamic_quant_filter_fn)
```
Finally, compile and perform inference:
```python
pipe.unet = torch.compile(pipe.unet, mode="max-autotune", fullgraph=True)
pipe.vae.decode = torch.compile(pipe.vae.decode, mode="max-autotune", fullgraph=True)
prompt = "Astronaut in a jungle, cold color palette, muted colors, detailed, 8k"
image = pipe(prompt, num_inference_steps=30).images[0]
```
Applying dynamic quantization improves the latency from 2.52 seconds to 2.43 seconds.
# Load LoRAs for inference
There are many adapter types (with [LoRAs](https://huggingface.co/docs/peft/conceptual_guides/adapter#low-rank-adaptation-lora) being the most popular) trained in different styles to achieve different effects. You can even combine multiple adapters to create new and unique images.
In this tutorial, you'll learn how to easily load and manage adapters for inference with the 🤗 [PEFT](https://huggingface.co/docs/peft/index) integration in 🤗 Diffusers. You'll use LoRA as the main adapter technique, so you'll see the terms LoRA and adapter used interchangeably.
Let's first install all the required libraries.
```bash
!pip install -q transformers accelerate peft diffusers
```
Now, load a pipeline with a [Stable Diffusion XL (SDXL)](../api/pipelines/stable_diffusion/stable_diffusion_xl) checkpoint:
```python
from diffusers import DiffusionPipeline
import torch
pipe_id = "stabilityai/stable-diffusion-xl-base-1.0"
pipe = DiffusionPipeline.from_pretrained(pipe_id, torch_dtype=torch.float16).to("cuda")
```
Next, load a [CiroN2022/toy-face](https://huggingface.co/CiroN2022/toy-face) adapter with the `load_lora_weights()` method. With the 🤗 PEFT integration, you can assign a specific `adapter_name` to the checkpoint, which lets you easily switch between different LoRA checkpoints. Let's call this adapter `"toy"`.
```python
pipe.load_lora_weights("CiroN2022/toy-face", weight_name="toy_face_sdxl.safetensors", adapter_name="toy")
```
Make sure to include the token `toy_face` in the prompt and then you can perform inference:
```python
prompt = "toy_face of a hacker with a hoodie"
lora_scale = 0.9
image = pipe(
prompt, num_inference_steps=30, cross_attention_kwargs={"scale": lora_scale}, generator=torch.manual_seed(0)
).images[0]
image
```
![toy-face](https://huggingface.co/datasets/huggingface/documentation-images/resolve/main/diffusers/peft_integration/diffusers_peft_lora_inference_8_1.png)
With the `adapter_name` parameter, it is really easy to use another adapter for inference! Load the [nerijs/pixel-art-xl](https://huggingface.co/nerijs/pixel-art-xl) adapter that has been fine-tuned to generate pixel art images and call it `"pixel"`.
The pipeline automatically sets the first loaded adapter (`"toy"`) as the active adapter, but you can activate the `"pixel"` adapter with the `~diffusers.loaders.UNet2DConditionLoadersMixin.set_adapters` method:
```python
pipe.load_lora_weights("nerijs/pixel-art-xl", weight_name="pixel-art-xl.safetensors", adapter_name="pixel")
pipe.set_adapters("pixel")
```
Make sure you include the token `pixel art` in your prompt to generate a pixel art image:
```python
prompt = "a hacker with a hoodie, pixel art"
image = pipe(
prompt, num_inference_steps=30, cross_attention_kwargs={"scale": lora_scale}, generator=torch.manual_seed(0)
).images[0]
image
```
![pixel-art](https://huggingface.co/datasets/huggingface/documentation-images/resolve/main/diffusers/peft_integration/diffusers_peft_lora_inference_12_1.png)
By default, if the most up-to-date versions of PEFT and Transformers are detected, `low_cpu_mem_usage` is set to `True` to speed up the loading time of LoRA checkpoints.
## Merge adapters
You can also merge different adapter checkpoints for inference to blend their styles together.
Once again, use the `~diffusers.loaders.UNet2DConditionLoadersMixin.set_adapters` method to activate the `pixel` and `toy` adapters and specify the weights for how they should be merged.
```python
pipe.set_adapters(["pixel", "toy"], adapter_weights=[0.5, 1.0])
```
LoRA checkpoints in the diffusion community are almost always obtained with [DreamBooth](https://huggingface.co/docs/diffusers/main/en/training/dreambooth). DreamBooth training often relies on "trigger" words in the input text prompts in order for the generation results to look as expected. When you combine multiple LoRA checkpoints, it's important to ensure the trigger words for the corresponding LoRA checkpoints are present in the input text prompts.
Remember to use the trigger words for [CiroN2022/toy-face](https://hf.co/CiroN2022/toy-face) and [nerijs/pixel-art-xl](https://hf.co/nerijs/pixel-art-xl) (these are found in their repositories) in the prompt to generate an image.
```python
prompt = "toy_face of a hacker with a hoodie, pixel art"
image = pipe(
prompt, num_inference_steps=30, cross_attention_kwargs={"scale": 1.0}, generator=torch.manual_seed(0)
).images[0]
image
```
![toy-face-pixel-art](https://huggingface.co/datasets/huggingface/documentation-images/resolve/main/diffusers/peft_integration/diffusers_peft_lora_inference_16_1.png)
Impressive! As you can see, the model generated an image that mixed the characteristics of both adapters.
> [!TIP]
> Through its PEFT integration, Diffusers also offers more efficient merging methods which you can learn about in the [Merge LoRAs](../using-diffusers/merge_loras) guide!
To return to only using one adapter, use the `~diffusers.loaders.UNet2DConditionLoadersMixin.set_adapters` method to activate the `"toy"` adapter:
```python
pipe.set_adapters("toy")
prompt = "toy_face of a hacker with a hoodie"
lora_scale = 0.9
image = pipe(
prompt, num_inference_steps=30, cross_attention_kwargs={"scale": lora_scale}, generator=torch.manual_seed(0)
).images[0]
image
```
Or to disable all adapters entirely, use the `~diffusers.loaders.UNet2DConditionLoadersMixin.disable_lora` method to return the base model.
```python
pipe.disable_lora()
prompt = "toy_face of a hacker with a hoodie"
image = pipe(prompt, num_inference_steps=30, generator=torch.manual_seed(0)).images[0]
image
```
![no-lora](https://huggingface.co/datasets/huggingface/documentation-images/resolve/main/diffusers/peft_integration/diffusers_peft_lora_inference_20_1.png)
### Customize adapters strength
For even more customization, you can control how strongly the adapter affects each part of the pipeline. For this, pass a dictionary with the control strengths (called "scales") to `~diffusers.loaders.UNet2DConditionLoadersMixin.set_adapters`.
For example, here's how you can turn on the adapter for the `down` parts, but turn it off for the `mid` and `up` parts:
```python
pipe.enable_lora() # enable lora again, after we disabled it above
prompt = "toy_face of a hacker with a hoodie, pixel art"
adapter_weight_scales = { "unet": { "down": 1, "mid": 0, "up": 0} }
pipe.set_adapters("pixel", adapter_weight_scales)
image = pipe(prompt, num_inference_steps=30, generator=torch.manual_seed(0)).images[0]
image
```
![block-lora-text-and-down](https://huggingface.co/datasets/huggingface/documentation-images/resolve/main/diffusers/peft_integration/diffusers_peft_lora_inference_block_down.png)
Let's see how turning off the `down` part and turning on the `mid` and `up` part respectively changes the image.
```python
adapter_weight_scales = { "unet": { "down": 0, "mid": 1, "up": 0} }
pipe.set_adapters("pixel", adapter_weight_scales)
image = pipe(prompt, num_inference_steps=30, generator=torch.manual_seed(0)).images[0]
image
```
![block-lora-text-and-mid](https://huggingface.co/datasets/huggingface/documentation-images/resolve/main/diffusers/peft_integration/diffusers_peft_lora_inference_block_mid.png)
```python
adapter_weight_scales = { "unet": { "down": 0, "mid": 0, "up": 1} }
pipe.set_adapters("pixel", adapter_weight_scales)
image = pipe(prompt, num_inference_steps=30, generator=torch.manual_seed(0)).images[0]
image
```
![block-lora-text-and-up](https://huggingface.co/datasets/huggingface/documentation-images/resolve/main/diffusers/peft_integration/diffusers_peft_lora_inference_block_up.png)
Looks cool!
This is a really powerful feature. You can use it to control the adapter strengths down to per-transformer level. And you can even use it for multiple adapters.
```python
adapter_weight_scales_toy = 0.5
adapter_weight_scales_pixel = {
"unet": {
"down": 0.9, # all transformers in the down-part will use scale 0.9
# "mid" # because, in this example, "mid" is not given, all transformers in the mid part will use the default scale 1.0
"up": {
"block_0": 0.6, # all 3 transformers in the 0th block in the up-part will use scale 0.6
"block_1": [0.4, 0.8, 1.0], # the 3 transformers in the 1st block in the up-part will use scales 0.4, 0.8 and 1.0 respectively
}
}
}
pipe.set_adapters(["toy", "pixel"], [adapter_weight_scales_toy, adapter_weight_scales_pixel])
image = pipe(prompt, num_inference_steps=30, generator=torch.manual_seed(0)).images[0]
image
```
![block-lora-mixed](https://huggingface.co/datasets/huggingface/documentation-images/resolve/main/diffusers/peft_integration/diffusers_peft_lora_inference_block_mixed.png)
## Manage active adapters
You have attached multiple adapters in this tutorial, and if you're feeling a bit lost on what adapters have been attached to the pipeline's components, use the `get_active_adapters()` method to check the list of active adapters:
```py
active_adapters = pipe.get_active_adapters()
active_adapters
["toy", "pixel"]
```
You can also get the active adapters of each pipeline component with `get_list_adapters()`:
```py
list_adapters_component_wise = pipe.get_list_adapters()
list_adapters_component_wise
{"text_encoder": ["toy", "pixel"], "unet": ["toy", "pixel"], "text_encoder_2": ["toy", "pixel"]}
```
# Overview
Welcome to 🧨 Diffusers! If you're new to diffusion models and generative AI, and want to learn more, then you've come to the right place. These beginner-friendly tutorials are designed to provide a gentle introduction to diffusion models and help you understand the library fundamentals - the core components and how 🧨 Diffusers is meant to be used.
You'll learn how to use a pipeline for inference to rapidly generate things, and then deconstruct that pipeline to really understand how to use the library as a modular toolbox for building your own diffusion systems. In the next lesson, you'll learn how to train your own diffusion model to generate what you want.
After completing the tutorials, you'll have gained the necessary skills to start exploring the library on your own and see how to use it for your own projects and applications.
Feel free to join our community on [Discord](https://discord.com/invite/JfAtkvEtRb) or the [forums](https://discuss.huggingface.co/c/discussion-related-to-httpsgithubcomhuggingfacediffusers/63) to connect and collaborate with other users and developers!
Let's start diffusing! 🧨
# Train a diffusion model
Unconditional image generation is a popular application of diffusion models that generates images that look like those in the dataset used for training. Typically, the best results are obtained from finetuning a pretrained model on a specific dataset. You can find many of these checkpoints on the [Hub](https://huggingface.co/search/full-text?q=unconditional-image-generation&type=model), but if you can't find one you like, you can always train your own!
This tutorial will teach you how to train a `UNet2DModel` from scratch on a subset of the [Smithsonian Butterflies](https://huggingface.co/datasets/huggan/smithsonian_butterflies_subset) dataset to generate your own 🦋 butterflies 🦋.
💡 This training tutorial is based on the [Training with 🧨 Diffusers](https://colab.research.google.com/github/huggingface/notebooks/blob/main/diffusers/training_example.ipynb) notebook. For additional details and context about diffusion models like how they work, check out the notebook!
Before you begin, make sure you have 🤗 Datasets installed to load and preprocess image datasets, and 🤗 Accelerate, to simplify training on any number of GPUs. The following command will also install [TensorBoard](https://www.tensorflow.org/tensorboard) to visualize training metrics (you can also use [Weights & Biases](https://docs.wandb.ai/) to track your training).
```py
# uncomment to install the necessary libraries in Colab
#!pip install diffusers[training]
```
We encourage you to share your model with the community, and in order to do that, you'll need to login to your Hugging Face account (create one [here](https://hf.co/join) if you don't already have one!). You can login from a notebook and enter your token when prompted. Make sure your token has the write role.
```py
>>> from huggingface_hub import notebook_login
>>> notebook_login()
```
Or login in from the terminal:
```bash
huggingface-cli login
```
Since the model checkpoints are quite large, install [Git-LFS](https://git-lfs.com/) to version these large files:
```bash
!sudo apt -qq install git-lfs
!git config --global credential.helper store
```
## Training configuration
For convenience, create a `TrainingConfig` class containing the training hyperparameters (feel free to adjust them):
```py
>>> from dataclasses import dataclass
>>> @dataclass
... class TrainingConfig:
... image_size = 128 # the generated image resolution
... train_batch_size = 16
... eval_batch_size = 16 # how many images to sample during evaluation
... num_epochs = 50
... gradient_accumulation_steps = 1
... learning_rate = 1e-4
... lr_warmup_steps = 500
... save_image_epochs = 10
... save_model_epochs = 30
... mixed_precision = "fp16" # `no` for float32, `fp16` for automatic mixed precision
... output_dir = "ddpm-butterflies-128" # the model name locally and on the HF Hub
... push_to_hub = True # whether to upload the saved model to the HF Hub
... hub_model_id = "/" # the name of the repository to create on the HF Hub
... hub_private_repo = False
... overwrite_output_dir = True # overwrite the old model when re-running the notebook
... seed = 0
>>> config = TrainingConfig()
```
## Load the dataset
You can easily load the [Smithsonian Butterflies](https://huggingface.co/datasets/huggan/smithsonian_butterflies_subset) dataset with the 🤗 Datasets library:
```py
>>> from datasets import load_dataset
>>> config.dataset_name = "huggan/smithsonian_butterflies_subset"
>>> dataset = load_dataset(config.dataset_name, split="train")
```
💡 You can find additional datasets from the [HugGan Community Event](https://huggingface.co/huggan) or you can use your own dataset by creating a local [`ImageFolder`](https://huggingface.co/docs/datasets/image_dataset#imagefolder). Set `config.dataset_name` to the repository id of the dataset if it is from the HugGan Community Event, or `imagefolder` if you're using your own images.
🤗 Datasets uses the [Image](https://huggingface.co/docs/datasets/main/en/package_reference/main_classes#datasets.Image) feature to automatically decode the image data and load it as a [`PIL.Image`](https://pillow.readthedocs.io/en/stable/reference/Image.html) which we can visualize:
```py
>>> import matplotlib.pyplot as plt
>>> fig, axs = plt.subplots(1, 4, figsize=(16, 4))
>>> for i, image in enumerate(dataset[:4]["image"]):
... axs[i].imshow(image)
... axs[i].set_axis_off()
>>> fig.show()
```
The images are all different sizes though, so you'll need to preprocess them first:
* `Resize` changes the image size to the one defined in `config.image_size`.
* `RandomHorizontalFlip` augments the dataset by randomly mirroring the images.
* `Normalize` is important to rescale the pixel values into a [-1, 1] range, which is what the model expects.
```py
>>> from torchvision import transforms
>>> preprocess = transforms.Compose(
... [
... transforms.Resize((config.image_size, config.image_size)),
... transforms.RandomHorizontalFlip(),
... transforms.ToTensor(),
... transforms.Normalize([0.5], [0.5]),
... ]
... )
```
Use 🤗 Datasets' [set_transform](https://huggingface.co/docs/datasets/main/en/package_reference/main_classes#datasets.Dataset.set_transform) method to apply the `preprocess` function on the fly during training:
```py
>>> def transform(examples):
... images = [preprocess(image.convert("RGB")) for image in examples["image"]]
... return {"images": images}
>>> dataset.set_transform(transform)
```
Feel free to visualize the images again to confirm that they've been resized. Now you're ready to wrap the dataset in a [DataLoader](https://pytorch.org/docs/stable/data#torch.utils.data.DataLoader) for training!
```py
>>> import torch
>>> train_dataloader = torch.utils.data.DataLoader(dataset, batch_size=config.train_batch_size, shuffle=True)
```
## Create a UNet2DModel
Pretrained models in 🧨 Diffusers are easily created from their model class with the parameters you want. For example, to create a `UNet2DModel`:
```py
>>> from diffusers import UNet2DModel
>>> model = UNet2DModel(
... sample_size=config.image_size, # the target image resolution
... in_channels=3, # the number of input channels, 3 for RGB images
... out_channels=3, # the number of output channels
... layers_per_block=2, # how many ResNet layers to use per UNet block
... block_out_channels=(128, 128, 256, 256, 512, 512), # the number of output channels for each UNet block
... down_block_types=(
... "DownBlock2D", # a regular ResNet downsampling block
... "DownBlock2D",
... "DownBlock2D",
... "DownBlock2D",
... "AttnDownBlock2D", # a ResNet downsampling block with spatial self-attention
... "DownBlock2D",
... ),
... up_block_types=(
... "UpBlock2D", # a regular ResNet upsampling block
... "AttnUpBlock2D", # a ResNet upsampling block with spatial self-attention
... "UpBlock2D",
... "UpBlock2D",
... "UpBlock2D",
... "UpBlock2D",
... ),
... )
```
It is often a good idea to quickly check the sample image shape matches the model output shape:
```py
>>> sample_image = dataset[0]["images"].unsqueeze(0)
>>> print("Input shape:", sample_image.shape)
Input shape: torch.Size([1, 3, 128, 128])
>>> print("Output shape:", model(sample_image, timestep=0).sample.shape)
Output shape: torch.Size([1, 3, 128, 128])
```
Great! Next, you'll need a scheduler to add some noise to the image.
## Create a scheduler
The scheduler behaves differently depending on whether you're using the model for training or inference. During inference, the scheduler generates image from the noise. During training, the scheduler takes a model output - or a sample - from a specific point in the diffusion process and applies noise to the image according to a *noise schedule* and an *update rule*.
Let's take a look at the `DDPMScheduler` and use the `add_noise` method to add some random noise to the `sample_image` from before:
```py
>>> import torch
>>> from PIL import Image
>>> from diffusers import DDPMScheduler
>>> noise_scheduler = DDPMScheduler(num_train_timesteps=1000)
>>> noise = torch.randn(sample_image.shape)
>>> timesteps = torch.LongTensor([50])
>>> noisy_image = noise_scheduler.add_noise(sample_image, noise, timesteps)
>>> Image.fromarray(((noisy_image.permute(0, 2, 3, 1) + 1.0) * 127.5).type(torch.uint8).numpy()[0])
```
The training objective of the model is to predict the noise added to the image. The loss at this step can be calculated by:
```py
>>> import torch.nn.functional as F
>>> noise_pred = model(noisy_image, timesteps).sample
>>> loss = F.mse_loss(noise_pred, noise)
```
## Train the model
By now, you have most of the pieces to start training the model and all that's left is putting everything together.
First, you'll need an optimizer and a learning rate scheduler:
```py
>>> from diffusers.optimization import get_cosine_schedule_with_warmup
>>> optimizer = torch.optim.AdamW(model.parameters(), lr=config.learning_rate)
>>> lr_scheduler = get_cosine_schedule_with_warmup(
... optimizer=optimizer,
... num_warmup_steps=config.lr_warmup_steps,
... num_training_steps=(len(train_dataloader) * config.num_epochs),
... )
```
Then, you'll need a way to evaluate the model. For evaluation, you can use the `DDPMPipeline` to generate a batch of sample images and save it as a grid:
```py
>>> from diffusers import DDPMPipeline
>>> from diffusers.utils import make_image_grid
>>> import os
>>> def evaluate(config, epoch, pipeline):
... # Sample some images from random noise (this is the backward diffusion process).
... # The default pipeline output type is `List[PIL.Image]`
... images = pipeline(
... batch_size=config.eval_batch_size,
... generator=torch.Generator(device='cpu').manual_seed(config.seed), # Use a separate torch generator to avoid rewinding the random state of the main training loop
... ).images
... # Make a grid out of the images
... image_grid = make_image_grid(images, rows=4, cols=4)
... # Save the images
... test_dir = os.path.join(config.output_dir, "samples")
... os.makedirs(test_dir, exist_ok=True)
... image_grid.save(f"{test_dir}/{epoch:04d}.png")
```
Now you can wrap all these components together in a training loop with 🤗 Accelerate for easy TensorBoard logging, gradient accumulation, and mixed precision training. To upload the model to the Hub, write a function to get your repository name and information and then push it to the Hub.
💡 The training loop below may look intimidating and long, but it'll be worth it later when you launch your training in just one line of code! If you can't wait and want to start generating images, feel free to copy and run the code below. You can always come back and examine the training loop more closely later, like when you're waiting for your model to finish training. 🤗
```py
>>> from accelerate import Accelerator
>>> from huggingface_hub import create_repo, upload_folder
>>> from tqdm.auto import tqdm
>>> from pathlib import Path
>>> import os
>>> def train_loop(config, model, noise_scheduler, optimizer, train_dataloader, lr_scheduler):
... # Initialize accelerator and tensorboard logging
... accelerator = Accelerator(
... mixed_precision=config.mixed_precision,
... gradient_accumulation_steps=config.gradient_accumulation_steps,
... log_with="tensorboard",
... project_dir=os.path.join(config.output_dir, "logs"),
... )
... if accelerator.is_main_process:
... if config.output_dir is not None:
... os.makedirs(config.output_dir, exist_ok=True)
... if config.push_to_hub:
... repo_id = create_repo(
... repo_id=config.hub_model_id or Path(config.output_dir).name, exist_ok=True
... ).repo_id
... accelerator.init_trackers("train_example")
... # Prepare everything
... # There is no specific order to remember, you just need to unpack the
... # objects in the same order you gave them to the prepare method.
... model, optimizer, train_dataloader, lr_scheduler = accelerator.prepare(
... model, optimizer, train_dataloader, lr_scheduler
... )
... global_step = 0
... # Now you train the model
... for epoch in range(config.num_epochs):
... progress_bar = tqdm(total=len(train_dataloader), disable=not accelerator.is_local_main_process)
... progress_bar.set_description(f"Epoch {epoch}")
... for step, batch in enumerate(train_dataloader):
... clean_images = batch["images"]
... # Sample noise to add to the images
... noise = torch.randn(clean_images.shape, device=clean_images.device)
... bs = clean_images.shape[0]
... # Sample a random timestep for each image
... timesteps = torch.randint(
... 0, noise_scheduler.config.num_train_timesteps, (bs,), device=clean_images.device,
... dtype=torch.int64
... )
... # Add noise to the clean images according to the noise magnitude at each timestep
... # (this is the forward diffusion process)
... noisy_images = noise_scheduler.add_noise(clean_images, noise, timesteps)
... with accelerator.accumulate(model):
... # Predict the noise residual
... noise_pred = model(noisy_images, timesteps, return_dict=False)[0]
... loss = F.mse_loss(noise_pred, noise)
... accelerator.backward(loss)
... if accelerator.sync_gradients:
... accelerator.clip_grad_norm_(model.parameters(), 1.0)
... optimizer.step()
... lr_scheduler.step()
... optimizer.zero_grad()
... progress_bar.update(1)
... logs = {"loss": loss.detach().item(), "lr": lr_scheduler.get_last_lr()[0], "step": global_step}
... progress_bar.set_postfix(**logs)
... accelerator.log(logs, step=global_step)
... global_step += 1
... # After each epoch you optionally sample some demo images with evaluate() and save the model
... if accelerator.is_main_process:
... pipeline = DDPMPipeline(unet=accelerator.unwrap_model(model), scheduler=noise_scheduler)
... if (epoch + 1) % config.save_image_epochs == 0 or epoch == config.num_epochs - 1:
... evaluate(config, epoch, pipeline)
... if (epoch + 1) % config.save_model_epochs == 0 or epoch == config.num_epochs - 1:
... if config.push_to_hub:
... upload_folder(
... repo_id=repo_id,
... folder_path=config.output_dir,
... commit_message=f"Epoch {epoch}",
... ignore_patterns=["step_*", "epoch_*"],
... )
... else:
... pipeline.save_pretrained(config.output_dir)
```
Phew, that was quite a bit of code! But you're finally ready to launch the training with 🤗 Accelerate's [notebook_launcher](https://huggingface.co/docs/accelerate/main/en/package_reference/launchers#accelerate.notebook_launcher) function. Pass the function the training loop, all the training arguments, and the number of processes (you can change this value to the number of GPUs available to you) to use for training:
```py
>>> from accelerate import notebook_launcher
>>> args = (config, model, noise_scheduler, optimizer, train_dataloader, lr_scheduler)
>>> notebook_launcher(train_loop, args, num_processes=1)
```
Once training is complete, take a look at the final 🦋 images 🦋 generated by your diffusion model!
```py
>>> import glob
>>> sample_images = sorted(glob.glob(f"{config.output_dir}/samples/*.png"))
>>> Image.open(sample_images[-1])
```
## Next steps
Unconditional image generation is one example of a task that can be trained. You can explore other tasks and training techniques by visiting the [🧨 Diffusers Training Examples](../training/overview) page. Here are some examples of what you can learn:
* [Textual Inversion](../training/text_inversion), an algorithm that teaches a model a specific visual concept and integrates it into the generated image.
* [DreamBooth](../training/dreambooth), a technique for generating personalized images of a subject given several input images of the subject.
* [Guide](../training/text2image) to finetuning a Stable Diffusion model on your own dataset.
* [Guide](../training/lora) to using LoRA, a memory-efficient technique for finetuning really large models faster.
# Outpainting
Outpainting extends an image beyond its original boundaries, allowing you to add, replace, or modify visual elements in an image while preserving the original image. Like [inpainting](../using-diffusers/inpaint), you want to fill the white area (in this case, the area outside of the original image) with new visual elements while keeping the original image (represented by a mask of black pixels). There are a couple of ways to outpaint, such as with a [ControlNet](https://hf.co/blog/OzzyGT/outpainting-controlnet) or with [Differential Diffusion](https://hf.co/blog/OzzyGT/outpainting-differential-diffusion).
This guide will show you how to outpaint with an inpainting model, ControlNet, and a ZoeDepth estimator.
Before you begin, make sure you have the [controlnet_aux](https://github.com/huggingface/controlnet_aux) library installed so you can use the ZoeDepth estimator.
```py
!pip install -q controlnet_aux
```
## Image preparation
Start by picking an image to outpaint with and remove the background with a Space like [BRIA-RMBG-1.4](https://hf.co/spaces/briaai/BRIA-RMBG-1.4).
For example, remove the background from this image of a pair of shoes.
original image
background removed
[Stable Diffusion XL (SDXL)](../using-diffusers/sdxl) models work best with 1024x1024 images, but you can resize the image to any size as long as your hardware has enough memory to support it. The transparent background in the image should also be replaced with a white background. Create a function (like the one below) that scales and pastes the image onto a white background.
```py
import random
import requests
import torch
from controlnet_aux import ZoeDetector
from PIL import Image, ImageOps
from diffusers import (
AutoencoderKL,
ControlNetModel,
StableDiffusionXLControlNetPipeline,
StableDiffusionXLInpaintPipeline,
)
def scale_and_paste(original_image):
aspect_ratio = original_image.width / original_image.height
if original_image.width > original_image.height:
new_width = 1024
new_height = round(new_width / aspect_ratio)
else:
new_height = 1024
new_width = round(new_height * aspect_ratio)
resized_original = original_image.resize((new_width, new_height), Image.LANCZOS)
white_background = Image.new("RGBA", (1024, 1024), "white")
x = (1024 - new_width) // 2
y = (1024 - new_height) // 2
white_background.paste(resized_original, (x, y), resized_original)
return resized_original, white_background
original_image = Image.open(
requests.get(
"https://huggingface.co/datasets/stevhliu/testing-images/resolve/main/no-background-jordan.png",
stream=True,
).raw
).convert("RGBA")
resized_img, white_bg_image = scale_and_paste(original_image)
```
To avoid adding unwanted extra details, use the ZoeDepth estimator to provide additional guidance during generation and to ensure the shoes remain consistent with the original image.
```py
zoe = ZoeDetector.from_pretrained("lllyasviel/Annotators")
image_zoe = zoe(white_bg_image, detect_resolution=512, image_resolution=1024)
image_zoe
```
## Outpaint
Once your image is ready, you can generate content in the white area around the shoes with [controlnet-inpaint-dreamer-sdxl](https://hf.co/destitech/controlnet-inpaint-dreamer-sdxl), a SDXL ControlNet trained for inpainting.
Load the inpainting ControlNet, ZoeDepth model, VAE and pass them to the `StableDiffusionXLControlNetPipeline`. Then you can create an optional `generate_image` function (for convenience) to outpaint an initial image.
```py
controlnets = [
ControlNetModel.from_pretrained(
"destitech/controlnet-inpaint-dreamer-sdxl", torch_dtype=torch.float16, variant="fp16"
),
ControlNetModel.from_pretrained(
"diffusers/controlnet-zoe-depth-sdxl-1.0", torch_dtype=torch.float16
),
]
vae = AutoencoderKL.from_pretrained("madebyollin/sdxl-vae-fp16-fix", torch_dtype=torch.float16).to("cuda")
pipeline = StableDiffusionXLControlNetPipeline.from_pretrained(
"SG161222/RealVisXL_V4.0", torch_dtype=torch.float16, variant="fp16", controlnet=controlnets, vae=vae
).to("cuda")
def generate_image(prompt, negative_prompt, inpaint_image, zoe_image, seed: int = None):
if seed is None:
seed = random.randint(0, 2**32 - 1)
generator = torch.Generator(device="cpu").manual_seed(seed)
image = pipeline(
prompt,
negative_prompt=negative_prompt,
image=[inpaint_image, zoe_image],
guidance_scale=6.5,
num_inference_steps=25,
generator=generator,
controlnet_conditioning_scale=[0.5, 0.8],
control_guidance_end=[0.9, 0.6],
).images[0]
return image
prompt = "nike air jordans on a basketball court"
negative_prompt = ""
temp_image = generate_image(prompt, negative_prompt, white_bg_image, image_zoe, 908097)
```
Paste the original image over the initial outpainted image. You'll improve the outpainted background in a later step.
```py
x = (1024 - resized_img.width) // 2
y = (1024 - resized_img.height) // 2
temp_image.paste(resized_img, (x, y), resized_img)
temp_image
```
> [!TIP]
> Now is a good time to free up some memory if you're running low!
>
> ```py
> pipeline=None
> torch.cuda.empty_cache()
> ```
Now that you have an initial outpainted image, load the `StableDiffusionXLInpaintPipeline` with the [RealVisXL](https://hf.co/SG161222/RealVisXL_V4.0) model to generate the final outpainted image with better quality.
```py
pipeline = StableDiffusionXLInpaintPipeline.from_pretrained(
"OzzyGT/RealVisXL_V4.0_inpainting",
torch_dtype=torch.float16,
variant="fp16",
vae=vae,
).to("cuda")
```
Prepare a mask for the final outpainted image. To create a more natural transition between the original image and the outpainted background, blur the mask to help it blend better.
```py
mask = Image.new("L", temp_image.size)
mask.paste(resized_img.split()[3], (x, y))
mask = ImageOps.invert(mask)
final_mask = mask.point(lambda p: p > 128 and 255)
mask_blurred = pipeline.mask_processor.blur(final_mask, blur_factor=20)
mask_blurred
```
Create a better prompt and pass it to the `generate_outpaint` function to generate the final outpainted image. Again, paste the original image over the final outpainted background.
```py
def generate_outpaint(prompt, negative_prompt, image, mask, seed: int = None):
if seed is None:
seed = random.randint(0, 2**32 - 1)
generator = torch.Generator(device="cpu").manual_seed(seed)
image = pipeline(
prompt,
negative_prompt=negative_prompt,
image=image,
mask_image=mask,
guidance_scale=10.0,
strength=0.8,
num_inference_steps=30,
generator=generator,
).images[0]
return image
prompt = "high quality photo of nike air jordans on a basketball court, highly detailed"
negative_prompt = ""
final_image = generate_outpaint(prompt, negative_prompt, temp_image, mask_blurred, 7688778)
x = (1024 - resized_img.width) // 2
y = (1024 - resized_img.height) // 2
final_image.paste(resized_img, (x, y), resized_img)
final_image
```
# Logging
🤗 Diffusers has a centralized logging system to easily manage the verbosity of the library. The default verbosity is set to `WARNING`.
To change the verbosity level, use one of the direct setters. For instance, to change the verbosity to the `INFO` level.
```python
import diffusers
diffusers.logging.set_verbosity_info()
```
You can also use the environment variable `DIFFUSERS_VERBOSITY` to override the default verbosity. You can set it
to one of the following: `debug`, `info`, `warning`, `error`, `critical`. For example:
```bash
DIFFUSERS_VERBOSITY=error ./myprogram.py
```
Additionally, some `warnings` can be disabled by setting the environment variable
`DIFFUSERS_NO_ADVISORY_WARNINGS` to a true value, like `1`. This disables any warning logged by
`logger.warning_advice`. For example:
```bash
DIFFUSERS_NO_ADVISORY_WARNINGS=1 ./myprogram.py
```
Here is an example of how to use the same logger as the library in your own module or script:
```python
from diffusers.utils import logging
logging.set_verbosity_info()
logger = logging.get_logger("diffusers")
logger.info("INFO")
logger.warning("WARN")
```
All methods of the logging module are documented below. The main methods are
`logging.get_verbosity` to get the current level of verbosity in the logger and
`logging.set_verbosity` to set the verbosity to the level of your choice.
In order from the least verbose to the most verbose:
| Method | Integer value | Description |
|----------------------------------------------------------:|--------------:|----------------------------------------------------:|
| `diffusers.logging.CRITICAL` or `diffusers.logging.FATAL` | 50 | only report the most critical errors |
| `diffusers.logging.ERROR` | 40 | only report errors |
| `diffusers.logging.WARNING` or `diffusers.logging.WARN` | 30 | only report errors and warnings (default) |
| `diffusers.logging.INFO` | 20 | only report errors, warnings, and basic information |
| `diffusers.logging.DEBUG` | 10 | report all information |
By default, `tqdm` progress bars are displayed during model download. `logging.disable_progress_bar` and `logging.enable_progress_bar` are used to enable or disable this behavior.
## Base setters
## Other functions
[[autodoc]] utils.logging.set_verbosity_error
[[autodoc]] utils.logging.set_verbosity_warning
[[autodoc]] utils.logging.set_verbosity_info
[[autodoc]] utils.logging.set_verbosity_debug
[[autodoc]] utils.logging.get_verbosity
[[autodoc]] utils.logging.set_verbosity
[[autodoc]] utils.logging.get_logger
[[autodoc]] utils.logging.enable_default_handler
[[autodoc]] utils.logging.disable_default_handler
[[autodoc]] utils.logging.enable_explicit_format
[[autodoc]] utils.logging.reset_format
[[autodoc]] utils.logging.enable_progress_bar
[[autodoc]] utils.logging.disable_progress_bar
# VAE Image Processor
The `VaeImageProcessor` provides a unified API for `StableDiffusionPipeline`s to prepare image inputs for VAE encoding and post-processing outputs once they're decoded. This includes transformations such as resizing, normalization, and conversion between PIL Image, PyTorch, and NumPy arrays.
All pipelines with `VaeImageProcessor` accept PIL Image, PyTorch tensor, or NumPy arrays as image inputs and return outputs based on the `output_type` argument by the user. You can pass encoded image latents directly to the pipeline and return latents from the pipeline as a specific output with the `output_type` argument (for example `output_type="latent"`). This allows you to take the generated latents from one pipeline and pass it to another pipeline as input without leaving the latent space. It also makes it much easier to use multiple pipelines together by passing PyTorch tensors directly between different pipelines.
## VaeImageProcessor
## VaeImageProcessorLDM3D
The `VaeImageProcessorLDM3D` accepts RGB and depth inputs and returns RGB and depth outputs.
## PixArtImageProcessor
## IPAdapterMaskProcessor
[[autodoc]] image_processor.VaeImageProcessor
[[autodoc]] image_processor.VaeImageProcessorLDM3D
[[autodoc]] image_processor.PixArtImageProcessor
[[autodoc]] image_processor.IPAdapterMaskProcessor
# Configuration
Schedulers from `SchedulerMixin` and models from `ModelMixin` inherit from `ConfigMixin` which stores all the parameters that are passed to their respective `__init__` methods in a JSON-configuration file.
To use private or [gated](https://huggingface.co/docs/hub/models-gated#gated-models) models, log-in with `huggingface-cli login`.
## ConfigMixin
[[autodoc]] ConfigMixin
- load_config
- from_config
- save_config
- to_json_file
- to_json_string
# Video Processor
The `VideoProcessor` provides a unified API for video pipelines to prepare inputs for VAE encoding and post-processing outputs once they're decoded. The class inherits `VaeImageProcessor` so it includes transformations such as resizing, normalization, and conversion between PIL Image, PyTorch, and NumPy arrays.
## VideoProcessor
[[autodoc]] video_processor.VideoProcessor.preprocess_video
[[autodoc]] video_processor.VideoProcessor.postprocess_video
# Normalization layers
Customized normalization layers for supporting various models in 🤗 Diffusers.
## AdaLayerNorm
## AdaLayerNormZero
## AdaLayerNormSingle
## AdaGroupNorm
[[autodoc]] models.normalization.AdaLayerNorm
[[autodoc]] models.normalization.AdaLayerNormZero
[[autodoc]] models.normalization.AdaLayerNormSingle
[[autodoc]] models.normalization.AdaGroupNorm
# Outputs
All model outputs are subclasses of `BaseOutput`, data structures containing all the information returned by the model. The outputs can also be used as tuples or dictionaries.
For example:
```python
from diffusers import DDIMPipeline
pipeline = DDIMPipeline.from_pretrained("google/ddpm-cifar10-32")
outputs = pipeline()
```
The `outputs` object is a `ImagePipelineOutput` which means it has an image attribute.
You can access each attribute as you normally would or with a keyword lookup, and if that attribute is not returned by the model, you will get `None`:
```python
outputs.images
outputs["images"]
```
When considering the `outputs` object as a tuple, it only considers the attributes that don't have `None` values.
For instance, retrieving an image by indexing into it returns the tuple `(outputs.images)`:
```python
outputs[:1]
```
To check a specific pipeline or model output, refer to its corresponding API documentation.
## BaseOutput
## ImagePipelineOutput
## FlaxImagePipelineOutput
## AudioPipelineOutput
## ImageTextPipelineOutput
[[autodoc]] utils.BaseOutput
- to_tuple
[[autodoc]] pipelines.ImagePipelineOutput
[[autodoc]] pipelines.pipeline_flax_utils.FlaxImagePipelineOutput
[[autodoc]] pipelines.AudioPipelineOutput
[[autodoc]] ImageTextPipelineOutput
# Overview
The APIs in this section are more experimental and prone to breaking changes. Most of them are used internally for development, but they may also be useful to you if you're interested in building a diffusion model with some custom parts or if you're interested in some of our helper utilities for working with 🤗 Diffusers.
# Quantization
Quantization techniques reduce memory and computational costs by representing weights and activations with lower-precision data types like 8-bit integers (int8). This enables loading larger models you normally wouldn't be able to fit into memory, and speeding up inference. Diffusers supports 8-bit and 4-bit quantization with [bitsandbytes](https://huggingface.co/docs/bitsandbytes/en/index).
Quantization techniques that aren't supported in Transformers can be added with the `DiffusersQuantizer` class.
Learn how to quantize models in the [Quantization](../quantization/overview) guide.
## BitsAndBytesConfig
## DiffusersQuantizer
[[autodoc]] BitsAndBytesConfig
[[autodoc]] quantizers.base.DiffusersQuantizer
# Utilities
Utility and helper functions for working with 🤗 Diffusers.
## numpy_to_pil
## pt_to_pil
## load_image
## export_to_gif
## export_to_video
## make_image_grid
## randn_tensor
[[autodoc]] utils.numpy_to_pil
[[autodoc]] utils.pt_to_pil
[[autodoc]] utils.load_image
[[autodoc]] utils.export_to_gif
[[autodoc]] utils.export_to_video
[[autodoc]] utils.make_image_grid
[[autodoc]] utils.torch_utils.randn_tensor
# Activation functions
Customized activation functions for supporting various models in 🤗 Diffusers.
## GELU
## GEGLU
## ApproximateGELU
[[autodoc]] models.activations.GELU
[[autodoc]] models.activations.GEGLU
[[autodoc]] models.activations.ApproximateGELU
# Attention Processor
An attention processor is a class for applying different types of attention mechanisms.
## AttnProcessor
## AttnProcessor2_0
## AttnAddedKVProcessor
## AttnAddedKVProcessor2_0
## CrossFrameAttnProcessor
## CustomDiffusionAttnProcessor
## CustomDiffusionAttnProcessor2_0
## CustomDiffusionXFormersAttnProcessor
## FusedAttnProcessor2_0
## SlicedAttnProcessor
## SlicedAttnAddedKVProcessor
## XFormersAttnProcessor
## AttnProcessorNPU
[[autodoc]] models.attention_processor.AttnProcessor
[[autodoc]] models.attention_processor.AttnProcessor2_0
[[autodoc]] models.attention_processor.AttnAddedKVProcessor
[[autodoc]] models.attention_processor.AttnAddedKVProcessor2_0
[[autodoc]] pipelines.text_to_video_synthesis.pipeline_text_to_video_zero.CrossFrameAttnProcessor
[[autodoc]] models.attention_processor.CustomDiffusionAttnProcessor
[[autodoc]] models.attention_processor.CustomDiffusionAttnProcessor2_0
[[autodoc]] models.attention_processor.CustomDiffusionXFormersAttnProcessor
[[autodoc]] models.attention_processor.FusedAttnProcessor2_0
[[autodoc]] models.attention_processor.SlicedAttnProcessor
[[autodoc]] models.attention_processor.SlicedAttnAddedKVProcessor
[[autodoc]] models.attention_processor.XFormersAttnProcessor
[[autodoc]] models.attention_processor.AttnProcessorNPU
# PriorTransformer
The Prior Transformer was originally introduced in [Hierarchical Text-Conditional Image Generation with CLIP Latents](https://huggingface.co/papers/2204.06125) by Ramesh et al. It is used to predict CLIP image embeddings from CLIP text embeddings; image embeddings are predicted through a denoising diffusion process.
The abstract from the paper is:
*Contrastive models like CLIP have been shown to learn robust representations of images that capture both semantics and style. To leverage these representations for image generation, we propose a two-stage model: a prior that generates a CLIP image embedding given a text caption, and a decoder that generates an image conditioned on the image embedding. We show that explicitly generating image representations improves image diversity with minimal loss in photorealism and caption similarity. Our decoders conditioned on image representations can also produce variations of an image that preserve both its semantics and style, while varying the non-essential details absent from the image representation. Moreover, the joint embedding space of CLIP enables language-guided image manipulations in a zero-shot fashion. We use diffusion models for the decoder and experiment with both autoregressive and diffusion models for the prior, finding that the latter are computationally more efficient and produce higher-quality samples.*
## PriorTransformer
## PriorTransformerOutput
[[autodoc]] PriorTransformer
[[autodoc]] models.transformers.prior_transformer.PriorTransformerOutput
# AutoencoderKLMochi
The 3D variational autoencoder (VAE) model with KL loss used in [Mochi](https://github.com/genmoai/models) was introduced in [Mochi 1 Preview](https://huggingface.co/genmo/mochi-1-preview) by Tsinghua University & ZhipuAI.
The model can be loaded with the following code snippet.
```python
from diffusers import AutoencoderKLMochi
vae = AutoencoderKLMochi.from_pretrained("genmo/mochi-1-preview", subfolder="vae", torch_dtype=torch.float32).to("cuda")
```
## AutoencoderKLMochi
## DecoderOutput
[[autodoc]] AutoencoderKLMochi
- decode
- all
[[autodoc]] models.autoencoders.vae.DecoderOutput
# UNet2DConditionModel
The [UNet](https://huggingface.co/papers/1505.04597) model was originally introduced by Ronneberger et al. for biomedical image segmentation, but it is also commonly used in 🤗 Diffusers because it outputs images that are the same size as the input. It is one of the most important components of a diffusion system because it facilitates the actual diffusion process. There are several variants of the UNet model in 🤗 Diffusers, depending on it's number of dimensions and whether it is a conditional model or not. This is a 2D UNet conditional model.
The abstract from the paper is:
*There is large consent that successful training of deep networks requires many thousand annotated training samples. In this paper, we present a network and training strategy that relies on the strong use of data augmentation to use the available annotated samples more efficiently. The architecture consists of a contracting path to capture context and a symmetric expanding path that enables precise localization. We show that such a network can be trained end-to-end from very few images and outperforms the prior best method (a sliding-window convolutional network) on the ISBI challenge for segmentation of neuronal structures in electron microscopic stacks. Using the same network trained on transmitted light microscopy images (phase contrast and DIC) we won the ISBI cell tracking challenge 2015 in these categories by a large margin. Moreover, the network is fast. Segmentation of a 512x512 image takes less than a second on a recent GPU. The full implementation (based on Caffe) and the trained networks are available at http://lmb.informatik.uni-freiburg.de/people/ronneber/u-net.*
## UNet2DConditionModel
## UNet2DConditionOutput
## FlaxUNet2DConditionModel
## FlaxUNet2DConditionOutput
[[autodoc]] UNet2DConditionModel
[[autodoc]] models.unets.unet_2d_condition.UNet2DConditionOutput
[[autodoc]] models.unets.unet_2d_condition_flax.FlaxUNet2DConditionModel
[[autodoc]] models.unets.unet_2d_condition_flax.FlaxUNet2DConditionOutput
# FluxTransformer2DModel
A Transformer model for image-like data from [Flux](https://blackforestlabs.ai/announcing-black-forest-labs/).
## FluxTransformer2DModel
[[autodoc]] FluxTransformer2DModel
# CogVideoXTransformer3DModel
A Diffusion Transformer model for 3D data from [CogVideoX](https://github.com/THUDM/CogVideo) was introduced in [CogVideoX: Text-to-Video Diffusion Models with An Expert Transformer](https://github.com/THUDM/CogVideo/blob/main/resources/CogVideoX.pdf) by Tsinghua University & ZhipuAI.
The model can be loaded with the following code snippet.
```python
from diffusers import CogVideoXTransformer3DModel
vae = CogVideoXTransformer3DModel.from_pretrained("THUDM/CogVideoX-2b", subfolder="transformer", torch_dtype=torch.float16).to("cuda")
```
## CogVideoXTransformer3DModel
## Transformer2DModelOutput
[[autodoc]] CogVideoXTransformer3DModel
[[autodoc]] models.modeling_outputs.Transformer2DModelOutput
# UNet3DConditionModel
The [UNet](https://huggingface.co/papers/1505.04597) model was originally introduced by Ronneberger et al. for biomedical image segmentation, but it is also commonly used in 🤗 Diffusers because it outputs images that are the same size as the input. It is one of the most important components of a diffusion system because it facilitates the actual diffusion process. There are several variants of the UNet model in 🤗 Diffusers, depending on it's number of dimensions and whether it is a conditional model or not. This is a 3D UNet conditional model.
The abstract from the paper is:
*There is large consent that successful training of deep networks requires many thousand annotated training samples. In this paper, we present a network and training strategy that relies on the strong use of data augmentation to use the available annotated samples more efficiently. The architecture consists of a contracting path to capture context and a symmetric expanding path that enables precise localization. We show that such a network can be trained end-to-end from very few images and outperforms the prior best method (a sliding-window convolutional network) on the ISBI challenge for segmentation of neuronal structures in electron microscopic stacks. Using the same network trained on transmitted light microscopy images (phase contrast and DIC) we won the ISBI cell tracking challenge 2015 in these categories by a large margin. Moreover, the network is fast. Segmentation of a 512x512 image takes less than a second on a recent GPU. The full implementation (based on Caffe) and the trained networks are available at http://lmb.informatik.uni-freiburg.de/people/ronneber/u-net.*
## UNet3DConditionModel
## UNet3DConditionOutput
[[autodoc]] UNet3DConditionModel
[[autodoc]] models.unets.unet_3d_condition.UNet3DConditionOutput
# ControlNetModel
The ControlNet model was introduced in [Adding Conditional Control to Text-to-Image Diffusion Models](https://huggingface.co/papers/2302.05543) by Lvmin Zhang, Anyi Rao, Maneesh Agrawala. It provides a greater degree of control over text-to-image generation by conditioning the model on additional inputs such as edge maps, depth maps, segmentation maps, and keypoints for pose detection.
The abstract from the paper is:
*We present ControlNet, a neural network architecture to add spatial conditioning controls to large, pretrained text-to-image diffusion models. ControlNet locks the production-ready large diffusion models, and reuses their deep and robust encoding layers pretrained with billions of images as a strong backbone to learn a diverse set of conditional controls. The neural architecture is connected with "zero convolutions" (zero-initialized convolution layers) that progressively grow the parameters from zero and ensure that no harmful noise could affect the finetuning. We test various conditioning controls, eg, edges, depth, segmentation, human pose, etc, with Stable Diffusion, using single or multiple conditions, with or without prompts. We show that the training of ControlNets is robust with small (<50k) and large (>1m) datasets. Extensive results show that ControlNet may facilitate wider applications to control image diffusion models.*
## Loading from the original format
By default the `ControlNetModel` should be loaded with `from_pretrained()`, but it can also be loaded
from the original format using `FromOriginalModelMixin.from_single_file` as follows:
```py
from diffusers import StableDiffusionControlNetPipeline, ControlNetModel
url = "https://huggingface.co/lllyasviel/ControlNet-v1-1/blob/main/control_v11p_sd15_canny.pth" # can also be a local path
controlnet = ControlNetModel.from_single_file(url)
url = "https://huggingface.co/stable-diffusion-v1-5/stable-diffusion-v1-5/blob/main/v1-5-pruned.safetensors" # can also be a local path
pipe = StableDiffusionControlNetPipeline.from_single_file(url, controlnet=controlnet)
```
## ControlNetModel
## ControlNetOutput
## FlaxControlNetModel
## FlaxControlNetOutput
[[autodoc]] ControlNetModel
[[autodoc]] models.controlnets.controlnet.ControlNetOutput
[[autodoc]] FlaxControlNetModel
[[autodoc]] models.controlnets.controlnet_flax.FlaxControlNetOutput
# Consistency Decoder
Consistency decoder can be used to decode the latents from the denoising UNet in the `StableDiffusionPipeline`. This decoder was introduced in the [DALL-E 3 technical report](https://openai.com/dall-e-3).
The original codebase can be found at [openai/consistencydecoder](https://github.com/openai/consistencydecoder).
Inference is only supported for 2 iterations as of now.
The pipeline could not have been contributed without the help of [madebyollin](https://github.com/madebyollin) and [mrsteyk](https://github.com/mrsteyk) from [this issue](https://github.com/openai/consistencydecoder/issues/1).
## ConsistencyDecoderVAE
[[autodoc]] ConsistencyDecoderVAE
- all
- decode
# PixArtTransformer2DModel
A Transformer model for image-like data from [PixArt-Alpha](https://huggingface.co/papers/2310.00426) and [PixArt-Sigma](https://huggingface.co/papers/2403.04692).
## PixArtTransformer2DModel
[[autodoc]] PixArtTransformer2DModel
# UNet1DModel
The [UNet](https://huggingface.co/papers/1505.04597) model was originally introduced by Ronneberger et al. for biomedical image segmentation, but it is also commonly used in 🤗 Diffusers because it outputs images that are the same size as the input. It is one of the most important components of a diffusion system because it facilitates the actual diffusion process. There are several variants of the UNet model in 🤗 Diffusers, depending on it's number of dimensions and whether it is a conditional model or not. This is a 1D UNet model.
The abstract from the paper is:
*There is large consent that successful training of deep networks requires many thousand annotated training samples. In this paper, we present a network and training strategy that relies on the strong use of data augmentation to use the available annotated samples more efficiently. The architecture consists of a contracting path to capture context and a symmetric expanding path that enables precise localization. We show that such a network can be trained end-to-end from very few images and outperforms the prior best method (a sliding-window convolutional network) on the ISBI challenge for segmentation of neuronal structures in electron microscopic stacks. Using the same network trained on transmitted light microscopy images (phase contrast and DIC) we won the ISBI cell tracking challenge 2015 in these categories by a large margin. Moreover, the network is fast. Segmentation of a 512x512 image takes less than a second on a recent GPU. The full implementation (based on Caffe) and the trained networks are available at http://lmb.informatik.uni-freiburg.de/people/ronneber/u-net.*
## UNet1DModel
## UNet1DOutput
[[autodoc]] UNet1DModel
[[autodoc]] models.unets.unet_1d.UNet1DOutput
# DiTTransformer2DModel
A Transformer model for image-like data from [DiT](https://huggingface.co/papers/2212.09748).
## DiTTransformer2DModel
[[autodoc]] DiTTransformer2DModel
# UNetMotionModel
The [UNet](https://huggingface.co/papers/1505.04597) model was originally introduced by Ronneberger et al for biomedical image segmentation, but it is also commonly used in 🤗 Diffusers because it outputs images that are the same size as the input. It is one of the most important components of a diffusion system because it facilitates the actual diffusion process. There are several variants of the UNet model in 🤗 Diffusers, depending on it's number of dimensions and whether it is a conditional model or not. This is a 2D UNet model.
The abstract from the paper is:
*There is large consent that successful training of deep networks requires many thousand annotated training samples. In this paper, we present a network and training strategy that relies on the strong use of data augmentation to use the available annotated samples more efficiently. The architecture consists of a contracting path to capture context and a symmetric expanding path that enables precise localization. We show that such a network can be trained end-to-end from very few images and outperforms the prior best method (a sliding-window convolutional network) on the ISBI challenge for segmentation of neuronal structures in electron microscopic stacks. Using the same network trained on transmitted light microscopy images (phase contrast and DIC) we won the ISBI cell tracking challenge 2015 in these categories by a large margin. Moreover, the network is fast. Segmentation of a 512x512 image takes less than a second on a recent GPU. The full implementation (based on Caffe) and the trained networks are available at http://lmb.informatik.uni-freiburg.de/people/ronneber/u-net.*
## UNetMotionModel
## UNet3DConditionOutput
[[autodoc]] UNetMotionModel
[[autodoc]] models.unets.unet_3d_condition.UNet3DConditionOutput
# Transformer2DModel
A Transformer model for image-like data from [CompVis](https://huggingface.co/CompVis) that is based on the [Vision Transformer](https://huggingface.co/papers/2010.11929) introduced by Dosovitskiy et al. The `Transformer2DModel` accepts discrete (classes of vector embeddings) or continuous (actual embeddings) inputs.
When the input is **continuous**:
1. Project the input and reshape it to `(batch_size, sequence_length, feature_dimension)`.
2. Apply the Transformer blocks in the standard way.
3. Reshape to image.
When the input is **discrete**:
It is assumed one of the input classes is the masked latent pixel. The predicted classes of the unnoised image don't contain a prediction for the masked pixel because the unnoised image cannot be masked.
1. Convert input (classes of latent pixels) to embeddings and apply positional embeddings.
2. Apply the Transformer blocks in the standard way.
3. Predict classes of unnoised image.
## Transformer2DModel
## Transformer2DModelOutput
[[autodoc]] Transformer2DModel
[[autodoc]] models.modeling_outputs.Transformer2DModelOutput
# SD3 Transformer Model
The Transformer model introduced in [Stable Diffusion 3](https://hf.co/papers/2403.03206). Its novelty lies in the MMDiT transformer block.
## SD3Transformer2DModel
[[autodoc]] SD3Transformer2DModel
# CogView3PlusTransformer2DModel
A Diffusion Transformer model for 2D data from [CogView3Plus](https://github.com/THUDM/CogView3) was introduced in [CogView3: Finer and Faster Text-to-Image Generation via Relay Diffusion](https://huggingface.co/papers/2403.05121) by Tsinghua University & ZhipuAI.
The model can be loaded with the following code snippet.
```python
from diffusers import CogView3PlusTransformer2DModel
vae = CogView3PlusTransformer2DModel.from_pretrained("THUDM/CogView3Plus-3b", subfolder="transformer", torch_dtype=torch.bfloat16).to("cuda")
```
## CogView3PlusTransformer2DModel
## Transformer2DModelOutput
[[autodoc]] CogView3PlusTransformer2DModel
[[autodoc]] models.modeling_outputs.Transformer2DModelOutput
# MochiTransformer3DModel
A Diffusion Transformer model for 3D video-like data was introduced in [Mochi-1 Preview](https://huggingface.co/genmo/mochi-1-preview) by Genmo.
The model can be loaded with the following code snippet.
```python
from diffusers import MochiTransformer3DModel
vae = MochiTransformer3DModel.from_pretrained("genmo/mochi-1-preview", subfolder="transformer", torch_dtype=torch.float16).to("cuda")
```
## MochiTransformer3DModel
## Transformer2DModelOutput
[[autodoc]] MochiTransformer3DModel
[[autodoc]] models.modeling_outputs.Transformer2DModelOutput
# AutoencoderKL
The variational autoencoder (VAE) model with KL loss was introduced in [Auto-Encoding Variational Bayes](https://arxiv.org/abs/1312.6114v11) by Diederik P. Kingma and Max Welling. The model is used in 🤗 Diffusers to encode images into latents and to decode latent representations into images.
The abstract from the paper is:
*How can we perform efficient inference and learning in directed probabilistic models, in the presence of continuous latent variables with intractable posterior distributions, and large datasets? We introduce a stochastic variational inference and learning algorithm that scales to large datasets and, under some mild differentiability conditions, even works in the intractable case. Our contributions are two-fold. First, we show that a reparameterization of the variational lower bound yields a lower bound estimator that can be straightforwardly optimized using standard stochastic gradient methods. Second, we show that for i.i.d. datasets with continuous latent variables per datapoint, posterior inference can be made especially efficient by fitting an approximate inference model (also called a recognition model) to the intractable posterior using the proposed lower bound estimator. Theoretical advantages are reflected in experimental results.*
## Loading from the original format
By default the `AutoencoderKL` should be loaded with `from_pretrained()`, but it can also be loaded
from the original format using `FromOriginalModelMixin.from_single_file` as follows:
```py
from diffusers import AutoencoderKL
url = "https://huggingface.co/stabilityai/sd-vae-ft-mse-original/blob/main/vae-ft-mse-840000-ema-pruned.safetensors" # can also be a local file
model = AutoencoderKL.from_single_file(url)
```
## AutoencoderKL
## AutoencoderKLOutput
## DecoderOutput
## FlaxAutoencoderKL
## FlaxAutoencoderKLOutput
## FlaxDecoderOutput
[[autodoc]] AutoencoderKL
- decode
- encode
- all
[[autodoc]] models.autoencoders.autoencoder_kl.AutoencoderKLOutput
[[autodoc]] models.autoencoders.vae.DecoderOutput
[[autodoc]] FlaxAutoencoderKL
[[autodoc]] models.vae_flax.FlaxAutoencoderKLOutput
[[autodoc]] models.vae_flax.FlaxDecoderOutput
# SD3ControlNetModel
SD3ControlNetModel is an implementation of ControlNet for Stable Diffusion 3.
The ControlNet model was introduced in [Adding Conditional Control to Text-to-Image Diffusion Models](https://huggingface.co/papers/2302.05543) by Lvmin Zhang, Anyi Rao, Maneesh Agrawala. It provides a greater degree of control over text-to-image generation by conditioning the model on additional inputs such as edge maps, depth maps, segmentation maps, and keypoints for pose detection.
The abstract from the paper is:
*We present ControlNet, a neural network architecture to add spatial conditioning controls to large, pretrained text-to-image diffusion models. ControlNet locks the production-ready large diffusion models, and reuses their deep and robust encoding layers pretrained with billions of images as a strong backbone to learn a diverse set of conditional controls. The neural architecture is connected with "zero convolutions" (zero-initialized convolution layers) that progressively grow the parameters from zero and ensure that no harmful noise could affect the finetuning. We test various conditioning controls, eg, edges, depth, segmentation, human pose, etc, with Stable Diffusion, using single or multiple conditions, with or without prompts. We show that the training of ControlNets is robust with small (<50k) and large (>1m) datasets. Extensive results show that ControlNet may facilitate wider applications to control image diffusion models.*
## Loading from the original format
By default the `SD3ControlNetModel` should be loaded with `from_pretrained()`.
```py
from diffusers import StableDiffusion3ControlNetPipeline
from diffusers.models import SD3ControlNetModel, SD3MultiControlNetModel
controlnet = SD3ControlNetModel.from_pretrained("InstantX/SD3-Controlnet-Canny")
pipe = StableDiffusion3ControlNetPipeline.from_pretrained("stabilityai/stable-diffusion-3-medium-diffusers", controlnet=controlnet)
```
## SD3ControlNetModel
## SD3ControlNetOutput
[[autodoc]] SD3ControlNetModel
[[autodoc]] models.controlnets.controlnet_sd3.SD3ControlNetOutput
# TransformerTemporalModel
A Transformer model for video-like data.
## TransformerTemporalModel
## TransformerTemporalModelOutput
[[autodoc]] models.transformers.transformer_temporal.TransformerTemporalModel
[[autodoc]] models.transformers.transformer_temporal.TransformerTemporalModelOutput
# AuraFlowTransformer2DModel
A Transformer model for image-like data from [AuraFlow](https://blog.fal.ai/auraflow/).
## AuraFlowTransformer2DModel
[[autodoc]] AuraFlowTransformer2DModel
# Models
🤗 Diffusers provides pretrained models for popular algorithms and modules to create custom diffusion systems. The primary function of models is to denoise an input sample as modeled by the distribution \\(p_{\theta}(x_{t-1}|x_{t})\\).
All models are built from the base `ModelMixin` class which is a [`torch.nn.Module`](https://pytorch.org/docs/stable/generated/torch.nn.Module.html) providing basic functionality for saving and loading models, locally and from the Hugging Face Hub.
## ModelMixin
## FlaxModelMixin
## PushToHubMixin
[[autodoc]] ModelMixin
[[autodoc]] FlaxModelMixin
[[autodoc]] utils.PushToHubMixin
# AutoencoderKLCogVideoX
The 3D variational autoencoder (VAE) model with KL loss used in [CogVideoX](https://github.com/THUDM/CogVideo) was introduced in [CogVideoX: Text-to-Video Diffusion Models with An Expert Transformer](https://github.com/THUDM/CogVideo/blob/main/resources/CogVideoX.pdf) by Tsinghua University & ZhipuAI.
The model can be loaded with the following code snippet.
```python
from diffusers import AutoencoderKLCogVideoX
vae = AutoencoderKLCogVideoX.from_pretrained("THUDM/CogVideoX-2b", subfolder="vae", torch_dtype=torch.float16).to("cuda")
```
## AutoencoderKLCogVideoX
## AutoencoderKLOutput
## DecoderOutput
[[autodoc]] AutoencoderKLCogVideoX
- decode
- encode
- all
[[autodoc]] models.autoencoders.autoencoder_kl.AutoencoderKLOutput
[[autodoc]] models.autoencoders.vae.DecoderOutput
# AsymmetricAutoencoderKL
Improved larger variational autoencoder (VAE) model with KL loss for inpainting task: [Designing a Better Asymmetric VQGAN for StableDiffusion](https://arxiv.org/abs/2306.04632) by Zixin Zhu, Xuelu Feng, Dongdong Chen, Jianmin Bao, Le Wang, Yinpeng Chen, Lu Yuan, Gang Hua.
The abstract from the paper is:
*StableDiffusion is a revolutionary text-to-image generator that is causing a stir in the world of image generation and editing. Unlike traditional methods that learn a diffusion model in pixel space, StableDiffusion learns a diffusion model in the latent space via a VQGAN, ensuring both efficiency and quality. It not only supports image generation tasks, but also enables image editing for real images, such as image inpainting and local editing. However, we have observed that the vanilla VQGAN used in StableDiffusion leads to significant information loss, causing distortion artifacts even in non-edited image regions. To this end, we propose a new asymmetric VQGAN with two simple designs. Firstly, in addition to the input from the encoder, the decoder contains a conditional branch that incorporates information from task-specific priors, such as the unmasked image region in inpainting. Secondly, the decoder is much heavier than the encoder, allowing for more detailed recovery while only slightly increasing the total inference cost. The training cost of our asymmetric VQGAN is cheap, and we only need to retrain a new asymmetric decoder while keeping the vanilla VQGAN encoder and StableDiffusion unchanged. Our asymmetric VQGAN can be widely used in StableDiffusion-based inpainting and local editing methods. Extensive experiments demonstrate that it can significantly improve the inpainting and editing performance, while maintaining the original text-to-image capability. The code is available at https://github.com/buxiangzhiren/Asymmetric_VQGAN*
Evaluation results can be found in section 4.1 of the original paper.
## Available checkpoints
* [https://huggingface.co/cross-attention/asymmetric-autoencoder-kl-x-1-5](https://huggingface.co/cross-attention/asymmetric-autoencoder-kl-x-1-5)
* [https://huggingface.co/cross-attention/asymmetric-autoencoder-kl-x-2](https://huggingface.co/cross-attention/asymmetric-autoencoder-kl-x-2)
## Example Usage
```python
from diffusers import AsymmetricAutoencoderKL, StableDiffusionInpaintPipeline
from diffusers.utils import load_image, make_image_grid
prompt = "a photo of a person with beard"
img_url = "https://huggingface.co/datasets/hf-internal-testing/diffusers-images/resolve/main/repaint/celeba_hq_256.png"
mask_url = "https://huggingface.co/datasets/hf-internal-testing/diffusers-images/resolve/main/repaint/mask_256.png"
original_image = load_image(img_url).resize((512, 512))
mask_image = load_image(mask_url).resize((512, 512))
pipe = StableDiffusionInpaintPipeline.from_pretrained("runwayml/stable-diffusion-inpainting")
pipe.vae = AsymmetricAutoencoderKL.from_pretrained("cross-attention/asymmetric-autoencoder-kl-x-1-5")
pipe.to("cuda")
image = pipe(prompt=prompt, image=original_image, mask_image=mask_image).images[0]
make_image_grid([original_image, mask_image, image], rows=1, cols=3)
```
## AsymmetricAutoencoderKL
## AutoencoderKLOutput
## DecoderOutput
[[autodoc]] models.autoencoders.autoencoder_asym_kl.AsymmetricAutoencoderKL
[[autodoc]] models.autoencoders.autoencoder_kl.AutoencoderKLOutput
[[autodoc]] models.autoencoders.vae.DecoderOutput
# AutoencoderOobleck
The Oobleck variational autoencoder (VAE) model with KL loss was introduced in [Stability-AI/stable-audio-tools](https://github.com/Stability-AI/stable-audio-tools) and [Stable Audio Open](https://huggingface.co/papers/2407.14358) by Stability AI. The model is used in 🤗 Diffusers to encode audio waveforms into latents and to decode latent representations into audio waveforms.
The abstract from the paper is:
*Open generative models are vitally important for the community, allowing for fine-tunes and serving as baselines when presenting new models. However, most current text-to-audio models are private and not accessible for artists and researchers to build upon. Here we describe the architecture and training process of a new open-weights text-to-audio model trained with Creative Commons data. Our evaluation shows that the model's performance is competitive with the state-of-the-art across various metrics. Notably, the reported FDopenl3 results (measuring the realism of the generations) showcase its potential for high-quality stereo sound synthesis at 44.1kHz.*
## AutoencoderOobleck
## OobleckDecoderOutput
## AutoencoderOobleckOutput
[[autodoc]] AutoencoderOobleck
- decode
- encode
- all
[[autodoc]] models.autoencoders.autoencoder_oobleck.OobleckDecoderOutput
[[autodoc]] models.autoencoders.autoencoder_oobleck.OobleckDecoderOutput
[[autodoc]] models.autoencoders.autoencoder_oobleck.AutoencoderOobleckOutput
# Tiny AutoEncoder
Tiny AutoEncoder for Stable Diffusion (TAESD) was introduced in [madebyollin/taesd](https://github.com/madebyollin/taesd) by Ollin Boer Bohan. It is a tiny distilled version of Stable Diffusion's VAE that can quickly decode the latents in a `StableDiffusionPipeline` or `StableDiffusionXLPipeline` almost instantly.
To use with Stable Diffusion v-2.1:
```python
import torch
from diffusers import DiffusionPipeline, AutoencoderTiny
pipe = DiffusionPipeline.from_pretrained(
"stabilityai/stable-diffusion-2-1-base", torch_dtype=torch.float16
)
pipe.vae = AutoencoderTiny.from_pretrained("madebyollin/taesd", torch_dtype=torch.float16)
pipe = pipe.to("cuda")
prompt = "slice of delicious New York-style berry cheesecake"
image = pipe(prompt, num_inference_steps=25).images[0]
image
```
To use with Stable Diffusion XL 1.0
```python
import torch
from diffusers import DiffusionPipeline, AutoencoderTiny
pipe = DiffusionPipeline.from_pretrained(
"stabilityai/stable-diffusion-xl-base-1.0", torch_dtype=torch.float16
)
pipe.vae = AutoencoderTiny.from_pretrained("madebyollin/taesdxl", torch_dtype=torch.float16)
pipe = pipe.to("cuda")
prompt = "slice of delicious New York-style berry cheesecake"
image = pipe(prompt, num_inference_steps=25).images[0]
image
```
## AutoencoderTiny
## AutoencoderTinyOutput
[[autodoc]] AutoencoderTiny
[[autodoc]] models.autoencoders.autoencoder_tiny.AutoencoderTinyOutput
# StableAudioDiTModel
A Transformer model for audio waveforms from [Stable Audio Open](https://huggingface.co/papers/2407.14358).
## StableAudioDiTModel
[[autodoc]] StableAudioDiTModel
# AutoencoderKLAllegro
The 3D variational autoencoder (VAE) model with KL loss used in [Allegro](https://github.com/rhymes-ai/Allegro) was introduced in [Allegro: Open the Black Box of Commercial-Level Video Generation Model](https://huggingface.co/papers/2410.15458) by RhymesAI.
The model can be loaded with the following code snippet.
```python
from diffusers import AutoencoderKLAllegro
vae = AutoencoderKLCogVideoX.from_pretrained("rhymes-ai/Allegro", subfolder="vae", torch_dtype=torch.float32).to("cuda")
```
## AutoencoderKLAllegro
## AutoencoderKLOutput
## DecoderOutput
[[autodoc]] AutoencoderKLAllegro
- decode
- encode
- all
[[autodoc]] models.autoencoders.autoencoder_kl.AutoencoderKLOutput
[[autodoc]] models.autoencoders.vae.DecoderOutput
## LatteTransformer3DModel
A Diffusion Transformer model for 3D data from [Latte](https://github.com/Vchitect/Latte).
## LatteTransformer3DModel
[[autodoc]] LatteTransformer3DModel
# LuminaNextDiT2DModel
A Next Version of Diffusion Transformer model for 2D data from [Lumina-T2X](https://github.com/Alpha-VLLM/Lumina-T2X).
## LuminaNextDiT2DModel
[[autodoc]] LuminaNextDiT2DModel
# HunyuanDiT2DControlNetModel
HunyuanDiT2DControlNetModel is an implementation of ControlNet for [Hunyuan-DiT](https://arxiv.org/abs/2405.08748).
ControlNet was introduced in [Adding Conditional Control to Text-to-Image Diffusion Models](https://huggingface.co/papers/2302.05543) by Lvmin Zhang, Anyi Rao, and Maneesh Agrawala.
With a ControlNet model, you can provide an additional control image to condition and control Hunyuan-DiT generation. For example, if you provide a depth map, the ControlNet model generates an image that'll preserve the spatial information from the depth map. It is a more flexible and accurate way to control the image generation process.
The abstract from the paper is:
*We present ControlNet, a neural network architecture to add spatial conditioning controls to large, pretrained text-to-image diffusion models. ControlNet locks the production-ready large diffusion models, and reuses their deep and robust encoding layers pretrained with billions of images as a strong backbone to learn a diverse set of conditional controls. The neural architecture is connected with "zero convolutions" (zero-initialized convolution layers) that progressively grow the parameters from zero and ensure that no harmful noise could affect the finetuning. We test various conditioning controls, eg, edges, depth, segmentation, human pose, etc, with Stable Diffusion, using single or multiple conditions, with or without prompts. We show that the training of ControlNets is robust with small (<50k) and large (>1m) datasets. Extensive results show that ControlNet may facilitate wider applications to control image diffusion models.*
This code is implemented by Tencent Hunyuan Team. You can find pre-trained checkpoints for Hunyuan-DiT ControlNets on [Tencent Hunyuan](https://huggingface.co/Tencent-Hunyuan).
## Example For Loading HunyuanDiT2DControlNetModel
```py
from diffusers import HunyuanDiT2DControlNetModel
import torch
controlnet = HunyuanDiT2DControlNetModel.from_pretrained("Tencent-Hunyuan/HunyuanDiT-v1.1-ControlNet-Diffusers-Pose", torch_dtype=torch.float16)
```
## HunyuanDiT2DControlNetModel
[[autodoc]] HunyuanDiT2DControlNetModel
# HunyuanDiT2DModel
A Diffusion Transformer model for 2D data from [Hunyuan-DiT](https://github.com/Tencent/HunyuanDiT).
## HunyuanDiT2DModel
[[autodoc]] HunyuanDiT2DModel
# StableCascadeUNet
A UNet model from the [Stable Cascade pipeline](../pipelines/stable_cascade.md).
## StableCascadeUNet
[[autodoc]] models.unets.unet_stable_cascade.StableCascadeUNet
# UNet2DModel
The [UNet](https://huggingface.co/papers/1505.04597) model was originally introduced by Ronneberger et al. for biomedical image segmentation, but it is also commonly used in 🤗 Diffusers because it outputs images that are the same size as the input. It is one of the most important components of a diffusion system because it facilitates the actual diffusion process. There are several variants of the UNet model in 🤗 Diffusers, depending on it's number of dimensions and whether it is a conditional model or not. This is a 2D UNet model.
The abstract from the paper is:
*There is large consent that successful training of deep networks requires many thousand annotated training samples. In this paper, we present a network and training strategy that relies on the strong use of data augmentation to use the available annotated samples more efficiently. The architecture consists of a contracting path to capture context and a symmetric expanding path that enables precise localization. We show that such a network can be trained end-to-end from very few images and outperforms the prior best method (a sliding-window convolutional network) on the ISBI challenge for segmentation of neuronal structures in electron microscopic stacks. Using the same network trained on transmitted light microscopy images (phase contrast and DIC) we won the ISBI cell tracking challenge 2015 in these categories by a large margin. Moreover, the network is fast. Segmentation of a 512x512 image takes less than a second on a recent GPU. The full implementation (based on Caffe) and the trained networks are available at http://lmb.informatik.uni-freiburg.de/people/ronneber/u-net.*
## UNet2DModel
## UNet2DOutput
[[autodoc]] UNet2DModel
[[autodoc]] models.unets.unet_2d.UNet2DOutput
# AllegroTransformer3DModel
A Diffusion Transformer model for 3D data from [Allegro](https://github.com/rhymes-ai/Allegro) was introduced in [Allegro: Open the Black Box of Commercial-Level Video Generation Model](https://huggingface.co/papers/2410.15458) by RhymesAI.
The model can be loaded with the following code snippet.
```python
from diffusers import AllegroTransformer3DModel
vae = AllegroTransformer3DModel.from_pretrained("rhymes-ai/Allegro", subfolder="transformer", torch_dtype=torch.bfloat16).to("cuda")
```
## AllegroTransformer3DModel
## Transformer2DModelOutput
[[autodoc]] AllegroTransformer3DModel
[[autodoc]] models.modeling_outputs.Transformer2DModelOutput
# VQModel
The VQ-VAE model was introduced in [Neural Discrete Representation Learning](https://huggingface.co/papers/1711.00937) by Aaron van den Oord, Oriol Vinyals and Koray Kavukcuoglu. The model is used in 🤗 Diffusers to decode latent representations into images. Unlike [AutoencoderKL](/docs/diffusers/main/en/api/models/autoencoderkl#diffusers.AutoencoderKL), the `VQModel` works in a quantized latent space.
The abstract from the paper is:
*Learning useful representations without supervision remains a key challenge in machine learning. In this paper, we propose a simple yet powerful generative model that learns such discrete representations. Our model, the Vector Quantised-Variational AutoEncoder (VQ-VAE), differs from VAEs in two key ways: the encoder network outputs discrete, rather than continuous, codes; and the prior is learnt rather than static. In order to learn a discrete latent representation, we incorporate ideas from vector quantisation (VQ). Using the VQ method allows the model to circumvent issues of "posterior collapse" -- where the latents are ignored when they are paired with a powerful autoregressive decoder -- typically observed in the VAE framework. Pairing these representations with an autoregressive prior, the model can generate high quality images, videos, and speech as well as doing high quality speaker conversion and unsupervised learning of phonemes, providing further evidence of the utility of the learnt representations.*
## VQModel
## VQEncoderOutput
[[autodoc]] VQModel
[[autodoc]] models.autoencoders.vq_model.VQEncoderOutput
# UVit2DModel
The [U-ViT](https://hf.co/papers/2301.11093) model is a vision transformer (ViT) based UNet. This model incorporates elements from ViT (considers all inputs such as time, conditions and noisy image patches as tokens) and a UNet (long skip connections between the shallow and deep layers). The skip connection is important for predicting pixel-level features. An additional 3x3 convolutional block is applied prior to the final output to improve image quality.
The abstract from the paper is:
*Currently, applying diffusion models in pixel space of high resolution images is difficult. Instead, existing approaches focus on diffusion in lower dimensional spaces (latent diffusion), or have multiple super-resolution levels of generation referred to as cascades. The downside is that these approaches add additional complexity to the diffusion framework. This paper aims to improve denoising diffusion for high resolution images while keeping the model as simple as possible. The paper is centered around the research question: How can one train a standard denoising diffusion models on high resolution images, and still obtain performance comparable to these alternate approaches? The four main findings are: 1) the noise schedule should be adjusted for high resolution images, 2) It is sufficient to scale only a particular part of the architecture, 3) dropout should be added at specific locations in the architecture, and 4) downsampling is an effective strategy to avoid high resolution feature maps. Combining these simple yet effective techniques, we achieve state-of-the-art on image generation among diffusion models without sampling modifiers on ImageNet.*
## UVit2DModel
## UVit2DConvEmbed
## UVitBlock
## ConvNextBlock
## ConvMlmLayer
[[autodoc]] UVit2DModel
[[autodoc]] models.unets.uvit_2d.UVit2DConvEmbed
[[autodoc]] models.unets.uvit_2d.UVitBlock
[[autodoc]] models.unets.uvit_2d.ConvNextBlock
[[autodoc]] models.unets.uvit_2d.ConvMlmLayer
# RePaintScheduler
`RePaintScheduler` is a DDPM-based inpainting scheduler for unsupervised inpainting with extreme masks. It is designed to be used with the `RePaintPipeline`, and it is based on the paper [RePaint: Inpainting using Denoising Diffusion Probabilistic Models](https://huggingface.co/papers/2201.09865) by Andreas Lugmayr et al.
The abstract from the paper is:
*Free-form inpainting is the task of adding new content to an image in the regions specified by an arbitrary binary mask. Most existing approaches train for a certain distribution of masks, which limits their generalization capabilities to unseen mask types. Furthermore, training with pixel-wise and perceptual losses often leads to simple textural extensions towards the missing areas instead of semantically meaningful generation. In this work, we propose RePaint: A Denoising Diffusion Probabilistic Model (DDPM) based inpainting approach that is applicable to even extreme masks. We employ a pretrained unconditional DDPM as the generative prior. To condition the generation process, we only alter the reverse diffusion iterations by sampling the unmasked regions using the given image information. Since this technique does not modify or condition the original DDPM network itself, the model produces high-quality and diverse output images for any inpainting form. We validate our method for both faces and general-purpose image inpainting using standard and extreme masks. RePaint outperforms state-of-the-art Autoregressive, and GAN approaches for at least five out of six mask distributions. GitHub Repository: [this http URL](http://git.io/RePaint).*
The original implementation can be found at [andreas128/RePaint](https://github.com/andreas128/).
## RePaintScheduler
## RePaintSchedulerOutput
[[autodoc]] RePaintScheduler
[[autodoc]] schedulers.scheduling_repaint.RePaintSchedulerOutput
# EulerAncestralDiscreteScheduler
A scheduler that uses ancestral sampling with Euler method steps. This is a fast scheduler which can often generate good outputs in 20-30 steps. The scheduler is based on the original [k-diffusion](https://github.com/crowsonkb/k-diffusion/blob/481677d114f6ea445aa009cf5bd7a9cdee909e47/k_diffusion/sampling.py#L72) implementation by [Katherine Crowson](https://github.com/crowsonkb/).
## EulerAncestralDiscreteScheduler
## EulerAncestralDiscreteSchedulerOutput
[[autodoc]] EulerAncestralDiscreteScheduler
[[autodoc]] schedulers.scheduling_euler_ancestral_discrete.EulerAncestralDiscreteSchedulerOutput
# FlowMatchHeunDiscreteScheduler
`FlowMatchHeunDiscreteScheduler` is based on the flow-matching sampling introduced in [EDM](https://arxiv.org/abs/2403.03206).
## FlowMatchHeunDiscreteScheduler
[[autodoc]] FlowMatchHeunDiscreteScheduler
# HeunDiscreteScheduler
The Heun scheduler (Algorithm 1) is from the [Elucidating the Design Space of Diffusion-Based Generative Models](https://huggingface.co/papers/2206.00364) paper by Karras et al. The scheduler is ported from the [k-diffusion](https://github.com/crowsonkb/k-diffusion) library and created by [Katherine Crowson](https://github.com/crowsonkb/).
## HeunDiscreteScheduler
## SchedulerOutput
[[autodoc]] HeunDiscreteScheduler
[[autodoc]] schedulers.scheduling_utils.SchedulerOutput
# UniPCMultistepScheduler
`UniPCMultistepScheduler` is a training-free framework designed for fast sampling of diffusion models. It was introduced in [UniPC: A Unified Predictor-Corrector Framework for Fast Sampling of Diffusion Models](https://huggingface.co/papers/2302.04867) by Wenliang Zhao, Lujia Bai, Yongming Rao, Jie Zhou, Jiwen Lu.
It consists of a corrector (UniC) and a predictor (UniP) that share a unified analytical form and support arbitrary orders.
UniPC is by design model-agnostic, supporting pixel-space/latent-space DPMs on unconditional/conditional sampling. It can also be applied to both noise prediction and data prediction models. The corrector UniC can be also applied after any off-the-shelf solvers to increase the order of accuracy.
The abstract from the paper is:
*Diffusion probabilistic models (DPMs) have demonstrated a very promising ability in high-resolution image synthesis. However, sampling from a pre-trained DPM is time-consuming due to the multiple evaluations of the denoising network, making it more and more important to accelerate the sampling of DPMs. Despite recent progress in designing fast samplers, existing methods still cannot generate satisfying images in many applications where fewer steps (e.g., <10) are favored. In this paper, we develop a unified corrector (UniC) that can be applied after any existing DPM sampler to increase the order of accuracy without extra model evaluations, and derive a unified predictor (UniP) that supports arbitrary order as a byproduct. Combining UniP and UniC, we propose a unified predictor-corrector framework called UniPC for the fast sampling of DPMs, which has a unified analytical form for any order and can significantly improve the sampling quality over previous methods, especially in extremely few steps. We evaluate our methods through extensive experiments including both unconditional and conditional sampling using pixel-space and latent-space DPMs. Our UniPC can achieve 3.87 FID on CIFAR10 (unconditional) and 7.51 FID on ImageNet 256×256 (conditional) with only 10 function evaluations. Code is available at [this https URL](https://github.com/wl-zhao/UniPC).*
## Tips
It is recommended to set `solver_order` to 2 for guide sampling, and `solver_order=3` for unconditional sampling.
Dynamic thresholding from [Imagen](https://huggingface.co/papers/2205.11487) is supported, and for pixel-space
diffusion models, you can set both `predict_x0=True` and `thresholding=True` to use dynamic thresholding. This thresholding method is unsuitable for latent-space diffusion models such as Stable Diffusion.
## UniPCMultistepScheduler
## SchedulerOutput
[[autodoc]] UniPCMultistepScheduler
[[autodoc]] schedulers.scheduling_utils.SchedulerOutput
# DDPMScheduler
[Denoising Diffusion Probabilistic Models](https://huggingface.co/papers/2006.11239) (DDPM) by Jonathan Ho, Ajay Jain and Pieter Abbeel proposes a diffusion based model of the same name. In the context of the 🤗 Diffusers library, DDPM refers to the discrete denoising scheduler from the paper as well as the pipeline.
The abstract from the paper is:
*We present high quality image synthesis results using diffusion probabilistic models, a class of latent variable models inspired by considerations from nonequilibrium thermodynamics. Our best results are obtained by training on a weighted variational bound designed according to a novel connection between diffusion probabilistic models and denoising score matching with Langevin dynamics, and our models naturally admit a progressive lossy decompression scheme that can be interpreted as a generalization of autoregressive decoding. On the unconditional CIFAR10 dataset, we obtain an Inception score of 9.46 and a state-of-the-art FID score of 3.17. On 256x256 LSUN, we obtain sample quality similar to ProgressiveGAN. Our implementation is available at [this https URL](https://github.com/hojonathanho/diffusion).*
## DDPMScheduler
## DDPMSchedulerOutput
[[autodoc]] DDPMScheduler
[[autodoc]] schedulers.scheduling_ddpm.DDPMSchedulerOutput
# PNDMScheduler
`PNDMScheduler`, or pseudo numerical methods for diffusion models, uses more advanced ODE integration techniques like the Runge-Kutta and linear multi-step method. The original implementation can be found at [crowsonkb/k-diffusion](https://github.com/crowsonkb/k-diffusion/blob/481677d114f6ea445aa009cf5bd7a9cdee909e47/k_diffusion/sampling.py#L181).
## PNDMScheduler
## SchedulerOutput
[[autodoc]] PNDMScheduler
[[autodoc]] schedulers.scheduling_utils.SchedulerOutput
# VQDiffusionScheduler
`VQDiffusionScheduler` converts the transformer model's output into a sample for the unnoised image at the previous diffusion timestep. It was introduced in [Vector Quantized Diffusion Model for Text-to-Image Synthesis](https://huggingface.co/papers/2111.14822) by Shuyang Gu, Dong Chen, Jianmin Bao, Fang Wen, Bo Zhang, Dongdong Chen, Lu Yuan, Baining Guo.
The abstract from the paper is:
*We present the vector quantized diffusion (VQ-Diffusion) model for text-to-image generation. This method is based on a vector quantized variational autoencoder (VQ-VAE) whose latent space is modeled by a conditional variant of the recently developed Denoising Diffusion Probabilistic Model (DDPM). We find that this latent-space method is well-suited for text-to-image generation tasks because it not only eliminates the unidirectional bias with existing methods but also allows us to incorporate a mask-and-replace diffusion strategy to avoid the accumulation of errors, which is a serious problem with existing methods. Our experiments show that the VQ-Diffusion produces significantly better text-to-image generation results when compared with conventional autoregressive (AR) models with similar numbers of parameters. Compared with previous GAN-based text-to-image methods, our VQ-Diffusion can handle more complex scenes and improve the synthesized image quality by a large margin. Finally, we show that the image generation computation in our method can be made highly efficient by reparameterization. With traditional AR methods, the text-to-image generation time increases linearly with the output image resolution and hence is quite time consuming even for normal size images. The VQ-Diffusion allows us to achieve a better trade-off between quality and speed. Our experiments indicate that the VQ-Diffusion model with the reparameterization is fifteen times faster than traditional AR methods while achieving a better image quality.*
## VQDiffusionScheduler
## VQDiffusionSchedulerOutput
[[autodoc]] VQDiffusionScheduler
[[autodoc]] schedulers.scheduling_vq_diffusion.VQDiffusionSchedulerOutput
# DDIMScheduler
[Denoising Diffusion Implicit Models](https://huggingface.co/papers/2010.02502) (DDIM) by Jiaming Song, Chenlin Meng and Stefano Ermon.
The abstract from the paper is:
*Denoising diffusion probabilistic models (DDPMs) have achieved high quality image generation without adversarial training, yet they require simulating a Markov chain for many steps to produce a sample.
To accelerate sampling, we present denoising diffusion implicit models (DDIMs), a more efficient class of iterative implicit probabilistic models
with the same training procedure as DDPMs. In DDPMs, the generative process is defined as the reverse of a Markovian diffusion process.
We construct a class of non-Markovian diffusion processes that lead to the same training objective, but whose reverse process can be much faster to sample from.
We empirically demonstrate that DDIMs can produce high quality samples 10× to 50× faster in terms of wall-clock time compared to DDPMs, allow us to trade off computation for sample quality, and can perform semantically meaningful image interpolation directly in the latent space.*
The original codebase of this paper can be found at [ermongroup/ddim](https://github.com/ermongroup/ddim), and you can contact the author on [tsong.me](https://tsong.me/).
## Tips
The paper [Common Diffusion Noise Schedules and Sample Steps are Flawed](https://huggingface.co/papers/2305.08891) claims that a mismatch between the training and inference settings leads to suboptimal inference generation results for Stable Diffusion. To fix this, the authors propose:
🧪 This is an experimental feature!
1. rescale the noise schedule to enforce zero terminal signal-to-noise ratio (SNR)
```py
pipe.scheduler = DDIMScheduler.from_config(pipe.scheduler.config, rescale_betas_zero_snr=True)
```
2. train a model with `v_prediction` (add the following argument to the [train_text_to_image.py](https://github.com/huggingface/diffusers/blob/main/examples/text_to_image/train_text_to_image.py) or [train_text_to_image_lora.py](https://github.com/huggingface/diffusers/blob/main/examples/text_to_image/train_text_to_image_lora.py) scripts)
```bash
--prediction_type="v_prediction"
```
3. change the sampler to always start from the last timestep
```py
pipe.scheduler = DDIMScheduler.from_config(pipe.scheduler.config, timestep_spacing="trailing")
```
4. rescale classifier-free guidance to prevent over-exposure
```py
image = pipe(prompt, guidance_rescale=0.7).images[0]
```
For example:
```py
from diffusers import DiffusionPipeline, DDIMScheduler
import torch
pipe = DiffusionPipeline.from_pretrained("ptx0/pseudo-journey-v2", torch_dtype=torch.float16)
pipe.scheduler = DDIMScheduler.from_config(
pipe.scheduler.config, rescale_betas_zero_snr=True, timestep_spacing="trailing"
)
pipe.to("cuda")
prompt = "A lion in galaxies, spirals, nebulae, stars, smoke, iridescent, intricate detail, octane render, 8k"
image = pipe(prompt, guidance_rescale=0.7).images[0]
image
```
## DDIMScheduler
## DDIMSchedulerOutput
[[autodoc]] DDIMScheduler
[[autodoc]] schedulers.scheduling_ddim.DDIMSchedulerOutput
# KDPM2DiscreteScheduler
The `KDPM2DiscreteScheduler` is inspired by the [Elucidating the Design Space of Diffusion-Based Generative Models](https://huggingface.co/papers/2206.00364) paper, and the scheduler is ported from and created by [Katherine Crowson](https://github.com/crowsonkb/).
The original codebase can be found at [crowsonkb/k-diffusion](https://github.com/crowsonkb/k-diffusion).
## KDPM2DiscreteScheduler
## SchedulerOutput
[[autodoc]] KDPM2DiscreteScheduler
[[autodoc]] schedulers.scheduling_utils.SchedulerOutput
# EDMEulerScheduler
The Karras formulation of the Euler scheduler (Algorithm 2) from the [Elucidating the Design Space of Diffusion-Based Generative Models](https://huggingface.co/papers/2206.00364) paper by Karras et al. This is a fast scheduler which can often generate good outputs in 20-30 steps. The scheduler is based on the original [k-diffusion](https://github.com/crowsonkb/k-diffusion/blob/481677d114f6ea445aa009cf5bd7a9cdee909e47/k_diffusion/sampling.py#L51) implementation by [Katherine Crowson](https://github.com/crowsonkb/).
## EDMEulerScheduler
## EDMEulerSchedulerOutput
[[autodoc]] EDMEulerScheduler
[[autodoc]] schedulers.scheduling_edm_euler.EDMEulerSchedulerOutput
# KarrasVeScheduler
`KarrasVeScheduler` is a stochastic sampler tailored to variance-expanding (VE) models. It is based on the [Elucidating the Design Space of Diffusion-Based Generative Models](https://huggingface.co/papers/2206.00364) and [Score-based generative modeling through stochastic differential equations](https://huggingface.co/papers/2011.13456) papers.
## KarrasVeScheduler
## KarrasVeOutput
[[autodoc]] KarrasVeScheduler
[[autodoc]] schedulers.deprecated.scheduling_karras_ve.KarrasVeOutput
# CosineDPMSolverMultistepScheduler
The `CosineDPMSolverMultistepScheduler` is a variant of `DPMSolverMultistepScheduler` with cosine schedule, proposed by Nichol and Dhariwal (2021).
It is being used in the [Stable Audio Open](https://arxiv.org/abs/2407.14358) paper and the [Stability-AI/stable-audio-tool](https://github.com/Stability-AI/stable-audio-tool) codebase.
This scheduler was contributed by [Yoach Lacombe](https://huggingface.co/ylacombe).
## CosineDPMSolverMultistepScheduler
## SchedulerOutput
[[autodoc]] CosineDPMSolverMultistepScheduler
[[autodoc]] schedulers.scheduling_utils.SchedulerOutput
# KDPM2AncestralDiscreteScheduler
The `KDPM2DiscreteScheduler` with ancestral sampling is inspired by the [Elucidating the Design Space of Diffusion-Based Generative Models](https://huggingface.co/papers/2206.00364) paper, and the scheduler is ported from and created by [Katherine Crowson](https://github.com/crowsonkb/).
The original codebase can be found at [crowsonkb/k-diffusion](https://github.com/crowsonkb/k-diffusion).
## KDPM2AncestralDiscreteScheduler
## SchedulerOutput
[[autodoc]] KDPM2AncestralDiscreteScheduler
[[autodoc]] schedulers.scheduling_utils.SchedulerOutput
# Schedulers
🤗 Diffusers provides many scheduler functions for the diffusion process. A scheduler takes a model's output (the sample which the diffusion process is iterating on) and a timestep to return a denoised sample. The timestep is important because it dictates where in the diffusion process the step is; data is generated by iterating forward *n* timesteps and inference occurs by propagating backward through the timesteps. Based on the timestep, a scheduler may be *discrete* in which case the timestep is an `int` or *continuous* in which case the timestep is a `float`.
Depending on the context, a scheduler defines how to iteratively add noise to an image or how to update a sample based on a model's output:
- during *training*, a scheduler adds noise (there are different algorithms for how to add noise) to a sample to train a diffusion model
- during *inference*, a scheduler defines how to update a sample based on a pretrained model's output
Many schedulers are implemented from the [k-diffusion](https://github.com/crowsonkb/k-diffusion) library by [Katherine Crowson](https://github.com/crowsonkb/), and they're also widely used in A1111. To help you map the schedulers from k-diffusion and A1111 to the schedulers in 🤗 Diffusers, take a look at the table below:
| A1111/k-diffusion | 🤗 Diffusers | Usage |
|---------------------|-------------------------------------|---------------------------------------------------------------------------------------------------------------|
| DPM++ 2M | `DPMSolverMultistepScheduler` | |
| DPM++ 2M Karras | `DPMSolverMultistepScheduler` | init with `use_karras_sigmas=True` |
| DPM++ 2M SDE | `DPMSolverMultistepScheduler` | init with `algorithm_type="sde-dpmsolver++"` |
| DPM++ 2M SDE Karras | `DPMSolverMultistepScheduler` | init with `use_karras_sigmas=True` and `algorithm_type="sde-dpmsolver++"` |
| DPM++ 2S a | N/A | very similar to `DPMSolverSinglestepScheduler` |
| DPM++ 2S a Karras | N/A | very similar to `DPMSolverSinglestepScheduler(use_karras_sigmas=True, ...)` |
| DPM++ SDE | `DPMSolverSinglestepScheduler` | |
| DPM++ SDE Karras | `DPMSolverSinglestepScheduler` | init with `use_karras_sigmas=True` |
| DPM2 | [KDPM2DiscreteScheduler](/docs/diffusers/main/en/api/schedulers/dpm_discrete#diffusers.KDPM2DiscreteScheduler) | |
| DPM2 Karras | [KDPM2DiscreteScheduler](/docs/diffusers/main/en/api/schedulers/dpm_discrete#diffusers.KDPM2DiscreteScheduler) | init with `use_karras_sigmas=True` |
| DPM2 a | [KDPM2AncestralDiscreteScheduler](/docs/diffusers/main/en/api/schedulers/dpm_discrete_ancestral#diffusers.KDPM2AncestralDiscreteScheduler) | |
| DPM2 a Karras | [KDPM2AncestralDiscreteScheduler](/docs/diffusers/main/en/api/schedulers/dpm_discrete_ancestral#diffusers.KDPM2AncestralDiscreteScheduler) | init with `use_karras_sigmas=True` |
| DPM adaptive | N/A | |
| DPM fast | N/A | |
| Euler | `EulerDiscreteScheduler` | |
| Euler a | [EulerAncestralDiscreteScheduler](/docs/diffusers/main/en/api/schedulers/euler_ancestral#diffusers.EulerAncestralDiscreteScheduler) | |
| Heun | [HeunDiscreteScheduler](/docs/diffusers/main/en/api/schedulers/heun#diffusers.HeunDiscreteScheduler) | |
| LMS | `LMSDiscreteScheduler` | |
| LMS Karras | `LMSDiscreteScheduler` | init with `use_karras_sigmas=True` |
| N/A | `DEISMultistepScheduler` | |
| N/A | [UniPCMultistepScheduler](/docs/diffusers/main/en/api/schedulers/unipc#diffusers.UniPCMultistepScheduler) | |
## Noise schedules and schedule types
| A1111/k-diffusion | 🤗 Diffusers |
|--------------------------|----------------------------------------------------------------------------|
| Karras | init with `use_karras_sigmas=True` |
| sgm_uniform | init with `timestep_spacing="trailing"` |
| simple | init with `timestep_spacing="trailing"` |
| exponential | init with `timestep_spacing="linspace"`, `use_exponential_sigmas=True` |
| beta | init with `timestep_spacing="linspace"`, `use_beta_sigmas=True` |
All schedulers are built from the base `SchedulerMixin` class which implements low level utilities shared by all schedulers.
## SchedulerMixin
## SchedulerOutput
## KarrasDiffusionSchedulers
`KarrasDiffusionSchedulers` are a broad generalization of schedulers in 🤗 Diffusers. The schedulers in this class are distinguished at a high level by their noise sampling strategy, the type of network and scaling, the training strategy, and how the loss is weighed.
The different schedulers in this class, depending on the ordinary differential equations (ODE) solver type, fall into the above taxonomy and provide a good abstraction for the design of the main schedulers implemented in 🤗 Diffusers. The schedulers in this class are given [here](https://github.com/huggingface/diffusers/blob/a69754bb879ed55b9b6dc9dd0b3cf4fa4124c765/src/diffusers/schedulers/scheduling_utils.py#L32).
## PushToHubMixin
[[autodoc]] SchedulerMixin
[[autodoc]] schedulers.scheduling_utils.SchedulerOutput
[[autodoc]] utils.PushToHubMixin
# TCDScheduler
[Trajectory Consistency Distillation](https://huggingface.co/papers/2402.19159) by Jianbin Zheng, Minghui Hu, Zhongyi Fan, Chaoyue Wang, Changxing Ding, Dacheng Tao and Tat-Jen Cham introduced a Strategic Stochastic Sampling (Algorithm 4) that is capable of generating good samples in a small number of steps. Distinguishing it as an advanced iteration of the multistep scheduler (Algorithm 1) in the [Consistency Models](https://huggingface.co/papers/2303.01469), Strategic Stochastic Sampling specifically tailored for the trajectory consistency function.
The abstract from the paper is:
*Latent Consistency Model (LCM) extends the Consistency Model to the latent space and leverages the guided consistency distillation technique to achieve impressive performance in accelerating text-to-image synthesis. However, we observed that LCM struggles to generate images with both clarity and detailed intricacy. To address this limitation, we initially delve into and elucidate the underlying causes. Our investigation identifies that the primary issue stems from errors in three distinct areas. Consequently, we introduce Trajectory Consistency Distillation (TCD), which encompasses trajectory consistency function and strategic stochastic sampling. The trajectory consistency function diminishes the distillation errors by broadening the scope of the self-consistency boundary condition and endowing the TCD with the ability to accurately trace the entire trajectory of the Probability Flow ODE. Additionally, strategic stochastic sampling is specifically designed to circumvent the accumulated errors inherent in multi-step consistency sampling, which is meticulously tailored to complement the TCD model. Experiments demonstrate that TCD not only significantly enhances image quality at low NFEs but also yields more detailed results compared to the teacher model at high NFEs.*
The original codebase can be found at [jabir-zheng/TCD](https://github.com/jabir-zheng/TCD).
## TCDScheduler
## TCDSchedulerOutput
[[autodoc]] TCDScheduler
[[autodoc]] schedulers.scheduling_tcd.TCDSchedulerOutput
# DPMSolverSinglestepScheduler
`DPMSolverSinglestepScheduler` is a single step scheduler from [DPM-Solver: A Fast ODE Solver for Diffusion Probabilistic Model Sampling in Around 10 Steps](https://huggingface.co/papers/2206.00927) and [DPM-Solver++: Fast Solver for Guided Sampling of Diffusion Probabilistic Models](https://huggingface.co/papers/2211.01095) by Cheng Lu, Yuhao Zhou, Fan Bao, Jianfei Chen, Chongxuan Li, and Jun Zhu.
DPMSolver (and the improved version DPMSolver++) is a fast dedicated high-order solver for diffusion ODEs with convergence order guarantee. Empirically, DPMSolver sampling with only 20 steps can generate high-quality
samples, and it can generate quite good samples even in 10 steps.
The original implementation can be found at [LuChengTHU/dpm-solver](https://github.com/LuChengTHU/dpm-solver).
## Tips
It is recommended to set `solver_order` to 2 for guide sampling, and `solver_order=3` for unconditional sampling.
Dynamic thresholding from [Imagen](https://huggingface.co/papers/2205.11487) is supported, and for pixel-space
diffusion models, you can set both `algorithm_type="dpmsolver++"` and `thresholding=True` to use dynamic
thresholding. This thresholding method is unsuitable for latent-space diffusion models such as
Stable Diffusion.
## DPMSolverSinglestepScheduler
## SchedulerOutput
[[autodoc]] DPMSolverSinglestepScheduler
[[autodoc]] schedulers.scheduling_utils.SchedulerOutput
# ScoreSdeVeScheduler
`ScoreSdeVeScheduler` is a variance exploding stochastic differential equation (SDE) scheduler. It was introduced in the [Score-Based Generative Modeling through Stochastic Differential Equations](https://huggingface.co/papers/2011.13456) paper by Yang Song, Jascha Sohl-Dickstein, Diederik P. Kingma, Abhishek Kumar, Stefano Ermon, Ben Poole.
The abstract from the paper is:
*Creating noise from data is easy; creating data from noise is generative modeling. We present a stochastic differential equation (SDE) that smoothly transforms a complex data distribution to a known prior distribution by slowly injecting noise, and a corresponding reverse-time SDE that transforms the prior distribution back into the data distribution by slowly removing the noise. Crucially, the reverse-time SDE depends only on the time-dependent gradient field (\aka, score) of the perturbed data distribution. By leveraging advances in score-based generative modeling, we can accurately estimate these scores with neural networks, and use numerical SDE solvers to generate samples. We show that this framework encapsulates previous approaches in score-based generative modeling and diffusion probabilistic modeling, allowing for new sampling procedures and new modeling capabilities. In particular, we introduce a predictor-corrector framework to correct errors in the evolution of the discretized reverse-time SDE. We also derive an equivalent neural ODE that samples from the same distribution as the SDE, but additionally enables exact likelihood computation, and improved sampling efficiency. In addition, we provide a new way to solve inverse problems with score-based models, as demonstrated with experiments on class-conditional generation, image inpainting, and colorization. Combined with multiple architectural improvements, we achieve record-breaking performance for unconditional image generation on CIFAR-10 with an Inception score of 9.89 and FID of 2.20, a competitive likelihood of 2.99 bits/dim, and demonstrate high fidelity generation of 1024 x 1024 images for the first time from a score-based generative model.*
## ScoreSdeVeScheduler
## SdeVeOutput
[[autodoc]] ScoreSdeVeScheduler
[[autodoc]] schedulers.scheduling_sde_ve.SdeVeOutput
# DEISMultistepScheduler
Diffusion Exponential Integrator Sampler (DEIS) is proposed in [Fast Sampling of Diffusion Models with Exponential Integrator](https://huggingface.co/papers/2204.13902) by Qinsheng Zhang and Yongxin Chen. `DEISMultistepScheduler` is a fast high order solver for diffusion ordinary differential equations (ODEs).
This implementation modifies the polynomial fitting formula in log-rho space instead of the original linear `t` space in the DEIS paper. The modification enjoys closed-form coefficients for exponential multistep update instead of replying on the numerical solver.
The abstract from the paper is:
*The past few years have witnessed the great success of Diffusion models~(DMs) in generating high-fidelity samples in generative modeling tasks. A major limitation of the DM is its notoriously slow sampling procedure which normally requires hundreds to thousands of time discretization steps of the learned diffusion process to reach the desired accuracy. Our goal is to develop a fast sampling method for DMs with a much less number of steps while retaining high sample quality. To this end, we systematically analyze the sampling procedure in DMs and identify key factors that affect the sample quality, among which the method of discretization is most crucial. By carefully examining the learned diffusion process, we propose Diffusion Exponential Integrator Sampler~(DEIS). It is based on the Exponential Integrator designed for discretizing ordinary differential equations (ODEs) and leverages a semilinear structure of the learned diffusion process to reduce the discretization error. The proposed method can be applied to any DMs and can generate high-fidelity samples in as few as 10 steps. In our experiments, it takes about 3 minutes on one A6000 GPU to generate 50k images from CIFAR10. Moreover, by directly using pre-trained DMs, we achieve the state-of-art sampling performance when the number of score function evaluation~(NFE) is limited, e.g., 4.17 FID with 10 NFEs, 3.37 FID, and 9.74 IS with only 15 NFEs on CIFAR10. Code is available at [this https URL](https://github.com/qsh-zh/deis).*
## Tips
It is recommended to set `solver_order` to 2 or 3, while `solver_order=1` is equivalent to [DDIMScheduler](/docs/diffusers/main/en/api/schedulers/ddim#diffusers.DDIMScheduler).
Dynamic thresholding from [Imagen](https://huggingface.co/papers/2205.11487) is supported, and for pixel-space
diffusion models, you can set `thresholding=True` to use the dynamic thresholding.
## DEISMultistepScheduler
## SchedulerOutput
[[autodoc]] DEISMultistepScheduler
[[autodoc]] schedulers.scheduling_utils.SchedulerOutput
# Latent Consistency Model Multistep Scheduler
## Overview
Multistep and onestep scheduler (Algorithm 3) introduced alongside latent consistency models in the paper [Latent Consistency Models: Synthesizing High-Resolution Images with Few-Step Inference](https://arxiv.org/abs/2310.04378) by Simian Luo, Yiqin Tan, Longbo Huang, Jian Li, and Hang Zhao.
This scheduler should be able to generate good samples from `LatentConsistencyModelPipeline` in 1-8 steps.
## LCMScheduler
[[autodoc]] LCMScheduler
# EDMDPMSolverMultistepScheduler
`EDMDPMSolverMultistepScheduler` is a [Karras formulation](https://huggingface.co/papers/2206.00364) of `DPMSolverMultistepScheduler`, a multistep scheduler from [DPM-Solver: A Fast ODE Solver for Diffusion Probabilistic Model Sampling in Around 10 Steps](https://huggingface.co/papers/2206.00927) and [DPM-Solver++: Fast Solver for Guided Sampling of Diffusion Probabilistic Models](https://huggingface.co/papers/2211.01095) by Cheng Lu, Yuhao Zhou, Fan Bao, Jianfei Chen, Chongxuan Li, and Jun Zhu.
DPMSolver (and the improved version DPMSolver++) is a fast dedicated high-order solver for diffusion ODEs with convergence order guarantee. Empirically, DPMSolver sampling with only 20 steps can generate high-quality
samples, and it can generate quite good samples even in 10 steps.
## EDMDPMSolverMultistepScheduler
## SchedulerOutput
[[autodoc]] EDMDPMSolverMultistepScheduler
[[autodoc]] schedulers.scheduling_utils.SchedulerOutput
# LMSDiscreteScheduler
`LMSDiscreteScheduler` is a linear multistep scheduler for discrete beta schedules. The scheduler is ported from and created by [Katherine Crowson](https://github.com/crowsonkb/), and the original implementation can be found at [crowsonkb/k-diffusion](https://github.com/crowsonkb/k-diffusion/blob/481677d114f6ea445aa009cf5bd7a9cdee909e47/k_diffusion/sampling.py#L181).
## LMSDiscreteScheduler
## LMSDiscreteSchedulerOutput
[[autodoc]] LMSDiscreteScheduler
[[autodoc]] schedulers.scheduling_lms_discrete.LMSDiscreteSchedulerOutput
# ScoreSdeVpScheduler
`ScoreSdeVpScheduler` is a variance preserving stochastic differential equation (SDE) scheduler. It was introduced in the [Score-Based Generative Modeling through Stochastic Differential Equations](https://huggingface.co/papers/2011.13456) paper by Yang Song, Jascha Sohl-Dickstein, Diederik P. Kingma, Abhishek Kumar, Stefano Ermon, Ben Poole.
The abstract from the paper is:
*Creating noise from data is easy; creating data from noise is generative modeling. We present a stochastic differential equation (SDE) that smoothly transforms a complex data distribution to a known prior distribution by slowly injecting noise, and a corresponding reverse-time SDE that transforms the prior distribution back into the data distribution by slowly removing the noise. Crucially, the reverse-time SDE depends only on the time-dependent gradient field (\aka, score) of the perturbed data distribution. By leveraging advances in score-based generative modeling, we can accurately estimate these scores with neural networks, and use numerical SDE solvers to generate samples. We show that this framework encapsulates previous approaches in score-based generative modeling and diffusion probabilistic modeling, allowing for new sampling procedures and new modeling capabilities. In particular, we introduce a predictor-corrector framework to correct errors in the evolution of the discretized reverse-time SDE. We also derive an equivalent neural ODE that samples from the same distribution as the SDE, but additionally enables exact likelihood computation, and improved sampling efficiency. In addition, we provide a new way to solve inverse problems with score-based models, as demonstrated with experiments on class-conditional generation, image inpainting, and colorization. Combined with multiple architectural improvements, we achieve record-breaking performance for unconditional image generation on CIFAR-10 with an Inception score of 9.89 and FID of 2.20, a competitive likelihood of 2.99 bits/dim, and demonstrate high fidelity generation of 1024 x 1024 images for the first time from a score-based generative model.*
🚧 This scheduler is under construction!
## ScoreSdeVpScheduler
[[autodoc]] schedulers.deprecated.scheduling_sde_vp.ScoreSdeVpScheduler
# DDIMInverseScheduler
`DDIMInverseScheduler` is the inverted scheduler from [Denoising Diffusion Implicit Models](https://huggingface.co/papers/2010.02502) (DDIM) by Jiaming Song, Chenlin Meng and Stefano Ermon.
The implementation is mostly based on the DDIM inversion definition from [Null-text Inversion for Editing Real Images using Guided Diffusion Models](https://huggingface.co/papers/2211.09794).
## DDIMInverseScheduler
[[autodoc]] DDIMInverseScheduler
# ConsistencyDecoderScheduler
This scheduler is a part of the `ConsistencyDecoderPipeline` and was introduced in [DALL-E 3](https://openai.com/dall-e-3).
The original codebase can be found at [openai/consistency_models](https://github.com/openai/consistency_models).
## ConsistencyDecoderScheduler
[[autodoc]] schedulers.scheduling_consistency_decoder.ConsistencyDecoderScheduler
# DPMSolverSDEScheduler
The `DPMSolverSDEScheduler` is inspired by the stochastic sampler from the [Elucidating the Design Space of Diffusion-Based Generative Models](https://huggingface.co/papers/2206.00364) paper, and the scheduler is ported from and created by [Katherine Crowson](https://github.com/crowsonkb/).
## DPMSolverSDEScheduler
## SchedulerOutput
[[autodoc]] DPMSolverSDEScheduler
[[autodoc]] schedulers.scheduling_utils.SchedulerOutput
# IPNDMScheduler
`IPNDMScheduler` is a fourth-order Improved Pseudo Linear Multistep scheduler. The original implementation can be found at [crowsonkb/v-diffusion-pytorch](https://github.com/crowsonkb/v-diffusion-pytorch/blob/987f8985e38208345c1959b0ea767a625831cc9b/diffusion/sampling.py#L296).
## IPNDMScheduler
## SchedulerOutput
[[autodoc]] IPNDMScheduler
[[autodoc]] schedulers.scheduling_utils.SchedulerOutput
# EulerDiscreteScheduler
The Euler scheduler (Algorithm 2) is from the [Elucidating the Design Space of Diffusion-Based Generative Models](https://huggingface.co/papers/2206.00364) paper by Karras et al. This is a fast scheduler which can often generate good outputs in 20-30 steps. The scheduler is based on the original [k-diffusion](https://github.com/crowsonkb/k-diffusion/blob/481677d114f6ea445aa009cf5bd7a9cdee909e47/k_diffusion/sampling.py#L51) implementation by [Katherine Crowson](https://github.com/crowsonkb/).
## EulerDiscreteScheduler
## EulerDiscreteSchedulerOutput
[[autodoc]] EulerDiscreteScheduler
[[autodoc]] schedulers.scheduling_euler_discrete.EulerDiscreteSchedulerOutput
# FlowMatchEulerDiscreteScheduler
`FlowMatchEulerDiscreteScheduler` is based on the flow-matching sampling introduced in [Stable Diffusion 3](https://arxiv.org/abs/2403.03206).
## FlowMatchEulerDiscreteScheduler
[[autodoc]] FlowMatchEulerDiscreteScheduler
# DPMSolverMultistepInverse
`DPMSolverMultistepInverse` is the inverted scheduler from [DPM-Solver: A Fast ODE Solver for Diffusion Probabilistic Model Sampling in Around 10 Steps](https://huggingface.co/papers/2206.00927) and [DPM-Solver++: Fast Solver for Guided Sampling of Diffusion Probabilistic Models](https://huggingface.co/papers/2211.01095) by Cheng Lu, Yuhao Zhou, Fan Bao, Jianfei Chen, Chongxuan Li, and Jun Zhu.
The implementation is mostly based on the DDIM inversion definition of [Null-text Inversion for Editing Real Images using Guided Diffusion Models](https://huggingface.co/papers/2211.09794) and notebook implementation of the `DiffEdit` latent inversion from [Xiang-cd/DiffEdit-stable-diffusion](https://github.com/Xiang-cd/DiffEdit-stable-diffusion/blob/main/diffedit.ipynb).
## Tips
Dynamic thresholding from [Imagen](https://huggingface.co/papers/2205.11487) is supported, and for pixel-space
diffusion models, you can set both `algorithm_type="dpmsolver++"` and `thresholding=True` to use the dynamic
thresholding. This thresholding method is unsuitable for latent-space diffusion models such as
Stable Diffusion.
## DPMSolverMultistepInverseScheduler
## SchedulerOutput
[[autodoc]] DPMSolverMultistepInverseScheduler
[[autodoc]] schedulers.scheduling_utils.SchedulerOutput
# DPMSolverMultistepScheduler
`DPMSolverMultistepScheduler` is a multistep scheduler from [DPM-Solver: A Fast ODE Solver for Diffusion Probabilistic Model Sampling in Around 10 Steps](https://huggingface.co/papers/2206.00927) and [DPM-Solver++: Fast Solver for Guided Sampling of Diffusion Probabilistic Models](https://huggingface.co/papers/2211.01095) by Cheng Lu, Yuhao Zhou, Fan Bao, Jianfei Chen, Chongxuan Li, and Jun Zhu.
DPMSolver (and the improved version DPMSolver++) is a fast dedicated high-order solver for diffusion ODEs with convergence order guarantee. Empirically, DPMSolver sampling with only 20 steps can generate high-quality
samples, and it can generate quite good samples even in 10 steps.
## Tips
It is recommended to set `solver_order` to 2 for guide sampling, and `solver_order=3` for unconditional sampling.
Dynamic thresholding from [Imagen](https://huggingface.co/papers/2205.11487) is supported, and for pixel-space
diffusion models, you can set both `algorithm_type="dpmsolver++"` and `thresholding=True` to use the dynamic
thresholding. This thresholding method is unsuitable for latent-space diffusion models such as
Stable Diffusion.
The SDE variant of DPMSolver and DPM-Solver++ is also supported, but only for the first and second-order solvers. This is a fast SDE solver for the reverse diffusion SDE. It is recommended to use the second-order `sde-dpmsolver++`.
## DPMSolverMultistepScheduler
## SchedulerOutput
[[autodoc]] DPMSolverMultistepScheduler
[[autodoc]] schedulers.scheduling_utils.SchedulerOutput
# CMStochasticIterativeScheduler
[Consistency Models](https://huggingface.co/papers/2303.01469) by Yang Song, Prafulla Dhariwal, Mark Chen, and Ilya Sutskever introduced a multistep and onestep scheduler (Algorithm 1) that is capable of generating good samples in one or a small number of steps.
The abstract from the paper is:
*Diffusion models have significantly advanced the fields of image, audio, and video generation, but they depend on an iterative sampling process that causes slow generation. To overcome this limitation, we propose consistency models, a new family of models that generate high quality samples by directly mapping noise to data. They support fast one-step generation by design, while still allowing multistep sampling to trade compute for sample quality. They also support zero-shot data editing, such as image inpainting, colorization, and super-resolution, without requiring explicit training on these tasks. Consistency models can be trained either by distilling pre-trained diffusion models, or as standalone generative models altogether. Through extensive experiments, we demonstrate that they outperform existing distillation techniques for diffusion models in one- and few-step sampling, achieving the new state-of-the-art FID of 3.55 on CIFAR-10 and 6.20 on ImageNet 64x64 for one-step generation. When trained in isolation, consistency models become a new family of generative models that can outperform existing one-step, non-adversarial generative models on standard benchmarks such as CIFAR-10, ImageNet 64x64 and LSUN 256x256.*
The original codebase can be found at [openai/consistency_models](https://github.com/openai/consistency_models).
## CMStochasticIterativeScheduler
## CMStochasticIterativeSchedulerOutput
[[autodoc]] CMStochasticIterativeScheduler
[[autodoc]] schedulers.scheduling_consistency_models.CMStochasticIterativeSchedulerOutput
# IP-Adapter
[IP-Adapter](https://hf.co/papers/2308.06721) is a lightweight adapter that enables prompting a diffusion model with an image. This method decouples the cross-attention layers of the image and text features. The image features are generated from an image encoder.
Learn how to load an IP-Adapter checkpoint and image in the IP-Adapter [loading](../../using-diffusers/loading_adapters#ip-adapter) guide, and you can see how to use it in the [usage](../../using-diffusers/ip_adapter) guide.
## IPAdapterMixin
## IPAdapterMaskProcessor
[[autodoc]] loaders.ip_adapter.IPAdapterMixin
[[autodoc]] image_processor.IPAdapterMaskProcessor
# UNet
Some training methods - like LoRA and Custom Diffusion - typically target the UNet's attention layers, but these training methods can also target other non-attention layers. Instead of training all of a model's parameters, only a subset of the parameters are trained, which is faster and more efficient. This class is useful if you're *only* loading weights into a UNet. If you need to load weights into the text encoder or a text encoder and UNet, try using the `load_lora_weights()` function instead.
The `UNet2DConditionLoadersMixin` class provides functions for loading and saving weights, fusing and unfusing LoRAs, disabling and enabling LoRAs, and setting and deleting adapters.
To learn more about how to load LoRA weights, see the [LoRA](../../using-diffusers/loading_adapters#lora) loading guide.
## UNet2DConditionLoadersMixin
[[autodoc]] loaders.unet.UNet2DConditionLoadersMixin
# Textual Inversion
Textual Inversion is a training method for personalizing models by learning new text embeddings from a few example images. The file produced from training is extremely small (a few KBs) and the new embeddings can be loaded into the text encoder.
`TextualInversionLoaderMixin` provides a function for loading Textual Inversion embeddings from Diffusers and Automatic1111 into the text encoder and loading a special token to activate the embeddings.
To learn more about how to load Textual Inversion embeddings, see the [Textual Inversion](../../using-diffusers/loading_adapters#textual-inversion) loading guide.
## TextualInversionLoaderMixin
[[autodoc]] loaders.textual_inversion.TextualInversionLoaderMixin
# PEFT
Diffusers supports loading adapters such as [LoRA](../../using-diffusers/loading_adapters) with the [PEFT](https://huggingface.co/docs/peft/index) library with the `PeftAdapterMixin` class. This allows modeling classes in Diffusers like [UNet2DConditionModel](/docs/diffusers/main/en/api/models/unet2d-cond#diffusers.UNet2DConditionModel), [SD3Transformer2DModel](/docs/diffusers/main/en/api/models/sd3_transformer2d#diffusers.SD3Transformer2DModel) to operate with an adapter.
Refer to the [Inference with PEFT](../../tutorials/using_peft_for_inference.md) tutorial for an overview of how to use PEFT in Diffusers for inference.
## PeftAdapterMixin
[[autodoc]] loaders.peft.PeftAdapterMixin
# LoRA
LoRA is a fast and lightweight training method that inserts and trains a significantly smaller number of parameters instead of all the model parameters. This produces a smaller file (~100 MBs) and makes it easier to quickly train a model to learn a new concept. LoRA weights are typically loaded into the denoiser, text encoder or both. The denoiser usually corresponds to a UNet ([UNet2DConditionModel](/docs/diffusers/main/en/api/models/unet2d-cond#diffusers.UNet2DConditionModel), for example) or a Transformer ([SD3Transformer2DModel](/docs/diffusers/main/en/api/models/sd3_transformer2d#diffusers.SD3Transformer2DModel), for example). There are several classes for loading LoRA weights:
- `StableDiffusionLoraLoaderMixin` provides functions for loading and unloading, fusing and unfusing, enabling and disabling, and more functions for managing LoRA weights. This class can be used with any model.
- `StableDiffusionXLLoraLoaderMixin` is a [Stable Diffusion (SDXL)](../../api/pipelines/stable_diffusion/stable_diffusion_xl) version of the `StableDiffusionLoraLoaderMixin` class for loading and saving LoRA weights. It can only be used with the SDXL model.
- `SD3LoraLoaderMixin` provides similar functions for [Stable Diffusion 3](https://huggingface.co/blog/sd3).
- `AmusedLoraLoaderMixin` is for the `AmusedPipeline`.
- `LoraBaseMixin` provides a base class with several utility methods to fuse, unfuse, unload, LoRAs and more.
To learn more about how to load LoRA weights, see the [LoRA](../../using-diffusers/loading_adapters#lora) loading guide.
## StableDiffusionLoraLoaderMixin
## StableDiffusionXLLoraLoaderMixin
## SD3LoraLoaderMixin
## AmusedLoraLoaderMixin
## LoraBaseMixin
[[autodoc]] loaders.lora_pipeline.StableDiffusionLoraLoaderMixin
[[autodoc]] loaders.lora_pipeline.StableDiffusionXLLoraLoaderMixin
[[autodoc]] loaders.lora_pipeline.SD3LoraLoaderMixin
[[autodoc]] loaders.lora_pipeline.AmusedLoraLoaderMixin
[[autodoc]] loaders.lora_base.LoraBaseMixin
# Single files
The `from_single_file()` method allows you to load:
* a model stored in a single file, which is useful if you're working with models from the diffusion ecosystem, like Automatic1111, and commonly rely on a single-file layout to store and share models
* a model stored in their originally distributed layout, which is useful if you're working with models finetuned with other services, and want to load it directly into Diffusers model objects and pipelines
> [!TIP]
> Read the [Model files and layouts](../../using-diffusers/other-formats) guide to learn more about the Diffusers-multifolder layout versus the single-file layout, and how to load models stored in these different layouts.
## Supported pipelines
- `StableDiffusionPipeline`
- `StableDiffusionImg2ImgPipeline`
- `StableDiffusionInpaintPipeline`
- `StableDiffusionControlNetPipeline`
- `StableDiffusionControlNetImg2ImgPipeline`
- `StableDiffusionControlNetInpaintPipeline`
- `StableDiffusionUpscalePipeline`
- `StableDiffusionXLPipeline`
- `StableDiffusionXLImg2ImgPipeline`
- `StableDiffusionXLInpaintPipeline`
- `StableDiffusionXLInstructPix2PixPipeline`
- `StableDiffusionXLControlNetPipeline`
- `StableDiffusionXLKDiffusionPipeline`
- `StableDiffusion3Pipeline`
- `LatentConsistencyModelPipeline`
- `LatentConsistencyModelImg2ImgPipeline`
- `StableDiffusionControlNetXSPipeline`
- `StableDiffusionXLControlNetXSPipeline`
- `LEditsPPPipelineStableDiffusion`
- `LEditsPPPipelineStableDiffusionXL`
- `PIAPipeline`
## Supported models
- [UNet2DConditionModel](/docs/diffusers/main/en/api/models/unet2d-cond#diffusers.UNet2DConditionModel)
- `StableCascadeUNet`
- [AutoencoderKL](/docs/diffusers/main/en/api/models/autoencoderkl#diffusers.AutoencoderKL)
- [ControlNetModel](/docs/diffusers/main/en/api/models/controlnet#diffusers.ControlNetModel)
- [SD3Transformer2DModel](/docs/diffusers/main/en/api/models/sd3_transformer2d#diffusers.SD3Transformer2DModel)
- [FluxTransformer2DModel](/docs/diffusers/main/en/api/models/flux_transformer#diffusers.FluxTransformer2DModel)
## FromSingleFileMixin
## FromOriginalModelMixin
[[autodoc]] loaders.single_file.FromSingleFileMixin
[[autodoc]] loaders.single_file_model.FromOriginalModelMixin
# InstructPix2Pix
[InstructPix2Pix: Learning to Follow Image Editing Instructions](https://huggingface.co/papers/2211.09800) is by Tim Brooks, Aleksander Holynski and Alexei A. Efros.
The abstract from the paper is:
*We propose a method for editing images from human instructions: given an input image and a written instruction that tells the model what to do, our model follows these instructions to edit the image. To obtain training data for this problem, we combine the knowledge of two large pretrained models -- a language model (GPT-3) and a text-to-image model (Stable Diffusion) -- to generate a large dataset of image editing examples. Our conditional diffusion model, InstructPix2Pix, is trained on our generated data, and generalizes to real images and user-written instructions at inference time. Since it performs edits in the forward pass and does not require per example fine-tuning or inversion, our model edits images quickly, in a matter of seconds. We show compelling editing results for a diverse collection of input images and written instructions.*
You can find additional information about InstructPix2Pix on the [project page](https://www.timothybrooks.com/instruct-pix2pix), [original codebase](https://github.com/timothybrooks/instruct-pix2pix), and try it out in a [demo](https://huggingface.co/spaces/timbrooks/instruct-pix2pix).
Make sure to check out the Schedulers [guide](../../using-diffusers/schedulers) to learn how to explore the tradeoff between scheduler speed and quality, and see the [reuse components across pipelines](../../using-diffusers/loading#reuse-components-across-pipelines) section to learn how to efficiently load the same components into multiple pipelines.
## StableDiffusionInstructPix2PixPipeline
## StableDiffusionXLInstructPix2PixPipeline
[[autodoc]] StableDiffusionInstructPix2PixPipeline
- __call__
- all
- load_textual_inversion
- load_lora_weights
- save_lora_weights
[[autodoc]] StableDiffusionXLInstructPix2PixPipeline
- __call__
- all
# Latte
![latte text-to-video](https://github.com/Vchitect/Latte/blob/52bc0029899babbd6e9250384c83d8ed2670ff7a/visuals/latte.gif?raw=true)
[Latte: Latent Diffusion Transformer for Video Generation](https://arxiv.org/abs/2401.03048) from Monash University, Shanghai AI Lab, Nanjing University, and Nanyang Technological University.
The abstract from the paper is:
*We propose a novel Latent Diffusion Transformer, namely Latte, for video generation. Latte first extracts spatio-temporal tokens from input videos and then adopts a series of Transformer blocks to model video distribution in the latent space. In order to model a substantial number of tokens extracted from videos, four efficient variants are introduced from the perspective of decomposing the spatial and temporal dimensions of input videos. To improve the quality of generated videos, we determine the best practices of Latte through rigorous experimental analysis, including video clip patch embedding, model variants, timestep-class information injection, temporal positional embedding, and learning strategies. Our comprehensive evaluation demonstrates that Latte achieves state-of-the-art performance across four standard video generation datasets, i.e., FaceForensics, SkyTimelapse, UCF101, and Taichi-HD. In addition, we extend Latte to text-to-video generation (T2V) task, where Latte achieves comparable results compared to recent T2V models. We strongly believe that Latte provides valuable insights for future research on incorporating Transformers into diffusion models for video generation.*
**Highlights**: Latte is a latent diffusion transformer proposed as a backbone for modeling different modalities (trained for text-to-video generation here). It achieves state-of-the-art performance across four standard video benchmarks - [FaceForensics](https://arxiv.org/abs/1803.09179), [SkyTimelapse](https://arxiv.org/abs/1709.07592), [UCF101](https://arxiv.org/abs/1212.0402) and [Taichi-HD](https://arxiv.org/abs/2003.00196). To prepare and download the datasets for evaluation, please refer to [this https URL](https://github.com/Vchitect/Latte/blob/main/docs/datasets_evaluation.md).
This pipeline was contributed by [maxin-cn](https://github.com/maxin-cn). The original codebase can be found [here](https://github.com/Vchitect/Latte). The original weights can be found under [hf.co/maxin-cn](https://huggingface.co/maxin-cn).
Make sure to check out the Schedulers [guide](../../using-diffusers/schedulers.md) to learn how to explore the tradeoff between scheduler speed and quality, and see the [reuse components across pipelines](../../using-diffusers/loading.md#reuse-a-pipeline) section to learn how to efficiently load the same components into multiple pipelines.
### Inference
Use [`torch.compile`](https://huggingface.co/docs/diffusers/main/en/tutorials/fast_diffusion#torchcompile) to reduce the inference latency.
First, load the pipeline:
```python
import torch
from diffusers import LattePipeline
pipeline = LattePipeline.from_pretrained(
"maxin-cn/Latte-1", torch_dtype=torch.float16
).to("cuda")
```
Then change the memory layout of the pipelines `transformer` and `vae` components to `torch.channels-last`:
```python
pipeline.transformer.to(memory_format=torch.channels_last)
pipeline.vae.to(memory_format=torch.channels_last)
```
Finally, compile the components and run inference:
```python
pipeline.transformer = torch.compile(pipeline.transformer)
pipeline.vae.decode = torch.compile(pipeline.vae.decode)
video = pipeline(prompt="A dog wearing sunglasses floating in space, surreal, nebulae in background").frames[0]
```
The [benchmark](https://gist.github.com/a-r-r-o-w/4e1694ca46374793c0361d740a99ff19) results on an 80GB A100 machine are:
```
Without torch.compile(): Average inference time: 16.246 seconds.
With torch.compile(): Average inference time: 14.573 seconds.
```
## LattePipeline
[[autodoc]] LattePipeline
- all
- __call__
# aMUSEd
aMUSEd was introduced in [aMUSEd: An Open MUSE Reproduction](https://huggingface.co/papers/2401.01808) by Suraj Patil, William Berman, Robin Rombach, and Patrick von Platen.
Amused is a lightweight text to image model based off of the [MUSE](https://arxiv.org/abs/2301.00704) architecture. Amused is particularly useful in applications that require a lightweight and fast model such as generating many images quickly at once.
Amused is a vqvae token based transformer that can generate an image in fewer forward passes than many diffusion models. In contrast with muse, it uses the smaller text encoder CLIP-L/14 instead of t5-xxl. Due to its small parameter count and few forward pass generation process, amused can generate many images quickly. This benefit is seen particularly at larger batch sizes.
The abstract from the paper is:
*We present aMUSEd, an open-source, lightweight masked image model (MIM) for text-to-image generation based on MUSE. With 10 percent of MUSE's parameters, aMUSEd is focused on fast image generation. We believe MIM is under-explored compared to latent diffusion, the prevailing approach for text-to-image generation. Compared to latent diffusion, MIM requires fewer inference steps and is more interpretable. Additionally, MIM can be fine-tuned to learn additional styles with only a single image. We hope to encourage further exploration of MIM by demonstrating its effectiveness on large-scale text-to-image generation and releasing reproducible training code. We also release checkpoints for two models which directly produce images at 256x256 and 512x512 resolutions.*
| Model | Params |
|-------|--------|
| [amused-256](https://huggingface.co/amused/amused-256) | 603M |
| [amused-512](https://huggingface.co/amused/amused-512) | 608M |
## AmusedPipeline
[[autodoc]] AmusedPipeline
- __call__
- all
- enable_xformers_memory_efficient_attention
- disable_xformers_memory_efficient_attention
[[autodoc]] AmusedImg2ImgPipeline
- __call__
- all
- enable_xformers_memory_efficient_attention
- disable_xformers_memory_efficient_attention
[[autodoc]] AmusedInpaintPipeline
- __call__
- all
- enable_xformers_memory_efficient_attention
- disable_xformers_memory_efficient_attention
# I2VGen-XL
[I2VGen-XL: High-Quality Image-to-Video Synthesis via Cascaded Diffusion Models](https://hf.co/papers/2311.04145.pdf) by Shiwei Zhang, Jiayu Wang, Yingya Zhang, Kang Zhao, Hangjie Yuan, Zhiwu Qin, Xiang Wang, Deli Zhao, and Jingren Zhou.
The abstract from the paper is:
*Video synthesis has recently made remarkable strides benefiting from the rapid development of diffusion models. However, it still encounters challenges in terms of semantic accuracy, clarity and spatio-temporal continuity. They primarily arise from the scarcity of well-aligned text-video data and the complex inherent structure of videos, making it difficult for the model to simultaneously ensure semantic and qualitative excellence. In this report, we propose a cascaded I2VGen-XL approach that enhances model performance by decoupling these two factors and ensures the alignment of the input data by utilizing static images as a form of crucial guidance. I2VGen-XL consists of two stages: i) the base stage guarantees coherent semantics and preserves content from input images by using two hierarchical encoders, and ii) the refinement stage enhances the video's details by incorporating an additional brief text and improves the resolution to 1280×720. To improve the diversity, we collect around 35 million single-shot text-video pairs and 6 billion text-image pairs to optimize the model. By this means, I2VGen-XL can simultaneously enhance the semantic accuracy, continuity of details and clarity of generated videos. Through extensive experiments, we have investigated the underlying principles of I2VGen-XL and compared it with current top methods, which can demonstrate its effectiveness on diverse data. The source code and models will be publicly available at [this https URL](https://i2vgen-xl.github.io/).*
The original codebase can be found [here](https://github.com/ali-vilab/i2vgen-xl/). The model checkpoints can be found [here](https://huggingface.co/ali-vilab/).
Make sure to check out the Schedulers [guide](../../using-diffusers/schedulers) to learn how to explore the tradeoff between scheduler speed and quality, and see the [reuse components across pipelines](../../using-diffusers/loading#reuse-components-across-pipelines) section to learn how to efficiently load the same components into multiple pipelines. Also, to know more about reducing the memory usage of this pipeline, refer to the ["Reduce memory usage"] section [here](../../using-diffusers/svd#reduce-memory-usage).
Sample output with I2VGenXL:
library.
## Notes
* I2VGenXL always uses a `clip_skip` value of 1. This means it leverages the penultimate layer representations from the text encoder of CLIP.
* It can generate videos of quality that is often on par with [Stable Video Diffusion](../../using-diffusers/svd) (SVD).
* Unlike SVD, it additionally accepts text prompts as inputs.
* It can generate higher resolution videos.
* When using the [DDIMScheduler](/docs/diffusers/main/en/api/schedulers/ddim#diffusers.DDIMScheduler) (which is default for this pipeline), less than 50 steps for inference leads to bad results.
* This implementation is 1-stage variant of I2VGenXL. The main figure in the [I2VGen-XL](https://arxiv.org/abs/2311.04145) paper shows a 2-stage variant, however, 1-stage variant works well. See [this discussion](https://github.com/huggingface/diffusers/discussions/7952) for more details.
## I2VGenXLPipeline
## I2VGenXLPipelineOutput
[[autodoc]] I2VGenXLPipeline
- all
- __call__
[[autodoc]] pipelines.i2vgen_xl.pipeline_i2vgen_xl.I2VGenXLPipelineOutput
# Dance Diffusion
[Dance Diffusion](https://github.com/Harmonai-org/sample-generator) is by Zach Evans.
Dance Diffusion is the first in a suite of generative audio tools for producers and musicians released by [Harmonai](https://github.com/Harmonai-org).
Make sure to check out the Schedulers [guide](../../using-diffusers/schedulers) to learn how to explore the tradeoff between scheduler speed and quality, and see the [reuse components across pipelines](../../using-diffusers/loading#reuse-components-across-pipelines) section to learn how to efficiently load the same components into multiple pipelines.
## DanceDiffusionPipeline
## AudioPipelineOutput
[[autodoc]] DanceDiffusionPipeline
- all
- __call__
[[autodoc]] pipelines.AudioPipelineOutput
# Würstchen
[Wuerstchen: An Efficient Architecture for Large-Scale Text-to-Image Diffusion Models](https://huggingface.co/papers/2306.00637) is by Pablo Pernias, Dominic Rampas, Mats L. Richter and Christopher Pal and Marc Aubreville.
The abstract from the paper is:
*We introduce Würstchen, a novel architecture for text-to-image synthesis that combines competitive performance with unprecedented cost-effectiveness for large-scale text-to-image diffusion models. A key contribution of our work is to develop a latent diffusion technique in which we learn a detailed but extremely compact semantic image representation used to guide the diffusion process. This highly compressed representation of an image provides much more detailed guidance compared to latent representations of language and this significantly reduces the computational requirements to achieve state-of-the-art results. Our approach also improves the quality of text-conditioned image generation based on our user preference study. The training requirements of our approach consists of 24,602 A100-GPU hours - compared to Stable Diffusion 2.1's 200,000 GPU hours. Our approach also requires less training data to achieve these results. Furthermore, our compact latent representations allows us to perform inference over twice as fast, slashing the usual costs and carbon footprint of a state-of-the-art (SOTA) diffusion model significantly, without compromising the end performance. In a broader comparison against SOTA models our approach is substantially more efficient and compares favorably in terms of image quality. We believe that this work motivates more emphasis on the prioritization of both performance and computational accessibility.*
## Würstchen Overview
Würstchen is a diffusion model, whose text-conditional model works in a highly compressed latent space of images. Why is this important? Compressing data can reduce computational costs for both training and inference by magnitudes. Training on 1024x1024 images is way more expensive than training on 32x32. Usually, other works make use of a relatively small compression, in the range of 4x - 8x spatial compression. Würstchen takes this to an extreme. Through its novel design, we achieve a 42x spatial compression. This was unseen before because common methods fail to faithfully reconstruct detailed images after 16x spatial compression. Würstchen employs a two-stage compression, what we call Stage A and Stage B. Stage A is a VQGAN, and Stage B is a Diffusion Autoencoder (more details can be found in the [paper](https://huggingface.co/papers/2306.00637)). A third model, Stage C, is learned in that highly compressed latent space. This training requires fractions of the compute used for current top-performing models, while also allowing cheaper and faster inference.
## Würstchen v2 comes to Diffusers
After the initial paper release, we have improved numerous things in the architecture, training and sampling, making Würstchen competitive to current state-of-the-art models in many ways. We are excited to release this new version together with Diffusers. Here is a list of the improvements.
- Higher resolution (1024x1024 up to 2048x2048)
- Faster inference
- Multi Aspect Resolution Sampling
- Better quality
We are releasing 3 checkpoints for the text-conditional image generation model (Stage C). Those are:
- v2-base
- v2-aesthetic
- **(default)** v2-interpolated (50% interpolation between v2-base and v2-aesthetic)
We recommend using v2-interpolated, as it has a nice touch of both photorealism and aesthetics. Use v2-base for finetunings as it does not have a style bias and use v2-aesthetic for very artistic generations.
A comparison can be seen here:
## Text-to-Image Generation
For the sake of usability, Würstchen can be used with a single pipeline. This pipeline can be used as follows:
```python
import torch
from diffusers import AutoPipelineForText2Image
from diffusers.pipelines.wuerstchen import DEFAULT_STAGE_C_TIMESTEPS
pipe = AutoPipelineForText2Image.from_pretrained("warp-ai/wuerstchen", torch_dtype=torch.float16).to("cuda")
caption = "Anthropomorphic cat dressed as a fire fighter"
images = pipe(
caption,
width=1024,
height=1536,
prior_timesteps=DEFAULT_STAGE_C_TIMESTEPS,
prior_guidance_scale=4.0,
num_images_per_prompt=2,
).images
```
For explanation purposes, we can also initialize the two main pipelines of Würstchen individually. Würstchen consists of 3 stages: Stage C, Stage B, Stage A. They all have different jobs and work only together. When generating text-conditional images, Stage C will first generate the latents in a very compressed latent space. This is what happens in the `prior_pipeline`. Afterwards, the generated latents will be passed to Stage B, which decompresses the latents into a bigger latent space of a VQGAN. These latents can then be decoded by Stage A, which is a VQGAN, into the pixel-space. Stage B & Stage A are both encapsulated in the `decoder_pipeline`. For more details, take a look at the [paper](https://huggingface.co/papers/2306.00637).
```python
import torch
from diffusers import WuerstchenDecoderPipeline, WuerstchenPriorPipeline
from diffusers.pipelines.wuerstchen import DEFAULT_STAGE_C_TIMESTEPS
device = "cuda"
dtype = torch.float16
num_images_per_prompt = 2
prior_pipeline = WuerstchenPriorPipeline.from_pretrained(
"warp-ai/wuerstchen-prior", torch_dtype=dtype
).to(device)
decoder_pipeline = WuerstchenDecoderPipeline.from_pretrained(
"warp-ai/wuerstchen", torch_dtype=dtype
).to(device)
caption = "Anthropomorphic cat dressed as a fire fighter"
negative_prompt = ""
prior_output = prior_pipeline(
prompt=caption,
height=1024,
width=1536,
timesteps=DEFAULT_STAGE_C_TIMESTEPS,
negative_prompt=negative_prompt,
guidance_scale=4.0,
num_images_per_prompt=num_images_per_prompt,
)
decoder_output = decoder_pipeline(
image_embeddings=prior_output.image_embeddings,
prompt=caption,
negative_prompt=negative_prompt,
guidance_scale=0.0,
output_type="pil",
).images[0]
decoder_output
```
## Speed-Up Inference
You can make use of `torch.compile` function and gain a speed-up of about 2-3x:
```python
prior_pipeline.prior = torch.compile(prior_pipeline.prior, mode="reduce-overhead", fullgraph=True)
decoder_pipeline.decoder = torch.compile(decoder_pipeline.decoder, mode="reduce-overhead", fullgraph=True)
```
## Limitations
- Due to the high compression employed by Würstchen, generations can lack a good amount
of detail. To our human eye, this is especially noticeable in faces, hands etc.
- **Images can only be generated in 128-pixel steps**, e.g. the next higher resolution
after 1024x1024 is 1152x1152
- The model lacks the ability to render correct text in images
- The model often does not achieve photorealism
- Difficult compositional prompts are hard for the model
The original codebase, as well as experimental ideas, can be found at [dome272/Wuerstchen](https://github.com/dome272/Wuerstchen).
## WuerstchenCombinedPipeline
## WuerstchenPriorPipeline
## WuerstchenPriorPipelineOutput
## WuerstchenDecoderPipeline
## Citation
```bibtex
@misc{pernias2023wuerstchen,
title={Wuerstchen: An Efficient Architecture for Large-Scale Text-to-Image Diffusion Models},
author={Pablo Pernias and Dominic Rampas and Mats L. Richter and Christopher J. Pal and Marc Aubreville},
year={2023},
eprint={2306.00637},
archivePrefix={arXiv},
primaryClass={cs.CV}
}
```
[[autodoc]] WuerstchenCombinedPipeline
- all
- __call__
[[autodoc]] WuerstchenPriorPipeline
- all
- __call__
[[autodoc]] pipelines.wuerstchen.pipeline_wuerstchen_prior.WuerstchenPriorPipelineOutput
[[autodoc]] WuerstchenDecoderPipeline
- all
- __call__
# MultiDiffusion
[MultiDiffusion: Fusing Diffusion Paths for Controlled Image Generation](https://huggingface.co/papers/2302.08113) is by Omer Bar-Tal, Lior Yariv, Yaron Lipman, and Tali Dekel.
The abstract from the paper is:
*Recent advances in text-to-image generation with diffusion models present transformative capabilities in image quality. However, user controllability of the generated image, and fast adaptation to new tasks still remains an open challenge, currently mostly addressed by costly and long re-training and fine-tuning or ad-hoc adaptations to specific image generation tasks. In this work, we present MultiDiffusion, a unified framework that enables versatile and controllable image generation, using a pre-trained text-to-image diffusion model, without any further training or finetuning. At the center of our approach is a new generation process, based on an optimization task that binds together multiple diffusion generation processes with a shared set of parameters or constraints. We show that MultiDiffusion can be readily applied to generate high quality and diverse images that adhere to user-provided controls, such as desired aspect ratio (e.g., panorama), and spatial guiding signals, ranging from tight segmentation masks to bounding boxes.*
You can find additional information about MultiDiffusion on the [project page](https://multidiffusion.github.io/), [original codebase](https://github.com/omerbt/MultiDiffusion), and try it out in a [demo](https://huggingface.co/spaces/weizmannscience/MultiDiffusion).
## Tips
While calling `StableDiffusionPanoramaPipeline`, it's possible to specify the `view_batch_size` parameter to be > 1.
For some GPUs with high performance, this can speedup the generation process and increase VRAM usage.
To generate panorama-like images make sure you pass the width parameter accordingly. We recommend a width value of 2048 which is the default.
Circular padding is applied to ensure there are no stitching artifacts when working with panoramas to ensure a seamless transition from the rightmost part to the leftmost part. By enabling circular padding (set `circular_padding=True`), the operation applies additional crops after the rightmost point of the image, allowing the model to "see” the transition from the rightmost part to the leftmost part. This helps maintain visual consistency in a 360-degree sense and creates a proper “panorama” that can be viewed using 360-degree panorama viewers. When decoding latents in Stable Diffusion, circular padding is applied to ensure that the decoded latents match in the RGB space.
For example, without circular padding, there is a stitching artifact (default):
![img](https://huggingface.co/datasets/huggingface/documentation-images/resolve/main/indoor_%20no_circular_padding.png)
But with circular padding, the right and the left parts are matching (`circular_padding=True`):
![img](https://huggingface.co/datasets/huggingface/documentation-images/resolve/main/indoor_%20circular_padding.png)
Make sure to check out the Schedulers [guide](../../using-diffusers/schedulers) to learn how to explore the tradeoff between scheduler speed and quality, and see the [reuse components across pipelines](../../using-diffusers/loading#reuse-components-across-pipelines) section to learn how to efficiently load the same components into multiple pipelines.
## StableDiffusionPanoramaPipeline
## StableDiffusionPipelineOutput
[[autodoc]] StableDiffusionPanoramaPipeline
- __call__
- all
[[autodoc]] pipelines.stable_diffusion.StableDiffusionPipelineOutput
# Lumina-T2X
![concepts](https://github.com/Alpha-VLLM/Lumina-T2X/assets/54879512/9f52eabb-07dc-4881-8257-6d8a5f2a0a5a)
[Lumina-Next : Making Lumina-T2X Stronger and Faster with Next-DiT](https://github.com/Alpha-VLLM/Lumina-T2X/blob/main/assets/lumina-next.pdf) from Alpha-VLLM, OpenGVLab, Shanghai AI Laboratory.
The abstract from the paper is:
*Lumina-T2X is a nascent family of Flow-based Large Diffusion Transformers (Flag-DiT) that establishes a unified framework for transforming noise into various modalities, such as images and videos, conditioned on text instructions. Despite its promising capabilities, Lumina-T2X still encounters challenges including training instability, slow inference, and extrapolation artifacts. In this paper, we present Lumina-Next, an improved version of Lumina-T2X, showcasing stronger generation performance with increased training and inference efficiency. We begin with a comprehensive analysis of the Flag-DiT architecture and identify several suboptimal components, which we address by introducing the Next-DiT architecture with 3D RoPE and sandwich normalizations. To enable better resolution extrapolation, we thoroughly compare different context extrapolation methods applied to text-to-image generation with 3D RoPE, and propose Frequency- and Time-Aware Scaled RoPE tailored for diffusion transformers. Additionally, we introduce a sigmoid time discretization schedule to reduce sampling steps in solving the Flow ODE and the Context Drop method to merge redundant visual tokens for faster network evaluation, effectively boosting the overall sampling speed. Thanks to these improvements, Lumina-Next not only improves the quality and efficiency of basic text-to-image generation but also demonstrates superior resolution extrapolation capabilities and multilingual generation using decoder-based LLMs as the text encoder, all in a zero-shot manner. To further validate Lumina-Next as a versatile generative framework, we instantiate it on diverse tasks including visual recognition, multi-view, audio, music, and point cloud generation, showcasing strong performance across these domains. By releasing all codes and model weights at https://github.com/Alpha-VLLM/Lumina-T2X, we aim to advance the development of next-generation generative AI capable of universal modeling.*
**Highlights**: Lumina-Next is a next-generation Diffusion Transformer that significantly enhances text-to-image generation, multilingual generation, and multitask performance by introducing the Next-DiT architecture, 3D RoPE, and frequency- and time-aware RoPE, among other improvements.
Lumina-Next has the following components:
* It improves sampling efficiency with fewer and faster Steps.
* It uses a Next-DiT as a transformer backbone with Sandwichnorm 3D RoPE, and Grouped-Query Attention.
* It uses a Frequency- and Time-Aware Scaled RoPE.
---
[Lumina-T2X: Transforming Text into Any Modality, Resolution, and Duration via Flow-based Large Diffusion Transformers](https://arxiv.org/abs/2405.05945) from Alpha-VLLM, OpenGVLab, Shanghai AI Laboratory.
The abstract from the paper is:
*Sora unveils the potential of scaling Diffusion Transformer for generating photorealistic images and videos at arbitrary resolutions, aspect ratios, and durations, yet it still lacks sufficient implementation details. In this technical report, we introduce the Lumina-T2X family - a series of Flow-based Large Diffusion Transformers (Flag-DiT) equipped with zero-initialized attention, as a unified framework designed to transform noise into images, videos, multi-view 3D objects, and audio clips conditioned on text instructions. By tokenizing the latent spatial-temporal space and incorporating learnable placeholders such as [nextline] and [nextframe] tokens, Lumina-T2X seamlessly unifies the representations of different modalities across various spatial-temporal resolutions. This unified approach enables training within a single framework for different modalities and allows for flexible generation of multimodal data at any resolution, aspect ratio, and length during inference. Advanced techniques like RoPE, RMSNorm, and flow matching enhance the stability, flexibility, and scalability of Flag-DiT, enabling models of Lumina-T2X to scale up to 7 billion parameters and extend the context window to 128K tokens. This is particularly beneficial for creating ultra-high-definition images with our Lumina-T2I model and long 720p videos with our Lumina-T2V model. Remarkably, Lumina-T2I, powered by a 5-billion-parameter Flag-DiT, requires only 35% of the training computational costs of a 600-million-parameter naive DiT. Our further comprehensive analysis underscores Lumina-T2X's preliminary capability in resolution extrapolation, high-resolution editing, generating consistent 3D views, and synthesizing videos with seamless transitions. We expect that the open-sourcing of Lumina-T2X will further foster creativity, transparency, and diversity in the generative AI community.*
You can find the original codebase at [Alpha-VLLM](https://github.com/Alpha-VLLM/Lumina-T2X) and all the available checkpoints at [Alpha-VLLM Lumina Family](https://huggingface.co/collections/Alpha-VLLM/lumina-family-66423205bedb81171fd0644b).
**Highlights**: Lumina-T2X supports Any Modality, Resolution, and Duration.
Lumina-T2X has the following components:
* It uses a Flow-based Large Diffusion Transformer as the backbone
* It supports different any modalities with one backbone and corresponding encoder, decoder.
This pipeline was contributed by [PommesPeter](https://github.com/PommesPeter). The original codebase can be found [here](https://github.com/Alpha-VLLM/Lumina-T2X). The original weights can be found under [hf.co/Alpha-VLLM](https://huggingface.co/Alpha-VLLM).
Make sure to check out the Schedulers [guide](../../using-diffusers/schedulers.md) to learn how to explore the tradeoff between scheduler speed and quality, and see the [reuse components across pipelines](../../using-diffusers/loading.md#reuse-a-pipeline) section to learn how to efficiently load the same components into multiple pipelines.
### Inference (Text-to-Image)
Use [`torch.compile`](https://huggingface.co/docs/diffusers/main/en/tutorials/fast_diffusion#torchcompile) to reduce the inference latency.
First, load the pipeline:
```python
from diffusers import LuminaText2ImgPipeline
import torch
pipeline = LuminaText2ImgPipeline.from_pretrained(
"Alpha-VLLM/Lumina-Next-SFT-diffusers", torch_dtype=torch.bfloat16
).to("cuda")
```
Then change the memory layout of the pipelines `transformer` and `vae` components to `torch.channels-last`:
```python
pipeline.transformer.to(memory_format=torch.channels_last)
pipeline.vae.to(memory_format=torch.channels_last)
```
Finally, compile the components and run inference:
```python
pipeline.transformer = torch.compile(pipeline.transformer, mode="max-autotune", fullgraph=True)
pipeline.vae.decode = torch.compile(pipeline.vae.decode, mode="max-autotune", fullgraph=True)
image = pipeline(prompt="Upper body of a young woman in a Victorian-era outfit with brass goggles and leather straps. Background shows an industrial revolution cityscape with smoky skies and tall, metal structures").images[0]
```
## LuminaText2ImgPipeline
[[autodoc]] LuminaText2ImgPipeline
- all
- __call__
# CogVideoX
[CogVideoX: Text-to-Video Diffusion Models with An Expert Transformer](https://arxiv.org/abs/2408.06072) from Tsinghua University & ZhipuAI, by Zhuoyi Yang, Jiayan Teng, Wendi Zheng, Ming Ding, Shiyu Huang, Jiazheng Xu, Yuanming Yang, Wenyi Hong, Xiaohan Zhang, Guanyu Feng, Da Yin, Xiaotao Gu, Yuxuan Zhang, Weihan Wang, Yean Cheng, Ting Liu, Bin Xu, Yuxiao Dong, Jie Tang.
The abstract from the paper is:
*We introduce CogVideoX, a large-scale diffusion transformer model designed for generating videos based on text prompts. To efficently model video data, we propose to levearge a 3D Variational Autoencoder (VAE) to compresses videos along both spatial and temporal dimensions. To improve the text-video alignment, we propose an expert transformer with the expert adaptive LayerNorm to facilitate the deep fusion between the two modalities. By employing a progressive training technique, CogVideoX is adept at producing coherent, long-duration videos characterized by significant motion. In addition, we develop an effectively text-video data processing pipeline that includes various data preprocessing strategies and a video captioning method. It significantly helps enhance the performance of CogVideoX, improving both generation quality and semantic alignment. Results show that CogVideoX demonstrates state-of-the-art performance across both multiple machine metrics and human evaluations. The model weight of CogVideoX-2B is publicly available at https://github.com/THUDM/CogVideo.*
Make sure to check out the Schedulers [guide](../../using-diffusers/schedulers.md) to learn how to explore the tradeoff between scheduler speed and quality, and see the [reuse components across pipelines](../../using-diffusers/loading.md#reuse-a-pipeline) section to learn how to efficiently load the same components into multiple pipelines.
This pipeline was contributed by [zRzRzRzRzRzRzR](https://github.com/zRzRzRzRzRzRzR). The original codebase can be found [here](https://huggingface.co/THUDM). The original weights can be found under [hf.co/THUDM](https://huggingface.co/THUDM).
There are two models available that can be used with the text-to-video and video-to-video CogVideoX pipelines:
- [`THUDM/CogVideoX-2b`](https://huggingface.co/THUDM/CogVideoX-2b): The recommended dtype for running this model is `fp16`.
- [`THUDM/CogVideoX-5b`](https://huggingface.co/THUDM/CogVideoX-5b): The recommended dtype for running this model is `bf16`.
There is one model available that can be used with the image-to-video CogVideoX pipeline:
- [`THUDM/CogVideoX-5b-I2V`](https://huggingface.co/THUDM/CogVideoX-5b-I2V): The recommended dtype for running this model is `bf16`.
There are two models that support pose controllable generation (by the [Alibaba-PAI](https://huggingface.co/alibaba-pai) team):
- [`alibaba-pai/CogVideoX-Fun-V1.1-2b-Pose`](https://huggingface.co/alibaba-pai/CogVideoX-Fun-V1.1-2b-Pose): The recommended dtype for running this model is `bf16`.
- [`alibaba-pai/CogVideoX-Fun-V1.1-5b-Pose`](https://huggingface.co/alibaba-pai/CogVideoX-Fun-V1.1-5b-Pose): The recommended dtype for running this model is `bf16`.
## Inference
Use [`torch.compile`](https://huggingface.co/docs/diffusers/main/en/tutorials/fast_diffusion#torchcompile) to reduce the inference latency.
First, load the pipeline:
```python
import torch
from diffusers import CogVideoXPipeline, CogVideoXImageToVideoPipeline
from diffusers.utils import export_to_video,load_image
pipe = CogVideoXPipeline.from_pretrained("THUDM/CogVideoX-5b").to("cuda") # or "THUDM/CogVideoX-2b"
```
If you are using the image-to-video pipeline, load it as follows:
```python
pipe = CogVideoXImageToVideoPipeline.from_pretrained("THUDM/CogVideoX-5b-I2V").to("cuda")
```
Then change the memory layout of the pipelines `transformer` component to `torch.channels_last`:
```python
pipe.transformer.to(memory_format=torch.channels_last)
```
Compile the components and run inference:
```python
pipe.transformer = torch.compile(pipeline.transformer, mode="max-autotune", fullgraph=True)
# CogVideoX works well with long and well-described prompts
prompt = "A panda, dressed in a small, red jacket and a tiny hat, sits on a wooden stool in a serene bamboo forest. The panda's fluffy paws strum a miniature acoustic guitar, producing soft, melodic tunes. Nearby, a few other pandas gather, watching curiously and some clapping in rhythm. Sunlight filters through the tall bamboo, casting a gentle glow on the scene. The panda's face is expressive, showing concentration and joy as it plays. The background includes a small, flowing stream and vibrant green foliage, enhancing the peaceful and magical atmosphere of this unique musical performance."
video = pipe(prompt=prompt, guidance_scale=6, num_inference_steps=50).frames[0]
```
The [T2V benchmark](https://gist.github.com/a-r-r-o-w/5183d75e452a368fd17448fcc810bd3f) results on an 80GB A100 machine are:
```
Without torch.compile(): Average inference time: 96.89 seconds.
With torch.compile(): Average inference time: 76.27 seconds.
```
### Memory optimization
CogVideoX-2b requires about 19 GB of GPU memory to decode 49 frames (6 seconds of video at 8 FPS) with output resolution 720x480 (W x H), which makes it not possible to run on consumer GPUs or free-tier T4 Colab. The following memory optimizations could be used to reduce the memory footprint. For replication, you can refer to [this](https://gist.github.com/a-r-r-o-w/3959a03f15be5c9bd1fe545b09dfcc93) script.
- `pipe.enable_model_cpu_offload()`:
- Without enabling cpu offloading, memory usage is `33 GB`
- With enabling cpu offloading, memory usage is `19 GB`
- `pipe.enable_sequential_cpu_offload()`:
- Similar to `enable_model_cpu_offload` but can significantly reduce memory usage at the cost of slow inference
- When enabled, memory usage is under `4 GB`
- `pipe.vae.enable_tiling()`:
- With enabling cpu offloading and tiling, memory usage is `11 GB`
- `pipe.vae.enable_slicing()`
### Quantized inference
[torchao](https://github.com/pytorch/ao) and [optimum-quanto](https://github.com/huggingface/optimum-quanto/) can be used to quantize the text encoder, transformer and VAE modules to lower the memory requirements. This makes it possible to run the model on a free-tier T4 Colab or lower VRAM GPUs!
It is also worth noting that torchao quantization is fully compatible with [torch.compile](/optimization/torch2.0#torchcompile), which allows for much faster inference speed. Additionally, models can be serialized and stored in a quantized datatype to save disk space with torchao. Find examples and benchmarks in the gists below.
- [torchao](https://gist.github.com/a-r-r-o-w/4d9732d17412888c885480c6521a9897)
- [quanto](https://gist.github.com/a-r-r-o-w/31be62828b00a9292821b85c1017effa)
## CogVideoXPipeline
## CogVideoXImageToVideoPipeline
## CogVideoXVideoToVideoPipeline
## CogVideoXFunControlPipeline
## CogVideoXPipelineOutput
[[autodoc]] CogVideoXPipeline
- all
- __call__
[[autodoc]] CogVideoXImageToVideoPipeline
- all
- __call__
[[autodoc]] CogVideoXVideoToVideoPipeline
- all
- __call__
[[autodoc]] CogVideoXFunControlPipeline
- all
- __call__
[[autodoc]] pipelines.cogvideo.pipeline_output.CogVideoXPipelineOutput
# ControlNet-XS with Stable Diffusion XL
ControlNet-XS was introduced in [ControlNet-XS](https://vislearn.github.io/ControlNet-XS/) by Denis Zavadski and Carsten Rother. It is based on the observation that the control model in the [original ControlNet](https://huggingface.co/papers/2302.05543) can be made much smaller and still produce good results.
Like the original ControlNet model, you can provide an additional control image to condition and control Stable Diffusion generation. For example, if you provide a depth map, the ControlNet model generates an image that'll preserve the spatial information from the depth map. It is a more flexible and accurate way to control the image generation process.
ControlNet-XS generates images with comparable quality to a regular ControlNet, but it is 20-25% faster ([see benchmark](https://github.com/UmerHA/controlnet-xs-benchmark/blob/main/Speed%20Benchmark.ipynb)) and uses ~45% less memory.
Here's the overview from the [project page](https://vislearn.github.io/ControlNet-XS/):
*With increasing computing capabilities, current model architectures appear to follow the trend of simply upscaling all components without validating the necessity for doing so. In this project we investigate the size and architectural design of ControlNet [Zhang et al., 2023] for controlling the image generation process with stable diffusion-based models. We show that a new architecture with as little as 1% of the parameters of the base model achieves state-of-the art results, considerably better than ControlNet in terms of FID score. Hence we call it ControlNet-XS. We provide the code for controlling StableDiffusion-XL [Podell et al., 2023] (Model B, 48M Parameters) and StableDiffusion 2.1 [Rombach et al. 2022] (Model B, 14M Parameters), all under openrail license.*
This model was contributed by [UmerHA](https://twitter.com/UmerHAdil). ❤️
🧪 Many of the SDXL ControlNet checkpoints are experimental, and there is a lot of room for improvement. Feel free to open an [Issue](https://github.com/huggingface/diffusers/issues/new/choose) and leave us feedback on how we can improve!
Make sure to check out the Schedulers [guide](../../using-diffusers/schedulers) to learn how to explore the tradeoff between scheduler speed and quality, and see the [reuse components across pipelines](../../using-diffusers/loading#reuse-components-across-pipelines) section to learn how to efficiently load the same components into multiple pipelines.
## StableDiffusionXLControlNetXSPipeline
## StableDiffusionPipelineOutput
[[autodoc]] StableDiffusionXLControlNetXSPipeline
- all
- __call__
[[autodoc]] pipelines.stable_diffusion.StableDiffusionPipelineOutput
# Perturbed-Attention Guidance
[Perturbed-Attention Guidance (PAG)](https://ku-cvlab.github.io/Perturbed-Attention-Guidance/) is a new diffusion sampling guidance that improves sample quality across both unconditional and conditional settings, achieving this without requiring further training or the integration of external modules.
PAG was introduced in [Self-Rectifying Diffusion Sampling with Perturbed-Attention Guidance](https://huggingface.co/papers/2403.17377) by Donghoon Ahn, Hyoungwon Cho, Jaewon Min, Wooseok Jang, Jungwoo Kim, SeonHwa Kim, Hyun Hee Park, Kyong Hwan Jin and Seungryong Kim.
The abstract from the paper is:
*Recent studies have demonstrated that diffusion models are capable of generating high-quality samples, but their quality heavily depends on sampling guidance techniques, such as classifier guidance (CG) and classifier-free guidance (CFG). These techniques are often not applicable in unconditional generation or in various downstream tasks such as image restoration. In this paper, we propose a novel sampling guidance, called Perturbed-Attention Guidance (PAG), which improves diffusion sample quality across both unconditional and conditional settings, achieving this without requiring additional training or the integration of external modules. PAG is designed to progressively enhance the structure of samples throughout the denoising process. It involves generating intermediate samples with degraded structure by substituting selected self-attention maps in diffusion U-Net with an identity matrix, by considering the self-attention mechanisms' ability to capture structural information, and guiding the denoising process away from these degraded samples. In both ADM and Stable Diffusion, PAG surprisingly improves sample quality in conditional and even unconditional scenarios. Moreover, PAG significantly improves the baseline performance in various downstream tasks where existing guidances such as CG or CFG cannot be fully utilized, including ControlNet with empty prompts and image restoration such as inpainting and deblurring.*
PAG can be used by specifying the `pag_applied_layers` as a parameter when instantiating a PAG pipeline. It can be a single string or a list of strings. Each string can be a unique layer identifier or a regular expression to identify one or more layers.
- Full identifier as a normal string: `down_blocks.2.attentions.0.transformer_blocks.0.attn1.processor`
- Full identifier as a RegEx: `down_blocks.2.(attentions|motion_modules).0.transformer_blocks.0.attn1.processor`
- Partial identifier as a RegEx: `down_blocks.2`, or `attn1`
- List of identifiers (can be combo of strings and ReGex): `["blocks.1", "blocks.(14|20)", r"down_blocks\.(2,3)"]`
Since RegEx is supported as a way for matching layer identifiers, it is crucial to use it correctly otherwise there might be unexpected behaviour. The recommended way to use PAG is by specifying layers as `blocks.{layer_index}` and `blocks.({layer_index_1|layer_index_2|...})`. Using it in any other way, while doable, may bypass our basic validation checks and give you unexpected results.
## AnimateDiffPAGPipeline
## HunyuanDiTPAGPipeline
## KolorsPAGPipeline
## StableDiffusionPAGPipeline
## StableDiffusionPAGImg2ImgPipeline
## StableDiffusionControlNetPAGPipeline
## StableDiffusionControlNetPAGInpaintPipeline
## StableDiffusionXLPAGPipeline
## StableDiffusionXLPAGImg2ImgPipeline
## StableDiffusionXLPAGInpaintPipeline
## StableDiffusionXLControlNetPAGPipeline
## StableDiffusionXLControlNetPAGImg2ImgPipeline
## StableDiffusion3PAGPipeline
## PixArtSigmaPAGPipeline
[[autodoc]] AnimateDiffPAGPipeline
- all
- __call__
[[autodoc]] HunyuanDiTPAGPipeline
- all
- __call__
[[autodoc]] KolorsPAGPipeline
- all
- __call__
[[autodoc]] StableDiffusionPAGPipeline
- all
- __call__
[[autodoc]] StableDiffusionPAGImg2ImgPipeline
- all
- __call__
[[autodoc]] StableDiffusionControlNetPAGPipeline
[[autodoc]] StableDiffusionControlNetPAGInpaintPipeline
- all
- __call__
[[autodoc]] StableDiffusionXLPAGPipeline
- all
- __call__
[[autodoc]] StableDiffusionXLPAGImg2ImgPipeline
- all
- __call__
[[autodoc]] StableDiffusionXLPAGInpaintPipeline
- all
- __call__
[[autodoc]] StableDiffusionXLControlNetPAGPipeline
- all
- __call__
[[autodoc]] StableDiffusionXLControlNetPAGImg2ImgPipeline
- all
- __call__
[[autodoc]] StableDiffusion3PAGPipeline
- all
- __call__
[[autodoc]] PixArtSigmaPAGPipeline
- all
- __call__
# ControlNet with Flux.1
FluxControlNetPipeline is an implementation of ControlNet for Flux.1.
ControlNet was introduced in [Adding Conditional Control to Text-to-Image Diffusion Models](https://huggingface.co/papers/2302.05543) by Lvmin Zhang, Anyi Rao, and Maneesh Agrawala.
With a ControlNet model, you can provide an additional control image to condition and control Stable Diffusion generation. For example, if you provide a depth map, the ControlNet model generates an image that'll preserve the spatial information from the depth map. It is a more flexible and accurate way to control the image generation process.
The abstract from the paper is:
*We present ControlNet, a neural network architecture to add spatial conditioning controls to large, pretrained text-to-image diffusion models. ControlNet locks the production-ready large diffusion models, and reuses their deep and robust encoding layers pretrained with billions of images as a strong backbone to learn a diverse set of conditional controls. The neural architecture is connected with "zero convolutions" (zero-initialized convolution layers) that progressively grow the parameters from zero and ensure that no harmful noise could affect the finetuning. We test various conditioning controls, eg, edges, depth, segmentation, human pose, etc, with Stable Diffusion, using single or multiple conditions, with or without prompts. We show that the training of ControlNets is robust with small (<50k) and large (>1m) datasets. Extensive results show that ControlNet may facilitate wider applications to control image diffusion models.*
This controlnet code is implemented by [The InstantX Team](https://huggingface.co/InstantX). You can find pre-trained checkpoints for Flux-ControlNet in the table below:
| ControlNet type | Developer | Link |
| -------- | ---------- | ---- |
| Canny | [The InstantX Team](https://huggingface.co/InstantX) | [Link](https://huggingface.co/InstantX/FLUX.1-dev-Controlnet-Canny) |
| Depth | [The InstantX Team](https://huggingface.co/InstantX) | [Link](https://huggingface.co/Shakker-Labs/FLUX.1-dev-ControlNet-Depth) |
| Union | [The InstantX Team](https://huggingface.co/InstantX) | [Link](https://huggingface.co/InstantX/FLUX.1-dev-Controlnet-Union) |
XLabs ControlNets are also supported, which was contributed by the [XLabs team](https://huggingface.co/XLabs-AI).
| ControlNet type | Developer | Link |
| -------- | ---------- | ---- |
| Canny | [The XLabs Team](https://huggingface.co/XLabs-AI) | [Link](https://huggingface.co/XLabs-AI/flux-controlnet-canny-diffusers) |
| Depth | [The XLabs Team](https://huggingface.co/XLabs-AI) | [Link](https://huggingface.co/XLabs-AI/flux-controlnet-depth-diffusers) |
| HED | [The XLabs Team](https://huggingface.co/XLabs-AI) | [Link](https://huggingface.co/XLabs-AI/flux-controlnet-hed-diffusers) |
Make sure to check out the Schedulers [guide](../../using-diffusers/schedulers) to learn how to explore the tradeoff between scheduler speed and quality, and see the [reuse components across pipelines](../../using-diffusers/loading#reuse-components-across-pipelines) section to learn how to efficiently load the same components into multiple pipelines.
## FluxControlNetPipeline
## FluxPipelineOutput
[[autodoc]] FluxControlNetPipeline
- all
- __call__
[[autodoc]] pipelines.flux.pipeline_output.FluxPipelineOutput
# DDPM
[Denoising Diffusion Probabilistic Models](https://huggingface.co/papers/2006.11239) (DDPM) by Jonathan Ho, Ajay Jain and Pieter Abbeel proposes a diffusion based model of the same name. In the 🤗 Diffusers library, DDPM refers to the *discrete denoising scheduler* from the paper as well as the pipeline.
The abstract from the paper is:
*We present high quality image synthesis results using diffusion probabilistic models, a class of latent variable models inspired by considerations from nonequilibrium thermodynamics. Our best results are obtained by training on a weighted variational bound designed according to a novel connection between diffusion probabilistic models and denoising score matching with Langevin dynamics, and our models naturally admit a progressive lossy decompression scheme that can be interpreted as a generalization of autoregressive decoding. On the unconditional CIFAR10 dataset, we obtain an Inception score of 9.46 and a state-of-the-art FID score of 3.17. On 256x256 LSUN, we obtain sample quality similar to ProgressiveGAN.*
The original codebase can be found at [hohonathanho/diffusion](https://github.com/hojonathanho/diffusion).
Make sure to check out the Schedulers [guide](../../using-diffusers/schedulers) to learn how to explore the tradeoff between scheduler speed and quality, and see the [reuse components across pipelines](../../using-diffusers/loading#reuse-components-across-pipelines) section to learn how to efficiently load the same components into multiple pipelines.
# DDPMPipeline
## ImagePipelineOutput
[[autodoc]] DDPMPipeline
- all
- __call__
[[autodoc]] pipelines.ImagePipelineOutput
# DiT
[Scalable Diffusion Models with Transformers](https://huggingface.co/papers/2212.09748) (DiT) is by William Peebles and Saining Xie.
The abstract from the paper is:
*We explore a new class of diffusion models based on the transformer architecture. We train latent diffusion models of images, replacing the commonly-used U-Net backbone with a transformer that operates on latent patches. We analyze the scalability of our Diffusion Transformers (DiTs) through the lens of forward pass complexity as measured by Gflops. We find that DiTs with higher Gflops -- through increased transformer depth/width or increased number of input tokens -- consistently have lower FID. In addition to possessing good scalability properties, our largest DiT-XL/2 models outperform all prior diffusion models on the class-conditional ImageNet 512x512 and 256x256 benchmarks, achieving a state-of-the-art FID of 2.27 on the latter.*
The original codebase can be found at [facebookresearch/dit](https://github.com/facebookresearch/dit).
Make sure to check out the Schedulers [guide](../../using-diffusers/schedulers) to learn how to explore the tradeoff between scheduler speed and quality, and see the [reuse components across pipelines](../../using-diffusers/loading#reuse-components-across-pipelines) section to learn how to efficiently load the same components into multiple pipelines.
## DiTPipeline
## ImagePipelineOutput
[[autodoc]] DiTPipeline
- all
- __call__
[[autodoc]] pipelines.ImagePipelineOutput
# ControlNet
ControlNet was introduced in [Adding Conditional Control to Text-to-Image Diffusion Models](https://huggingface.co/papers/2302.05543) by Lvmin Zhang, Anyi Rao, and Maneesh Agrawala.
With a ControlNet model, you can provide an additional control image to condition and control Stable Diffusion generation. For example, if you provide a depth map, the ControlNet model generates an image that'll preserve the spatial information from the depth map. It is a more flexible and accurate way to control the image generation process.
The abstract from the paper is:
*We present ControlNet, a neural network architecture to add spatial conditioning controls to large, pretrained text-to-image diffusion models. ControlNet locks the production-ready large diffusion models, and reuses their deep and robust encoding layers pretrained with billions of images as a strong backbone to learn a diverse set of conditional controls. The neural architecture is connected with "zero convolutions" (zero-initialized convolution layers) that progressively grow the parameters from zero and ensure that no harmful noise could affect the finetuning. We test various conditioning controls, eg, edges, depth, segmentation, human pose, etc, with Stable Diffusion, using single or multiple conditions, with or without prompts. We show that the training of ControlNets is robust with small (<50k) and large (>1m) datasets. Extensive results show that ControlNet may facilitate wider applications to control image diffusion models.*
This model was contributed by [takuma104](https://huggingface.co/takuma104). ❤️
The original codebase can be found at [lllyasviel/ControlNet](https://github.com/lllyasviel/ControlNet), and you can find official ControlNet checkpoints on [lllyasviel's](https://huggingface.co/lllyasviel) Hub profile.
Make sure to check out the Schedulers [guide](../../using-diffusers/schedulers) to learn how to explore the tradeoff between scheduler speed and quality, and see the [reuse components across pipelines](../../using-diffusers/loading#reuse-components-across-pipelines) section to learn how to efficiently load the same components into multiple pipelines.
## StableDiffusionControlNetPipeline
## StableDiffusionControlNetImg2ImgPipeline
## StableDiffusionControlNetInpaintPipeline
## StableDiffusionPipelineOutput
## FlaxStableDiffusionControlNetPipeline
## FlaxStableDiffusionControlNetPipelineOutput
[[autodoc]] StableDiffusionControlNetPipeline
- all
- __call__
- enable_attention_slicing
- disable_attention_slicing
- enable_vae_slicing
- disable_vae_slicing
- enable_xformers_memory_efficient_attention
- disable_xformers_memory_efficient_attention
- load_textual_inversion
[[autodoc]] StableDiffusionControlNetImg2ImgPipeline
- all
- __call__
- enable_attention_slicing
- disable_attention_slicing
- enable_vae_slicing
- disable_vae_slicing
- enable_xformers_memory_efficient_attention
- disable_xformers_memory_efficient_attention
- load_textual_inversion
[[autodoc]] StableDiffusionControlNetInpaintPipeline
- all
- __call__
- enable_attention_slicing
- disable_attention_slicing
- enable_vae_slicing
- disable_vae_slicing
- enable_xformers_memory_efficient_attention
- disable_xformers_memory_efficient_attention
- load_textual_inversion
[[autodoc]] pipelines.stable_diffusion.StableDiffusionPipelineOutput
[[autodoc]] FlaxStableDiffusionControlNetPipeline
- all
- __call__
[[autodoc]] pipelines.stable_diffusion.FlaxStableDiffusionPipelineOutput
# Paint by Example
[Paint by Example: Exemplar-based Image Editing with Diffusion Models](https://huggingface.co/papers/2211.13227) is by Binxin Yang, Shuyang Gu, Bo Zhang, Ting Zhang, Xuejin Chen, Xiaoyan Sun, Dong Chen, Fang Wen.
The abstract from the paper is:
*Language-guided image editing has achieved great success recently. In this paper, for the first time, we investigate exemplar-guided image editing for more precise control. We achieve this goal by leveraging self-supervised training to disentangle and re-organize the source image and the exemplar. However, the naive approach will cause obvious fusing artifacts. We carefully analyze it and propose an information bottleneck and strong augmentations to avoid the trivial solution of directly copying and pasting the exemplar image. Meanwhile, to ensure the controllability of the editing process, we design an arbitrary shape mask for the exemplar image and leverage the classifier-free guidance to increase the similarity to the exemplar image. The whole framework involves a single forward of the diffusion model without any iterative optimization. We demonstrate that our method achieves an impressive performance and enables controllable editing on in-the-wild images with high fidelity.*
The original codebase can be found at [Fantasy-Studio/Paint-by-Example](https://github.com/Fantasy-Studio/Paint-by-Example), and you can try it out in a [demo](https://huggingface.co/spaces/Fantasy-Studio/Paint-by-Example).
## Tips
Paint by Example is supported by the official [Fantasy-Studio/Paint-by-Example](https://huggingface.co/Fantasy-Studio/Paint-by-Example) checkpoint. The checkpoint is warm-started from [CompVis/stable-diffusion-v1-4](https://huggingface.co/CompVis/stable-diffusion-v1-4) to inpaint partly masked images conditioned on example and reference images.
Make sure to check out the Schedulers [guide](../../using-diffusers/schedulers) to learn how to explore the tradeoff between scheduler speed and quality, and see the [reuse components across pipelines](../../using-diffusers/loading#reuse-components-across-pipelines) section to learn how to efficiently load the same components into multiple pipelines.
## PaintByExamplePipeline
## StableDiffusionPipelineOutput
[[autodoc]] PaintByExamplePipeline
- all
- __call__
[[autodoc]] pipelines.stable_diffusion.StableDiffusionPipelineOutput
# PixArt-α
![](https://huggingface.co/datasets/huggingface/documentation-images/resolve/main/diffusers/pixart/header_collage.png)
[PixArt-α: Fast Training of Diffusion Transformer for Photorealistic Text-to-Image Synthesis](https://huggingface.co/papers/2310.00426) is Junsong Chen, Jincheng Yu, Chongjian Ge, Lewei Yao, Enze Xie, Yue Wu, Zhongdao Wang, James Kwok, Ping Luo, Huchuan Lu, and Zhenguo Li.
The abstract from the paper is:
*The most advanced text-to-image (T2I) models require significant training costs (e.g., millions of GPU hours), seriously hindering the fundamental innovation for the AIGC community while increasing CO2 emissions. This paper introduces PIXART-α, a Transformer-based T2I diffusion model whose image generation quality is competitive with state-of-the-art image generators (e.g., Imagen, SDXL, and even Midjourney), reaching near-commercial application standards. Additionally, it supports high-resolution image synthesis up to 1024px resolution with low training cost, as shown in Figure 1 and 2. To achieve this goal, three core designs are proposed: (1) Training strategy decomposition: We devise three distinct training steps that separately optimize pixel dependency, text-image alignment, and image aesthetic quality; (2) Efficient T2I Transformer: We incorporate cross-attention modules into Diffusion Transformer (DiT) to inject text conditions and streamline the computation-intensive class-condition branch; (3) High-informative data: We emphasize the significance of concept density in text-image pairs and leverage a large Vision-Language model to auto-label dense pseudo-captions to assist text-image alignment learning. As a result, PIXART-α's training speed markedly surpasses existing large-scale T2I models, e.g., PIXART-α only takes 10.8% of Stable Diffusion v1.5's training time (675 vs. 6,250 A100 GPU days), saving nearly $300,000 ($26,000 vs. $320,000) and reducing 90% CO2 emissions. Moreover, compared with a larger SOTA model, RAPHAEL, our training cost is merely 1%. Extensive experiments demonstrate that PIXART-α excels in image quality, artistry, and semantic control. We hope PIXART-α will provide new insights to the AIGC community and startups to accelerate building their own high-quality yet low-cost generative models from scratch.*
You can find the original codebase at [PixArt-alpha/PixArt-alpha](https://github.com/PixArt-alpha/PixArt-alpha) and all the available checkpoints at [PixArt-alpha](https://huggingface.co/PixArt-alpha).
Some notes about this pipeline:
* It uses a Transformer backbone (instead of a UNet) for denoising. As such it has a similar architecture as [DiT](./dit).
* It was trained using text conditions computed from T5. This aspect makes the pipeline better at following complex text prompts with intricate details.
* It is good at producing high-resolution images at different aspect ratios. To get the best results, the authors recommend some size brackets which can be found [here](https://github.com/PixArt-alpha/PixArt-alpha/blob/08fbbd281ec96866109bdd2cdb75f2f58fb17610/diffusion/data/datasets/utils.py).
* It rivals the quality of state-of-the-art text-to-image generation systems (as of this writing) such as Stable Diffusion XL, Imagen, and DALL-E 2, while being more efficient than them.
Make sure to check out the Schedulers [guide](../../using-diffusers/schedulers.md) to learn how to explore the tradeoff between scheduler speed and quality, and see the [reuse components across pipelines](../../using-diffusers/loading.md#reuse-a-pipeline) section to learn how to efficiently load the same components into multiple pipelines.
## Inference with under 8GB GPU VRAM
Run the `PixArtAlphaPipeline` with under 8GB GPU VRAM by loading the text encoder in 8-bit precision. Let's walk through a full-fledged example.
First, install the [bitsandbytes](https://github.com/TimDettmers/bitsandbytes) library:
```bash
pip install -U bitsandbytes
```
Then load the text encoder in 8-bit:
```python
from transformers import T5EncoderModel
from diffusers import PixArtAlphaPipeline
import torch
text_encoder = T5EncoderModel.from_pretrained(
"PixArt-alpha/PixArt-XL-2-1024-MS",
subfolder="text_encoder",
load_in_8bit=True,
device_map="auto",
)
pipe = PixArtAlphaPipeline.from_pretrained(
"PixArt-alpha/PixArt-XL-2-1024-MS",
text_encoder=text_encoder,
transformer=None,
device_map="auto"
)
```
Now, use the `pipe` to encode a prompt:
```python
with torch.no_grad():
prompt = "cute cat"
prompt_embeds, prompt_attention_mask, negative_embeds, negative_prompt_attention_mask = pipe.encode_prompt(prompt)
```
Since text embeddings have been computed, remove the `text_encoder` and `pipe` from the memory, and free up some GPU VRAM:
```python
import gc
def flush():
gc.collect()
torch.cuda.empty_cache()
del text_encoder
del pipe
flush()
```
Then compute the latents with the prompt embeddings as inputs:
```python
pipe = PixArtAlphaPipeline.from_pretrained(
"PixArt-alpha/PixArt-XL-2-1024-MS",
text_encoder=None,
torch_dtype=torch.float16,
).to("cuda")
latents = pipe(
negative_prompt=None,
prompt_embeds=prompt_embeds,
negative_prompt_embeds=negative_embeds,
prompt_attention_mask=prompt_attention_mask,
negative_prompt_attention_mask=negative_prompt_attention_mask,
num_images_per_prompt=1,
output_type="latent",
).images
del pipe.transformer
flush()
```
Notice that while initializing `pipe`, you're setting `text_encoder` to `None` so that it's not loaded.
Once the latents are computed, pass it off to the VAE to decode into a real image:
```python
with torch.no_grad():
image = pipe.vae.decode(latents / pipe.vae.config.scaling_factor, return_dict=False)[0]
image = pipe.image_processor.postprocess(image, output_type="pil")[0]
image.save("cat.png")
```
By deleting components you aren't using and flushing the GPU VRAM, you should be able to run `PixArtAlphaPipeline` with under 8GB GPU VRAM.
![](https://huggingface.co/datasets/huggingface/documentation-images/resolve/main/diffusers/pixart/8bits_cat.png)
If you want a report of your memory-usage, run this [script](https://gist.github.com/sayakpaul/3ae0f847001d342af27018a96f467e4e).
Text embeddings computed in 8-bit can impact the quality of the generated images because of the information loss in the representation space caused by the reduced precision. It's recommended to compare the outputs with and without 8-bit.
While loading the `text_encoder`, you set `load_in_8bit` to `True`. You could also specify `load_in_4bit` to bring your memory requirements down even further to under 7GB.
## PixArtAlphaPipeline
[[autodoc]] PixArtAlphaPipeline
- all
- __call__
# Latent Consistency Models
Latent Consistency Models (LCMs) were proposed in [Latent Consistency Models: Synthesizing High-Resolution Images with Few-Step Inference](https://huggingface.co/papers/2310.04378) by Simian Luo, Yiqin Tan, Longbo Huang, Jian Li, and Hang Zhao.
The abstract of the paper is as follows:
*Latent Diffusion models (LDMs) have achieved remarkable results in synthesizing high-resolution images. However, the iterative sampling process is computationally intensive and leads to slow generation. Inspired by Consistency Models (song et al.), we propose Latent Consistency Models (LCMs), enabling swift inference with minimal steps on any pre-trained LDMs, including Stable Diffusion (rombach et al). Viewing the guided reverse diffusion process as solving an augmented probability flow ODE (PF-ODE), LCMs are designed to directly predict the solution of such ODE in latent space, mitigating the need for numerous iterations and allowing rapid, high-fidelity sampling. Efficiently distilled from pre-trained classifier-free guided diffusion models, a high-quality 768 x 768 2~4-step LCM takes only 32 A100 GPU hours for training. Furthermore, we introduce Latent Consistency Fine-tuning (LCF), a novel method that is tailored for fine-tuning LCMs on customized image datasets. Evaluation on the LAION-5B-Aesthetics dataset demonstrates that LCMs achieve state-of-the-art text-to-image generation performance with few-step inference. Project Page: [this https URL](https://latent-consistency-models.github.io/).*
A demo for the [SimianLuo/LCM_Dreamshaper_v7](https://huggingface.co/SimianLuo/LCM_Dreamshaper_v7) checkpoint can be found [here](https://huggingface.co/spaces/SimianLuo/Latent_Consistency_Model).
The pipelines were contributed by [luosiallen](https://luosiallen.github.io/), [nagolinc](https://github.com/nagolinc), and [dg845](https://github.com/dg845).
## LatentConsistencyModelPipeline
## LatentConsistencyModelImg2ImgPipeline
## StableDiffusionPipelineOutput
[[autodoc]] LatentConsistencyModelPipeline
- all
- __call__
- enable_freeu
- disable_freeu
- enable_vae_slicing
- disable_vae_slicing
- enable_vae_tiling
- disable_vae_tiling
[[autodoc]] LatentConsistencyModelImg2ImgPipeline
- all
- __call__
- enable_freeu
- disable_freeu
- enable_vae_slicing
- disable_vae_slicing
- enable_vae_tiling
- disable_vae_tiling
[[autodoc]] pipelines.stable_diffusion.StableDiffusionPipelineOutput
# unCLIP
[Hierarchical Text-Conditional Image Generation with CLIP Latents](https://huggingface.co/papers/2204.06125) is by Aditya Ramesh, Prafulla Dhariwal, Alex Nichol, Casey Chu, Mark Chen. The unCLIP model in 🤗 Diffusers comes from kakaobrain's [karlo](https://github.com/kakaobrain/karlo).
The abstract from the paper is following:
*Contrastive models like CLIP have been shown to learn robust representations of images that capture both semantics and style. To leverage these representations for image generation, we propose a two-stage model: a prior that generates a CLIP image embedding given a text caption, and a decoder that generates an image conditioned on the image embedding. We show that explicitly generating image representations improves image diversity with minimal loss in photorealism and caption similarity. Our decoders conditioned on image representations can also produce variations of an image that preserve both its semantics and style, while varying the non-essential details absent from the image representation. Moreover, the joint embedding space of CLIP enables language-guided image manipulations in a zero-shot fashion. We use diffusion models for the decoder and experiment with both autoregressive and diffusion models for the prior, finding that the latter are computationally more efficient and produce higher-quality samples.*
You can find lucidrains' DALL-E 2 recreation at [lucidrains/DALLE2-pytorch](https://github.com/lucidrains/DALLE2-pytorch).
Make sure to check out the Schedulers [guide](../../using-diffusers/schedulers) to learn how to explore the tradeoff between scheduler speed and quality, and see the [reuse components across pipelines](../../using-diffusers/loading#reuse-components-across-pipelines) section to learn how to efficiently load the same components into multiple pipelines.
## UnCLIPPipeline
## UnCLIPImageVariationPipeline
## ImagePipelineOutput
[[autodoc]] UnCLIPPipeline
- all
- __call__
[[autodoc]] UnCLIPImageVariationPipeline
- all
- __call__
[[autodoc]] pipelines.ImagePipelineOutput
# Text-to-Video Generation with AnimateDiff
## Overview
[AnimateDiff: Animate Your Personalized Text-to-Image Diffusion Models without Specific Tuning](https://arxiv.org/abs/2307.04725) by Yuwei Guo, Ceyuan Yang, Anyi Rao, Yaohui Wang, Yu Qiao, Dahua Lin, Bo Dai.
The abstract of the paper is the following:
*With the advance of text-to-image models (e.g., Stable Diffusion) and corresponding personalization techniques such as DreamBooth and LoRA, everyone can manifest their imagination into high-quality images at an affordable cost. Subsequently, there is a great demand for image animation techniques to further combine generated static images with motion dynamics. In this report, we propose a practical framework to animate most of the existing personalized text-to-image models once and for all, saving efforts in model-specific tuning. At the core of the proposed framework is to insert a newly initialized motion modeling module into the frozen text-to-image model and train it on video clips to distill reasonable motion priors. Once trained, by simply injecting this motion modeling module, all personalized versions derived from the same base T2I readily become text-driven models that produce diverse and personalized animated images. We conduct our evaluation on several public representative personalized text-to-image models across anime pictures and realistic photographs, and demonstrate that our proposed framework helps these models generate temporally smooth animation clips while preserving the domain and diversity of their outputs. Code and pre-trained weights will be publicly available at [this https URL](https://animatediff.github.io/).*
## Available Pipelines
| Pipeline | Tasks | Demo
|---|---|:---:|
| [AnimateDiffPipeline](https://github.com/huggingface/diffusers/blob/main/src/diffusers/pipelines/animatediff/pipeline_animatediff.py) | *Text-to-Video Generation with AnimateDiff* |
| [AnimateDiffControlNetPipeline](https://github.com/huggingface/diffusers/blob/main/src/diffusers/pipelines/animatediff/pipeline_animatediff_controlnet.py) | *Controlled Video-to-Video Generation with AnimateDiff using ControlNet* |
| [AnimateDiffSparseControlNetPipeline](https://github.com/huggingface/diffusers/blob/main/src/diffusers/pipelines/animatediff/pipeline_animatediff_sparsectrl.py) | *Controlled Video-to-Video Generation with AnimateDiff using SparseCtrl* |
| [AnimateDiffSDXLPipeline](https://github.com/huggingface/diffusers/blob/main/src/diffusers/pipelines/animatediff/pipeline_animatediff_sdxl.py) | *Video-to-Video Generation with AnimateDiff* |
| [AnimateDiffVideoToVideoPipeline](https://github.com/huggingface/diffusers/blob/main/src/diffusers/pipelines/animatediff/pipeline_animatediff_video2video.py) | *Video-to-Video Generation with AnimateDiff* |
| [AnimateDiffVideoToVideoControlNetPipeline](https://github.com/huggingface/diffusers/blob/main/src/diffusers/pipelines/animatediff/pipeline_animatediff_video2video_controlnet.py) | *Video-to-Video Generation with AnimateDiff using ControlNet* |
## Available checkpoints
Motion Adapter checkpoints can be found under [guoyww](https://huggingface.co/guoyww/). These checkpoints are meant to work with any model based on Stable Diffusion 1.4/1.5.
## Usage example
### AnimateDiffPipeline
AnimateDiff works with a MotionAdapter checkpoint and a Stable Diffusion model checkpoint. The MotionAdapter is a collection of Motion Modules that are responsible for adding coherent motion across image frames. These modules are applied after the Resnet and Attention blocks in Stable Diffusion UNet.
The following example demonstrates how to use a *MotionAdapter* checkpoint with Diffusers for inference based on StableDiffusion-1.4/1.5.
```python
import torch
from diffusers import AnimateDiffPipeline, DDIMScheduler, MotionAdapter
from diffusers.utils import export_to_gif
# Load the motion adapter
adapter = MotionAdapter.from_pretrained("guoyww/animatediff-motion-adapter-v1-5-2", torch_dtype=torch.float16)
# load SD 1.5 based finetuned model
model_id = "SG161222/Realistic_Vision_V5.1_noVAE"
pipe = AnimateDiffPipeline.from_pretrained(model_id, motion_adapter=adapter, torch_dtype=torch.float16)
scheduler = DDIMScheduler.from_pretrained(
model_id,
subfolder="scheduler",
clip_sample=False,
timestep_spacing="linspace",
beta_schedule="linear",
steps_offset=1,
)
pipe.scheduler = scheduler
# enable memory savings
pipe.enable_vae_slicing()
pipe.enable_model_cpu_offload()
output = pipe(
prompt=(
"masterpiece, bestquality, highlydetailed, ultradetailed, sunset, "
"orange sky, warm lighting, fishing boats, ocean waves seagulls, "
"rippling water, wharf, silhouette, serene atmosphere, dusk, evening glow, "
"golden hour, coastal landscape, seaside scenery"
),
negative_prompt="bad quality, worse quality",
num_frames=16,
guidance_scale=7.5,
num_inference_steps=25,
generator=torch.Generator("cpu").manual_seed(42),
)
frames = output.frames[0]
export_to_gif(frames, "animation.gif")
```
Here are some sample outputs:
masterpiece, bestquality, sunset.
AnimateDiff tends to work better with finetuned Stable Diffusion models. If you plan on using a scheduler that can clip samples, make sure to disable it by setting `clip_sample=False` in the scheduler as this can also have an adverse effect on generated samples. Additionally, the AnimateDiff checkpoints can be sensitive to the beta schedule of the scheduler. We recommend setting this to `linear`.
### AnimateDiffControlNetPipeline
AnimateDiff can also be used with ControlNets ControlNet was introduced in [Adding Conditional Control to Text-to-Image Diffusion Models](https://huggingface.co/papers/2302.05543) by Lvmin Zhang, Anyi Rao, and Maneesh Agrawala. With a ControlNet model, you can provide an additional control image to condition and control Stable Diffusion generation. For example, if you provide depth maps, the ControlNet model generates a video that'll preserve the spatial information from the depth maps. It is a more flexible and accurate way to control the video generation process.
```python
import torch
from diffusers import AnimateDiffControlNetPipeline, AutoencoderKL, ControlNetModel, MotionAdapter, LCMScheduler
from diffusers.utils import export_to_gif, load_video
# Additionally, you will need a preprocess videos before they can be used with the ControlNet
# HF maintains just the right package for it: `pip install controlnet_aux`
from controlnet_aux.processor import ZoeDetector
# Download controlnets from https://huggingface.co/lllyasviel/ControlNet-v1-1 to use .from_single_file
# Download Diffusers-format controlnets, such as https://huggingface.co/lllyasviel/sd-controlnet-depth, to use .from_pretrained()
controlnet = ControlNetModel.from_single_file("control_v11f1p_sd15_depth.pth", torch_dtype=torch.float16)
# We use AnimateLCM for this example but one can use the original motion adapters as well (for example, https://huggingface.co/guoyww/animatediff-motion-adapter-v1-5-3)
motion_adapter = MotionAdapter.from_pretrained("wangfuyun/AnimateLCM")
vae = AutoencoderKL.from_pretrained("stabilityai/sd-vae-ft-mse", torch_dtype=torch.float16)
pipe: AnimateDiffControlNetPipeline = AnimateDiffControlNetPipeline.from_pretrained(
"SG161222/Realistic_Vision_V5.1_noVAE",
motion_adapter=motion_adapter,
controlnet=controlnet,
vae=vae,
).to(device="cuda", dtype=torch.float16)
pipe.scheduler = LCMScheduler.from_config(pipe.scheduler.config, beta_schedule="linear")
pipe.load_lora_weights("wangfuyun/AnimateLCM", weight_name="AnimateLCM_sd15_t2v_lora.safetensors", adapter_name="lcm-lora")
pipe.set_adapters(["lcm-lora"], [0.8])
depth_detector = ZoeDetector.from_pretrained("lllyasviel/Annotators").to("cuda")
video = load_video("https://huggingface.co/datasets/huggingface/documentation-images/resolve/main/diffusers/animatediff-vid2vid-input-1.gif")
conditioning_frames = []
with pipe.progress_bar(total=len(video)) as progress_bar:
for frame in video:
conditioning_frames.append(depth_detector(frame))
progress_bar.update()
prompt = "a panda, playing a guitar, sitting in a pink boat, in the ocean, mountains in background, realistic, high quality"
negative_prompt = "bad quality, worst quality"
video = pipe(
prompt=prompt,
negative_prompt=negative_prompt,
num_frames=len(video),
num_inference_steps=10,
guidance_scale=2.0,
conditioning_frames=conditioning_frames,
generator=torch.Generator().manual_seed(42),
).frames[0]
export_to_gif(video, "animatediff_controlnet.gif", fps=8)
```
Here are some sample outputs:
Source Video
Output Video
raccoon playing a guitar
a panda, playing a guitar, sitting in a pink boat, in the ocean, mountains in background, realistic, high quality
### AnimateDiffSparseControlNetPipeline
[SparseCtrl: Adding Sparse Controls to Text-to-Video Diffusion Models](https://arxiv.org/abs/2311.16933) for achieving controlled generation in text-to-video diffusion models by Yuwei Guo, Ceyuan Yang, Anyi Rao, Maneesh Agrawala, Dahua Lin, and Bo Dai.
The abstract from the paper is:
*The development of text-to-video (T2V), i.e., generating videos with a given text prompt, has been significantly advanced in recent years. However, relying solely on text prompts often results in ambiguous frame composition due to spatial uncertainty. The research community thus leverages the dense structure signals, e.g., per-frame depth/edge sequences, to enhance controllability, whose collection accordingly increases the burden of inference. In this work, we present SparseCtrl to enable flexible structure control with temporally sparse signals, requiring only one or a few inputs, as shown in Figure 1. It incorporates an additional condition encoder to process these sparse signals while leaving the pre-trained T2V model untouched. The proposed approach is compatible with various modalities, including sketches, depth maps, and RGB images, providing more practical control for video generation and promoting applications such as storyboarding, depth rendering, keyframe animation, and interpolation. Extensive experiments demonstrate the generalization of SparseCtrl on both original and personalized T2V generators. Codes and models will be publicly available at [this https URL](https://guoyww.github.io/projects/SparseCtrl).*
SparseCtrl introduces the following checkpoints for controlled text-to-video generation:
- [SparseCtrl Scribble](https://huggingface.co/guoyww/animatediff-sparsectrl-scribble)
- [SparseCtrl RGB](https://huggingface.co/guoyww/animatediff-sparsectrl-rgb)
#### Using SparseCtrl Scribble
```python
import torch
from diffusers import AnimateDiffSparseControlNetPipeline
from diffusers.models import AutoencoderKL, MotionAdapter, SparseControlNetModel
from diffusers.schedulers import DPMSolverMultistepScheduler
from diffusers.utils import export_to_gif, load_image
model_id = "SG161222/Realistic_Vision_V5.1_noVAE"
motion_adapter_id = "guoyww/animatediff-motion-adapter-v1-5-3"
controlnet_id = "guoyww/animatediff-sparsectrl-scribble"
lora_adapter_id = "guoyww/animatediff-motion-lora-v1-5-3"
vae_id = "stabilityai/sd-vae-ft-mse"
device = "cuda"
motion_adapter = MotionAdapter.from_pretrained(motion_adapter_id, torch_dtype=torch.float16).to(device)
controlnet = SparseControlNetModel.from_pretrained(controlnet_id, torch_dtype=torch.float16).to(device)
vae = AutoencoderKL.from_pretrained(vae_id, torch_dtype=torch.float16).to(device)
scheduler = DPMSolverMultistepScheduler.from_pretrained(
model_id,
subfolder="scheduler",
beta_schedule="linear",
algorithm_type="dpmsolver++",
use_karras_sigmas=True,
)
pipe = AnimateDiffSparseControlNetPipeline.from_pretrained(
model_id,
motion_adapter=motion_adapter,
controlnet=controlnet,
vae=vae,
scheduler=scheduler,
torch_dtype=torch.float16,
).to(device)
pipe.load_lora_weights(lora_adapter_id, adapter_name="motion_lora")
pipe.fuse_lora(lora_scale=1.0)
prompt = "an aerial view of a cyberpunk city, night time, neon lights, masterpiece, high quality"
negative_prompt = "low quality, worst quality, letterboxed"
image_files = [
"https://huggingface.co/datasets/huggingface/documentation-images/resolve/main/diffusers/animatediff-scribble-1.png",
"https://huggingface.co/datasets/huggingface/documentation-images/resolve/main/diffusers/animatediff-scribble-2.png",
"https://huggingface.co/datasets/huggingface/documentation-images/resolve/main/diffusers/animatediff-scribble-3.png"
]
condition_frame_indices = [0, 8, 15]
conditioning_frames = [load_image(img_file) for img_file in image_files]
video = pipe(
prompt=prompt,
negative_prompt=negative_prompt,
num_inference_steps=25,
conditioning_frames=conditioning_frames,
controlnet_conditioning_scale=1.0,
controlnet_frame_indices=condition_frame_indices,
generator=torch.Generator().manual_seed(1337),
).frames[0]
export_to_gif(video, "output.gif")
```
Here are some sample outputs:
an aerial view of a cyberpunk city, night time, neon lights, masterpiece, high quality
#### Using SparseCtrl RGB
```python
import torch
from diffusers import AnimateDiffSparseControlNetPipeline
from diffusers.models import AutoencoderKL, MotionAdapter, SparseControlNetModel
from diffusers.schedulers import DPMSolverMultistepScheduler
from diffusers.utils import export_to_gif, load_image
model_id = "SG161222/Realistic_Vision_V5.1_noVAE"
motion_adapter_id = "guoyww/animatediff-motion-adapter-v1-5-3"
controlnet_id = "guoyww/animatediff-sparsectrl-rgb"
lora_adapter_id = "guoyww/animatediff-motion-lora-v1-5-3"
vae_id = "stabilityai/sd-vae-ft-mse"
device = "cuda"
motion_adapter = MotionAdapter.from_pretrained(motion_adapter_id, torch_dtype=torch.float16).to(device)
controlnet = SparseControlNetModel.from_pretrained(controlnet_id, torch_dtype=torch.float16).to(device)
vae = AutoencoderKL.from_pretrained(vae_id, torch_dtype=torch.float16).to(device)
scheduler = DPMSolverMultistepScheduler.from_pretrained(
model_id,
subfolder="scheduler",
beta_schedule="linear",
algorithm_type="dpmsolver++",
use_karras_sigmas=True,
)
pipe = AnimateDiffSparseControlNetPipeline.from_pretrained(
model_id,
motion_adapter=motion_adapter,
controlnet=controlnet,
vae=vae,
scheduler=scheduler,
torch_dtype=torch.float16,
).to(device)
pipe.load_lora_weights(lora_adapter_id, adapter_name="motion_lora")
image = load_image("https://huggingface.co/datasets/huggingface/documentation-images/resolve/main/diffusers/animatediff-firework.png")
video = pipe(
prompt="closeup face photo of man in black clothes, night city street, bokeh, fireworks in background",
negative_prompt="low quality, worst quality",
num_inference_steps=25,
conditioning_frames=image,
controlnet_frame_indices=[0],
controlnet_conditioning_scale=1.0,
generator=torch.Generator().manual_seed(42),
).frames[0]
export_to_gif(video, "output.gif")
```
Here are some sample outputs:
closeup face photo of man in black clothes, night city street, bokeh, fireworks in background
### AnimateDiffSDXLPipeline
AnimateDiff can also be used with SDXL models. This is currently an experimental feature as only a beta release of the motion adapter checkpoint is available.
```python
import torch
from diffusers.models import MotionAdapter
from diffusers import AnimateDiffSDXLPipeline, DDIMScheduler
from diffusers.utils import export_to_gif
adapter = MotionAdapter.from_pretrained("guoyww/animatediff-motion-adapter-sdxl-beta", torch_dtype=torch.float16)
model_id = "stabilityai/stable-diffusion-xl-base-1.0"
scheduler = DDIMScheduler.from_pretrained(
model_id,
subfolder="scheduler",
clip_sample=False,
timestep_spacing="linspace",
beta_schedule="linear",
steps_offset=1,
)
pipe = AnimateDiffSDXLPipeline.from_pretrained(
model_id,
motion_adapter=adapter,
scheduler=scheduler,
torch_dtype=torch.float16,
variant="fp16",
).to("cuda")
# enable memory savings
pipe.enable_vae_slicing()
pipe.enable_vae_tiling()
output = pipe(
prompt="a panda surfing in the ocean, realistic, high quality",
negative_prompt="low quality, worst quality",
num_inference_steps=20,
guidance_scale=8,
width=1024,
height=1024,
num_frames=16,
)
frames = output.frames[0]
export_to_gif(frames, "animation.gif")
```
### AnimateDiffVideoToVideoPipeline
AnimateDiff can also be used to generate visually similar videos or enable style/character/background or other edits starting from an initial video, allowing you to seamlessly explore creative possibilities.
```python
import imageio
import requests
import torch
from diffusers import AnimateDiffVideoToVideoPipeline, DDIMScheduler, MotionAdapter
from diffusers.utils import export_to_gif
from io import BytesIO
from PIL import Image
# Load the motion adapter
adapter = MotionAdapter.from_pretrained("guoyww/animatediff-motion-adapter-v1-5-2", torch_dtype=torch.float16)
# load SD 1.5 based finetuned model
model_id = "SG161222/Realistic_Vision_V5.1_noVAE"
pipe = AnimateDiffVideoToVideoPipeline.from_pretrained(model_id, motion_adapter=adapter, torch_dtype=torch.float16)
scheduler = DDIMScheduler.from_pretrained(
model_id,
subfolder="scheduler",
clip_sample=False,
timestep_spacing="linspace",
beta_schedule="linear",
steps_offset=1,
)
pipe.scheduler = scheduler
# enable memory savings
pipe.enable_vae_slicing()
pipe.enable_model_cpu_offload()
# helper function to load videos
def load_video(file_path: str):
images = []
if file_path.startswith(('http://', 'https://')):
# If the file_path is a URL
response = requests.get(file_path)
response.raise_for_status()
content = BytesIO(response.content)
vid = imageio.get_reader(content)
else:
# Assuming it's a local file path
vid = imageio.get_reader(file_path)
for frame in vid:
pil_image = Image.fromarray(frame)
images.append(pil_image)
return images
video = load_video("https://huggingface.co/datasets/huggingface/documentation-images/resolve/main/diffusers/animatediff-vid2vid-input-1.gif")
output = pipe(
video = video,
prompt="panda playing a guitar, on a boat, in the ocean, high quality",
negative_prompt="bad quality, worse quality",
guidance_scale=7.5,
num_inference_steps=25,
strength=0.5,
generator=torch.Generator("cpu").manual_seed(42),
)
frames = output.frames[0]
export_to_gif(frames, "animation.gif")
```
Here are some sample outputs:
Source Video
Output Video
raccoon playing a guitar
panda playing a guitar
closeup of margot robbie, fireworks in the background, high quality
closeup of tony stark, robert downey jr, fireworks
### AnimateDiffVideoToVideoControlNetPipeline
AnimateDiff can be used together with ControlNets to enhance video-to-video generation by allowing for precise control over the output. ControlNet was introduced in [Adding Conditional Control to Text-to-Image Diffusion Models](https://huggingface.co/papers/2302.05543) by Lvmin Zhang, Anyi Rao, and Maneesh Agrawala, and allows you to condition Stable Diffusion with an additional control image to ensure that the spatial information is preserved throughout the video.
This pipeline allows you to condition your generation both on the original video and on a sequence of control images.
```python
import torch
from PIL import Image
from tqdm.auto import tqdm
from controlnet_aux.processor import OpenposeDetector
from diffusers import AnimateDiffVideoToVideoControlNetPipeline
from diffusers.utils import export_to_gif, load_video
from diffusers import AutoencoderKL, ControlNetModel, MotionAdapter, LCMScheduler
# Load the ControlNet
controlnet = ControlNetModel.from_pretrained("lllyasviel/sd-controlnet-openpose", torch_dtype=torch.float16)
# Load the motion adapter
motion_adapter = MotionAdapter.from_pretrained("wangfuyun/AnimateLCM")
# Load SD 1.5 based finetuned model
vae = AutoencoderKL.from_pretrained("stabilityai/sd-vae-ft-mse", torch_dtype=torch.float16)
pipe = AnimateDiffVideoToVideoControlNetPipeline.from_pretrained(
"SG161222/Realistic_Vision_V5.1_noVAE",
motion_adapter=motion_adapter,
controlnet=controlnet,
vae=vae,
).to(device="cuda", dtype=torch.float16)
# Enable LCM to speed up inference
pipe.scheduler = LCMScheduler.from_config(pipe.scheduler.config, beta_schedule="linear")
pipe.load_lora_weights("wangfuyun/AnimateLCM", weight_name="AnimateLCM_sd15_t2v_lora.safetensors", adapter_name="lcm-lora")
pipe.set_adapters(["lcm-lora"], [0.8])
video = load_video("https://huggingface.co/datasets/huggingface/documentation-images/resolve/main/diffusers/dance.gif")
video = [frame.convert("RGB") for frame in video]
prompt = "astronaut in space, dancing"
negative_prompt = "bad quality, worst quality, jpeg artifacts, ugly"
# Create controlnet preprocessor
open_pose = OpenposeDetector.from_pretrained("lllyasviel/Annotators").to("cuda")
# Preprocess controlnet images
conditioning_frames = []
for frame in tqdm(video):
conditioning_frames.append(open_pose(frame))
strength = 0.8
with torch.inference_mode():
video = pipe(
video=video,
prompt=prompt,
negative_prompt=negative_prompt,
num_inference_steps=10,
guidance_scale=2.0,
controlnet_conditioning_scale=0.75,
conditioning_frames=conditioning_frames,
strength=strength,
generator=torch.Generator().manual_seed(42),
).frames[0]
video = [frame.resize(conditioning_frames[0].size) for frame in video]
export_to_gif(video, f"animatediff_vid2vid_controlnet.gif", fps=8)
```
Here are some sample outputs:
Source Video
Output Video
anime girl, dancing
astronaut in space, dancing
**The lights and composition were transferred from the Source Video.**
## Using Motion LoRAs
Motion LoRAs are a collection of LoRAs that work with the `guoyww/animatediff-motion-adapter-v1-5-2` checkpoint. These LoRAs are responsible for adding specific types of motion to the animations.
```python
import torch
from diffusers import AnimateDiffPipeline, DDIMScheduler, MotionAdapter
from diffusers.utils import export_to_gif
# Load the motion adapter
adapter = MotionAdapter.from_pretrained("guoyww/animatediff-motion-adapter-v1-5-2", torch_dtype=torch.float16)
# load SD 1.5 based finetuned model
model_id = "SG161222/Realistic_Vision_V5.1_noVAE"
pipe = AnimateDiffPipeline.from_pretrained(model_id, motion_adapter=adapter, torch_dtype=torch.float16)
pipe.load_lora_weights(
"guoyww/animatediff-motion-lora-zoom-out", adapter_name="zoom-out"
)
scheduler = DDIMScheduler.from_pretrained(
model_id,
subfolder="scheduler",
clip_sample=False,
beta_schedule="linear",
timestep_spacing="linspace",
steps_offset=1,
)
pipe.scheduler = scheduler
# enable memory savings
pipe.enable_vae_slicing()
pipe.enable_model_cpu_offload()
output = pipe(
prompt=(
"masterpiece, bestquality, highlydetailed, ultradetailed, sunset, "
"orange sky, warm lighting, fishing boats, ocean waves seagulls, "
"rippling water, wharf, silhouette, serene atmosphere, dusk, evening glow, "
"golden hour, coastal landscape, seaside scenery"
),
negative_prompt="bad quality, worse quality",
num_frames=16,
guidance_scale=7.5,
num_inference_steps=25,
generator=torch.Generator("cpu").manual_seed(42),
)
frames = output.frames[0]
export_to_gif(frames, "animation.gif")
```
masterpiece, bestquality, sunset.
## Using Motion LoRAs with PEFT
You can also leverage the [PEFT](https://github.com/huggingface/peft) backend to combine Motion LoRA's and create more complex animations.
First install PEFT with
```shell
pip install peft
```
Then you can use the following code to combine Motion LoRAs.
```python
import torch
from diffusers import AnimateDiffPipeline, DDIMScheduler, MotionAdapter
from diffusers.utils import export_to_gif
# Load the motion adapter
adapter = MotionAdapter.from_pretrained("guoyww/animatediff-motion-adapter-v1-5-2", torch_dtype=torch.float16)
# load SD 1.5 based finetuned model
model_id = "SG161222/Realistic_Vision_V5.1_noVAE"
pipe = AnimateDiffPipeline.from_pretrained(model_id, motion_adapter=adapter, torch_dtype=torch.float16)
pipe.load_lora_weights(
"diffusers/animatediff-motion-lora-zoom-out", adapter_name="zoom-out",
)
pipe.load_lora_weights(
"diffusers/animatediff-motion-lora-pan-left", adapter_name="pan-left",
)
pipe.set_adapters(["zoom-out", "pan-left"], adapter_weights=[1.0, 1.0])
scheduler = DDIMScheduler.from_pretrained(
model_id,
subfolder="scheduler",
clip_sample=False,
timestep_spacing="linspace",
beta_schedule="linear",
steps_offset=1,
)
pipe.scheduler = scheduler
# enable memory savings
pipe.enable_vae_slicing()
pipe.enable_model_cpu_offload()
output = pipe(
prompt=(
"masterpiece, bestquality, highlydetailed, ultradetailed, sunset, "
"orange sky, warm lighting, fishing boats, ocean waves seagulls, "
"rippling water, wharf, silhouette, serene atmosphere, dusk, evening glow, "
"golden hour, coastal landscape, seaside scenery"
),
negative_prompt="bad quality, worse quality",
num_frames=16,
guidance_scale=7.5,
num_inference_steps=25,
generator=torch.Generator("cpu").manual_seed(42),
)
frames = output.frames[0]
export_to_gif(frames, "animation.gif")
```
masterpiece, bestquality, sunset.
## Using FreeInit
[FreeInit: Bridging Initialization Gap in Video Diffusion Models](https://arxiv.org/abs/2312.07537) by Tianxing Wu, Chenyang Si, Yuming Jiang, Ziqi Huang, Ziwei Liu.
FreeInit is an effective method that improves temporal consistency and overall quality of videos generated using video-diffusion-models without any addition training. It can be applied to AnimateDiff, ModelScope, VideoCrafter and various other video generation models seamlessly at inference time, and works by iteratively refining the latent-initialization noise. More details can be found it the paper.
The following example demonstrates the usage of FreeInit.
```python
import torch
from diffusers import MotionAdapter, AnimateDiffPipeline, DDIMScheduler
from diffusers.utils import export_to_gif
adapter = MotionAdapter.from_pretrained("guoyww/animatediff-motion-adapter-v1-5-2")
model_id = "SG161222/Realistic_Vision_V5.1_noVAE"
pipe = AnimateDiffPipeline.from_pretrained(model_id, motion_adapter=adapter, torch_dtype=torch.float16).to("cuda")
pipe.scheduler = DDIMScheduler.from_pretrained(
model_id,
subfolder="scheduler",
beta_schedule="linear",
clip_sample=False,
timestep_spacing="linspace",
steps_offset=1
)
# enable memory savings
pipe.enable_vae_slicing()
pipe.enable_vae_tiling()
# enable FreeInit
# Refer to the enable_free_init documentation for a full list of configurable parameters
pipe.enable_free_init(method="butterworth", use_fast_sampling=True)
# run inference
output = pipe(
prompt="a panda playing a guitar, on a boat, in the ocean, high quality",
negative_prompt="bad quality, worse quality",
num_frames=16,
guidance_scale=7.5,
num_inference_steps=20,
generator=torch.Generator("cpu").manual_seed(666),
)
# disable FreeInit
pipe.disable_free_init()
frames = output.frames[0]
export_to_gif(frames, "animation.gif")
```
FreeInit is not really free - the improved quality comes at the cost of extra computation. It requires sampling a few extra times depending on the `num_iters` parameter that is set when enabling it. Setting the `use_fast_sampling` parameter to `True` can improve the overall performance (at the cost of lower quality compared to when `use_fast_sampling=False` but still better results than vanilla video generation models).
Make sure to check out the Schedulers [guide](../../using-diffusers/schedulers) to learn how to explore the tradeoff between scheduler speed and quality, and see the [reuse components across pipelines](../../using-diffusers/loading#reuse-components-across-pipelines) section to learn how to efficiently load the same components into multiple pipelines.
Without FreeInit enabled
With FreeInit enabled
panda playing a guitar
## Using AnimateLCM
[AnimateLCM](https://animatelcm.github.io/) is a motion module checkpoint and an [LCM LoRA](https://huggingface.co/docs/diffusers/using-diffusers/inference_with_lcm_lora) that have been created using a consistency learning strategy that decouples the distillation of the image generation priors and the motion generation priors.
```python
import torch
from diffusers import AnimateDiffPipeline, LCMScheduler, MotionAdapter
from diffusers.utils import export_to_gif
adapter = MotionAdapter.from_pretrained("wangfuyun/AnimateLCM")
pipe = AnimateDiffPipeline.from_pretrained("emilianJR/epiCRealism", motion_adapter=adapter)
pipe.scheduler = LCMScheduler.from_config(pipe.scheduler.config, beta_schedule="linear")
pipe.load_lora_weights("wangfuyun/AnimateLCM", weight_name="sd15_lora_beta.safetensors", adapter_name="lcm-lora")
pipe.enable_vae_slicing()
pipe.enable_model_cpu_offload()
output = pipe(
prompt="A space rocket with trails of smoke behind it launching into space from the desert, 4k, high resolution",
negative_prompt="bad quality, worse quality, low resolution",
num_frames=16,
guidance_scale=1.5,
num_inference_steps=6,
generator=torch.Generator("cpu").manual_seed(0),
)
frames = output.frames[0]
export_to_gif(frames, "animatelcm.gif")
```
A space rocket, 4K.
AnimateLCM is also compatible with existing [Motion LoRAs](https://huggingface.co/collections/dn6/animatediff-motion-loras-654cb8ad732b9e3cf4d3c17e).
```python
import torch
from diffusers import AnimateDiffPipeline, LCMScheduler, MotionAdapter
from diffusers.utils import export_to_gif
adapter = MotionAdapter.from_pretrained("wangfuyun/AnimateLCM")
pipe = AnimateDiffPipeline.from_pretrained("emilianJR/epiCRealism", motion_adapter=adapter)
pipe.scheduler = LCMScheduler.from_config(pipe.scheduler.config, beta_schedule="linear")
pipe.load_lora_weights("wangfuyun/AnimateLCM", weight_name="sd15_lora_beta.safetensors", adapter_name="lcm-lora")
pipe.load_lora_weights("guoyww/animatediff-motion-lora-tilt-up", adapter_name="tilt-up")
pipe.set_adapters(["lcm-lora", "tilt-up"], [1.0, 0.8])
pipe.enable_vae_slicing()
pipe.enable_model_cpu_offload()
output = pipe(
prompt="A space rocket with trails of smoke behind it launching into space from the desert, 4k, high resolution",
negative_prompt="bad quality, worse quality, low resolution",
num_frames=16,
guidance_scale=1.5,
num_inference_steps=6,
generator=torch.Generator("cpu").manual_seed(0),
)
frames = output.frames[0]
export_to_gif(frames, "animatelcm-motion-lora.gif")
```
A space rocket, 4K.
## Using FreeNoise
[FreeNoise: Tuning-Free Longer Video Diffusion via Noise Rescheduling](https://arxiv.org/abs/2310.15169) by Haonan Qiu, Menghan Xia, Yong Zhang, Yingqing He, Xintao Wang, Ying Shan, Ziwei Liu.
FreeNoise is a sampling mechanism that can generate longer videos with short-video generation models by employing noise-rescheduling, temporal attention over sliding windows, and weighted averaging of latent frames. It also can be used with multiple prompts to allow for interpolated video generations. More details are available in the paper.
The currently supported AnimateDiff pipelines that can be used with FreeNoise are:
- `AnimateDiffPipeline`
- `AnimateDiffControlNetPipeline`
- `AnimateDiffVideoToVideoPipeline`
- `AnimateDiffVideoToVideoControlNetPipeline`
In order to use FreeNoise, a single line needs to be added to the inference code after loading your pipelines.
```diff
+ pipe.enable_free_noise()
```
After this, either a single prompt could be used, or multiple prompts can be passed as a dictionary of integer-string pairs. The integer keys of the dictionary correspond to the frame index at which the influence of that prompt would be maximum. Each frame index should map to a single string prompt. The prompts for intermediate frame indices, that are not passed in the dictionary, are created by interpolating between the frame prompts that are passed. By default, simple linear interpolation is used. However, you can customize this behaviour with a callback to the `prompt_interpolation_callback` parameter when enabling FreeNoise.
Full example:
```python
import torch
from diffusers import AutoencoderKL, AnimateDiffPipeline, LCMScheduler, MotionAdapter
from diffusers.utils import export_to_video, load_image
# Load pipeline
dtype = torch.float16
motion_adapter = MotionAdapter.from_pretrained("wangfuyun/AnimateLCM", torch_dtype=dtype)
vae = AutoencoderKL.from_pretrained("stabilityai/sd-vae-ft-mse", torch_dtype=dtype)
pipe = AnimateDiffPipeline.from_pretrained("emilianJR/epiCRealism", motion_adapter=motion_adapter, vae=vae, torch_dtype=dtype)
pipe.scheduler = LCMScheduler.from_config(pipe.scheduler.config, beta_schedule="linear")
pipe.load_lora_weights(
"wangfuyun/AnimateLCM", weight_name="AnimateLCM_sd15_t2v_lora.safetensors", adapter_name="lcm_lora"
)
pipe.set_adapters(["lcm_lora"], [0.8])
# Enable FreeNoise for long prompt generation
pipe.enable_free_noise(context_length=16, context_stride=4)
pipe.to("cuda")
# Can be a single prompt, or a dictionary with frame timesteps
prompt = {
0: "A caterpillar on a leaf, high quality, photorealistic",
40: "A caterpillar transforming into a cocoon, on a leaf, near flowers, photorealistic",
80: "A cocoon on a leaf, flowers in the backgrond, photorealistic",
120: "A cocoon maturing and a butterfly being born, flowers and leaves visible in the background, photorealistic",
160: "A beautiful butterfly, vibrant colors, sitting on a leaf, flowers in the background, photorealistic",
200: "A beautiful butterfly, flying away in a forest, photorealistic",
240: "A cyberpunk butterfly, neon lights, glowing",
}
negative_prompt = "bad quality, worst quality, jpeg artifacts"
# Run inference
output = pipe(
prompt=prompt,
negative_prompt=negative_prompt,
num_frames=256,
guidance_scale=2.5,
num_inference_steps=10,
generator=torch.Generator("cpu").manual_seed(0),
)
# Save video
frames = output.frames[0]
export_to_video(frames, "output.mp4", fps=16)
```
### FreeNoise memory savings
Since FreeNoise processes multiple frames together, there are parts in the modeling where the memory required exceeds that available on normal consumer GPUs. The main memory bottlenecks that we identified are spatial and temporal attention blocks, upsampling and downsampling blocks, resnet blocks and feed-forward layers. Since most of these blocks operate effectively only on the channel/embedding dimension, one can perform chunked inference across the batch dimensions. The batch dimension in AnimateDiff are either spatial (`[B x F, H x W, C]`) or temporal (`B x H x W, F, C`) in nature (note that it may seem counter-intuitive, but the batch dimension here are correct, because spatial blocks process across the `B x F` dimension while the temporal blocks process across the `B x H x W` dimension). We introduce a `SplitInferenceModule` that makes it easier to chunk across any dimension and perform inference. This saves a lot of memory but comes at the cost of requiring more time for inference.
```diff
# Load pipeline and adapters
# ...
+ pipe.enable_free_noise_split_inference()
+ pipe.unet.enable_forward_chunking(16)
```
The call to `pipe.enable_free_noise_split_inference` method accepts two parameters: `spatial_split_size` (defaults to `256`) and `temporal_split_size` (defaults to `16`). These can be configured based on how much VRAM you have available. A lower split size results in lower memory usage but slower inference, whereas a larger split size results in faster inference at the cost of more memory.
## Using `from_single_file` with the MotionAdapter
`diffusers>=0.30.0` supports loading the AnimateDiff checkpoints into the `MotionAdapter` in their original format via `from_single_file`
```python
from diffusers import MotionAdapter
ckpt_path = "https://huggingface.co/Lightricks/LongAnimateDiff/blob/main/lt_long_mm_32_frames.ckpt"
adapter = MotionAdapter.from_single_file(ckpt_path, torch_dtype=torch.float16)
pipe = AnimateDiffPipeline.from_pretrained("emilianJR/epiCRealism", motion_adapter=adapter)
```
## AnimateDiffPipeline
## AnimateDiffControlNetPipeline
## AnimateDiffSparseControlNetPipeline
## AnimateDiffSDXLPipeline
## AnimateDiffVideoToVideoPipeline
## AnimateDiffVideoToVideoControlNetPipeline
## AnimateDiffPipelineOutput
[[autodoc]] AnimateDiffPipeline
- all
- __call__
[[autodoc]] AnimateDiffControlNetPipeline
- all
- __call__
[[autodoc]] AnimateDiffSparseControlNetPipeline
- all
- __call__
[[autodoc]] AnimateDiffSDXLPipeline
- all
- __call__
[[autodoc]] AnimateDiffVideoToVideoPipeline
- all
- __call__
[[autodoc]] AnimateDiffVideoToVideoControlNetPipeline
- all
- __call__
[[autodoc]] pipelines.animatediff.AnimateDiffPipelineOutput
# Mochi
[Mochi 1 Preview](https://huggingface.co/genmo/mochi-1-preview) from Genmo.
*Mochi 1 preview is an open state-of-the-art video generation model with high-fidelity motion and strong prompt adherence in preliminary evaluation. This model dramatically closes the gap between closed and open video generation systems. The model is released under a permissive Apache 2.0 license.*
Make sure to check out the Schedulers [guide](../../using-diffusers/schedulers.md) to learn how to explore the tradeoff between scheduler speed and quality, and see the [reuse components across pipelines](../../using-diffusers/loading.md#reuse-a-pipeline) section to learn how to efficiently load the same components into multiple pipelines.
## MochiPipeline
## MochiPipelineOutput
[[autodoc]] MochiPipeline
- all
- __call__
[[autodoc]] pipelines.mochi.pipeline_output.MochiPipelineOutput
# Flux
Flux is a series of text-to-image generation models based on diffusion transformers. To know more about Flux, check out the original [blog post](https://blackforestlabs.ai/announcing-black-forest-labs/) by the creators of Flux, Black Forest Labs.
Original model checkpoints for Flux can be found [here](https://huggingface.co/black-forest-labs). Original inference code can be found [here](https://github.com/black-forest-labs/flux).
Flux can be quite expensive to run on consumer hardware devices. However, you can perform a suite of optimizations to run it faster and in a more memory-friendly manner. Check out [this section](https://huggingface.co/blog/sd3#memory-optimizations-for-sd3) for more details. Additionally, Flux can benefit from quantization for memory efficiency with a trade-off in inference latency. Refer to [this blog post](https://huggingface.co/blog/quanto-diffusers) to learn more. For an exhaustive list of resources, check out [this gist](https://gist.github.com/sayakpaul/b664605caf0aa3bf8585ab109dd5ac9c).
Flux comes in two variants:
* Timestep-distilled (`black-forest-labs/FLUX.1-schnell`)
* Guidance-distilled (`black-forest-labs/FLUX.1-dev`)
Both checkpoints have slightly difference usage which we detail below.
### Timestep-distilled
* `max_sequence_length` cannot be more than 256.
* `guidance_scale` needs to be 0.
* As this is a timestep-distilled model, it benefits from fewer sampling steps.
```python
import torch
from diffusers import FluxPipeline
pipe = FluxPipeline.from_pretrained("black-forest-labs/FLUX.1-schnell", torch_dtype=torch.bfloat16)
pipe.enable_model_cpu_offload()
prompt = "A cat holding a sign that says hello world"
out = pipe(
prompt=prompt,
guidance_scale=0.,
height=768,
width=1360,
num_inference_steps=4,
max_sequence_length=256,
).images[0]
out.save("image.png")
```
### Guidance-distilled
* The guidance-distilled variant takes about 50 sampling steps for good-quality generation.
* It doesn't have any limitations around the `max_sequence_length`.
```python
import torch
from diffusers import FluxPipeline
pipe = FluxPipeline.from_pretrained("black-forest-labs/FLUX.1-dev", torch_dtype=torch.bfloat16)
pipe.enable_model_cpu_offload()
prompt = "a tiny astronaut hatching from an egg on the moon"
out = pipe(
prompt=prompt,
guidance_scale=3.5,
height=768,
width=1360,
num_inference_steps=50,
).images[0]
out.save("image.png")
```
## Running FP16 inference
Flux can generate high-quality images with FP16 (i.e. to accelerate inference on Turing/Volta GPUs) but produces different outputs compared to FP32/BF16. The issue is that some activations in the text encoders have to be clipped when running in FP16, which affects the overall image. Forcing text encoders to run with FP32 inference thus removes this output difference. See [here](https://github.com/huggingface/diffusers/pull/9097#issuecomment-2272292516) for details.
FP16 inference code:
```python
import torch
from diffusers import FluxPipeline
pipe = FluxPipeline.from_pretrained("black-forest-labs/FLUX.1-schnell", torch_dtype=torch.bfloat16) # can replace schnell with dev
# to run on low vram GPUs (i.e. between 4 and 32 GB VRAM)
pipe.enable_sequential_cpu_offload()
pipe.vae.enable_slicing()
pipe.vae.enable_tiling()
pipe.to(torch.float16) # casting here instead of in the pipeline constructor because doing so in the constructor loads all models into CPU memory at once
prompt = "A cat holding a sign that says hello world"
out = pipe(
prompt=prompt,
guidance_scale=0.,
height=768,
width=1360,
num_inference_steps=4,
max_sequence_length=256,
).images[0]
out.save("image.png")
```
## Single File Loading for the `FluxTransformer2DModel`
The `FluxTransformer2DModel` supports loading checkpoints in the original format shipped by Black Forest Labs. This is also useful when trying to load finetunes or quantized versions of the models that have been published by the community.
`FP8` inference can be brittle depending on the GPU type, CUDA version, and `torch` version that you are using. It is recommended that you use the `optimum-quanto` library in order to run FP8 inference on your machine.
The following example demonstrates how to run Flux with less than 16GB of VRAM.
First install `optimum-quanto`
```shell
pip install optimum-quanto
```
Then run the following example
```python
import torch
from diffusers import FluxTransformer2DModel, FluxPipeline
from transformers import T5EncoderModel, CLIPTextModel
from optimum.quanto import freeze, qfloat8, quantize
bfl_repo = "black-forest-labs/FLUX.1-dev"
dtype = torch.bfloat16
transformer = FluxTransformer2DModel.from_single_file("https://huggingface.co/Kijai/flux-fp8/blob/main/flux1-dev-fp8.safetensors", torch_dtype=dtype)
quantize(transformer, weights=qfloat8)
freeze(transformer)
text_encoder_2 = T5EncoderModel.from_pretrained(bfl_repo, subfolder="text_encoder_2", torch_dtype=dtype)
quantize(text_encoder_2, weights=qfloat8)
freeze(text_encoder_2)
pipe = FluxPipeline.from_pretrained(bfl_repo, transformer=None, text_encoder_2=None, torch_dtype=dtype)
pipe.transformer = transformer
pipe.text_encoder_2 = text_encoder_2
pipe.enable_model_cpu_offload()
prompt = "A cat holding a sign that says hello world"
image = pipe(
prompt,
guidance_scale=3.5,
output_type="pil",
num_inference_steps=20,
generator=torch.Generator("cpu").manual_seed(0)
).images[0]
image.save("flux-fp8-dev.png")
```
## FluxPipeline
## FluxImg2ImgPipeline
## FluxInpaintPipeline
## FluxControlNetInpaintPipeline
## FluxControlNetImg2ImgPipeline
[[autodoc]] FluxPipeline
- all
- __call__
[[autodoc]] FluxImg2ImgPipeline
- all
- __call__
[[autodoc]] FluxInpaintPipeline
- all
- __call__
[[autodoc]] FluxControlNetInpaintPipeline
- all
- __call__
[[autodoc]] FluxControlNetImg2ImgPipeline
- all
- __call__
# Text2Video-Zero
[Text2Video-Zero: Text-to-Image Diffusion Models are Zero-Shot Video Generators](https://huggingface.co/papers/2303.13439) is by Levon Khachatryan, Andranik Movsisyan, Vahram Tadevosyan, Roberto Henschel, [Zhangyang Wang](https://www.ece.utexas.edu/people/faculty/atlas-wang), Shant Navasardyan, [Humphrey Shi](https://www.humphreyshi.com).
Text2Video-Zero enables zero-shot video generation using either:
1. A textual prompt
2. A prompt combined with guidance from poses or edges
3. Video Instruct-Pix2Pix (instruction-guided video editing)
Results are temporally consistent and closely follow the guidance and textual prompts.
![teaser-img](https://huggingface.co/datasets/huggingface/documentation-images/resolve/main/diffusers/t2v_zero_teaser.png)
The abstract from the paper is:
*Recent text-to-video generation approaches rely on computationally heavy training and require large-scale video datasets. In this paper, we introduce a new task of zero-shot text-to-video generation and propose a low-cost approach (without any training or optimization) by leveraging the power of existing text-to-image synthesis methods (e.g., Stable Diffusion), making them suitable for the video domain.
Our key modifications include (i) enriching the latent codes of the generated frames with motion dynamics to keep the global scene and the background time consistent; and (ii) reprogramming frame-level self-attention using a new cross-frame attention of each frame on the first frame, to preserve the context, appearance, and identity of the foreground object.
Experiments show that this leads to low overhead, yet high-quality and remarkably consistent video generation. Moreover, our approach is not limited to text-to-video synthesis but is also applicable to other tasks such as conditional and content-specialized video generation, and Video Instruct-Pix2Pix, i.e., instruction-guided video editing.
As experiments show, our method performs comparably or sometimes better than recent approaches, despite not being trained on additional video data.*
You can find additional information about Text2Video-Zero on the [project page](https://text2video-zero.github.io/), [paper](https://arxiv.org/abs/2303.13439), and [original codebase](https://github.com/Picsart-AI-Research/Text2Video-Zero).
## Usage example
### Text-To-Video
To generate a video from prompt, run the following Python code:
```python
import torch
from diffusers import TextToVideoZeroPipeline
import imageio
model_id = "stable-diffusion-v1-5/stable-diffusion-v1-5"
pipe = TextToVideoZeroPipeline.from_pretrained(model_id, torch_dtype=torch.float16).to("cuda")
prompt = "A panda is playing guitar on times square"
result = pipe(prompt=prompt).images
result = [(r * 255).astype("uint8") for r in result]
imageio.mimsave("video.mp4", result, fps=4)
```
You can change these parameters in the pipeline call:
* Motion field strength (see the [paper](https://arxiv.org/abs/2303.13439), Sect. 3.3.1):
* `motion_field_strength_x` and `motion_field_strength_y`. Default: `motion_field_strength_x=12`, `motion_field_strength_y=12`
* `T` and `T'` (see the [paper](https://arxiv.org/abs/2303.13439), Sect. 3.3.1)
* `t0` and `t1` in the range `{0, ..., num_inference_steps}`. Default: `t0=45`, `t1=48`
* Video length:
* `video_length`, the number of frames video_length to be generated. Default: `video_length=8`
We can also generate longer videos by doing the processing in a chunk-by-chunk manner:
```python
import torch
from diffusers import TextToVideoZeroPipeline
import numpy as np
model_id = "stable-diffusion-v1-5/stable-diffusion-v1-5"
pipe = TextToVideoZeroPipeline.from_pretrained(model_id, torch_dtype=torch.float16).to("cuda")
seed = 0
video_length = 24 #24 ÷ 4fps = 6 seconds
chunk_size = 8
prompt = "A panda is playing guitar on times square"
# Generate the video chunk-by-chunk
result = []
chunk_ids = np.arange(0, video_length, chunk_size - 1)
generator = torch.Generator(device="cuda")
for i in range(len(chunk_ids)):
print(f"Processing chunk {i + 1} / {len(chunk_ids)}")
ch_start = chunk_ids[i]
ch_end = video_length if i == len(chunk_ids) - 1 else chunk_ids[i + 1]
# Attach the first frame for Cross Frame Attention
frame_ids = [0] + list(range(ch_start, ch_end))
# Fix the seed for the temporal consistency
generator.manual_seed(seed)
output = pipe(prompt=prompt, video_length=len(frame_ids), generator=generator, frame_ids=frame_ids)
result.append(output.images[1:])
# Concatenate chunks and save
result = np.concatenate(result)
result = [(r * 255).astype("uint8") for r in result]
imageio.mimsave("video.mp4", result, fps=4)
```
- #### SDXL Support
In order to use the SDXL model when generating a video from prompt, use the `TextToVideoZeroSDXLPipeline` pipeline:
```python
import torch
from diffusers import TextToVideoZeroSDXLPipeline
model_id = "stabilityai/stable-diffusion-xl-base-1.0"
pipe = TextToVideoZeroSDXLPipeline.from_pretrained(
model_id, torch_dtype=torch.float16, variant="fp16", use_safetensors=True
).to("cuda")
```
### Text-To-Video with Pose Control
To generate a video from prompt with additional pose control
1. Download a demo video
```python
from huggingface_hub import hf_hub_download
filename = "__assets__/poses_skeleton_gifs/dance1_corr.mp4"
repo_id = "PAIR/Text2Video-Zero"
video_path = hf_hub_download(repo_type="space", repo_id=repo_id, filename=filename)
```
2. Read video containing extracted pose images
```python
from PIL import Image
import imageio
reader = imageio.get_reader(video_path, "ffmpeg")
frame_count = 8
pose_images = [Image.fromarray(reader.get_data(i)) for i in range(frame_count)]
```
To extract pose from actual video, read [ControlNet documentation](controlnet).
3. Run `StableDiffusionControlNetPipeline` with our custom attention processor
```python
import torch
from diffusers import StableDiffusionControlNetPipeline, ControlNetModel
from diffusers.pipelines.text_to_video_synthesis.pipeline_text_to_video_zero import CrossFrameAttnProcessor
model_id = "stable-diffusion-v1-5/stable-diffusion-v1-5"
controlnet = ControlNetModel.from_pretrained("lllyasviel/sd-controlnet-openpose", torch_dtype=torch.float16)
pipe = StableDiffusionControlNetPipeline.from_pretrained(
model_id, controlnet=controlnet, torch_dtype=torch.float16
).to("cuda")
# Set the attention processor
pipe.unet.set_attn_processor(CrossFrameAttnProcessor(batch_size=2))
pipe.controlnet.set_attn_processor(CrossFrameAttnProcessor(batch_size=2))
# fix latents for all frames
latents = torch.randn((1, 4, 64, 64), device="cuda", dtype=torch.float16).repeat(len(pose_images), 1, 1, 1)
prompt = "Darth Vader dancing in a desert"
result = pipe(prompt=[prompt] * len(pose_images), image=pose_images, latents=latents).images
imageio.mimsave("video.mp4", result, fps=4)
```
- #### SDXL Support
Since our attention processor also works with SDXL, it can be utilized to generate a video from prompt using ControlNet models powered by SDXL:
```python
import torch
from diffusers import StableDiffusionXLControlNetPipeline, ControlNetModel
from diffusers.pipelines.text_to_video_synthesis.pipeline_text_to_video_zero import CrossFrameAttnProcessor
controlnet_model_id = 'thibaud/controlnet-openpose-sdxl-1.0'
model_id = 'stabilityai/stable-diffusion-xl-base-1.0'
controlnet = ControlNetModel.from_pretrained(controlnet_model_id, torch_dtype=torch.float16)
pipe = StableDiffusionControlNetPipeline.from_pretrained(
model_id, controlnet=controlnet, torch_dtype=torch.float16
).to('cuda')
# Set the attention processor
pipe.unet.set_attn_processor(CrossFrameAttnProcessor(batch_size=2))
pipe.controlnet.set_attn_processor(CrossFrameAttnProcessor(batch_size=2))
# fix latents for all frames
latents = torch.randn((1, 4, 128, 128), device="cuda", dtype=torch.float16).repeat(len(pose_images), 1, 1, 1)
prompt = "Darth Vader dancing in a desert"
result = pipe(prompt=[prompt] * len(pose_images), image=pose_images, latents=latents).images
imageio.mimsave("video.mp4", result, fps=4)
```
### Text-To-Video with Edge Control
To generate a video from prompt with additional Canny edge control, follow the same steps described above for pose-guided generation using [Canny edge ControlNet model](https://huggingface.co/lllyasviel/sd-controlnet-canny).
### Video Instruct-Pix2Pix
To perform text-guided video editing (with [InstructPix2Pix](pix2pix)):
1. Download a demo video
```python
from huggingface_hub import hf_hub_download
filename = "__assets__/pix2pix video/camel.mp4"
repo_id = "PAIR/Text2Video-Zero"
video_path = hf_hub_download(repo_type="space", repo_id=repo_id, filename=filename)
```
2. Read video from path
```python
from PIL import Image
import imageio
reader = imageio.get_reader(video_path, "ffmpeg")
frame_count = 8
video = [Image.fromarray(reader.get_data(i)) for i in range(frame_count)]
```
3. Run `StableDiffusionInstructPix2PixPipeline` with our custom attention processor
```python
import torch
from diffusers import StableDiffusionInstructPix2PixPipeline
from diffusers.pipelines.text_to_video_synthesis.pipeline_text_to_video_zero import CrossFrameAttnProcessor
model_id = "timbrooks/instruct-pix2pix"
pipe = StableDiffusionInstructPix2PixPipeline.from_pretrained(model_id, torch_dtype=torch.float16).to("cuda")
pipe.unet.set_attn_processor(CrossFrameAttnProcessor(batch_size=3))
prompt = "make it Van Gogh Starry Night style"
result = pipe(prompt=[prompt] * len(video), image=video).images
imageio.mimsave("edited_video.mp4", result, fps=4)
```
### DreamBooth specialization
Methods **Text-To-Video**, **Text-To-Video with Pose Control** and **Text-To-Video with Edge Control**
can run with custom [DreamBooth](../../training/dreambooth) models, as shown below for
[Canny edge ControlNet model](https://huggingface.co/lllyasviel/sd-controlnet-canny) and
[Avatar style DreamBooth](https://huggingface.co/PAIR/text2video-zero-controlnet-canny-avatar) model:
1. Download a demo video
```python
from huggingface_hub import hf_hub_download
filename = "__assets__/canny_videos_mp4/girl_turning.mp4"
repo_id = "PAIR/Text2Video-Zero"
video_path = hf_hub_download(repo_type="space", repo_id=repo_id, filename=filename)
```
2. Read video from path
```python
from PIL import Image
import imageio
reader = imageio.get_reader(video_path, "ffmpeg")
frame_count = 8
canny_edges = [Image.fromarray(reader.get_data(i)) for i in range(frame_count)]
```
3. Run `StableDiffusionControlNetPipeline` with custom trained DreamBooth model
```python
import torch
from diffusers import StableDiffusionControlNetPipeline, ControlNetModel
from diffusers.pipelines.text_to_video_synthesis.pipeline_text_to_video_zero import CrossFrameAttnProcessor
# set model id to custom model
model_id = "PAIR/text2video-zero-controlnet-canny-avatar"
controlnet = ControlNetModel.from_pretrained("lllyasviel/sd-controlnet-canny", torch_dtype=torch.float16)
pipe = StableDiffusionControlNetPipeline.from_pretrained(
model_id, controlnet=controlnet, torch_dtype=torch.float16
).to("cuda")
# Set the attention processor
pipe.unet.set_attn_processor(CrossFrameAttnProcessor(batch_size=2))
pipe.controlnet.set_attn_processor(CrossFrameAttnProcessor(batch_size=2))
# fix latents for all frames
latents = torch.randn((1, 4, 64, 64), device="cuda", dtype=torch.float16).repeat(len(canny_edges), 1, 1, 1)
prompt = "oil painting of a beautiful girl avatar style"
result = pipe(prompt=[prompt] * len(canny_edges), image=canny_edges, latents=latents).images
imageio.mimsave("video.mp4", result, fps=4)
```
You can filter out some available DreamBooth-trained models with [this link](https://huggingface.co/models?search=dreambooth).
Make sure to check out the Schedulers [guide](../../using-diffusers/schedulers) to learn how to explore the tradeoff between scheduler speed and quality, and see the [reuse components across pipelines](../../using-diffusers/loading#reuse-components-across-pipelines) section to learn how to efficiently load the same components into multiple pipelines.
## TextToVideoZeroPipeline
## TextToVideoZeroSDXLPipeline
## TextToVideoPipelineOutput
[[autodoc]] TextToVideoZeroPipeline
- all
- __call__
[[autodoc]] TextToVideoZeroSDXLPipeline
- all
- __call__
[[autodoc]] pipelines.text_to_video_synthesis.pipeline_text_to_video_zero.TextToVideoPipelineOutput
# DDIM
[Denoising Diffusion Implicit Models](https://huggingface.co/papers/2010.02502) (DDIM) by Jiaming Song, Chenlin Meng and Stefano Ermon.
The abstract from the paper is:
*Denoising diffusion probabilistic models (DDPMs) have achieved high quality image generation without adversarial training, yet they require simulating a Markov chain for many steps to produce a sample. To accelerate sampling, we present denoising diffusion implicit models (DDIMs), a more efficient class of iterative implicit probabilistic models with the same training procedure as DDPMs. In DDPMs, the generative process is defined as the reverse of a Markovian diffusion process. We construct a class of non-Markovian diffusion processes that lead to the same training objective, but whose reverse process can be much faster to sample from. We empirically demonstrate that DDIMs can produce high quality samples 10× to 50× faster in terms of wall-clock time compared to DDPMs, allow us to trade off computation for sample quality, and can perform semantically meaningful image interpolation directly in the latent space.*
The original codebase can be found at [ermongroup/ddim](https://github.com/ermongroup/ddim).
## DDIMPipeline
## ImagePipelineOutput
[[autodoc]] DDIMPipeline
- all
- __call__
[[autodoc]] pipelines.ImagePipelineOutput
🧪 This pipeline is for research purposes only.
# Text-to-video
[ModelScope Text-to-Video Technical Report](https://arxiv.org/abs/2308.06571) is by Jiuniu Wang, Hangjie Yuan, Dayou Chen, Yingya Zhang, Xiang Wang, Shiwei Zhang.
The abstract from the paper is:
*This paper introduces ModelScopeT2V, a text-to-video synthesis model that evolves from a text-to-image synthesis model (i.e., Stable Diffusion). ModelScopeT2V incorporates spatio-temporal blocks to ensure consistent frame generation and smooth movement transitions. The model could adapt to varying frame numbers during training and inference, rendering it suitable for both image-text and video-text datasets. ModelScopeT2V brings together three components (i.e., VQGAN, a text encoder, and a denoising UNet), totally comprising 1.7 billion parameters, in which 0.5 billion parameters are dedicated to temporal capabilities. The model demonstrates superior performance over state-of-the-art methods across three evaluation metrics. The code and an online demo are available at https://modelscope.cn/models/damo/text-to-video-synthesis/summary.*
You can find additional information about Text-to-Video on the [project page](https://modelscope.cn/models/damo/text-to-video-synthesis/summary), [original codebase](https://github.com/modelscope/modelscope/), and try it out in a [demo](https://huggingface.co/spaces/damo-vilab/modelscope-text-to-video-synthesis). Official checkpoints can be found at [damo-vilab](https://huggingface.co/damo-vilab) and [cerspense](https://huggingface.co/cerspense).
## Usage example
### `text-to-video-ms-1.7b`
Let's start by generating a short video with the default length of 16 frames (2s at 8 fps):
```python
import torch
from diffusers import DiffusionPipeline
from diffusers.utils import export_to_video
pipe = DiffusionPipeline.from_pretrained("damo-vilab/text-to-video-ms-1.7b", torch_dtype=torch.float16, variant="fp16")
pipe = pipe.to("cuda")
prompt = "Spiderman is surfing"
video_frames = pipe(prompt).frames[0]
video_path = export_to_video(video_frames)
video_path
```
Diffusers supports different optimization techniques to improve the latency
and memory footprint of a pipeline. Since videos are often more memory-heavy than images,
we can enable CPU offloading and VAE slicing to keep the memory footprint at bay.
Let's generate a video of 8 seconds (64 frames) on the same GPU using CPU offloading and VAE slicing:
```python
import torch
from diffusers import DiffusionPipeline
from diffusers.utils import export_to_video
pipe = DiffusionPipeline.from_pretrained("damo-vilab/text-to-video-ms-1.7b", torch_dtype=torch.float16, variant="fp16")
pipe.enable_model_cpu_offload()
# memory optimization
pipe.enable_vae_slicing()
prompt = "Darth Vader surfing a wave"
video_frames = pipe(prompt, num_frames=64).frames[0]
video_path = export_to_video(video_frames)
video_path
```
It just takes **7 GBs of GPU memory** to generate the 64 video frames using PyTorch 2.0, "fp16" precision and the techniques mentioned above.
We can also use a different scheduler easily, using the same method we'd use for Stable Diffusion:
```python
import torch
from diffusers import DiffusionPipeline, DPMSolverMultistepScheduler
from diffusers.utils import export_to_video
pipe = DiffusionPipeline.from_pretrained("damo-vilab/text-to-video-ms-1.7b", torch_dtype=torch.float16, variant="fp16")
pipe.scheduler = DPMSolverMultistepScheduler.from_config(pipe.scheduler.config)
pipe.enable_model_cpu_offload()
prompt = "Spiderman is surfing"
video_frames = pipe(prompt, num_inference_steps=25).frames[0]
video_path = export_to_video(video_frames)
video_path
```
Here are some sample outputs:
An astronaut riding a horse.
Darth vader surfing in waves.
### `cerspense/zeroscope_v2_576w` & `cerspense/zeroscope_v2_XL`
Zeroscope are watermark-free model and have been trained on specific sizes such as `576x320` and `1024x576`.
One should first generate a video using the lower resolution checkpoint [`cerspense/zeroscope_v2_576w`](https://huggingface.co/cerspense/zeroscope_v2_576w) with `TextToVideoSDPipeline`,
which can then be upscaled using `VideoToVideoSDPipeline` and [`cerspense/zeroscope_v2_XL`](https://huggingface.co/cerspense/zeroscope_v2_XL).
```py
import torch
from diffusers import DiffusionPipeline, DPMSolverMultistepScheduler
from diffusers.utils import export_to_video
from PIL import Image
pipe = DiffusionPipeline.from_pretrained("cerspense/zeroscope_v2_576w", torch_dtype=torch.float16)
pipe.enable_model_cpu_offload()
# memory optimization
pipe.unet.enable_forward_chunking(chunk_size=1, dim=1)
pipe.enable_vae_slicing()
prompt = "Darth Vader surfing a wave"
video_frames = pipe(prompt, num_frames=24).frames[0]
video_path = export_to_video(video_frames)
video_path
```
Now the video can be upscaled:
```py
pipe = DiffusionPipeline.from_pretrained("cerspense/zeroscope_v2_XL", torch_dtype=torch.float16)
pipe.scheduler = DPMSolverMultistepScheduler.from_config(pipe.scheduler.config)
pipe.enable_model_cpu_offload()
# memory optimization
pipe.unet.enable_forward_chunking(chunk_size=1, dim=1)
pipe.enable_vae_slicing()
video = [Image.fromarray(frame).resize((1024, 576)) for frame in video_frames]
video_frames = pipe(prompt, video=video, strength=0.6).frames[0]
video_path = export_to_video(video_frames)
video_path
```
Here are some sample outputs:
Darth vader surfing in waves.
## Tips
Video generation is memory-intensive and one way to reduce your memory usage is to set `enable_forward_chunking` on the pipeline's UNet so you don't run the entire feedforward layer at once. Breaking it up into chunks in a loop is more efficient.
Check out the [Text or image-to-video](text-img2vid) guide for more details about how certain parameters can affect video generation and how to optimize inference by reducing memory usage.
Make sure to check out the Schedulers [guide](../../using-diffusers/schedulers) to learn how to explore the tradeoff between scheduler speed and quality, and see the [reuse components across pipelines](../../using-diffusers/loading#reuse-components-across-pipelines) section to learn how to efficiently load the same components into multiple pipelines.
## TextToVideoSDPipeline
## VideoToVideoSDPipeline
## TextToVideoSDPipelineOutput
[[autodoc]] TextToVideoSDPipeline
- all
- __call__
[[autodoc]] VideoToVideoSDPipeline
- all
- __call__
[[autodoc]] pipelines.text_to_video_synthesis.TextToVideoSDPipelineOutput
# Kolors: Effective Training of Diffusion Model for Photorealistic Text-to-Image Synthesis
![](https://huggingface.co/datasets/huggingface/documentation-images/resolve/main/kolors/kolors_header_collage.png)
Kolors is a large-scale text-to-image generation model based on latent diffusion, developed by [the Kuaishou Kolors team](https://github.com/Kwai-Kolors/Kolors). Trained on billions of text-image pairs, Kolors exhibits significant advantages over both open-source and closed-source models in visual quality, complex semantic accuracy, and text rendering for both Chinese and English characters. Furthermore, Kolors supports both Chinese and English inputs, demonstrating strong performance in understanding and generating Chinese-specific content. For more details, please refer to this [technical report](https://github.com/Kwai-Kolors/Kolors/blob/master/imgs/Kolors_paper.pdf).
The abstract from the technical report is:
*We present Kolors, a latent diffusion model for text-to-image synthesis, characterized by its profound understanding of both English and Chinese, as well as an impressive degree of photorealism. There are three key insights contributing to the development of Kolors. Firstly, unlike large language model T5 used in Imagen and Stable Diffusion 3, Kolors is built upon the General Language Model (GLM), which enhances its comprehension capabilities in both English and Chinese. Moreover, we employ a multimodal large language model to recaption the extensive training dataset for fine-grained text understanding. These strategies significantly improve Kolors’ ability to comprehend intricate semantics, particularly those involving multiple entities, and enable its advanced text rendering capabilities. Secondly, we divide the training of Kolors into two phases: the concept learning phase with broad knowledge and the quality improvement phase with specifically curated high-aesthetic data. Furthermore, we investigate the critical role of the noise schedule and introduce a novel schedule to optimize high-resolution image generation. These strategies collectively enhance the visual appeal of the generated high-resolution images. Lastly, we propose a category-balanced benchmark KolorsPrompts, which serves as a guide for the training and evaluation of Kolors. Consequently, even when employing the commonly used U-Net backbone, Kolors has demonstrated remarkable performance in human evaluations, surpassing the existing open-source models and achieving Midjourney-v6 level performance, especially in terms of visual appeal. We will release the code and weights of Kolors at , and hope that it will benefit future research and applications in the visual generation community.*
## Usage Example
```python
import torch
from diffusers import DPMSolverMultistepScheduler, KolorsPipeline
pipe = KolorsPipeline.from_pretrained("Kwai-Kolors/Kolors-diffusers", torch_dtype=torch.float16, variant="fp16")
pipe.to("cuda")
pipe.scheduler = DPMSolverMultistepScheduler.from_config(pipe.scheduler.config, use_karras_sigmas=True)
image = pipe(
prompt='一张瓢虫的照片,微距,变焦,高质量,电影,拿着一个牌子,写着"可图"',
negative_prompt="",
guidance_scale=6.5,
num_inference_steps=25,
).images[0]
image.save("kolors_sample.png")
```
### IP Adapter
Kolors needs a different IP Adapter to work, and it uses [Openai-CLIP-336](https://huggingface.co/openai/clip-vit-large-patch14-336) as an image encoder.
Using an IP Adapter with Kolors requires more than 24GB of VRAM. To use it, we recommend using `enable_model_cpu_offload()` on consumer GPUs.
While Kolors is integrated in Diffusers, you need to load the image encoder from a revision to use the safetensor files. You can still use the main branch of the original repository if you're comfortable loading pickle checkpoints.
```python
import torch
from transformers import CLIPVisionModelWithProjection
from diffusers import DPMSolverMultistepScheduler, KolorsPipeline
from diffusers.utils import load_image
image_encoder = CLIPVisionModelWithProjection.from_pretrained(
"Kwai-Kolors/Kolors-IP-Adapter-Plus",
subfolder="image_encoder",
low_cpu_mem_usage=True,
torch_dtype=torch.float16,
revision="refs/pr/4",
)
pipe = KolorsPipeline.from_pretrained(
"Kwai-Kolors/Kolors-diffusers", image_encoder=image_encoder, torch_dtype=torch.float16, variant="fp16"
)
pipe.scheduler = DPMSolverMultistepScheduler.from_config(pipe.scheduler.config, use_karras_sigmas=True)
pipe.load_ip_adapter(
"Kwai-Kolors/Kolors-IP-Adapter-Plus",
subfolder="",
weight_name="ip_adapter_plus_general.safetensors",
revision="refs/pr/4",
image_encoder_folder=None,
)
pipe.enable_model_cpu_offload()
ipa_image = load_image("https://huggingface.co/datasets/huggingface/documentation-images/resolve/main/kolors/cat_square.png")
image = pipe(
prompt="best quality, high quality",
negative_prompt="",
guidance_scale=6.5,
num_inference_steps=25,
ip_adapter_image=ipa_image,
).images[0]
image.save("kolors_ipa_sample.png")
```
## KolorsPipeline
- __call__
## KolorsImg2ImgPipeline
- __call__
[[autodoc]] KolorsPipeline
- all
[[autodoc]] KolorsImg2ImgPipeline
- all
# Kandinsky 2.1
Kandinsky 2.1 is created by [Arseniy Shakhmatov](https://github.com/cene555), [Anton Razzhigaev](https://github.com/razzant), [Aleksandr Nikolich](https://github.com/AlexWortega), [Vladimir Arkhipkin](https://github.com/oriBetelgeuse), [Igor Pavlov](https://github.com/boomb0om), [Andrey Kuznetsov](https://github.com/kuznetsoffandrey), and [Denis Dimitrov](https://github.com/denndimitrov).
The description from it's GitHub page is:
*Kandinsky 2.1 inherits best practicies from Dall-E 2 and Latent diffusion, while introducing some new ideas. As text and image encoder it uses CLIP model and diffusion image prior (mapping) between latent spaces of CLIP modalities. This approach increases the visual performance of the model and unveils new horizons in blending images and text-guided image manipulation.*
The original codebase can be found at [ai-forever/Kandinsky-2](https://github.com/ai-forever/Kandinsky-2).
Check out the [Kandinsky Community](https://huggingface.co/kandinsky-community) organization on the Hub for the official model checkpoints for tasks like text-to-image, image-to-image, and inpainting.
Make sure to check out the Schedulers [guide](../../using-diffusers/schedulers) to learn how to explore the tradeoff between scheduler speed and quality, and see the [reuse components across pipelines](../../using-diffusers/loading#reuse-components-across-pipelines) section to learn how to efficiently load the same components into multiple pipelines.
## KandinskyPriorPipeline
## KandinskyPipeline
## KandinskyCombinedPipeline
## KandinskyImg2ImgPipeline
## KandinskyImg2ImgCombinedPipeline
## KandinskyInpaintPipeline
## KandinskyInpaintCombinedPipeline
[[autodoc]] KandinskyPriorPipeline
- all
- __call__
- interpolate
[[autodoc]] KandinskyPipeline
- all
- __call__
[[autodoc]] KandinskyCombinedPipeline
- all
- __call__
[[autodoc]] KandinskyImg2ImgPipeline
- all
- __call__
[[autodoc]] KandinskyImg2ImgCombinedPipeline
- all
- __call__
[[autodoc]] KandinskyInpaintPipeline
- all
- __call__
[[autodoc]] KandinskyInpaintCombinedPipeline
- all
- __call__
# AudioLDM
AudioLDM was proposed in [AudioLDM: Text-to-Audio Generation with Latent Diffusion Models](https://huggingface.co/papers/2301.12503) by Haohe Liu et al. Inspired by [Stable Diffusion](https://huggingface.co/docs/diffusers/api/pipelines/stable_diffusion/overview), AudioLDM
is a text-to-audio _latent diffusion model (LDM)_ that learns continuous audio representations from [CLAP](https://huggingface.co/docs/transformers/main/model_doc/clap)
latents. AudioLDM takes a text prompt as input and predicts the corresponding audio. It can generate text-conditional
sound effects, human speech and music.
The abstract from the paper is:
*Text-to-audio (TTA) system has recently gained attention for its ability to synthesize general audio based on text descriptions. However, previous studies in TTA have limited generation quality with high computational costs. In this study, we propose AudioLDM, a TTA system that is built on a latent space to learn the continuous audio representations from contrastive language-audio pretraining (CLAP) latents. The pretrained CLAP models enable us to train LDMs with audio embedding while providing text embedding as a condition during sampling. By learning the latent representations of audio signals and their compositions without modeling the cross-modal relationship, AudioLDM is advantageous in both generation quality and computational efficiency. Trained on AudioCaps with a single GPU, AudioLDM achieves state-of-the-art TTA performance measured by both objective and subjective metrics (e.g., frechet distance). Moreover, AudioLDM is the first TTA system that enables various text-guided audio manipulations (e.g., style transfer) in a zero-shot fashion. Our implementation and demos are available at [this https URL](https://audioldm.github.io/).*
The original codebase can be found at [haoheliu/AudioLDM](https://github.com/haoheliu/AudioLDM).
## Tips
When constructing a prompt, keep in mind:
* Descriptive prompt inputs work best; you can use adjectives to describe the sound (for example, "high quality" or "clear") and make the prompt context specific (for example, "water stream in a forest" instead of "stream").
* It's best to use general terms like "cat" or "dog" instead of specific names or abstract objects the model may not be familiar with.
During inference:
* The _quality_ of the predicted audio sample can be controlled by the `num_inference_steps` argument; higher steps give higher quality audio at the expense of slower inference.
* The _length_ of the predicted audio sample can be controlled by varying the `audio_length_in_s` argument.
Make sure to check out the Schedulers [guide](../../using-diffusers/schedulers) to learn how to explore the tradeoff between scheduler speed and quality, and see the [reuse components across pipelines](../../using-diffusers/loading#reuse-components-across-pipelines) section to learn how to efficiently load the same components into multiple pipelines.
## AudioLDMPipeline
## AudioPipelineOutput
[[autodoc]] AudioLDMPipeline
- all
- __call__
[[autodoc]] pipelines.AudioPipelineOutput
# Hunyuan-DiT
![chinese elements understanding](https://github.com/gnobitab/diffusers-hunyuan/assets/1157982/39b99036-c3cb-4f16-bb1a-40ec25eda573)
[Hunyuan-DiT : A Powerful Multi-Resolution Diffusion Transformer with Fine-Grained Chinese Understanding](https://arxiv.org/abs/2405.08748) from Tencent Hunyuan.
The abstract from the paper is:
*We present Hunyuan-DiT, a text-to-image diffusion transformer with fine-grained understanding of both English and Chinese. To construct Hunyuan-DiT, we carefully design the transformer structure, text encoder, and positional encoding. We also build from scratch a whole data pipeline to update and evaluate data for iterative model optimization. For fine-grained language understanding, we train a Multimodal Large Language Model to refine the captions of the images. Finally, Hunyuan-DiT can perform multi-turn multimodal dialogue with users, generating and refining images according to the context. Through our holistic human evaluation protocol with more than 50 professional human evaluators, Hunyuan-DiT sets a new state-of-the-art in Chinese-to-image generation compared with other open-source models.*
You can find the original codebase at [Tencent/HunyuanDiT](https://github.com/Tencent/HunyuanDiT) and all the available checkpoints at [Tencent-Hunyuan](https://huggingface.co/Tencent-Hunyuan/HunyuanDiT).
**Highlights**: HunyuanDiT supports Chinese/English-to-image, multi-resolution generation.
HunyuanDiT has the following components:
* It uses a diffusion transformer as the backbone
* It combines two text encoders, a bilingual CLIP and a multilingual T5 encoder
Make sure to check out the Schedulers [guide](../../using-diffusers/schedulers.md) to learn how to explore the tradeoff between scheduler speed and quality, and see the [reuse components across pipelines](../../using-diffusers/loading.md#reuse-a-pipeline) section to learn how to efficiently load the same components into multiple pipelines.
You can further improve generation quality by passing the generated image from `HungyuanDiTPipeline` to the [SDXL refiner](../../using-diffusers/sdxl#base-to-refiner-model) model.
## Optimization
You can optimize the pipeline's runtime and memory consumption with torch.compile and feed-forward chunking. To learn about other optimization methods, check out the [Speed up inference](../../optimization/fp16) and [Reduce memory usage](../../optimization/memory) guides.
### Inference
Use [`torch.compile`](https://huggingface.co/docs/diffusers/main/en/tutorials/fast_diffusion#torchcompile) to reduce the inference latency.
First, load the pipeline:
```python
from diffusers import HunyuanDiTPipeline
import torch
pipeline = HunyuanDiTPipeline.from_pretrained(
"Tencent-Hunyuan/HunyuanDiT-Diffusers", torch_dtype=torch.float16
).to("cuda")
```
Then change the memory layout of the pipelines `transformer` and `vae` components to `torch.channels-last`:
```python
pipeline.transformer.to(memory_format=torch.channels_last)
pipeline.vae.to(memory_format=torch.channels_last)
```
Finally, compile the components and run inference:
```python
pipeline.transformer = torch.compile(pipeline.transformer, mode="max-autotune", fullgraph=True)
pipeline.vae.decode = torch.compile(pipeline.vae.decode, mode="max-autotune", fullgraph=True)
image = pipeline(prompt="一个宇航员在骑马").images[0]
```
The [benchmark](https://gist.github.com/sayakpaul/29d3a14905cfcbf611fe71ebd22e9b23) results on a 80GB A100 machine are:
```bash
With torch.compile(): Average inference time: 12.470 seconds.
Without torch.compile(): Average inference time: 20.570 seconds.
```
### Memory optimization
By loading the T5 text encoder in 8 bits, you can run the pipeline in just under 6 GBs of GPU VRAM. Refer to [this script](https://gist.github.com/sayakpaul/3154605f6af05b98a41081aaba5ca43e) for details.
Furthermore, you can use the [enable_forward_chunking()](/docs/diffusers/main/en/api/models/hunyuan_transformer2d#diffusers.HunyuanDiT2DModel.enable_forward_chunking) method to reduce memory usage. Feed-forward chunking runs the feed-forward layers in a transformer block in a loop instead of all at once. This gives you a trade-off between memory consumption and inference runtime.
```diff
+ pipeline.transformer.enable_forward_chunking(chunk_size=1, dim=1)
```
## HunyuanDiTPipeline
[[autodoc]] HunyuanDiTPipeline
- all
- __call__
# Stable unCLIP
Stable unCLIP checkpoints are finetuned from [Stable Diffusion 2.1](./stable_diffusion/stable_diffusion_2) checkpoints to condition on CLIP image embeddings.
Stable unCLIP still conditions on text embeddings. Given the two separate conditionings, stable unCLIP can be used
for text guided image variation. When combined with an unCLIP prior, it can also be used for full text to image generation.
The abstract from the paper is:
*Contrastive models like CLIP have been shown to learn robust representations of images that capture both semantics and style. To leverage these representations for image generation, we propose a two-stage model: a prior that generates a CLIP image embedding given a text caption, and a decoder that generates an image conditioned on the image embedding. We show that explicitly generating image representations improves image diversity with minimal loss in photorealism and caption similarity. Our decoders conditioned on image representations can also produce variations of an image that preserve both its semantics and style, while varying the non-essential details absent from the image representation. Moreover, the joint embedding space of CLIP enables language-guided image manipulations in a zero-shot fashion. We use diffusion models for the decoder and experiment with both autoregressive and diffusion models for the prior, finding that the latter are computationally more efficient and produce higher-quality samples.*
## Tips
Stable unCLIP takes `noise_level` as input during inference which determines how much noise is added to the image embeddings. A higher `noise_level` increases variation in the final un-noised images. By default, we do not add any additional noise to the image embeddings (`noise_level = 0`).
### Text-to-Image Generation
Stable unCLIP can be leveraged for text-to-image generation by pipelining it with the prior model of KakaoBrain's open source DALL-E 2 replication [Karlo](https://huggingface.co/kakaobrain/karlo-v1-alpha):
```python
import torch
from diffusers import UnCLIPScheduler, DDPMScheduler, StableUnCLIPPipeline
from diffusers.models import PriorTransformer
from transformers import CLIPTokenizer, CLIPTextModelWithProjection
prior_model_id = "kakaobrain/karlo-v1-alpha"
data_type = torch.float16
prior = PriorTransformer.from_pretrained(prior_model_id, subfolder="prior", torch_dtype=data_type)
prior_text_model_id = "openai/clip-vit-large-patch14"
prior_tokenizer = CLIPTokenizer.from_pretrained(prior_text_model_id)
prior_text_model = CLIPTextModelWithProjection.from_pretrained(prior_text_model_id, torch_dtype=data_type)
prior_scheduler = UnCLIPScheduler.from_pretrained(prior_model_id, subfolder="prior_scheduler")
prior_scheduler = DDPMScheduler.from_config(prior_scheduler.config)
stable_unclip_model_id = "stabilityai/stable-diffusion-2-1-unclip-small"
pipe = StableUnCLIPPipeline.from_pretrained(
stable_unclip_model_id,
torch_dtype=data_type,
variant="fp16",
prior_tokenizer=prior_tokenizer,
prior_text_encoder=prior_text_model,
prior=prior,
prior_scheduler=prior_scheduler,
)
pipe = pipe.to("cuda")
wave_prompt = "dramatic wave, the Oceans roar, Strong wave spiral across the oceans as the waves unfurl into roaring crests; perfect wave form; perfect wave shape; dramatic wave shape; wave shape unbelievable; wave; wave shape spectacular"
image = pipe(prompt=wave_prompt).images[0]
image
```
For text-to-image we use `stabilityai/stable-diffusion-2-1-unclip-small` as it was trained on CLIP ViT-L/14 embedding, the same as the Karlo model prior. [stabilityai/stable-diffusion-2-1-unclip](https://hf.co/stabilityai/stable-diffusion-2-1-unclip) was trained on OpenCLIP ViT-H, so we don't recommend its use.
### Text guided Image-to-Image Variation
```python
from diffusers import StableUnCLIPImg2ImgPipeline
from diffusers.utils import load_image
import torch
pipe = StableUnCLIPImg2ImgPipeline.from_pretrained(
"stabilityai/stable-diffusion-2-1-unclip", torch_dtype=torch.float16, variation="fp16"
)
pipe = pipe.to("cuda")
url = "https://huggingface.co/datasets/hf-internal-testing/diffusers-images/resolve/main/stable_unclip/tarsila_do_amaral.png"
init_image = load_image(url)
images = pipe(init_image).images
images[0].save("variation_image.png")
```
Optionally, you can also pass a prompt to `pipe` such as:
```python
prompt = "A fantasy landscape, trending on artstation"
image = pipe(init_image, prompt=prompt).images[0]
image
```
Make sure to check out the Schedulers [guide](../../using-diffusers/schedulers) to learn how to explore the tradeoff between scheduler speed and quality, and see the [reuse components across pipelines](../../using-diffusers/loading#reuse-components-across-pipelines) section to learn how to efficiently load the same components into multiple pipelines.
## StableUnCLIPPipeline
## StableUnCLIPImg2ImgPipeline
## ImagePipelineOutput
[[autodoc]] StableUnCLIPPipeline
- all
- __call__
- enable_attention_slicing
- disable_attention_slicing
- enable_vae_slicing
- disable_vae_slicing
- enable_xformers_memory_efficient_attention
- disable_xformers_memory_efficient_attention
[[autodoc]] StableUnCLIPImg2ImgPipeline
- all
- __call__
- enable_attention_slicing
- disable_attention_slicing
- enable_vae_slicing
- disable_vae_slicing
- enable_xformers_memory_efficient_attention
- disable_xformers_memory_efficient_attention
[[autodoc]] pipelines.ImagePipelineOutput
# Self-Attention Guidance
[Improving Sample Quality of Diffusion Models Using Self-Attention Guidance](https://huggingface.co/papers/2210.00939) is by Susung Hong et al.
The abstract from the paper is:
*Denoising diffusion models (DDMs) have attracted attention for their exceptional generation quality and diversity. This success is largely attributed to the use of class- or text-conditional diffusion guidance methods, such as classifier and classifier-free guidance. In this paper, we present a more comprehensive perspective that goes beyond the traditional guidance methods. From this generalized perspective, we introduce novel condition- and training-free strategies to enhance the quality of generated images. As a simple solution, blur guidance improves the suitability of intermediate samples for their fine-scale information and structures, enabling diffusion models to generate higher quality samples with a moderate guidance scale. Improving upon this, Self-Attention Guidance (SAG) uses the intermediate self-attention maps of diffusion models to enhance their stability and efficacy. Specifically, SAG adversarially blurs only the regions that diffusion models attend to at each iteration and guides them accordingly. Our experimental results show that our SAG improves the performance of various diffusion models, including ADM, IDDPM, Stable Diffusion, and DiT. Moreover, combining SAG with conventional guidance methods leads to further improvement.*
You can find additional information about Self-Attention Guidance on the [project page](https://ku-cvlab.github.io/Self-Attention-Guidance), [original codebase](https://github.com/KU-CVLAB/Self-Attention-Guidance), and try it out in a [demo](https://huggingface.co/spaces/susunghong/Self-Attention-Guidance) or [notebook](https://colab.research.google.com/github/SusungHong/Self-Attention-Guidance/blob/main/SAG_Stable.ipynb).
Make sure to check out the Schedulers [guide](../../using-diffusers/schedulers) to learn how to explore the tradeoff between scheduler speed and quality, and see the [reuse components across pipelines](../../using-diffusers/loading#reuse-components-across-pipelines) section to learn how to efficiently load the same components into multiple pipelines.
## StableDiffusionSAGPipeline
## StableDiffusionOutput
[[autodoc]] StableDiffusionSAGPipeline
- __call__
- all
[[autodoc]] pipelines.stable_diffusion.StableDiffusionPipelineOutput
# Kandinsky 2.2
Kandinsky 2.2 is created by [Arseniy Shakhmatov](https://github.com/cene555), [Anton Razzhigaev](https://github.com/razzant), [Aleksandr Nikolich](https://github.com/AlexWortega), [Vladimir Arkhipkin](https://github.com/oriBetelgeuse), [Igor Pavlov](https://github.com/boomb0om), [Andrey Kuznetsov](https://github.com/kuznetsoffandrey), and [Denis Dimitrov](https://github.com/denndimitrov).
The description from it's GitHub page is:
*Kandinsky 2.2 brings substantial improvements upon its predecessor, Kandinsky 2.1, by introducing a new, more powerful image encoder - CLIP-ViT-G and the ControlNet support. The switch to CLIP-ViT-G as the image encoder significantly increases the model's capability to generate more aesthetic pictures and better understand text, thus enhancing the model's overall performance. The addition of the ControlNet mechanism allows the model to effectively control the process of generating images. This leads to more accurate and visually appealing outputs and opens new possibilities for text-guided image manipulation.*
The original codebase can be found at [ai-forever/Kandinsky-2](https://github.com/ai-forever/Kandinsky-2).
Check out the [Kandinsky Community](https://huggingface.co/kandinsky-community) organization on the Hub for the official model checkpoints for tasks like text-to-image, image-to-image, and inpainting.
Make sure to check out the schedulers [guide](../../using-diffusers/schedulers) to learn how to explore the tradeoff between scheduler speed and quality, and see the [reuse components across pipelines](../../using-diffusers/loading#reuse-components-across-pipelines) section to learn how to efficiently load the same components into multiple pipelines.
## KandinskyV22PriorPipeline
## KandinskyV22Pipeline
## KandinskyV22CombinedPipeline
## KandinskyV22ControlnetPipeline
## KandinskyV22PriorEmb2EmbPipeline
## KandinskyV22Img2ImgPipeline
## KandinskyV22Img2ImgCombinedPipeline
## KandinskyV22ControlnetImg2ImgPipeline
## KandinskyV22InpaintPipeline
## KandinskyV22InpaintCombinedPipeline
[[autodoc]] KandinskyV22PriorPipeline
- all
- __call__
- interpolate
[[autodoc]] KandinskyV22Pipeline
- all
- __call__
[[autodoc]] KandinskyV22CombinedPipeline
- all
- __call__
[[autodoc]] KandinskyV22ControlnetPipeline
- all
- __call__
[[autodoc]] KandinskyV22PriorEmb2EmbPipeline
- all
- __call__
- interpolate
[[autodoc]] KandinskyV22Img2ImgPipeline
- all
- __call__
[[autodoc]] KandinskyV22Img2ImgCombinedPipeline
- all
- __call__
[[autodoc]] KandinskyV22ControlnetImg2ImgPipeline
- all
- __call__
[[autodoc]] KandinskyV22InpaintPipeline
- all
- __call__
[[autodoc]] KandinskyV22InpaintCombinedPipeline
- all
- __call__
# ControlNet with Stable Diffusion 3
StableDiffusion3ControlNetPipeline is an implementation of ControlNet for Stable Diffusion 3.
ControlNet was introduced in [Adding Conditional Control to Text-to-Image Diffusion Models](https://huggingface.co/papers/2302.05543) by Lvmin Zhang, Anyi Rao, and Maneesh Agrawala.
With a ControlNet model, you can provide an additional control image to condition and control Stable Diffusion generation. For example, if you provide a depth map, the ControlNet model generates an image that'll preserve the spatial information from the depth map. It is a more flexible and accurate way to control the image generation process.
The abstract from the paper is:
*We present ControlNet, a neural network architecture to add spatial conditioning controls to large, pretrained text-to-image diffusion models. ControlNet locks the production-ready large diffusion models, and reuses their deep and robust encoding layers pretrained with billions of images as a strong backbone to learn a diverse set of conditional controls. The neural architecture is connected with "zero convolutions" (zero-initialized convolution layers) that progressively grow the parameters from zero and ensure that no harmful noise could affect the finetuning. We test various conditioning controls, eg, edges, depth, segmentation, human pose, etc, with Stable Diffusion, using single or multiple conditions, with or without prompts. We show that the training of ControlNets is robust with small (<50k) and large (>1m) datasets. Extensive results show that ControlNet may facilitate wider applications to control image diffusion models.*
This controlnet code is mainly implemented by [The InstantX Team](https://huggingface.co/InstantX). The inpainting-related code was developed by [The Alimama Creative Team](https://huggingface.co/alimama-creative). You can find pre-trained checkpoints for SD3-ControlNet in the table below:
| ControlNet type | Developer | Link |
| -------- | ---------- | ---- |
| Canny | [The InstantX Team](https://huggingface.co/InstantX) | [Link](https://huggingface.co/InstantX/SD3-Controlnet-Canny) |
| Pose | [The InstantX Team](https://huggingface.co/InstantX) | [Link](https://huggingface.co/InstantX/SD3-Controlnet-Pose) |
| Tile | [The InstantX Team](https://huggingface.co/InstantX) | [Link](https://huggingface.co/InstantX/SD3-Controlnet-Tile) |
| Inpainting | [The AlimamaCreative Team](https://huggingface.co/alimama-creative) | [link](https://huggingface.co/alimama-creative/SD3-Controlnet-Inpainting) |
Make sure to check out the Schedulers [guide](../../using-diffusers/schedulers) to learn how to explore the tradeoff between scheduler speed and quality, and see the [reuse components across pipelines](../../using-diffusers/loading#reuse-components-across-pipelines) section to learn how to efficiently load the same components into multiple pipelines.
## StableDiffusion3ControlNetPipeline
## StableDiffusion3ControlNetInpaintingPipeline
## StableDiffusion3PipelineOutput
[[autodoc]] StableDiffusion3ControlNetPipeline
- all
- __call__
[[autodoc]] pipelines.controlnet_sd3.pipeline_stable_diffusion_3_controlnet_inpainting.StableDiffusion3ControlNetInpaintingPipeline
- all
- __call__
[[autodoc]] pipelines.stable_diffusion_3.pipeline_output.StableDiffusion3PipelineOutput
# LEDITS++
LEDITS++ was proposed in [LEDITS++: Limitless Image Editing using Text-to-Image Models](https://huggingface.co/papers/2311.16711) by Manuel Brack, Felix Friedrich, Katharina Kornmeier, Linoy Tsaban, Patrick Schramowski, Kristian Kersting, Apolinário Passos.
The abstract from the paper is:
*Text-to-image diffusion models have recently received increasing interest for their astonishing ability to produce high-fidelity images from solely text inputs. Subsequent research efforts aim to exploit and apply their capabilities to real image editing. However, existing image-to-image methods are often inefficient, imprecise, and of limited versatility. They either require time-consuming fine-tuning, deviate unnecessarily strongly from the input image, and/or lack support for multiple, simultaneous edits. To address these issues, we introduce LEDITS++, an efficient yet versatile and precise textual image manipulation technique. LEDITS++'s novel inversion approach requires no tuning nor optimization and produces high-fidelity results with a few diffusion steps. Second, our methodology supports multiple simultaneous edits and is architecture-agnostic. Third, we use a novel implicit masking technique that limits changes to relevant image regions. We propose the novel TEdBench++ benchmark as part of our exhaustive evaluation. Our results demonstrate the capabilities of LEDITS++ and its improvements over previous methods. The project page is available at https://leditsplusplus-project.static.hf.space .*
You can find additional information about LEDITS++ on the [project page](https://leditsplusplus-project.static.hf.space/index.html) and try it out in a [demo](https://huggingface.co/spaces/editing-images/leditsplusplus).
Due to some backward compatability issues with the current diffusers implementation of [DPMSolverMultistepScheduler](/docs/diffusers/main/en/api/schedulers/multistep_dpm_solver#diffusers.DPMSolverMultistepScheduler) this implementation of LEdits++ can no longer guarantee perfect inversion.
This issue is unlikely to have any noticeable effects on applied use-cases. However, we provide an alternative implementation that guarantees perfect inversion in a dedicated [GitHub repo](https://github.com/ml-research/ledits_pp).
We provide two distinct pipelines based on different pre-trained models.
## LEditsPPPipelineStableDiffusion
## LEditsPPPipelineStableDiffusionXL
## LEditsPPDiffusionPipelineOutput
## LEditsPPInversionPipelineOutput
[[autodoc]] pipelines.ledits_pp.LEditsPPPipelineStableDiffusion
- all
- __call__
- invert
[[autodoc]] pipelines.ledits_pp.LEditsPPPipelineStableDiffusionXL
- all
- __call__
- invert
[[autodoc]] pipelines.ledits_pp.pipeline_output.LEditsPPDiffusionPipelineOutput
- all
[[autodoc]] pipelines.ledits_pp.pipeline_output.LEditsPPInversionPipelineOutput
- all
# Pipelines
Pipelines provide a simple way to run state-of-the-art diffusion models in inference by bundling all of the necessary components (multiple independently-trained models, schedulers, and processors) into a single end-to-end class. Pipelines are flexible and they can be adapted to use different schedulers or even model components.
All pipelines are built from the base `DiffusionPipeline` class which provides basic functionality for loading, downloading, and saving all the components. Specific pipeline types (for example `StableDiffusionPipeline`) loaded with `from_pretrained()` are automatically detected and the pipeline components are loaded and passed to the `__init__` function of the pipeline.
You shouldn't use the `DiffusionPipeline` class for training. Individual components (for example, [UNet2DModel](/docs/diffusers/main/en/api/models/unet2d#diffusers.UNet2DModel) and [UNet2DConditionModel](/docs/diffusers/main/en/api/models/unet2d-cond#diffusers.UNet2DConditionModel)) of diffusion pipelines are usually trained individually, so we suggest directly working with them instead.
Pipelines do not offer any training functionality. You'll notice PyTorch's autograd is disabled by decorating the `__call__()` method with a [`torch.no_grad`](https://pytorch.org/docs/stable/generated/torch.no_grad.html) decorator because pipelines should not be used for training. If you're interested in training, please take a look at the [Training](../../training/overview) guides instead!
The table below lists all the pipelines currently available in 🤗 Diffusers and the tasks they support. Click on a pipeline to view its abstract and published paper.
| Pipeline | Tasks |
|---|---|
| [aMUSEd](amused) | text2image |
| [AnimateDiff](animatediff) | text2video |
| [Attend-and-Excite](attend_and_excite) | text2image |
| [AudioLDM](audioldm) | text2audio |
| [AudioLDM2](audioldm2) | text2audio |
| [AuraFlow](auraflow) | text2image |
| [BLIP Diffusion](blip_diffusion) | text2image |
| [CogVideoX](cogvideox) | text2video |
| [Consistency Models](consistency_models) | unconditional image generation |
| [ControlNet](controlnet) | text2image, image2image, inpainting |
| [ControlNet with Flux.1](controlnet_flux) | text2image |
| [ControlNet with Hunyuan-DiT](controlnet_hunyuandit) | text2image |
| [ControlNet with Stable Diffusion 3](controlnet_sd3) | text2image |
| [ControlNet with Stable Diffusion XL](controlnet_sdxl) | text2image |
| [ControlNet-XS](controlnetxs) | text2image |
| [ControlNet-XS with Stable Diffusion XL](controlnetxs_sdxl) | text2image |
| [Dance Diffusion](dance_diffusion) | unconditional audio generation |
| [DDIM](ddim) | unconditional image generation |
| [DDPM](ddpm) | unconditional image generation |
| [DeepFloyd IF](deepfloyd_if) | text2image, image2image, inpainting, super-resolution |
| [DiffEdit](diffedit) | inpainting |
| [DiT](dit) | text2image |
| [Flux](flux) | text2image |
| [Hunyuan-DiT](hunyuandit) | text2image |
| [I2VGen-XL](i2vgenxl) | text2video |
| [InstructPix2Pix](pix2pix) | image editing |
| [Kandinsky 2.1](kandinsky) | text2image, image2image, inpainting, interpolation |
| [Kandinsky 2.2](kandinsky_v22) | text2image, image2image, inpainting |
| [Kandinsky 3](kandinsky3) | text2image, image2image |
| [Kolors](kolors) | text2image |
| [Latent Consistency Models](latent_consistency_models) | text2image |
| [Latent Diffusion](latent_diffusion) | text2image, super-resolution |
| [Latte](latte) | text2image |
| [LEDITS++](ledits_pp) | image editing |
| [Lumina-T2X](lumina) | text2image |
| [Marigold](marigold) | depth |
| [MultiDiffusion](panorama) | text2image |
| [MusicLDM](musicldm) | text2audio |
| [PAG](pag) | text2image |
| [Paint by Example](paint_by_example) | inpainting |
| [PIA](pia) | image2video |
| [PixArt-α](pixart) | text2image |
| [PixArt-Σ](pixart_sigma) | text2image |
| [Self-Attention Guidance](self_attention_guidance) | text2image |
| [Semantic Guidance](semantic_stable_diffusion) | text2image |
| [Shap-E](shap_e) | text-to-3D, image-to-3D |
| [Stable Audio](stable_audio) | text2audio |
| [Stable Cascade](stable_cascade) | text2image |
| [Stable Diffusion](stable_diffusion/overview) | text2image, image2image, depth2image, inpainting, image variation, latent upscaler, super-resolution |
| [Stable Diffusion XL](stable_diffusion/stable_diffusion_xl) | text2image, image2image, inpainting |
| [Stable Diffusion XL Turbo](stable_diffusion/sdxl_turbo) | text2image, image2image, inpainting |
| [Stable unCLIP](stable_unclip) | text2image, image variation |
| [T2I-Adapter](stable_diffusion/adapter) | text2image |
| [Text2Video](text_to_video) | text2video, video2video |
| [Text2Video-Zero](text_to_video_zero) | text2video |
| [unCLIP](unclip) | text2image, image variation |
| [UniDiffuser](unidiffuser) | text2image, image2text, image variation, text variation, unconditional image generation, unconditional audio generation |
| [Value-guided planning](value_guided_sampling) | value guided sampling |
| [Wuerstchen](wuerstchen) | text2image |
## DiffusionPipeline
## FlaxDiffusionPipeline
## PushToHubMixin
[[autodoc]] DiffusionPipeline
- all
- __call__
- device
- to
- components
[[autodoc]] pipelines.StableDiffusionMixin.enable_freeu
[[autodoc]] pipelines.StableDiffusionMixin.disable_freeu
[[autodoc]] pipelines.pipeline_flax_utils.FlaxDiffusionPipeline
[[autodoc]] utils.PushToHubMixin
# MusicLDM
MusicLDM was proposed in [MusicLDM: Enhancing Novelty in Text-to-Music Generation Using Beat-Synchronous Mixup Strategies](https://huggingface.co/papers/2308.01546) by Ke Chen, Yusong Wu, Haohe Liu, Marianna Nezhurina, Taylor Berg-Kirkpatrick, Shlomo Dubnov.
MusicLDM takes a text prompt as input and predicts the corresponding music sample.
Inspired by [Stable Diffusion](https://huggingface.co/docs/diffusers/api/pipelines/stable_diffusion/overview) and [AudioLDM](https://huggingface.co/docs/diffusers/api/pipelines/audioldm),
MusicLDM is a text-to-music _latent diffusion model (LDM)_ that learns continuous audio representations from [CLAP](https://huggingface.co/docs/transformers/main/model_doc/clap)
latents.
MusicLDM is trained on a corpus of 466 hours of music data. Beat-synchronous data augmentation strategies are applied to the music samples, both in the time domain and in the latent space. Using beat-synchronous data augmentation strategies encourages the model to interpolate between the training samples, but stay within the domain of the training data. The result is generated music that is more diverse while staying faithful to the corresponding style.
The abstract of the paper is the following:
*Diffusion models have shown promising results in cross-modal generation tasks, including text-to-image and text-to-audio generation. However, generating music, as a special type of audio, presents unique challenges due to limited availability of music data and sensitive issues related to copyright and plagiarism. In this paper, to tackle these challenges, we first construct a state-of-the-art text-to-music model, MusicLDM, that adapts Stable Diffusion and AudioLDM architectures to the music domain. We achieve this by retraining the contrastive language-audio pretraining model (CLAP) and the Hifi-GAN vocoder, as components of MusicLDM, on a collection of music data samples. Then, to address the limitations of training data and to avoid plagiarism, we leverage a beat tracking model and propose two different mixup strategies for data augmentation: beat-synchronous audio mixup and beat-synchronous latent mixup, which recombine training audio directly or via a latent embeddings space, respectively. Such mixup strategies encourage the model to interpolate between musical training samples and generate new music within the convex hull of the training data, making the generated music more diverse while still staying faithful to the corresponding style. In addition to popular evaluation metrics, we design several new evaluation metrics based on CLAP score to demonstrate that our proposed MusicLDM and beat-synchronous mixup strategies improve both the quality and novelty of generated music, as well as the correspondence between input text and generated music.*
This pipeline was contributed by [sanchit-gandhi](https://huggingface.co/sanchit-gandhi).
## Tips
When constructing a prompt, keep in mind:
* Descriptive prompt inputs work best; use adjectives to describe the sound (for example, "high quality" or "clear") and make the prompt context specific where possible (e.g. "melodic techno with a fast beat and synths" works better than "techno").
* Using a *negative prompt* can significantly improve the quality of the generated audio. Try using a negative prompt of "low quality, average quality".
During inference:
* The _quality_ of the generated audio sample can be controlled by the `num_inference_steps` argument; higher steps give higher quality audio at the expense of slower inference.
* Multiple waveforms can be generated in one go: set `num_waveforms_per_prompt` to a value greater than 1 to enable. Automatic scoring will be performed between the generated waveforms and prompt text, and the audios ranked from best to worst accordingly.
* The _length_ of the generated audio sample can be controlled by varying the `audio_length_in_s` argument.
Make sure to check out the Schedulers [guide](../../using-diffusers/schedulers) to learn how to explore the tradeoff between scheduler speed and quality, and see the [reuse components across pipelines](../../using-diffusers/loading#reuse-components-across-pipelines) section to learn how to efficiently load the same components into multiple pipelines.
## MusicLDMPipeline
[[autodoc]] MusicLDMPipeline
- all
- __call__
# Consistency Models
Consistency Models were proposed in [Consistency Models](https://huggingface.co/papers/2303.01469) by Yang Song, Prafulla Dhariwal, Mark Chen, and Ilya Sutskever.
The abstract from the paper is:
*Diffusion models have significantly advanced the fields of image, audio, and video generation, but they depend on an iterative sampling process that causes slow generation. To overcome this limitation, we propose consistency models, a new family of models that generate high quality samples by directly mapping noise to data. They support fast one-step generation by design, while still allowing multistep sampling to trade compute for sample quality. They also support zero-shot data editing, such as image inpainting, colorization, and super-resolution, without requiring explicit training on these tasks. Consistency models can be trained either by distilling pre-trained diffusion models, or as standalone generative models altogether. Through extensive experiments, we demonstrate that they outperform existing distillation techniques for diffusion models in one- and few-step sampling, achieving the new state-of-the-art FID of 3.55 on CIFAR-10 and 6.20 on ImageNet 64x64 for one-step generation. When trained in isolation, consistency models become a new family of generative models that can outperform existing one-step, non-adversarial generative models on standard benchmarks such as CIFAR-10, ImageNet 64x64 and LSUN 256x256.*
The original codebase can be found at [openai/consistency_models](https://github.com/openai/consistency_models), and additional checkpoints are available at [openai](https://huggingface.co/openai).
The pipeline was contributed by [dg845](https://github.com/dg845) and [ayushtues](https://huggingface.co/ayushtues). ❤️
## Tips
For an additional speed-up, use `torch.compile` to generate multiple images in <1 second:
```diff
import torch
from diffusers import ConsistencyModelPipeline
device = "cuda"
# Load the cd_bedroom256_lpips checkpoint.
model_id_or_path = "openai/diffusers-cd_bedroom256_lpips"
pipe = ConsistencyModelPipeline.from_pretrained(model_id_or_path, torch_dtype=torch.float16)
pipe.to(device)
+ pipe.unet = torch.compile(pipe.unet, mode="reduce-overhead", fullgraph=True)
# Multistep sampling
# Timesteps can be explicitly specified; the particular timesteps below are from the original GitHub repo:
# https://github.com/openai/consistency_models/blob/main/scripts/launch.sh#L83
for _ in range(10):
image = pipe(timesteps=[17, 0]).images[0]
image.show()
```
## ConsistencyModelPipeline
## ImagePipelineOutput
[[autodoc]] ConsistencyModelPipeline
- all
- __call__
[[autodoc]] pipelines.ImagePipelineOutput
# AuraFlow
AuraFlow is inspired by [Stable Diffusion 3](../pipelines/stable_diffusion/stable_diffusion_3.md) and is by far the largest text-to-image generation model that comes with an Apache 2.0 license. This model achieves state-of-the-art results on the [GenEval](https://github.com/djghosh13/geneval) benchmark.
It was developed by the Fal team and more details about it can be found in [this blog post](https://blog.fal.ai/auraflow/).
AuraFlow can be quite expensive to run on consumer hardware devices. However, you can perform a suite of optimizations to run it faster and in a more memory-friendly manner. Check out [this section](https://huggingface.co/blog/sd3#memory-optimizations-for-sd3) for more details.
## AuraFlowPipeline
[[autodoc]] AuraFlowPipeline
- all
- __call__
# Value-guided planning
🧪 This is an experimental pipeline for reinforcement learning!
This pipeline is based on the [Planning with Diffusion for Flexible Behavior Synthesis](https://huggingface.co/papers/2205.09991) paper by Michael Janner, Yilun Du, Joshua B. Tenenbaum, Sergey Levine.
The abstract from the paper is:
*Model-based reinforcement learning methods often use learning only for the purpose of estimating an approximate dynamics model, offloading the rest of the decision-making work to classical trajectory optimizers. While conceptually simple, this combination has a number of empirical shortcomings, suggesting that learned models may not be well-suited to standard trajectory optimization. In this paper, we consider what it would look like to fold as much of the trajectory optimization pipeline as possible into the modeling problem, such that sampling from the model and planning with it become nearly identical. The core of our technical approach lies in a diffusion probabilistic model that plans by iteratively denoising trajectories. We show how classifier-guided sampling and image inpainting can be reinterpreted as coherent planning strategies, explore the unusual and useful properties of diffusion-based planning methods, and demonstrate the effectiveness of our framework in control settings that emphasize long-horizon decision-making and test-time flexibility.*
You can find additional information about the model on the [project page](https://diffusion-planning.github.io/), the [original codebase](https://github.com/jannerm/diffuser), or try it out in a demo [notebook](https://colab.research.google.com/drive/1rXm8CX4ZdN5qivjJ2lhwhkOmt_m0CvU0#scrollTo=6HXJvhyqcITc&uniqifier=1).
The script to run the model is available [here](https://github.com/huggingface/diffusers/tree/main/examples/reinforcement_learning).
Make sure to check out the Schedulers [guide](../../using-diffusers/schedulers) to learn how to explore the tradeoff between scheduler speed and quality, and see the [reuse components across pipelines](../../using-diffusers/loading#reuse-components-across-pipelines) section to learn how to efficiently load the same components into multiple pipelines.
## ValueGuidedRLPipeline
[[autodoc]] diffusers.experimental.ValueGuidedRLPipeline
# Stable Cascade
This model is built upon the [Würstchen](https://openreview.net/forum?id=gU58d5QeGv) architecture and its main
difference to other models like Stable Diffusion is that it is working at a much smaller latent space. Why is this
important? The smaller the latent space, the **faster** you can run inference and the **cheaper** the training becomes.
How small is the latent space? Stable Diffusion uses a compression factor of 8, resulting in a 1024x1024 image being
encoded to 128x128. Stable Cascade achieves a compression factor of 42, meaning that it is possible to encode a
1024x1024 image to 24x24, while maintaining crisp reconstructions. The text-conditional model is then trained in the
highly compressed latent space. Previous versions of this architecture, achieved a 16x cost reduction over Stable
Diffusion 1.5.
Therefore, this kind of model is well suited for usages where efficiency is important. Furthermore, all known extensions
like finetuning, LoRA, ControlNet, IP-Adapter, LCM etc. are possible with this method as well.
The original codebase can be found at [Stability-AI/StableCascade](https://github.com/Stability-AI/StableCascade).
## Model Overview
Stable Cascade consists of three models: Stage A, Stage B and Stage C, representing a cascade to generate images,
hence the name "Stable Cascade".
Stage A & B are used to compress images, similar to what the job of the VAE is in Stable Diffusion.
However, with this setup, a much higher compression of images can be achieved. While the Stable Diffusion models use a
spatial compression factor of 8, encoding an image with resolution of 1024 x 1024 to 128 x 128, Stable Cascade achieves
a compression factor of 42. This encodes a 1024 x 1024 image to 24 x 24, while being able to accurately decode the
image. This comes with the great benefit of cheaper training and inference. Furthermore, Stage C is responsible
for generating the small 24 x 24 latents given a text prompt.
The Stage C model operates on the small 24 x 24 latents and denoises the latents conditioned on text prompts. The model is also the largest component in the Cascade pipeline and is meant to be used with the `StableCascadePriorPipeline`
The Stage B and Stage A models are used with the `StableCascadeDecoderPipeline` and are responsible for generating the final image given the small 24 x 24 latents.
There are some restrictions on data types that can be used with the Stable Cascade models. The official checkpoints for the `StableCascadePriorPipeline` do not support the `torch.float16` data type. Please use `torch.bfloat16` instead.
In order to use the `torch.bfloat16` data type with the `StableCascadeDecoderPipeline` you need to have PyTorch 2.2.0 or higher installed. This also means that using the `StableCascadeCombinedPipeline` with `torch.bfloat16` requires PyTorch 2.2.0 or higher, since it calls the `StableCascadeDecoderPipeline` internally.
If it is not possible to install PyTorch 2.2.0 or higher in your environment, the `StableCascadeDecoderPipeline` can be used on its own with the `torch.float16` data type. You can download the full precision or `bf16` variant weights for the pipeline and cast the weights to `torch.float16`.
## Usage example
```python
import torch
from diffusers import StableCascadeDecoderPipeline, StableCascadePriorPipeline
prompt = "an image of a shiba inu, donning a spacesuit and helmet"
negative_prompt = ""
prior = StableCascadePriorPipeline.from_pretrained("stabilityai/stable-cascade-prior", variant="bf16", torch_dtype=torch.bfloat16)
decoder = StableCascadeDecoderPipeline.from_pretrained("stabilityai/stable-cascade", variant="bf16", torch_dtype=torch.float16)
prior.enable_model_cpu_offload()
prior_output = prior(
prompt=prompt,
height=1024,
width=1024,
negative_prompt=negative_prompt,
guidance_scale=4.0,
num_images_per_prompt=1,
num_inference_steps=20
)
decoder.enable_model_cpu_offload()
decoder_output = decoder(
image_embeddings=prior_output.image_embeddings.to(torch.float16),
prompt=prompt,
negative_prompt=negative_prompt,
guidance_scale=0.0,
output_type="pil",
num_inference_steps=10
).images[0]
decoder_output.save("cascade.png")
```
## Using the Lite Versions of the Stage B and Stage C models
```python
import torch
from diffusers import (
StableCascadeDecoderPipeline,
StableCascadePriorPipeline,
StableCascadeUNet,
)
prompt = "an image of a shiba inu, donning a spacesuit and helmet"
negative_prompt = ""
prior_unet = StableCascadeUNet.from_pretrained("stabilityai/stable-cascade-prior", subfolder="prior_lite")
decoder_unet = StableCascadeUNet.from_pretrained("stabilityai/stable-cascade", subfolder="decoder_lite")
prior = StableCascadePriorPipeline.from_pretrained("stabilityai/stable-cascade-prior", prior=prior_unet)
decoder = StableCascadeDecoderPipeline.from_pretrained("stabilityai/stable-cascade", decoder=decoder_unet)
prior.enable_model_cpu_offload()
prior_output = prior(
prompt=prompt,
height=1024,
width=1024,
negative_prompt=negative_prompt,
guidance_scale=4.0,
num_images_per_prompt=1,
num_inference_steps=20
)
decoder.enable_model_cpu_offload()
decoder_output = decoder(
image_embeddings=prior_output.image_embeddings,
prompt=prompt,
negative_prompt=negative_prompt,
guidance_scale=0.0,
output_type="pil",
num_inference_steps=10
).images[0]
decoder_output.save("cascade.png")
```
## Loading original checkpoints with `from_single_file`
Loading the original format checkpoints is supported via `from_single_file` method in the StableCascadeUNet.
```python
import torch
from diffusers import (
StableCascadeDecoderPipeline,
StableCascadePriorPipeline,
StableCascadeUNet,
)
prompt = "an image of a shiba inu, donning a spacesuit and helmet"
negative_prompt = ""
prior_unet = StableCascadeUNet.from_single_file(
"https://huggingface.co/stabilityai/stable-cascade/resolve/main/stage_c_bf16.safetensors",
torch_dtype=torch.bfloat16
)
decoder_unet = StableCascadeUNet.from_single_file(
"https://huggingface.co/stabilityai/stable-cascade/blob/main/stage_b_bf16.safetensors",
torch_dtype=torch.bfloat16
)
prior = StableCascadePriorPipeline.from_pretrained("stabilityai/stable-cascade-prior", prior=prior_unet, torch_dtype=torch.bfloat16)
decoder = StableCascadeDecoderPipeline.from_pretrained("stabilityai/stable-cascade", decoder=decoder_unet, torch_dtype=torch.bfloat16)
prior.enable_model_cpu_offload()
prior_output = prior(
prompt=prompt,
height=1024,
width=1024,
negative_prompt=negative_prompt,
guidance_scale=4.0,
num_images_per_prompt=1,
num_inference_steps=20
)
decoder.enable_model_cpu_offload()
decoder_output = decoder(
image_embeddings=prior_output.image_embeddings,
prompt=prompt,
negative_prompt=negative_prompt,
guidance_scale=0.0,
output_type="pil",
num_inference_steps=10
).images[0]
decoder_output.save("cascade-single-file.png")
```
## Uses
### Direct Use
The model is intended for research purposes for now. Possible research areas and tasks include
- Research on generative models.
- Safe deployment of models which have the potential to generate harmful content.
- Probing and understanding the limitations and biases of generative models.
- Generation of artworks and use in design and other artistic processes.
- Applications in educational or creative tools.
Excluded uses are described below.
### Out-of-Scope Use
The model was not trained to be factual or true representations of people or events,
and therefore using the model to generate such content is out-of-scope for the abilities of this model.
The model should not be used in any way that violates Stability AI's [Acceptable Use Policy](https://stability.ai/use-policy).
## Limitations and Bias
### Limitations
- Faces and people in general may not be generated properly.
- The autoencoding part of the model is lossy.
## StableCascadeCombinedPipeline
## StableCascadePriorPipeline
## StableCascadePriorPipelineOutput
## StableCascadeDecoderPipeline
[[autodoc]] StableCascadeCombinedPipeline
- all
- __call__
[[autodoc]] StableCascadePriorPipeline
- all
- __call__
[[autodoc]] pipelines.stable_cascade.pipeline_stable_cascade_prior.StableCascadePriorPipelineOutput
[[autodoc]] StableCascadeDecoderPipeline
- all
- __call__
# ControlNet with Stable Diffusion XL
ControlNet was introduced in [Adding Conditional Control to Text-to-Image Diffusion Models](https://huggingface.co/papers/2302.05543) by Lvmin Zhang, Anyi Rao, and Maneesh Agrawala.
With a ControlNet model, you can provide an additional control image to condition and control Stable Diffusion generation. For example, if you provide a depth map, the ControlNet model generates an image that'll preserve the spatial information from the depth map. It is a more flexible and accurate way to control the image generation process.
The abstract from the paper is:
*We present ControlNet, a neural network architecture to add spatial conditioning controls to large, pretrained text-to-image diffusion models. ControlNet locks the production-ready large diffusion models, and reuses their deep and robust encoding layers pretrained with billions of images as a strong backbone to learn a diverse set of conditional controls. The neural architecture is connected with "zero convolutions" (zero-initialized convolution layers) that progressively grow the parameters from zero and ensure that no harmful noise could affect the finetuning. We test various conditioning controls, eg, edges, depth, segmentation, human pose, etc, with Stable Diffusion, using single or multiple conditions, with or without prompts. We show that the training of ControlNets is robust with small (<50k) and large (>1m) datasets. Extensive results show that ControlNet may facilitate wider applications to control image diffusion models.*
You can find additional smaller Stable Diffusion XL (SDXL) ControlNet checkpoints from the 🤗 [Diffusers](https://huggingface.co/diffusers) Hub organization, and browse [community-trained](https://huggingface.co/models?other=stable-diffusion-xl&other=controlnet) checkpoints on the Hub.
🧪 Many of the SDXL ControlNet checkpoints are experimental, and there is a lot of room for improvement. Feel free to open an [Issue](https://github.com/huggingface/diffusers/issues/new/choose) and leave us feedback on how we can improve!
If you don't see a checkpoint you're interested in, you can train your own SDXL ControlNet with our [training script](../../../../../examples/controlnet/README_sdxl).
Make sure to check out the Schedulers [guide](../../using-diffusers/schedulers) to learn how to explore the tradeoff between scheduler speed and quality, and see the [reuse components across pipelines](../../using-diffusers/loading#reuse-components-across-pipelines) section to learn how to efficiently load the same components into multiple pipelines.
## StableDiffusionXLControlNetPipeline
## StableDiffusionXLControlNetImg2ImgPipeline
## StableDiffusionXLControlNetInpaintPipeline
## StableDiffusionPipelineOutput
[[autodoc]] StableDiffusionXLControlNetPipeline
- all
- __call__
[[autodoc]] StableDiffusionXLControlNetImg2ImgPipeline
- all
- __call__
[[autodoc]] StableDiffusionXLControlNetInpaintPipeline
- all
- __call__
[[autodoc]] pipelines.stable_diffusion.StableDiffusionPipelineOutput
# Image-to-Video Generation with PIA (Personalized Image Animator)
## Overview
[PIA: Your Personalized Image Animator via Plug-and-Play Modules in Text-to-Image Models](https://arxiv.org/abs/2312.13964) by Yiming Zhang, Zhening Xing, Yanhong Zeng, Youqing Fang, Kai Chen
Recent advancements in personalized text-to-image (T2I) models have revolutionized content creation, empowering non-experts to generate stunning images with unique styles. While promising, adding realistic motions into these personalized images by text poses significant challenges in preserving distinct styles, high-fidelity details, and achieving motion controllability by text. In this paper, we present PIA, a Personalized Image Animator that excels in aligning with condition images, achieving motion controllability by text, and the compatibility with various personalized T2I models without specific tuning. To achieve these goals, PIA builds upon a base T2I model with well-trained temporal alignment layers, allowing for the seamless transformation of any personalized T2I model into an image animation model. A key component of PIA is the introduction of the condition module, which utilizes the condition frame and inter-frame affinity as input to transfer appearance information guided by the affinity hint for individual frame synthesis in the latent space. This design mitigates the challenges of appearance-related image alignment within and allows for a stronger focus on aligning with motion-related guidance.
[Project page](https://pi-animator.github.io/)
## Available Pipelines
| Pipeline | Tasks | Demo
|---|---|:---:|
| [PIAPipeline](https://github.com/huggingface/diffusers/blob/main/src/diffusers/pipelines/pia/pipeline_pia.py) | *Image-to-Video Generation with PIA* |
## Available checkpoints
Motion Adapter checkpoints for PIA can be found under the [OpenMMLab org](https://huggingface.co/openmmlab/PIA-condition-adapter). These checkpoints are meant to work with any model based on Stable Diffusion 1.5
## Usage example
PIA works with a MotionAdapter checkpoint and a Stable Diffusion 1.5 model checkpoint. The MotionAdapter is a collection of Motion Modules that are responsible for adding coherent motion across image frames. These modules are applied after the Resnet and Attention blocks in the Stable Diffusion UNet. In addition to the motion modules, PIA also replaces the input convolution layer of the SD 1.5 UNet model with a 9 channel input convolution layer.
The following example demonstrates how to use PIA to generate a video from a single image.
```python
import torch
from diffusers import (
EulerDiscreteScheduler,
MotionAdapter,
PIAPipeline,
)
from diffusers.utils import export_to_gif, load_image
adapter = MotionAdapter.from_pretrained("openmmlab/PIA-condition-adapter")
pipe = PIAPipeline.from_pretrained("SG161222/Realistic_Vision_V6.0_B1_noVAE", motion_adapter=adapter, torch_dtype=torch.float16)
pipe.scheduler = EulerDiscreteScheduler.from_config(pipe.scheduler.config)
pipe.enable_model_cpu_offload()
pipe.enable_vae_slicing()
image = load_image(
"https://huggingface.co/datasets/hf-internal-testing/diffusers-images/resolve/main/pix2pix/cat_6.png?download=true"
)
image = image.resize((512, 512))
prompt = "cat in a field"
negative_prompt = "wrong white balance, dark, sketches,worst quality,low quality"
generator = torch.Generator("cpu").manual_seed(0)
output = pipe(image=image, prompt=prompt, generator=generator)
frames = output.frames[0]
export_to_gif(frames, "pia-animation.gif")
```
Here are some sample outputs:
cat in a field.
If you plan on using a scheduler that can clip samples, make sure to disable it by setting `clip_sample=False` in the scheduler as this can also have an adverse effect on generated samples. Additionally, the PIA checkpoints can be sensitive to the beta schedule of the scheduler. We recommend setting this to `linear`.
## Using FreeInit
[FreeInit: Bridging Initialization Gap in Video Diffusion Models](https://arxiv.org/abs/2312.07537) by Tianxing Wu, Chenyang Si, Yuming Jiang, Ziqi Huang, Ziwei Liu.
FreeInit is an effective method that improves temporal consistency and overall quality of videos generated using video-diffusion-models without any addition training. It can be applied to PIA, AnimateDiff, ModelScope, VideoCrafter and various other video generation models seamlessly at inference time, and works by iteratively refining the latent-initialization noise. More details can be found it the paper.
The following example demonstrates the usage of FreeInit.
```python
import torch
from diffusers import (
DDIMScheduler,
MotionAdapter,
PIAPipeline,
)
from diffusers.utils import export_to_gif, load_image
adapter = MotionAdapter.from_pretrained("openmmlab/PIA-condition-adapter")
pipe = PIAPipeline.from_pretrained("SG161222/Realistic_Vision_V6.0_B1_noVAE", motion_adapter=adapter)
# enable FreeInit
# Refer to the enable_free_init documentation for a full list of configurable parameters
pipe.enable_free_init(method="butterworth", use_fast_sampling=True)
# Memory saving options
pipe.enable_model_cpu_offload()
pipe.enable_vae_slicing()
pipe.scheduler = DDIMScheduler.from_config(pipe.scheduler.config)
image = load_image(
"https://huggingface.co/datasets/hf-internal-testing/diffusers-images/resolve/main/pix2pix/cat_6.png?download=true"
)
image = image.resize((512, 512))
prompt = "cat in a field"
negative_prompt = "wrong white balance, dark, sketches,worst quality,low quality"
generator = torch.Generator("cpu").manual_seed(0)
output = pipe(image=image, prompt=prompt, generator=generator)
frames = output.frames[0]
export_to_gif(frames, "pia-freeinit-animation.gif")
```
cat in a field.
FreeInit is not really free - the improved quality comes at the cost of extra computation. It requires sampling a few extra times depending on the `num_iters` parameter that is set when enabling it. Setting the `use_fast_sampling` parameter to `True` can improve the overall performance (at the cost of lower quality compared to when `use_fast_sampling=False` but still better results than vanilla video generation models).
## PIAPipeline
## PIAPipelineOutput
[[autodoc]] PIAPipeline
- all
- __call__
- enable_freeu
- disable_freeu
- enable_free_init
- disable_free_init
- enable_vae_slicing
- disable_vae_slicing
- enable_vae_tiling
- disable_vae_tiling
[[autodoc]] pipelines.pia.PIAPipelineOutput
# Stable Audio
Stable Audio was proposed in [Stable Audio Open](https://arxiv.org/abs/2407.14358) by Zach Evans et al. . it takes a text prompt as input and predicts the corresponding sound or music sample.
Stable Audio Open generates variable-length (up to 47s) stereo audio at 44.1kHz from text prompts. It comprises three components: an autoencoder that compresses waveforms into a manageable sequence length, a T5-based text embedding for text conditioning, and a transformer-based diffusion (DiT) model that operates in the latent space of the autoencoder.
Stable Audio is trained on a corpus of around 48k audio recordings, where around 47k are from Freesound and the rest are from the Free Music Archive (FMA). All audio files are licensed under CC0, CC BY, or CC Sampling+. This data is used to train the autoencoder and the DiT.
The abstract of the paper is the following:
*Open generative models are vitally important for the community, allowing for fine-tunes and serving as baselines when presenting new models. However, most current text-to-audio models are private and not accessible for artists and researchers to build upon. Here we describe the architecture and training process of a new open-weights text-to-audio model trained with Creative Commons data. Our evaluation shows that the model's performance is competitive with the state-of-the-art across various metrics. Notably, the reported FDopenl3 results (measuring the realism of the generations) showcase its potential for high-quality stereo sound synthesis at 44.1kHz.*
This pipeline was contributed by [Yoach Lacombe](https://huggingface.co/ylacombe). The original codebase can be found at [Stability-AI/stable-audio-tools](https://github.com/Stability-AI/stable-audio-tools).
## Tips
When constructing a prompt, keep in mind:
* Descriptive prompt inputs work best; use adjectives to describe the sound (for example, "high quality" or "clear") and make the prompt context specific where possible (e.g. "melodic techno with a fast beat and synths" works better than "techno").
* Using a *negative prompt* can significantly improve the quality of the generated audio. Try using a negative prompt of "low quality, average quality".
During inference:
* The _quality_ of the generated audio sample can be controlled by the `num_inference_steps` argument; higher steps give higher quality audio at the expense of slower inference.
* Multiple waveforms can be generated in one go: set `num_waveforms_per_prompt` to a value greater than 1 to enable. Automatic scoring will be performed between the generated waveforms and prompt text, and the audios ranked from best to worst accordingly.
## StableAudioPipeline
[[autodoc]] StableAudioPipeline
- all
- __call__
# AutoPipeline
The `AutoPipeline` is designed to make it easy to load a checkpoint for a task without needing to know the specific pipeline class. Based on the task, the `AutoPipeline` automatically retrieves the correct pipeline class from the checkpoint `model_index.json` file.
> [!TIP]
> Check out the [AutoPipeline](../../tutorials/autopipeline) tutorial to learn how to use this API!
## AutoPipelineForText2Image
## AutoPipelineForImage2Image
## AutoPipelineForInpainting
[[autodoc]] AutoPipelineForText2Image
- all
- from_pretrained
- from_pipe
[[autodoc]] AutoPipelineForImage2Image
- all
- from_pretrained
- from_pipe
[[autodoc]] AutoPipelineForInpainting
- all
- from_pretrained
- from_pipe
# Attend-and-Excite
Attend-and-Excite for Stable Diffusion was proposed in [Attend-and-Excite: Attention-Based Semantic Guidance for Text-to-Image Diffusion Models](https://attendandexcite.github.io/Attend-and-Excite/) and provides textual attention control over image generation.
The abstract from the paper is:
*Recent text-to-image generative models have demonstrated an unparalleled ability to generate diverse and creative imagery guided by a target text prompt. While revolutionary, current state-of-the-art diffusion models may still fail in generating images that fully convey the semantics in the given text prompt. We analyze the publicly available Stable Diffusion model and assess the existence of catastrophic neglect, where the model fails to generate one or more of the subjects from the input prompt. Moreover, we find that in some cases the model also fails to correctly bind attributes (e.g., colors) to their corresponding subjects. To help mitigate these failure cases, we introduce the concept of Generative Semantic Nursing (GSN), where we seek to intervene in the generative process on the fly during inference time to improve the faithfulness of the generated images. Using an attention-based formulation of GSN, dubbed Attend-and-Excite, we guide the model to refine the cross-attention units to attend to all subject tokens in the text prompt and strengthen - or excite - their activations, encouraging the model to generate all subjects described in the text prompt. We compare our approach to alternative approaches and demonstrate that it conveys the desired concepts more faithfully across a range of text prompts.*
You can find additional information about Attend-and-Excite on the [project page](https://attendandexcite.github.io/Attend-and-Excite/), the [original codebase](https://github.com/AttendAndExcite/Attend-and-Excite), or try it out in a [demo](https://huggingface.co/spaces/AttendAndExcite/Attend-and-Excite).
Make sure to check out the Schedulers [guide](../../using-diffusers/schedulers) to learn how to explore the tradeoff between scheduler speed and quality, and see the [reuse components across pipelines](../../using-diffusers/loading#reuse-components-across-pipelines) section to learn how to efficiently load the same components into multiple pipelines.
## StableDiffusionAttendAndExcitePipeline
## StableDiffusionPipelineOutput
[[autodoc]] StableDiffusionAttendAndExcitePipeline
- all
- __call__
[[autodoc]] pipelines.stable_diffusion.StableDiffusionPipelineOutput
# Shap-E
The Shap-E model was proposed in [Shap-E: Generating Conditional 3D Implicit Functions](https://huggingface.co/papers/2305.02463) by Alex Nichol and Heewoo Jun from [OpenAI](https://github.com/openai).
The abstract from the paper is:
*We present Shap-E, a conditional generative model for 3D assets. Unlike recent work on 3D generative models which produce a single output representation, Shap-E directly generates the parameters of implicit functions that can be rendered as both textured meshes and neural radiance fields. We train Shap-E in two stages: first, we train an encoder that deterministically maps 3D assets into the parameters of an implicit function; second, we train a conditional diffusion model on outputs of the encoder. When trained on a large dataset of paired 3D and text data, our resulting models are capable of generating complex and diverse 3D assets in a matter of seconds. When compared to Point-E, an explicit generative model over point clouds, Shap-E converges faster and reaches comparable or better sample quality despite modeling a higher-dimensional, multi-representation output space.*
The original codebase can be found at [openai/shap-e](https://github.com/openai/shap-e).
See the [reuse components across pipelines](../../using-diffusers/loading#reuse-components-across-pipelines) section to learn how to efficiently load the same components into multiple pipelines.
## ShapEPipeline
## ShapEImg2ImgPipeline
## ShapEPipelineOutput
[[autodoc]] ShapEPipeline
- all
- __call__
[[autodoc]] ShapEImg2ImgPipeline
- all
- __call__
[[autodoc]] pipelines.shap_e.pipeline_shap_e.ShapEPipelineOutput
# DeepFloyd IF
## Overview
DeepFloyd IF is a novel state-of-the-art open-source text-to-image model with a high degree of photorealism and language understanding.
The model is a modular composed of a frozen text encoder and three cascaded pixel diffusion modules:
- Stage 1: a base model that generates 64x64 px image based on text prompt,
- Stage 2: a 64x64 px => 256x256 px super-resolution model, and
- Stage 3: a 256x256 px => 1024x1024 px super-resolution model
Stage 1 and Stage 2 utilize a frozen text encoder based on the T5 transformer to extract text embeddings, which are then fed into a UNet architecture enhanced with cross-attention and attention pooling.
Stage 3 is [Stability AI's x4 Upscaling model](https://huggingface.co/stabilityai/stable-diffusion-x4-upscaler).
The result is a highly efficient model that outperforms current state-of-the-art models, achieving a zero-shot FID score of 6.66 on the COCO dataset.
Our work underscores the potential of larger UNet architectures in the first stage of cascaded diffusion models and depicts a promising future for text-to-image synthesis.
## Usage
Before you can use IF, you need to accept its usage conditions. To do so:
1. Make sure to have a [Hugging Face account](https://huggingface.co/join) and be logged in.
2. Accept the license on the model card of [DeepFloyd/IF-I-XL-v1.0](https://huggingface.co/DeepFloyd/IF-I-XL-v1.0). Accepting the license on the stage I model card will auto accept for the other IF models.
3. Make sure to login locally. Install `huggingface_hub`:
```sh
pip install huggingface_hub --upgrade
```
run the login function in a Python shell:
```py
from huggingface_hub import login
login()
```
and enter your [Hugging Face Hub access token](https://huggingface.co/docs/hub/security-tokens#what-are-user-access-tokens).
Next we install `diffusers` and dependencies:
```sh
pip install -q diffusers accelerate transformers
```
The following sections give more in-detail examples of how to use IF. Specifically:
- [Text-to-Image Generation](#text-to-image-generation)
- [Image-to-Image Generation](#text-guided-image-to-image-generation)
- [Inpainting](#text-guided-inpainting-generation)
- [Reusing model weights](#converting-between-different-pipelines)
- [Speed optimization](#optimizing-for-speed)
- [Memory optimization](#optimizing-for-memory)
**Available checkpoints**
- *Stage-1*
- [DeepFloyd/IF-I-XL-v1.0](https://huggingface.co/DeepFloyd/IF-I-XL-v1.0)
- [DeepFloyd/IF-I-L-v1.0](https://huggingface.co/DeepFloyd/IF-I-L-v1.0)
- [DeepFloyd/IF-I-M-v1.0](https://huggingface.co/DeepFloyd/IF-I-M-v1.0)
- *Stage-2*
- [DeepFloyd/IF-II-L-v1.0](https://huggingface.co/DeepFloyd/IF-II-L-v1.0)
- [DeepFloyd/IF-II-M-v1.0](https://huggingface.co/DeepFloyd/IF-II-M-v1.0)
- *Stage-3*
- [stabilityai/stable-diffusion-x4-upscaler](https://huggingface.co/stabilityai/stable-diffusion-x4-upscaler)
**Google Colab**
[![Open In Colab](https://colab.research.google.com/assets/colab-badge.svg)](https://colab.research.google.com/github/huggingface/notebooks/blob/main/diffusers/deepfloyd_if_free_tier_google_colab.ipynb)
### Text-to-Image Generation
By default diffusers makes use of [model cpu offloading](../../optimization/memory#model-offloading) to run the whole IF pipeline with as little as 14 GB of VRAM.
```python
from diffusers import DiffusionPipeline
from diffusers.utils import pt_to_pil, make_image_grid
import torch
# stage 1
stage_1 = DiffusionPipeline.from_pretrained("DeepFloyd/IF-I-XL-v1.0", variant="fp16", torch_dtype=torch.float16)
stage_1.enable_model_cpu_offload()
# stage 2
stage_2 = DiffusionPipeline.from_pretrained(
"DeepFloyd/IF-II-L-v1.0", text_encoder=None, variant="fp16", torch_dtype=torch.float16
)
stage_2.enable_model_cpu_offload()
# stage 3
safety_modules = {
"feature_extractor": stage_1.feature_extractor,
"safety_checker": stage_1.safety_checker,
"watermarker": stage_1.watermarker,
}
stage_3 = DiffusionPipeline.from_pretrained(
"stabilityai/stable-diffusion-x4-upscaler", **safety_modules, torch_dtype=torch.float16
)
stage_3.enable_model_cpu_offload()
prompt = 'a photo of a kangaroo wearing an orange hoodie and blue sunglasses standing in front of the eiffel tower holding a sign that says "very deep learning"'
generator = torch.manual_seed(1)
# text embeds
prompt_embeds, negative_embeds = stage_1.encode_prompt(prompt)
# stage 1
stage_1_output = stage_1(
prompt_embeds=prompt_embeds, negative_prompt_embeds=negative_embeds, generator=generator, output_type="pt"
).images
#pt_to_pil(stage_1_output)[0].save("./if_stage_I.png")
# stage 2
stage_2_output = stage_2(
image=stage_1_output,
prompt_embeds=prompt_embeds,
negative_prompt_embeds=negative_embeds,
generator=generator,
output_type="pt",
).images
#pt_to_pil(stage_2_output)[0].save("./if_stage_II.png")
# stage 3
stage_3_output = stage_3(prompt=prompt, image=stage_2_output, noise_level=100, generator=generator).images
#stage_3_output[0].save("./if_stage_III.png")
make_image_grid([pt_to_pil(stage_1_output)[0], pt_to_pil(stage_2_output)[0], stage_3_output[0]], rows=1, rows=3)
```
### Text Guided Image-to-Image Generation
The same IF model weights can be used for text-guided image-to-image translation or image variation.
In this case just make sure to load the weights using the `IFImg2ImgPipeline` and `IFImg2ImgSuperResolutionPipeline` pipelines.
**Note**: You can also directly move the weights of the text-to-image pipelines to the image-to-image pipelines
without loading them twice by making use of the [components](/docs/diffusers/main/en/api/pipelines/overview#diffusers.DiffusionPipeline.components) argument as explained [here](#converting-between-different-pipelines).
```python
from diffusers import IFImg2ImgPipeline, IFImg2ImgSuperResolutionPipeline, DiffusionPipeline
from diffusers.utils import pt_to_pil, load_image, make_image_grid
import torch
# download image
url = "https://raw.githubusercontent.com/CompVis/stable-diffusion/main/assets/stable-samples/img2img/sketch-mountains-input.jpg"
original_image = load_image(url)
original_image = original_image.resize((768, 512))
# stage 1
stage_1 = IFImg2ImgPipeline.from_pretrained("DeepFloyd/IF-I-XL-v1.0", variant="fp16", torch_dtype=torch.float16)
stage_1.enable_model_cpu_offload()
# stage 2
stage_2 = IFImg2ImgSuperResolutionPipeline.from_pretrained(
"DeepFloyd/IF-II-L-v1.0", text_encoder=None, variant="fp16", torch_dtype=torch.float16
)
stage_2.enable_model_cpu_offload()
# stage 3
safety_modules = {
"feature_extractor": stage_1.feature_extractor,
"safety_checker": stage_1.safety_checker,
"watermarker": stage_1.watermarker,
}
stage_3 = DiffusionPipeline.from_pretrained(
"stabilityai/stable-diffusion-x4-upscaler", **safety_modules, torch_dtype=torch.float16
)
stage_3.enable_model_cpu_offload()
prompt = "A fantasy landscape in style minecraft"
generator = torch.manual_seed(1)
# text embeds
prompt_embeds, negative_embeds = stage_1.encode_prompt(prompt)
# stage 1
stage_1_output = stage_1(
image=original_image,
prompt_embeds=prompt_embeds,
negative_prompt_embeds=negative_embeds,
generator=generator,
output_type="pt",
).images
#pt_to_pil(stage_1_output)[0].save("./if_stage_I.png")
# stage 2
stage_2_output = stage_2(
image=stage_1_output,
original_image=original_image,
prompt_embeds=prompt_embeds,
negative_prompt_embeds=negative_embeds,
generator=generator,
output_type="pt",
).images
#pt_to_pil(stage_2_output)[0].save("./if_stage_II.png")
# stage 3
stage_3_output = stage_3(prompt=prompt, image=stage_2_output, generator=generator, noise_level=100).images
#stage_3_output[0].save("./if_stage_III.png")
make_image_grid([original_image, pt_to_pil(stage_1_output)[0], pt_to_pil(stage_2_output)[0], stage_3_output[0]], rows=1, rows=4)
```
### Text Guided Inpainting Generation
The same IF model weights can be used for text-guided image-to-image translation or image variation.
In this case just make sure to load the weights using the `IFInpaintingPipeline` and `IFInpaintingSuperResolutionPipeline` pipelines.
**Note**: You can also directly move the weights of the text-to-image pipelines to the image-to-image pipelines
without loading them twice by making use of the `~DiffusionPipeline.components()` function as explained [here](#converting-between-different-pipelines).
```python
from diffusers import IFInpaintingPipeline, IFInpaintingSuperResolutionPipeline, DiffusionPipeline
from diffusers.utils import pt_to_pil, load_image, make_image_grid
import torch
# download image
url = "https://huggingface.co/datasets/diffusers/docs-images/resolve/main/if/person.png"
original_image = load_image(url)
# download mask
url = "https://huggingface.co/datasets/diffusers/docs-images/resolve/main/if/glasses_mask.png"
mask_image = load_image(url)
# stage 1
stage_1 = IFInpaintingPipeline.from_pretrained("DeepFloyd/IF-I-XL-v1.0", variant="fp16", torch_dtype=torch.float16)
stage_1.enable_model_cpu_offload()
# stage 2
stage_2 = IFInpaintingSuperResolutionPipeline.from_pretrained(
"DeepFloyd/IF-II-L-v1.0", text_encoder=None, variant="fp16", torch_dtype=torch.float16
)
stage_2.enable_model_cpu_offload()
# stage 3
safety_modules = {
"feature_extractor": stage_1.feature_extractor,
"safety_checker": stage_1.safety_checker,
"watermarker": stage_1.watermarker,
}
stage_3 = DiffusionPipeline.from_pretrained(
"stabilityai/stable-diffusion-x4-upscaler", **safety_modules, torch_dtype=torch.float16
)
stage_3.enable_model_cpu_offload()
prompt = "blue sunglasses"
generator = torch.manual_seed(1)
# text embeds
prompt_embeds, negative_embeds = stage_1.encode_prompt(prompt)
# stage 1
stage_1_output = stage_1(
image=original_image,
mask_image=mask_image,
prompt_embeds=prompt_embeds,
negative_prompt_embeds=negative_embeds,
generator=generator,
output_type="pt",
).images
#pt_to_pil(stage_1_output)[0].save("./if_stage_I.png")
# stage 2
stage_2_output = stage_2(
image=stage_1_output,
original_image=original_image,
mask_image=mask_image,
prompt_embeds=prompt_embeds,
negative_prompt_embeds=negative_embeds,
generator=generator,
output_type="pt",
).images
#pt_to_pil(stage_1_output)[0].save("./if_stage_II.png")
# stage 3
stage_3_output = stage_3(prompt=prompt, image=stage_2_output, generator=generator, noise_level=100).images
#stage_3_output[0].save("./if_stage_III.png")
make_image_grid([original_image, mask_image, pt_to_pil(stage_1_output)[0], pt_to_pil(stage_2_output)[0], stage_3_output[0]], rows=1, rows=5)
```
### Converting between different pipelines
In addition to being loaded with `from_pretrained`, Pipelines can also be loaded directly from each other.
```python
from diffusers import IFPipeline, IFSuperResolutionPipeline
pipe_1 = IFPipeline.from_pretrained("DeepFloyd/IF-I-XL-v1.0")
pipe_2 = IFSuperResolutionPipeline.from_pretrained("DeepFloyd/IF-II-L-v1.0")
from diffusers import IFImg2ImgPipeline, IFImg2ImgSuperResolutionPipeline
pipe_1 = IFImg2ImgPipeline(**pipe_1.components)
pipe_2 = IFImg2ImgSuperResolutionPipeline(**pipe_2.components)
from diffusers import IFInpaintingPipeline, IFInpaintingSuperResolutionPipeline
pipe_1 = IFInpaintingPipeline(**pipe_1.components)
pipe_2 = IFInpaintingSuperResolutionPipeline(**pipe_2.components)
```
### Optimizing for speed
The simplest optimization to run IF faster is to move all model components to the GPU.
```py
pipe = DiffusionPipeline.from_pretrained("DeepFloyd/IF-I-XL-v1.0", variant="fp16", torch_dtype=torch.float16)
pipe.to("cuda")
```
You can also run the diffusion process for a shorter number of timesteps.
This can either be done with the `num_inference_steps` argument:
```py
pipe("", num_inference_steps=30)
```
Or with the `timesteps` argument:
```py
from diffusers.pipelines.deepfloyd_if import fast27_timesteps
pipe("", timesteps=fast27_timesteps)
```
When doing image variation or inpainting, you can also decrease the number of timesteps
with the strength argument. The strength argument is the amount of noise to add to the input image which also determines how many steps to run in the denoising process.
A smaller number will vary the image less but run faster.
```py
pipe = IFImg2ImgPipeline.from_pretrained("DeepFloyd/IF-I-XL-v1.0", variant="fp16", torch_dtype=torch.float16)
pipe.to("cuda")
image = pipe(image=image, prompt="", strength=0.3).images
```
You can also use [`torch.compile`](../../optimization/torch2.0). Note that we have not exhaustively tested `torch.compile`
with IF and it might not give expected results.
```py
from diffusers import DiffusionPipeline
import torch
pipe = DiffusionPipeline.from_pretrained("DeepFloyd/IF-I-XL-v1.0", variant="fp16", torch_dtype=torch.float16)
pipe.to("cuda")
pipe.text_encoder = torch.compile(pipe.text_encoder, mode="reduce-overhead", fullgraph=True)
pipe.unet = torch.compile(pipe.unet, mode="reduce-overhead", fullgraph=True)
```
### Optimizing for memory
When optimizing for GPU memory, we can use the standard diffusers CPU offloading APIs.
Either the model based CPU offloading,
```py
pipe = DiffusionPipeline.from_pretrained("DeepFloyd/IF-I-XL-v1.0", variant="fp16", torch_dtype=torch.float16)
pipe.enable_model_cpu_offload()
```
or the more aggressive layer based CPU offloading.
```py
pipe = DiffusionPipeline.from_pretrained("DeepFloyd/IF-I-XL-v1.0", variant="fp16", torch_dtype=torch.float16)
pipe.enable_sequential_cpu_offload()
```
Additionally, T5 can be loaded in 8bit precision
```py
from transformers import T5EncoderModel
text_encoder = T5EncoderModel.from_pretrained(
"DeepFloyd/IF-I-XL-v1.0", subfolder="text_encoder", device_map="auto", load_in_8bit=True, variant="8bit"
)
from diffusers import DiffusionPipeline
pipe = DiffusionPipeline.from_pretrained(
"DeepFloyd/IF-I-XL-v1.0",
text_encoder=text_encoder, # pass the previously instantiated 8bit text encoder
unet=None,
device_map="auto",
)
prompt_embeds, negative_embeds = pipe.encode_prompt("")
```
For CPU RAM constrained machines like Google Colab free tier where we can't load all model components to the CPU at once, we can manually only load the pipeline with
the text encoder or UNet when the respective model components are needed.
```py
from diffusers import IFPipeline, IFSuperResolutionPipeline
import torch
import gc
from transformers import T5EncoderModel
from diffusers.utils import pt_to_pil, make_image_grid
text_encoder = T5EncoderModel.from_pretrained(
"DeepFloyd/IF-I-XL-v1.0", subfolder="text_encoder", device_map="auto", load_in_8bit=True, variant="8bit"
)
# text to image
pipe = DiffusionPipeline.from_pretrained(
"DeepFloyd/IF-I-XL-v1.0",
text_encoder=text_encoder, # pass the previously instantiated 8bit text encoder
unet=None,
device_map="auto",
)
prompt = 'a photo of a kangaroo wearing an orange hoodie and blue sunglasses standing in front of the eiffel tower holding a sign that says "very deep learning"'
prompt_embeds, negative_embeds = pipe.encode_prompt(prompt)
# Remove the pipeline so we can re-load the pipeline with the unet
del text_encoder
del pipe
gc.collect()
torch.cuda.empty_cache()
pipe = IFPipeline.from_pretrained(
"DeepFloyd/IF-I-XL-v1.0", text_encoder=None, variant="fp16", torch_dtype=torch.float16, device_map="auto"
)
generator = torch.Generator().manual_seed(0)
stage_1_output = pipe(
prompt_embeds=prompt_embeds,
negative_prompt_embeds=negative_embeds,
output_type="pt",
generator=generator,
).images
#pt_to_pil(stage_1_output)[0].save("./if_stage_I.png")
# Remove the pipeline so we can load the super-resolution pipeline
del pipe
gc.collect()
torch.cuda.empty_cache()
# First super resolution
pipe = IFSuperResolutionPipeline.from_pretrained(
"DeepFloyd/IF-II-L-v1.0", text_encoder=None, variant="fp16", torch_dtype=torch.float16, device_map="auto"
)
generator = torch.Generator().manual_seed(0)
stage_2_output = pipe(
image=stage_1_output,
prompt_embeds=prompt_embeds,
negative_prompt_embeds=negative_embeds,
output_type="pt",
generator=generator,
).images
#pt_to_pil(stage_2_output)[0].save("./if_stage_II.png")
make_image_grid([pt_to_pil(stage_1_output)[0], pt_to_pil(stage_2_output)[0]], rows=1, rows=2)
```
## Available Pipelines:
| Pipeline | Tasks | Colab
|---|---|:---:|
| [pipeline_if.py](https://github.com/huggingface/diffusers/blob/main/src/diffusers/pipelines/deepfloyd_if/pipeline_if.py) | *Text-to-Image Generation* | - |
| [pipeline_if_superresolution.py](https://github.com/huggingface/diffusers/blob/main/src/diffusers/pipelines/deepfloyd_if/pipeline_if_superresolution.py) | *Text-to-Image Generation* | - |
| [pipeline_if_img2img.py](https://github.com/huggingface/diffusers/blob/main/src/diffusers/pipelines/deepfloyd_if/pipeline_if_img2img.py) | *Image-to-Image Generation* | - |
| [pipeline_if_img2img_superresolution.py](https://github.com/huggingface/diffusers/blob/main/src/diffusers/pipelines/deepfloyd_if/pipeline_if_img2img_superresolution.py) | *Image-to-Image Generation* | - |
| [pipeline_if_inpainting.py](https://github.com/huggingface/diffusers/blob/main/src/diffusers/pipelines/deepfloyd_if/pipeline_if_inpainting.py) | *Image-to-Image Generation* | - |
| [pipeline_if_inpainting_superresolution.py](https://github.com/huggingface/diffusers/blob/main/src/diffusers/pipelines/deepfloyd_if/pipeline_if_inpainting_superresolution.py) | *Image-to-Image Generation* | - |
## IFPipeline
## IFSuperResolutionPipeline
## IFImg2ImgPipeline
## IFImg2ImgSuperResolutionPipeline
## IFInpaintingPipeline
## IFInpaintingSuperResolutionPipeline
[[autodoc]] IFPipeline
- all
- __call__
[[autodoc]] IFSuperResolutionPipeline
- all
- __call__
[[autodoc]] IFImg2ImgPipeline
- all
- __call__
[[autodoc]] IFImg2ImgSuperResolutionPipeline
- all
- __call__
[[autodoc]] IFInpaintingPipeline
- all
- __call__
[[autodoc]] IFInpaintingSuperResolutionPipeline
- all
- __call__
# CogView3Plus
[CogView3: Finer and Faster Text-to-Image Generation via Relay Diffusion](https://huggingface.co/papers/2403.05121) from Tsinghua University & ZhipuAI, by Wendi Zheng, Jiayan Teng, Zhuoyi Yang, Weihan Wang, Jidong Chen, Xiaotao Gu, Yuxiao Dong, Ming Ding, Jie Tang.
The abstract from the paper is:
*Recent advancements in text-to-image generative systems have been largely driven by diffusion models. However, single-stage text-to-image diffusion models still face challenges, in terms of computational efficiency and the refinement of image details. To tackle the issue, we propose CogView3, an innovative cascaded framework that enhances the performance of text-to-image diffusion. CogView3 is the first model implementing relay diffusion in the realm of text-to-image generation, executing the task by first creating low-resolution images and subsequently applying relay-based super-resolution. This methodology not only results in competitive text-to-image outputs but also greatly reduces both training and inference costs. Our experimental results demonstrate that CogView3 outperforms SDXL, the current state-of-the-art open-source text-to-image diffusion model, by 77.0% in human evaluations, all while requiring only about 1/2 of the inference time. The distilled variant of CogView3 achieves comparable performance while only utilizing 1/10 of the inference time by SDXL.*
Make sure to check out the Schedulers [guide](../../using-diffusers/schedulers.md) to learn how to explore the tradeoff between scheduler speed and quality, and see the [reuse components across pipelines](../../using-diffusers/loading.md#reuse-a-pipeline) section to learn how to efficiently load the same components into multiple pipelines.
This pipeline was contributed by [zRzRzRzRzRzRzR](https://github.com/zRzRzRzRzRzRzR). The original codebase can be found [here](https://huggingface.co/THUDM). The original weights can be found under [hf.co/THUDM](https://huggingface.co/THUDM).
## CogView3PlusPipeline
## CogView3PipelineOutput
[[autodoc]] CogView3PlusPipeline
- all
- __call__
[[autodoc]] pipelines.cogview3.pipeline_output.CogView3PipelineOutput
# AudioLDM 2
AudioLDM 2 was proposed in [AudioLDM 2: Learning Holistic Audio Generation with Self-supervised Pretraining](https://arxiv.org/abs/2308.05734) by Haohe Liu et al. AudioLDM 2 takes a text prompt as input and predicts the corresponding audio. It can generate text-conditional sound effects, human speech and music.
Inspired by [Stable Diffusion](https://huggingface.co/docs/diffusers/api/pipelines/stable_diffusion/overview), AudioLDM 2 is a text-to-audio _latent diffusion model (LDM)_ that learns continuous audio representations from text embeddings. Two text encoder models are used to compute the text embeddings from a prompt input: the text-branch of [CLAP](https://huggingface.co/docs/transformers/main/en/model_doc/clap) and the encoder of [Flan-T5](https://huggingface.co/docs/transformers/main/en/model_doc/flan-t5). These text embeddings are then projected to a shared embedding space by an [AudioLDM2ProjectionModel](https://huggingface.co/docs/diffusers/main/api/pipelines/audioldm2#diffusers.AudioLDM2ProjectionModel). A [GPT2](https://huggingface.co/docs/transformers/main/en/model_doc/gpt2) _language model (LM)_ is used to auto-regressively predict eight new embedding vectors, conditional on the projected CLAP and Flan-T5 embeddings. The generated embedding vectors and Flan-T5 text embeddings are used as cross-attention conditioning in the LDM. The [UNet](https://huggingface.co/docs/diffusers/main/en/api/pipelines/audioldm2#diffusers.AudioLDM2UNet2DConditionModel) of AudioLDM 2 is unique in the sense that it takes **two** cross-attention embeddings, as opposed to one cross-attention conditioning, as in most other LDMs.
The abstract of the paper is the following:
*Although audio generation shares commonalities across different types of audio, such as speech, music, and sound effects, designing models for each type requires careful consideration of specific objectives and biases that can significantly differ from those of other types. To bring us closer to a unified perspective of audio generation, this paper proposes a framework that utilizes the same learning method for speech, music, and sound effect generation. Our framework introduces a general representation of audio, called "language of audio" (LOA). Any audio can be translated into LOA based on AudioMAE, a self-supervised pre-trained representation learning model. In the generation process, we translate any modalities into LOA by using a GPT-2 model, and we perform self-supervised audio generation learning with a latent diffusion model conditioned on LOA. The proposed framework naturally brings advantages such as in-context learning abilities and reusable self-supervised pretrained AudioMAE and latent diffusion models. Experiments on the major benchmarks of text-to-audio, text-to-music, and text-to-speech demonstrate state-of-the-art or competitive performance against previous approaches. Our code, pretrained model, and demo are available at [this https URL](https://audioldm.github.io/audioldm2).*
This pipeline was contributed by [sanchit-gandhi](https://huggingface.co/sanchit-gandhi) and [Nguyễn Công Tú Anh](https://github.com/tuanh123789). The original codebase can be
found at [haoheliu/audioldm2](https://github.com/haoheliu/audioldm2).
## Tips
### Choosing a checkpoint
AudioLDM2 comes in three variants. Two of these checkpoints are applicable to the general task of text-to-audio generation. The third checkpoint is trained exclusively on text-to-music generation.
All checkpoints share the same model size for the text encoders and VAE. They differ in the size and depth of the UNet.
See table below for details on the three checkpoints:
| Checkpoint | Task | UNet Model Size | Total Model Size | Training Data / h |
|-----------------------------------------------------------------|---------------|-----------------|------------------|-------------------|
| [audioldm2](https://huggingface.co/cvssp/audioldm2) | Text-to-audio | 350M | 1.1B | 1150k |
| [audioldm2-large](https://huggingface.co/cvssp/audioldm2-large) | Text-to-audio | 750M | 1.5B | 1150k |
| [audioldm2-music](https://huggingface.co/cvssp/audioldm2-music) | Text-to-music | 350M | 1.1B | 665k |
| [audioldm2-gigaspeech](https://huggingface.co/anhnct/audioldm2_gigaspeech) | Text-to-speech | 350M | 1.1B |10k |
| [audioldm2-ljspeech](https://huggingface.co/anhnct/audioldm2_ljspeech) | Text-to-speech | 350M | 1.1B | |
### Constructing a prompt
* Descriptive prompt inputs work best: use adjectives to describe the sound (e.g. "high quality" or "clear") and make the prompt context specific (e.g. "water stream in a forest" instead of "stream").
* It's best to use general terms like "cat" or "dog" instead of specific names or abstract objects the model may not be familiar with.
* Using a **negative prompt** can significantly improve the quality of the generated waveform, by guiding the generation away from terms that correspond to poor quality audio. Try using a negative prompt of "Low quality."
### Controlling inference
* The _quality_ of the predicted audio sample can be controlled by the `num_inference_steps` argument; higher steps give higher quality audio at the expense of slower inference.
* The _length_ of the predicted audio sample can be controlled by varying the `audio_length_in_s` argument.
### Evaluating generated waveforms:
* The quality of the generated waveforms can vary significantly based on the seed. Try generating with different seeds until you find a satisfactory generation.
* Multiple waveforms can be generated in one go: set `num_waveforms_per_prompt` to a value greater than 1. Automatic scoring will be performed between the generated waveforms and prompt text, and the audios ranked from best to worst accordingly.
The following example demonstrates how to construct good music and speech generation using the aforementioned tips: [example](https://huggingface.co/docs/diffusers/main/en/api/pipelines/audioldm2#diffusers.AudioLDM2Pipeline.__call__.example).
Make sure to check out the Schedulers [guide](../../using-diffusers/schedulers) to learn how to explore the tradeoff between scheduler speed and quality, and see the [reuse components across pipelines](../../using-diffusers/loading#reuse-components-across-pipelines) section to learn how to efficiently load the same components into multiple pipelines.
## AudioLDM2Pipeline
## AudioLDM2ProjectionModel
## AudioLDM2UNet2DConditionModel
## AudioPipelineOutput
[[autodoc]] AudioLDM2Pipeline
- all
- __call__
[[autodoc]] AudioLDM2ProjectionModel
- forward
[[autodoc]] AudioLDM2UNet2DConditionModel
- forward
[[autodoc]] pipelines.AudioPipelineOutput
# Latent Diffusion
Latent Diffusion was proposed in [High-Resolution Image Synthesis with Latent Diffusion Models](https://huggingface.co/papers/2112.10752) by Robin Rombach, Andreas Blattmann, Dominik Lorenz, Patrick Esser, Björn Ommer.
The abstract from the paper is:
*By decomposing the image formation process into a sequential application of denoising autoencoders, diffusion models (DMs) achieve state-of-the-art synthesis results on image data and beyond. Additionally, their formulation allows for a guiding mechanism to control the image generation process without retraining. However, since these models typically operate directly in pixel space, optimization of powerful DMs often consumes hundreds of GPU days and inference is expensive due to sequential evaluations. To enable DM training on limited computational resources while retaining their quality and flexibility, we apply them in the latent space of powerful pretrained autoencoders. In contrast to previous work, training diffusion models on such a representation allows for the first time to reach a near-optimal point between complexity reduction and detail preservation, greatly boosting visual fidelity. By introducing cross-attention layers into the model architecture, we turn diffusion models into powerful and flexible generators for general conditioning inputs such as text or bounding boxes and high-resolution synthesis becomes possible in a convolutional manner. Our latent diffusion models (LDMs) achieve a new state of the art for image inpainting and highly competitive performance on various tasks, including unconditional image generation, semantic scene synthesis, and super-resolution, while significantly reducing computational requirements compared to pixel-based DMs.*
The original codebase can be found at [CompVis/latent-diffusion](https://github.com/CompVis/latent-diffusion).
Make sure to check out the Schedulers [guide](../../using-diffusers/schedulers) to learn how to explore the tradeoff between scheduler speed and quality, and see the [reuse components across pipelines](../../using-diffusers/loading#reuse-components-across-pipelines) section to learn how to efficiently load the same components into multiple pipelines.
## LDMTextToImagePipeline
## LDMSuperResolutionPipeline
## ImagePipelineOutput
[[autodoc]] LDMTextToImagePipeline
- all
- __call__
[[autodoc]] LDMSuperResolutionPipeline
- all
- __call__
[[autodoc]] pipelines.ImagePipelineOutput
# ControlNet with Hunyuan-DiT
HunyuanDiTControlNetPipeline is an implementation of ControlNet for [Hunyuan-DiT](https://arxiv.org/abs/2405.08748).
ControlNet was introduced in [Adding Conditional Control to Text-to-Image Diffusion Models](https://huggingface.co/papers/2302.05543) by Lvmin Zhang, Anyi Rao, and Maneesh Agrawala.
With a ControlNet model, you can provide an additional control image to condition and control Hunyuan-DiT generation. For example, if you provide a depth map, the ControlNet model generates an image that'll preserve the spatial information from the depth map. It is a more flexible and accurate way to control the image generation process.
The abstract from the paper is:
*We present ControlNet, a neural network architecture to add spatial conditioning controls to large, pretrained text-to-image diffusion models. ControlNet locks the production-ready large diffusion models, and reuses their deep and robust encoding layers pretrained with billions of images as a strong backbone to learn a diverse set of conditional controls. The neural architecture is connected with "zero convolutions" (zero-initialized convolution layers) that progressively grow the parameters from zero and ensure that no harmful noise could affect the finetuning. We test various conditioning controls, eg, edges, depth, segmentation, human pose, etc, with Stable Diffusion, using single or multiple conditions, with or without prompts. We show that the training of ControlNets is robust with small (<50k) and large (>1m) datasets. Extensive results show that ControlNet may facilitate wider applications to control image diffusion models.*
This code is implemented by Tencent Hunyuan Team. You can find pre-trained checkpoints for Hunyuan-DiT ControlNets on [Tencent Hunyuan](https://huggingface.co/Tencent-Hunyuan).
Make sure to check out the Schedulers [guide](../../using-diffusers/schedulers) to learn how to explore the tradeoff between scheduler speed and quality, and see the [reuse components across pipelines](../../using-diffusers/loading#reuse-components-across-pipelines) section to learn how to efficiently load the same components into multiple pipelines.
## HunyuanDiTControlNetPipeline
[[autodoc]] HunyuanDiTControlNetPipeline
- all
- __call__
# Semantic Guidance
Semantic Guidance for Diffusion Models was proposed in [SEGA: Instructing Text-to-Image Models using Semantic Guidance](https://huggingface.co/papers/2301.12247) and provides strong semantic control over image generation.
Small changes to the text prompt usually result in entirely different output images. However, with SEGA a variety of changes to the image are enabled that can be controlled easily and intuitively, while staying true to the original image composition.
The abstract from the paper is:
*Text-to-image diffusion models have recently received a lot of interest for their astonishing ability to produce high-fidelity images from text only. However, achieving one-shot generation that aligns with the user's intent is nearly impossible, yet small changes to the input prompt often result in very different images. This leaves the user with little semantic control. To put the user in control, we show how to interact with the diffusion process to flexibly steer it along semantic directions. This semantic guidance (SEGA) generalizes to any generative architecture using classifier-free guidance. More importantly, it allows for subtle and extensive edits, changes in composition and style, as well as optimizing the overall artistic conception. We demonstrate SEGA's effectiveness on both latent and pixel-based diffusion models such as Stable Diffusion, Paella, and DeepFloyd-IF using a variety of tasks, thus providing strong evidence for its versatility, flexibility, and improvements over existing methods.*
Make sure to check out the Schedulers [guide](../../using-diffusers/schedulers) to learn how to explore the tradeoff between scheduler speed and quality, and see the [reuse components across pipelines](../../using-diffusers/loading#reuse-components-across-pipelines) section to learn how to efficiently load the same components into multiple pipelines.
## SemanticStableDiffusionPipeline
## SemanticStableDiffusionPipelineOutput
[[autodoc]] SemanticStableDiffusionPipeline
- all
- __call__
[[autodoc]] pipelines.semantic_stable_diffusion.pipeline_output.SemanticStableDiffusionPipelineOutput
- all
# DiffEdit
[DiffEdit: Diffusion-based semantic image editing with mask guidance](https://huggingface.co/papers/2210.11427) is by Guillaume Couairon, Jakob Verbeek, Holger Schwenk, and Matthieu Cord.
The abstract from the paper is:
*Image generation has recently seen tremendous advances, with diffusion models allowing to synthesize convincing images for a large variety of text prompts. In this article, we propose DiffEdit, a method to take advantage of text-conditioned diffusion models for the task of semantic image editing, where the goal is to edit an image based on a text query. Semantic image editing is an extension of image generation, with the additional constraint that the generated image should be as similar as possible to a given input image. Current editing methods based on diffusion models usually require to provide a mask, making the task much easier by treating it as a conditional inpainting task. In contrast, our main contribution is able to automatically generate a mask highlighting regions of the input image that need to be edited, by contrasting predictions of a diffusion model conditioned on different text prompts. Moreover, we rely on latent inference to preserve content in those regions of interest and show excellent synergies with mask-based diffusion. DiffEdit achieves state-of-the-art editing performance on ImageNet. In addition, we evaluate semantic image editing in more challenging settings, using images from the COCO dataset as well as text-based generated images.*
The original codebase can be found at [Xiang-cd/DiffEdit-stable-diffusion](https://github.com/Xiang-cd/DiffEdit-stable-diffusion), and you can try it out in this [demo](https://blog.problemsolversguild.com/technical/research/2022/11/02/DiffEdit-Implementation.html).
This pipeline was contributed by [clarencechen](https://github.com/clarencechen). ❤️
## Tips
* The pipeline can generate masks that can be fed into other inpainting pipelines.
* In order to generate an image using this pipeline, both an image mask (source and target prompts can be manually specified or generated, and passed to `generate_mask()`)
and a set of partially inverted latents (generated using `invert()`) _must_ be provided as arguments when calling the pipeline to generate the final edited image.
* The function `generate_mask()` exposes two prompt arguments, `source_prompt` and `target_prompt`
that let you control the locations of the semantic edits in the final image to be generated. Let's say,
you wanted to translate from "cat" to "dog". In this case, the edit direction will be "cat -> dog". To reflect
this in the generated mask, you simply have to set the embeddings related to the phrases including "cat" to
`source_prompt` and "dog" to `target_prompt`.
* When generating partially inverted latents using `invert`, assign a caption or text embedding describing the
overall image to the `prompt` argument to help guide the inverse latent sampling process. In most cases, the
source concept is sufficiently descriptive to yield good results, but feel free to explore alternatives.
* When calling the pipeline to generate the final edited image, assign the source concept to `negative_prompt`
and the target concept to `prompt`. Taking the above example, you simply have to set the embeddings related to
the phrases including "cat" to `negative_prompt` and "dog" to `prompt`.
* If you wanted to reverse the direction in the example above, i.e., "dog -> cat", then it's recommended to:
* Swap the `source_prompt` and `target_prompt` in the arguments to `generate_mask`.
* Change the input prompt in `invert()` to include "dog".
* Swap the `prompt` and `negative_prompt` in the arguments to call the pipeline to generate the final edited image.
* The source and target prompts, or their corresponding embeddings, can also be automatically generated. Please refer to the [DiffEdit](../../using-diffusers/diffedit) guide for more details.
## StableDiffusionDiffEditPipeline
## StableDiffusionPipelineOutput
[[autodoc]] StableDiffusionDiffEditPipeline
- all
- generate_mask
- invert
- __call__
[[autodoc]] pipelines.stable_diffusion.StableDiffusionPipelineOutput
# Marigold Pipelines for Computer Vision Tasks
![marigold](https://marigoldmonodepth.github.io/images/teaser_collage_compressed.jpg)
Marigold was proposed in [Repurposing Diffusion-Based Image Generators for Monocular Depth Estimation](https://huggingface.co/papers/2312.02145), a CVPR 2024 Oral paper by [Bingxin Ke](http://www.kebingxin.com/), [Anton Obukhov](https://www.obukhov.ai/), [Shengyu Huang](https://shengyuh.github.io/), [Nando Metzger](https://nandometzger.github.io/), [Rodrigo Caye Daudt](https://rcdaudt.github.io/), and [Konrad Schindler](https://scholar.google.com/citations?user=FZuNgqIAAAAJ&hl=en).
The idea is to repurpose the rich generative prior of Text-to-Image Latent Diffusion Models (LDMs) for traditional computer vision tasks.
Initially, this idea was explored to fine-tune Stable Diffusion for Monocular Depth Estimation, as shown in the teaser above.
Later,
- [Tianfu Wang](https://tianfwang.github.io/) trained the first Latent Consistency Model (LCM) of Marigold, which unlocked fast single-step inference;
- [Kevin Qu](https://www.linkedin.com/in/kevin-qu-b3417621b/?locale=en_US) extended the approach to Surface Normals Estimation;
- [Anton Obukhov](https://www.obukhov.ai/) contributed the pipelines and documentation into diffusers (enabled and supported by [YiYi Xu](https://yiyixuxu.github.io/) and [Sayak Paul](https://sayak.dev/)).
The abstract from the paper is:
*Monocular depth estimation is a fundamental computer vision task. Recovering 3D depth from a single image is geometrically ill-posed and requires scene understanding, so it is not surprising that the rise of deep learning has led to a breakthrough. The impressive progress of monocular depth estimators has mirrored the growth in model capacity, from relatively modest CNNs to large Transformer architectures. Still, monocular depth estimators tend to struggle when presented with images with unfamiliar content and layout, since their knowledge of the visual world is restricted by the data seen during training, and challenged by zero-shot generalization to new domains. This motivates us to explore whether the extensive priors captured in recent generative diffusion models can enable better, more generalizable depth estimation. We introduce Marigold, a method for affine-invariant monocular depth estimation that is derived from Stable Diffusion and retains its rich prior knowledge. The estimator can be fine-tuned in a couple of days on a single GPU using only synthetic training data. It delivers state-of-the-art performance across a wide range of datasets, including over 20% performance gains in specific cases. Project page: https://marigoldmonodepth.github.io.*
## Available Pipelines
Each pipeline supports one Computer Vision task, which takes an input RGB image as input and produces a *prediction* of the modality of interest, such as a depth map of the input image.
Currently, the following tasks are implemented:
| Pipeline | Predicted Modalities | Demos |
|---------------------------------------------------------------------------------------------------------------------------------------------|------------------------------------------------------------------------------------------------------------------|:--------------------------------------------------------------------------------------------------------------------------------------------------:|
| [MarigoldDepthPipeline](https://github.com/huggingface/diffusers/blob/main/src/diffusers/pipelines/marigold/pipeline_marigold_depth.py) | [Depth](https://en.wikipedia.org/wiki/Depth_map), [Disparity](https://en.wikipedia.org/wiki/Binocular_disparity) | [Fast Demo (LCM)](https://huggingface.co/spaces/prs-eth/marigold-lcm), [Slow Original Demo (DDIM)](https://huggingface.co/spaces/prs-eth/marigold) |
| [MarigoldNormalsPipeline](https://github.com/huggingface/diffusers/blob/main/src/diffusers/pipelines/marigold/pipeline_marigold_normals.py) | [Surface normals](https://en.wikipedia.org/wiki/Normal_mapping) | [Fast Demo (LCM)](https://huggingface.co/spaces/prs-eth/marigold-normals-lcm) |
## Available Checkpoints
The original checkpoints can be found under the [PRS-ETH](https://huggingface.co/prs-eth/) Hugging Face organization.
Make sure to check out the Schedulers [guide](../../using-diffusers/schedulers) to learn how to explore the tradeoff between scheduler speed and quality, and see the [reuse components across pipelines](../../using-diffusers/loading#reuse-components-across-pipelines) section to learn how to efficiently load the same components into multiple pipelines. Also, to know more about reducing the memory usage of this pipeline, refer to the ["Reduce memory usage"] section [here](../../using-diffusers/svd#reduce-memory-usage).
Marigold pipelines were designed and tested only with `DDIMScheduler` and `LCMScheduler`.
Depending on the scheduler, the number of inference steps required to get reliable predictions varies, and there is no universal value that works best across schedulers.
Because of that, the default value of `num_inference_steps` in the `__call__` method of the pipeline is set to `None` (see the API reference).
Unless set explicitly, its value will be taken from the checkpoint configuration `model_index.json`.
This is done to ensure high-quality predictions when calling the pipeline with just the `image` argument.
See also Marigold [usage examples](marigold_usage).
## MarigoldDepthPipeline
## MarigoldNormalsPipeline
## MarigoldDepthOutput
## MarigoldNormalsOutput
[[autodoc]] MarigoldDepthPipeline
- all
- __call__
[[autodoc]] MarigoldNormalsPipeline
- all
- __call__
[[autodoc]] pipelines.marigold.pipeline_marigold_depth.MarigoldDepthOutput
[[autodoc]] pipelines.marigold.pipeline_marigold_normals.MarigoldNormalsOutput
# ControlNet-XS
ControlNet-XS was introduced in [ControlNet-XS](https://vislearn.github.io/ControlNet-XS/) by Denis Zavadski and Carsten Rother. It is based on the observation that the control model in the [original ControlNet](https://huggingface.co/papers/2302.05543) can be made much smaller and still produce good results.
Like the original ControlNet model, you can provide an additional control image to condition and control Stable Diffusion generation. For example, if you provide a depth map, the ControlNet model generates an image that'll preserve the spatial information from the depth map. It is a more flexible and accurate way to control the image generation process.
ControlNet-XS generates images with comparable quality to a regular ControlNet, but it is 20-25% faster ([see benchmark](https://github.com/UmerHA/controlnet-xs-benchmark/blob/main/Speed%20Benchmark.ipynb) with StableDiffusion-XL) and uses ~45% less memory.
Here's the overview from the [project page](https://vislearn.github.io/ControlNet-XS/):
*With increasing computing capabilities, current model architectures appear to follow the trend of simply upscaling all components without validating the necessity for doing so. In this project we investigate the size and architectural design of ControlNet [Zhang et al., 2023] for controlling the image generation process with stable diffusion-based models. We show that a new architecture with as little as 1% of the parameters of the base model achieves state-of-the art results, considerably better than ControlNet in terms of FID score. Hence we call it ControlNet-XS. We provide the code for controlling StableDiffusion-XL [Podell et al., 2023] (Model B, 48M Parameters) and StableDiffusion 2.1 [Rombach et al. 2022] (Model B, 14M Parameters), all under openrail license.*
This model was contributed by [UmerHA](https://twitter.com/UmerHAdil). ❤️
Make sure to check out the Schedulers [guide](../../using-diffusers/schedulers) to learn how to explore the tradeoff between scheduler speed and quality, and see the [reuse components across pipelines](../../using-diffusers/loading#reuse-components-across-pipelines) section to learn how to efficiently load the same components into multiple pipelines.
## StableDiffusionControlNetXSPipeline
## StableDiffusionPipelineOutput
[[autodoc]] StableDiffusionControlNetXSPipeline
- all
- __call__
[[autodoc]] pipelines.stable_diffusion.StableDiffusionPipelineOutput
# PixArt-Σ
![](https://huggingface.co/datasets/huggingface/documentation-images/resolve/main/diffusers/pixart/header_collage_sigma.jpg)
[PixArt-Σ: Weak-to-Strong Training of Diffusion Transformer for 4K Text-to-Image Generation](https://huggingface.co/papers/2403.04692) is Junsong Chen, Jincheng Yu, Chongjian Ge, Lewei Yao, Enze Xie, Yue Wu, Zhongdao Wang, James Kwok, Ping Luo, Huchuan Lu, and Zhenguo Li.
The abstract from the paper is:
*In this paper, we introduce PixArt-Σ, a Diffusion Transformer model (DiT) capable of directly generating images at 4K resolution. PixArt-Σ represents a significant advancement over its predecessor, PixArt-α, offering images of markedly higher fidelity and improved alignment with text prompts. A key feature of PixArt-Σ is its training efficiency. Leveraging the foundational pre-training of PixArt-α, it evolves from the ‘weaker’ baseline to a ‘stronger’ model via incorporating higher quality data, a process we term “weak-to-strong training”. The advancements in PixArt-Σ are twofold: (1) High-Quality Training Data: PixArt-Σ incorporates superior-quality image data, paired with more precise and detailed image captions. (2) Efficient Token Compression: we propose a novel attention module within the DiT framework that compresses both keys and values, significantly improving efficiency and facilitating ultra-high-resolution image generation. Thanks to these improvements, PixArt-Σ achieves superior image quality and user prompt adherence capabilities with significantly smaller model size (0.6B parameters) than existing text-to-image diffusion models, such as SDXL (2.6B parameters) and SD Cascade (5.1B parameters). Moreover, PixArt-Σ’s capability to generate 4K images supports the creation of high-resolution posters and wallpapers, efficiently bolstering the production of highquality visual content in industries such as film and gaming.*
You can find the original codebase at [PixArt-alpha/PixArt-sigma](https://github.com/PixArt-alpha/PixArt-sigma) and all the available checkpoints at [PixArt-alpha](https://huggingface.co/PixArt-alpha).
Some notes about this pipeline:
* It uses a Transformer backbone (instead of a UNet) for denoising. As such it has a similar architecture as [DiT](https://hf.co/docs/transformers/model_doc/dit).
* It was trained using text conditions computed from T5. This aspect makes the pipeline better at following complex text prompts with intricate details.
* It is good at producing high-resolution images at different aspect ratios. To get the best results, the authors recommend some size brackets which can be found [here](https://github.com/PixArt-alpha/PixArt-sigma/blob/master/diffusion/data/datasets/utils.py).
* It rivals the quality of state-of-the-art text-to-image generation systems (as of this writing) such as PixArt-α, Stable Diffusion XL, Playground V2.0 and DALL-E 3, while being more efficient than them.
* It shows the ability of generating super high resolution images, such as 2048px or even 4K.
* It shows that text-to-image models can grow from a weak model to a stronger one through several improvements (VAEs, datasets, and so on.)
Make sure to check out the Schedulers [guide](../../using-diffusers/schedulers) to learn how to explore the tradeoff between scheduler speed and quality, and see the [reuse components across pipelines](../../using-diffusers/loading#reuse-a-pipeline) section to learn how to efficiently load the same components into multiple pipelines.
You can further improve generation quality by passing the generated image from `PixArtSigmaPipeline` to the [SDXL refiner](../../using-diffusers/sdxl#base-to-refiner-model) model.
## Inference with under 8GB GPU VRAM
Run the `PixArtSigmaPipeline` with under 8GB GPU VRAM by loading the text encoder in 8-bit precision. Let's walk through a full-fledged example.
First, install the [bitsandbytes](https://github.com/TimDettmers/bitsandbytes) library:
```bash
pip install -U bitsandbytes
```
Then load the text encoder in 8-bit:
```python
from transformers import T5EncoderModel
from diffusers import PixArtSigmaPipeline
import torch
text_encoder = T5EncoderModel.from_pretrained(
"PixArt-alpha/PixArt-Sigma-XL-2-1024-MS",
subfolder="text_encoder",
load_in_8bit=True,
device_map="auto",
)
pipe = PixArtSigmaPipeline.from_pretrained(
"PixArt-alpha/PixArt-Sigma-XL-2-1024-MS",
text_encoder=text_encoder,
transformer=None,
device_map="balanced"
)
```
Now, use the `pipe` to encode a prompt:
```python
with torch.no_grad():
prompt = "cute cat"
prompt_embeds, prompt_attention_mask, negative_embeds, negative_prompt_attention_mask = pipe.encode_prompt(prompt)
```
Since text embeddings have been computed, remove the `text_encoder` and `pipe` from the memory, and free up some GPU VRAM:
```python
import gc
def flush():
gc.collect()
torch.cuda.empty_cache()
del text_encoder
del pipe
flush()
```
Then compute the latents with the prompt embeddings as inputs:
```python
pipe = PixArtSigmaPipeline.from_pretrained(
"PixArt-alpha/PixArt-Sigma-XL-2-1024-MS",
text_encoder=None,
torch_dtype=torch.float16,
).to("cuda")
latents = pipe(
negative_prompt=None,
prompt_embeds=prompt_embeds,
negative_prompt_embeds=negative_embeds,
prompt_attention_mask=prompt_attention_mask,
negative_prompt_attention_mask=negative_prompt_attention_mask,
num_images_per_prompt=1,
output_type="latent",
).images
del pipe.transformer
flush()
```
Notice that while initializing `pipe`, you're setting `text_encoder` to `None` so that it's not loaded.
Once the latents are computed, pass it off to the VAE to decode into a real image:
```python
with torch.no_grad():
image = pipe.vae.decode(latents / pipe.vae.config.scaling_factor, return_dict=False)[0]
image = pipe.image_processor.postprocess(image, output_type="pil")[0]
image.save("cat.png")
```
By deleting components you aren't using and flushing the GPU VRAM, you should be able to run `PixArtSigmaPipeline` with under 8GB GPU VRAM.
![](https://huggingface.co/datasets/huggingface/documentation-images/resolve/main/diffusers/pixart/8bits_cat.png)
If you want a report of your memory-usage, run this [script](https://gist.github.com/sayakpaul/3ae0f847001d342af27018a96f467e4e).
Text embeddings computed in 8-bit can impact the quality of the generated images because of the information loss in the representation space caused by the reduced precision. It's recommended to compare the outputs with and without 8-bit.
While loading the `text_encoder`, you set `load_in_8bit` to `True`. You could also specify `load_in_4bit` to bring your memory requirements down even further to under 7GB.
## PixArtSigmaPipeline
[[autodoc]] PixArtSigmaPipeline
- all
- __call__
# UniDiffuser
The UniDiffuser model was proposed in [One Transformer Fits All Distributions in Multi-Modal Diffusion at Scale](https://huggingface.co/papers/2303.06555) by Fan Bao, Shen Nie, Kaiwen Xue, Chongxuan Li, Shi Pu, Yaole Wang, Gang Yue, Yue Cao, Hang Su, Jun Zhu.
The abstract from the paper is:
*This paper proposes a unified diffusion framework (dubbed UniDiffuser) to fit all distributions relevant to a set of multi-modal data in one model. Our key insight is -- learning diffusion models for marginal, conditional, and joint distributions can be unified as predicting the noise in the perturbed data, where the perturbation levels (i.e. timesteps) can be different for different modalities. Inspired by the unified view, UniDiffuser learns all distributions simultaneously with a minimal modification to the original diffusion model -- perturbs data in all modalities instead of a single modality, inputs individual timesteps in different modalities, and predicts the noise of all modalities instead of a single modality. UniDiffuser is parameterized by a transformer for diffusion models to handle input types of different modalities. Implemented on large-scale paired image-text data, UniDiffuser is able to perform image, text, text-to-image, image-to-text, and image-text pair generation by setting proper timesteps without additional overhead. In particular, UniDiffuser is able to produce perceptually realistic samples in all tasks and its quantitative results (e.g., the FID and CLIP score) are not only superior to existing general-purpose models but also comparable to the bespoken models (e.g., Stable Diffusion and DALL-E 2) in representative tasks (e.g., text-to-image generation).*
You can find the original codebase at [thu-ml/unidiffuser](https://github.com/thu-ml/unidiffuser) and additional checkpoints at [thu-ml](https://huggingface.co/thu-ml).
There is currently an issue on PyTorch 1.X where the output images are all black or the pixel values become `NaNs`. This issue can be mitigated by switching to PyTorch 2.X.
This pipeline was contributed by [dg845](https://github.com/dg845). ❤️
## Usage Examples
Because the UniDiffuser model is trained to model the joint distribution of (image, text) pairs, it is capable of performing a diverse range of generation tasks:
### Unconditional Image and Text Generation
Unconditional generation (where we start from only latents sampled from a standard Gaussian prior) from a `UniDiffuserPipeline` will produce a (image, text) pair:
```python
import torch
from diffusers import UniDiffuserPipeline
device = "cuda"
model_id_or_path = "thu-ml/unidiffuser-v1"
pipe = UniDiffuserPipeline.from_pretrained(model_id_or_path, torch_dtype=torch.float16)
pipe.to(device)
# Unconditional image and text generation. The generation task is automatically inferred.
sample = pipe(num_inference_steps=20, guidance_scale=8.0)
image = sample.images[0]
text = sample.text[0]
image.save("unidiffuser_joint_sample_image.png")
print(text)
```
This is also called "joint" generation in the UniDiffuser paper, since we are sampling from the joint image-text distribution.
Note that the generation task is inferred from the inputs used when calling the pipeline.
It is also possible to manually specify the unconditional generation task ("mode") manually with `UniDiffuserPipeline.set_joint_mode()`:
```python
# Equivalent to the above.
pipe.set_joint_mode()
sample = pipe(num_inference_steps=20, guidance_scale=8.0)
```
When the mode is set manually, subsequent calls to the pipeline will use the set mode without attempting to infer the mode.
You can reset the mode with `UniDiffuserPipeline.reset_mode()`, after which the pipeline will once again infer the mode.
You can also generate only an image or only text (which the UniDiffuser paper calls "marginal" generation since we sample from the marginal distribution of images and text, respectively):
```python
# Unlike other generation tasks, image-only and text-only generation don't use classifier-free guidance
# Image-only generation
pipe.set_image_mode()
sample_image = pipe(num_inference_steps=20).images[0]
# Text-only generation
pipe.set_text_mode()
sample_text = pipe(num_inference_steps=20).text[0]
```
### Text-to-Image Generation
UniDiffuser is also capable of sampling from conditional distributions; that is, the distribution of images conditioned on a text prompt or the distribution of texts conditioned on an image.
Here is an example of sampling from the conditional image distribution (text-to-image generation or text-conditioned image generation):
```python
import torch
from diffusers import UniDiffuserPipeline
device = "cuda"
model_id_or_path = "thu-ml/unidiffuser-v1"
pipe = UniDiffuserPipeline.from_pretrained(model_id_or_path, torch_dtype=torch.float16)
pipe.to(device)
# Text-to-image generation
prompt = "an elephant under the sea"
sample = pipe(prompt=prompt, num_inference_steps=20, guidance_scale=8.0)
t2i_image = sample.images[0]
t2i_image
```
The `text2img` mode requires that either an input `prompt` or `prompt_embeds` be supplied. You can set the `text2img` mode manually with `UniDiffuserPipeline.set_text_to_image_mode()`.
### Image-to-Text Generation
Similarly, UniDiffuser can also produce text samples given an image (image-to-text or image-conditioned text generation):
```python
import torch
from diffusers import UniDiffuserPipeline
from diffusers.utils import load_image
device = "cuda"
model_id_or_path = "thu-ml/unidiffuser-v1"
pipe = UniDiffuserPipeline.from_pretrained(model_id_or_path, torch_dtype=torch.float16)
pipe.to(device)
# Image-to-text generation
image_url = "https://huggingface.co/datasets/hf-internal-testing/diffusers-images/resolve/main/unidiffuser/unidiffuser_example_image.jpg"
init_image = load_image(image_url).resize((512, 512))
sample = pipe(image=init_image, num_inference_steps=20, guidance_scale=8.0)
i2t_text = sample.text[0]
print(i2t_text)
```
The `img2text` mode requires that an input `image` be supplied. You can set the `img2text` mode manually with `UniDiffuserPipeline.set_image_to_text_mode()`.
### Image Variation
The UniDiffuser authors suggest performing image variation through a "round-trip" generation method, where given an input image, we first perform an image-to-text generation, and then perform a text-to-image generation on the outputs of the first generation.
This produces a new image which is semantically similar to the input image:
```python
import torch
from diffusers import UniDiffuserPipeline
from diffusers.utils import load_image
device = "cuda"
model_id_or_path = "thu-ml/unidiffuser-v1"
pipe = UniDiffuserPipeline.from_pretrained(model_id_or_path, torch_dtype=torch.float16)
pipe.to(device)
# Image variation can be performed with an image-to-text generation followed by a text-to-image generation:
# 1. Image-to-text generation
image_url = "https://huggingface.co/datasets/hf-internal-testing/diffusers-images/resolve/main/unidiffuser/unidiffuser_example_image.jpg"
init_image = load_image(image_url).resize((512, 512))
sample = pipe(image=init_image, num_inference_steps=20, guidance_scale=8.0)
i2t_text = sample.text[0]
print(i2t_text)
# 2. Text-to-image generation
sample = pipe(prompt=i2t_text, num_inference_steps=20, guidance_scale=8.0)
final_image = sample.images[0]
final_image.save("unidiffuser_image_variation_sample.png")
```
### Text Variation
Similarly, text variation can be performed on an input prompt with a text-to-image generation followed by a image-to-text generation:
```python
import torch
from diffusers import UniDiffuserPipeline
device = "cuda"
model_id_or_path = "thu-ml/unidiffuser-v1"
pipe = UniDiffuserPipeline.from_pretrained(model_id_or_path, torch_dtype=torch.float16)
pipe.to(device)
# Text variation can be performed with a text-to-image generation followed by a image-to-text generation:
# 1. Text-to-image generation
prompt = "an elephant under the sea"
sample = pipe(prompt=prompt, num_inference_steps=20, guidance_scale=8.0)
t2i_image = sample.images[0]
t2i_image.save("unidiffuser_text2img_sample_image.png")
# 2. Image-to-text generation
sample = pipe(image=t2i_image, num_inference_steps=20, guidance_scale=8.0)
final_prompt = sample.text[0]
print(final_prompt)
```
Make sure to check out the Schedulers [guide](../../using-diffusers/schedulers) to learn how to explore the tradeoff between scheduler speed and quality, and see the [reuse components across pipelines](../../using-diffusers/loading#reuse-components-across-pipelines) section to learn how to efficiently load the same components into multiple pipelines.
## UniDiffuserPipeline
## ImageTextPipelineOutput
[[autodoc]] UniDiffuserPipeline
- all
- __call__
[[autodoc]] pipelines.ImageTextPipelineOutput
# Allegro
[Allegro: Open the Black Box of Commercial-Level Video Generation Model](https://huggingface.co/papers/2410.15458) from RhymesAI, by Yuan Zhou, Qiuyue Wang, Yuxuan Cai, Huan Yang.
The abstract from the paper is:
*Significant advancements have been made in the field of video generation, with the open-source community contributing a wealth of research papers and tools for training high-quality models. However, despite these efforts, the available information and resources remain insufficient for achieving commercial-level performance. In this report, we open the black box and introduce Allegro, an advanced video generation model that excels in both quality and temporal consistency. We also highlight the current limitations in the field and present a comprehensive methodology for training high-performance, commercial-level video generation models, addressing key aspects such as data, model architecture, training pipeline, and evaluation. Our user study shows that Allegro surpasses existing open-source models and most commercial models, ranking just behind Hailuo and Kling. Code: https://github.com/rhymes-ai/Allegro , Model: https://huggingface.co/rhymes-ai/Allegro , Gallery: https://rhymes.ai/allegro_gallery .*
Make sure to check out the Schedulers [guide](../../using-diffusers/schedulers.md) to learn how to explore the tradeoff between scheduler speed and quality, and see the [reuse components across pipelines](../../using-diffusers/loading.md#reuse-a-pipeline) section to learn how to efficiently load the same components into multiple pipelines.
## AllegroPipeline
## AllegroPipelineOutput
[[autodoc]] AllegroPipeline
- all
- __call__
[[autodoc]] pipelines.allegro.pipeline_output.AllegroPipelineOutput
# BLIP-Diffusion
BLIP-Diffusion was proposed in [BLIP-Diffusion: Pre-trained Subject Representation for Controllable Text-to-Image Generation and Editing](https://arxiv.org/abs/2305.14720). It enables zero-shot subject-driven generation and control-guided zero-shot generation.
The abstract from the paper is:
*Subject-driven text-to-image generation models create novel renditions of an input subject based on text prompts. Existing models suffer from lengthy fine-tuning and difficulties preserving the subject fidelity. To overcome these limitations, we introduce BLIP-Diffusion, a new subject-driven image generation model that supports multimodal control which consumes inputs of subject images and text prompts. Unlike other subject-driven generation models, BLIP-Diffusion introduces a new multimodal encoder which is pre-trained to provide subject representation. We first pre-train the multimodal encoder following BLIP-2 to produce visual representation aligned with the text. Then we design a subject representation learning task which enables a diffusion model to leverage such visual representation and generates new subject renditions. Compared with previous methods such as DreamBooth, our model enables zero-shot subject-driven generation, and efficient fine-tuning for customized subject with up to 20x speedup. We also demonstrate that BLIP-Diffusion can be flexibly combined with existing techniques such as ControlNet and prompt-to-prompt to enable novel subject-driven generation and editing applications. Project page at [this https URL](https://dxli94.github.io/BLIP-Diffusion-website/).*
The original codebase can be found at [salesforce/LAVIS](https://github.com/salesforce/LAVIS/tree/main/projects/blip-diffusion). You can find the official BLIP-Diffusion checkpoints under the [hf.co/SalesForce](https://hf.co/SalesForce) organization.
`BlipDiffusionPipeline` and `BlipDiffusionControlNetPipeline` were contributed by [`ayushtues`](https://github.com/ayushtues/).
Make sure to check out the Schedulers [guide](../../using-diffusers/schedulers) to learn how to explore the tradeoff between scheduler speed and quality, and see the [reuse components across pipelines](../../using-diffusers/loading#reuse-components-across-pipelines) section to learn how to efficiently load the same components into multiple pipelines.
## BlipDiffusionPipeline
## BlipDiffusionControlNetPipeline
[[autodoc]] BlipDiffusionPipeline
- all
- __call__
[[autodoc]] BlipDiffusionControlNetPipeline
- all
- __call__
# Kandinsky 3
Kandinsky 3 is created by [Vladimir Arkhipkin](https://github.com/oriBetelgeuse),[Anastasia Maltseva](https://github.com/NastyaMittseva),[Igor Pavlov](https://github.com/boomb0om),[Andrei Filatov](https://github.com/anvilarth),[Arseniy Shakhmatov](https://github.com/cene555),[Andrey Kuznetsov](https://github.com/kuznetsoffandrey),[Denis Dimitrov](https://github.com/denndimitrov), [Zein Shaheen](https://github.com/zeinsh)
The description from it's GitHub page:
*Kandinsky 3.0 is an open-source text-to-image diffusion model built upon the Kandinsky2-x model family. In comparison to its predecessors, enhancements have been made to the text understanding and visual quality of the model, achieved by increasing the size of the text encoder and Diffusion U-Net models, respectively.*
Its architecture includes 3 main components:
1. [FLAN-UL2](https://huggingface.co/google/flan-ul2), which is an encoder decoder model based on the T5 architecture.
2. New U-Net architecture featuring BigGAN-deep blocks doubles depth while maintaining the same number of parameters.
3. Sber-MoVQGAN is a decoder proven to have superior results in image restoration.
The original codebase can be found at [ai-forever/Kandinsky-3](https://github.com/ai-forever/Kandinsky-3).
Check out the [Kandinsky Community](https://huggingface.co/kandinsky-community) organization on the Hub for the official model checkpoints for tasks like text-to-image, image-to-image, and inpainting.
Make sure to check out the schedulers [guide](../../using-diffusers/schedulers) to learn how to explore the tradeoff between scheduler speed and quality, and see the [reuse components across pipelines](../../using-diffusers/loading#reuse-components-across-pipelines) section to learn how to efficiently load the same components into multiple pipelines.
## Kandinsky3Pipeline
## Kandinsky3Img2ImgPipeline
[[autodoc]] Kandinsky3Pipeline
- all
- __call__
[[autodoc]] Kandinsky3Img2ImgPipeline
- all
- __call__
# K-Diffusion
[k-diffusion](https://github.com/crowsonkb/k-diffusion) is a popular library created by [Katherine Crowson](https://github.com/crowsonkb/). We provide `StableDiffusionKDiffusionPipeline` and `StableDiffusionXLKDiffusionPipeline` that allow you to run Stable DIffusion with samplers from k-diffusion.
Note that most the samplers from k-diffusion are implemented in Diffusers and we recommend using existing schedulers. You can find a mapping between k-diffusion samplers and schedulers in Diffusers [here](https://huggingface.co/docs/diffusers/api/schedulers/overview)
## StableDiffusionKDiffusionPipeline
## StableDiffusionXLKDiffusionPipeline
[[autodoc]] StableDiffusionKDiffusionPipeline
[[autodoc]] StableDiffusionXLKDiffusionPipeline
# GLIGEN (Grounded Language-to-Image Generation)
The GLIGEN model was created by researchers and engineers from [University of Wisconsin-Madison, Columbia University, and Microsoft](https://github.com/gligen/GLIGEN). The `StableDiffusionGLIGENPipeline` and `StableDiffusionGLIGENTextImagePipeline` can generate photorealistic images conditioned on grounding inputs. Along with text and bounding boxes with `StableDiffusionGLIGENPipeline`, if input images are given, `StableDiffusionGLIGENTextImagePipeline` can insert objects described by text at the region defined by bounding boxes. Otherwise, it'll generate an image described by the caption/prompt and insert objects described by text at the region defined by bounding boxes. It's trained on COCO2014D and COCO2014CD datasets, and the model uses a frozen CLIP ViT-L/14 text encoder to condition itself on grounding inputs.
The abstract from the [paper](https://huggingface.co/papers/2301.07093) is:
*Large-scale text-to-image diffusion models have made amazing advances. However, the status quo is to use text input alone, which can impede controllability. In this work, we propose GLIGEN, Grounded-Language-to-Image Generation, a novel approach that builds upon and extends the functionality of existing pre-trained text-to-image diffusion models by enabling them to also be conditioned on grounding inputs. To preserve the vast concept knowledge of the pre-trained model, we freeze all of its weights and inject the grounding information into new trainable layers via a gated mechanism. Our model achieves open-world grounded text2img generation with caption and bounding box condition inputs, and the grounding ability generalizes well to novel spatial configurations and concepts. GLIGEN’s zeroshot performance on COCO and LVIS outperforms existing supervised layout-to-image baselines by a large margin.*
Make sure to check out the Stable Diffusion [Tips](https://huggingface.co/docs/diffusers/en/api/pipelines/stable_diffusion/overview#tips) section to learn how to explore the tradeoff between scheduler speed and quality and how to reuse pipeline components efficiently!
If you want to use one of the official checkpoints for a task, explore the [gligen](https://huggingface.co/gligen) Hub organizations!
`StableDiffusionGLIGENPipeline` was contributed by [Nikhil Gajendrakumar](https://github.com/nikhil-masterful) and `StableDiffusionGLIGENTextImagePipeline` was contributed by [Nguyễn Công Tú Anh](https://github.com/tuanh123789).
## StableDiffusionGLIGENPipeline
## StableDiffusionGLIGENTextImagePipeline
## StableDiffusionPipelineOutput
[[autodoc]] StableDiffusionGLIGENPipeline
- all
- __call__
- enable_vae_slicing
- disable_vae_slicing
- enable_vae_tiling
- disable_vae_tiling
- enable_model_cpu_offload
- prepare_latents
- enable_fuser
[[autodoc]] StableDiffusionGLIGENTextImagePipeline
- all
- __call__
- enable_vae_slicing
- disable_vae_slicing
- enable_vae_tiling
- disable_vae_tiling
- enable_model_cpu_offload
- prepare_latents
- enable_fuser
[[autodoc]] pipelines.stable_diffusion.StableDiffusionPipelineOutput
# T2I-Adapter
[T2I-Adapter: Learning Adapters to Dig out More Controllable Ability for Text-to-Image Diffusion Models](https://arxiv.org/abs/2302.08453) by Chong Mou, Xintao Wang, Liangbin Xie, Jian Zhang, Zhongang Qi, Ying Shan, Xiaohu Qie.
Using the pretrained models we can provide control images (for example, a depth map) to control Stable Diffusion text-to-image generation so that it follows the structure of the depth image and fills in the details.
The abstract of the paper is the following:
*The incredible generative ability of large-scale text-to-image (T2I) models has demonstrated strong power of learning complex structures and meaningful semantics. However, relying solely on text prompts cannot fully take advantage of the knowledge learned by the model, especially when flexible and accurate controlling (e.g., color and structure) is needed. In this paper, we aim to ``dig out" the capabilities that T2I models have implicitly learned, and then explicitly use them to control the generation more granularly. Specifically, we propose to learn simple and lightweight T2I-Adapters to align internal knowledge in T2I models with external control signals, while freezing the original large T2I models. In this way, we can train various adapters according to different conditions, achieving rich control and editing effects in the color and structure of the generation results. Further, the proposed T2I-Adapters have attractive properties of practical value, such as composability and generalization ability. Extensive experiments demonstrate that our T2I-Adapter has promising generation quality and a wide range of applications.*
This model was contributed by the community contributor [HimariO](https://github.com/HimariO) ❤️ .
## StableDiffusionAdapterPipeline
## StableDiffusionXLAdapterPipeline
[[autodoc]] StableDiffusionAdapterPipeline
- all
- __call__
- enable_attention_slicing
- disable_attention_slicing
- enable_vae_slicing
- disable_vae_slicing
- enable_xformers_memory_efficient_attention
- disable_xformers_memory_efficient_attention
[[autodoc]] StableDiffusionXLAdapterPipeline
- all
- __call__
- enable_attention_slicing
- disable_attention_slicing
- enable_vae_slicing
- disable_vae_slicing
- enable_xformers_memory_efficient_attention
- disable_xformers_memory_efficient_attention
# SDXL Turbo
Stable Diffusion XL (SDXL) Turbo was proposed in [Adversarial Diffusion Distillation](https://stability.ai/research/adversarial-diffusion-distillation) by Axel Sauer, Dominik Lorenz, Andreas Blattmann, and Robin Rombach.
The abstract from the paper is:
*We introduce Adversarial Diffusion Distillation (ADD), a novel training approach that efficiently samples large-scale foundational image diffusion models in just 1–4 steps while maintaining high image quality. We use score distillation to leverage large-scale off-the-shelf image diffusion models as a teacher signal in combination with an adversarial loss to ensure high image fidelity even in the low-step regime of one or two sampling steps. Our analyses show that our model clearly outperforms existing few-step methods (GANs,Latent Consistency Models) in a single step and reaches the performance of state-of-the-art diffusion models (SDXL) in only four steps. ADD is the first method to unlock single-step, real-time image synthesis with foundation models.*
## Tips
- SDXL Turbo uses the exact same architecture as [SDXL](./stable_diffusion_xl), which means it also has the same API. Please refer to the [SDXL](./stable_diffusion_xl) API reference for more details.
- SDXL Turbo should disable guidance scale by setting `guidance_scale=0.0`.
- SDXL Turbo should use `timestep_spacing='trailing'` for the scheduler and use between 1 and 4 steps.
- SDXL Turbo has been trained to generate images of size 512x512.
- SDXL Turbo is open-access, but not open-source meaning that one might have to buy a model license in order to use it for commercial applications. Make sure to read the [official model card](https://huggingface.co/stabilityai/sdxl-turbo) to learn more.
To learn how to use SDXL Turbo for various tasks, how to optimize performance, and other usage examples, take a look at the [SDXL Turbo](../../../using-diffusers/sdxl_turbo) guide.
Check out the [Stability AI](https://huggingface.co/stabilityai) Hub organization for the official base and refiner model checkpoints!
# Super-resolution
The Stable Diffusion upscaler diffusion model was created by the researchers and engineers from [CompVis](https://github.com/CompVis), [Stability AI](https://stability.ai/), and [LAION](https://laion.ai/). It is used to enhance the resolution of input images by a factor of 4.
Make sure to check out the Stable Diffusion [Tips](overview#tips) section to learn how to explore the tradeoff between scheduler speed and quality, and how to reuse pipeline components efficiently!
If you're interested in using one of the official checkpoints for a task, explore the [CompVis](https://huggingface.co/CompVis), [Runway](https://huggingface.co/runwayml), and [Stability AI](https://huggingface.co/stabilityai) Hub organizations!
## StableDiffusionUpscalePipeline
## StableDiffusionPipelineOutput
[[autodoc]] StableDiffusionUpscalePipeline
- all
- __call__
- enable_attention_slicing
- disable_attention_slicing
- enable_xformers_memory_efficient_attention
- disable_xformers_memory_efficient_attention
[[autodoc]] pipelines.stable_diffusion.StableDiffusionPipelineOutput
# Depth-to-image
The Stable Diffusion model can also infer depth based on an image using [MiDaS](https://github.com/isl-org/MiDaS). This allows you to pass a text prompt and an initial image to condition the generation of new images as well as a `depth_map` to preserve the image structure.
Make sure to check out the Stable Diffusion [Tips](overview#tips) section to learn how to explore the tradeoff between scheduler speed and quality, and how to reuse pipeline components efficiently!
If you're interested in using one of the official checkpoints for a task, explore the [CompVis](https://huggingface.co/CompVis), [Runway](https://huggingface.co/runwayml), and [Stability AI](https://huggingface.co/stabilityai) Hub organizations!
## StableDiffusionDepth2ImgPipeline
## StableDiffusionPipelineOutput
[[autodoc]] StableDiffusionDepth2ImgPipeline
- all
- __call__
- enable_attention_slicing
- disable_attention_slicing
- enable_xformers_memory_efficient_attention
- disable_xformers_memory_efficient_attention
- load_textual_inversion
- load_lora_weights
- save_lora_weights
[[autodoc]] pipelines.stable_diffusion.StableDiffusionPipelineOutput
# Safe Stable Diffusion
Safe Stable Diffusion was proposed in [Safe Latent Diffusion: Mitigating Inappropriate Degeneration in Diffusion Models](https://huggingface.co/papers/2211.05105) and mitigates inappropriate degeneration from Stable Diffusion models because they're trained on unfiltered web-crawled datasets. For instance Stable Diffusion may unexpectedly generate nudity, violence, images depicting self-harm, and otherwise offensive content. Safe Stable Diffusion is an extension of Stable Diffusion that drastically reduces this type of content.
The abstract from the paper is:
*Text-conditioned image generation models have recently achieved astonishing results in image quality and text alignment and are consequently employed in a fast-growing number of applications. Since they are highly data-driven, relying on billion-sized datasets randomly scraped from the internet, they also suffer, as we demonstrate, from degenerated and biased human behavior. In turn, they may even reinforce such biases. To help combat these undesired side effects, we present safe latent diffusion (SLD). Specifically, to measure the inappropriate degeneration due to unfiltered and imbalanced training sets, we establish a novel image generation test bed-inappropriate image prompts (I2P)-containing dedicated, real-world image-to-text prompts covering concepts such as nudity and violence. As our exhaustive empirical evaluation demonstrates, the introduced SLD removes and suppresses inappropriate image parts during the diffusion process, with no additional training required and no adverse effect on overall image quality or text alignment.*
## Tips
Use the `safety_concept` property of `StableDiffusionPipelineSafe` to check and edit the current safety concept:
```python
>>> from diffusers import StableDiffusionPipelineSafe
>>> pipeline = StableDiffusionPipelineSafe.from_pretrained("AIML-TUDA/stable-diffusion-safe")
>>> pipeline.safety_concept
'an image showing hate, harassment, violence, suffering, humiliation, harm, suicide, sexual, nudity, bodily fluids, blood, obscene gestures, illegal activity, drug use, theft, vandalism, weapons, child abuse, brutality, cruelty'
```
For each image generation the active concept is also contained in `StableDiffusionSafePipelineOutput`.
There are 4 configurations (`SafetyConfig.WEAK`, `SafetyConfig.MEDIUM`, `SafetyConfig.STRONG`, and `SafetyConfig.MAX`) that can be applied:
```python
>>> from diffusers import StableDiffusionPipelineSafe
>>> from diffusers.pipelines.stable_diffusion_safe import SafetyConfig
>>> pipeline = StableDiffusionPipelineSafe.from_pretrained("AIML-TUDA/stable-diffusion-safe")
>>> prompt = "the four horsewomen of the apocalypse, painting by tom of finland, gaston bussiere, craig mullins, j. c. leyendecker"
>>> out = pipeline(prompt=prompt, **SafetyConfig.MAX)
```
Make sure to check out the Stable Diffusion [Tips](overview#tips) section to learn how to explore the tradeoff between scheduler speed and quality, and how to reuse pipeline components efficiently!
## StableDiffusionPipelineSafe
## StableDiffusionSafePipelineOutput
[[autodoc]] StableDiffusionPipelineSafe
- all
- __call__
[[autodoc]] pipelines.stable_diffusion_safe.StableDiffusionSafePipelineOutput
- all
- __call__
# Latent upscaler
The Stable Diffusion latent upscaler model was created by [Katherine Crowson](https://github.com/crowsonkb/k-diffusion) in collaboration with [Stability AI](https://stability.ai/). It is used to enhance the output image resolution by a factor of 2 (see this demo [notebook](https://colab.research.google.com/drive/1o1qYJcFeywzCIdkfKJy7cTpgZTCM2EI4) for a demonstration of the original implementation).
Make sure to check out the Stable Diffusion [Tips](overview#tips) section to learn how to explore the tradeoff between scheduler speed and quality, and how to reuse pipeline components efficiently!
If you're interested in using one of the official checkpoints for a task, explore the [CompVis](https://huggingface.co/CompVis), [Runway](https://huggingface.co/runwayml), and [Stability AI](https://huggingface.co/stabilityai) Hub organizations!
## StableDiffusionLatentUpscalePipeline
## StableDiffusionPipelineOutput
[[autodoc]] StableDiffusionLatentUpscalePipeline
- all
- __call__
- enable_sequential_cpu_offload
- enable_attention_slicing
- disable_attention_slicing
- enable_xformers_memory_efficient_attention
- disable_xformers_memory_efficient_attention
[[autodoc]] pipelines.stable_diffusion.StableDiffusionPipelineOutput
# Text-to-image
The Stable Diffusion model was created by researchers and engineers from [CompVis](https://github.com/CompVis), [Stability AI](https://stability.ai/), [Runway](https://github.com/runwayml), and [LAION](https://laion.ai/). The `StableDiffusionPipeline` is capable of generating photorealistic images given any text input. It's trained on 512x512 images from a subset of the LAION-5B dataset. This model uses a frozen CLIP ViT-L/14 text encoder to condition the model on text prompts. With its 860M UNet and 123M text encoder, the model is relatively lightweight and can run on consumer GPUs. Latent diffusion is the research on top of which Stable Diffusion was built. It was proposed in [High-Resolution Image Synthesis with Latent Diffusion Models](https://huggingface.co/papers/2112.10752) by Robin Rombach, Andreas Blattmann, Dominik Lorenz, Patrick Esser, Björn Ommer.
The abstract from the paper is:
*By decomposing the image formation process into a sequential application of denoising autoencoders, diffusion models (DMs) achieve state-of-the-art synthesis results on image data and beyond. Additionally, their formulation allows for a guiding mechanism to control the image generation process without retraining. However, since these models typically operate directly in pixel space, optimization of powerful DMs often consumes hundreds of GPU days and inference is expensive due to sequential evaluations. To enable DM training on limited computational resources while retaining their quality and flexibility, we apply them in the latent space of powerful pretrained autoencoders. In contrast to previous work, training diffusion models on such a representation allows for the first time to reach a near-optimal point between complexity reduction and detail preservation, greatly boosting visual fidelity. By introducing cross-attention layers into the model architecture, we turn diffusion models into powerful and flexible generators for general conditioning inputs such as text or bounding boxes and high-resolution synthesis becomes possible in a convolutional manner. Our latent diffusion models (LDMs) achieve a new state of the art for image inpainting and highly competitive performance on various tasks, including unconditional image generation, semantic scene synthesis, and super-resolution, while significantly reducing computational requirements compared to pixel-based DMs. Code is available at https://github.com/CompVis/latent-diffusion.*
Make sure to check out the Stable Diffusion [Tips](overview#tips) section to learn how to explore the tradeoff between scheduler speed and quality, and how to reuse pipeline components efficiently!
If you're interested in using one of the official checkpoints for a task, explore the [CompVis](https://huggingface.co/CompVis), [Runway](https://huggingface.co/runwayml), and [Stability AI](https://huggingface.co/stabilityai) Hub organizations!
## StableDiffusionPipeline
## StableDiffusionPipelineOutput
## FlaxStableDiffusionPipeline
## FlaxStableDiffusionPipelineOutput
[[autodoc]] StableDiffusionPipeline
- all
- __call__
- enable_attention_slicing
- disable_attention_slicing
- enable_vae_slicing
- disable_vae_slicing
- enable_xformers_memory_efficient_attention
- disable_xformers_memory_efficient_attention
- enable_vae_tiling
- disable_vae_tiling
- load_textual_inversion
- from_single_file
- load_lora_weights
- save_lora_weights
[[autodoc]] pipelines.stable_diffusion.StableDiffusionPipelineOutput
[[autodoc]] FlaxStableDiffusionPipeline
- all
- __call__
[[autodoc]] pipelines.stable_diffusion.FlaxStableDiffusionPipelineOutput
# Image variation
The Stable Diffusion model can also generate variations from an input image. It uses a fine-tuned version of a Stable Diffusion model by [Justin Pinkney](https://www.justinpinkney.com/) from [Lambda](https://lambdalabs.com/).
The original codebase can be found at [LambdaLabsML/lambda-diffusers](https://github.com/LambdaLabsML/lambda-diffusers#stable-diffusion-image-variations) and additional official checkpoints for image variation can be found at [lambdalabs/sd-image-variations-diffusers](https://huggingface.co/lambdalabs/sd-image-variations-diffusers).
Make sure to check out the Stable Diffusion [Tips](./overview#tips) section to learn how to explore the tradeoff between scheduler speed and quality, and how to reuse pipeline components efficiently!
## StableDiffusionImageVariationPipeline
## StableDiffusionPipelineOutput
[[autodoc]] StableDiffusionImageVariationPipeline
- all
- __call__
- enable_attention_slicing
- disable_attention_slicing
- enable_xformers_memory_efficient_attention
- disable_xformers_memory_efficient_attention
[[autodoc]] pipelines.stable_diffusion.StableDiffusionPipelineOutput
# Stable Video Diffusion
Stable Video Diffusion was proposed in [Stable Video Diffusion: Scaling Latent Video Diffusion Models to Large Datasets](https://hf.co/papers/2311.15127) by Andreas Blattmann, Tim Dockhorn, Sumith Kulal, Daniel Mendelevitch, Maciej Kilian, Dominik Lorenz, Yam Levi, Zion English, Vikram Voleti, Adam Letts, Varun Jampani, Robin Rombach.
The abstract from the paper is:
*We present Stable Video Diffusion - a latent video diffusion model for high-resolution, state-of-the-art text-to-video and image-to-video generation. Recently, latent diffusion models trained for 2D image synthesis have been turned into generative video models by inserting temporal layers and finetuning them on small, high-quality video datasets. However, training methods in the literature vary widely, and the field has yet to agree on a unified strategy for curating video data. In this paper, we identify and evaluate three different stages for successful training of video LDMs: text-to-image pretraining, video pretraining, and high-quality video finetuning. Furthermore, we demonstrate the necessity of a well-curated pretraining dataset for generating high-quality videos and present a systematic curation process to train a strong base model, including captioning and filtering strategies. We then explore the impact of finetuning our base model on high-quality data and train a text-to-video model that is competitive with closed-source video generation. We also show that our base model provides a powerful motion representation for downstream tasks such as image-to-video generation and adaptability to camera motion-specific LoRA modules. Finally, we demonstrate that our model provides a strong multi-view 3D-prior and can serve as a base to finetune a multi-view diffusion model that jointly generates multiple views of objects in a feedforward fashion, outperforming image-based methods at a fraction of their compute budget. We release code and model weights at this https URL.*
To learn how to use Stable Video Diffusion, take a look at the [Stable Video Diffusion](../../../using-diffusers/svd) guide.
Check out the [Stability AI](https://huggingface.co/stabilityai) Hub organization for the [base](https://huggingface.co/stabilityai/stable-video-diffusion-img2vid) and [extended frame](https://huggingface.co/stabilityai/stable-video-diffusion-img2vid-xt) checkpoints!
## Tips
Video generation is memory-intensive and one way to reduce your memory usage is to set `enable_forward_chunking` on the pipeline's UNet so you don't run the entire feedforward layer at once. Breaking it up into chunks in a loop is more efficient.
Check out the [Text or image-to-video](text-img2vid) guide for more details about how certain parameters can affect video generation and how to optimize inference by reducing memory usage.
## StableVideoDiffusionPipeline
## StableVideoDiffusionPipelineOutput
[[autodoc]] StableVideoDiffusionPipeline
[[autodoc]] pipelines.stable_video_diffusion.StableVideoDiffusionPipelineOutput
# Stable Diffusion 2
Stable Diffusion 2 is a text-to-image _latent diffusion_ model built upon the work of the original [Stable Diffusion](https://stability.ai/blog/stable-diffusion-public-release), and it was led by Robin Rombach and Katherine Crowson from [Stability AI](https://stability.ai/) and [LAION](https://laion.ai/).
*The Stable Diffusion 2.0 release includes robust text-to-image models trained using a brand new text encoder (OpenCLIP), developed by LAION with support from Stability AI, which greatly improves the quality of the generated images compared to earlier V1 releases. The text-to-image models in this release can generate images with default resolutions of both 512x512 pixels and 768x768 pixels.
These models are trained on an aesthetic subset of the [LAION-5B dataset](https://laion.ai/blog/laion-5b/) created by the DeepFloyd team at Stability AI, which is then further filtered to remove adult content using [LAION’s NSFW filter](https://openreview.net/forum?id=M3Y74vmsMcY).*
For more details about how Stable Diffusion 2 works and how it differs from the original Stable Diffusion, please refer to the official [announcement post](https://stability.ai/blog/stable-diffusion-v2-release).
The architecture of Stable Diffusion 2 is more or less identical to the original [Stable Diffusion model](./text2img) so check out it's API documentation for how to use Stable Diffusion 2. We recommend using the [DPMSolverMultistepScheduler](/docs/diffusers/main/en/api/schedulers/multistep_dpm_solver#diffusers.DPMSolverMultistepScheduler) as it gives a reasonable speed/quality trade-off and can be run with as little as 20 steps.
Stable Diffusion 2 is available for tasks like text-to-image, inpainting, super-resolution, and depth-to-image:
| Task | Repository |
|-------------------------|---------------------------------------------------------------------------------------------------------------|
| text-to-image (512x512) | [stabilityai/stable-diffusion-2-base](https://huggingface.co/stabilityai/stable-diffusion-2-base) |
| text-to-image (768x768) | [stabilityai/stable-diffusion-2](https://huggingface.co/stabilityai/stable-diffusion-2) |
| inpainting | [stabilityai/stable-diffusion-2-inpainting](https://huggingface.co/stabilityai/stable-diffusion-2-inpainting) |
| super-resolution | [stable-diffusion-x4-upscaler](https://huggingface.co/stabilityai/stable-diffusion-x4-upscaler) |
| depth-to-image | [stabilityai/stable-diffusion-2-depth](https://huggingface.co/stabilityai/stable-diffusion-2-depth) |
Here are some examples for how to use Stable Diffusion 2 for each task:
Make sure to check out the Stable Diffusion [Tips](overview#tips) section to learn how to explore the tradeoff between scheduler speed and quality, and how to reuse pipeline components efficiently!
If you're interested in using one of the official checkpoints for a task, explore the [CompVis](https://huggingface.co/CompVis), [Runway](https://huggingface.co/runwayml), and [Stability AI](https://huggingface.co/stabilityai) Hub organizations!
## Text-to-image
```py
from diffusers import DiffusionPipeline, DPMSolverMultistepScheduler
import torch
repo_id = "stabilityai/stable-diffusion-2-base"
pipe = DiffusionPipeline.from_pretrained(repo_id, torch_dtype=torch.float16, variant="fp16")
pipe.scheduler = DPMSolverMultistepScheduler.from_config(pipe.scheduler.config)
pipe = pipe.to("cuda")
prompt = "High quality photo of an astronaut riding a horse in space"
image = pipe(prompt, num_inference_steps=25).images[0]
image
```
## Inpainting
```py
import torch
from diffusers import DiffusionPipeline, DPMSolverMultistepScheduler
from diffusers.utils import load_image, make_image_grid
img_url = "https://raw.githubusercontent.com/CompVis/latent-diffusion/main/data/inpainting_examples/overture-creations-5sI6fQgYIuo.png"
mask_url = "https://raw.githubusercontent.com/CompVis/latent-diffusion/main/data/inpainting_examples/overture-creations-5sI6fQgYIuo_mask.png"
init_image = load_image(img_url).resize((512, 512))
mask_image = load_image(mask_url).resize((512, 512))
repo_id = "stabilityai/stable-diffusion-2-inpainting"
pipe = DiffusionPipeline.from_pretrained(repo_id, torch_dtype=torch.float16, variant="fp16")
pipe.scheduler = DPMSolverMultistepScheduler.from_config(pipe.scheduler.config)
pipe = pipe.to("cuda")
prompt = "Face of a yellow cat, high resolution, sitting on a park bench"
image = pipe(prompt=prompt, image=init_image, mask_image=mask_image, num_inference_steps=25).images[0]
make_image_grid([init_image, mask_image, image], rows=1, cols=3)
```
## Super-resolution
```py
from diffusers import StableDiffusionUpscalePipeline
from diffusers.utils import load_image, make_image_grid
import torch
# load model and scheduler
model_id = "stabilityai/stable-diffusion-x4-upscaler"
pipeline = StableDiffusionUpscalePipeline.from_pretrained(model_id, torch_dtype=torch.float16)
pipeline = pipeline.to("cuda")
# let's download an image
url = "https://huggingface.co/datasets/hf-internal-testing/diffusers-images/resolve/main/sd2-upscale/low_res_cat.png"
low_res_img = load_image(url)
low_res_img = low_res_img.resize((128, 128))
prompt = "a white cat"
upscaled_image = pipeline(prompt=prompt, image=low_res_img).images[0]
make_image_grid([low_res_img.resize((512, 512)), upscaled_image.resize((512, 512))], rows=1, cols=2)
```
## Depth-to-image
```py
import torch
from diffusers import StableDiffusionDepth2ImgPipeline
from diffusers.utils import load_image, make_image_grid
pipe = StableDiffusionDepth2ImgPipeline.from_pretrained(
"stabilityai/stable-diffusion-2-depth",
torch_dtype=torch.float16,
).to("cuda")
url = "http://images.cocodataset.org/val2017/000000039769.jpg"
init_image = load_image(url)
prompt = "two tigers"
negative_prompt = "bad, deformed, ugly, bad anotomy"
image = pipe(prompt=prompt, image=init_image, negative_prompt=negative_prompt, strength=0.7).images[0]
make_image_grid([init_image, image], rows=1, cols=2)
```
# Stable Diffusion pipelines
Stable Diffusion is a text-to-image latent diffusion model created by the researchers and engineers from [CompVis](https://github.com/CompVis), [Stability AI](https://stability.ai/) and [LAION](https://laion.ai/). Latent diffusion applies the diffusion process over a lower dimensional latent space to reduce memory and compute complexity. This specific type of diffusion model was proposed in [High-Resolution Image Synthesis with Latent Diffusion Models](https://huggingface.co/papers/2112.10752) by Robin Rombach, Andreas Blattmann, Dominik Lorenz, Patrick Esser, Björn Ommer.
Stable Diffusion is trained on 512x512 images from a subset of the LAION-5B dataset. This model uses a frozen CLIP ViT-L/14 text encoder to condition the model on text prompts. With its 860M UNet and 123M text encoder, the model is relatively lightweight and can run on consumer GPUs.
For more details about how Stable Diffusion works and how it differs from the base latent diffusion model, take a look at the Stability AI [announcement](https://stability.ai/blog/stable-diffusion-announcement) and our own [blog post](https://huggingface.co/blog/stable_diffusion#how-does-stable-diffusion-work) for more technical details.
You can find the original codebase for Stable Diffusion v1.0 at [CompVis/stable-diffusion](https://github.com/CompVis/stable-diffusion) and Stable Diffusion v2.0 at [Stability-AI/stablediffusion](https://github.com/Stability-AI/stablediffusion) as well as their original scripts for various tasks. Additional official checkpoints for the different Stable Diffusion versions and tasks can be found on the [CompVis](https://huggingface.co/CompVis), [Runway](https://huggingface.co/runwayml), and [Stability AI](https://huggingface.co/stabilityai) Hub organizations. Explore these organizations to find the best checkpoint for your use-case!
The table below summarizes the available Stable Diffusion pipelines, their supported tasks, and an interactive demo:
## Tips
To help you get the most out of the Stable Diffusion pipelines, here are a few tips for improving performance and usability. These tips are applicable to all Stable Diffusion pipelines.
### Explore tradeoff between speed and quality
[StableDiffusionPipeline](/docs/diffusers/main/en/api/pipelines/stable_diffusion/text2img#diffusers.StableDiffusionPipeline) uses the [PNDMScheduler](/docs/diffusers/main/en/api/schedulers/pndm#diffusers.PNDMScheduler) by default, but 🤗 Diffusers provides many other schedulers (some of which are faster or output better quality) that are compatible. For example, if you want to use the [EulerDiscreteScheduler](/docs/diffusers/main/en/api/schedulers/euler#diffusers.EulerDiscreteScheduler) instead of the default:
```py
from diffusers import StableDiffusionPipeline, EulerDiscreteScheduler
pipeline = StableDiffusionPipeline.from_pretrained("CompVis/stable-diffusion-v1-4")
pipeline.scheduler = EulerDiscreteScheduler.from_config(pipeline.scheduler.config)
# or
euler_scheduler = EulerDiscreteScheduler.from_pretrained("CompVis/stable-diffusion-v1-4", subfolder="scheduler")
pipeline = StableDiffusionPipeline.from_pretrained("CompVis/stable-diffusion-v1-4", scheduler=euler_scheduler)
```
### Reuse pipeline components to save memory
To save memory and use the same components across multiple pipelines, use the `.components` method to avoid loading weights into RAM more than once.
```py
from diffusers import (
StableDiffusionPipeline,
StableDiffusionImg2ImgPipeline,
StableDiffusionInpaintPipeline,
)
text2img = StableDiffusionPipeline.from_pretrained("CompVis/stable-diffusion-v1-4")
img2img = StableDiffusionImg2ImgPipeline(**text2img.components)
inpaint = StableDiffusionInpaintPipeline(**text2img.components)
# now you can use text2img(...), img2img(...), inpaint(...) just like the call methods of each respective pipeline
```
### Create web demos using `gradio`
The Stable Diffusion pipelines are automatically supported in [Gradio](https://github.com/gradio-app/gradio/), a library that makes creating beautiful and user-friendly machine learning apps on the web a breeze. First, make sure you have Gradio installed:
```sh
pip install -U gradio
```
Then, create a web demo around any Stable Diffusion-based pipeline. For example, you can create an image generation pipeline in a single line of code with Gradio's [`Interface.from_pipeline`](https://www.gradio.app/docs/interface#interface-from-pipeline) function:
```py
from diffusers import StableDiffusionPipeline
import gradio as gr
pipe = StableDiffusionPipeline.from_pretrained("CompVis/stable-diffusion-v1-4")
gr.Interface.from_pipeline(pipe).launch()
```
which opens an intuitive drag-and-drop interface in your browser:
![](https://huggingface.co/datasets/huggingface/documentation-images/resolve/main/diffusers/gradio-panda.png)
Similarly, you could create a demo for an image-to-image pipeline with:
```py
from diffusers import StableDiffusionImg2ImgPipeline
import gradio as gr
pipe = StableDiffusionImg2ImgPipeline.from_pretrained("stable-diffusion-v1-5/stable-diffusion-v1-5")
gr.Interface.from_pipeline(pipe).launch()
```
By default, the web demo runs on a local server. If you'd like to share it with others, you can generate a temporary public
link by setting `share=True` in `launch()`. Or, you can host your demo on [Hugging Face Spaces](https://huggingface.co/spaces)https://huggingface.co/spaces for a permanent link.
# Text-to-(RGB, depth)
LDM3D was proposed in [LDM3D: Latent Diffusion Model for 3D](https://huggingface.co/papers/2305.10853) by Gabriela Ben Melech Stan, Diana Wofk, Scottie Fox, Alex Redden, Will Saxton, Jean Yu, Estelle Aflalo, Shao-Yen Tseng, Fabio Nonato, Matthias Muller, and Vasudev Lal. LDM3D generates an image and a depth map from a given text prompt unlike the existing text-to-image diffusion models such as [Stable Diffusion](./overview) which only generates an image. With almost the same number of parameters, LDM3D achieves to create a latent space that can compress both the RGB images and the depth maps.
Two checkpoints are available for use:
- [ldm3d-original](https://huggingface.co/Intel/ldm3d). The original checkpoint used in the [paper](https://arxiv.org/pdf/2305.10853.pdf)
- [ldm3d-4c](https://huggingface.co/Intel/ldm3d-4c). The new version of LDM3D using 4 channels inputs instead of 6-channels inputs and finetuned on higher resolution images.
The abstract from the paper is:
*This research paper proposes a Latent Diffusion Model for 3D (LDM3D) that generates both image and depth map data from a given text prompt, allowing users to generate RGBD images from text prompts. The LDM3D model is fine-tuned on a dataset of tuples containing an RGB image, depth map and caption, and validated through extensive experiments. We also develop an application called DepthFusion, which uses the generated RGB images and depth maps to create immersive and interactive 360-degree-view experiences using TouchDesigner. This technology has the potential to transform a wide range of industries, from entertainment and gaming to architecture and design. Overall, this paper presents a significant contribution to the field of generative AI and computer vision, and showcases the potential of LDM3D and DepthFusion to revolutionize content creation and digital experiences. A short video summarizing the approach can be found at [this url](https://t.ly/tdi2).*
Make sure to check out the Stable Diffusion [Tips](overview#tips) section to learn how to explore the tradeoff between scheduler speed and quality, and how to reuse pipeline components efficiently!
## StableDiffusionLDM3DPipeline
## LDM3DPipelineOutput
# Upscaler
[LDM3D-VR](https://arxiv.org/pdf/2311.03226.pdf) is an extended version of LDM3D.
The abstract from the paper is:
*Latent diffusion models have proven to be state-of-the-art in the creation and manipulation of visual outputs. However, as far as we know, the generation of depth maps jointly with RGB is still limited. We introduce LDM3D-VR, a suite of diffusion models targeting virtual reality development that includes LDM3D-pano and LDM3D-SR. These models enable the generation of panoramic RGBD based on textual prompts and the upscaling of low-resolution inputs to high-resolution RGBD, respectively. Our models are fine-tuned from existing pretrained models on datasets containing panoramic/high-resolution RGB images, depth maps and captions. Both models are evaluated in comparison to existing related methods*
Two checkpoints are available for use:
- [ldm3d-pano](https://huggingface.co/Intel/ldm3d-pano). This checkpoint enables the generation of panoramic images and requires the StableDiffusionLDM3DPipeline pipeline to be used.
- [ldm3d-sr](https://huggingface.co/Intel/ldm3d-sr). This checkpoint enables the upscaling of RGB and depth images. Can be used in cascade after the original LDM3D pipeline using the StableDiffusionUpscaleLDM3DPipeline from communauty pipeline.
[[autodoc]] pipelines.stable_diffusion_ldm3d.pipeline_stable_diffusion_ldm3d.StableDiffusionLDM3DPipeline
- all
- __call__
[[autodoc]] pipelines.stable_diffusion_ldm3d.pipeline_stable_diffusion_ldm3d.LDM3DPipelineOutput
- all
- __call__
# Stable Diffusion 3
Stable Diffusion 3 (SD3) was proposed in [Scaling Rectified Flow Transformers for High-Resolution Image Synthesis](https://arxiv.org/pdf/2403.03206.pdf) by Patrick Esser, Sumith Kulal, Andreas Blattmann, Rahim Entezari, Jonas Muller, Harry Saini, Yam Levi, Dominik Lorenz, Axel Sauer, Frederic Boesel, Dustin Podell, Tim Dockhorn, Zion English, Kyle Lacey, Alex Goodwin, Yannik Marek, and Robin Rombach.
The abstract from the paper is:
*Diffusion models create data from noise by inverting the forward paths of data towards noise and have emerged as a powerful generative modeling technique for high-dimensional, perceptual data such as images and videos. Rectified flow is a recent generative model formulation that connects data and noise in a straight line. Despite its better theoretical properties and conceptual simplicity, it is not yet decisively established as standard practice. In this work, we improve existing noise sampling techniques for training rectified flow models by biasing them towards perceptually relevant scales. Through a large-scale study, we demonstrate the superior performance of this approach compared to established diffusion formulations for high-resolution text-to-image synthesis. Additionally, we present a novel transformer-based architecture for text-to-image generation that uses separate weights for the two modalities and enables a bidirectional flow of information between image and text tokens, improving text comprehension typography, and human preference ratings. We demonstrate that this architecture follows predictable scaling trends and correlates lower validation loss to improved text-to-image synthesis as measured by various metrics and human evaluations.*
## Usage Example
_As the model is gated, before using it with diffusers you first need to go to the [Stable Diffusion 3 Medium Hugging Face page](https://huggingface.co/stabilityai/stable-diffusion-3-medium-diffusers), fill in the form and accept the gate. Once you are in, you need to login so that your system knows you’ve accepted the gate._
Use the command below to log in:
```bash
huggingface-cli login
```
The SD3 pipeline uses three text encoders to generate an image. Model offloading is necessary in order for it to run on most commodity hardware. Please use the `torch.float16` data type for additional memory savings.
```python
import torch
from diffusers import StableDiffusion3Pipeline
pipe = StableDiffusion3Pipeline.from_pretrained("stabilityai/stable-diffusion-3-medium-diffusers", torch_dtype=torch.float16)
pipe.to("cuda")
image = pipe(
prompt="a photo of a cat holding a sign that says hello world",
negative_prompt="",
num_inference_steps=28,
height=1024,
width=1024,
guidance_scale=7.0,
).images[0]
image.save("sd3_hello_world.png")
```
**Note:** Stable Diffusion 3.5 can also be run using the SD3 pipeline, and all mentioned optimizations and techniques apply to it as well. In total there are three official models in the SD3 family:
- [`stabilityai/stable-diffusion-3-medium-diffusers`](https://huggingface.co/stabilityai/stable-diffusion-3-medium-diffusers)
- [`stabilityai/stable-diffusion-3.5-large`](https://huggingface.co/stabilityai/stable-diffusion-3-5-large)
- [`stabilityai/stable-diffusion-3.5-large-turbo`](https://huggingface.co/stabilityai/stable-diffusion-3-5-large-turbo)
## Memory Optimisations for SD3
SD3 uses three text encoders, one if which is the very large T5-XXL model. This makes it challenging to run the model on GPUs with less than 24GB of VRAM, even when using `fp16` precision. The following section outlines a few memory optimizations in Diffusers that make it easier to run SD3 on low resource hardware.
### Running Inference with Model Offloading
The most basic memory optimization available in Diffusers allows you to offload the components of the model to CPU during inference in order to save memory, while seeing a slight increase in inference latency. Model offloading will only move a model component onto the GPU when it needs to be executed, while keeping the remaining components on the CPU.
```python
import torch
from diffusers import StableDiffusion3Pipeline
pipe = StableDiffusion3Pipeline.from_pretrained("stabilityai/stable-diffusion-3-medium-diffusers", torch_dtype=torch.float16)
pipe.enable_model_cpu_offload()
image = pipe(
prompt="a photo of a cat holding a sign that says hello world",
negative_prompt="",
num_inference_steps=28,
height=1024,
width=1024,
guidance_scale=7.0,
).images[0]
image.save("sd3_hello_world.png")
```
### Dropping the T5 Text Encoder during Inference
Removing the memory-intensive 4.7B parameter T5-XXL text encoder during inference can significantly decrease the memory requirements for SD3 with only a slight loss in performance.
```python
import torch
from diffusers import StableDiffusion3Pipeline
pipe = StableDiffusion3Pipeline.from_pretrained(
"stabilityai/stable-diffusion-3-medium-diffusers",
text_encoder_3=None,
tokenizer_3=None,
torch_dtype=torch.float16
)
pipe.to("cuda")
image = pipe(
prompt="a photo of a cat holding a sign that says hello world",
negative_prompt="",
num_inference_steps=28,
height=1024,
width=1024,
guidance_scale=7.0,
).images[0]
image.save("sd3_hello_world-no-T5.png")
```
### Using a Quantized Version of the T5 Text Encoder
We can leverage the `bitsandbytes` library to load and quantize the T5-XXL text encoder to 8-bit precision. This allows you to keep using all three text encoders while only slightly impacting performance.
First install the `bitsandbytes` library.
```shell
pip install bitsandbytes
```
Then load the T5-XXL model using the `BitsAndBytesConfig`.
```python
import torch
from diffusers import StableDiffusion3Pipeline
from transformers import T5EncoderModel, BitsAndBytesConfig
quantization_config = BitsAndBytesConfig(load_in_8bit=True)
model_id = "stabilityai/stable-diffusion-3-medium-diffusers"
text_encoder = T5EncoderModel.from_pretrained(
model_id,
subfolder="text_encoder_3",
quantization_config=quantization_config,
)
pipe = StableDiffusion3Pipeline.from_pretrained(
model_id,
text_encoder_3=text_encoder,
device_map="balanced",
torch_dtype=torch.float16
)
image = pipe(
prompt="a photo of a cat holding a sign that says hello world",
negative_prompt="",
num_inference_steps=28,
height=1024,
width=1024,
guidance_scale=7.0,
).images[0]
image.save("sd3_hello_world-8bit-T5.png")
```
You can find the end-to-end script [here](https://gist.github.com/sayakpaul/82acb5976509851f2db1a83456e504f1).
## Performance Optimizations for SD3
### Using Torch Compile to Speed Up Inference
Using compiled components in the SD3 pipeline can speed up inference by as much as 4X. The following code snippet demonstrates how to compile the Transformer and VAE components of the SD3 pipeline.
```python
import torch
from diffusers import StableDiffusion3Pipeline
torch.set_float32_matmul_precision("high")
torch._inductor.config.conv_1x1_as_mm = True
torch._inductor.config.coordinate_descent_tuning = True
torch._inductor.config.epilogue_fusion = False
torch._inductor.config.coordinate_descent_check_all_directions = True
pipe = StableDiffusion3Pipeline.from_pretrained(
"stabilityai/stable-diffusion-3-medium-diffusers",
torch_dtype=torch.float16
).to("cuda")
pipe.set_progress_bar_config(disable=True)
pipe.transformer.to(memory_format=torch.channels_last)
pipe.vae.to(memory_format=torch.channels_last)
pipe.transformer = torch.compile(pipe.transformer, mode="max-autotune", fullgraph=True)
pipe.vae.decode = torch.compile(pipe.vae.decode, mode="max-autotune", fullgraph=True)
# Warm Up
prompt = "a photo of a cat holding a sign that says hello world"
for _ in range(3):
_ = pipe(prompt=prompt, generator=torch.manual_seed(1))
# Run Inference
image = pipe(prompt=prompt, generator=torch.manual_seed(1)).images[0]
image.save("sd3_hello_world.png")
```
Check out the full script [here](https://gist.github.com/sayakpaul/508d89d7aad4f454900813da5d42ca97).
## Using Long Prompts with the T5 Text Encoder
By default, the T5 Text Encoder prompt uses a maximum sequence length of `256`. This can be adjusted by setting the `max_sequence_length` to accept fewer or more tokens. Keep in mind that longer sequences require additional resources and result in longer generation times, such as during batch inference.
```python
prompt = "A whimsical and creative image depicting a hybrid creature that is a mix of a waffle and a hippopotamus, basking in a river of melted butter amidst a breakfast-themed landscape. It features the distinctive, bulky body shape of a hippo. However, instead of the usual grey skin, the creature’s body resembles a golden-brown, crispy waffle fresh off the griddle. The skin is textured with the familiar grid pattern of a waffle, each square filled with a glistening sheen of syrup. The environment combines the natural habitat of a hippo with elements of a breakfast table setting, a river of warm, melted butter, with oversized utensils or plates peeking out from the lush, pancake-like foliage in the background, a towering pepper mill standing in for a tree. As the sun rises in this fantastical world, it casts a warm, buttery glow over the scene. The creature, content in its butter river, lets out a yawn. Nearby, a flock of birds take flight"
image = pipe(
prompt=prompt,
negative_prompt="",
num_inference_steps=28,
guidance_scale=4.5,
max_sequence_length=512,
).images[0]
```
### Sending a different prompt to the T5 Text Encoder
You can send a different prompt to the CLIP Text Encoders and the T5 Text Encoder to prevent the prompt from being truncated by the CLIP Text Encoders and to improve generation.
The prompt with the CLIP Text Encoders is still truncated to the 77 token limit.
```python
prompt = "A whimsical and creative image depicting a hybrid creature that is a mix of a waffle and a hippopotamus, basking in a river of melted butter amidst a breakfast-themed landscape. A river of warm, melted butter, pancake-like foliage in the background, a towering pepper mill standing in for a tree."
prompt_3 = "A whimsical and creative image depicting a hybrid creature that is a mix of a waffle and a hippopotamus, basking in a river of melted butter amidst a breakfast-themed landscape. It features the distinctive, bulky body shape of a hippo. However, instead of the usual grey skin, the creature’s body resembles a golden-brown, crispy waffle fresh off the griddle. The skin is textured with the familiar grid pattern of a waffle, each square filled with a glistening sheen of syrup. The environment combines the natural habitat of a hippo with elements of a breakfast table setting, a river of warm, melted butter, with oversized utensils or plates peeking out from the lush, pancake-like foliage in the background, a towering pepper mill standing in for a tree. As the sun rises in this fantastical world, it casts a warm, buttery glow over the scene. The creature, content in its butter river, lets out a yawn. Nearby, a flock of birds take flight"
image = pipe(
prompt=prompt,
prompt_3=prompt_3,
negative_prompt="",
num_inference_steps=28,
guidance_scale=4.5,
max_sequence_length=512,
).images[0]
```
## Tiny AutoEncoder for Stable Diffusion 3
Tiny AutoEncoder for Stable Diffusion (TAESD3) is a tiny distilled version of Stable Diffusion 3's VAE by [Ollin Boer Bohan](https://github.com/madebyollin/taesd) that can decode `StableDiffusion3Pipeline` latents almost instantly.
To use with Stable Diffusion 3:
```python
import torch
from diffusers import StableDiffusion3Pipeline, AutoencoderTiny
pipe = StableDiffusion3Pipeline.from_pretrained(
"stabilityai/stable-diffusion-3-medium-diffusers", torch_dtype=torch.float16
)
pipe.vae = AutoencoderTiny.from_pretrained("madebyollin/taesd3", torch_dtype=torch.float16)
pipe = pipe.to("cuda")
prompt = "slice of delicious New York-style berry cheesecake"
image = pipe(prompt, num_inference_steps=25).images[0]
image.save("cheesecake.png")
```
## Loading the original checkpoints via `from_single_file`
The `SD3Transformer2DModel` and `StableDiffusion3Pipeline` classes support loading the original checkpoints via the `from_single_file` method. This method allows you to load the original checkpoint files that were used to train the models.
## Loading the original checkpoints for the `SD3Transformer2DModel`
```python
from diffusers import SD3Transformer2DModel
model = SD3Transformer2DModel.from_single_file("https://huggingface.co/stabilityai/stable-diffusion-3-medium/blob/main/sd3_medium.safetensors")
```
## Loading the single checkpoint for the `StableDiffusion3Pipeline`
### Loading the single file checkpoint without T5
```python
import torch
from diffusers import StableDiffusion3Pipeline
pipe = StableDiffusion3Pipeline.from_single_file(
"https://huggingface.co/stabilityai/stable-diffusion-3-medium/blob/main/sd3_medium_incl_clips.safetensors",
torch_dtype=torch.float16,
text_encoder_3=None
)
pipe.enable_model_cpu_offload()
image = pipe("a picture of a cat holding a sign that says hello world").images[0]
image.save('sd3-single-file.png')
```
### Loading the single file checkpoint with T5
> [!TIP]
> The following example loads a checkpoint stored in a 8-bit floating point format which requires PyTorch 2.3 or later.
```python
import torch
from diffusers import StableDiffusion3Pipeline
pipe = StableDiffusion3Pipeline.from_single_file(
"https://huggingface.co/stabilityai/stable-diffusion-3-medium/blob/main/sd3_medium_incl_clips_t5xxlfp8.safetensors",
torch_dtype=torch.float16,
)
pipe.enable_model_cpu_offload()
image = pipe("a picture of a cat holding a sign that says hello world").images[0]
image.save('sd3-single-file-t5-fp8.png')
```
### Loading the single file checkpoint for the Stable Diffusion 3.5 Transformer Model
```python
import torch
from diffusers import SD3Transformer2DModel, StableDiffusion3Pipeline
transformer = SD3Transformer2DModel.from_single_file(
"https://huggingface.co/stabilityai/stable-diffusion-3.5-large-turbo/blob/main/sd3.5_large.safetensors",
torch_dtype=torch.bfloat16,
)
pipe = StableDiffusion3Pipeline.from_pretrained(
"stabilityai/stable-diffusion-3.5-large",
transformer=transformer,
torch_dtype=torch.bfloat16,
)
pipe.enable_model_cpu_offload()
image = pipe("a cat holding a sign that says hello world").images[0]
image.save("sd35.png")
```
## StableDiffusion3Pipeline
[[autodoc]] StableDiffusion3Pipeline
- all
- __call__
# Image-to-image
The Stable Diffusion model can also be applied to image-to-image generation by passing a text prompt and an initial image to condition the generation of new images.
The `StableDiffusionImg2ImgPipeline` uses the diffusion-denoising mechanism proposed in [SDEdit: Guided Image Synthesis and Editing with Stochastic Differential Equations](https://huggingface.co/papers/2108.01073) by Chenlin Meng, Yutong He, Yang Song, Jiaming Song, Jiajun Wu, Jun-Yan Zhu, Stefano Ermon.
The abstract from the paper is:
*Guided image synthesis enables everyday users to create and edit photo-realistic images with minimum effort. The key challenge is balancing faithfulness to the user input (e.g., hand-drawn colored strokes) and realism of the synthesized image. Existing GAN-based methods attempt to achieve such balance using either conditional GANs or GAN inversions, which are challenging and often require additional training data or loss functions for individual applications. To address these issues, we introduce a new image synthesis and editing method, Stochastic Differential Editing (SDEdit), based on a diffusion model generative prior, which synthesizes realistic images by iteratively denoising through a stochastic differential equation (SDE). Given an input image with user guide of any type, SDEdit first adds noise to the input, then subsequently denoises the resulting image through the SDE prior to increase its realism. SDEdit does not require task-specific training or inversions and can naturally achieve the balance between realism and faithfulness. SDEdit significantly outperforms state-of-the-art GAN-based methods by up to 98.09% on realism and 91.72% on overall satisfaction scores, according to a human perception study, on multiple tasks, including stroke-based image synthesis and editing as well as image compositing.*
Make sure to check out the Stable Diffusion [Tips](overview#tips) section to learn how to explore the tradeoff between scheduler speed and quality, and how to reuse pipeline components efficiently!
## StableDiffusionImg2ImgPipeline
## StableDiffusionPipelineOutput
## FlaxStableDiffusionImg2ImgPipeline
## FlaxStableDiffusionPipelineOutput
[[autodoc]] StableDiffusionImg2ImgPipeline
- all
- __call__
- enable_attention_slicing
- disable_attention_slicing
- enable_xformers_memory_efficient_attention
- disable_xformers_memory_efficient_attention
- load_textual_inversion
- from_single_file
- load_lora_weights
- save_lora_weights
[[autodoc]] pipelines.stable_diffusion.StableDiffusionPipelineOutput
[[autodoc]] FlaxStableDiffusionImg2ImgPipeline
- all
- __call__
[[autodoc]] pipelines.stable_diffusion.FlaxStableDiffusionPipelineOutput
# Stable Diffusion XL
Stable Diffusion XL (SDXL) was proposed in [SDXL: Improving Latent Diffusion Models for High-Resolution Image Synthesis](https://huggingface.co/papers/2307.01952) by Dustin Podell, Zion English, Kyle Lacey, Andreas Blattmann, Tim Dockhorn, Jonas Müller, Joe Penna, and Robin Rombach.
The abstract from the paper is:
*We present SDXL, a latent diffusion model for text-to-image synthesis. Compared to previous versions of Stable Diffusion, SDXL leverages a three times larger UNet backbone: The increase of model parameters is mainly due to more attention blocks and a larger cross-attention context as SDXL uses a second text encoder. We design multiple novel conditioning schemes and train SDXL on multiple aspect ratios. We also introduce a refinement model which is used to improve the visual fidelity of samples generated by SDXL using a post-hoc image-to-image technique. We demonstrate that SDXL shows drastically improved performance compared the previous versions of Stable Diffusion and achieves results competitive with those of black-box state-of-the-art image generators.*
## Tips
- Using SDXL with a DPM++ scheduler for less than 50 steps is known to produce [visual artifacts](https://github.com/huggingface/diffusers/issues/5433) because the solver becomes numerically unstable. To fix this issue, take a look at this [PR](https://github.com/huggingface/diffusers/pull/5541) which recommends for ODE/SDE solvers:
- set `use_karras_sigmas=True` or `lu_lambdas=True` to improve image quality
- set `euler_at_final=True` if you're using a solver with uniform step sizes (DPM++2M or DPM++2M SDE)
- Most SDXL checkpoints work best with an image size of 1024x1024. Image sizes of 768x768 and 512x512 are also supported, but the results aren't as good. Anything below 512x512 is not recommended and likely won't be for default checkpoints like [stabilityai/stable-diffusion-xl-base-1.0](https://huggingface.co/stabilityai/stable-diffusion-xl-base-1.0).
- SDXL can pass a different prompt for each of the text encoders it was trained on. We can even pass different parts of the same prompt to the text encoders.
- SDXL output images can be improved by making use of a refiner model in an image-to-image setting.
- SDXL offers `negative_original_size`, `negative_crops_coords_top_left`, and `negative_target_size` to negatively condition the model on image resolution and cropping parameters.
To learn how to use SDXL for various tasks, how to optimize performance, and other usage examples, take a look at the [Stable Diffusion XL](../../../using-diffusers/sdxl) guide.
Check out the [Stability AI](https://huggingface.co/stabilityai) Hub organization for the official base and refiner model checkpoints!
## StableDiffusionXLPipeline
## StableDiffusionXLImg2ImgPipeline
## StableDiffusionXLInpaintPipeline
[[autodoc]] StableDiffusionXLPipeline
- all
- __call__
[[autodoc]] StableDiffusionXLImg2ImgPipeline
- all
- __call__
[[autodoc]] StableDiffusionXLInpaintPipeline
- all
- __call__
# Inpainting
The Stable Diffusion model can also be applied to inpainting which lets you edit specific parts of an image by providing a mask and a text prompt using Stable Diffusion.
## Tips
It is recommended to use this pipeline with checkpoints that have been specifically fine-tuned for inpainting, such
as [runwayml/stable-diffusion-inpainting](https://huggingface.co/runwayml/stable-diffusion-inpainting). Default
text-to-image Stable Diffusion checkpoints, such as
[stable-diffusion-v1-5/stable-diffusion-v1-5](https://huggingface.co/stable-diffusion-v1-5/stable-diffusion-v1-5) are also compatible but they might be less performant.
Make sure to check out the Stable Diffusion [Tips](overview#tips) section to learn how to explore the tradeoff between scheduler speed and quality, and how to reuse pipeline components efficiently!
If you're interested in using one of the official checkpoints for a task, explore the [CompVis](https://huggingface.co/CompVis), [Runway](https://huggingface.co/runwayml), and [Stability AI](https://huggingface.co/stabilityai) Hub organizations!
## StableDiffusionInpaintPipeline
## StableDiffusionPipelineOutput
## FlaxStableDiffusionInpaintPipeline
## FlaxStableDiffusionPipelineOutput
[[autodoc]] StableDiffusionInpaintPipeline
- all
- __call__
- enable_attention_slicing
- disable_attention_slicing
- enable_xformers_memory_efficient_attention
- disable_xformers_memory_efficient_attention
- load_textual_inversion
- load_lora_weights
- save_lora_weights
[[autodoc]] pipelines.stable_diffusion.StableDiffusionPipelineOutput
[[autodoc]] FlaxStableDiffusionInpaintPipeline
- all
- __call__
[[autodoc]] pipelines.stable_diffusion.FlaxStableDiffusionPipelineOutput
# bitsandbytes
[bitsandbytes](https://huggingface.co/docs/bitsandbytes/index) is the easiest option for quantizing a model to 8 and 4-bit. 8-bit quantization multiplies outliers in fp16 with non-outliers in int8, converts the non-outlier values back to fp16, and then adds them together to return the weights in fp16. This reduces the degradative effect outlier values have on a model's performance.
4-bit quantization compresses a model even further, and it is commonly used with [QLoRA](https://hf.co/papers/2305.14314) to finetune quantized LLMs.
To use bitsandbytes, make sure you have the following libraries installed:
```bash
pip install diffusers transformers accelerate bitsandbytes -U
```
Now you can quantize a model by passing a [BitsAndBytesConfig](/docs/diffusers/main/en/api/quantization#diffusers.BitsAndBytesConfig) to [from_pretrained()](/docs/diffusers/main/en/api/models/overview#diffusers.ModelMixin.from_pretrained). This works for any model in any modality, as long as it supports loading with [Accelerate](https://hf.co/docs/accelerate/index) and contains `torch.nn.Linear` layers.
Quantizing a model in 8-bit halves the memory-usage:
```py
from diffusers import FluxTransformer2DModel, BitsAndBytesConfig
quantization_config = BitsAndBytesConfig(load_in_8bit=True)
model_8bit = FluxTransformer2DModel.from_pretrained(
"black-forest-labs/FLUX.1-dev",
subfolder="transformer",
quantization_config=quantization_config
)
```
By default, all the other modules such as `torch.nn.LayerNorm` are converted to `torch.float16`. You can change the data type of these modules with the `torch_dtype` parameter if you want:
```py
from diffusers import FluxTransformer2DModel, BitsAndBytesConfig
quantization_config = BitsAndBytesConfig(load_in_8bit=True)
model_8bit = FluxTransformer2DModel.from_pretrained(
"black-forest-labs/FLUX.1-dev",
subfolder="transformer",
quantization_config=quantization_config,
torch_dtype=torch.float32
)
model_8bit.transformer_blocks.layers[-1].norm2.weight.dtype
```
Once a model is quantized, you can push the model to the Hub with the [push_to_hub()](/docs/diffusers/main/en/api/pipelines/overview#diffusers.utils.PushToHubMixin.push_to_hub) method. The quantization `config.json` file is pushed first, followed by the quantized model weights. You can also save the serialized 4-bit models locally with [save_pretrained()](/docs/diffusers/main/en/api/models/overview#diffusers.ModelMixin.save_pretrained).
Quantizing a model in 4-bit reduces your memory-usage by 4x:
```py
from diffusers import FluxTransformer2DModel, BitsAndBytesConfig
quantization_config = BitsAndBytesConfig(load_in_4bit=True)
model_4bit = FluxTransformer2DModel.from_pretrained(
"black-forest-labs/FLUX.1-dev",
subfolder="transformer",
quantization_config=quantization_config
)
```
By default, all the other modules such as `torch.nn.LayerNorm` are converted to `torch.float16`. You can change the data type of these modules with the `torch_dtype` parameter if you want:
```py
from diffusers import FluxTransformer2DModel, BitsAndBytesConfig
quantization_config = BitsAndBytesConfig(load_in_4bit=True)
model_4bit = FluxTransformer2DModel.from_pretrained(
"black-forest-labs/FLUX.1-dev",
subfolder="transformer",
quantization_config=quantization_config,
torch_dtype=torch.float32
)
model_4bit.transformer_blocks.layers[-1].norm2.weight.dtype
```
Call [push_to_hub()](/docs/diffusers/main/en/api/pipelines/overview#diffusers.utils.PushToHubMixin.push_to_hub) after loading it in 4-bit precision. You can also save the serialized 4-bit models locally with [save_pretrained()](/docs/diffusers/main/en/api/models/overview#diffusers.ModelMixin.save_pretrained).
Training with 8-bit and 4-bit weights are only supported for training *extra* parameters.
Check your memory footprint with the `get_memory_footprint` method:
```py
print(model.get_memory_footprint())
```
Quantized models can be loaded from the [from_pretrained()](/docs/diffusers/main/en/api/models/overview#diffusers.ModelMixin.from_pretrained) method without needing to specify the `quantization_config` parameters:
```py
from diffusers import FluxTransformer2DModel, BitsAndBytesConfig
quantization_config = BitsAndBytesConfig(load_in_4bit=True)
model_4bit = FluxTransformer2DModel.from_pretrained(
"hf-internal-testing/flux.1-dev-nf4-pkg", subfolder="transformer"
)
```
## 8-bit (LLM.int8() algorithm)
Learn more about the details of 8-bit quantization in this [blog post](https://huggingface.co/blog/hf-bitsandbytes-integration)!
This section explores some of the specific features of 8-bit models, such as outlier thresholds and skipping module conversion.
### Outlier threshold
An "outlier" is a hidden state value greater than a certain threshold, and these values are computed in fp16. While the values are usually normally distributed ([-3.5, 3.5]), this distribution can be very different for large models ([-60, 6] or [6, 60]). 8-bit quantization works well for values ~5, but beyond that, there is a significant performance penalty. A good default threshold value is 6, but a lower threshold may be needed for more unstable models (small models or finetuning).
To find the best threshold for your model, we recommend experimenting with the `llm_int8_threshold` parameter in [BitsAndBytesConfig](/docs/diffusers/main/en/api/quantization#diffusers.BitsAndBytesConfig):
```py
from diffusers import FluxTransformer2DModel, BitsAndBytesConfig
quantization_config = BitsAndBytesConfig(
load_in_8bit=True, llm_int8_threshold=10,
)
model_8bit = FluxTransformer2DModel.from_pretrained(
"black-forest-labs/FLUX.1-dev",
subfolder="transformer",
quantization_config=quantization_config,
)
```
### Skip module conversion
For some models, you don't need to quantize every module to 8-bit which can actually cause instability. For example, for diffusion models like [Stable Diffusion 3](../api/pipelines/stable_diffusion/stable_diffusion_3), the `proj_out` module can be skipped using the `llm_int8_skip_modules` parameter in [BitsAndBytesConfig](/docs/diffusers/main/en/api/quantization#diffusers.BitsAndBytesConfig):
```py
from diffusers import SD3Transformer2DModel, BitsAndBytesConfig
quantization_config = BitsAndBytesConfig(
load_in_8bit=True, llm_int8_skip_modules=["proj_out"],
)
model_8bit = SD3Transformer2DModel.from_pretrained(
"stabilityai/stable-diffusion-3-medium-diffusers",
subfolder="transformer",
quantization_config=quantization_config,
)
```
## 4-bit (QLoRA algorithm)
Learn more about its details in this [blog post](https://huggingface.co/blog/4bit-transformers-bitsandbytes).
This section explores some of the specific features of 4-bit models, such as changing the compute data type, using the Normal Float 4 (NF4) data type, and using nested quantization.
### Compute data type
To speedup computation, you can change the data type from float32 (the default value) to bf16 using the `bnb_4bit_compute_dtype` parameter in [BitsAndBytesConfig](/docs/diffusers/main/en/api/quantization#diffusers.BitsAndBytesConfig):
```py
import torch
from diffusers import BitsAndBytesConfig
quantization_config = BitsAndBytesConfig(load_in_4bit=True, bnb_4bit_compute_dtype=torch.bfloat16)
```
### Normal Float 4 (NF4)
NF4 is a 4-bit data type from the [QLoRA](https://hf.co/papers/2305.14314) paper, adapted for weights initialized from a normal distribution. You should use NF4 for training 4-bit base models. This can be configured with the `bnb_4bit_quant_type` parameter in the [BitsAndBytesConfig](/docs/diffusers/main/en/api/quantization#diffusers.BitsAndBytesConfig):
```py
from diffusers import BitsAndBytesConfig
nf4_config = BitsAndBytesConfig(
load_in_4bit=True,
bnb_4bit_quant_type="nf4",
)
model_nf4 = SD3Transformer2DModel.from_pretrained(
"stabilityai/stable-diffusion-3-medium-diffusers",
subfolder="transformer",
quantization_config=nf4_config,
)
```
For inference, the `bnb_4bit_quant_type` does not have a huge impact on performance. However, to remain consistent with the model weights, you should use the `bnb_4bit_compute_dtype` and `torch_dtype` values.
### Nested quantization
Nested quantization is a technique that can save additional memory at no additional performance cost. This feature performs a second quantization of the already quantized weights to save an additional 0.4 bits/parameter.
```py
from diffusers import BitsAndBytesConfig
double_quant_config = BitsAndBytesConfig(
load_in_4bit=True,
bnb_4bit_use_double_quant=True,
)
double_quant_model = SD3Transformer2DModel.from_pretrained(
"stabilityai/stable-diffusion-3-medium-diffusers",
subfolder="transformer",
quantization_config=double_quant_config,
)
```
## Dequantizing `bitsandbytes` models
Once quantized, you can dequantize the model to the original precision but this might result in a small quality loss of the model. Make sure you have enough GPU RAM to fit the dequantized model.
```python
from diffusers import BitsAndBytesConfig
double_quant_config = BitsAndBytesConfig(
load_in_4bit=True,
bnb_4bit_use_double_quant=True,
)
double_quant_model = SD3Transformer2DModel.from_pretrained(
"stabilityai/stable-diffusion-3-medium-diffusers",
subfolder="transformer",
quantization_config=double_quant_config,
)
model.dequantize()
```
## Resources
* [End-to-end notebook showing Flux.1 Dev inference in a free-tier Colab](https://gist.github.com/sayakpaul/c76bd845b48759e11687ac550b99d8b4)
* [Training](https://gist.github.com/sayakpaul/05afd428bc089b47af7c016e42004527)
# Quantization
Quantization techniques focus on representing data with less information while also trying to not lose too much accuracy. This often means converting a data type to represent the same information with fewer bits. For example, if your model weights are stored as 32-bit floating points and they're quantized to 16-bit floating points, this halves the model size which makes it easier to store and reduces memory-usage. Lower precision can also speedup inference because it takes less time to perform calculations with fewer bits.
Interested in adding a new quantization method to Transformers? Refer to the [Contribute new quantization method guide](https://huggingface.co/docs/transformers/main/en/quantization/contribute) to learn more about adding a new quantization method.
If you are new to the quantization field, we recommend you to check out these beginner-friendly courses about quantization in collaboration with DeepLearning.AI:
* [Quantization Fundamentals with Hugging Face](https://www.deeplearning.ai/short-courses/quantization-fundamentals-with-hugging-face/)
* [Quantization in Depth](https://www.deeplearning.ai/short-courses/quantization-in-depth/)
## When to use what?
This section will be expanded once Diffusers has multiple quantization backends. Currently, we only support `bitsandbytes`. [This resource](https://huggingface.co/docs/transformers/main/en/quantization/overview#when-to-use-what) provides a good overview of the pros and cons of different quantization techniques.
# T-GATE
[T-GATE](https://github.com/HaozheLiu-ST/T-GATE/tree/main) accelerates inference for [Stable Diffusion](../api/pipelines/stable_diffusion/overview), [PixArt](../api/pipelines/pixart), and [Latency Consistency Model](../api/pipelines/latent_consistency_models.md) pipelines by skipping the cross-attention calculation once it converges. This method doesn't require any additional training and it can speed up inference from 10-50%. T-GATE is also compatible with other optimization methods like [DeepCache](./deepcache).
Before you begin, make sure you install T-GATE.
```bash
pip install tgate
pip install -U torch diffusers transformers accelerate DeepCache
```
To use T-GATE with a pipeline, you need to use its corresponding loader.
| Pipeline | T-GATE Loader |
|---|---|
| PixArt | TgatePixArtLoader |
| Stable Diffusion XL | TgateSDXLLoader |
| Stable Diffusion XL + DeepCache | TgateSDXLDeepCacheLoader |
| Stable Diffusion | TgateSDLoader |
| Stable Diffusion + DeepCache | TgateSDDeepCacheLoader |
Next, create a `TgateLoader` with a pipeline, the gate step (the time step to stop calculating the cross attention), and the number of inference steps. Then call the `tgate` method on the pipeline with a prompt, gate step, and the number of inference steps.
Let's see how to enable this for several different pipelines.
Accelerate `PixArtAlphaPipeline` with T-GATE:
```py
import torch
from diffusers import PixArtAlphaPipeline
from tgate import TgatePixArtLoader
pipe = PixArtAlphaPipeline.from_pretrained("PixArt-alpha/PixArt-XL-2-1024-MS", torch_dtype=torch.float16)
gate_step = 8
inference_step = 25
pipe = TgatePixArtLoader(
pipe,
gate_step=gate_step,
num_inference_steps=inference_step,
).to("cuda")
image = pipe.tgate(
"An alpaca made of colorful building blocks, cyberpunk.",
gate_step=gate_step,
num_inference_steps=inference_step,
).images[0]
```
Accelerate `StableDiffusionXLPipeline` with T-GATE:
```py
import torch
from diffusers import StableDiffusionXLPipeline
from diffusers import DPMSolverMultistepScheduler
from tgate import TgateSDXLLoader
pipe = StableDiffusionXLPipeline.from_pretrained(
"stabilityai/stable-diffusion-xl-base-1.0",
torch_dtype=torch.float16,
variant="fp16",
use_safetensors=True,
)
pipe.scheduler = DPMSolverMultistepScheduler.from_config(pipe.scheduler.config)
gate_step = 10
inference_step = 25
pipe = TgateSDXLLoader(
pipe,
gate_step=gate_step,
num_inference_steps=inference_step,
).to("cuda")
image = pipe.tgate(
"Astronaut in a jungle, cold color palette, muted colors, detailed, 8k.",
gate_step=gate_step,
num_inference_steps=inference_step
).images[0]
```
Accelerate `StableDiffusionXLPipeline` with [DeepCache](https://github.com/horseee/DeepCache) and T-GATE:
```py
import torch
from diffusers import StableDiffusionXLPipeline
from diffusers import DPMSolverMultistepScheduler
from tgate import TgateSDXLDeepCacheLoader
pipe = StableDiffusionXLPipeline.from_pretrained(
"stabilityai/stable-diffusion-xl-base-1.0",
torch_dtype=torch.float16,
variant="fp16",
use_safetensors=True,
)
pipe.scheduler = DPMSolverMultistepScheduler.from_config(pipe.scheduler.config)
gate_step = 10
inference_step = 25
pipe = TgateSDXLDeepCacheLoader(
pipe,
cache_interval=3,
cache_branch_id=0,
).to("cuda")
image = pipe.tgate(
"Astronaut in a jungle, cold color palette, muted colors, detailed, 8k.",
gate_step=gate_step,
num_inference_steps=inference_step
).images[0]
```
Accelerate `latent-consistency/lcm-sdxl` with T-GATE:
```py
import torch
from diffusers import StableDiffusionXLPipeline
from diffusers import UNet2DConditionModel, LCMScheduler
from diffusers import DPMSolverMultistepScheduler
from tgate import TgateSDXLLoader
unet = UNet2DConditionModel.from_pretrained(
"latent-consistency/lcm-sdxl",
torch_dtype=torch.float16,
variant="fp16",
)
pipe = StableDiffusionXLPipeline.from_pretrained(
"stabilityai/stable-diffusion-xl-base-1.0",
unet=unet,
torch_dtype=torch.float16,
variant="fp16",
)
pipe.scheduler = LCMScheduler.from_config(pipe.scheduler.config)
gate_step = 1
inference_step = 4
pipe = TgateSDXLLoader(
pipe,
gate_step=gate_step,
num_inference_steps=inference_step,
lcm=True
).to("cuda")
image = pipe.tgate(
"Astronaut in a jungle, cold color palette, muted colors, detailed, 8k.",
gate_step=gate_step,
num_inference_steps=inference_step
).images[0]
```
T-GATE also supports [StableDiffusionPipeline](/docs/diffusers/main/en/api/pipelines/stable_diffusion/text2img#diffusers.StableDiffusionPipeline) and [PixArt-alpha/PixArt-LCM-XL-2-1024-MS](https://hf.co/PixArt-alpha/PixArt-LCM-XL-2-1024-MS).
## Benchmarks
| Model | MACs | Param | Latency | Zero-shot 10K-FID on MS-COCO |
|-----------------------|----------|-----------|---------|---------------------------|
| SD-1.5 | 16.938T | 859.520M | 7.032s | 23.927 |
| SD-1.5 w/ T-GATE | 9.875T | 815.557M | 4.313s | 20.789 |
| SD-2.1 | 38.041T | 865.785M | 16.121s | 22.609 |
| SD-2.1 w/ T-GATE | 22.208T | 815.433 M | 9.878s | 19.940 |
| SD-XL | 149.438T | 2.570B | 53.187s | 24.628 |
| SD-XL w/ T-GATE | 84.438T | 2.024B | 27.932s | 22.738 |
| Pixart-Alpha | 107.031T | 611.350M | 61.502s | 38.669 |
| Pixart-Alpha w/ T-GATE | 65.318T | 462.585M | 37.867s | 35.825 |
| DeepCache (SD-XL) | 57.888T | - | 19.931s | 23.755 |
| DeepCache w/ T-GATE | 43.868T | - | 14.666s | 23.999 |
| LCM (SD-XL) | 11.955T | 2.570B | 3.805s | 25.044 |
| LCM w/ T-GATE | 11.171T | 2.024B | 3.533s | 25.028 |
| LCM (Pixart-Alpha) | 8.563T | 611.350M | 4.733s | 36.086 |
| LCM w/ T-GATE | 7.623T | 462.585M | 4.543s | 37.048 |
The latency is tested on an NVIDIA 1080TI, MACs and Params are calculated with [calflops](https://github.com/MrYxJ/calculate-flops.pytorch), and the FID is calculated with [PytorchFID](https://github.com/mseitzer/pytorch-fid).
# Token merging
[Token merging](https://huggingface.co/papers/2303.17604) (ToMe) merges redundant tokens/patches progressively in the forward pass of a Transformer-based network which can speed-up the inference latency of [StableDiffusionPipeline](/docs/diffusers/main/en/api/pipelines/stable_diffusion/text2img#diffusers.StableDiffusionPipeline).
Install ToMe from `pip`:
```bash
pip install tomesd
```
You can use ToMe from the [`tomesd`](https://github.com/dbolya/tomesd) library with the [`apply_patch`](https://github.com/dbolya/tomesd?tab=readme-ov-file#usage) function:
```diff
from diffusers import StableDiffusionPipeline
import torch
import tomesd
pipeline = StableDiffusionPipeline.from_pretrained(
"stable-diffusion-v1-5/stable-diffusion-v1-5", torch_dtype=torch.float16, use_safetensors=True,
).to("cuda")
+ tomesd.apply_patch(pipeline, ratio=0.5)
image = pipeline("a photo of an astronaut riding a horse on mars").images[0]
```
The `apply_patch` function exposes a number of [arguments](https://github.com/dbolya/tomesd#usage) to help strike a balance between pipeline inference speed and the quality of the generated tokens. The most important argument is `ratio` which controls the number of tokens that are merged during the forward pass.
As reported in the [paper](https://huggingface.co/papers/2303.17604), ToMe can greatly preserve the quality of the generated images while boosting inference speed. By increasing the `ratio`, you can speed-up inference even further, but at the cost of some degraded image quality.
To test the quality of the generated images, we sampled a few prompts from [Parti Prompts](https://parti.research.google/) and performed inference with the [StableDiffusionPipeline](/docs/diffusers/main/en/api/pipelines/stable_diffusion/text2img#diffusers.StableDiffusionPipeline) with the following settings:
We didn’t notice any significant decrease in the quality of the generated samples, and you can check out the generated samples in this [WandB report](https://wandb.ai/sayakpaul/tomesd-results/runs/23j4bj3i?workspace=). If you're interested in reproducing this experiment, use this [script](https://gist.github.com/sayakpaul/8cac98d7f22399085a060992f411ecbd).
## Benchmarks
We also benchmarked the impact of `tomesd` on the [StableDiffusionPipeline](/docs/diffusers/main/en/api/pipelines/stable_diffusion/text2img#diffusers.StableDiffusionPipeline) with [xFormers](https://huggingface.co/docs/diffusers/optimization/xformers) enabled across several image resolutions. The results are obtained from A100 and V100 GPUs in the following development environment:
```bash
- `diffusers` version: 0.15.1
- Python version: 3.8.16
- PyTorch version (GPU?): 1.13.1+cu116 (True)
- Huggingface_hub version: 0.13.2
- Transformers version: 4.27.2
- Accelerate version: 0.18.0
- xFormers version: 0.0.16
- tomesd version: 0.1.2
```
To reproduce this benchmark, feel free to use this [script](https://gist.github.com/sayakpaul/27aec6bca7eb7b0e0aa4112205850335). The results are reported in seconds, and where applicable we report the speed-up percentage over the vanilla pipeline when using ToMe and ToMe + xFormers.
| **GPU** | **Resolution** | **Batch size** | **Vanilla** | **ToMe** | **ToMe + xFormers** |
|----------|----------------|----------------|-------------|----------------|---------------------|
| **A100** | 512 | 10 | 6.88 | 5.26 (+23.55%) | 4.69 (+31.83%) |
| | 768 | 10 | OOM | 14.71 | 11 |
| | | 8 | OOM | 11.56 | 8.84 |
| | | 4 | OOM | 5.98 | 4.66 |
| | | 2 | 4.99 | 3.24 (+35.07%) | 2.1 (+37.88%) |
| | | 1 | 3.29 | 2.24 (+31.91%) | 2.03 (+38.3%) |
| | 1024 | 10 | OOM | OOM | OOM |
| | | 8 | OOM | OOM | OOM |
| | | 4 | OOM | 12.51 | 9.09 |
| | | 2 | OOM | 6.52 | 4.96 |
| | | 1 | 6.4 | 3.61 (+43.59%) | 2.81 (+56.09%) |
| **V100** | 512 | 10 | OOM | 10.03 | 9.29 |
| | | 8 | OOM | 8.05 | 7.47 |
| | | 4 | 5.7 | 4.3 (+24.56%) | 3.98 (+30.18%) |
| | | 2 | 3.14 | 2.43 (+22.61%) | 2.27 (+27.71%) |
| | | 1 | 1.88 | 1.57 (+16.49%) | 1.57 (+16.49%) |
| | 768 | 10 | OOM | OOM | 23.67 |
| | | 8 | OOM | OOM | 18.81 |
| | | 4 | OOM | 11.81 | 9.7 |
| | | 2 | OOM | 6.27 | 5.2 |
| | | 1 | 5.43 | 3.38 (+37.75%) | 2.82 (+48.07%) |
| | 1024 | 10 | OOM | OOM | OOM |
| | | 8 | OOM | OOM | OOM |
| | | 4 | OOM | OOM | 19.35 |
| | | 2 | OOM | 13 | 10.78 |
| | | 1 | OOM | 6.66 | 5.54 |
As seen in the tables above, the speed-up from `tomesd` becomes more pronounced for larger image resolutions. It is also interesting to note that with `tomesd`, it is possible to run the pipeline on a higher resolution like 1024x1024. You may be able to speed-up inference even more with [`torch.compile`](torch2.0).
# DeepCache
[DeepCache](https://huggingface.co/papers/2312.00858) accelerates [StableDiffusionPipeline](/docs/diffusers/main/en/api/pipelines/stable_diffusion/text2img#diffusers.StableDiffusionPipeline) and [StableDiffusionXLPipeline](/docs/diffusers/main/en/api/pipelines/stable_diffusion/stable_diffusion_xl#diffusers.StableDiffusionXLPipeline) by strategically caching and reusing high-level features while efficiently updating low-level features by taking advantage of the U-Net architecture.
Start by installing [DeepCache](https://github.com/horseee/DeepCache):
```bash
pip install DeepCache
```
Then load and enable the [`DeepCacheSDHelper`](https://github.com/horseee/DeepCache#usage):
```diff
import torch
from diffusers import StableDiffusionPipeline
pipe = StableDiffusionPipeline.from_pretrained('stable-diffusion-v1-5/stable-diffusion-v1-5', torch_dtype=torch.float16).to("cuda")
+ from DeepCache import DeepCacheSDHelper
+ helper = DeepCacheSDHelper(pipe=pipe)
+ helper.set_params(
+ cache_interval=3,
+ cache_branch_id=0,
+ )
+ helper.enable()
image = pipe("a photo of an astronaut on a moon").images[0]
```
The `set_params` method accepts two arguments: `cache_interval` and `cache_branch_id`. `cache_interval` means the frequency of feature caching, specified as the number of steps between each cache operation. `cache_branch_id` identifies which branch of the network (ordered from the shallowest to the deepest layer) is responsible for executing the caching processes.
Opting for a lower `cache_branch_id` or a larger `cache_interval` can lead to faster inference speed at the expense of reduced image quality (ablation experiments of these two hyperparameters can be found in the [paper](https://arxiv.org/abs/2312.00858)). Once those arguments are set, use the `enable` or `disable` methods to activate or deactivate the `DeepCacheSDHelper`.
You can find more generated samples (original pipeline vs DeepCache) and the corresponding inference latency in the [WandB report](https://wandb.ai/horseee/DeepCache/runs/jwlsqqgt?workspace=user-horseee). The prompts are randomly selected from the [MS-COCO 2017](https://cocodataset.org/#home) dataset.
## Benchmark
We tested how much faster DeepCache accelerates [Stable Diffusion v2.1](https://huggingface.co/stabilityai/stable-diffusion-2-1) with 50 inference steps on an NVIDIA RTX A5000, using different configurations for resolution, batch size, cache interval (I), and cache branch (B).
| **Resolution** | **Batch size** | **Original** | **DeepCache(I=3, B=0)** | **DeepCache(I=5, B=0)** | **DeepCache(I=5, B=1)** |
|----------------|----------------|--------------|-------------------------|-------------------------|-------------------------|
| 512| 8| 15.96| 6.88(2.32x)| 5.03(3.18x)| 7.27(2.20x)|
| | 4| 8.39| 3.60(2.33x)| 2.62(3.21x)| 3.75(2.24x)|
| | 1| 2.61| 1.12(2.33x)| 0.81(3.24x)| 1.11(2.35x)|
| 768| 8| 43.58| 18.99(2.29x)| 13.96(3.12x)| 21.27(2.05x)|
| | 4| 22.24| 9.67(2.30x)| 7.10(3.13x)| 10.74(2.07x)|
| | 1| 6.33| 2.72(2.33x)| 1.97(3.21x)| 2.98(2.12x)|
| 1024| 8| 101.95| 45.57(2.24x)| 33.72(3.02x)| 53.00(1.92x)|
| | 4| 49.25| 21.86(2.25x)| 16.19(3.04x)| 25.78(1.91x)|
| | 1| 13.83| 6.07(2.28x)| 4.43(3.12x)| 7.15(1.93x)|
# ONNX Runtime
🤗 [Optimum](https://github.com/huggingface/optimum) provides a Stable Diffusion pipeline compatible with ONNX Runtime. You'll need to install 🤗 Optimum with the following command for ONNX Runtime support:
```bash
pip install -q optimum["onnxruntime"]
```
This guide will show you how to use the Stable Diffusion and Stable Diffusion XL (SDXL) pipelines with ONNX Runtime.
## Stable Diffusion
To load and run inference, use the [ORTStableDiffusionPipeline](https://huggingface.co/docs/optimum/main/en/onnxruntime/package_reference/modeling_ort#optimum.onnxruntime.ORTStableDiffusionPipeline). If you want to load a PyTorch model and convert it to the ONNX format on-the-fly, set `export=True`:
```python
from optimum.onnxruntime import ORTStableDiffusionPipeline
model_id = "stable-diffusion-v1-5/stable-diffusion-v1-5"
pipeline = ORTStableDiffusionPipeline.from_pretrained(model_id, export=True)
prompt = "sailing ship in storm by Leonardo da Vinci"
image = pipeline(prompt).images[0]
pipeline.save_pretrained("./onnx-stable-diffusion-v1-5")
```
Generating multiple prompts in a batch seems to take too much memory. While we look into it, you may need to iterate instead of batching.
To export the pipeline in the ONNX format offline and use it later for inference,
use the [`optimum-cli export`](https://huggingface.co/docs/optimum/main/en/exporters/onnx/usage_guides/export_a_model#exporting-a-model-to-onnx-using-the-cli) command:
```bash
optimum-cli export onnx --model stable-diffusion-v1-5/stable-diffusion-v1-5 sd_v15_onnx/
```
Then to perform inference (you don't have to specify `export=True` again):
```python
from optimum.onnxruntime import ORTStableDiffusionPipeline
model_id = "sd_v15_onnx"
pipeline = ORTStableDiffusionPipeline.from_pretrained(model_id)
prompt = "sailing ship in storm by Leonardo da Vinci"
image = pipeline(prompt).images[0]
```
You can find more examples in 🤗 Optimum [documentation](https://huggingface.co/docs/optimum/), and Stable Diffusion is supported for text-to-image, image-to-image, and inpainting.
## Stable Diffusion XL
To load and run inference with SDXL, use the [ORTStableDiffusionXLPipeline](https://huggingface.co/docs/optimum/main/en/onnxruntime/package_reference/modeling_ort#optimum.onnxruntime.ORTStableDiffusionXLPipeline):
```python
from optimum.onnxruntime import ORTStableDiffusionXLPipeline
model_id = "stabilityai/stable-diffusion-xl-base-1.0"
pipeline = ORTStableDiffusionXLPipeline.from_pretrained(model_id)
prompt = "sailing ship in storm by Leonardo da Vinci"
image = pipeline(prompt).images[0]
```
To export the pipeline in the ONNX format and use it later for inference, use the [`optimum-cli export`](https://huggingface.co/docs/optimum/main/en/exporters/onnx/usage_guides/export_a_model#exporting-a-model-to-onnx-using-the-cli) command:
```bash
optimum-cli export onnx --model stabilityai/stable-diffusion-xl-base-1.0 --task stable-diffusion-xl sd_xl_onnx/
```
SDXL in the ONNX format is supported for text-to-image and image-to-image.
# AWS Neuron
Diffusers functionalities are available on [AWS Inf2 instances](https://aws.amazon.com/ec2/instance-types/inf2/), which are EC2 instances powered by [Neuron machine learning accelerators](https://aws.amazon.com/machine-learning/inferentia/). These instances aim to provide better compute performance (higher throughput, lower latency) with good cost-efficiency, making them good candidates for AWS users to deploy diffusion models to production.
[Optimum Neuron](https://huggingface.co/docs/optimum-neuron/en/index) is the interface between Hugging Face libraries and AWS Accelerators, including AWS [Trainium](https://aws.amazon.com/machine-learning/trainium/) and AWS [Inferentia](https://aws.amazon.com/machine-learning/inferentia/). It supports many of the features in Diffusers with similar APIs, so it is easier to learn if you're already familiar with Diffusers. Once you have created an AWS Inf2 instance, install Optimum Neuron.
```bash
python -m pip install --upgrade-strategy eager optimum[neuronx]
```
We provide pre-built [Hugging Face Neuron Deep Learning AMI](https://aws.amazon.com/marketplace/pp/prodview-gr3e6yiscria2) (DLAMI) and Optimum Neuron containers for Amazon SageMaker. It's recommended to correctly set up your environment.
The example below demonstrates how to generate images with the Stable Diffusion XL model on an inf2.8xlarge instance (you can switch to cheaper inf2.xlarge instances once the model is compiled). To generate some images, use the `NeuronStableDiffusionXLPipeline` class, which is similar to the [StableDiffusionXLPipeline](/docs/diffusers/main/en/api/pipelines/stable_diffusion/stable_diffusion_xl#diffusers.StableDiffusionXLPipeline) class in Diffusers.
Unlike Diffusers, you need to compile models in the pipeline to the Neuron format, `.neuron`. Launch the following command to export the model to the `.neuron` format.
```bash
optimum-cli export neuron --model stabilityai/stable-diffusion-xl-base-1.0 \
--batch_size 1 \
--height 1024 `# height in pixels of generated image, eg. 768, 1024` \
--width 1024 `# width in pixels of generated image, eg. 768, 1024` \
--num_images_per_prompt 1 `# number of images to generate per prompt, defaults to 1` \
--auto_cast matmul `# cast only matrix multiplication operations` \
--auto_cast_type bf16 `# cast operations from FP32 to BF16` \
sd_neuron_xl/
```
Now generate some images with the pre-compiled SDXL model.
```python
>>> from optimum.neuron import NeuronStableDiffusionXLPipeline
>>> stable_diffusion_xl = NeuronStableDiffusionXLPipeline.from_pretrained("sd_neuron_xl/")
>>> prompt = "a pig with wings flying in floating US dollar banknotes in the air, skyscrapers behind, warm color palette, muted colors, detailed, 8k"
>>> image = stable_diffusion_xl(prompt).images[0]
```
Feel free to check out more guides and examples on different use cases from the Optimum Neuron [documentation](https://huggingface.co/docs/optimum-neuron/en/inference_tutorials/stable_diffusion#generate-images-with-stable-diffusion-models-on-aws-inferentia)!
# PyTorch 2.0
🤗 Diffusers supports the latest optimizations from [PyTorch 2.0](https://pytorch.org/get-started/pytorch-2.0/) which include:
1. A memory-efficient attention implementation, scaled dot product attention, without requiring any extra dependencies such as xFormers.
2. [`torch.compile`](https://pytorch.org/tutorials/intermediate/torch_compile_tutorial.html), a just-in-time (JIT) compiler to provide an extra performance boost when individual models are compiled.
Both of these optimizations require PyTorch 2.0 or later and 🤗 Diffusers > 0.13.0.
```bash
pip install --upgrade torch diffusers
```
## Scaled dot product attention
[`torch.nn.functional.scaled_dot_product_attention`](https://pytorch.org/docs/master/generated/torch.nn.functional.scaled_dot_product_attention) (SDPA) is an optimized and memory-efficient attention (similar to xFormers) that automatically enables several other optimizations depending on the model inputs and GPU type. SDPA is enabled by default if you're using PyTorch 2.0 and the latest version of 🤗 Diffusers, so you don't need to add anything to your code.
However, if you want to explicitly enable it, you can set a [DiffusionPipeline](/docs/diffusers/main/en/api/pipelines/overview#diffusers.DiffusionPipeline) to use [AttnProcessor2_0](/docs/diffusers/main/en/api/attnprocessor#diffusers.models.attention_processor.AttnProcessor2_0):
```diff
import torch
from diffusers import DiffusionPipeline
+ from diffusers.models.attention_processor import AttnProcessor2_0
pipe = DiffusionPipeline.from_pretrained("stable-diffusion-v1-5/stable-diffusion-v1-5", torch_dtype=torch.float16, use_safetensors=True).to("cuda")
+ pipe.unet.set_attn_processor(AttnProcessor2_0())
prompt = "a photo of an astronaut riding a horse on mars"
image = pipe(prompt).images[0]
```
SDPA should be as fast and memory efficient as `xFormers`; check the [benchmark](#benchmark) for more details.
In some cases - such as making the pipeline more deterministic or converting it to other formats - it may be helpful to use the vanilla attention processor, [AttnProcessor](/docs/diffusers/main/en/api/attnprocessor#diffusers.models.attention_processor.AttnProcessor). To revert to [AttnProcessor](/docs/diffusers/main/en/api/attnprocessor#diffusers.models.attention_processor.AttnProcessor), call the [set_default_attn_processor()](/docs/diffusers/main/en/api/models/unet2d-cond#diffusers.UNet2DConditionModel.set_default_attn_processor) function on the pipeline:
```diff
import torch
from diffusers import DiffusionPipeline
pipe = DiffusionPipeline.from_pretrained("stable-diffusion-v1-5/stable-diffusion-v1-5", torch_dtype=torch.float16, use_safetensors=True).to("cuda")
+ pipe.unet.set_default_attn_processor()
prompt = "a photo of an astronaut riding a horse on mars"
image = pipe(prompt).images[0]
```
## torch.compile
The `torch.compile` function can often provide an additional speed-up to your PyTorch code. In 🤗 Diffusers, it is usually best to wrap the UNet with `torch.compile` because it does most of the heavy lifting in the pipeline.
```python
from diffusers import DiffusionPipeline
import torch
pipe = DiffusionPipeline.from_pretrained("stable-diffusion-v1-5/stable-diffusion-v1-5", torch_dtype=torch.float16, use_safetensors=True).to("cuda")
pipe.unet = torch.compile(pipe.unet, mode="reduce-overhead", fullgraph=True)
images = pipe(prompt, num_inference_steps=steps, num_images_per_prompt=batch_size).images[0]
```
Depending on GPU type, `torch.compile` can provide an *additional speed-up* of **5-300x** on top of SDPA! If you're using more recent GPU architectures such as Ampere (A100, 3090), Ada (4090), and Hopper (H100), `torch.compile` is able to squeeze even more performance out of these GPUs.
Compilation requires some time to complete, so it is best suited for situations where you prepare your pipeline once and then perform the same type of inference operations multiple times. For example, calling the compiled pipeline on a different image size triggers compilation again which can be expensive.
For more information and different options about `torch.compile`, refer to the [`torch_compile`](https://pytorch.org/tutorials/intermediate/torch_compile_tutorial.html) tutorial.
> [!TIP]
> Learn more about other ways PyTorch 2.0 can help optimize your model in the [Accelerate inference of text-to-image diffusion models](../tutorials/fast_diffusion) tutorial.
## Benchmark
We conducted a comprehensive benchmark with PyTorch 2.0's efficient attention implementation and `torch.compile` across different GPUs and batch sizes for five of our most used pipelines. The code is benchmarked on 🤗 Diffusers v0.17.0.dev0 to optimize `torch.compile` usage (see [here](https://github.com/huggingface/diffusers/pull/3313) for more details).
Expand the dropdown below to find the code used to benchmark each pipeline:
### Stable Diffusion text-to-image
```python
from diffusers import DiffusionPipeline
import torch
path = "stable-diffusion-v1-5/stable-diffusion-v1-5"
run_compile = True # Set True / False
pipe = DiffusionPipeline.from_pretrained(path, torch_dtype=torch.float16, use_safetensors=True)
pipe = pipe.to("cuda")
pipe.unet.to(memory_format=torch.channels_last)
if run_compile:
print("Run torch compile")
pipe.unet = torch.compile(pipe.unet, mode="reduce-overhead", fullgraph=True)
prompt = "ghibli style, a fantasy landscape with castles"
for _ in range(3):
images = pipe(prompt=prompt).images
```
### Stable Diffusion image-to-image
```python
from diffusers import StableDiffusionImg2ImgPipeline
from diffusers.utils import load_image
import torch
url = "https://raw.githubusercontent.com/CompVis/stable-diffusion/main/assets/stable-samples/img2img/sketch-mountains-input.jpg"
init_image = load_image(url)
init_image = init_image.resize((512, 512))
path = "stable-diffusion-v1-5/stable-diffusion-v1-5"
run_compile = True # Set True / False
pipe = StableDiffusionImg2ImgPipeline.from_pretrained(path, torch_dtype=torch.float16, use_safetensors=True)
pipe = pipe.to("cuda")
pipe.unet.to(memory_format=torch.channels_last)
if run_compile:
print("Run torch compile")
pipe.unet = torch.compile(pipe.unet, mode="reduce-overhead", fullgraph=True)
prompt = "ghibli style, a fantasy landscape with castles"
for _ in range(3):
image = pipe(prompt=prompt, image=init_image).images[0]
```
### Stable Diffusion inpainting
```python
from diffusers import StableDiffusionInpaintPipeline
from diffusers.utils import load_image
import torch
img_url = "https://raw.githubusercontent.com/CompVis/latent-diffusion/main/data/inpainting_examples/overture-creations-5sI6fQgYIuo.png"
mask_url = "https://raw.githubusercontent.com/CompVis/latent-diffusion/main/data/inpainting_examples/overture-creations-5sI6fQgYIuo_mask.png"
init_image = load_image(img_url).resize((512, 512))
mask_image = load_image(mask_url).resize((512, 512))
path = "runwayml/stable-diffusion-inpainting"
run_compile = True # Set True / False
pipe = StableDiffusionInpaintPipeline.from_pretrained(path, torch_dtype=torch.float16, use_safetensors=True)
pipe = pipe.to("cuda")
pipe.unet.to(memory_format=torch.channels_last)
if run_compile:
print("Run torch compile")
pipe.unet = torch.compile(pipe.unet, mode="reduce-overhead", fullgraph=True)
prompt = "ghibli style, a fantasy landscape with castles"
for _ in range(3):
image = pipe(prompt=prompt, image=init_image, mask_image=mask_image).images[0]
```
### ControlNet
```python
from diffusers import StableDiffusionControlNetPipeline, ControlNetModel
from diffusers.utils import load_image
import torch
url = "https://raw.githubusercontent.com/CompVis/stable-diffusion/main/assets/stable-samples/img2img/sketch-mountains-input.jpg"
init_image = load_image(url)
init_image = init_image.resize((512, 512))
path = "stable-diffusion-v1-5/stable-diffusion-v1-5"
run_compile = True # Set True / False
controlnet = ControlNetModel.from_pretrained("lllyasviel/sd-controlnet-canny", torch_dtype=torch.float16, use_safetensors=True)
pipe = StableDiffusionControlNetPipeline.from_pretrained(
path, controlnet=controlnet, torch_dtype=torch.float16, use_safetensors=True
)
pipe = pipe.to("cuda")
pipe.unet.to(memory_format=torch.channels_last)
pipe.controlnet.to(memory_format=torch.channels_last)
if run_compile:
print("Run torch compile")
pipe.unet = torch.compile(pipe.unet, mode="reduce-overhead", fullgraph=True)
pipe.controlnet = torch.compile(pipe.controlnet, mode="reduce-overhead", fullgraph=True)
prompt = "ghibli style, a fantasy landscape with castles"
for _ in range(3):
image = pipe(prompt=prompt, image=init_image).images[0]
```
### DeepFloyd IF text-to-image + upscaling
```python
from diffusers import DiffusionPipeline
import torch
run_compile = True # Set True / False
pipe_1 = DiffusionPipeline.from_pretrained("DeepFloyd/IF-I-M-v1.0", variant="fp16", text_encoder=None, torch_dtype=torch.float16, use_safetensors=True)
pipe_1.to("cuda")
pipe_2 = DiffusionPipeline.from_pretrained("DeepFloyd/IF-II-M-v1.0", variant="fp16", text_encoder=None, torch_dtype=torch.float16, use_safetensors=True)
pipe_2.to("cuda")
pipe_3 = DiffusionPipeline.from_pretrained("stabilityai/stable-diffusion-x4-upscaler", torch_dtype=torch.float16, use_safetensors=True)
pipe_3.to("cuda")
pipe_1.unet.to(memory_format=torch.channels_last)
pipe_2.unet.to(memory_format=torch.channels_last)
pipe_3.unet.to(memory_format=torch.channels_last)
if run_compile:
pipe_1.unet = torch.compile(pipe_1.unet, mode="reduce-overhead", fullgraph=True)
pipe_2.unet = torch.compile(pipe_2.unet, mode="reduce-overhead", fullgraph=True)
pipe_3.unet = torch.compile(pipe_3.unet, mode="reduce-overhead", fullgraph=True)
prompt = "the blue hulk"
prompt_embeds = torch.randn((1, 2, 4096), dtype=torch.float16)
neg_prompt_embeds = torch.randn((1, 2, 4096), dtype=torch.float16)
for _ in range(3):
image_1 = pipe_1(prompt_embeds=prompt_embeds, negative_prompt_embeds=neg_prompt_embeds, output_type="pt").images
image_2 = pipe_2(image=image_1, prompt_embeds=prompt_embeds, negative_prompt_embeds=neg_prompt_embeds, output_type="pt").images
image_3 = pipe_3(prompt=prompt, image=image_1, noise_level=100).images
```
The graph below highlights the relative speed-ups for the [StableDiffusionPipeline](/docs/diffusers/main/en/api/pipelines/stable_diffusion/text2img#diffusers.StableDiffusionPipeline) across five GPU families with PyTorch 2.0 and `torch.compile` enabled. The benchmarks for the following graphs are measured in *number of iterations/second*.
![t2i_speedup](https://huggingface.co/datasets/diffusers/docs-images/resolve/main/pt2_benchmarks/t2i_speedup.png)
To give you an even better idea of how this speed-up holds for the other pipelines, consider the following
graph for an A100 with PyTorch 2.0 and `torch.compile`:
![a100_numbers](https://huggingface.co/datasets/diffusers/docs-images/resolve/main/pt2_benchmarks/a100_numbers.png)
In the following tables, we report our findings in terms of the *number of iterations/second*.
### A100 (batch size: 1)
| **Pipeline** | **torch 2.0 - no compile** | **torch nightly - no compile** | **torch 2.0 - compile** | **torch nightly - compile** |
|:---:|:---:|:---:|:---:|:---:|
| SD - txt2img | 21.66 | 23.13 | 44.03 | 49.74 |
| SD - img2img | 21.81 | 22.40 | 43.92 | 46.32 |
| SD - inpaint | 22.24 | 23.23 | 43.76 | 49.25 |
| SD - controlnet | 15.02 | 15.82 | 32.13 | 36.08 |
| IF | 20.21 / 13.84 / 24.00 | 20.12 / 13.70 / 24.03 | ❌ | 97.34 / 27.23 / 111.66 |
| SDXL - txt2img | 8.64 | 9.9 | - | - |
### A100 (batch size: 4)
| **Pipeline** | **torch 2.0 - no compile** | **torch nightly - no compile** | **torch 2.0 - compile** | **torch nightly - compile** |
|:---:|:---:|:---:|:---:|:---:|
| SD - txt2img | 11.6 | 13.12 | 14.62 | 17.27 |
| SD - img2img | 11.47 | 13.06 | 14.66 | 17.25 |
| SD - inpaint | 11.67 | 13.31 | 14.88 | 17.48 |
| SD - controlnet | 8.28 | 9.38 | 10.51 | 12.41 |
| IF | 25.02 | 18.04 | ❌ | 48.47 |
| SDXL - txt2img | 2.44 | 2.74 | - | - |
### A100 (batch size: 16)
| **Pipeline** | **torch 2.0 - no compile** | **torch nightly - no compile** | **torch 2.0 - compile** | **torch nightly - compile** |
|:---:|:---:|:---:|:---:|:---:|
| SD - txt2img | 3.04 | 3.6 | 3.83 | 4.68 |
| SD - img2img | 2.98 | 3.58 | 3.83 | 4.67 |
| SD - inpaint | 3.04 | 3.66 | 3.9 | 4.76 |
| SD - controlnet | 2.15 | 2.58 | 2.74 | 3.35 |
| IF | 8.78 | 9.82 | ❌ | 16.77 |
| SDXL - txt2img | 0.64 | 0.72 | - | - |
### V100 (batch size: 1)
| **Pipeline** | **torch 2.0 - no compile** | **torch nightly - no compile** | **torch 2.0 - compile** | **torch nightly - compile** |
|:---:|:---:|:---:|:---:|:---:|
| SD - txt2img | 18.99 | 19.14 | 20.95 | 22.17 |
| SD - img2img | 18.56 | 19.18 | 20.95 | 22.11 |
| SD - inpaint | 19.14 | 19.06 | 21.08 | 22.20 |
| SD - controlnet | 13.48 | 13.93 | 15.18 | 15.88 |
| IF | 20.01 / 9.08 / 23.34 | 19.79 / 8.98 / 24.10 | ❌ | 55.75 / 11.57 / 57.67 |
### V100 (batch size: 4)
| **Pipeline** | **torch 2.0 - no compile** | **torch nightly - no compile** | **torch 2.0 - compile** | **torch nightly - compile** |
|:---:|:---:|:---:|:---:|:---:|
| SD - txt2img | 5.96 | 5.89 | 6.83 | 6.86 |
| SD - img2img | 5.90 | 5.91 | 6.81 | 6.82 |
| SD - inpaint | 5.99 | 6.03 | 6.93 | 6.95 |
| SD - controlnet | 4.26 | 4.29 | 4.92 | 4.93 |
| IF | 15.41 | 14.76 | ❌ | 22.95 |
### V100 (batch size: 16)
| **Pipeline** | **torch 2.0 - no compile** | **torch nightly - no compile** | **torch 2.0 - compile** | **torch nightly - compile** |
|:---:|:---:|:---:|:---:|:---:|
| SD - txt2img | 1.66 | 1.66 | 1.92 | 1.90 |
| SD - img2img | 1.65 | 1.65 | 1.91 | 1.89 |
| SD - inpaint | 1.69 | 1.69 | 1.95 | 1.93 |
| SD - controlnet | 1.19 | 1.19 | OOM after warmup | 1.36 |
| IF | 5.43 | 5.29 | ❌ | 7.06 |
### T4 (batch size: 1)
| **Pipeline** | **torch 2.0 - no compile** | **torch nightly - no compile** | **torch 2.0 - compile** | **torch nightly - compile** |
|:---:|:---:|:---:|:---:|:---:|
| SD - txt2img | 6.9 | 6.95 | 7.3 | 7.56 |
| SD - img2img | 6.84 | 6.99 | 7.04 | 7.55 |
| SD - inpaint | 6.91 | 6.7 | 7.01 | 7.37 |
| SD - controlnet | 4.89 | 4.86 | 5.35 | 5.48 |
| IF | 17.42 / 2.47 / 18.52 | 16.96 / 2.45 / 18.69 | ❌ | 24.63 / 2.47 / 23.39 |
| SDXL - txt2img | 1.15 | 1.16 | - | - |
### T4 (batch size: 4)
| **Pipeline** | **torch 2.0 - no compile** | **torch nightly - no compile** | **torch 2.0 - compile** | **torch nightly - compile** |
|:---:|:---:|:---:|:---:|:---:|
| SD - txt2img | 1.79 | 1.79 | 2.03 | 1.99 |
| SD - img2img | 1.77 | 1.77 | 2.05 | 2.04 |
| SD - inpaint | 1.81 | 1.82 | 2.09 | 2.09 |
| SD - controlnet | 1.34 | 1.27 | 1.47 | 1.46 |
| IF | 5.79 | 5.61 | ❌ | 7.39 |
| SDXL - txt2img | 0.288 | 0.289 | - | - |
### T4 (batch size: 16)
| **Pipeline** | **torch 2.0 - no compile** | **torch nightly - no compile** | **torch 2.0 - compile** | **torch nightly - compile** |
|:---:|:---:|:---:|:---:|:---:|
| SD - txt2img | 2.34s | 2.30s | OOM after 2nd iteration | 1.99s |
| SD - img2img | 2.35s | 2.31s | OOM after warmup | 2.00s |
| SD - inpaint | 2.30s | 2.26s | OOM after 2nd iteration | 1.95s |
| SD - controlnet | OOM after 2nd iteration | OOM after 2nd iteration | OOM after warmup | OOM after warmup |
| IF * | 1.44 | 1.44 | ❌ | 1.94 |
| SDXL - txt2img | OOM | OOM | - | - |
### RTX 3090 (batch size: 1)
| **Pipeline** | **torch 2.0 - no compile** | **torch nightly - no compile** | **torch 2.0 - compile** | **torch nightly - compile** |
|:---:|:---:|:---:|:---:|:---:|
| SD - txt2img | 22.56 | 22.84 | 23.84 | 25.69 |
| SD - img2img | 22.25 | 22.61 | 24.1 | 25.83 |
| SD - inpaint | 22.22 | 22.54 | 24.26 | 26.02 |
| SD - controlnet | 16.03 | 16.33 | 17.38 | 18.56 |
| IF | 27.08 / 9.07 / 31.23 | 26.75 / 8.92 / 31.47 | ❌ | 68.08 / 11.16 / 65.29 |
### RTX 3090 (batch size: 4)
| **Pipeline** | **torch 2.0 - no compile** | **torch nightly - no compile** | **torch 2.0 - compile** | **torch nightly - compile** |
|:---:|:---:|:---:|:---:|:---:|
| SD - txt2img | 6.46 | 6.35 | 7.29 | 7.3 |
| SD - img2img | 6.33 | 6.27 | 7.31 | 7.26 |
| SD - inpaint | 6.47 | 6.4 | 7.44 | 7.39 |
| SD - controlnet | 4.59 | 4.54 | 5.27 | 5.26 |
| IF | 16.81 | 16.62 | ❌ | 21.57 |
### RTX 3090 (batch size: 16)
| **Pipeline** | **torch 2.0 - no compile** | **torch nightly - no compile** | **torch 2.0 - compile** | **torch nightly - compile** |
|:---:|:---:|:---:|:---:|:---:|
| SD - txt2img | 1.7 | 1.69 | 1.93 | 1.91 |
| SD - img2img | 1.68 | 1.67 | 1.93 | 1.9 |
| SD - inpaint | 1.72 | 1.71 | 1.97 | 1.94 |
| SD - controlnet | 1.23 | 1.22 | 1.4 | 1.38 |
| IF | 5.01 | 5.00 | ❌ | 6.33 |
### RTX 4090 (batch size: 1)
| **Pipeline** | **torch 2.0 - no compile** | **torch nightly - no compile** | **torch 2.0 - compile** | **torch nightly - compile** |
|:---:|:---:|:---:|:---:|:---:|
| SD - txt2img | 40.5 | 41.89 | 44.65 | 49.81 |
| SD - img2img | 40.39 | 41.95 | 44.46 | 49.8 |
| SD - inpaint | 40.51 | 41.88 | 44.58 | 49.72 |
| SD - controlnet | 29.27 | 30.29 | 32.26 | 36.03 |
| IF | 69.71 / 18.78 / 85.49 | 69.13 / 18.80 / 85.56 | ❌ | 124.60 / 26.37 / 138.79 |
| SDXL - txt2img | 6.8 | 8.18 | - | - |
### RTX 4090 (batch size: 4)
| **Pipeline** | **torch 2.0 - no compile** | **torch nightly - no compile** | **torch 2.0 - compile** | **torch nightly - compile** |
|:---:|:---:|:---:|:---:|:---:|
| SD - txt2img | 12.62 | 12.84 | 15.32 | 15.59 |
| SD - img2img | 12.61 | 12,.79 | 15.35 | 15.66 |
| SD - inpaint | 12.65 | 12.81 | 15.3 | 15.58 |
| SD - controlnet | 9.1 | 9.25 | 11.03 | 11.22 |
| IF | 31.88 | 31.14 | ❌ | 43.92 |
| SDXL - txt2img | 2.19 | 2.35 | - | - |
### RTX 4090 (batch size: 16)
| **Pipeline** | **torch 2.0 - no compile** | **torch nightly - no compile** | **torch 2.0 - compile** | **torch nightly - compile** |
|:---:|:---:|:---:|:---:|:---:|
| SD - txt2img | 3.17 | 3.2 | 3.84 | 3.85 |
| SD - img2img | 3.16 | 3.2 | 3.84 | 3.85 |
| SD - inpaint | 3.17 | 3.2 | 3.85 | 3.85 |
| SD - controlnet | 2.23 | 2.3 | 2.7 | 2.75 |
| IF | 9.26 | 9.2 | ❌ | 13.31 |
| SDXL - txt2img | 0.52 | 0.53 | - | - |
## Notes
* Follow this [PR](https://github.com/huggingface/diffusers/pull/3313) for more details on the environment used for conducting the benchmarks.
* For the DeepFloyd IF pipeline where batch sizes > 1, we only used a batch size of > 1 in the first IF pipeline for text-to-image generation and NOT for upscaling. That means the two upscaling pipelines received a batch size of 1.
*Thanks to [Horace He](https://github.com/Chillee) from the PyTorch team for their support in improving our support of `torch.compile()` in Diffusers.*
# Reduce memory usage
A barrier to using diffusion models is the large amount of memory required. To overcome this challenge, there are several memory-reducing techniques you can use to run even some of the largest models on free-tier or consumer GPUs. Some of these techniques can even be combined to further reduce memory usage.
In many cases, optimizing for memory or speed leads to improved performance in the other, so you should try to optimize for both whenever you can. This guide focuses on minimizing memory usage, but you can also learn more about how to [Speed up inference](fp16).
The results below are obtained from generating a single 512x512 image from the prompt a photo of an astronaut riding a horse on mars with 50 DDIM steps on a Nvidia Titan RTX, demonstrating the speed-up you can expect as a result of reduced memory consumption.
| | latency | speed-up |
| ---------------- | ------- | ------- |
| original | 9.50s | x1 |
| fp16 | 3.61s | x2.63 |
| channels last | 3.30s | x2.88 |
| traced UNet | 3.21s | x2.96 |
| memory-efficient attention | 2.63s | x3.61 |
## Sliced VAE
Sliced VAE enables decoding large batches of images with limited VRAM or batches with 32 images or more by decoding the batches of latents one image at a time. You'll likely want to couple this with [enable_xformers_memory_efficient_attention()](/docs/diffusers/main/en/api/models/overview#diffusers.ModelMixin.enable_xformers_memory_efficient_attention) to reduce memory use further if you have xFormers installed.
To use sliced VAE, call [enable_vae_slicing()](/docs/diffusers/main/en/api/pipelines/controlnet#diffusers.StableDiffusionControlNetPipeline.enable_vae_slicing) on your pipeline before inference:
```python
import torch
from diffusers import StableDiffusionPipeline
pipe = StableDiffusionPipeline.from_pretrained(
"stable-diffusion-v1-5/stable-diffusion-v1-5",
torch_dtype=torch.float16,
use_safetensors=True,
)
pipe = pipe.to("cuda")
prompt = "a photo of an astronaut riding a horse on mars"
pipe.enable_vae_slicing()
#pipe.enable_xformers_memory_efficient_attention()
images = pipe([prompt] * 32).images
```
You may see a small performance boost in VAE decoding on multi-image batches, and there should be no performance impact on single-image batches.
## Tiled VAE
Tiled VAE processing also enables working with large images on limited VRAM (for example, generating 4k images on 8GB of VRAM) by splitting the image into overlapping tiles, decoding the tiles, and then blending the outputs together to compose the final image. You should also used tiled VAE with [enable_xformers_memory_efficient_attention()](/docs/diffusers/main/en/api/models/overview#diffusers.ModelMixin.enable_xformers_memory_efficient_attention) to reduce memory use further if you have xFormers installed.
To use tiled VAE processing, call [enable_vae_tiling()](/docs/diffusers/main/en/api/pipelines/latent_consistency_models#diffusers.LatentConsistencyModelPipeline.enable_vae_tiling) on your pipeline before inference:
```python
import torch
from diffusers import StableDiffusionPipeline, UniPCMultistepScheduler
pipe = StableDiffusionPipeline.from_pretrained(
"stable-diffusion-v1-5/stable-diffusion-v1-5",
torch_dtype=torch.float16,
use_safetensors=True,
)
pipe.scheduler = UniPCMultistepScheduler.from_config(pipe.scheduler.config)
pipe = pipe.to("cuda")
prompt = "a beautiful landscape photograph"
pipe.enable_vae_tiling()
#pipe.enable_xformers_memory_efficient_attention()
image = pipe([prompt], width=3840, height=2224, num_inference_steps=20).images[0]
```
The output image has some tile-to-tile tone variation because the tiles are decoded separately, but you shouldn't see any sharp and obvious seams between the tiles. Tiling is turned off for images that are 512x512 or smaller.
## CPU offloading
Offloading the weights to the CPU and only loading them on the GPU when performing the forward pass can also save memory. Often, this technique can reduce memory consumption to less than 3GB.
To perform CPU offloading, call [enable_sequential_cpu_offload()](/docs/diffusers/main/en/api/pipelines/overview#diffusers.DiffusionPipeline.enable_sequential_cpu_offload):
```Python
import torch
from diffusers import StableDiffusionPipeline
pipe = StableDiffusionPipeline.from_pretrained(
"stable-diffusion-v1-5/stable-diffusion-v1-5",
torch_dtype=torch.float16,
use_safetensors=True,
)
prompt = "a photo of an astronaut riding a horse on mars"
pipe.enable_sequential_cpu_offload()
image = pipe(prompt).images[0]
```
CPU offloading works on submodules rather than whole models. This is the best way to minimize memory consumption, but inference is much slower due to the iterative nature of the diffusion process. The UNet component of the pipeline runs several times (as many as `num_inference_steps`); each time, the different UNet submodules are sequentially onloaded and offloaded as needed, resulting in a large number of memory transfers.
Consider using [model offloading](#model-offloading) if you want to optimize for speed because it is much faster. The tradeoff is your memory savings won't be as large.
When using [enable_sequential_cpu_offload()](/docs/diffusers/main/en/api/pipelines/overview#diffusers.DiffusionPipeline.enable_sequential_cpu_offload), don't move the pipeline to CUDA beforehand or else the gain in memory consumption will only be minimal (see this [issue](https://github.com/huggingface/diffusers/issues/1934) for more information).
[enable_sequential_cpu_offload()](/docs/diffusers/main/en/api/pipelines/overview#diffusers.DiffusionPipeline.enable_sequential_cpu_offload) is a stateful operation that installs hooks on the models.
## Model offloading
Model offloading requires 🤗 Accelerate version 0.17.0 or higher.
[Sequential CPU offloading](#cpu-offloading) preserves a lot of memory but it makes inference slower because submodules are moved to GPU as needed, and they're immediately returned to the CPU when a new module runs.
Full-model offloading is an alternative that moves whole models to the GPU, instead of handling each model's constituent *submodules*. There is a negligible impact on inference time (compared with moving the pipeline to `cuda`), and it still provides some memory savings.
During model offloading, only one of the main components of the pipeline (typically the text encoder, UNet and VAE)
is placed on the GPU while the others wait on the CPU. Components like the UNet that run for multiple iterations stay on the GPU until they're no longer needed.
Enable model offloading by calling [enable_model_cpu_offload()](/docs/diffusers/main/en/api/pipelines/overview#diffusers.DiffusionPipeline.enable_model_cpu_offload) on the pipeline:
```Python
import torch
from diffusers import StableDiffusionPipeline
pipe = StableDiffusionPipeline.from_pretrained(
"stable-diffusion-v1-5/stable-diffusion-v1-5",
torch_dtype=torch.float16,
use_safetensors=True,
)
prompt = "a photo of an astronaut riding a horse on mars"
pipe.enable_model_cpu_offload()
image = pipe(prompt).images[0]
```
In order to properly offload models after they're called, it is required to run the entire pipeline and models are called in the pipeline's expected order. Exercise caution if models are reused outside the context of the pipeline after hooks have been installed. See [Removing Hooks](https://huggingface.co/docs/accelerate/en/package_reference/big_modeling#accelerate.hooks.remove_hook_from_module) for more information.
[enable_model_cpu_offload()](/docs/diffusers/main/en/api/pipelines/overview#diffusers.DiffusionPipeline.enable_model_cpu_offload) is a stateful operation that installs hooks on the models and state on the pipeline.
## Channels-last memory format
The channels-last memory format is an alternative way of ordering NCHW tensors in memory to preserve dimension ordering. Channels-last tensors are ordered in such a way that the channels become the densest dimension (storing images pixel-per-pixel). Since not all operators currently support the channels-last format, it may result in worst performance but you should still try and see if it works for your model.
For example, to set the pipeline's UNet to use the channels-last format:
```python
print(pipe.unet.conv_out.state_dict()["weight"].stride()) # (2880, 9, 3, 1)
pipe.unet.to(memory_format=torch.channels_last) # in-place operation
print(
pipe.unet.conv_out.state_dict()["weight"].stride()
) # (2880, 1, 960, 320) having a stride of 1 for the 2nd dimension proves that it works
```
## Tracing
Tracing runs an example input tensor through the model and captures the operations that are performed on it as that input makes its way through the model's layers. The executable or `ScriptFunction` that is returned is optimized with just-in-time compilation.
To trace a UNet:
```python
import time
import torch
from diffusers import StableDiffusionPipeline
import functools
# torch disable grad
torch.set_grad_enabled(False)
# set variables
n_experiments = 2
unet_runs_per_experiment = 50
# load inputs
def generate_inputs():
sample = torch.randn((2, 4, 64, 64), device="cuda", dtype=torch.float16)
timestep = torch.rand(1, device="cuda", dtype=torch.float16) * 999
encoder_hidden_states = torch.randn((2, 77, 768), device="cuda", dtype=torch.float16)
return sample, timestep, encoder_hidden_states
pipe = StableDiffusionPipeline.from_pretrained(
"stable-diffusion-v1-5/stable-diffusion-v1-5",
torch_dtype=torch.float16,
use_safetensors=True,
).to("cuda")
unet = pipe.unet
unet.eval()
unet.to(memory_format=torch.channels_last) # use channels_last memory format
unet.forward = functools.partial(unet.forward, return_dict=False) # set return_dict=False as default
# warmup
for _ in range(3):
with torch.inference_mode():
inputs = generate_inputs()
orig_output = unet(*inputs)
# trace
print("tracing..")
unet_traced = torch.jit.trace(unet, inputs)
unet_traced.eval()
print("done tracing")
# warmup and optimize graph
for _ in range(5):
with torch.inference_mode():
inputs = generate_inputs()
orig_output = unet_traced(*inputs)
# benchmarking
with torch.inference_mode():
for _ in range(n_experiments):
torch.cuda.synchronize()
start_time = time.time()
for _ in range(unet_runs_per_experiment):
orig_output = unet_traced(*inputs)
torch.cuda.synchronize()
print(f"unet traced inference took {time.time() - start_time:.2f} seconds")
for _ in range(n_experiments):
torch.cuda.synchronize()
start_time = time.time()
for _ in range(unet_runs_per_experiment):
orig_output = unet(*inputs)
torch.cuda.synchronize()
print(f"unet inference took {time.time() - start_time:.2f} seconds")
# save the model
unet_traced.save("unet_traced.pt")
```
Replace the `unet` attribute of the pipeline with the traced model:
```python
from diffusers import StableDiffusionPipeline
import torch
from dataclasses import dataclass
@dataclass
class UNet2DConditionOutput:
sample: torch.Tensor
pipe = StableDiffusionPipeline.from_pretrained(
"stable-diffusion-v1-5/stable-diffusion-v1-5",
torch_dtype=torch.float16,
use_safetensors=True,
).to("cuda")
# use jitted unet
unet_traced = torch.jit.load("unet_traced.pt")
# del pipe.unet
class TracedUNet(torch.nn.Module):
def __init__(self):
super().__init__()
self.in_channels = pipe.unet.config.in_channels
self.device = pipe.unet.device
def forward(self, latent_model_input, t, encoder_hidden_states):
sample = unet_traced(latent_model_input, t, encoder_hidden_states)[0]
return UNet2DConditionOutput(sample=sample)
pipe.unet = TracedUNet()
with torch.inference_mode():
image = pipe([prompt] * 1, num_inference_steps=50).images[0]
```
## Memory-efficient attention
Recent work on optimizing bandwidth in the attention block has generated huge speed-ups and reductions in GPU memory usage. The most recent type of memory-efficient attention is [Flash Attention](https://arxiv.org/abs/2205.14135) (you can check out the original code at [HazyResearch/flash-attention](https://github.com/HazyResearch/flash-attention)).
If you have PyTorch >= 2.0 installed, you should not expect a speed-up for inference when enabling `xformers`.
To use Flash Attention, install the following:
- PyTorch > 1.12
- CUDA available
- [xFormers](xformers)
Then call [enable_xformers_memory_efficient_attention()](/docs/diffusers/main/en/api/models/overview#diffusers.ModelMixin.enable_xformers_memory_efficient_attention) on the pipeline:
```python
from diffusers import DiffusionPipeline
import torch
pipe = DiffusionPipeline.from_pretrained(
"stable-diffusion-v1-5/stable-diffusion-v1-5",
torch_dtype=torch.float16,
use_safetensors=True,
).to("cuda")
pipe.enable_xformers_memory_efficient_attention()
with torch.inference_mode():
sample = pipe("a small cat")
# optional: You can disable it via
# pipe.disable_xformers_memory_efficient_attention()
```
The iteration speed when using `xformers` should match the iteration speed of PyTorch 2.0 as described [here](torch2.0).
# OpenVINO
🤗 [Optimum](https://github.com/huggingface/optimum-intel) provides Stable Diffusion pipelines compatible with OpenVINO to perform inference on a variety of Intel processors (see the [full list](https://docs.openvino.ai/latest/openvino_docs_OV_UG_supported_plugins_Supported_Devices.html) of supported devices).
You'll need to install 🤗 Optimum Intel with the `--upgrade-strategy eager` option to ensure [`optimum-intel`](https://github.com/huggingface/optimum-intel) is using the latest version:
```bash
pip install --upgrade-strategy eager optimum["openvino"]
```
This guide will show you how to use the Stable Diffusion and Stable Diffusion XL (SDXL) pipelines with OpenVINO.
## Stable Diffusion
To load and run inference, use the `OVStableDiffusionPipeline`. If you want to load a PyTorch model and convert it to the OpenVINO format on-the-fly, set `export=True`:
```python
from optimum.intel import OVStableDiffusionPipeline
model_id = "stable-diffusion-v1-5/stable-diffusion-v1-5"
pipeline = OVStableDiffusionPipeline.from_pretrained(model_id, export=True)
prompt = "sailing ship in storm by Rembrandt"
image = pipeline(prompt).images[0]
# Don't forget to save the exported model
pipeline.save_pretrained("openvino-sd-v1-5")
```
To further speed-up inference, statically reshape the model. If you change any parameters such as the outputs height or width, you’ll need to statically reshape your model again.
```python
# Define the shapes related to the inputs and desired outputs
batch_size, num_images, height, width = 1, 1, 512, 512
# Statically reshape the model
pipeline.reshape(batch_size, height, width, num_images)
# Compile the model before inference
pipeline.compile()
image = pipeline(
prompt,
height=height,
width=width,
num_images_per_prompt=num_images,
).images[0]
```
You can find more examples in the 🤗 Optimum [documentation](https://huggingface.co/docs/optimum/intel/inference#stable-diffusion), and Stable Diffusion is supported for text-to-image, image-to-image, and inpainting.
## Stable Diffusion XL
To load and run inference with SDXL, use the `OVStableDiffusionXLPipeline`:
```python
from optimum.intel import OVStableDiffusionXLPipeline
model_id = "stabilityai/stable-diffusion-xl-base-1.0"
pipeline = OVStableDiffusionXLPipeline.from_pretrained(model_id)
prompt = "sailing ship in storm by Rembrandt"
image = pipeline(prompt).images[0]
```
To further speed-up inference, [statically reshape](#stable-diffusion) the model as shown in the Stable Diffusion section.
You can find more examples in the 🤗 Optimum [documentation](https://huggingface.co/docs/optimum/intel/inference#stable-diffusion-xl), and running SDXL in OpenVINO is supported for text-to-image and image-to-image.
# How to run Stable Diffusion with Core ML
[Core ML](https://developer.apple.com/documentation/coreml) is the model format and machine learning library supported by Apple frameworks. If you are interested in running Stable Diffusion models inside your macOS or iOS/iPadOS apps, this guide will show you how to convert existing PyTorch checkpoints into the Core ML format and use them for inference with Python or Swift.
Core ML models can leverage all the compute engines available in Apple devices: the CPU, the GPU, and the Apple Neural Engine (or ANE, a tensor-optimized accelerator available in Apple Silicon Macs and modern iPhones/iPads). Depending on the model and the device it's running on, Core ML can mix and match compute engines too, so some portions of the model may run on the CPU while others run on GPU, for example.
You can also run the `diffusers` Python codebase on Apple Silicon Macs using the `mps` accelerator built into PyTorch. This approach is explained in depth in [the mps guide](mps), but it is not compatible with native apps.
## Stable Diffusion Core ML Checkpoints
Stable Diffusion weights (or checkpoints) are stored in the PyTorch format, so you need to convert them to the Core ML format before we can use them inside native apps.
Thankfully, Apple engineers developed [a conversion tool](https://github.com/apple/ml-stable-diffusion#-converting-models-to-core-ml) based on `diffusers` to convert the PyTorch checkpoints to Core ML.
Before you convert a model, though, take a moment to explore the Hugging Face Hub – chances are the model you're interested in is already available in Core ML format:
- the [Apple](https://huggingface.co/apple) organization includes Stable Diffusion versions 1.4, 1.5, 2.0 base, and 2.1 base
- [coreml community](https://huggingface.co/coreml-community) includes custom finetuned models
- use this [filter](https://huggingface.co/models?pipeline_tag=text-to-image&library=coreml&p=2&sort=likes) to return all available Core ML checkpoints
If you can't find the model you're interested in, we recommend you follow the instructions for [Converting Models to Core ML](https://github.com/apple/ml-stable-diffusion#-converting-models-to-core-ml) by Apple.
## Selecting the Core ML Variant to Use
Stable Diffusion models can be converted to different Core ML variants intended for different purposes:
- The type of attention blocks used. The attention operation is used to "pay attention" to the relationship between different areas in the image representations and to understand how the image and text representations are related. Attention is compute- and memory-intensive, so different implementations exist that consider the hardware characteristics of different devices. For Core ML Stable Diffusion models, there are two attention variants:
* `split_einsum` ([introduced by Apple](https://machinelearning.apple.com/research/neural-engine-transformers)) is optimized for ANE devices, which is available in modern iPhones, iPads and M-series computers.
* The "original" attention (the base implementation used in `diffusers`) is only compatible with CPU/GPU and not ANE. It can be *faster* to run your model on CPU + GPU using `original` attention than ANE. See [this performance benchmark](https://huggingface.co/blog/fast-mac-diffusers#performance-benchmarks) as well as some [additional measures provided by the community](https://github.com/huggingface/swift-coreml-diffusers/issues/31) for additional details.
- The supported inference framework.
* `packages` are suitable for Python inference. This can be used to test converted Core ML models before attempting to integrate them inside native apps, or if you want to explore Core ML performance but don't need to support native apps. For example, an application with a web UI could perfectly use a Python Core ML backend.
* `compiled` models are required for Swift code. The `compiled` models in the Hub split the large UNet model weights into several files for compatibility with iOS and iPadOS devices. This corresponds to the [`--chunk-unet` conversion option](https://github.com/apple/ml-stable-diffusion#-converting-models-to-core-ml). If you want to support native apps, then you need to select the `compiled` variant.
The official Core ML Stable Diffusion [models](https://huggingface.co/apple/coreml-stable-diffusion-v1-4/tree/main) include these variants, but the community ones may vary:
```
coreml-stable-diffusion-v1-4
├── README.md
├── original
│ ├── compiled
│ └── packages
└── split_einsum
├── compiled
└── packages
```
You can download and use the variant you need as shown below.
## Core ML Inference in Python
Install the following libraries to run Core ML inference in Python:
```bash
pip install huggingface_hub
pip install git+https://github.com/apple/ml-stable-diffusion
```
### Download the Model Checkpoints
To run inference in Python, use one of the versions stored in the `packages` folders because the `compiled` ones are only compatible with Swift. You may choose whether you want to use `original` or `split_einsum` attention.
This is how you'd download the `original` attention variant from the Hub to a directory called `models`:
```Python
from huggingface_hub import snapshot_download
from pathlib import Path
repo_id = "apple/coreml-stable-diffusion-v1-4"
variant = "original/packages"
model_path = Path("./models") / (repo_id.split("/")[-1] + "_" + variant.replace("/", "_"))
snapshot_download(repo_id, allow_patterns=f"{variant}/*", local_dir=model_path, local_dir_use_symlinks=False)
print(f"Model downloaded at {model_path}")
```
### Inference[[python-inference]]
Once you have downloaded a snapshot of the model, you can test it using Apple's Python script.
```shell
python -m python_coreml_stable_diffusion.pipeline --prompt "a photo of an astronaut riding a horse on mars" -i ./models/coreml-stable-diffusion-v1-4_original_packages/original/packages -o --compute-unit CPU_AND_GPU --seed 93
```
Pass the path of the downloaded checkpoint with `-i` flag to the script. `--compute-unit` indicates the hardware you want to allow for inference. It must be one of the following options: `ALL`, `CPU_AND_GPU`, `CPU_ONLY`, `CPU_AND_NE`. You may also provide an optional output path, and a seed for reproducibility.
The inference script assumes you're using the original version of the Stable Diffusion model, `CompVis/stable-diffusion-v1-4`. If you use another model, you *have* to specify its Hub id in the inference command line, using the `--model-version` option. This works for models already supported and custom models you trained or fine-tuned yourself.
For example, if you want to use [`stable-diffusion-v1-5/stable-diffusion-v1-5`](https://huggingface.co/stable-diffusion-v1-5/stable-diffusion-v1-5):
```shell
python -m python_coreml_stable_diffusion.pipeline --prompt "a photo of an astronaut riding a horse on mars" --compute-unit ALL -o output --seed 93 -i models/coreml-stable-diffusion-v1-5_original_packages --model-version stable-diffusion-v1-5/stable-diffusion-v1-5
```
## Core ML inference in Swift
Running inference in Swift is slightly faster than in Python because the models are already compiled in the `mlmodelc` format. This is noticeable on app startup when the model is loaded but shouldn’t be noticeable if you run several generations afterward.
### Download
To run inference in Swift on your Mac, you need one of the `compiled` checkpoint versions. We recommend you download them locally using Python code similar to the previous example, but with one of the `compiled` variants:
```Python
from huggingface_hub import snapshot_download
from pathlib import Path
repo_id = "apple/coreml-stable-diffusion-v1-4"
variant = "original/compiled"
model_path = Path("./models") / (repo_id.split("/")[-1] + "_" + variant.replace("/", "_"))
snapshot_download(repo_id, allow_patterns=f"{variant}/*", local_dir=model_path, local_dir_use_symlinks=False)
print(f"Model downloaded at {model_path}")
```
### Inference[[swift-inference]]
To run inference, please clone Apple's repo:
```bash
git clone https://github.com/apple/ml-stable-diffusion
cd ml-stable-diffusion
```
And then use Apple's command line tool, [Swift Package Manager](https://www.swift.org/package-manager/#):
```bash
swift run StableDiffusionSample --resource-path models/coreml-stable-diffusion-v1-4_original_compiled --compute-units all "a photo of an astronaut riding a horse on mars"
```
You have to specify in `--resource-path` one of the checkpoints downloaded in the previous step, so please make sure it contains compiled Core ML bundles with the extension `.mlmodelc`. The `--compute-units` has to be one of these values: `all`, `cpuOnly`, `cpuAndGPU`, `cpuAndNeuralEngine`.
For more details, please refer to the [instructions in Apple's repo](https://github.com/apple/ml-stable-diffusion).
## Supported Diffusers Features
The Core ML models and inference code don't support many of the features, options, and flexibility of 🧨 Diffusers. These are some of the limitations to keep in mind:
- Core ML models are only suitable for inference. They can't be used for training or fine-tuning.
- Only two schedulers have been ported to Swift, the default one used by Stable Diffusion and `DPMSolverMultistepScheduler`, which we ported to Swift from our `diffusers` implementation. We recommend you use `DPMSolverMultistepScheduler`, since it produces the same quality in about half the steps.
- Negative prompts, classifier-free guidance scale, and image-to-image tasks are available in the inference code. Advanced features such as depth guidance, ControlNet, and latent upscalers are not available yet.
Apple's [conversion and inference repo](https://github.com/apple/ml-stable-diffusion) and our own [swift-coreml-diffusers](https://github.com/huggingface/swift-coreml-diffusers) repos are intended as technology demonstrators to enable other developers to build upon.
If you feel strongly about any missing features, please feel free to open a feature request or, better yet, a contribution PR 🙂.
## Native Diffusers Swift app
One easy way to run Stable Diffusion on your own Apple hardware is to use [our open-source Swift repo](https://github.com/huggingface/swift-coreml-diffusers), based on `diffusers` and Apple's conversion and inference repo. You can study the code, compile it with [Xcode](https://developer.apple.com/xcode/) and adapt it for your own needs. For your convenience, there's also a [standalone Mac app in the App Store](https://apps.apple.com/app/diffusers/id1666309574), so you can play with it without having to deal with the code or IDE. If you are a developer and have determined that Core ML is the best solution to build your Stable Diffusion app, then you can use the rest of this guide to get started with your project. We can't wait to see what you'll build 🙂.
# Speed up inference
There are several ways to optimize Diffusers for inference speed, such as reducing the computational burden by lowering the data precision or using a lightweight distilled model. There are also memory-efficient attention implementations, [xFormers](xformers) and [scaled dot product attention](https://pytorch.org/docs/stable/generated/torch.nn.functional.scaled_dot_product_attention.html) in PyTorch 2.0, that reduce memory usage which also indirectly speeds up inference. Different speed optimizations can be stacked together to get the fastest inference times.
> [!TIP]
> Optimizing for inference speed or reduced memory usage can lead to improved performance in the other category, so you should try to optimize for both whenever you can. This guide focuses on inference speed, but you can learn more about lowering memory usage in the [Reduce memory usage](memory) guide.
The inference times below are obtained from generating a single 512x512 image from the prompt "a photo of an astronaut riding a horse on mars" with 50 DDIM steps on a NVIDIA A100.
| setup | latency | speed-up |
|----------|---------|----------|
| baseline | 5.27s | x1 |
| tf32 | 4.14s | x1.27 |
| fp16 | 3.51s | x1.50 |
| combined | 3.41s | x1.54 |
## TensorFloat-32
On Ampere and later CUDA devices, matrix multiplications and convolutions can use the [TensorFloat-32 (tf32)](https://blogs.nvidia.com/blog/2020/05/14/tensorfloat-32-precision-format/) mode for faster, but slightly less accurate computations. By default, PyTorch enables tf32 mode for convolutions but not matrix multiplications. Unless your network requires full float32 precision, we recommend enabling tf32 for matrix multiplications. It can significantly speed up computations with typically negligible loss in numerical accuracy.
```python
import torch
torch.backends.cuda.matmul.allow_tf32 = True
```
Learn more about tf32 in the [Mixed precision training](https://huggingface.co/docs/transformers/en/perf_train_gpu_one#tf32) guide.
## Half-precision weights
To save GPU memory and get more speed, set `torch_dtype=torch.float16` to load and run the model weights directly with half-precision weights.
```Python
import torch
from diffusers import DiffusionPipeline
pipe = DiffusionPipeline.from_pretrained(
"stable-diffusion-v1-5/stable-diffusion-v1-5",
torch_dtype=torch.float16,
use_safetensors=True,
)
pipe = pipe.to("cuda")
```
> [!WARNING]
> Don't use [torch.autocast](https://pytorch.org/docs/stable/amp.html#torch.autocast) in any of the pipelines as it can lead to black images and is always slower than pure float16 precision.
## Distilled model
You could also use a distilled Stable Diffusion model and autoencoder to speed up inference. During distillation, many of the UNet's residual and attention blocks are shed to reduce the model size by 51% and improve latency on CPU/GPU by 43%. The distilled model is faster and uses less memory while generating images of comparable quality to the full Stable Diffusion model.
> [!TIP]
> Read the [Open-sourcing Knowledge Distillation Code and Weights of SD-Small and SD-Tiny](https://huggingface.co/blog/sd_distillation) blog post to learn more about how knowledge distillation training works to produce a faster, smaller, and cheaper generative model.
The inference times below are obtained from generating 4 images from the prompt "a photo of an astronaut riding a horse on mars" with 25 PNDM steps on a NVIDIA A100. Each generation is repeated 3 times with the distilled Stable Diffusion v1.4 model by [Nota AI](https://hf.co/nota-ai).
| setup | latency | speed-up |
|------------------------------|---------|----------|
| baseline | 6.37s | x1 |
| distilled | 4.18s | x1.52 |
| distilled + tiny autoencoder | 3.83s | x1.66 |
Let's load the distilled Stable Diffusion model and compare it against the original Stable Diffusion model.
```py
from diffusers import StableDiffusionPipeline
import torch
distilled = StableDiffusionPipeline.from_pretrained(
"nota-ai/bk-sdm-small", torch_dtype=torch.float16, use_safetensors=True,
).to("cuda")
prompt = "a golden vase with different flowers"
generator = torch.manual_seed(2023)
image = distilled("a golden vase with different flowers", num_inference_steps=25, generator=generator).images[0]
image
```
original Stable Diffusion
distilled Stable Diffusion
### Tiny AutoEncoder
To speed inference up even more, replace the autoencoder with a [distilled version](https://huggingface.co/sayakpaul/taesdxl-diffusers) of it.
```py
import torch
from diffusers import AutoencoderTiny, StableDiffusionPipeline
distilled = StableDiffusionPipeline.from_pretrained(
"nota-ai/bk-sdm-small", torch_dtype=torch.float16, use_safetensors=True,
).to("cuda")
distilled.vae = AutoencoderTiny.from_pretrained(
"sayakpaul/taesd-diffusers", torch_dtype=torch.float16, use_safetensors=True,
).to("cuda")
prompt = "a golden vase with different flowers"
generator = torch.manual_seed(2023)
image = distilled("a golden vase with different flowers", num_inference_steps=25, generator=generator).images[0]
image
```
distilled Stable Diffusion + Tiny AutoEncoder
More tiny autoencoder models for other Stable Diffusion models, like Stable Diffusion 3, are available from [madebyollin](https://huggingface.co/madebyollin).
# Metal Performance Shaders (MPS)
🤗 Diffusers is compatible with Apple silicon (M1/M2 chips) using the PyTorch [`mps`](https://pytorch.org/docs/stable/notes/mps.html) device, which uses the Metal framework to leverage the GPU on MacOS devices. You'll need to have:
- macOS computer with Apple silicon (M1/M2) hardware
- macOS 12.6 or later (13.0 or later recommended)
- arm64 version of Python
- [PyTorch 2.0](https://pytorch.org/get-started/locally/) (recommended) or 1.13 (minimum version supported for `mps`)
The `mps` backend uses PyTorch's `.to()` interface to move the Stable Diffusion pipeline on to your M1 or M2 device:
```python
from diffusers import DiffusionPipeline
pipe = DiffusionPipeline.from_pretrained("stable-diffusion-v1-5/stable-diffusion-v1-5")
pipe = pipe.to("mps")
# Recommended if your computer has < 64 GB of RAM
pipe.enable_attention_slicing()
prompt = "a photo of an astronaut riding a horse on mars"
image = pipe(prompt).images[0]
image
```
Generating multiple prompts in a batch can [crash](https://github.com/huggingface/diffusers/issues/363) or fail to work reliably. We believe this is related to the [`mps`](https://github.com/pytorch/pytorch/issues/84039) backend in PyTorch. While this is being investigated, you should iterate instead of batching.
If you're using **PyTorch 1.13**, you need to "prime" the pipeline with an additional one-time pass through it. This is a temporary workaround for an issue where the first inference pass produces slightly different results than subsequent ones. You only need to do this pass once, and after just one inference step you can discard the result.
```diff
from diffusers import DiffusionPipeline
pipe = DiffusionPipeline.from_pretrained("stable-diffusion-v1-5/stable-diffusion-v1-5").to("mps")
pipe.enable_attention_slicing()
prompt = "a photo of an astronaut riding a horse on mars"
# First-time "warmup" pass if PyTorch version is 1.13
+ _ = pipe(prompt, num_inference_steps=1)
# Results match those from the CPU device after the warmup pass.
image = pipe(prompt).images[0]
```
## Troubleshoot
M1/M2 performance is very sensitive to memory pressure. When this occurs, the system automatically swaps if it needs to which significantly degrades performance.
To prevent this from happening, we recommend *attention slicing* to reduce memory pressure during inference and prevent swapping. This is especially relevant if your computer has less than 64GB of system RAM, or if you generate images at non-standard resolutions larger than 512×512 pixels. Call the [enable_attention_slicing()](/docs/diffusers/main/en/api/pipelines/overview#diffusers.DiffusionPipeline.enable_attention_slicing) function on your pipeline:
```py
from diffusers import DiffusionPipeline
import torch
pipeline = DiffusionPipeline.from_pretrained("stable-diffusion-v1-5/stable-diffusion-v1-5", torch_dtype=torch.float16, variant="fp16", use_safetensors=True).to("mps")
pipeline.enable_attention_slicing()
```
Attention slicing performs the costly attention operation in multiple steps instead of all at once. It usually improves performance by ~20% in computers without universal memory, but we've observed *better performance* in most Apple silicon computers unless you have 64GB of RAM or more.
# xFormers
We recommend [xFormers](https://github.com/facebookresearch/xformers) for both inference and training. In our tests, the optimizations performed in the attention blocks allow for both faster speed and reduced memory consumption.
Install xFormers from `pip`:
```bash
pip install xformers
```
The xFormers `pip` package requires the latest version of PyTorch. If you need to use a previous version of PyTorch, then we recommend [installing xFormers from the source](https://github.com/facebookresearch/xformers#installing-xformers).
After xFormers is installed, you can use `enable_xformers_memory_efficient_attention()` for faster inference and reduced memory consumption as shown in this [section](memory#memory-efficient-attention).
According to this [issue](https://github.com/huggingface/diffusers/issues/2234#issuecomment-1416931212), xFormers `v0.0.16` cannot be used for training (fine-tune or DreamBooth) in some GPUs. If you observe this problem, please install a development version as indicated in the issue comments.
# xDiT
[xDiT](https://github.com/xdit-project/xDiT) is an inference engine designed for the large scale parallel deployment of Diffusion Transformers (DiTs). xDiT provides a suite of efficient parallel approaches for Diffusion Models, as well as GPU kernel accelerations.
There are four parallel methods supported in xDiT, including [Unified Sequence Parallelism](https://arxiv.org/abs/2405.07719), [PipeFusion](https://arxiv.org/abs/2405.14430), CFG parallelism and data parallelism. The four parallel methods in xDiT can be configured in a hybrid manner, optimizing communication patterns to best suit the underlying network hardware.
Optimization orthogonal to parallelization focuses on accelerating single GPU performance. In addition to utilizing well-known Attention optimization libraries, we leverage compilation acceleration technologies such as torch.compile and onediff.
The overview of xDiT is shown as follows.
You can install xDiT using the following command:
```bash
pip install xfuser
```
Here's an example of using xDiT to accelerate inference of a Diffusers model.
```diff
import torch
from diffusers import StableDiffusion3Pipeline
from xfuser import xFuserArgs, xDiTParallel
from xfuser.config import FlexibleArgumentParser
from xfuser.core.distributed import get_world_group
def main():
+ parser = FlexibleArgumentParser(description="xFuser Arguments")
+ args = xFuserArgs.add_cli_args(parser).parse_args()
+ engine_args = xFuserArgs.from_cli_args(args)
+ engine_config, input_config = engine_args.create_config()
local_rank = get_world_group().local_rank
pipe = StableDiffusion3Pipeline.from_pretrained(
pretrained_model_name_or_path=engine_config.model_config.model,
torch_dtype=torch.float16,
).to(f"cuda:{local_rank}")
# do anything you want with pipeline here
+ pipe = xDiTParallel(pipe, engine_config, input_config)
pipe(
height=input_config.height,
width=input_config.height,
prompt=input_config.prompt,
num_inference_steps=input_config.num_inference_steps,
output_type=input_config.output_type,
generator=torch.Generator(device="cuda").manual_seed(input_config.seed),
)
+ if input_config.output_type == "pil":
+ pipe.save("results", "stable_diffusion_3")
if __name__ == "__main__":
main()
```
As you can see, we only need to use xFuserArgs from xDiT to get configuration parameters, and pass these parameters along with the pipeline object from the Diffusers library into xDiTParallel to complete the parallelization of a specific pipeline in Diffusers.
xDiT runtime parameters can be viewed in the command line using `-h`, and you can refer to this [usage](https://github.com/xdit-project/xDiT?tab=readme-ov-file#2-usage) example for more details.
xDiT needs to be launched using torchrun to support its multi-node, multi-GPU parallel capabilities. For example, the following command can be used for 8-GPU parallel inference:
```bash
torchrun --nproc_per_node=8 ./inference.py --model models/FLUX.1-dev --data_parallel_degree 2 --ulysses_degree 2 --ring_degree 2 --prompt "A snowy mountain" "A small dog" --num_inference_steps 50
```
## Supported models
A subset of Diffusers models are supported in xDiT, such as Flux.1, Stable Diffusion 3, etc. The latest supported models can be found [here](https://github.com/xdit-project/xDiT?tab=readme-ov-file#-supported-dits).
## Benchmark
We tested different models on various machines, and here is some of the benchmark data.
### Flux.1-schnell
### Stable Diffusion 3
### HunyuanDiT
More detailed performance metric can be found on our [github page](https://github.com/xdit-project/xDiT?tab=readme-ov-file#perf).
## Reference
[xDiT-project](https://github.com/xdit-project/xDiT)
[USP: A Unified Sequence Parallelism Approach for Long Context Generative AI](https://arxiv.org/abs/2405.07719)
[PipeFusion: Displaced Patch Pipeline Parallelism for Inference of Diffusion Transformer Models](https://arxiv.org/abs/2405.14430)
# Habana Gaudi
🤗 Diffusers is compatible with Habana Gaudi through 🤗 [Optimum](https://huggingface.co/docs/optimum/habana/usage_guides/stable_diffusion). Follow the [installation](https://docs.habana.ai/en/latest/Installation_Guide/index.html) guide to install the SynapseAI and Gaudi drivers, and then install Optimum Habana:
```bash
python -m pip install --upgrade-strategy eager optimum[habana]
```
To generate images with Stable Diffusion 1 and 2 on Gaudi, you need to instantiate two instances:
- `GaudiStableDiffusionPipeline`, a pipeline for text-to-image generation.
- `GaudiDDIMScheduler`, a Gaudi-optimized scheduler.
When you initialize the pipeline, you have to specify `use_habana=True` to deploy it on HPUs and to get the fastest possible generation, you should enable **HPU graphs** with `use_hpu_graphs=True`.
Finally, specify a `GaudiConfig` which can be downloaded from the [Habana](https://huggingface.co/Habana) organization on the Hub.
```python
from optimum.habana import GaudiConfig
from optimum.habana.diffusers import GaudiDDIMScheduler, GaudiStableDiffusionPipeline
model_name = "stabilityai/stable-diffusion-2-base"
scheduler = GaudiDDIMScheduler.from_pretrained(model_name, subfolder="scheduler")
pipeline = GaudiStableDiffusionPipeline.from_pretrained(
model_name,
scheduler=scheduler,
use_habana=True,
use_hpu_graphs=True,
gaudi_config="Habana/stable-diffusion-2",
)
```
Now you can call the pipeline to generate images by batches from one or several prompts:
```python
outputs = pipeline(
prompt=[
"High quality photo of an astronaut riding a horse in space",
"Face of a yellow cat, high resolution, sitting on a park bench",
],
num_images_per_prompt=10,
batch_size=4,
)
```
For more information, check out 🤗 Optimum Habana's [documentation](https://huggingface.co/docs/optimum/habana/usage_guides/stable_diffusion) and the [example](https://github.com/huggingface/optimum-habana/tree/main/examples/stable-diffusion) provided in the official GitHub repository.
## Benchmark
We benchmarked Habana's first-generation Gaudi and Gaudi2 with the [Habana/stable-diffusion](https://huggingface.co/Habana/stable-diffusion) and [Habana/stable-diffusion-2](https://huggingface.co/Habana/stable-diffusion-2) Gaudi configurations (mixed precision bf16/fp32) to demonstrate their performance.
For [Stable Diffusion v1.5](https://huggingface.co/stable-diffusion-v1-5/stable-diffusion-v1-5) on 512x512 images:
| | Latency (batch size = 1) | Throughput |
| ---------------------- |:------------------------:|:---------------------------:|
| first-generation Gaudi | 3.80s | 0.308 images/s (batch size = 8) |
| Gaudi2 | 1.33s | 1.081 images/s (batch size = 8) |
For [Stable Diffusion v2.1](https://huggingface.co/stabilityai/stable-diffusion-2-1) on 768x768 images:
| | Latency (batch size = 1) | Throughput |
| ---------------------- |:------------------------:|:-------------------------------:|
| first-generation Gaudi | 10.2s | 0.108 images/s (batch size = 4) |
| Gaudi2 | 3.17s | 0.379 images/s (batch size = 8) |
# Text-to-image
When you think of diffusion models, text-to-image is usually one of the first things that come to mind. Text-to-image generates an image from a text description (for example, "Astronaut in a jungle, cold color palette, muted colors, detailed, 8k") which is also known as a *prompt*.
From a very high level, a diffusion model takes a prompt and some random initial noise, and iteratively removes the noise to construct an image. The *denoising* process is guided by the prompt, and once the denoising process ends after a predetermined number of time steps, the image representation is decoded into an image.
Read the [How does Stable Diffusion work?](https://huggingface.co/blog/stable_diffusion#how-does-stable-diffusion-work) blog post to learn more about how a latent diffusion model works.
You can generate images from a prompt in 🤗 Diffusers in two steps:
1. Load a checkpoint into the [AutoPipelineForText2Image](/docs/diffusers/main/en/api/pipelines/auto_pipeline#diffusers.AutoPipelineForText2Image) class, which automatically detects the appropriate pipeline class to use based on the checkpoint:
```py
from diffusers import AutoPipelineForText2Image
import torch
pipeline = AutoPipelineForText2Image.from_pretrained(
"stable-diffusion-v1-5/stable-diffusion-v1-5", torch_dtype=torch.float16, variant="fp16"
).to("cuda")
```
2. Pass a prompt to the pipeline to generate an image:
```py
image = pipeline(
"stained glass of darth vader, backlight, centered composition, masterpiece, photorealistic, 8k"
).images[0]
image
```
## Popular models
The most common text-to-image models are [Stable Diffusion v1.5](https://huggingface.co/stable-diffusion-v1-5/stable-diffusion-v1-5), [Stable Diffusion XL (SDXL)](https://huggingface.co/stabilityai/stable-diffusion-xl-base-1.0), and [Kandinsky 2.2](https://huggingface.co/kandinsky-community/kandinsky-2-2-decoder). There are also ControlNet models or adapters that can be used with text-to-image models for more direct control in generating images. The results from each model are slightly different because of their architecture and training process, but no matter which model you choose, their usage is more or less the same. Let's use the same prompt for each model and compare their results.
### Stable Diffusion v1.5
[Stable Diffusion v1.5](https://huggingface.co/stable-diffusion-v1-5/stable-diffusion-v1-5) is a latent diffusion model initialized from [Stable Diffusion v1-4](https://huggingface.co/CompVis/stable-diffusion-v1-4), and finetuned for 595K steps on 512x512 images from the LAION-Aesthetics V2 dataset. You can use this model like:
```py
from diffusers import AutoPipelineForText2Image
import torch
pipeline = AutoPipelineForText2Image.from_pretrained(
"stable-diffusion-v1-5/stable-diffusion-v1-5", torch_dtype=torch.float16, variant="fp16"
).to("cuda")
generator = torch.Generator("cuda").manual_seed(31)
image = pipeline("Astronaut in a jungle, cold color palette, muted colors, detailed, 8k", generator=generator).images[0]
image
```
### Stable Diffusion XL
SDXL is a much larger version of the previous Stable Diffusion models, and involves a two-stage model process that adds even more details to an image. It also includes some additional *micro-conditionings* to generate high-quality images centered subjects. Take a look at the more comprehensive [SDXL](sdxl) guide to learn more about how to use it. In general, you can use SDXL like:
```py
from diffusers import AutoPipelineForText2Image
import torch
pipeline = AutoPipelineForText2Image.from_pretrained(
"stabilityai/stable-diffusion-xl-base-1.0", torch_dtype=torch.float16, variant="fp16"
).to("cuda")
generator = torch.Generator("cuda").manual_seed(31)
image = pipeline("Astronaut in a jungle, cold color palette, muted colors, detailed, 8k", generator=generator).images[0]
image
```
### Kandinsky 2.2
The Kandinsky model is a bit different from the Stable Diffusion models because it also uses an image prior model to create embeddings that are used to better align text and images in the diffusion model.
The easiest way to use Kandinsky 2.2 is:
```py
from diffusers import AutoPipelineForText2Image
import torch
pipeline = AutoPipelineForText2Image.from_pretrained(
"kandinsky-community/kandinsky-2-2-decoder", torch_dtype=torch.float16
).to("cuda")
generator = torch.Generator("cuda").manual_seed(31)
image = pipeline("Astronaut in a jungle, cold color palette, muted colors, detailed, 8k", generator=generator).images[0]
image
```
### ControlNet
ControlNet models are auxiliary models or adapters that are finetuned on top of text-to-image models, such as [Stable Diffusion v1.5](https://huggingface.co/stable-diffusion-v1-5/stable-diffusion-v1-5). Using ControlNet models in combination with text-to-image models offers diverse options for more explicit control over how to generate an image. With ControlNet, you add an additional conditioning input image to the model. For example, if you provide an image of a human pose (usually represented as multiple keypoints that are connected into a skeleton) as a conditioning input, the model generates an image that follows the pose of the image. Check out the more in-depth [ControlNet](controlnet) guide to learn more about other conditioning inputs and how to use them.
In this example, let's condition the ControlNet with a human pose estimation image. Load the ControlNet model pretrained on human pose estimations:
```py
from diffusers import ControlNetModel, AutoPipelineForText2Image
from diffusers.utils import load_image
import torch
controlnet = ControlNetModel.from_pretrained(
"lllyasviel/control_v11p_sd15_openpose", torch_dtype=torch.float16, variant="fp16"
).to("cuda")
pose_image = load_image("https://huggingface.co/lllyasviel/control_v11p_sd15_openpose/resolve/main/images/control.png")
```
Pass the `controlnet` to the [AutoPipelineForText2Image](/docs/diffusers/main/en/api/pipelines/auto_pipeline#diffusers.AutoPipelineForText2Image), and provide the prompt and pose estimation image:
```py
pipeline = AutoPipelineForText2Image.from_pretrained(
"stable-diffusion-v1-5/stable-diffusion-v1-5", controlnet=controlnet, torch_dtype=torch.float16, variant="fp16"
).to("cuda")
generator = torch.Generator("cuda").manual_seed(31)
image = pipeline("Astronaut in a jungle, cold color palette, muted colors, detailed, 8k", image=pose_image, generator=generator).images[0]
image
```
Stable Diffusion v1.5
Stable Diffusion XL
Kandinsky 2.2
ControlNet (pose conditioning)
## Configure pipeline parameters
There are a number of parameters that can be configured in the pipeline that affect how an image is generated. You can change the image's output size, specify a negative prompt to improve image quality, and more. This section dives deeper into how to use these parameters.
### Height and width
The `height` and `width` parameters control the height and width (in pixels) of the generated image. By default, the Stable Diffusion v1.5 model outputs 512x512 images, but you can change this to any size that is a multiple of 8. For example, to create a rectangular image:
```py
from diffusers import AutoPipelineForText2Image
import torch
pipeline = AutoPipelineForText2Image.from_pretrained(
"stable-diffusion-v1-5/stable-diffusion-v1-5", torch_dtype=torch.float16, variant="fp16"
).to("cuda")
image = pipeline(
"Astronaut in a jungle, cold color palette, muted colors, detailed, 8k", height=768, width=512
).images[0]
image
```
Other models may have different default image sizes depending on the image sizes in the training dataset. For example, SDXL's default image size is 1024x1024 and using lower `height` and `width` values may result in lower quality images. Make sure you check the model's API reference first!
### Guidance scale
The `guidance_scale` parameter affects how much the prompt influences image generation. A lower value gives the model "creativity" to generate images that are more loosely related to the prompt. Higher `guidance_scale` values push the model to follow the prompt more closely, and if this value is too high, you may observe some artifacts in the generated image.
```py
from diffusers import AutoPipelineForText2Image
import torch
pipeline = AutoPipelineForText2Image.from_pretrained(
"stable-diffusion-v1-5/stable-diffusion-v1-5", torch_dtype=torch.float16
).to("cuda")
image = pipeline(
"Astronaut in a jungle, cold color palette, muted colors, detailed, 8k", guidance_scale=3.5
).images[0]
image
```
guidance_scale = 2.5
guidance_scale = 7.5
guidance_scale = 10.5
### Negative prompt
Just like how a prompt guides generation, a *negative prompt* steers the model away from things you don't want the model to generate. This is commonly used to improve overall image quality by removing poor or bad image features such as "low resolution" or "bad details". You can also use a negative prompt to remove or modify the content and style of an image.
```py
from diffusers import AutoPipelineForText2Image
import torch
pipeline = AutoPipelineForText2Image.from_pretrained(
"stable-diffusion-v1-5/stable-diffusion-v1-5", torch_dtype=torch.float16
).to("cuda")
image = pipeline(
prompt="Astronaut in a jungle, cold color palette, muted colors, detailed, 8k",
negative_prompt="ugly, deformed, disfigured, poor details, bad anatomy",
).images[0]
image
```
negative_prompt = "ugly, deformed, disfigured, poor details, bad anatomy"
negative_prompt = "astronaut"
### Generator
A [`torch.Generator`](https://pytorch.org/docs/stable/generated/torch.Generator.html#generator) object enables reproducibility in a pipeline by setting a manual seed. You can use a `Generator` to generate batches of images and iteratively improve on an image generated from a seed as detailed in the [Improve image quality with deterministic generation](reusing_seeds) guide.
You can set a seed and `Generator` as shown below. Creating an image with a `Generator` should return the same result each time instead of randomly generating a new image.
```py
from diffusers import AutoPipelineForText2Image
import torch
pipeline = AutoPipelineForText2Image.from_pretrained(
"stable-diffusion-v1-5/stable-diffusion-v1-5", torch_dtype=torch.float16
).to("cuda")
generator = torch.Generator(device="cuda").manual_seed(30)
image = pipeline(
"Astronaut in a jungle, cold color palette, muted colors, detailed, 8k",
generator=generator,
).images[0]
image
```
## Control image generation
There are several ways to exert more control over how an image is generated outside of configuring a pipeline's parameters, such as prompt weighting and ControlNet models.
### Prompt weighting
Prompt weighting is a technique for increasing or decreasing the importance of concepts in a prompt to emphasize or minimize certain features in an image. We recommend using the [Compel](https://github.com/damian0815/compel) library to help you generate the weighted prompt embeddings.
Learn how to create the prompt embeddings in the [Prompt weighting](weighted_prompts) guide. This example focuses on how to use the prompt embeddings in the pipeline.
Once you've created the embeddings, you can pass them to the `prompt_embeds` (and `negative_prompt_embeds` if you're using a negative prompt) parameter in the pipeline.
```py
from diffusers import AutoPipelineForText2Image
import torch
pipeline = AutoPipelineForText2Image.from_pretrained(
"stable-diffusion-v1-5/stable-diffusion-v1-5", torch_dtype=torch.float16
).to("cuda")
image = pipeline(
prompt_embeds=prompt_embeds, # generated from Compel
negative_prompt_embeds=negative_prompt_embeds, # generated from Compel
).images[0]
```
### ControlNet
As you saw in the [ControlNet](#controlnet) section, these models offer a more flexible and accurate way to generate images by incorporating an additional conditioning image input. Each ControlNet model is pretrained on a particular type of conditioning image to generate new images that resemble it. For example, if you take a ControlNet model pretrained on depth maps, you can give the model a depth map as a conditioning input and it'll generate an image that preserves the spatial information in it. This is quicker and easier than specifying the depth information in a prompt. You can even combine multiple conditioning inputs with a [MultiControlNet](controlnet#multicontrolnet)!
There are many types of conditioning inputs you can use, and 🤗 Diffusers supports ControlNet for Stable Diffusion and SDXL models. Take a look at the more comprehensive [ControlNet](controlnet) guide to learn how you can use these models.
## Optimize
Diffusion models are large, and the iterative nature of denoising an image is computationally expensive and intensive. But this doesn't mean you need access to powerful - or even many - GPUs to use them. There are many optimization techniques for running diffusion models on consumer and free-tier resources. For example, you can load model weights in half-precision to save GPU memory and increase speed or offload the entire model to the GPU to save even more memory.
PyTorch 2.0 also supports a more memory-efficient attention mechanism called [*scaled dot product attention*](../optimization/torch2.0#scaled-dot-product-attention) that is automatically enabled if you're using PyTorch 2.0. You can combine this with [`torch.compile`](https://pytorch.org/tutorials/intermediate/torch_compile_tutorial.html) to speed your code up even more:
```py
from diffusers import AutoPipelineForText2Image
import torch
pipeline = AutoPipelineForText2Image.from_pretrained("stable-diffusion-v1-5/stable-diffusion-v1-5", torch_dtype=torch.float16, variant="fp16").to("cuda")
pipeline.unet = torch.compile(pipeline.unet, mode="reduce-overhead", fullgraph=True)
```
For more tips on how to optimize your code to save memory and speed up inference, read the [Memory and speed](../optimization/fp16) and [Torch 2.0](../optimization/torch2.0) guides.
# Text or image-to-video
Driven by the success of text-to-image diffusion models, generative video models are able to generate short clips of video from a text prompt or an initial image. These models extend a pretrained diffusion model to generate videos by adding some type of temporal and/or spatial convolution layer to the architecture. A mixed dataset of images and videos are used to train the model which learns to output a series of video frames based on the text or image conditioning.
This guide will show you how to generate videos, how to configure video model parameters, and how to control video generation.
## Popular models
> [!TIP]
> Discover other cool and trending video generation models on the Hub [here](https://huggingface.co/models?pipeline_tag=text-to-video&sort=trending)!
[Stable Video Diffusions (SVD)](https://huggingface.co/stabilityai/stable-video-diffusion-img2vid), [I2VGen-XL](https://huggingface.co/ali-vilab/i2vgen-xl/), [AnimateDiff](https://huggingface.co/guoyww/animatediff), and [ModelScopeT2V](https://huggingface.co/ali-vilab/text-to-video-ms-1.7b) are popular models used for video diffusion. Each model is distinct. For example, AnimateDiff inserts a motion modeling module into a frozen text-to-image model to generate personalized animated images, whereas SVD is entirely pretrained from scratch with a three-stage training process to generate short high-quality videos.
[CogVideoX](https://huggingface.co/collections/THUDM/cogvideo-66c08e62f1685a3ade464cce) is another popular video generation model. The model is a multidimensional transformer that integrates text, time, and space. It employs full attention in the attention module and includes an expert block at the layer level to spatially align text and video.
### CogVideoX
[CogVideoX](../api/pipelines/cogvideox) uses a 3D Variational Autoencoder (VAE) to compress videos along the spatial and temporal dimensions.
Begin by loading the [CogVideoXPipeline](/docs/diffusers/main/en/api/pipelines/cogvideox#diffusers.CogVideoXPipeline) and passing an initial text or image to generate a video.
CogVideoX is available for image-to-video and text-to-video. [THUDM/CogVideoX-5b-I2V](https://huggingface.co/THUDM/CogVideoX-5b-I2V) uses the [CogVideoXImageToVideoPipeline](/docs/diffusers/main/en/api/pipelines/cogvideox#diffusers.CogVideoXImageToVideoPipeline) for image-to-video. [THUDM/CogVideoX-5b](https://huggingface.co/THUDM/CogVideoX-5b) and [THUDM/CogVideoX-2b](https://huggingface.co/THUDM/CogVideoX-2b) are available for text-to-video with the [CogVideoXPipeline](/docs/diffusers/main/en/api/pipelines/cogvideox#diffusers.CogVideoXPipeline).
```py
import torch
from diffusers import CogVideoXImageToVideoPipeline
from diffusers.utils import export_to_video, load_image
prompt = "A vast, shimmering ocean flows gracefully under a twilight sky, its waves undulating in a mesmerizing dance of blues and greens. The surface glints with the last rays of the setting sun, casting golden highlights that ripple across the water. Seagulls soar above, their cries blending with the gentle roar of the waves. The horizon stretches infinitely, where the ocean meets the sky in a seamless blend of hues. Close-ups reveal the intricate patterns of the waves, capturing the fluidity and dynamic beauty of the sea in motion."
image = load_image(image="cogvideox_rocket.png")
pipe = CogVideoXImageToVideoPipeline.from_pretrained(
"THUDM/CogVideoX-5b-I2V",
torch_dtype=torch.bfloat16
)
pipe.vae.enable_tiling()
pipe.vae.enable_slicing()
video = pipe(
prompt=prompt,
image=image,
num_videos_per_prompt=1,
num_inference_steps=50,
num_frames=49,
guidance_scale=6,
generator=torch.Generator(device="cuda").manual_seed(42),
).frames[0]
export_to_video(video, "output.mp4", fps=8)
```
initial image
generated video
### Stable Video Diffusion
[SVD](../api/pipelines/svd) is based on the Stable Diffusion 2.1 model and it is trained on images, then low-resolution videos, and finally a smaller dataset of high-resolution videos. This model generates a short 2-4 second video from an initial image. You can learn more details about model, like micro-conditioning, in the [Stable Video Diffusion](../using-diffusers/svd) guide.
Begin by loading the [StableVideoDiffusionPipeline](/docs/diffusers/main/en/api/pipelines/stable_diffusion/svd#diffusers.StableVideoDiffusionPipeline) and passing an initial image to generate a video from.
```py
import torch
from diffusers import StableVideoDiffusionPipeline
from diffusers.utils import load_image, export_to_video
pipeline = StableVideoDiffusionPipeline.from_pretrained(
"stabilityai/stable-video-diffusion-img2vid-xt", torch_dtype=torch.float16, variant="fp16"
)
pipeline.enable_model_cpu_offload()
image = load_image("https://huggingface.co/datasets/huggingface/documentation-images/resolve/main/diffusers/svd/rocket.png")
image = image.resize((1024, 576))
generator = torch.manual_seed(42)
frames = pipeline(image, decode_chunk_size=8, generator=generator).frames[0]
export_to_video(frames, "generated.mp4", fps=7)
```
initial image
generated video
### I2VGen-XL
[I2VGen-XL](../api/pipelines/i2vgenxl) is a diffusion model that can generate higher resolution videos than SVD and it is also capable of accepting text prompts in addition to images. The model is trained with two hierarchical encoders (detail and global encoder) to better capture low and high-level details in images. These learned details are used to train a video diffusion model which refines the video resolution and details in the generated video.
You can use I2VGen-XL by loading the [I2VGenXLPipeline](/docs/diffusers/main/en/api/pipelines/i2vgenxl#diffusers.I2VGenXLPipeline), and passing a text and image prompt to generate a video.
```py
import torch
from diffusers import I2VGenXLPipeline
from diffusers.utils import export_to_gif, load_image
pipeline = I2VGenXLPipeline.from_pretrained("ali-vilab/i2vgen-xl", torch_dtype=torch.float16, variant="fp16")
pipeline.enable_model_cpu_offload()
image_url = "https://huggingface.co/datasets/diffusers/docs-images/resolve/main/i2vgen_xl_images/img_0009.png"
image = load_image(image_url).convert("RGB")
prompt = "Papers were floating in the air on a table in the library"
negative_prompt = "Distorted, discontinuous, Ugly, blurry, low resolution, motionless, static, disfigured, disconnected limbs, Ugly faces, incomplete arms"
generator = torch.manual_seed(8888)
frames = pipeline(
prompt=prompt,
image=image,
num_inference_steps=50,
negative_prompt=negative_prompt,
guidance_scale=9.0,
generator=generator
).frames[0]
export_to_gif(frames, "i2v.gif")
```
initial image
generated video
### AnimateDiff
[AnimateDiff](../api/pipelines/animatediff) is an adapter model that inserts a motion module into a pretrained diffusion model to animate an image. The adapter is trained on video clips to learn motion which is used to condition the generation process to create a video. It is faster and easier to only train the adapter and it can be loaded into most diffusion models, effectively turning them into "video models".
Start by loading a `MotionAdapter`.
```py
import torch
from diffusers import AnimateDiffPipeline, DDIMScheduler, MotionAdapter
from diffusers.utils import export_to_gif
adapter = MotionAdapter.from_pretrained("guoyww/animatediff-motion-adapter-v1-5-2", torch_dtype=torch.float16)
```
Then load a finetuned Stable Diffusion model with the [AnimateDiffPipeline](/docs/diffusers/main/en/api/pipelines/animatediff#diffusers.AnimateDiffPipeline).
```py
pipeline = AnimateDiffPipeline.from_pretrained("emilianJR/epiCRealism", motion_adapter=adapter, torch_dtype=torch.float16)
scheduler = DDIMScheduler.from_pretrained(
"emilianJR/epiCRealism",
subfolder="scheduler",
clip_sample=False,
timestep_spacing="linspace",
beta_schedule="linear",
steps_offset=1,
)
pipeline.scheduler = scheduler
pipeline.enable_vae_slicing()
pipeline.enable_model_cpu_offload()
```
Create a prompt and generate the video.
```py
output = pipeline(
prompt="A space rocket with trails of smoke behind it launching into space from the desert, 4k, high resolution",
negative_prompt="bad quality, worse quality, low resolution",
num_frames=16,
guidance_scale=7.5,
num_inference_steps=50,
generator=torch.Generator("cpu").manual_seed(49),
)
frames = output.frames[0]
export_to_gif(frames, "animation.gif")
```
### ModelscopeT2V
[ModelscopeT2V](../api/pipelines/text_to_video) adds spatial and temporal convolutions and attention to a UNet, and it is trained on image-text and video-text datasets to enhance what it learns during training. The model takes a prompt, encodes it and creates text embeddings which are denoised by the UNet, and then decoded by a VQGAN into a video.
ModelScopeT2V generates watermarked videos due to the datasets it was trained on. To use a watermark-free model, try the [cerspense/zeroscope_v2_76w](https://huggingface.co/cerspense/zeroscope_v2_576w) model with the [TextToVideoSDPipeline](/docs/diffusers/main/en/api/pipelines/text_to_video#diffusers.TextToVideoSDPipeline) first, and then upscale it's output with the [cerspense/zeroscope_v2_XL](https://huggingface.co/cerspense/zeroscope_v2_XL) checkpoint using the [VideoToVideoSDPipeline](/docs/diffusers/main/en/api/pipelines/text_to_video#diffusers.VideoToVideoSDPipeline).
Load a ModelScopeT2V checkpoint into the [DiffusionPipeline](/docs/diffusers/main/en/api/pipelines/overview#diffusers.DiffusionPipeline) along with a prompt to generate a video.
```py
import torch
from diffusers import DiffusionPipeline
from diffusers.utils import export_to_video
pipeline = DiffusionPipeline.from_pretrained("damo-vilab/text-to-video-ms-1.7b", torch_dtype=torch.float16, variant="fp16")
pipeline.enable_model_cpu_offload()
pipeline.enable_vae_slicing()
prompt = "Confident teddy bear surfer rides the wave in the tropics"
video_frames = pipeline(prompt).frames[0]
export_to_video(video_frames, "modelscopet2v.mp4", fps=10)
```
## Configure model parameters
There are a few important parameters you can configure in the pipeline that'll affect the video generation process and quality. Let's take a closer look at what these parameters do and how changing them affects the output.
### Number of frames
The `num_frames` parameter determines how many video frames are generated per second. A frame is an image that is played in a sequence of other frames to create motion or a video. This affects video length because the pipeline generates a certain number of frames per second (check a pipeline's API reference for the default value). To increase the video duration, you'll need to increase the `num_frames` parameter.
```py
import torch
from diffusers import StableVideoDiffusionPipeline
from diffusers.utils import load_image, export_to_video
pipeline = StableVideoDiffusionPipeline.from_pretrained(
"stabilityai/stable-video-diffusion-img2vid", torch_dtype=torch.float16, variant="fp16"
)
pipeline.enable_model_cpu_offload()
image = load_image("https://huggingface.co/datasets/huggingface/documentation-images/resolve/main/diffusers/svd/rocket.png")
image = image.resize((1024, 576))
generator = torch.manual_seed(42)
frames = pipeline(image, decode_chunk_size=8, generator=generator, num_frames=25).frames[0]
export_to_video(frames, "generated.mp4", fps=7)
```
num_frames=14
num_frames=25
### Guidance scale
The `guidance_scale` parameter controls how closely aligned the generated video and text prompt or initial image is. A higher `guidance_scale` value means your generated video is more aligned with the text prompt or initial image, while a lower `guidance_scale` value means your generated video is less aligned which could give the model more "creativity" to interpret the conditioning input.
SVD uses the `min_guidance_scale` and `max_guidance_scale` parameters for applying guidance to the first and last frames respectively.
```py
import torch
from diffusers import I2VGenXLPipeline
from diffusers.utils import export_to_gif, load_image
pipeline = I2VGenXLPipeline.from_pretrained("ali-vilab/i2vgen-xl", torch_dtype=torch.float16, variant="fp16")
pipeline.enable_model_cpu_offload()
image_url = "https://huggingface.co/datasets/diffusers/docs-images/resolve/main/i2vgen_xl_images/img_0009.png"
image = load_image(image_url).convert("RGB")
prompt = "Papers were floating in the air on a table in the library"
negative_prompt = "Distorted, discontinuous, Ugly, blurry, low resolution, motionless, static, disfigured, disconnected limbs, Ugly faces, incomplete arms"
generator = torch.manual_seed(0)
frames = pipeline(
prompt=prompt,
image=image,
num_inference_steps=50,
negative_prompt=negative_prompt,
guidance_scale=1.0,
generator=generator
).frames[0]
export_to_gif(frames, "i2v.gif")
```
guidance_scale=9.0
guidance_scale=1.0
### Negative prompt
A negative prompt deters the model from generating things you don’t want it to. This parameter is commonly used to improve overall generation quality by removing poor or bad features such as “low resolution” or “bad details”.
```py
import torch
from diffusers import AnimateDiffPipeline, DDIMScheduler, MotionAdapter
from diffusers.utils import export_to_gif
adapter = MotionAdapter.from_pretrained("guoyww/animatediff-motion-adapter-v1-5-2", torch_dtype=torch.float16)
pipeline = AnimateDiffPipeline.from_pretrained("emilianJR/epiCRealism", motion_adapter=adapter, torch_dtype=torch.float16)
scheduler = DDIMScheduler.from_pretrained(
"emilianJR/epiCRealism",
subfolder="scheduler",
clip_sample=False,
timestep_spacing="linspace",
beta_schedule="linear",
steps_offset=1,
)
pipeline.scheduler = scheduler
pipeline.enable_vae_slicing()
pipeline.enable_model_cpu_offload()
output = pipeline(
prompt="360 camera shot of a sushi roll in a restaurant",
negative_prompt="Distorted, discontinuous, ugly, blurry, low resolution, motionless, static",
num_frames=16,
guidance_scale=7.5,
num_inference_steps=50,
generator=torch.Generator("cpu").manual_seed(0),
)
frames = output.frames[0]
export_to_gif(frames, "animation.gif")
```
no negative prompt
negative prompt applied
### Model-specific parameters
There are some pipeline parameters that are unique to each model such as adjusting the motion in a video or adding noise to the initial image.
Stable Video Diffusion provides additional micro-conditioning for the frame rate with the `fps` parameter and for motion with the `motion_bucket_id` parameter. Together, these parameters allow for adjusting the amount of motion in the generated video.
There is also a `noise_aug_strength` parameter that increases the amount of noise added to the initial image. Varying this parameter affects how similar the generated video and initial image are. A higher `noise_aug_strength` also increases the amount of motion. To learn more, read the [Micro-conditioning](../using-diffusers/svd#micro-conditioning) guide.
Text2Video-Zero computes the amount of motion to apply to each frame from randomly sampled latents. You can use the `motion_field_strength_x` and `motion_field_strength_y` parameters to control the amount of motion to apply to the x and y-axes of the video. The parameters `t0` and `t1` are the timesteps to apply motion to the latents.
## Control video generation
Video generation can be controlled similar to how text-to-image, image-to-image, and inpainting can be controlled with a [ControlNetModel](/docs/diffusers/main/en/api/models/controlnet#diffusers.ControlNetModel). The only difference is you need to use the [CrossFrameAttnProcessor](/docs/diffusers/main/en/api/attnprocessor#diffusers.pipelines.text_to_video_synthesis.pipeline_text_to_video_zero.CrossFrameAttnProcessor) so each frame attends to the first frame.
### Text2Video-Zero
Text2Video-Zero video generation can be conditioned on pose and edge images for even greater control over a subject's motion in the generated video or to preserve the identity of a subject/object in the video. You can also use Text2Video-Zero with [InstructPix2Pix](../api/pipelines/pix2pix) for editing videos with text.
Start by downloading a video and extracting the pose images from it.
```py
from huggingface_hub import hf_hub_download
from PIL import Image
import imageio
filename = "__assets__/poses_skeleton_gifs/dance1_corr.mp4"
repo_id = "PAIR/Text2Video-Zero"
video_path = hf_hub_download(repo_type="space", repo_id=repo_id, filename=filename)
reader = imageio.get_reader(video_path, "ffmpeg")
frame_count = 8
pose_images = [Image.fromarray(reader.get_data(i)) for i in range(frame_count)]
```
Load a [ControlNetModel](/docs/diffusers/main/en/api/models/controlnet#diffusers.ControlNetModel) for pose estimation and a checkpoint into the [StableDiffusionControlNetPipeline](/docs/diffusers/main/en/api/pipelines/controlnet#diffusers.StableDiffusionControlNetPipeline). Then you'll use the [CrossFrameAttnProcessor](/docs/diffusers/main/en/api/attnprocessor#diffusers.pipelines.text_to_video_synthesis.pipeline_text_to_video_zero.CrossFrameAttnProcessor) for the UNet and ControlNet.
```py
import torch
from diffusers import StableDiffusionControlNetPipeline, ControlNetModel
from diffusers.pipelines.text_to_video_synthesis.pipeline_text_to_video_zero import CrossFrameAttnProcessor
model_id = "stable-diffusion-v1-5/stable-diffusion-v1-5"
controlnet = ControlNetModel.from_pretrained("lllyasviel/sd-controlnet-openpose", torch_dtype=torch.float16)
pipeline = StableDiffusionControlNetPipeline.from_pretrained(
model_id, controlnet=controlnet, torch_dtype=torch.float16
).to("cuda")
pipeline.unet.set_attn_processor(CrossFrameAttnProcessor(batch_size=2))
pipeline.controlnet.set_attn_processor(CrossFrameAttnProcessor(batch_size=2))
```
Fix the latents for all the frames, and then pass your prompt and extracted pose images to the model to generate a video.
```py
latents = torch.randn((1, 4, 64, 64), device="cuda", dtype=torch.float16).repeat(len(pose_images), 1, 1, 1)
prompt = "Darth Vader dancing in a desert"
result = pipeline(prompt=[prompt] * len(pose_images), image=pose_images, latents=latents).images
imageio.mimsave("video.mp4", result, fps=4)
```
Download a video and extract the edges from it.
```py
from huggingface_hub import hf_hub_download
from PIL import Image
import imageio
filename = "__assets__/poses_skeleton_gifs/dance1_corr.mp4"
repo_id = "PAIR/Text2Video-Zero"
video_path = hf_hub_download(repo_type="space", repo_id=repo_id, filename=filename)
reader = imageio.get_reader(video_path, "ffmpeg")
frame_count = 8
pose_images = [Image.fromarray(reader.get_data(i)) for i in range(frame_count)]
```
Load a [ControlNetModel](/docs/diffusers/main/en/api/models/controlnet#diffusers.ControlNetModel) for canny edge and a checkpoint into the [StableDiffusionControlNetPipeline](/docs/diffusers/main/en/api/pipelines/controlnet#diffusers.StableDiffusionControlNetPipeline). Then you'll use the [CrossFrameAttnProcessor](/docs/diffusers/main/en/api/attnprocessor#diffusers.pipelines.text_to_video_synthesis.pipeline_text_to_video_zero.CrossFrameAttnProcessor) for the UNet and ControlNet.
```py
import torch
from diffusers import StableDiffusionControlNetPipeline, ControlNetModel
from diffusers.pipelines.text_to_video_synthesis.pipeline_text_to_video_zero import CrossFrameAttnProcessor
model_id = "stable-diffusion-v1-5/stable-diffusion-v1-5"
controlnet = ControlNetModel.from_pretrained("lllyasviel/sd-controlnet-canny", torch_dtype=torch.float16)
pipeline = StableDiffusionControlNetPipeline.from_pretrained(
model_id, controlnet=controlnet, torch_dtype=torch.float16
).to("cuda")
pipeline.unet.set_attn_processor(CrossFrameAttnProcessor(batch_size=2))
pipeline.controlnet.set_attn_processor(CrossFrameAttnProcessor(batch_size=2))
```
Fix the latents for all the frames, and then pass your prompt and extracted edge images to the model to generate a video.
```py
latents = torch.randn((1, 4, 64, 64), device="cuda", dtype=torch.float16).repeat(len(pose_images), 1, 1, 1)
prompt = "Darth Vader dancing in a desert"
result = pipeline(prompt=[prompt] * len(pose_images), image=pose_images, latents=latents).images
imageio.mimsave("video.mp4", result, fps=4)
```
InstructPix2Pix allows you to use text to describe the changes you want to make to the video. Start by downloading and reading a video.
```py
from huggingface_hub import hf_hub_download
from PIL import Image
import imageio
filename = "__assets__/pix2pix video/camel.mp4"
repo_id = "PAIR/Text2Video-Zero"
video_path = hf_hub_download(repo_type="space", repo_id=repo_id, filename=filename)
reader = imageio.get_reader(video_path, "ffmpeg")
frame_count = 8
video = [Image.fromarray(reader.get_data(i)) for i in range(frame_count)]
```
Load the [StableDiffusionInstructPix2PixPipeline](/docs/diffusers/main/en/api/pipelines/pix2pix#diffusers.StableDiffusionInstructPix2PixPipeline) and set the [CrossFrameAttnProcessor](/docs/diffusers/main/en/api/attnprocessor#diffusers.pipelines.text_to_video_synthesis.pipeline_text_to_video_zero.CrossFrameAttnProcessor) for the UNet.
```py
import torch
from diffusers import StableDiffusionInstructPix2PixPipeline
from diffusers.pipelines.text_to_video_synthesis.pipeline_text_to_video_zero import CrossFrameAttnProcessor
pipeline = StableDiffusionInstructPix2PixPipeline.from_pretrained("timbrooks/instruct-pix2pix", torch_dtype=torch.float16).to("cuda")
pipeline.unet.set_attn_processor(CrossFrameAttnProcessor(batch_size=3))
```
Pass a prompt describing the change you want to apply to the video.
```py
prompt = "make it Van Gogh Starry Night style"
result = pipeline(prompt=[prompt] * len(video), image=video).images
imageio.mimsave("edited_video.mp4", result, fps=4)
```
## Optimize
Video generation requires a lot of memory because you're generating many video frames at once. You can reduce your memory requirements at the expense of some inference speed. Try:
1. offloading pipeline components that are no longer needed to the CPU
2. feed-forward chunking runs the feed-forward layer in a loop instead of all at once
3. break up the number of frames the VAE has to decode into chunks instead of decoding them all at once
```diff
- pipeline.enable_model_cpu_offload()
- frames = pipeline(image, decode_chunk_size=8, generator=generator).frames[0]
+ pipeline.enable_model_cpu_offload()
+ pipeline.unet.enable_forward_chunking()
+ frames = pipeline(image, decode_chunk_size=2, generator=generator, num_frames=25).frames[0]
```
If memory is not an issue and you want to optimize for speed, try wrapping the UNet with [`torch.compile`](../optimization/torch2.0#torchcompile).
```diff
- pipeline.enable_model_cpu_offload()
+ pipeline.to("cuda")
+ pipeline.unet = torch.compile(pipeline.unet, mode="reduce-overhead", fullgraph=True)
```
# Stable Diffusion XL Turbo
SDXL Turbo is an adversarial time-distilled [Stable Diffusion XL](https://huggingface.co/papers/2307.01952) (SDXL) model capable
of running inference in as little as 1 step.
This guide will show you how to use SDXL-Turbo for text-to-image and image-to-image.
Before you begin, make sure you have the following libraries installed:
```py
# uncomment to install the necessary libraries in Colab
#!pip install -q diffusers transformers accelerate
```
## Load model checkpoints
Model weights may be stored in separate subfolders on the Hub or locally, in which case, you should use the [from_pretrained()](/docs/diffusers/main/en/api/pipelines/overview#diffusers.DiffusionPipeline.from_pretrained) method:
```py
from diffusers import AutoPipelineForText2Image
import torch
pipeline = AutoPipelineForText2Image.from_pretrained("stabilityai/sdxl-turbo", torch_dtype=torch.float16, variant="fp16")
pipeline = pipeline.to("cuda")
```
You can also use the [from_single_file()](/docs/diffusers/main/en/api/loaders/single_file#diffusers.loaders.FromSingleFileMixin.from_single_file) method to load a model checkpoint stored in a single file format (`.ckpt` or `.safetensors`) from the Hub or locally. For this loading method, you need to set `timestep_spacing="trailing"` (feel free to experiment with the other scheduler config values to get better results):
```py
from diffusers import StableDiffusionXLPipeline, EulerAncestralDiscreteScheduler
import torch
pipeline = StableDiffusionXLPipeline.from_single_file(
"https://huggingface.co/stabilityai/sdxl-turbo/blob/main/sd_xl_turbo_1.0_fp16.safetensors",
torch_dtype=torch.float16, variant="fp16")
pipeline = pipeline.to("cuda")
pipeline.scheduler = EulerAncestralDiscreteScheduler.from_config(pipeline.scheduler.config, timestep_spacing="trailing")
```
## Text-to-image
For text-to-image, pass a text prompt. By default, SDXL Turbo generates a 512x512 image, and that resolution gives the best results. You can try setting the `height` and `width` parameters to 768x768 or 1024x1024, but you should expect quality degradations when doing so.
Make sure to set `guidance_scale` to 0.0 to disable, as the model was trained without it. A single inference step is enough to generate high quality images.
Increasing the number of steps to 2, 3 or 4 should improve image quality.
```py
from diffusers import AutoPipelineForText2Image
import torch
pipeline_text2image = AutoPipelineForText2Image.from_pretrained("stabilityai/sdxl-turbo", torch_dtype=torch.float16, variant="fp16")
pipeline_text2image = pipeline_text2image.to("cuda")
prompt = "A cinematic shot of a baby racoon wearing an intricate italian priest robe."
image = pipeline_text2image(prompt=prompt, guidance_scale=0.0, num_inference_steps=1).images[0]
image
```
## Image-to-image
For image-to-image generation, make sure that `num_inference_steps * strength` is larger or equal to 1.
The image-to-image pipeline will run for `int(num_inference_steps * strength)` steps, e.g. `0.5 * 2.0 = 1` step in
our example below.
```py
from diffusers import AutoPipelineForImage2Image
from diffusers.utils import load_image, make_image_grid
# use from_pipe to avoid consuming additional memory when loading a checkpoint
pipeline_image2image = AutoPipelineForImage2Image.from_pipe(pipeline_text2image).to("cuda")
init_image = load_image("https://huggingface.co/datasets/huggingface/documentation-images/resolve/main/diffusers/cat.png")
init_image = init_image.resize((512, 512))
prompt = "cat wizard, gandalf, lord of the rings, detailed, fantasy, cute, adorable, Pixar, Disney, 8k"
image = pipeline_image2image(prompt, image=init_image, strength=0.5, guidance_scale=0.0, num_inference_steps=2).images[0]
make_image_grid([init_image, image], rows=1, cols=2)
```
## Speed-up SDXL Turbo even more
- Compile the UNet if you are using PyTorch version 2.0 or higher. The first inference run will be very slow, but subsequent ones will be much faster.
```py
pipe.unet = torch.compile(pipe.unet, mode="reduce-overhead", fullgraph=True)
```
- When using the default VAE, keep it in `float32` to avoid costly `dtype` conversions before and after each generation. You only need to do this one before your first generation:
```py
pipe.upcast_vae()
```
As an alternative, you can also use a [16-bit VAE](https://huggingface.co/madebyollin/sdxl-vae-fp16-fix) created by community member [`@madebyollin`](https://huggingface.co/madebyollin) that does not need to be upcasted to `float32`.
# Push files to the Hub
🤗 Diffusers provides a [PushToHubMixin](/docs/diffusers/main/en/api/pipelines/overview#diffusers.utils.PushToHubMixin) for uploading your model, scheduler, or pipeline to the Hub. It is an easy way to store your files on the Hub, and also allows you to share your work with others. Under the hood, the [PushToHubMixin](/docs/diffusers/main/en/api/pipelines/overview#diffusers.utils.PushToHubMixin):
1. creates a repository on the Hub
2. saves your model, scheduler, or pipeline files so they can be reloaded later
3. uploads folder containing these files to the Hub
This guide will show you how to use the [PushToHubMixin](/docs/diffusers/main/en/api/pipelines/overview#diffusers.utils.PushToHubMixin) to upload your files to the Hub.
You'll need to log in to your Hub account with your access [token](https://huggingface.co/settings/tokens) first:
```py
from huggingface_hub import notebook_login
notebook_login()
```
## Models
To push a model to the Hub, call [push_to_hub()](/docs/diffusers/main/en/api/pipelines/overview#diffusers.utils.PushToHubMixin.push_to_hub) and specify the repository id of the model to be stored on the Hub:
```py
from diffusers import ControlNetModel
controlnet = ControlNetModel(
block_out_channels=(32, 64),
layers_per_block=2,
in_channels=4,
down_block_types=("DownBlock2D", "CrossAttnDownBlock2D"),
cross_attention_dim=32,
conditioning_embedding_out_channels=(16, 32),
)
controlnet.push_to_hub("my-controlnet-model")
```
For models, you can also specify the [*variant*](loading#checkpoint-variants) of the weights to push to the Hub. For example, to push `fp16` weights:
```py
controlnet.push_to_hub("my-controlnet-model", variant="fp16")
```
The [push_to_hub()](/docs/diffusers/main/en/api/pipelines/overview#diffusers.utils.PushToHubMixin.push_to_hub) function saves the model's `config.json` file and the weights are automatically saved in the `safetensors` format.
Now you can reload the model from your repository on the Hub:
```py
model = ControlNetModel.from_pretrained("your-namespace/my-controlnet-model")
```
## Scheduler
To push a scheduler to the Hub, call [push_to_hub()](/docs/diffusers/main/en/api/pipelines/overview#diffusers.utils.PushToHubMixin.push_to_hub) and specify the repository id of the scheduler to be stored on the Hub:
```py
from diffusers import DDIMScheduler
scheduler = DDIMScheduler(
beta_start=0.00085,
beta_end=0.012,
beta_schedule="scaled_linear",
clip_sample=False,
set_alpha_to_one=False,
)
scheduler.push_to_hub("my-controlnet-scheduler")
```
The [push_to_hub()](/docs/diffusers/main/en/api/pipelines/overview#diffusers.utils.PushToHubMixin.push_to_hub) function saves the scheduler's `scheduler_config.json` file to the specified repository.
Now you can reload the scheduler from your repository on the Hub:
```py
scheduler = DDIMScheduler.from_pretrained("your-namepsace/my-controlnet-scheduler")
```
## Pipeline
You can also push an entire pipeline with all it's components to the Hub. For example, initialize the components of a [StableDiffusionPipeline](/docs/diffusers/main/en/api/pipelines/stable_diffusion/text2img#diffusers.StableDiffusionPipeline) with the parameters you want:
```py
from diffusers import (
UNet2DConditionModel,
AutoencoderKL,
DDIMScheduler,
StableDiffusionPipeline,
)
from transformers import CLIPTextModel, CLIPTextConfig, CLIPTokenizer
unet = UNet2DConditionModel(
block_out_channels=(32, 64),
layers_per_block=2,
sample_size=32,
in_channels=4,
out_channels=4,
down_block_types=("DownBlock2D", "CrossAttnDownBlock2D"),
up_block_types=("CrossAttnUpBlock2D", "UpBlock2D"),
cross_attention_dim=32,
)
scheduler = DDIMScheduler(
beta_start=0.00085,
beta_end=0.012,
beta_schedule="scaled_linear",
clip_sample=False,
set_alpha_to_one=False,
)
vae = AutoencoderKL(
block_out_channels=[32, 64],
in_channels=3,
out_channels=3,
down_block_types=["DownEncoderBlock2D", "DownEncoderBlock2D"],
up_block_types=["UpDecoderBlock2D", "UpDecoderBlock2D"],
latent_channels=4,
)
text_encoder_config = CLIPTextConfig(
bos_token_id=0,
eos_token_id=2,
hidden_size=32,
intermediate_size=37,
layer_norm_eps=1e-05,
num_attention_heads=4,
num_hidden_layers=5,
pad_token_id=1,
vocab_size=1000,
)
text_encoder = CLIPTextModel(text_encoder_config)
tokenizer = CLIPTokenizer.from_pretrained("hf-internal-testing/tiny-random-clip")
```
Pass all of the components to the [StableDiffusionPipeline](/docs/diffusers/main/en/api/pipelines/stable_diffusion/text2img#diffusers.StableDiffusionPipeline) and call [push_to_hub()](/docs/diffusers/main/en/api/pipelines/overview#diffusers.utils.PushToHubMixin.push_to_hub) to push the pipeline to the Hub:
```py
components = {
"unet": unet,
"scheduler": scheduler,
"vae": vae,
"text_encoder": text_encoder,
"tokenizer": tokenizer,
"safety_checker": None,
"feature_extractor": None,
}
pipeline = StableDiffusionPipeline(**components)
pipeline.push_to_hub("my-pipeline")
```
The [push_to_hub()](/docs/diffusers/main/en/api/pipelines/overview#diffusers.utils.PushToHubMixin.push_to_hub) function saves each component to a subfolder in the repository. Now you can reload the pipeline from your repository on the Hub:
```py
pipeline = StableDiffusionPipeline.from_pretrained("your-namespace/my-pipeline")
```
## Privacy
Set `private=True` in the [push_to_hub()](/docs/diffusers/main/en/api/pipelines/overview#diffusers.utils.PushToHubMixin.push_to_hub) function to keep your model, scheduler, or pipeline files private:
```py
controlnet.push_to_hub("my-controlnet-model-private", private=True)
```
Private repositories are only visible to you, and other users won't be able to clone the repository and your repository won't appear in search results. Even if a user has the URL to your private repository, they'll receive a `404 - Sorry, we can't find the page you are looking for`. You must be [logged in](https://huggingface.co/docs/huggingface_hub/quick-start#login) to load a model from a private repository.
# Model files and layouts
Diffusion models are saved in various file types and organized in different layouts. Diffusers stores model weights as safetensors files in *Diffusers-multifolder* layout and it also supports loading files (like safetensors and ckpt files) from a *single-file* layout which is commonly used in the diffusion ecosystem.
Each layout has its own benefits and use cases, and this guide will show you how to load the different files and layouts, and how to convert them.
## Files
PyTorch model weights are typically saved with Python's [pickle](https://docs.python.org/3/library/pickle.html) utility as ckpt or bin files. However, pickle is not secure and pickled files may contain malicious code that can be executed. This vulnerability is a serious concern given the popularity of model sharing. To address this security issue, the [Safetensors](https://hf.co/docs/safetensors) library was developed as a secure alternative to pickle, which saves models as safetensors files.
### safetensors
> [!TIP]
> Learn more about the design decisions and why safetensor files are preferred for saving and loading model weights in the [Safetensors audited as really safe and becoming the default](https://blog.eleuther.ai/safetensors-security-audit/) blog post.
[Safetensors](https://hf.co/docs/safetensors) is a safe and fast file format for securely storing and loading tensors. Safetensors restricts the header size to limit certain types of attacks, supports lazy loading (useful for distributed setups), and has generally faster loading speeds.
Make sure you have the [Safetensors](https://hf.co/docs/safetensors) library installed.
```py
!pip install safetensors
```
Safetensors stores weights in a safetensors file. Diffusers loads safetensors files by default if they're available and the Safetensors library is installed. There are two ways safetensors files can be organized:
1. Diffusers-multifolder layout: there may be several separate safetensors files, one for each pipeline component (text encoder, UNet, VAE), organized in subfolders (check out the [stable-diffusion-v1-5/stable-diffusion-v1-5](https://hf.co/stable-diffusion-v1-5/stable-diffusion-v1-5/tree/main) repository as an example)
2. single-file layout: all the model weights may be saved in a single file (check out the [WarriorMama777/OrangeMixs](https://hf.co/WarriorMama777/OrangeMixs/tree/main/Models/AbyssOrangeMix) repository as an example)
Use the [from_pretrained()](/docs/diffusers/main/en/api/pipelines/overview#diffusers.DiffusionPipeline.from_pretrained) method to load a model with safetensors files stored in multiple folders.
```py
from diffusers import DiffusionPipeline
pipeline = DiffusionPipeline.from_pretrained(
"stable-diffusion-v1-5/stable-diffusion-v1-5",
use_safetensors=True
)
```
Use the [from_single_file()](/docs/diffusers/main/en/api/loaders/single_file#diffusers.loaders.FromSingleFileMixin.from_single_file) method to load a model with all the weights stored in a single safetensors file.
```py
from diffusers import StableDiffusionPipeline
pipeline = StableDiffusionPipeline.from_single_file(
"https://huggingface.co/WarriorMama777/OrangeMixs/blob/main/Models/AbyssOrangeMix/AbyssOrangeMix.safetensors"
)
```
#### LoRA files
[LoRA](https://hf.co/docs/peft/conceptual_guides/adapter#low-rank-adaptation-lora) is a lightweight adapter that is fast and easy to train, making them especially popular for generating images in a certain way or style. These adapters are commonly stored in a safetensors file, and are widely popular on model sharing platforms like [civitai](https://civitai.com/).
LoRAs are loaded into a base model with the [load_lora_weights()](/docs/diffusers/main/en/api/loaders/lora#diffusers.loaders.StableDiffusionLoraLoaderMixin.load_lora_weights) method.
```py
from diffusers import StableDiffusionXLPipeline
import torch
# base model
pipeline = StableDiffusionXLPipeline.from_pretrained(
"Lykon/dreamshaper-xl-1-0", torch_dtype=torch.float16, variant="fp16"
).to("cuda")
# download LoRA weights
!wget https://civitai.com/api/download/models/168776 -O blueprintify.safetensors
# load LoRA weights
pipeline.load_lora_weights(".", weight_name="blueprintify.safetensors")
prompt = "bl3uprint, a highly detailed blueprint of the empire state building, explaining how to build all parts, many txt, blueprint grid backdrop"
negative_prompt = "lowres, cropped, worst quality, low quality, normal quality, artifacts, signature, watermark, username, blurry, more than one bridge, bad architecture"
image = pipeline(
prompt=prompt,
negative_prompt=negative_prompt,
generator=torch.manual_seed(0),
).images[0]
image
```
### ckpt
> [!WARNING]
> Pickled files may be unsafe because they can be exploited to execute malicious code. It is recommended to use safetensors files instead where possible, or convert the weights to safetensors files.
PyTorch's [torch.save](https://pytorch.org/docs/stable/generated/torch.save.html) function uses Python's [pickle](https://docs.python.org/3/library/pickle.html) utility to serialize and save models. These files are saved as a ckpt file and they contain the entire model's weights.
Use the [from_single_file()](/docs/diffusers/main/en/api/loaders/single_file#diffusers.loaders.FromSingleFileMixin.from_single_file) method to directly load a ckpt file.
```py
from diffusers import StableDiffusionPipeline
pipeline = StableDiffusionPipeline.from_single_file(
"https://huggingface.co/stable-diffusion-v1-5/stable-diffusion-v1-5/blob/main/v1-5-pruned.ckpt"
)
```
## Storage layout
There are two ways model files are organized, either in a Diffusers-multifolder layout or in a single-file layout. The Diffusers-multifolder layout is the default, and each component file (text encoder, UNet, VAE) is stored in a separate subfolder. Diffusers also supports loading models from a single-file layout where all the components are bundled together.
### Diffusers-multifolder
The Diffusers-multifolder layout is the default storage layout for Diffusers. Each component's (text encoder, UNet, VAE) weights are stored in a separate subfolder. The weights can be stored as safetensors or ckpt files.
multifolder layout
UNet subfolder
To load from Diffusers-multifolder layout, use the [from_pretrained()](/docs/diffusers/main/en/api/pipelines/overview#diffusers.DiffusionPipeline.from_pretrained) method.
```py
from diffusers import DiffusionPipeline
pipeline = DiffusionPipeline.from_pretrained(
"stabilityai/stable-diffusion-xl-base-1.0",
torch_dtype=torch.float16,
variant="fp16",
use_safetensors=True,
).to("cuda")
```
Benefits of using the Diffusers-multifolder layout include:
1. Faster to load each component file individually or in parallel.
2. Reduced memory usage because you only load the components you need. For example, models like [SDXL Turbo](https://hf.co/stabilityai/sdxl-turbo), [SDXL Lightning](https://hf.co/ByteDance/SDXL-Lightning), and [Hyper-SD](https://hf.co/ByteDance/Hyper-SD) have the same components except for the UNet. You can reuse their shared components with the [from_pipe()](/docs/diffusers/main/en/api/pipelines/overview#diffusers.DiffusionPipeline.from_pipe) method without consuming any additional memory (take a look at the [Reuse a pipeline](./loading#reuse-a-pipeline) guide) and only load the UNet. This way, you don't need to download redundant components and unnecessarily use more memory.
```py
import torch
from diffusers import StableDiffusionXLPipeline, UNet2DConditionModel, EulerDiscreteScheduler
# download one model
sdxl_pipeline = StableDiffusionXLPipeline.from_pretrained(
"stabilityai/stable-diffusion-xl-base-1.0",
torch_dtype=torch.float16,
variant="fp16",
use_safetensors=True,
).to("cuda")
# switch UNet for another model
unet = UNet2DConditionModel.from_pretrained(
"stabilityai/sdxl-turbo",
subfolder="unet",
torch_dtype=torch.float16,
variant="fp16",
use_safetensors=True
)
# reuse all the same components in new model except for the UNet
turbo_pipeline = StableDiffusionXLPipeline.from_pipe(
sdxl_pipeline, unet=unet,
).to("cuda")
turbo_pipeline.scheduler = EulerDiscreteScheduler.from_config(
turbo_pipeline.scheduler.config,
timestep+spacing="trailing"
)
image = turbo_pipeline(
"an astronaut riding a unicorn on mars",
num_inference_steps=1,
guidance_scale=0.0,
).images[0]
image
```
3. Reduced storage requirements because if a component, such as the SDXL [VAE](https://hf.co/madebyollin/sdxl-vae-fp16-fix), is shared across multiple models, you only need to download and store a single copy of it instead of downloading and storing it multiple times. For 10 SDXL models, this can save ~3.5GB of storage. The storage savings is even greater for newer models like PixArt Sigma, where the [text encoder](https://hf.co/PixArt-alpha/PixArt-Sigma-XL-2-1024-MS/tree/main/text_encoder) alone is ~19GB!
4. Flexibility to replace a component in the model with a newer or better version.
```py
from diffusers import DiffusionPipeline, AutoencoderKL
vae = AutoencoderKL.from_pretrained("madebyollin/sdxl-vae-fp16-fix", torch_dtype=torch.float16, use_safetensors=True)
pipeline = DiffusionPipeline.from_pretrained(
"stabilityai/stable-diffusion-xl-base-1.0",
vae=vae,
torch_dtype=torch.float16,
variant="fp16",
use_safetensors=True,
).to("cuda")
```
5. More visibility and information about a model's components, which are stored in a [config.json](https://hf.co/stabilityai/stable-diffusion-xl-base-1.0/blob/main/unet/config.json) file in each component subfolder.
### Single-file
The single-file layout stores all the model weights in a single file. All the model components (text encoder, UNet, VAE) weights are kept together instead of separately in subfolders. This can be a safetensors or ckpt file.
To load from a single-file layout, use the [from_single_file()](/docs/diffusers/main/en/api/loaders/single_file#diffusers.loaders.FromSingleFileMixin.from_single_file) method.
```py
import torch
from diffusers import StableDiffusionXLPipeline
pipeline = StableDiffusionXLPipeline.from_single_file(
"https://huggingface.co/stabilityai/stable-diffusion-xl-base-1.0/blob/main/sd_xl_base_1.0.safetensors",
torch_dtype=torch.float16,
variant="fp16",
use_safetensors=True,
).to("cuda")
```
Benefits of using a single-file layout include:
1. Easy compatibility with diffusion interfaces such as [ComfyUI](https://github.com/comfyanonymous/ComfyUI) or [Automatic1111](https://github.com/AUTOMATIC1111/stable-diffusion-webui) which commonly use a single-file layout.
2. Easier to manage (download and share) a single file.
## Convert layout and files
Diffusers provides many scripts and methods to convert storage layouts and file formats to enable broader support across the diffusion ecosystem.
Take a look at the [diffusers/scripts](https://github.com/huggingface/diffusers/tree/main/scripts) collection to find a script that fits your conversion needs.
> [!TIP]
> Scripts that have "`to_diffusers`" appended at the end mean they convert a model to the Diffusers-multifolder layout. Each script has their own specific set of arguments for configuring the conversion, so make sure you check what arguments are available!
For example, to convert a Stable Diffusion XL model stored in Diffusers-multifolder layout to a single-file layout, run the [convert_diffusers_to_original_sdxl.py](https://github.com/huggingface/diffusers/blob/main/scripts/convert_diffusers_to_original_sdxl.py) script. Provide the path to the model to convert, and the path to save the converted model to. You can optionally specify whether you want to save the model as a safetensors file and whether to save the model in half-precision.
```bash
python convert_diffusers_to_original_sdxl.py --model_path path/to/model/to/convert --checkpoint_path path/to/save/model/to --use_safetensors
```
You can also save a model to Diffusers-multifolder layout with the [save_pretrained()](/docs/diffusers/main/en/api/pipelines/overview#diffusers.DiffusionPipeline.save_pretrained) method. This creates a directory for you if it doesn't already exist, and it also saves the files as a safetensors file by default.
```py
from diffusers import StableDiffusionXLPipeline
pipeline = StableDiffusionXLPipeline.from_single_file(
"https://huggingface.co/stabilityai/stable-diffusion-xl-base-1.0/blob/main/sd_xl_base_1.0.safetensors",
)
pipeline.save_pretrained()
```
Lastly, there are also Spaces, such as [SD To Diffusers](https://hf.co/spaces/diffusers/sd-to-diffusers) and [SD-XL To Diffusers](https://hf.co/spaces/diffusers/sdxl-to-diffusers), that provide a more user-friendly interface for converting models to Diffusers-multifolder layout. This is the easiest and most convenient option for converting layouts, and it'll open a PR on your model repository with the converted files. However, this option is not as reliable as running a script, and the Space may fail for more complicated models.
## Single-file layout usage
Now that you're familiar with the differences between the Diffusers-multifolder and single-file layout, this section shows you how to load models and pipeline components, customize configuration options for loading, and load local files with the [from_single_file()](/docs/diffusers/main/en/api/loaders/single_file#diffusers.loaders.FromSingleFileMixin.from_single_file) method.
### Load a pipeline or model
Pass the file path of the pipeline or model to the [from_single_file()](/docs/diffusers/main/en/api/loaders/single_file#diffusers.loaders.FromSingleFileMixin.from_single_file) method to load it.
```py
from diffusers import StableDiffusionXLPipeline
ckpt_path = "https://huggingface.co/stabilityai/stable-diffusion-xl-base-1.0/blob/main/sd_xl_base_1.0_0.9vae.safetensors"
pipeline = StableDiffusionXLPipeline.from_single_file(ckpt_path)
```
```py
from diffusers import StableCascadeUNet
ckpt_path = "https://huggingface.co/stabilityai/stable-cascade/blob/main/stage_b_lite.safetensors"
model = StableCascadeUNet.from_single_file(ckpt_path)
```
Customize components in the pipeline by passing them directly to the [from_single_file()](/docs/diffusers/main/en/api/loaders/single_file#diffusers.loaders.FromSingleFileMixin.from_single_file) method. For example, you can use a different scheduler in a pipeline.
```py
from diffusers import StableDiffusionXLPipeline, DDIMScheduler
ckpt_path = "https://huggingface.co/stabilityai/stable-diffusion-xl-base-1.0/blob/main/sd_xl_base_1.0_0.9vae.safetensors"
scheduler = DDIMScheduler()
pipeline = StableDiffusionXLPipeline.from_single_file(ckpt_path, scheduler=scheduler)
```
Or you could use a ControlNet model in the pipeline.
```py
from diffusers import StableDiffusionControlNetPipeline, ControlNetModel
ckpt_path = "https://huggingface.co/stable-diffusion-v1-5/stable-diffusion-v1-5/blob/main/v1-5-pruned-emaonly.safetensors"
controlnet = ControlNetModel.from_pretrained("lllyasviel/control_v11p_sd15_canny")
pipeline = StableDiffusionControlNetPipeline.from_single_file(ckpt_path, controlnet=controlnet)
```
### Customize configuration options
Models have a configuration file that define their attributes like the number of inputs in a UNet. Pipelines configuration options are available in the pipeline's class. For example, if you look at the [StableDiffusionXLInstructPix2PixPipeline](/docs/diffusers/main/en/api/pipelines/pix2pix#diffusers.StableDiffusionXLInstructPix2PixPipeline) class, there is an option to scale the image latents with the `is_cosxl_edit` parameter.
These configuration files can be found in the models Hub repository or another location from which the configuration file originated (for example, a GitHub repository or locally on your device).
> [!TIP]
> The [from_single_file()](/docs/diffusers/main/en/api/loaders/single_file#diffusers.loaders.FromSingleFileMixin.from_single_file) method automatically maps the checkpoint to the appropriate model repository, but there are cases where it is useful to use the `config` parameter. For example, if the model components in the checkpoint are different from the original checkpoint or if a checkpoint doesn't have the necessary metadata to correctly determine the configuration to use for the pipeline.
The [from_single_file()](/docs/diffusers/main/en/api/loaders/single_file#diffusers.loaders.FromSingleFileMixin.from_single_file) method automatically determines the configuration to use from the configuration file in the model repository. You could also explicitly specify the configuration to use by providing the repository id to the `config` parameter.
```py
from diffusers import StableDiffusionXLPipeline
ckpt_path = "https://huggingface.co/segmind/SSD-1B/blob/main/SSD-1B.safetensors"
repo_id = "segmind/SSD-1B"
pipeline = StableDiffusionXLPipeline.from_single_file(ckpt_path, config=repo_id)
```
The model loads the configuration file for the [UNet](https://huggingface.co/segmind/SSD-1B/blob/main/unet/config.json), [VAE](https://huggingface.co/segmind/SSD-1B/blob/main/vae/config.json), and [text encoder](https://huggingface.co/segmind/SSD-1B/blob/main/text_encoder/config.json) from their respective subfolders in the repository.
The [from_single_file()](/docs/diffusers/main/en/api/loaders/single_file#diffusers.loaders.FromSingleFileMixin.from_single_file) method can also load the original configuration file of a pipeline that is stored elsewhere. Pass a local path or URL of the original configuration file to the `original_config` parameter.
```py
from diffusers import StableDiffusionXLPipeline
ckpt_path = "https://huggingface.co/stabilityai/stable-diffusion-xl-base-1.0/blob/main/sd_xl_base_1.0_0.9vae.safetensors"
original_config = "https://raw.githubusercontent.com/Stability-AI/generative-models/main/configs/inference/sd_xl_base.yaml"
pipeline = StableDiffusionXLPipeline.from_single_file(ckpt_path, original_config=original_config)
```
> [!TIP]
> Diffusers attempts to infer the pipeline components based on the type signatures of the pipeline class when you use `original_config` with `local_files_only=True`, instead of fetching the configuration files from the model repository on the Hub. This prevents backward breaking changes in code that can't connect to the internet to fetch the necessary configuration files.
>
> This is not as reliable as providing a path to a local model repository with the `config` parameter, and might lead to errors during pipeline configuration. To avoid errors, run the pipeline with `local_files_only=False` once to download the appropriate pipeline configuration files to the local cache.
While the configuration files specify the pipeline or models default parameters, you can override them by providing the parameters directly to the [from_single_file()](/docs/diffusers/main/en/api/loaders/single_file#diffusers.loaders.FromSingleFileMixin.from_single_file) method. Any parameter supported by the model or pipeline class can be configured in this way.
For example, to scale the image latents in [StableDiffusionXLInstructPix2PixPipeline](/docs/diffusers/main/en/api/pipelines/pix2pix#diffusers.StableDiffusionXLInstructPix2PixPipeline) pass the `is_cosxl_edit` parameter.
```python
from diffusers import StableDiffusionXLInstructPix2PixPipeline
ckpt_path = "https://huggingface.co/stabilityai/cosxl/blob/main/cosxl_edit.safetensors"
pipeline = StableDiffusionXLInstructPix2PixPipeline.from_single_file(ckpt_path, config="diffusers/sdxl-instructpix2pix-768", is_cosxl_edit=True)
```
For example, to upcast the attention dimensions in a [UNet2DConditionModel](/docs/diffusers/main/en/api/models/unet2d-cond#diffusers.UNet2DConditionModel) pass the `upcast_attention` parameter.
```python
from diffusers import UNet2DConditionModel
ckpt_path = "https://huggingface.co/stabilityai/stable-diffusion-xl-base-1.0/blob/main/sd_xl_base_1.0_0.9vae.safetensors"
model = UNet2DConditionModel.from_single_file(ckpt_path, upcast_attention=True)
```
### Local files
In Diffusers>=v0.28.0, the [from_single_file()](/docs/diffusers/main/en/api/loaders/single_file#diffusers.loaders.FromSingleFileMixin.from_single_file) method attempts to configure a pipeline or model by inferring the model type from the keys in the checkpoint file. The inferred model type is used to determine the appropriate model repository on the Hugging Face Hub to configure the model or pipeline.
For example, any single file checkpoint based on the Stable Diffusion XL base model will use the [stabilityai/stable-diffusion-xl-base-1.0](https://huggingface.co/stabilityai/stable-diffusion-xl-base-1.0) model repository to configure the pipeline.
But if you're working in an environment with restricted internet access, you should download the configuration files with the [snapshot_download](https://huggingface.co/docs/huggingface_hub/main/en/package_reference/file_download#huggingface_hub.snapshot_download) function, and the model checkpoint with the [hf_hub_download](https://huggingface.co/docs/huggingface_hub/main/en/package_reference/file_download#huggingface_hub.hf_hub_download) function. By default, these files are downloaded to the Hugging Face Hub [cache directory](https://huggingface.co/docs/huggingface_hub/en/guides/manage-cache), but you can specify a preferred directory to download the files to with the `local_dir` parameter.
Pass the configuration and checkpoint paths to the [from_single_file()](/docs/diffusers/main/en/api/loaders/single_file#diffusers.loaders.FromSingleFileMixin.from_single_file) method to load locally.
```python
from huggingface_hub import hf_hub_download, snapshot_download
my_local_checkpoint_path = hf_hub_download(
repo_id="segmind/SSD-1B",
filename="SSD-1B.safetensors"
)
my_local_config_path = snapshot_download(
repo_id="segmind/SSD-1B",
allow_patterns=["*.json", "**/*.json", "*.txt", "**/*.txt"]
)
pipeline = StableDiffusionXLPipeline.from_single_file(my_local_checkpoint_path, config=my_local_config_path, local_files_only=True)
```
```python
from huggingface_hub import hf_hub_download, snapshot_download
my_local_checkpoint_path = hf_hub_download(
repo_id="segmind/SSD-1B",
filename="SSD-1B.safetensors"
local_dir="my_local_checkpoints"
)
my_local_config_path = snapshot_download(
repo_id="segmind/SSD-1B",
allow_patterns=["*.json", "**/*.json", "*.txt", "**/*.txt"]
local_dir="my_local_config"
)
pipeline = StableDiffusionXLPipeline.from_single_file(my_local_checkpoint_path, config=my_local_config_path, local_files_only=True)
```
#### Local files without symlink
> [!TIP]
> In huggingface_hub>=v0.23.0, the `local_dir_use_symlinks` argument isn't necessary for the [hf_hub_download](https://huggingface.co/docs/huggingface_hub/main/en/package_reference/file_download#huggingface_hub.hf_hub_download) and [snapshot_download](https://huggingface.co/docs/huggingface_hub/main/en/package_reference/file_download#huggingface_hub.snapshot_download) functions.
The [from_single_file()](/docs/diffusers/main/en/api/loaders/single_file#diffusers.loaders.FromSingleFileMixin.from_single_file) method relies on the [huggingface_hub](https://hf.co/docs/huggingface_hub/index) caching mechanism to fetch and store checkpoints and configuration files for models and pipelines. If you're working with a file system that does not support symlinking, you should download the checkpoint file to a local directory first, and disable symlinking with the `local_dir_use_symlink=False` parameter in the [hf_hub_download](https://huggingface.co/docs/huggingface_hub/main/en/package_reference/file_download#huggingface_hub.hf_hub_download) function and [snapshot_download](https://huggingface.co/docs/huggingface_hub/main/en/package_reference/file_download#huggingface_hub.snapshot_download) functions.
```python
from huggingface_hub import hf_hub_download, snapshot_download
my_local_checkpoint_path = hf_hub_download(
repo_id="segmind/SSD-1B",
filename="SSD-1B.safetensors"
local_dir="my_local_checkpoints",
local_dir_use_symlinks=False
)
print("My local checkpoint: ", my_local_checkpoint_path)
my_local_config_path = snapshot_download(
repo_id="segmind/SSD-1B",
allow_patterns=["*.json", "**/*.json", "*.txt", "**/*.txt"]
local_dir_use_symlinks=False,
)
print("My local config: ", my_local_config_path)
```
Then you can pass the local paths to the `pretrained_model_link_or_path` and `config` parameters.
```python
pipeline = StableDiffusionXLPipeline.from_single_file(my_local_checkpoint_path, config=my_local_config_path, local_files_only=True)
```
# Trajectory Consistency Distillation-LoRA
Trajectory Consistency Distillation (TCD) enables a model to generate higher quality and more detailed images with fewer steps. Moreover, owing to the effective error mitigation during the distillation process, TCD demonstrates superior performance even under conditions of large inference steps.
The major advantages of TCD are:
- Better than Teacher: TCD demonstrates superior generative quality at both small and large inference steps and exceeds the performance of [DPM-Solver++(2S)](../../api/schedulers/multistep_dpm_solver) with Stable Diffusion XL (SDXL). There is no additional discriminator or LPIPS supervision included during TCD training.
- Flexible Inference Steps: The inference steps for TCD sampling can be freely adjusted without adversely affecting the image quality.
- Freely change detail level: During inference, the level of detail in the image can be adjusted with a single hyperparameter, *gamma*.
> [!TIP]
> For more technical details of TCD, please refer to the [paper](https://arxiv.org/abs/2402.19159) or official [project page](https://mhh0318.github.io/tcd/)).
For large models like SDXL, TCD is trained with [LoRA](https://huggingface.co/docs/peft/conceptual_guides/adapter#low-rank-adaptation-lora) to reduce memory usage. This is also useful because you can reuse LoRAs between different finetuned models, as long as they share the same base model, without further training.
This guide will show you how to perform inference with TCD-LoRAs for a variety of tasks like text-to-image and inpainting, as well as how you can easily combine TCD-LoRAs with other adapters. Choose one of the supported base model and it's corresponding TCD-LoRA checkpoint from the table below to get started.
| Base model | TCD-LoRA checkpoint |
|-------------------------------------------------------------------------------------------------|----------------------------------------------------------------|
| [stable-diffusion-v1-5](https://huggingface.co/stable-diffusion-v1-5/stable-diffusion-v1-5) | [TCD-SD15](https://huggingface.co/h1t/TCD-SD15-LoRA) |
| [stable-diffusion-2-1-base](https://huggingface.co/stabilityai/stable-diffusion-2-1-base) | [TCD-SD21-base](https://huggingface.co/h1t/TCD-SD21-base-LoRA) |
| [stable-diffusion-xl-base-1.0](https://huggingface.co/stabilityai/stable-diffusion-xl-base-1.0) | [TCD-SDXL](https://huggingface.co/h1t/TCD-SDXL-LoRA) |
Make sure you have [PEFT](https://github.com/huggingface/peft) installed for better LoRA support.
```bash
pip install -U peft
```
## General tasks
In this guide, let's use the [StableDiffusionXLPipeline](/docs/diffusers/main/en/api/pipelines/stable_diffusion/stable_diffusion_xl#diffusers.StableDiffusionXLPipeline) and the [TCDScheduler](/docs/diffusers/main/en/api/schedulers/tcd#diffusers.TCDScheduler). Use the [load_lora_weights()](/docs/diffusers/main/en/api/loaders/lora#diffusers.loaders.StableDiffusionLoraLoaderMixin.load_lora_weights) method to load the SDXL-compatible TCD-LoRA weights.
A few tips to keep in mind for TCD-LoRA inference are to:
- Keep the `num_inference_steps` between 4 and 50
- Set `eta` (used to control stochasticity at each step) between 0 and 1. You should use a higher `eta` when increasing the number of inference steps, but the downside is that a larger `eta` in [TCDScheduler](/docs/diffusers/main/en/api/schedulers/tcd#diffusers.TCDScheduler) leads to blurrier images. A value of 0.3 is recommended to produce good results.
```python
import torch
from diffusers import StableDiffusionXLPipeline, TCDScheduler
device = "cuda"
base_model_id = "stabilityai/stable-diffusion-xl-base-1.0"
tcd_lora_id = "h1t/TCD-SDXL-LoRA"
pipe = StableDiffusionXLPipeline.from_pretrained(base_model_id, torch_dtype=torch.float16, variant="fp16").to(device)
pipe.scheduler = TCDScheduler.from_config(pipe.scheduler.config)
pipe.load_lora_weights(tcd_lora_id)
pipe.fuse_lora()
prompt = "Painting of the orange cat Otto von Garfield, Count of Bismarck-Schönhausen, Duke of Lauenburg, Minister-President of Prussia. Depicted wearing a Prussian Pickelhaube and eating his favorite meal - lasagna."
image = pipe(
prompt=prompt,
num_inference_steps=4,
guidance_scale=0,
eta=0.3,
generator=torch.Generator(device=device).manual_seed(0),
).images[0]
```
![](https://github.com/jabir-zheng/TCD/raw/main/assets/demo_image.png)
```python
import torch
from diffusers import AutoPipelineForInpainting, TCDScheduler
from diffusers.utils import load_image, make_image_grid
device = "cuda"
base_model_id = "diffusers/stable-diffusion-xl-1.0-inpainting-0.1"
tcd_lora_id = "h1t/TCD-SDXL-LoRA"
pipe = AutoPipelineForInpainting.from_pretrained(base_model_id, torch_dtype=torch.float16, variant="fp16").to(device)
pipe.scheduler = TCDScheduler.from_config(pipe.scheduler.config)
pipe.load_lora_weights(tcd_lora_id)
pipe.fuse_lora()
img_url = "https://raw.githubusercontent.com/CompVis/latent-diffusion/main/data/inpainting_examples/overture-creations-5sI6fQgYIuo.png"
mask_url = "https://raw.githubusercontent.com/CompVis/latent-diffusion/main/data/inpainting_examples/overture-creations-5sI6fQgYIuo_mask.png"
init_image = load_image(img_url).resize((1024, 1024))
mask_image = load_image(mask_url).resize((1024, 1024))
prompt = "a tiger sitting on a park bench"
image = pipe(
prompt=prompt,
image=init_image,
mask_image=mask_image,
num_inference_steps=8,
guidance_scale=0,
eta=0.3,
strength=0.99, # make sure to use `strength` below 1.0
generator=torch.Generator(device=device).manual_seed(0),
).images[0]
grid_image = make_image_grid([init_image, mask_image, image], rows=1, cols=3)
```
![](https://github.com/jabir-zheng/TCD/raw/main/assets/inpainting_tcd.png)
## Community models
TCD-LoRA also works with many community finetuned models and plugins. For example, load the [animagine-xl-3.0](https://huggingface.co/cagliostrolab/animagine-xl-3.0) checkpoint which is a community finetuned version of SDXL for generating anime images.
```python
import torch
from diffusers import StableDiffusionXLPipeline, TCDScheduler
device = "cuda"
base_model_id = "cagliostrolab/animagine-xl-3.0"
tcd_lora_id = "h1t/TCD-SDXL-LoRA"
pipe = StableDiffusionXLPipeline.from_pretrained(base_model_id, torch_dtype=torch.float16, variant="fp16").to(device)
pipe.scheduler = TCDScheduler.from_config(pipe.scheduler.config)
pipe.load_lora_weights(tcd_lora_id)
pipe.fuse_lora()
prompt = "A man, clad in a meticulously tailored military uniform, stands with unwavering resolve. The uniform boasts intricate details, and his eyes gleam with determination. Strands of vibrant, windswept hair peek out from beneath the brim of his cap."
image = pipe(
prompt=prompt,
num_inference_steps=8,
guidance_scale=0,
eta=0.3,
generator=torch.Generator(device=device).manual_seed(0),
).images[0]
```
![](https://github.com/jabir-zheng/TCD/raw/main/assets/animagine_xl.png)
TCD-LoRA also supports other LoRAs trained on different styles. For example, let's load the [TheLastBen/Papercut_SDXL](https://huggingface.co/TheLastBen/Papercut_SDXL) LoRA and fuse it with the TCD-LoRA with the `~loaders.UNet2DConditionLoadersMixin.set_adapters` method.
> [!TIP]
> Check out the [Merge LoRAs](merge_loras) guide to learn more about efficient merging methods.
```python
import torch
from diffusers import StableDiffusionXLPipeline
from scheduling_tcd import TCDScheduler
device = "cuda"
base_model_id = "stabilityai/stable-diffusion-xl-base-1.0"
tcd_lora_id = "h1t/TCD-SDXL-LoRA"
styled_lora_id = "TheLastBen/Papercut_SDXL"
pipe = StableDiffusionXLPipeline.from_pretrained(base_model_id, torch_dtype=torch.float16, variant="fp16").to(device)
pipe.scheduler = TCDScheduler.from_config(pipe.scheduler.config)
pipe.load_lora_weights(tcd_lora_id, adapter_name="tcd")
pipe.load_lora_weights(styled_lora_id, adapter_name="style")
pipe.set_adapters(["tcd", "style"], adapter_weights=[1.0, 1.0])
prompt = "papercut of a winter mountain, snow"
image = pipe(
prompt=prompt,
num_inference_steps=4,
guidance_scale=0,
eta=0.3,
generator=torch.Generator(device=device).manual_seed(0),
).images[0]
```
![](https://github.com/jabir-zheng/TCD/raw/main/assets/styled_lora.png)
## Adapters
TCD-LoRA is very versatile, and it can be combined with other adapter types like ControlNets, IP-Adapter, and AnimateDiff.
### Depth ControlNet
```python
import torch
import numpy as np
from PIL import Image
from transformers import DPTImageProcessor, DPTForDepthEstimation
from diffusers import ControlNetModel, StableDiffusionXLControlNetPipeline
from diffusers.utils import load_image, make_image_grid
from scheduling_tcd import TCDScheduler
device = "cuda"
depth_estimator = DPTForDepthEstimation.from_pretrained("Intel/dpt-hybrid-midas").to(device)
feature_extractor = DPTImageProcessor.from_pretrained("Intel/dpt-hybrid-midas")
def get_depth_map(image):
image = feature_extractor(images=image, return_tensors="pt").pixel_values.to(device)
with torch.no_grad(), torch.autocast(device):
depth_map = depth_estimator(image).predicted_depth
depth_map = torch.nn.functional.interpolate(
depth_map.unsqueeze(1),
size=(1024, 1024),
mode="bicubic",
align_corners=False,
)
depth_min = torch.amin(depth_map, dim=[1, 2, 3], keepdim=True)
depth_max = torch.amax(depth_map, dim=[1, 2, 3], keepdim=True)
depth_map = (depth_map - depth_min) / (depth_max - depth_min)
image = torch.cat([depth_map] * 3, dim=1)
image = image.permute(0, 2, 3, 1).cpu().numpy()[0]
image = Image.fromarray((image * 255.0).clip(0, 255).astype(np.uint8))
return image
base_model_id = "stabilityai/stable-diffusion-xl-base-1.0"
controlnet_id = "diffusers/controlnet-depth-sdxl-1.0"
tcd_lora_id = "h1t/TCD-SDXL-LoRA"
controlnet = ControlNetModel.from_pretrained(
controlnet_id,
torch_dtype=torch.float16,
variant="fp16",
)
pipe = StableDiffusionXLControlNetPipeline.from_pretrained(
base_model_id,
controlnet=controlnet,
torch_dtype=torch.float16,
variant="fp16",
)
pipe.enable_model_cpu_offload()
pipe.scheduler = TCDScheduler.from_config(pipe.scheduler.config)
pipe.load_lora_weights(tcd_lora_id)
pipe.fuse_lora()
prompt = "stormtrooper lecture, photorealistic"
image = load_image("https://huggingface.co/lllyasviel/sd-controlnet-depth/resolve/main/images/stormtrooper.png")
depth_image = get_depth_map(image)
controlnet_conditioning_scale = 0.5 # recommended for good generalization
image = pipe(
prompt,
image=depth_image,
num_inference_steps=4,
guidance_scale=0,
eta=0.3,
controlnet_conditioning_scale=controlnet_conditioning_scale,
generator=torch.Generator(device=device).manual_seed(0),
).images[0]
grid_image = make_image_grid([depth_image, image], rows=1, cols=2)
```
![](https://github.com/jabir-zheng/TCD/raw/main/assets/controlnet_depth_tcd.png)
### Canny ControlNet
```python
import torch
from diffusers import ControlNetModel, StableDiffusionXLControlNetPipeline
from diffusers.utils import load_image, make_image_grid
from scheduling_tcd import TCDScheduler
device = "cuda"
base_model_id = "stabilityai/stable-diffusion-xl-base-1.0"
controlnet_id = "diffusers/controlnet-canny-sdxl-1.0"
tcd_lora_id = "h1t/TCD-SDXL-LoRA"
controlnet = ControlNetModel.from_pretrained(
controlnet_id,
torch_dtype=torch.float16,
variant="fp16",
)
pipe = StableDiffusionXLControlNetPipeline.from_pretrained(
base_model_id,
controlnet=controlnet,
torch_dtype=torch.float16,
variant="fp16",
)
pipe.enable_model_cpu_offload()
pipe.scheduler = TCDScheduler.from_config(pipe.scheduler.config)
pipe.load_lora_weights(tcd_lora_id)
pipe.fuse_lora()
prompt = "ultrarealistic shot of a furry blue bird"
canny_image = load_image("https://huggingface.co/datasets/hf-internal-testing/diffusers-images/resolve/main/sd_controlnet/bird_canny.png")
controlnet_conditioning_scale = 0.5 # recommended for good generalization
image = pipe(
prompt,
image=canny_image,
num_inference_steps=4,
guidance_scale=0,
eta=0.3,
controlnet_conditioning_scale=controlnet_conditioning_scale,
generator=torch.Generator(device=device).manual_seed(0),
).images[0]
grid_image = make_image_grid([canny_image, image], rows=1, cols=2)
```
![](https://github.com/jabir-zheng/TCD/raw/main/assets/controlnet_canny_tcd.png)
The inference parameters in this example might not work for all examples, so we recommend you to try different values for `num_inference_steps`, `guidance_scale`, `controlnet_conditioning_scale` and `cross_attention_kwargs` parameters and choose the best one.
This example shows how to use the TCD-LoRA with the [IP-Adapter](https://github.com/tencent-ailab/IP-Adapter/tree/main) and SDXL.
```python
import torch
from diffusers import StableDiffusionXLPipeline
from diffusers.utils import load_image, make_image_grid
from ip_adapter import IPAdapterXL
from scheduling_tcd import TCDScheduler
device = "cuda"
base_model_path = "stabilityai/stable-diffusion-xl-base-1.0"
image_encoder_path = "sdxl_models/image_encoder"
ip_ckpt = "sdxl_models/ip-adapter_sdxl.bin"
tcd_lora_id = "h1t/TCD-SDXL-LoRA"
pipe = StableDiffusionXLPipeline.from_pretrained(
base_model_path,
torch_dtype=torch.float16,
variant="fp16"
)
pipe.scheduler = TCDScheduler.from_config(pipe.scheduler.config)
pipe.load_lora_weights(tcd_lora_id)
pipe.fuse_lora()
ip_model = IPAdapterXL(pipe, image_encoder_path, ip_ckpt, device)
ref_image = load_image("https://raw.githubusercontent.com/tencent-ailab/IP-Adapter/main/assets/images/woman.png").resize((512, 512))
prompt = "best quality, high quality, wearing sunglasses"
image = ip_model.generate(
pil_image=ref_image,
prompt=prompt,
scale=0.5,
num_samples=1,
num_inference_steps=4,
guidance_scale=0,
eta=0.3,
seed=0,
)[0]
grid_image = make_image_grid([ref_image, image], rows=1, cols=2)
```
![](https://github.com/jabir-zheng/TCD/raw/main/assets/ip_adapter.png)
`AnimateDiff` allows animating images using Stable Diffusion models. TCD-LoRA can substantially accelerate the process without degrading image quality. The quality of animation with TCD-LoRA and AnimateDiff has a more lucid outcome.
```python
import torch
from diffusers import MotionAdapter, AnimateDiffPipeline, DDIMScheduler
from scheduling_tcd import TCDScheduler
from diffusers.utils import export_to_gif
adapter = MotionAdapter.from_pretrained("guoyww/animatediff-motion-adapter-v1-5")
pipe = AnimateDiffPipeline.from_pretrained(
"frankjoshua/toonyou_beta6",
motion_adapter=adapter,
).to("cuda")
# set TCDScheduler
pipe.scheduler = TCDScheduler.from_config(pipe.scheduler.config)
# load TCD LoRA
pipe.load_lora_weights("h1t/TCD-SD15-LoRA", adapter_name="tcd")
pipe.load_lora_weights("guoyww/animatediff-motion-lora-zoom-in", weight_name="diffusion_pytorch_model.safetensors", adapter_name="motion-lora")
pipe.set_adapters(["tcd", "motion-lora"], adapter_weights=[1.0, 1.2])
prompt = "best quality, masterpiece, 1girl, looking at viewer, blurry background, upper body, contemporary, dress"
generator = torch.manual_seed(0)
frames = pipe(
prompt=prompt,
num_inference_steps=5,
guidance_scale=0,
cross_attention_kwargs={"scale": 1},
num_frames=24,
eta=0.3,
generator=generator
).frames[0]
export_to_gif(frames, "animation.gif")
```
![](https://github.com/jabir-zheng/TCD/raw/main/assets/animation_example.gif)
# IP-Adapter
[IP-Adapter](https://hf.co/papers/2308.06721) is an image prompt adapter that can be plugged into diffusion models to enable image prompting without any changes to the underlying model. Furthermore, this adapter can be reused with other models finetuned from the same base model and it can be combined with other adapters like [ControlNet](../using-diffusers/controlnet). The key idea behind IP-Adapter is the *decoupled cross-attention* mechanism which adds a separate cross-attention layer just for image features instead of using the same cross-attention layer for both text and image features. This allows the model to learn more image-specific features.
> [!TIP]
> Learn how to load an IP-Adapter in the [Load adapters](../using-diffusers/loading_adapters#ip-adapter) guide, and make sure you check out the [IP-Adapter Plus](../using-diffusers/loading_adapters#ip-adapter-plus) section which requires manually loading the image encoder.
This guide will walk you through using IP-Adapter for various tasks and use cases.
## General tasks
Let's take a look at how to use IP-Adapter's image prompting capabilities with the [StableDiffusionXLPipeline](/docs/diffusers/main/en/api/pipelines/stable_diffusion/stable_diffusion_xl#diffusers.StableDiffusionXLPipeline) for tasks like text-to-image, image-to-image, and inpainting. We also encourage you to try out other pipelines such as Stable Diffusion, LCM-LoRA, ControlNet, T2I-Adapter, or AnimateDiff!
In all the following examples, you'll see the [set_ip_adapter_scale()](/docs/diffusers/main/en/api/loaders/ip_adapter#diffusers.loaders.IPAdapterMixin.set_ip_adapter_scale) method. This method controls the amount of text or image conditioning to apply to the model. A value of `1.0` means the model is only conditioned on the image prompt. Lowering this value encourages the model to produce more diverse images, but they may not be as aligned with the image prompt. Typically, a value of `0.5` achieves a good balance between the two prompt types and produces good results.
> [!TIP]
> In the examples below, try adding `low_cpu_mem_usage=True` to the [load_ip_adapter()](/docs/diffusers/main/en/api/loaders/ip_adapter#diffusers.loaders.IPAdapterMixin.load_ip_adapter) method to speed up the loading time.
Crafting the precise text prompt to generate the image you want can be difficult because it may not always capture what you'd like to express. Adding an image alongside the text prompt helps the model better understand what it should generate and can lead to more accurate results.
Load a Stable Diffusion XL (SDXL) model and insert an IP-Adapter into the model with the [load_ip_adapter()](/docs/diffusers/main/en/api/loaders/ip_adapter#diffusers.loaders.IPAdapterMixin.load_ip_adapter) method. Use the `subfolder` parameter to load the SDXL model weights.
```py
from diffusers import AutoPipelineForText2Image
from diffusers.utils import load_image
import torch
pipeline = AutoPipelineForText2Image.from_pretrained("stabilityai/stable-diffusion-xl-base-1.0", torch_dtype=torch.float16).to("cuda")
pipeline.load_ip_adapter("h94/IP-Adapter", subfolder="sdxl_models", weight_name="ip-adapter_sdxl.bin")
pipeline.set_ip_adapter_scale(0.6)
```
Create a text prompt and load an image prompt before passing them to the pipeline to generate an image.
```py
image = load_image("https://huggingface.co/datasets/huggingface/documentation-images/resolve/main/diffusers/ip_adapter_diner.png")
generator = torch.Generator(device="cpu").manual_seed(0)
images = pipeline(
prompt="a polar bear sitting in a chair drinking a milkshake",
ip_adapter_image=image,
negative_prompt="deformed, ugly, wrong proportion, low res, bad anatomy, worst quality, low quality",
num_inference_steps=100,
generator=generator,
).images
images[0]
```
IP-Adapter image
generated image
IP-Adapter can also help with image-to-image by guiding the model to generate an image that resembles the original image and the image prompt.
Load a Stable Diffusion XL (SDXL) model and insert an IP-Adapter into the model with the [load_ip_adapter()](/docs/diffusers/main/en/api/loaders/ip_adapter#diffusers.loaders.IPAdapterMixin.load_ip_adapter) method. Use the `subfolder` parameter to load the SDXL model weights.
```py
from diffusers import AutoPipelineForImage2Image
from diffusers.utils import load_image
import torch
pipeline = AutoPipelineForImage2Image.from_pretrained("stabilityai/stable-diffusion-xl-base-1.0", torch_dtype=torch.float16).to("cuda")
pipeline.load_ip_adapter("h94/IP-Adapter", subfolder="sdxl_models", weight_name="ip-adapter_sdxl.bin")
pipeline.set_ip_adapter_scale(0.6)
```
Pass the original image and the IP-Adapter image prompt to the pipeline to generate an image. Providing a text prompt to the pipeline is optional, but in this example, a text prompt is used to increase image quality.
```py
image = load_image("https://huggingface.co/datasets/huggingface/documentation-images/resolve/main/diffusers/ip_adapter_bear_1.png")
ip_image = load_image("https://huggingface.co/datasets/huggingface/documentation-images/resolve/main/diffusers/ip_adapter_bear_2.png")
generator = torch.Generator(device="cpu").manual_seed(4)
images = pipeline(
prompt="best quality, high quality",
image=image,
ip_adapter_image=ip_image,
generator=generator,
strength=0.6,
).images
images[0]
```
original image
IP-Adapter image
generated image
IP-Adapter is also useful for inpainting because the image prompt allows you to be much more specific about what you'd like to generate.
Load a Stable Diffusion XL (SDXL) model and insert an IP-Adapter into the model with the [load_ip_adapter()](/docs/diffusers/main/en/api/loaders/ip_adapter#diffusers.loaders.IPAdapterMixin.load_ip_adapter) method. Use the `subfolder` parameter to load the SDXL model weights.
```py
from diffusers import AutoPipelineForInpainting
from diffusers.utils import load_image
import torch
pipeline = AutoPipelineForInpainting.from_pretrained("diffusers/stable-diffusion-xl-1.0-inpainting-0.1", torch_dtype=torch.float16).to("cuda")
pipeline.load_ip_adapter("h94/IP-Adapter", subfolder="sdxl_models", weight_name="ip-adapter_sdxl.bin")
pipeline.set_ip_adapter_scale(0.6)
```
Pass a prompt, the original image, mask image, and the IP-Adapter image prompt to the pipeline to generate an image.
```py
mask_image = load_image("https://huggingface.co/datasets/huggingface/documentation-images/resolve/main/diffusers/ip_adapter_mask.png")
image = load_image("https://huggingface.co/datasets/huggingface/documentation-images/resolve/main/diffusers/ip_adapter_bear_1.png")
ip_image = load_image("https://huggingface.co/datasets/huggingface/documentation-images/resolve/main/diffusers/ip_adapter_gummy.png")
generator = torch.Generator(device="cpu").manual_seed(4)
images = pipeline(
prompt="a cute gummy bear waving",
image=image,
mask_image=mask_image,
ip_adapter_image=ip_image,
generator=generator,
num_inference_steps=100,
).images
images[0]
```
original image
IP-Adapter image
generated image
IP-Adapter can also help you generate videos that are more aligned with your text prompt. For example, let's load [AnimateDiff](../api/pipelines/animatediff) with its motion adapter and insert an IP-Adapter into the model with the [load_ip_adapter()](/docs/diffusers/main/en/api/loaders/ip_adapter#diffusers.loaders.IPAdapterMixin.load_ip_adapter) method.
> [!WARNING]
> If you're planning on offloading the model to the CPU, make sure you run it after you've loaded the IP-Adapter. When you call [enable_model_cpu_offload()](/docs/diffusers/main/en/api/pipelines/overview#diffusers.DiffusionPipeline.enable_model_cpu_offload) before loading the IP-Adapter, it offloads the image encoder module to the CPU and it'll return an error when you try to run the pipeline.
```py
import torch
from diffusers import AnimateDiffPipeline, DDIMScheduler, MotionAdapter
from diffusers.utils import export_to_gif
from diffusers.utils import load_image
adapter = MotionAdapter.from_pretrained("guoyww/animatediff-motion-adapter-v1-5-2", torch_dtype=torch.float16)
pipeline = AnimateDiffPipeline.from_pretrained("emilianJR/epiCRealism", motion_adapter=adapter, torch_dtype=torch.float16)
scheduler = DDIMScheduler.from_pretrained(
"emilianJR/epiCRealism",
subfolder="scheduler",
clip_sample=False,
timestep_spacing="linspace",
beta_schedule="linear",
steps_offset=1,
)
pipeline.scheduler = scheduler
pipeline.enable_vae_slicing()
pipeline.load_ip_adapter("h94/IP-Adapter", subfolder="models", weight_name="ip-adapter_sd15.bin")
pipeline.enable_model_cpu_offload()
```
Pass a prompt and an image prompt to the pipeline to generate a short video.
```py
ip_adapter_image = load_image("https://huggingface.co/datasets/huggingface/documentation-images/resolve/main/diffusers/ip_adapter_inpaint.png")
output = pipeline(
prompt="A cute gummy bear waving",
negative_prompt="bad quality, worse quality, low resolution",
ip_adapter_image=ip_adapter_image,
num_frames=16,
guidance_scale=7.5,
num_inference_steps=50,
generator=torch.Generator(device="cpu").manual_seed(0),
)
frames = output.frames[0]
export_to_gif(frames, "gummy_bear.gif")
```
IP-Adapter image
generated video
## Configure parameters
There are a couple of IP-Adapter parameters that are useful to know about and can help you with your image generation tasks. These parameters can make your workflow more efficient or give you more control over image generation.
### Image embeddings
IP-Adapter enabled pipelines provide the `ip_adapter_image_embeds` parameter to accept precomputed image embeddings. This is particularly useful in scenarios where you need to run the IP-Adapter pipeline multiple times because you have more than one image. For example, [multi IP-Adapter](#multi-ip-adapter) is a specific use case where you provide multiple styling images to generate a specific image in a specific style. Loading and encoding multiple images each time you use the pipeline would be inefficient. Instead, you can precompute and save the image embeddings to disk (which can save a lot of space if you're using high-quality images) and load them when you need them.
> [!TIP]
> This parameter also gives you the flexibility to load embeddings from other sources. For example, ComfyUI image embeddings for IP-Adapters are compatible with Diffusers and should work ouf-of-the-box!
Call the `prepare_ip_adapter_image_embeds()` method to encode and generate the image embeddings. Then you can save them to disk with `torch.save`.
> [!TIP]
> If you're using IP-Adapter with `ip_adapter_image_embedding` instead of `ip_adapter_image`', you can set `load_ip_adapter(image_encoder_folder=None,...)` because you don't need to load an encoder to generate the image embeddings.
```py
image_embeds = pipeline.prepare_ip_adapter_image_embeds(
ip_adapter_image=image,
ip_adapter_image_embeds=None,
device="cuda",
num_images_per_prompt=1,
do_classifier_free_guidance=True,
)
torch.save(image_embeds, "image_embeds.ipadpt")
```
Now load the image embeddings by passing them to the `ip_adapter_image_embeds` parameter.
```py
image_embeds = torch.load("image_embeds.ipadpt")
images = pipeline(
prompt="a polar bear sitting in a chair drinking a milkshake",
ip_adapter_image_embeds=image_embeds,
negative_prompt="deformed, ugly, wrong proportion, low res, bad anatomy, worst quality, low quality",
num_inference_steps=100,
generator=generator,
).images
```
### IP-Adapter masking
Binary masks specify which portion of the output image should be assigned to an IP-Adapter. This is useful for composing more than one IP-Adapter image. For each input IP-Adapter image, you must provide a binary mask.
To start, preprocess the input IP-Adapter images with the `~image_processor.IPAdapterMaskProcessor.preprocess()` to generate their masks. For optimal results, provide the output height and width to `~image_processor.IPAdapterMaskProcessor.preprocess()`. This ensures masks with different aspect ratios are appropriately stretched. If the input masks already match the aspect ratio of the generated image, you don't have to set the `height` and `width`.
```py
from diffusers.image_processor import IPAdapterMaskProcessor
mask1 = load_image("https://huggingface.co/datasets/huggingface/documentation-images/resolve/main/diffusers/ip_mask_mask1.png")
mask2 = load_image("https://huggingface.co/datasets/huggingface/documentation-images/resolve/main/diffusers/ip_mask_mask2.png")
output_height = 1024
output_width = 1024
processor = IPAdapterMaskProcessor()
masks = processor.preprocess([mask1, mask2], height=output_height, width=output_width)
```
mask one
mask two
When there is more than one input IP-Adapter image, load them as a list and provide the IP-Adapter scale list. Each of the input IP-Adapter images here corresponds to one of the masks generated above.
```py
pipeline.load_ip_adapter("h94/IP-Adapter", subfolder="sdxl_models", weight_name=["ip-adapter-plus-face_sdxl_vit-h.safetensors"])
pipeline.set_ip_adapter_scale([[0.7, 0.7]]) # one scale for each image-mask pair
face_image1 = load_image("https://huggingface.co/datasets/huggingface/documentation-images/resolve/main/diffusers/ip_mask_girl1.png")
face_image2 = load_image("https://huggingface.co/datasets/huggingface/documentation-images/resolve/main/diffusers/ip_mask_girl2.png")
ip_images = [[face_image1, face_image2]]
masks = [masks.reshape(1, masks.shape[0], masks.shape[2], masks.shape[3])]
```
IP-Adapter image one
IP-Adapter image two
Now pass the preprocessed masks to `cross_attention_kwargs` in the pipeline call.
```py
generator = torch.Generator(device="cpu").manual_seed(0)
num_images = 1
image = pipeline(
prompt="2 girls",
ip_adapter_image=ip_images,
negative_prompt="monochrome, lowres, bad anatomy, worst quality, low quality",
num_inference_steps=20,
num_images_per_prompt=num_images,
generator=generator,
cross_attention_kwargs={"ip_adapter_masks": masks}
).images[0]
image
```
IP-Adapter masking applied
no IP-Adapter masking applied
## Specific use cases
IP-Adapter's image prompting and compatibility with other adapters and models makes it a versatile tool for a variety of use cases. This section covers some of the more popular applications of IP-Adapter, and we can't wait to see what you come up with!
### Face model
Generating accurate faces is challenging because they are complex and nuanced. Diffusers supports two IP-Adapter checkpoints specifically trained to generate faces from the [h94/IP-Adapter](https://huggingface.co/h94/IP-Adapter) repository:
* [ip-adapter-full-face_sd15.safetensors](https://huggingface.co/h94/IP-Adapter/blob/main/models/ip-adapter-full-face_sd15.safetensors) is conditioned with images of cropped faces and removed backgrounds
* [ip-adapter-plus-face_sd15.safetensors](https://huggingface.co/h94/IP-Adapter/blob/main/models/ip-adapter-plus-face_sd15.safetensors) uses patch embeddings and is conditioned with images of cropped faces
Additionally, Diffusers supports all IP-Adapter checkpoints trained with face embeddings extracted by `insightface` face models. Supported models are from the [h94/IP-Adapter-FaceID](https://huggingface.co/h94/IP-Adapter-FaceID) repository.
For face models, use the [h94/IP-Adapter](https://huggingface.co/h94/IP-Adapter) checkpoint. It is also recommended to use [DDIMScheduler](/docs/diffusers/main/en/api/schedulers/ddim#diffusers.DDIMScheduler) or [EulerDiscreteScheduler](/docs/diffusers/main/en/api/schedulers/euler#diffusers.EulerDiscreteScheduler) for face models.
```py
import torch
from diffusers import StableDiffusionPipeline, DDIMScheduler
from diffusers.utils import load_image
pipeline = StableDiffusionPipeline.from_pretrained(
"stable-diffusion-v1-5/stable-diffusion-v1-5",
torch_dtype=torch.float16,
).to("cuda")
pipeline.scheduler = DDIMScheduler.from_config(pipeline.scheduler.config)
pipeline.load_ip_adapter("h94/IP-Adapter", subfolder="models", weight_name="ip-adapter-full-face_sd15.bin")
pipeline.set_ip_adapter_scale(0.5)
image = load_image("https://huggingface.co/datasets/huggingface/documentation-images/resolve/main/diffusers/ip_adapter_einstein_base.png")
generator = torch.Generator(device="cpu").manual_seed(26)
image = pipeline(
prompt="A photo of Einstein as a chef, wearing an apron, cooking in a French restaurant",
ip_adapter_image=image,
negative_prompt="lowres, bad anatomy, worst quality, low quality",
num_inference_steps=100,
generator=generator,
).images[0]
image
```
IP-Adapter image
generated image
To use IP-Adapter FaceID models, first extract face embeddings with `insightface`. Then pass the list of tensors to the pipeline as `ip_adapter_image_embeds`.
```py
import torch
from diffusers import StableDiffusionPipeline, DDIMScheduler
from diffusers.utils import load_image
from insightface.app import FaceAnalysis
pipeline = StableDiffusionPipeline.from_pretrained(
"stable-diffusion-v1-5/stable-diffusion-v1-5",
torch_dtype=torch.float16,
).to("cuda")
pipeline.scheduler = DDIMScheduler.from_config(pipeline.scheduler.config)
pipeline.load_ip_adapter("h94/IP-Adapter-FaceID", subfolder=None, weight_name="ip-adapter-faceid_sd15.bin", image_encoder_folder=None)
pipeline.set_ip_adapter_scale(0.6)
image = load_image("https://huggingface.co/datasets/huggingface/documentation-images/resolve/main/diffusers/ip_mask_girl1.png")
ref_images_embeds = []
app = FaceAnalysis(name="buffalo_l", providers=['CUDAExecutionProvider', 'CPUExecutionProvider'])
app.prepare(ctx_id=0, det_size=(640, 640))
image = cv2.cvtColor(np.asarray(image), cv2.COLOR_BGR2RGB)
faces = app.get(image)
image = torch.from_numpy(faces[0].normed_embedding)
ref_images_embeds.append(image.unsqueeze(0))
ref_images_embeds = torch.stack(ref_images_embeds, dim=0).unsqueeze(0)
neg_ref_images_embeds = torch.zeros_like(ref_images_embeds)
id_embeds = torch.cat([neg_ref_images_embeds, ref_images_embeds]).to(dtype=torch.float16, device="cuda")
generator = torch.Generator(device="cpu").manual_seed(42)
images = pipeline(
prompt="A photo of a girl",
ip_adapter_image_embeds=[id_embeds],
negative_prompt="monochrome, lowres, bad anatomy, worst quality, low quality",
num_inference_steps=20, num_images_per_prompt=1,
generator=generator
).images
```
Both IP-Adapter FaceID Plus and Plus v2 models require CLIP image embeddings. You can prepare face embeddings as shown previously, then you can extract and pass CLIP embeddings to the hidden image projection layers.
```py
from insightface.utils import face_align
ref_images_embeds = []
ip_adapter_images = []
app = FaceAnalysis(name="buffalo_l", providers=['CUDAExecutionProvider', 'CPUExecutionProvider'])
app.prepare(ctx_id=0, det_size=(640, 640))
image = cv2.cvtColor(np.asarray(image), cv2.COLOR_BGR2RGB)
faces = app.get(image)
ip_adapter_images.append(face_align.norm_crop(image, landmark=faces[0].kps, image_size=224))
image = torch.from_numpy(faces[0].normed_embedding)
ref_images_embeds.append(image.unsqueeze(0))
ref_images_embeds = torch.stack(ref_images_embeds, dim=0).unsqueeze(0)
neg_ref_images_embeds = torch.zeros_like(ref_images_embeds)
id_embeds = torch.cat([neg_ref_images_embeds, ref_images_embeds]).to(dtype=torch.float16, device="cuda")
clip_embeds = pipeline.prepare_ip_adapter_image_embeds(
[ip_adapter_images], None, torch.device("cuda"), num_images, True)[0]
pipeline.unet.encoder_hid_proj.image_projection_layers[0].clip_embeds = clip_embeds.to(dtype=torch.float16)
pipeline.unet.encoder_hid_proj.image_projection_layers[0].shortcut = False # True if Plus v2
```
### Multi IP-Adapter
More than one IP-Adapter can be used at the same time to generate specific images in more diverse styles. For example, you can use IP-Adapter-Face to generate consistent faces and characters, and IP-Adapter Plus to generate those faces in a specific style.
> [!TIP]
> Read the [IP-Adapter Plus](../using-diffusers/loading_adapters#ip-adapter-plus) section to learn why you need to manually load the image encoder.
Load the image encoder with [CLIPVisionModelWithProjection](https://huggingface.co/docs/transformers/main/en/model_doc/clip#transformers.CLIPVisionModelWithProjection).
```py
import torch
from diffusers import AutoPipelineForText2Image, DDIMScheduler
from transformers import CLIPVisionModelWithProjection
from diffusers.utils import load_image
image_encoder = CLIPVisionModelWithProjection.from_pretrained(
"h94/IP-Adapter",
subfolder="models/image_encoder",
torch_dtype=torch.float16,
)
```
Next, you'll load a base model, scheduler, and the IP-Adapters. The IP-Adapters to use are passed as a list to the `weight_name` parameter:
* [ip-adapter-plus_sdxl_vit-h](https://huggingface.co/h94/IP-Adapter#ip-adapter-for-sdxl-10) uses patch embeddings and a ViT-H image encoder
* [ip-adapter-plus-face_sdxl_vit-h](https://huggingface.co/h94/IP-Adapter#ip-adapter-for-sdxl-10) has the same architecture but it is conditioned with images of cropped faces
```py
pipeline = AutoPipelineForText2Image.from_pretrained(
"stabilityai/stable-diffusion-xl-base-1.0",
torch_dtype=torch.float16,
image_encoder=image_encoder,
)
pipeline.scheduler = DDIMScheduler.from_config(pipeline.scheduler.config)
pipeline.load_ip_adapter(
"h94/IP-Adapter",
subfolder="sdxl_models",
weight_name=["ip-adapter-plus_sdxl_vit-h.safetensors", "ip-adapter-plus-face_sdxl_vit-h.safetensors"]
)
pipeline.set_ip_adapter_scale([0.7, 0.3])
pipeline.enable_model_cpu_offload()
```
Load an image prompt and a folder containing images of a certain style you want to use.
```py
face_image = load_image("https://huggingface.co/datasets/YiYiXu/testing-images/resolve/main/women_input.png")
style_folder = "https://huggingface.co/datasets/YiYiXu/testing-images/resolve/main/style_ziggy"
style_images = [load_image(f"{style_folder}/img{i}.png") for i in range(10)]
```
IP-Adapter image of face
IP-Adapter style images
Pass the image prompt and style images as a list to the `ip_adapter_image` parameter, and run the pipeline!
```py
generator = torch.Generator(device="cpu").manual_seed(0)
image = pipeline(
prompt="wonderwoman",
ip_adapter_image=[style_images, face_image],
negative_prompt="monochrome, lowres, bad anatomy, worst quality, low quality",
num_inference_steps=50, num_images_per_prompt=1,
generator=generator,
).images[0]
image
```
### Instant generation
[Latent Consistency Models (LCM)](../using-diffusers/inference_with_lcm_lora) are diffusion models that can generate images in as little as 4 steps compared to other diffusion models like SDXL that typically require way more steps. This is why image generation with an LCM feels "instantaneous". IP-Adapters can be plugged into an LCM-LoRA model to instantly generate images with an image prompt.
The IP-Adapter weights need to be loaded first, then you can use [load_lora_weights()](/docs/diffusers/main/en/api/loaders/lora#diffusers.loaders.StableDiffusionLoraLoaderMixin.load_lora_weights) to load the LoRA style and weight you want to apply to your image.
```py
from diffusers import DiffusionPipeline, LCMScheduler
import torch
from diffusers.utils import load_image
model_id = "sd-dreambooth-library/herge-style"
lcm_lora_id = "latent-consistency/lcm-lora-sdv1-5"
pipeline = DiffusionPipeline.from_pretrained(model_id, torch_dtype=torch.float16)
pipeline.load_ip_adapter("h94/IP-Adapter", subfolder="models", weight_name="ip-adapter_sd15.bin")
pipeline.load_lora_weights(lcm_lora_id)
pipeline.scheduler = LCMScheduler.from_config(pipeline.scheduler.config)
pipeline.enable_model_cpu_offload()
```
Try using with a lower IP-Adapter scale to condition image generation more on the [herge_style](https://huggingface.co/sd-dreambooth-library/herge-style) checkpoint, and remember to use the special token `herge_style` in your prompt to trigger and apply the style.
```py
pipeline.set_ip_adapter_scale(0.4)
prompt = "herge_style woman in armor, best quality, high quality"
generator = torch.Generator(device="cpu").manual_seed(0)
ip_adapter_image = load_image("https://user-images.githubusercontent.com/24734142/266492875-2d50d223-8475-44f0-a7c6-08b51cb53572.png")
image = pipeline(
prompt=prompt,
ip_adapter_image=ip_adapter_image,
num_inference_steps=4,
guidance_scale=1,
).images[0]
image
```
### Structural control
To control image generation to an even greater degree, you can combine IP-Adapter with a model like [ControlNet](../using-diffusers/controlnet). A ControlNet is also an adapter that can be inserted into a diffusion model to allow for conditioning on an additional control image. The control image can be depth maps, edge maps, pose estimations, and more.
Load a [ControlNetModel](/docs/diffusers/main/en/api/models/controlnet#diffusers.ControlNetModel) checkpoint conditioned on depth maps, insert it into a diffusion model, and load the IP-Adapter.
```py
from diffusers import StableDiffusionControlNetPipeline, ControlNetModel
import torch
from diffusers.utils import load_image
controlnet_model_path = "lllyasviel/control_v11f1p_sd15_depth"
controlnet = ControlNetModel.from_pretrained(controlnet_model_path, torch_dtype=torch.float16)
pipeline = StableDiffusionControlNetPipeline.from_pretrained(
"stable-diffusion-v1-5/stable-diffusion-v1-5", controlnet=controlnet, torch_dtype=torch.float16)
pipeline.to("cuda")
pipeline.load_ip_adapter("h94/IP-Adapter", subfolder="models", weight_name="ip-adapter_sd15.bin")
```
Now load the IP-Adapter image and depth map.
```py
ip_adapter_image = load_image("https://huggingface.co/datasets/YiYiXu/testing-images/resolve/main/statue.png")
depth_map = load_image("https://huggingface.co/datasets/YiYiXu/testing-images/resolve/main/depth.png")
```
IP-Adapter image
depth map
Pass the depth map and IP-Adapter image to the pipeline to generate an image.
```py
generator = torch.Generator(device="cpu").manual_seed(33)
image = pipeline(
prompt="best quality, high quality",
image=depth_map,
ip_adapter_image=ip_adapter_image,
negative_prompt="monochrome, lowres, bad anatomy, worst quality, low quality",
num_inference_steps=50,
generator=generator,
).images[0]
image
```
### Style & layout control
[InstantStyle](https://arxiv.org/abs/2404.02733) is a plug-and-play method on top of IP-Adapter, which disentangles style and layout from image prompt to control image generation. This way, you can generate images following only the style or layout from image prompt, with significantly improved diversity. This is achieved by only activating IP-Adapters to specific parts of the model.
By default IP-Adapters are inserted to all layers of the model. Use the [set_ip_adapter_scale()](/docs/diffusers/main/en/api/loaders/ip_adapter#diffusers.loaders.IPAdapterMixin.set_ip_adapter_scale) method with a dictionary to assign scales to IP-Adapter at different layers.
```py
from diffusers import AutoPipelineForText2Image
from diffusers.utils import load_image
import torch
pipeline = AutoPipelineForText2Image.from_pretrained("stabilityai/stable-diffusion-xl-base-1.0", torch_dtype=torch.float16).to("cuda")
pipeline.load_ip_adapter("h94/IP-Adapter", subfolder="sdxl_models", weight_name="ip-adapter_sdxl.bin")
scale = {
"down": {"block_2": [0.0, 1.0]},
"up": {"block_0": [0.0, 1.0, 0.0]},
}
pipeline.set_ip_adapter_scale(scale)
```
This will activate IP-Adapter at the second layer in the model's down-part block 2 and up-part block 0. The former is the layer where IP-Adapter injects layout information and the latter injects style. Inserting IP-Adapter to these two layers you can generate images following both the style and layout from image prompt, but with contents more aligned to text prompt.
```py
style_image = load_image("https://huggingface.co/datasets/huggingface/documentation-images/resolve/0052a70beed5bf71b92610a43a52df6d286cd5f3/diffusers/rabbit.jpg")
generator = torch.Generator(device="cpu").manual_seed(26)
image = pipeline(
prompt="a cat, masterpiece, best quality, high quality",
ip_adapter_image=style_image,
negative_prompt="text, watermark, lowres, low quality, worst quality, deformed, glitch, low contrast, noisy, saturation, blurry",
guidance_scale=5,
num_inference_steps=30,
generator=generator,
).images[0]
image
```
IP-Adapter image
generated image
In contrast, inserting IP-Adapter to all layers will often generate images that overly focus on image prompt and diminish diversity.
Activate IP-Adapter only in the style layer and then call the pipeline again.
```py
scale = {
"up": {"block_0": [0.0, 1.0, 0.0]},
}
pipeline.set_ip_adapter_scale(scale)
generator = torch.Generator(device="cpu").manual_seed(26)
image = pipeline(
prompt="a cat, masterpiece, best quality, high quality",
ip_adapter_image=style_image,
negative_prompt="text, watermark, lowres, low quality, worst quality, deformed, glitch, low contrast, noisy, saturation, blurry",
guidance_scale=5,
num_inference_steps=30,
generator=generator,
).images[0]
image
```
IP-Adapter only in style layer
IP-Adapter in all layers
Note that you don't have to specify all layers in the dictionary. Those not included in the dictionary will be set to scale 0 which means disable IP-Adapter by default.
# Text-guided depth-to-image generation
The [StableDiffusionDepth2ImgPipeline](/docs/diffusers/main/en/api/pipelines/stable_diffusion/depth2img#diffusers.StableDiffusionDepth2ImgPipeline) lets you pass a text prompt and an initial image to condition the generation of new images. In addition, you can also pass a `depth_map` to preserve the image structure. If no `depth_map` is provided, the pipeline automatically predicts the depth via an integrated [depth-estimation model](https://github.com/isl-org/MiDaS).
Start by creating an instance of the [StableDiffusionDepth2ImgPipeline](/docs/diffusers/main/en/api/pipelines/stable_diffusion/depth2img#diffusers.StableDiffusionDepth2ImgPipeline):
```python
import torch
from diffusers import StableDiffusionDepth2ImgPipeline
from diffusers.utils import load_image, make_image_grid
pipeline = StableDiffusionDepth2ImgPipeline.from_pretrained(
"stabilityai/stable-diffusion-2-depth",
torch_dtype=torch.float16,
use_safetensors=True,
).to("cuda")
```
Now pass your prompt to the pipeline. You can also pass a `negative_prompt` to prevent certain words from guiding how an image is generated:
```python
url = "http://images.cocodataset.org/val2017/000000039769.jpg"
init_image = load_image(url)
prompt = "two tigers"
negative_prompt = "bad, deformed, ugly, bad anatomy"
image = pipeline(prompt=prompt, image=init_image, negative_prompt=negative_prompt, strength=0.7).images[0]
make_image_grid([init_image, image], rows=1, cols=2)
```
| Input | Output |
|---------------------------------------------------------------------------------|---------------------------------------------------------------------------------------------------------------------------------------|
| | |
# CogVideoX
CogVideoX is a text-to-video generation model focused on creating more coherent videos aligned with a prompt. It achieves this using several methods.
- a 3D variational autoencoder that compresses videos spatially and temporally, improving compression rate and video accuracy.
- an expert transformer block to help align text and video, and a 3D full attention module for capturing and creating spatially and temporally accurate videos.
## Load model checkpoints
Model weights may be stored in separate subfolders on the Hub or locally, in which case, you should use the [from_pretrained()](/docs/diffusers/main/en/api/pipelines/overview#diffusers.DiffusionPipeline.from_pretrained) method.
```py
from diffusers import CogVideoXPipeline, CogVideoXImageToVideoPipeline
pipe = CogVideoXPipeline.from_pretrained(
"THUDM/CogVideoX-2b",
torch_dtype=torch.float16
)
pipe = CogVideoXImageToVideoPipeline.from_pretrained(
"THUDM/CogVideoX-5b-I2V",
torch_dtype=torch.bfloat16
)
```
## Text-to-Video
For text-to-video, pass a text prompt. By default, CogVideoX generates a 720x480 video for the best results.
```py
import torch
from diffusers import CogVideoXPipeline
from diffusers.utils import export_to_video
prompt = "An elderly gentleman, with a serene expression, sits at the water's edge, a steaming cup of tea by his side. He is engrossed in his artwork, brush in hand, as he renders an oil painting on a canvas that's propped up against a small, weathered table. The sea breeze whispers through his silver hair, gently billowing his loose-fitting white shirt, while the salty air adds an intangible element to his masterpiece in progress. The scene is one of tranquility and inspiration, with the artist's canvas capturing the vibrant hues of the setting sun reflecting off the tranquil sea."
pipe = CogVideoXPipeline.from_pretrained(
"THUDM/CogVideoX-5b",
torch_dtype=torch.bfloat16
)
pipe.enable_model_cpu_offload()
pipe.vae.enable_tiling()
video = pipe(
prompt=prompt,
num_videos_per_prompt=1,
num_inference_steps=50,
num_frames=49,
guidance_scale=6,
generator=torch.Generator(device="cuda").manual_seed(42),
).frames[0]
export_to_video(video, "output.mp4", fps=8)
```
## Image-to-Video
You'll use the [THUDM/CogVideoX-5b-I2V](https://huggingface.co/THUDM/CogVideoX-5b-I2V) checkpoint for this guide.
```py
import torch
from diffusers import CogVideoXImageToVideoPipeline
from diffusers.utils import export_to_video, load_image
prompt = "A vast, shimmering ocean flows gracefully under a twilight sky, its waves undulating in a mesmerizing dance of blues and greens. The surface glints with the last rays of the setting sun, casting golden highlights that ripple across the water. Seagulls soar above, their cries blending with the gentle roar of the waves. The horizon stretches infinitely, where the ocean meets the sky in a seamless blend of hues. Close-ups reveal the intricate patterns of the waves, capturing the fluidity and dynamic beauty of the sea in motion."
image = load_image(image="cogvideox_rocket.png")
pipe = CogVideoXImageToVideoPipeline.from_pretrained(
"THUDM/CogVideoX-5b-I2V",
torch_dtype=torch.bfloat16
)
pipe.vae.enable_tiling()
pipe.vae.enable_slicing()
video = pipe(
prompt=prompt,
image=image,
num_videos_per_prompt=1,
num_inference_steps=50,
num_frames=49,
guidance_scale=6,
generator=torch.Generator(device="cuda").manual_seed(42),
).frames[0]
export_to_video(video, "output.mp4", fps=8)
```
initial image
generated video
# Merge LoRAs
It can be fun and creative to use multiple [LoRAs]((https://huggingface.co/docs/peft/conceptual_guides/adapter#low-rank-adaptation-lora)) together to generate something entirely new and unique. This works by merging multiple LoRA weights together to produce images that are a blend of different styles. Diffusers provides a few methods to merge LoRAs depending on *how* you want to merge their weights, which can affect image quality.
This guide will show you how to merge LoRAs using the [set_adapters()](/docs/diffusers/main/en/api/loaders/peft#diffusers.loaders.PeftAdapterMixin.set_adapters) and [add_weighted_adapter](https://huggingface.co/docs/peft/package_reference/lora#peft.LoraModel.add_weighted_adapter) methods. To improve inference speed and reduce memory-usage of merged LoRAs, you'll also see how to use the `fuse_lora()` method to fuse the LoRA weights with the original weights of the underlying model.
For this guide, load a Stable Diffusion XL (SDXL) checkpoint and the [KappaNeuro/studio-ghibli-style](https://huggingface.co/KappaNeuro/studio-ghibli-style) and [Norod78/sdxl-chalkboarddrawing-lora](https://huggingface.co/Norod78/sdxl-chalkboarddrawing-lora) LoRAs with the [load_lora_weights()](/docs/diffusers/main/en/api/loaders/lora#diffusers.loaders.StableDiffusionLoraLoaderMixin.load_lora_weights) method. You'll need to assign each LoRA an `adapter_name` to combine them later.
```py
from diffusers import DiffusionPipeline
import torch
pipeline = DiffusionPipeline.from_pretrained("stabilityai/stable-diffusion-xl-base-1.0", torch_dtype=torch.float16).to("cuda")
pipeline.load_lora_weights("ostris/ikea-instructions-lora-sdxl", weight_name="ikea_instructions_xl_v1_5.safetensors", adapter_name="ikea")
pipeline.load_lora_weights("lordjia/by-feng-zikai", weight_name="fengzikai_v1.0_XL.safetensors", adapter_name="feng")
```
## set_adapters
The [set_adapters()](/docs/diffusers/main/en/api/loaders/peft#diffusers.loaders.PeftAdapterMixin.set_adapters) method merges LoRA adapters by concatenating their weighted matrices. Use the adapter name to specify which LoRAs to merge, and the `adapter_weights` parameter to control the scaling for each LoRA. For example, if `adapter_weights=[0.5, 0.5]`, then the merged LoRA output is an average of both LoRAs. Try adjusting the adapter weights to see how it affects the generated image!
```py
pipeline.set_adapters(["ikea", "feng"], adapter_weights=[0.7, 0.8])
generator = torch.manual_seed(0)
prompt = "A bowl of ramen shaped like a cute kawaii bear, by Feng Zikai"
image = pipeline(prompt, generator=generator, cross_attention_kwargs={"scale": 1.0}).images[0]
image
```
## add_weighted_adapter
> [!WARNING]
> This is an experimental method that adds PEFTs [add_weighted_adapter](https://huggingface.co/docs/peft/package_reference/lora#peft.LoraModel.add_weighted_adapter) method to Diffusers to enable more efficient merging methods. Check out this [issue](https://github.com/huggingface/diffusers/issues/6892) if you're interested in learning more about the motivation and design behind this integration.
The [add_weighted_adapter](https://huggingface.co/docs/peft/package_reference/lora#peft.LoraModel.add_weighted_adapter) method provides access to more efficient merging method such as [TIES and DARE](https://huggingface.co/docs/peft/developer_guides/model_merging). To use these merging methods, make sure you have the latest stable version of Diffusers and PEFT installed.
```bash
pip install -U diffusers peft
```
There are three steps to merge LoRAs with the [add_weighted_adapter](https://huggingface.co/docs/peft/package_reference/lora#peft.LoraModel.add_weighted_adapter) method:
1. Create a [PeftModel](https://huggingface.co/docs/peft/package_reference/peft_model#peft.PeftModel) from the underlying model and LoRA checkpoint.
2. Load a base UNet model and the LoRA adapters.
3. Merge the adapters using the [add_weighted_adapter](https://huggingface.co/docs/peft/package_reference/lora#peft.LoraModel.add_weighted_adapter) method and the merging method of your choice.
Let's dive deeper into what these steps entail.
1. Load a UNet that corresponds to the UNet in the LoRA checkpoint. In this case, both LoRAs use the SDXL UNet as their base model.
```python
from diffusers import UNet2DConditionModel
import torch
unet = UNet2DConditionModel.from_pretrained(
"stabilityai/stable-diffusion-xl-base-1.0",
torch_dtype=torch.float16,
use_safetensors=True,
variant="fp16",
subfolder="unet",
).to("cuda")
```
Load the SDXL pipeline and the LoRA checkpoints, starting with the [ostris/ikea-instructions-lora-sdxl](https://huggingface.co/ostris/ikea-instructions-lora-sdxl) LoRA.
```python
from diffusers import DiffusionPipeline
pipeline = DiffusionPipeline.from_pretrained(
"stabilityai/stable-diffusion-xl-base-1.0",
variant="fp16",
torch_dtype=torch.float16,
unet=unet
).to("cuda")
pipeline.load_lora_weights("ostris/ikea-instructions-lora-sdxl", weight_name="ikea_instructions_xl_v1_5.safetensors", adapter_name="ikea")
```
Now you'll create a [PeftModel](https://huggingface.co/docs/peft/package_reference/peft_model#peft.PeftModel) from the loaded LoRA checkpoint by combining the SDXL UNet and the LoRA UNet from the pipeline.
```python
from peft import get_peft_model, LoraConfig
import copy
sdxl_unet = copy.deepcopy(unet)
ikea_peft_model = get_peft_model(
sdxl_unet,
pipeline.unet.peft_config["ikea"],
adapter_name="ikea"
)
original_state_dict = {f"base_model.model.{k}": v for k, v in pipeline.unet.state_dict().items()}
ikea_peft_model.load_state_dict(original_state_dict, strict=True)
```
> [!TIP]
> You can optionally push the ikea_peft_model to the Hub by calling `ikea_peft_model.push_to_hub("ikea_peft_model", token=TOKEN)`.
Repeat this process to create a [PeftModel](https://huggingface.co/docs/peft/package_reference/peft_model#peft.PeftModel) from the [lordjia/by-feng-zikai](https://huggingface.co/lordjia/by-feng-zikai) LoRA.
```python
pipeline.delete_adapters("ikea")
sdxl_unet.delete_adapters("ikea")
pipeline.load_lora_weights("lordjia/by-feng-zikai", weight_name="fengzikai_v1.0_XL.safetensors", adapter_name="feng")
pipeline.set_adapters(adapter_names="feng")
feng_peft_model = get_peft_model(
sdxl_unet,
pipeline.unet.peft_config["feng"],
adapter_name="feng"
)
original_state_dict = {f"base_model.model.{k}": v for k, v in pipe.unet.state_dict().items()}
feng_peft_model.load_state_dict(original_state_dict, strict=True)
```
2. Load a base UNet model and then load the adapters onto it.
```python
from peft import PeftModel
base_unet = UNet2DConditionModel.from_pretrained(
"stabilityai/stable-diffusion-xl-base-1.0",
torch_dtype=torch.float16,
use_safetensors=True,
variant="fp16",
subfolder="unet",
).to("cuda")
model = PeftModel.from_pretrained(base_unet, "stevhliu/ikea_peft_model", use_safetensors=True, subfolder="ikea", adapter_name="ikea")
model.load_adapter("stevhliu/feng_peft_model", use_safetensors=True, subfolder="feng", adapter_name="feng")
```
3. Merge the adapters using the [add_weighted_adapter](https://huggingface.co/docs/peft/package_reference/lora#peft.LoraModel.add_weighted_adapter) method and the merging method of your choice (learn more about other merging methods in this [blog post](https://huggingface.co/blog/peft_merging)). For this example, let's use the `"dare_linear"` method to merge the LoRAs.
> [!WARNING]
> Keep in mind the LoRAs need to have the same rank to be merged!
```python
model.add_weighted_adapter(
adapters=["ikea", "feng"],
weights=[1.0, 1.0],
combination_type="dare_linear",
adapter_name="ikea-feng"
)
model.set_adapters("ikea-feng")
```
Now you can generate an image with the merged LoRA.
```python
model = model.to(dtype=torch.float16, device="cuda")
pipeline = DiffusionPipeline.from_pretrained(
"stabilityai/stable-diffusion-xl-base-1.0", unet=model, variant="fp16", torch_dtype=torch.float16,
).to("cuda")
image = pipeline("A bowl of ramen shaped like a cute kawaii bear, by Feng Zikai", generator=torch.manual_seed(0)).images[0]
image
```
## fuse_lora
Both the [set_adapters()](/docs/diffusers/main/en/api/loaders/peft#diffusers.loaders.PeftAdapterMixin.set_adapters) and [add_weighted_adapter](https://huggingface.co/docs/peft/package_reference/lora#peft.LoraModel.add_weighted_adapter) methods require loading the base model and the LoRA adapters separately which incurs some overhead. The [fuse_lora()](/docs/diffusers/main/en/api/loaders/lora#diffusers.loaders.lora_base.LoraBaseMixin.fuse_lora) method allows you to fuse the LoRA weights directly with the original weights of the underlying model. This way, you're only loading the model once which can increase inference and lower memory-usage.
You can use PEFT to easily fuse/unfuse multiple adapters directly into the model weights (both UNet and text encoder) using the [fuse_lora()](/docs/diffusers/main/en/api/loaders/lora#diffusers.loaders.lora_base.LoraBaseMixin.fuse_lora) method, which can lead to a speed-up in inference and lower VRAM usage.
For example, if you have a base model and adapters loaded and set as active with the following adapter weights:
```py
from diffusers import DiffusionPipeline
import torch
pipeline = DiffusionPipeline.from_pretrained("stabilityai/stable-diffusion-xl-base-1.0", torch_dtype=torch.float16).to("cuda")
pipeline.load_lora_weights("ostris/ikea-instructions-lora-sdxl", weight_name="ikea_instructions_xl_v1_5.safetensors", adapter_name="ikea")
pipeline.load_lora_weights("lordjia/by-feng-zikai", weight_name="fengzikai_v1.0_XL.safetensors", adapter_name="feng")
pipeline.set_adapters(["ikea", "feng"], adapter_weights=[0.7, 0.8])
```
Fuse these LoRAs into the UNet with the [fuse_lora()](/docs/diffusers/main/en/api/loaders/lora#diffusers.loaders.lora_base.LoraBaseMixin.fuse_lora) method. The `lora_scale` parameter controls how much to scale the output by with the LoRA weights. It is important to make the `lora_scale` adjustments in the [fuse_lora()](/docs/diffusers/main/en/api/loaders/lora#diffusers.loaders.lora_base.LoraBaseMixin.fuse_lora) method because it won’t work if you try to pass `scale` to the `cross_attention_kwargs` in the pipeline.
```py
pipeline.fuse_lora(adapter_names=["ikea", "feng"], lora_scale=1.0)
```
Then you should use [unload_lora_weights()](/docs/diffusers/main/en/api/loaders/lora#diffusers.loaders.lora_base.LoraBaseMixin.unload_lora_weights) to unload the LoRA weights since they've already been fused with the underlying base model. Finally, call [save_pretrained()](/docs/diffusers/main/en/api/pipelines/overview#diffusers.DiffusionPipeline.save_pretrained) to save the fused pipeline locally or you could call [push_to_hub()](/docs/diffusers/main/en/api/pipelines/overview#diffusers.utils.PushToHubMixin.push_to_hub) to push the fused pipeline to the Hub.
```py
pipeline.unload_lora_weights()
# save locally
pipeline.save_pretrained("path/to/fused-pipeline")
# save to the Hub
pipeline.push_to_hub("fused-ikea-feng")
```
Now you can quickly load the fused pipeline and use it for inference without needing to separately load the LoRA adapters.
```py
pipeline = DiffusionPipeline.from_pretrained(
"username/fused-ikea-feng", torch_dtype=torch.float16,
).to("cuda")
image = pipeline("A bowl of ramen shaped like a cute kawaii bear, by Feng Zikai", generator=torch.manual_seed(0)).images[0]
image
```
You can call `~~loaders.lora_base.LoraBaseMixin.unfuse_lora` to restore the original model's weights (for example, if you want to use a different `lora_scale` value). However, this only works if you've only fused one LoRA adapter to the original model. If you've fused multiple LoRAs, you'll need to reload the model.
```py
pipeline.unfuse_lora()
```
### torch.compile
[torch.compile](../optimization/torch2.0#torchcompile) can speed up your pipeline even more, but the LoRA weights must be fused first and then unloaded. Typically, the UNet is compiled because it is such a computationally intensive component of the pipeline.
```py
from diffusers import DiffusionPipeline
import torch
# load base model and LoRAs
pipeline = DiffusionPipeline.from_pretrained("stabilityai/stable-diffusion-xl-base-1.0", torch_dtype=torch.float16).to("cuda")
pipeline.load_lora_weights("ostris/ikea-instructions-lora-sdxl", weight_name="ikea_instructions_xl_v1_5.safetensors", adapter_name="ikea")
pipeline.load_lora_weights("lordjia/by-feng-zikai", weight_name="fengzikai_v1.0_XL.safetensors", adapter_name="feng")
# activate both LoRAs and set adapter weights
pipeline.set_adapters(["ikea", "feng"], adapter_weights=[0.7, 0.8])
# fuse LoRAs and unload weights
pipeline.fuse_lora(adapter_names=["ikea", "feng"], lora_scale=1.0)
pipeline.unload_lora_weights()
# torch.compile
pipeline.unet.to(memory_format=torch.channels_last)
pipeline.unet = torch.compile(pipeline.unet, mode="reduce-overhead", fullgraph=True)
image = pipeline("A bowl of ramen shaped like a cute kawaii bear, by Feng Zikai", generator=torch.manual_seed(0)).images[0]
```
Learn more about torch.compile in the [Accelerate inference of text-to-image diffusion models](../tutorials/fast_diffusion#torchcompile) guide.
## Next steps
For more conceptual details about how each merging method works, take a look at the [🤗 PEFT welcomes new merging methods](https://huggingface.co/blog/peft_merging#concatenation-cat) blog post!
# Perturbed-Attention Guidance
[Perturbed-Attention Guidance (PAG)](https://ku-cvlab.github.io/Perturbed-Attention-Guidance/) is a new diffusion sampling guidance that improves sample quality across both unconditional and conditional settings, achieving this without requiring further training or the integration of external modules. PAG is designed to progressively enhance the structure of synthesized samples throughout the denoising process by considering the self-attention mechanisms' ability to capture structural information. It involves generating intermediate samples with degraded structure by substituting selected self-attention maps in diffusion U-Net with an identity matrix, and guiding the denoising process away from these degraded samples.
This guide will show you how to use PAG for various tasks and use cases.
## General tasks
You can apply PAG to the [StableDiffusionXLPipeline](/docs/diffusers/main/en/api/pipelines/stable_diffusion/stable_diffusion_xl#diffusers.StableDiffusionXLPipeline) for tasks such as text-to-image, image-to-image, and inpainting. To enable PAG for a specific task, load the pipeline using the [AutoPipeline](../api/pipelines/auto_pipeline) API with the `enable_pag=True` flag and the `pag_applied_layers` argument.
> [!TIP]
> 🤗 Diffusers currently only supports using PAG with selected SDXL pipelines and [PixArtSigmaPAGPipeline](/docs/diffusers/main/en/api/pipelines/pag#diffusers.PixArtSigmaPAGPipeline). But feel free to open a [feature request](https://github.com/huggingface/diffusers/issues/new/choose) if you want to add PAG support to a new pipeline!
```py
from diffusers import AutoPipelineForText2Image
from diffusers.utils import load_image
import torch
pipeline = AutoPipelineForText2Image.from_pretrained(
"stabilityai/stable-diffusion-xl-base-1.0",
enable_pag=True,
pag_applied_layers=["mid"],
torch_dtype=torch.float16
)
pipeline.enable_model_cpu_offload()
```
> [!TIP]
> The `pag_applied_layers` argument allows you to specify which layers PAG is applied to. Additionally, you can use `set_pag_applied_layers` method to update these layers after the pipeline has been created. Check out the [pag_applied_layers](#pag_applied_layers) section to learn more about applying PAG to other layers.
If you already have a pipeline created and loaded, you can enable PAG on it using the `from_pipe` API with the `enable_pag` flag. Internally, a PAG pipeline is created based on the pipeline and task you specified. In the example below, since we used `AutoPipelineForText2Image` and passed a `StableDiffusionXLPipeline`, a `StableDiffusionXLPAGPipeline` is created accordingly. Note that this does not require additional memory, and you will have both `StableDiffusionXLPipeline` and `StableDiffusionXLPAGPipeline` loaded and ready to use. You can read more about the `from_pipe` API and how to reuse pipelines in diffuser [here](https://huggingface.co/docs/diffusers/using-diffusers/loading#reuse-a-pipeline).
```py
pipeline_sdxl = AutoPipelineForText2Image.from_pretrained("stabilityai/stable-diffusion-xl-base-1.0", torch_dtype=torch.float16)
pipeline = AutoPipelineForText2Image.from_pipe(pipeline_sdxl, enable_pag=True)
```
To generate an image, you will also need to pass a `pag_scale`. When `pag_scale` increases, images gain more semantically coherent structures and exhibit fewer artifacts. However overly large guidance scale can lead to smoother textures and slight saturation in the images, similarly to CFG. `pag_scale=3.0` is used in the official demo and works well in most of the use cases, but feel free to experiment and select the appropriate value according to your needs! PAG is disabled when `pag_scale=0`.
```py
prompt = "an insect robot preparing a delicious meal, anime style"
for pag_scale in [0.0, 3.0]:
generator = torch.Generator(device="cpu").manual_seed(0)
images = pipeline(
prompt=prompt,
num_inference_steps=25,
guidance_scale=7.0,
generator=generator,
pag_scale=pag_scale,
).images
```
generated image without PAG
generated image with PAG
You can use PAG with image-to-image pipelines.
```py
from diffusers import AutoPipelineForImage2Image
from diffusers.utils import load_image
import torch
pipeline = AutoPipelineForImage2Image.from_pretrained(
"stabilityai/stable-diffusion-xl-base-1.0",
enable_pag=True,
pag_applied_layers=["mid"],
torch_dtype=torch.float16
)
pipeline.enable_model_cpu_offload()
```
If you already have a image-to-image pipeline and would like enable PAG on it, you can run this
```py
pipeline_t2i = AutoPipelineForImage2Image.from_pretrained("stabilityai/stable-diffusion-xl-base-1.0", torch_dtype=torch.float16)
pipeline = AutoPipelineForImage2Image.from_pipe(pipeline_t2i, enable_pag=True)
```
It is also very easy to directly switch from a text-to-image pipeline to PAG enabled image-to-image pipeline
```py
pipeline_pag = AutoPipelineForText2Image.from_pretrained("stabilityai/stable-diffusion-xl-base-1.0", torch_dtype=torch.float16)
pipeline = AutoPipelineForImage2Image.from_pipe(pipeline_t2i, enable_pag=True)
```
If you have a PAG enabled text-to-image pipeline, you can directly switch to a image-to-image pipeline with PAG still enabled
```py
pipeline_pag = AutoPipelineForText2Image.from_pretrained("stabilityai/stable-diffusion-xl-base-1.0", enable_pag=True, torch_dtype=torch.float16)
pipeline = AutoPipelineForImage2Image.from_pipe(pipeline_t2i)
```
Now let's generate an image!
```py
pag_scales = 4.0
guidance_scales = 7.0
url = "https://huggingface.co/datasets/huggingface/documentation-images/resolve/main/diffusers/sdxl-text2img.png"
init_image = load_image(url)
prompt = "a dog catching a frisbee in the jungle"
generator = torch.Generator(device="cpu").manual_seed(0)
image = pipeline(
prompt,
image=init_image,
strength=0.8,
guidance_scale=guidance_scale,
pag_scale=pag_scale,
generator=generator).images[0]
```
```py
from diffusers import AutoPipelineForInpainting
from diffusers.utils import load_image
import torch
pipeline = AutoPipelineForInpainting.from_pretrained(
"stabilityai/stable-diffusion-xl-base-1.0",
enable_pag=True,
torch_dtype=torch.float16
)
pipeline.enable_model_cpu_offload()
```
You can enable PAG on an exisiting inpainting pipeline like this
```py
pipeline_inpaint = AutoPipelineForInpaiting.from_pretrained("stabilityai/stable-diffusion-xl-base-1.0", torch_dtype=torch.float16)
pipeline = AutoPipelineForInpaiting.from_pipe(pipeline_inpaint, enable_pag=True)
```
This still works when your pipeline has a different task:
```py
pipeline_t2i = AutoPipelineForText2Image.from_pretrained("stabilityai/stable-diffusion-xl-base-1.0", torch_dtype=torch.float16)
pipeline = AutoPipelineForInpaiting.from_pipe(pipeline_t2i, enable_pag=True)
```
Let's generate an image!
```py
img_url = "https://raw.githubusercontent.com/CompVis/latent-diffusion/main/data/inpainting_examples/overture-creations-5sI6fQgYIuo.png"
mask_url = "https://raw.githubusercontent.com/CompVis/latent-diffusion/main/data/inpainting_examples/overture-creations-5sI6fQgYIuo_mask.png"
init_image = load_image(img_url).convert("RGB")
mask_image = load_image(mask_url).convert("RGB")
prompt = "A majestic tiger sitting on a bench"
pag_scales = 3.0
guidance_scales = 7.5
generator = torch.Generator(device="cpu").manual_seed(1)
images = pipeline(
prompt=prompt,
image=init_image,
mask_image=mask_image,
strength=0.8,
num_inference_steps=50,
guidance_scale=guidance_scale,
generator=generator,
pag_scale=pag_scale,
).images
images[0]
```
## PAG with ControlNet
To use PAG with ControlNet, first create a `controlnet`. Then, pass the `controlnet` and other PAG arguments to the `from_pretrained` method of the AutoPipeline for the specified task.
```py
from diffusers import AutoPipelineForText2Image, ControlNetModel
import torch
controlnet = ControlNetModel.from_pretrained(
"diffusers/controlnet-canny-sdxl-1.0", torch_dtype=torch.float16
)
pipeline = AutoPipelineForText2Image.from_pretrained(
"stabilityai/stable-diffusion-xl-base-1.0",
controlnet=controlnet,
enable_pag=True,
pag_applied_layers="mid",
torch_dtype=torch.float16
)
pipeline.enable_model_cpu_offload()
```
If you already have a controlnet pipeline and want to enable PAG, you can use the `from_pipe` API: `AutoPipelineForText2Image.from_pipe(pipeline_controlnet, enable_pag=True)`
You can use the pipeline in the same way you normally use ControlNet pipelines, with the added option to specify a `pag_scale` parameter. Note that PAG works well for unconditional generation. In this example, we will generate an image without a prompt.
```py
from diffusers.utils import load_image
canny_image = load_image(
"https://huggingface.co/datasets/YiYiXu/testing-images/resolve/main/pag_control_input.png"
)
for pag_scale in [0.0, 3.0]:
generator = torch.Generator(device="cpu").manual_seed(1)
images = pipeline(
prompt="",
controlnet_conditioning_scale=controlnet_conditioning_scale,
image=canny_image,
num_inference_steps=50,
guidance_scale=0,
generator=generator,
pag_scale=pag_scale,
).images
images[0]
```
generated image without PAG
generated image with PAG
## PAG with IP-Adapter
[IP-Adapter](https://hf.co/papers/2308.06721) is a popular model that can be plugged into diffusion models to enable image prompting without any changes to the underlying model. You can enable PAG on a pipeline with IP-Adapter loaded.
```py
from diffusers import AutoPipelineForText2Image
from diffusers.utils import load_image
from transformers import CLIPVisionModelWithProjection
import torch
image_encoder = CLIPVisionModelWithProjection.from_pretrained(
"h94/IP-Adapter",
subfolder="models/image_encoder",
torch_dtype=torch.float16
)
pipeline = AutoPipelineForText2Image.from_pretrained(
"stabilityai/stable-diffusion-xl-base-1.0",
image_encoder=image_encoder,
enable_pag=True,
torch_dtype=torch.float16
).to("cuda")
pipeline.load_ip_adapter("h94/IP-Adapter", subfolder="sdxl_models", weight_name="ip-adapter-plus_sdxl_vit-h.bin")
pag_scales = 5.0
ip_adapter_scales = 0.8
image = load_image("https://huggingface.co/datasets/huggingface/documentation-images/resolve/main/diffusers/ip_adapter_diner.png")
pipeline.set_ip_adapter_scale(ip_adapter_scale)
generator = torch.Generator(device="cpu").manual_seed(0)
images = pipeline(
prompt="a polar bear sitting in a chair drinking a milkshake",
ip_adapter_image=image,
negative_prompt="deformed, ugly, wrong proportion, low res, bad anatomy, worst quality, low quality",
num_inference_steps=25,
guidance_scale=3.0,
generator=generator,
pag_scale=pag_scale,
).images
images[0]
```
PAG reduces artifacts and improves the overall compposition.
generated image without PAG
generated image with PAG
## Configure parameters
### pag_applied_layers
The `pag_applied_layers` argument allows you to specify which layers PAG is applied to. By default, it applies only to the mid blocks. Changing this setting will significantly impact the output. You can use the `set_pag_applied_layers` method to adjust the PAG layers after the pipeline is created, helping you find the optimal layers for your model.
As an example, here is the images generated with `pag_layers = ["down.block_2"]` and `pag_layers = ["down.block_2", "up.block_1.attentions_0"]`
```py
prompt = "an insect robot preparing a delicious meal, anime style"
pipeline.set_pag_applied_layers(pag_layers)
generator = torch.Generator(device="cpu").manual_seed(0)
images = pipeline(
prompt=prompt,
num_inference_steps=25,
guidance_scale=guidance_scale,
generator=generator,
pag_scale=pag_scale,
).images
images[0]
```
down.block_2 + up.block1.attentions_0
down.block_2
# Controlled generation
Controlling outputs generated by diffusion models has been long pursued by the community and is now an active research topic. In many popular diffusion models, subtle changes in inputs, both images and text prompts, can drastically change outputs. In an ideal world we want to be able to control how semantics are preserved and changed.
Most examples of preserving semantics reduce to being able to accurately map a change in input to a change in output. I.e. adding an adjective to a subject in a prompt preserves the entire image, only modifying the changed subject. Or, image variation of a particular subject preserves the subject's pose.
Additionally, there are qualities of generated images that we would like to influence beyond semantic preservation. I.e. in general, we would like our outputs to be of good quality, adhere to a particular style, or be realistic.
We will document some of the techniques `diffusers` supports to control generation of diffusion models. Much is cutting edge research and can be quite nuanced. If something needs clarifying or you have a suggestion, don't hesitate to open a discussion on the [forum](https://discuss.huggingface.co/c/discussion-related-to-httpsgithubcomhuggingfacediffusers/63) or a [GitHub issue](https://github.com/huggingface/diffusers/issues).
We provide a high level explanation of how the generation can be controlled as well as a snippet of the technicals. For more in depth explanations on the technicals, the original papers which are linked from the pipelines are always the best resources.
Depending on the use case, one should choose a technique accordingly. In many cases, these techniques can be combined. For example, one can combine Textual Inversion with SEGA to provide more semantic guidance to the outputs generated using Textual Inversion.
Unless otherwise mentioned, these are techniques that work with existing models and don't require their own weights.
1. [InstructPix2Pix](#instruct-pix2pix)
2. [Pix2Pix Zero](#pix2pix-zero)
3. [Attend and Excite](#attend-and-excite)
4. [Semantic Guidance](#semantic-guidance-sega)
5. [Self-attention Guidance](#self-attention-guidance-sag)
6. [Depth2Image](#depth2image)
7. [MultiDiffusion Panorama](#multidiffusion-panorama)
8. [DreamBooth](#dreambooth)
9. [Textual Inversion](#textual-inversion)
10. [ControlNet](#controlnet)
11. [Prompt Weighting](#prompt-weighting)
12. [Custom Diffusion](#custom-diffusion)
13. [Model Editing](#model-editing)
14. [DiffEdit](#diffedit)
15. [T2I-Adapter](#t2i-adapter)
16. [FABRIC](#fabric)
For convenience, we provide a table to denote which methods are inference-only and which require fine-tuning/training.
| **Method** | **Inference only** | **Requires training / fine-tuning** | **Comments** |
| :-------------------------------------------------: | :----------------: | :-------------------------------------: | :---------------------------------------------------------------------------------------------: |
| [InstructPix2Pix](#instruct-pix2pix) | ✅ | ❌ | Can additionally be fine-tuned for better performance on specific edit instructions. |
| [Pix2Pix Zero](#pix2pix-zero) | ✅ | ❌ | |
| [Attend and Excite](#attend-and-excite) | ✅ | ❌ | |
| [Semantic Guidance](#semantic-guidance-sega) | ✅ | ❌ | |
| [Self-attention Guidance](#self-attention-guidance-sag) | ✅ | ❌ | |
| [Depth2Image](#depth2image) | ✅ | ❌ | |
| [MultiDiffusion Panorama](#multidiffusion-panorama) | ✅ | ❌ | |
| [DreamBooth](#dreambooth) | ❌ | ✅ | |
| [Textual Inversion](#textual-inversion) | ❌ | ✅ | |
| [ControlNet](#controlnet) | ✅ | ❌ | A ControlNet can be trained/fine-tuned on a custom conditioning. |
| [Prompt Weighting](#prompt-weighting) | ✅ | ❌ | |
| [Custom Diffusion](#custom-diffusion) | ❌ | ✅ | |
| [Model Editing](#model-editing) | ✅ | ❌ | |
| [DiffEdit](#diffedit) | ✅ | ❌ | |
| [T2I-Adapter](#t2i-adapter) | ✅ | ❌ | |
| [Fabric](#fabric) | ✅ | ❌ | |
## InstructPix2Pix
[Paper](https://arxiv.org/abs/2211.09800)
[InstructPix2Pix](../api/pipelines/pix2pix) is fine-tuned from Stable Diffusion to support editing input images. It takes as inputs an image and a prompt describing an edit, and it outputs the edited image.
InstructPix2Pix has been explicitly trained to work well with [InstructGPT](https://openai.com/blog/instruction-following/)-like prompts.
## Pix2Pix Zero
[Paper](https://arxiv.org/abs/2302.03027)
[Pix2Pix Zero](../api/pipelines/pix2pix_zero) allows modifying an image so that one concept or subject is translated to another one while preserving general image semantics.
The denoising process is guided from one conceptual embedding towards another conceptual embedding. The intermediate latents are optimized during the denoising process to push the attention maps towards reference attention maps. The reference attention maps are from the denoising process of the input image and are used to encourage semantic preservation.
Pix2Pix Zero can be used both to edit synthetic images as well as real images.
- To edit synthetic images, one first generates an image given a caption.
Next, we generate image captions for the concept that shall be edited and for the new target concept. We can use a model like [Flan-T5](https://huggingface.co/docs/transformers/model_doc/flan-t5) for this purpose. Then, "mean" prompt embeddings for both the source and target concepts are created via the text encoder. Finally, the pix2pix-zero algorithm is used to edit the synthetic image.
- To edit a real image, one first generates an image caption using a model like [BLIP](https://huggingface.co/docs/transformers/model_doc/blip). Then one applies DDIM inversion on the prompt and image to generate "inverse" latents. Similar to before, "mean" prompt embeddings for both source and target concepts are created and finally the pix2pix-zero algorithm in combination with the "inverse" latents is used to edit the image.
Pix2Pix Zero is the first model that allows "zero-shot" image editing. This means that the model
can edit an image in less than a minute on a consumer GPU as shown [here](../api/pipelines/pix2pix_zero#usage-example).
As mentioned above, Pix2Pix Zero includes optimizing the latents (and not any of the UNet, VAE, or the text encoder) to steer the generation toward a specific concept. This means that the overall
pipeline might require more memory than a standard [StableDiffusionPipeline](../api/pipelines/stable_diffusion/text2img).
An important distinction between methods like InstructPix2Pix and Pix2Pix Zero is that the former
involves fine-tuning the pre-trained weights while the latter does not. This means that you can
apply Pix2Pix Zero to any of the available Stable Diffusion models.
## Attend and Excite
[Paper](https://arxiv.org/abs/2301.13826)
[Attend and Excite](../api/pipelines/attend_and_excite) allows subjects in the prompt to be faithfully represented in the final image.
A set of token indices are given as input, corresponding to the subjects in the prompt that need to be present in the image. During denoising, each token index is guaranteed to have a minimum attention threshold for at least one patch of the image. The intermediate latents are iteratively optimized during the denoising process to strengthen the attention of the most neglected subject token until the attention threshold is passed for all subject tokens.
Like Pix2Pix Zero, Attend and Excite also involves a mini optimization loop (leaving the pre-trained weights untouched) in its pipeline and can require more memory than the usual [StableDiffusionPipeline](../api/pipelines/stable_diffusion/text2img).
## Semantic Guidance (SEGA)
[Paper](https://arxiv.org/abs/2301.12247)
[SEGA](../api/pipelines/semantic_stable_diffusion) allows applying or removing one or more concepts from an image. The strength of the concept can also be controlled. I.e. the smile concept can be used to incrementally increase or decrease the smile of a portrait.
Similar to how classifier free guidance provides guidance via empty prompt inputs, SEGA provides guidance on conceptual prompts. Multiple of these conceptual prompts can be applied simultaneously. Each conceptual prompt can either add or remove their concept depending on if the guidance is applied positively or negatively.
Unlike Pix2Pix Zero or Attend and Excite, SEGA directly interacts with the diffusion process instead of performing any explicit gradient-based optimization.
## Self-attention Guidance (SAG)
[Paper](https://arxiv.org/abs/2210.00939)
[Self-attention Guidance](../api/pipelines/self_attention_guidance) improves the general quality of images.
SAG provides guidance from predictions not conditioned on high-frequency details to fully conditioned images. The high frequency details are extracted out of the UNet self-attention maps.
## Depth2Image
[Project](https://huggingface.co/stabilityai/stable-diffusion-2-depth)
[Depth2Image](../api/pipelines/stable_diffusion/depth2img) is fine-tuned from Stable Diffusion to better preserve semantics for text guided image variation.
It conditions on a monocular depth estimate of the original image.
## MultiDiffusion Panorama
[Paper](https://arxiv.org/abs/2302.08113)
[MultiDiffusion Panorama](../api/pipelines/panorama) defines a new generation process over a pre-trained diffusion model. This process binds together multiple diffusion generation methods that can be readily applied to generate high quality and diverse images. Results adhere to user-provided controls, such as desired aspect ratio (e.g., panorama), and spatial guiding signals, ranging from tight segmentation masks to bounding boxes.
MultiDiffusion Panorama allows to generate high-quality images at arbitrary aspect ratios (e.g., panoramas).
## Fine-tuning your own models
In addition to pre-trained models, Diffusers has training scripts for fine-tuning models on user-provided data.
## DreamBooth
[Project](https://dreambooth.github.io/)
[DreamBooth](../training/dreambooth) fine-tunes a model to teach it about a new subject. I.e. a few pictures of a person can be used to generate images of that person in different styles.
## Textual Inversion
[Paper](https://arxiv.org/abs/2208.01618)
[Textual Inversion](../training/text_inversion) fine-tunes a model to teach it about a new concept. I.e. a few pictures of a style of artwork can be used to generate images in that style.
## ControlNet
[Paper](https://arxiv.org/abs/2302.05543)
[ControlNet](../api/pipelines/controlnet) is an auxiliary network which adds an extra condition.
There are 8 canonical pre-trained ControlNets trained on different conditionings such as edge detection, scribbles,
depth maps, and semantic segmentations.
## Prompt Weighting
[Prompt weighting](../using-diffusers/weighted_prompts) is a simple technique that puts more attention weight on certain parts of the text
input.
## Custom Diffusion
[Paper](https://arxiv.org/abs/2212.04488)
[Custom Diffusion](../training/custom_diffusion) only fine-tunes the cross-attention maps of a pre-trained
text-to-image diffusion model. It also allows for additionally performing Textual Inversion. It supports
multi-concept training by design. Like DreamBooth and Textual Inversion, Custom Diffusion is also used to
teach a pre-trained text-to-image diffusion model about new concepts to generate outputs involving the
concept(s) of interest.
## Model Editing
[Paper](https://arxiv.org/abs/2303.08084)
The [text-to-image model editing pipeline](../api/pipelines/model_editing) helps you mitigate some of the incorrect implicit assumptions a pre-trained text-to-image
diffusion model might make about the subjects present in the input prompt. For example, if you prompt Stable Diffusion to generate images for "A pack of roses", the roses in the generated images
are more likely to be red. This pipeline helps you change that assumption.
## DiffEdit
[Paper](https://arxiv.org/abs/2210.11427)
[DiffEdit](../api/pipelines/diffedit) allows for semantic editing of input images along with
input prompts while preserving the original input images as much as possible.
## T2I-Adapter
[Paper](https://arxiv.org/abs/2302.08453)
[T2I-Adapter](../api/pipelines/stable_diffusion/adapter) is an auxiliary network which adds an extra condition.
There are 8 canonical pre-trained adapters trained on different conditionings such as edge detection, sketch,
depth maps, and semantic segmentations.
## Fabric
[Paper](https://arxiv.org/abs/2307.10159)
[Fabric](https://github.com/huggingface/diffusers/tree/442017ccc877279bcf24fbe92f92d3d0def191b6/examples/community#stable-diffusion-fabric-pipeline) is a training-free
approach applicable to a wide range of popular diffusion models, which exploits
the self-attention layer present in the most widely used architectures to condition
the diffusion process on a set of feedback images.
# ControlNet
ControlNet is a type of model for controlling image diffusion models by conditioning the model with an additional input image. There are many types of conditioning inputs (canny edge, user sketching, human pose, depth, and more) you can use to control a diffusion model. This is hugely useful because it affords you greater control over image generation, making it easier to generate specific images without experimenting with different text prompts or denoising values as much.
Check out Section 3.5 of the [ControlNet](https://huggingface.co/papers/2302.05543) paper v1 for a list of ControlNet implementations on various conditioning inputs. You can find the official Stable Diffusion ControlNet conditioned models on [lllyasviel](https://huggingface.co/lllyasviel)'s Hub profile, and more [community-trained](https://huggingface.co/models?other=stable-diffusion&other=controlnet) ones on the Hub.
For Stable Diffusion XL (SDXL) ControlNet models, you can find them on the 🤗 [Diffusers](https://huggingface.co/diffusers) Hub organization, or you can browse [community-trained](https://huggingface.co/models?other=stable-diffusion-xl&other=controlnet) ones on the Hub.
A ControlNet model has two sets of weights (or blocks) connected by a zero-convolution layer:
- a *locked copy* keeps everything a large pretrained diffusion model has learned
- a *trainable copy* is trained on the additional conditioning input
Since the locked copy preserves the pretrained model, training and implementing a ControlNet on a new conditioning input is as fast as finetuning any other model because you aren't training the model from scratch.
This guide will show you how to use ControlNet for text-to-image, image-to-image, inpainting, and more! There are many types of ControlNet conditioning inputs to choose from, but in this guide we'll only focus on several of them. Feel free to experiment with other conditioning inputs!
Before you begin, make sure you have the following libraries installed:
```py
# uncomment to install the necessary libraries in Colab
#!pip install -q diffusers transformers accelerate opencv-python
```
## Text-to-image
For text-to-image, you normally pass a text prompt to the model. But with ControlNet, you can specify an additional conditioning input. Let's condition the model with a canny image, a white outline of an image on a black background. This way, the ControlNet can use the canny image as a control to guide the model to generate an image with the same outline.
Load an image and use the [opencv-python](https://github.com/opencv/opencv-python) library to extract the canny image:
```py
from diffusers.utils import load_image, make_image_grid
from PIL import Image
import cv2
import numpy as np
original_image = load_image(
"https://hf.co/datasets/huggingface/documentation-images/resolve/main/diffusers/input_image_vermeer.png"
)
image = np.array(original_image)
low_threshold = 100
high_threshold = 200
image = cv2.Canny(image, low_threshold, high_threshold)
image = image[:, :, None]
image = np.concatenate([image, image, image], axis=2)
canny_image = Image.fromarray(image)
```
original image
canny image
Next, load a ControlNet model conditioned on canny edge detection and pass it to the [StableDiffusionControlNetPipeline](/docs/diffusers/main/en/api/pipelines/controlnet#diffusers.StableDiffusionControlNetPipeline). Use the faster [UniPCMultistepScheduler](/docs/diffusers/main/en/api/schedulers/unipc#diffusers.UniPCMultistepScheduler) and enable model offloading to speed up inference and reduce memory usage.
```py
from diffusers import StableDiffusionControlNetPipeline, ControlNetModel, UniPCMultistepScheduler
import torch
controlnet = ControlNetModel.from_pretrained("lllyasviel/sd-controlnet-canny", torch_dtype=torch.float16, use_safetensors=True)
pipe = StableDiffusionControlNetPipeline.from_pretrained(
"stable-diffusion-v1-5/stable-diffusion-v1-5", controlnet=controlnet, torch_dtype=torch.float16, use_safetensors=True
)
pipe.scheduler = UniPCMultistepScheduler.from_config(pipe.scheduler.config)
pipe.enable_model_cpu_offload()
```
Now pass your prompt and canny image to the pipeline:
```py
output = pipe(
"the mona lisa", image=canny_image
).images[0]
make_image_grid([original_image, canny_image, output], rows=1, cols=3)
```
## Image-to-image
For image-to-image, you'd typically pass an initial image and a prompt to the pipeline to generate a new image. With ControlNet, you can pass an additional conditioning input to guide the model. Let's condition the model with a depth map, an image which contains spatial information. This way, the ControlNet can use the depth map as a control to guide the model to generate an image that preserves spatial information.
You'll use the [StableDiffusionControlNetImg2ImgPipeline](/docs/diffusers/main/en/api/pipelines/controlnet#diffusers.StableDiffusionControlNetImg2ImgPipeline) for this task, which is different from the [StableDiffusionControlNetPipeline](/docs/diffusers/main/en/api/pipelines/controlnet#diffusers.StableDiffusionControlNetPipeline) because it allows you to pass an initial image as the starting point for the image generation process.
Load an image and use the `depth-estimation` [Pipeline](https://huggingface.co/docs/transformers/main/en/main_classes/pipelines#transformers.Pipeline) from 🤗 Transformers to extract the depth map of an image:
```py
import torch
import numpy as np
from transformers import pipeline
from diffusers.utils import load_image, make_image_grid
image = load_image(
"https://huggingface.co/datasets/huggingface/documentation-images/resolve/main/diffusers/controlnet-img2img.jpg"
)
def get_depth_map(image, depth_estimator):
image = depth_estimator(image)["depth"]
image = np.array(image)
image = image[:, :, None]
image = np.concatenate([image, image, image], axis=2)
detected_map = torch.from_numpy(image).float() / 255.0
depth_map = detected_map.permute(2, 0, 1)
return depth_map
depth_estimator = pipeline("depth-estimation")
depth_map = get_depth_map(image, depth_estimator).unsqueeze(0).half().to("cuda")
```
Next, load a ControlNet model conditioned on depth maps and pass it to the [StableDiffusionControlNetImg2ImgPipeline](/docs/diffusers/main/en/api/pipelines/controlnet#diffusers.StableDiffusionControlNetImg2ImgPipeline). Use the faster [UniPCMultistepScheduler](/docs/diffusers/main/en/api/schedulers/unipc#diffusers.UniPCMultistepScheduler) and enable model offloading to speed up inference and reduce memory usage.
```py
from diffusers import StableDiffusionControlNetImg2ImgPipeline, ControlNetModel, UniPCMultistepScheduler
import torch
controlnet = ControlNetModel.from_pretrained("lllyasviel/control_v11f1p_sd15_depth", torch_dtype=torch.float16, use_safetensors=True)
pipe = StableDiffusionControlNetImg2ImgPipeline.from_pretrained(
"stable-diffusion-v1-5/stable-diffusion-v1-5", controlnet=controlnet, torch_dtype=torch.float16, use_safetensors=True
)
pipe.scheduler = UniPCMultistepScheduler.from_config(pipe.scheduler.config)
pipe.enable_model_cpu_offload()
```
Now pass your prompt, initial image, and depth map to the pipeline:
```py
output = pipe(
"lego batman and robin", image=image, control_image=depth_map,
).images[0]
make_image_grid([image, output], rows=1, cols=2)
```
original image
generated image
## Inpainting
For inpainting, you need an initial image, a mask image, and a prompt describing what to replace the mask with. ControlNet models allow you to add another control image to condition a model with. Let’s condition the model with an inpainting mask. This way, the ControlNet can use the inpainting mask as a control to guide the model to generate an image within the mask area.
Load an initial image and a mask image:
```py
from diffusers.utils import load_image, make_image_grid
init_image = load_image(
"https://huggingface.co/datasets/huggingface/documentation-images/resolve/main/diffusers/controlnet-inpaint.jpg"
)
init_image = init_image.resize((512, 512))
mask_image = load_image(
"https://huggingface.co/datasets/huggingface/documentation-images/resolve/main/diffusers/controlnet-inpaint-mask.jpg"
)
mask_image = mask_image.resize((512, 512))
make_image_grid([init_image, mask_image], rows=1, cols=2)
```
Create a function to prepare the control image from the initial and mask images. This'll create a tensor to mark the pixels in `init_image` as masked if the corresponding pixel in `mask_image` is over a certain threshold.
```py
import numpy as np
import torch
def make_inpaint_condition(image, image_mask):
image = np.array(image.convert("RGB")).astype(np.float32) / 255.0
image_mask = np.array(image_mask.convert("L")).astype(np.float32) / 255.0
assert image.shape[0:1] == image_mask.shape[0:1]
image[image_mask > 0.5] = -1.0 # set as masked pixel
image = np.expand_dims(image, 0).transpose(0, 3, 1, 2)
image = torch.from_numpy(image)
return image
control_image = make_inpaint_condition(init_image, mask_image)
```
original image
mask image
Load a ControlNet model conditioned on inpainting and pass it to the [StableDiffusionControlNetInpaintPipeline](/docs/diffusers/main/en/api/pipelines/controlnet#diffusers.StableDiffusionControlNetInpaintPipeline). Use the faster [UniPCMultistepScheduler](/docs/diffusers/main/en/api/schedulers/unipc#diffusers.UniPCMultistepScheduler) and enable model offloading to speed up inference and reduce memory usage.
```py
from diffusers import StableDiffusionControlNetInpaintPipeline, ControlNetModel, UniPCMultistepScheduler
controlnet = ControlNetModel.from_pretrained("lllyasviel/control_v11p_sd15_inpaint", torch_dtype=torch.float16, use_safetensors=True)
pipe = StableDiffusionControlNetInpaintPipeline.from_pretrained(
"stable-diffusion-v1-5/stable-diffusion-v1-5", controlnet=controlnet, torch_dtype=torch.float16, use_safetensors=True
)
pipe.scheduler = UniPCMultistepScheduler.from_config(pipe.scheduler.config)
pipe.enable_model_cpu_offload()
```
Now pass your prompt, initial image, mask image, and control image to the pipeline:
```py
output = pipe(
"corgi face with large ears, detailed, pixar, animated, disney",
num_inference_steps=20,
eta=1.0,
image=init_image,
mask_image=mask_image,
control_image=control_image,
).images[0]
make_image_grid([init_image, mask_image, output], rows=1, cols=3)
```
## Guess mode
[Guess mode](https://github.com/lllyasviel/ControlNet/discussions/188) does not require supplying a prompt to a ControlNet at all! This forces the ControlNet encoder to do its best to "guess" the contents of the input control map (depth map, pose estimation, canny edge, etc.).
Guess mode adjusts the scale of the output residuals from a ControlNet by a fixed ratio depending on the block depth. The shallowest `DownBlock` corresponds to 0.1, and as the blocks get deeper, the scale increases exponentially such that the scale of the `MidBlock` output becomes 1.0.
Guess mode does not have any impact on prompt conditioning and you can still provide a prompt if you want.
Set `guess_mode=True` in the pipeline, and it is [recommended](https://github.com/lllyasviel/ControlNet#guess-mode--non-prompt-mode) to set the `guidance_scale` value between 3.0 and 5.0.
```py
from diffusers import StableDiffusionControlNetPipeline, ControlNetModel
from diffusers.utils import load_image, make_image_grid
import numpy as np
import torch
from PIL import Image
import cv2
controlnet = ControlNetModel.from_pretrained("lllyasviel/sd-controlnet-canny", use_safetensors=True)
pipe = StableDiffusionControlNetPipeline.from_pretrained("stable-diffusion-v1-5/stable-diffusion-v1-5", controlnet=controlnet, use_safetensors=True).to("cuda")
original_image = load_image("https://huggingface.co/takuma104/controlnet_dev/resolve/main/bird_512x512.png")
image = np.array(original_image)
low_threshold = 100
high_threshold = 200
image = cv2.Canny(image, low_threshold, high_threshold)
image = image[:, :, None]
image = np.concatenate([image, image, image], axis=2)
canny_image = Image.fromarray(image)
image = pipe("", image=canny_image, guess_mode=True, guidance_scale=3.0).images[0]
make_image_grid([original_image, canny_image, image], rows=1, cols=3)
```
regular mode with prompt
guess mode without prompt
## ControlNet with Stable Diffusion XL
There aren't too many ControlNet models compatible with Stable Diffusion XL (SDXL) at the moment, but we've trained two full-sized ControlNet models for SDXL conditioned on canny edge detection and depth maps. We're also experimenting with creating smaller versions of these SDXL-compatible ControlNet models so it is easier to run on resource-constrained hardware. You can find these checkpoints on the [🤗 Diffusers Hub organization](https://huggingface.co/diffusers)!
Let's use a SDXL ControlNet conditioned on canny images to generate an image. Start by loading an image and prepare the canny image:
```py
from diffusers import StableDiffusionXLControlNetPipeline, ControlNetModel, AutoencoderKL
from diffusers.utils import load_image, make_image_grid
from PIL import Image
import cv2
import numpy as np
import torch
original_image = load_image(
"https://huggingface.co/datasets/hf-internal-testing/diffusers-images/resolve/main/sd_controlnet/hf-logo.png"
)
image = np.array(original_image)
low_threshold = 100
high_threshold = 200
image = cv2.Canny(image, low_threshold, high_threshold)
image = image[:, :, None]
image = np.concatenate([image, image, image], axis=2)
canny_image = Image.fromarray(image)
make_image_grid([original_image, canny_image], rows=1, cols=2)
```
original image
canny image
Load a SDXL ControlNet model conditioned on canny edge detection and pass it to the [StableDiffusionXLControlNetPipeline](/docs/diffusers/main/en/api/pipelines/controlnet_sdxl#diffusers.StableDiffusionXLControlNetPipeline). You can also enable model offloading to reduce memory usage.
```py
controlnet = ControlNetModel.from_pretrained(
"diffusers/controlnet-canny-sdxl-1.0",
torch_dtype=torch.float16,
use_safetensors=True
)
vae = AutoencoderKL.from_pretrained("madebyollin/sdxl-vae-fp16-fix", torch_dtype=torch.float16, use_safetensors=True)
pipe = StableDiffusionXLControlNetPipeline.from_pretrained(
"stabilityai/stable-diffusion-xl-base-1.0",
controlnet=controlnet,
vae=vae,
torch_dtype=torch.float16,
use_safetensors=True
)
pipe.enable_model_cpu_offload()
```
Now pass your prompt (and optionally a negative prompt if you're using one) and canny image to the pipeline:
The [`controlnet_conditioning_scale`](https://huggingface.co/docs/diffusers/main/en/api/pipelines/controlnet#diffusers.StableDiffusionControlNetPipeline.__call__.controlnet_conditioning_scale) parameter determines how much weight to assign to the conditioning inputs. A value of 0.5 is recommended for good generalization, but feel free to experiment with this number!
```py
prompt = "aerial view, a futuristic research complex in a bright foggy jungle, hard lighting"
negative_prompt = 'low quality, bad quality, sketches'
image = pipe(
prompt,
negative_prompt=negative_prompt,
image=canny_image,
controlnet_conditioning_scale=0.5,
).images[0]
make_image_grid([original_image, canny_image, image], rows=1, cols=3)
```
You can use [StableDiffusionXLControlNetPipeline](/docs/diffusers/main/en/api/pipelines/controlnet_sdxl#diffusers.StableDiffusionXLControlNetPipeline) in guess mode as well by setting the parameter to `True`:
```py
from diffusers import StableDiffusionXLControlNetPipeline, ControlNetModel, AutoencoderKL
from diffusers.utils import load_image, make_image_grid
import numpy as np
import torch
import cv2
from PIL import Image
prompt = "aerial view, a futuristic research complex in a bright foggy jungle, hard lighting"
negative_prompt = "low quality, bad quality, sketches"
original_image = load_image(
"https://hf.co/datasets/hf-internal-testing/diffusers-images/resolve/main/sd_controlnet/hf-logo.png"
)
controlnet = ControlNetModel.from_pretrained(
"diffusers/controlnet-canny-sdxl-1.0", torch_dtype=torch.float16, use_safetensors=True
)
vae = AutoencoderKL.from_pretrained("madebyollin/sdxl-vae-fp16-fix", torch_dtype=torch.float16, use_safetensors=True)
pipe = StableDiffusionXLControlNetPipeline.from_pretrained(
"stabilityai/stable-diffusion-xl-base-1.0", controlnet=controlnet, vae=vae, torch_dtype=torch.float16, use_safetensors=True
)
pipe.enable_model_cpu_offload()
image = np.array(original_image)
image = cv2.Canny(image, 100, 200)
image = image[:, :, None]
image = np.concatenate([image, image, image], axis=2)
canny_image = Image.fromarray(image)
image = pipe(
prompt, negative_prompt=negative_prompt, controlnet_conditioning_scale=0.5, image=canny_image, guess_mode=True,
).images[0]
make_image_grid([original_image, canny_image, image], rows=1, cols=3)
```
You can use a refiner model with `StableDiffusionXLControlNetPipeline` to improve image quality, just like you can with a regular `StableDiffusionXLPipeline`.
See the [Refine image quality](./sdxl#refine-image-quality) section to learn how to use the refiner model.
Make sure to use `StableDiffusionXLControlNetPipeline` and pass `image` and `controlnet_conditioning_scale`.
```py
base = StableDiffusionXLControlNetPipeline(...)
image = base(
prompt=prompt,
controlnet_conditioning_scale=0.5,
image=canny_image,
num_inference_steps=40,
denoising_end=0.8,
output_type="latent",
).images
# rest exactly as with StableDiffusionXLPipeline
```
## MultiControlNet
Replace the SDXL model with a model like [stable-diffusion-v1-5/stable-diffusion-v1-5](https://huggingface.co/stable-diffusion-v1-5/stable-diffusion-v1-5) to use multiple conditioning inputs with Stable Diffusion models.
You can compose multiple ControlNet conditionings from different image inputs to create a *MultiControlNet*. To get better results, it is often helpful to:
1. mask conditionings such that they don't overlap (for example, mask the area of a canny image where the pose conditioning is located)
2. experiment with the [`controlnet_conditioning_scale`](https://huggingface.co/docs/diffusers/main/en/api/pipelines/controlnet#diffusers.StableDiffusionControlNetPipeline.__call__.controlnet_conditioning_scale) parameter to determine how much weight to assign to each conditioning input
In this example, you'll combine a canny image and a human pose estimation image to generate a new image.
Prepare the canny image conditioning:
```py
from diffusers.utils import load_image, make_image_grid
from PIL import Image
import numpy as np
import cv2
original_image = load_image(
"https://huggingface.co/datasets/huggingface/documentation-images/resolve/main/diffusers/landscape.png"
)
image = np.array(original_image)
low_threshold = 100
high_threshold = 200
image = cv2.Canny(image, low_threshold, high_threshold)
# zero out middle columns of image where pose will be overlaid
zero_start = image.shape[1] // 4
zero_end = zero_start + image.shape[1] // 2
image[:, zero_start:zero_end] = 0
image = image[:, :, None]
image = np.concatenate([image, image, image], axis=2)
canny_image = Image.fromarray(image)
make_image_grid([original_image, canny_image], rows=1, cols=2)
```
original image
canny image
For human pose estimation, install [controlnet_aux](https://github.com/patrickvonplaten/controlnet_aux):
```py
# uncomment to install the necessary library in Colab
#!pip install -q controlnet-aux
```
Prepare the human pose estimation conditioning:
```py
from controlnet_aux import OpenposeDetector
openpose = OpenposeDetector.from_pretrained("lllyasviel/ControlNet")
original_image = load_image(
"https://huggingface.co/datasets/huggingface/documentation-images/resolve/main/diffusers/person.png"
)
openpose_image = openpose(original_image)
make_image_grid([original_image, openpose_image], rows=1, cols=2)
```
original image
human pose image
Load a list of ControlNet models that correspond to each conditioning, and pass them to the [StableDiffusionXLControlNetPipeline](/docs/diffusers/main/en/api/pipelines/controlnet_sdxl#diffusers.StableDiffusionXLControlNetPipeline). Use the faster [UniPCMultistepScheduler](/docs/diffusers/main/en/api/schedulers/unipc#diffusers.UniPCMultistepScheduler) and enable model offloading to reduce memory usage.
```py
from diffusers import StableDiffusionXLControlNetPipeline, ControlNetModel, AutoencoderKL, UniPCMultistepScheduler
import torch
controlnets = [
ControlNetModel.from_pretrained(
"thibaud/controlnet-openpose-sdxl-1.0", torch_dtype=torch.float16
),
ControlNetModel.from_pretrained(
"diffusers/controlnet-canny-sdxl-1.0", torch_dtype=torch.float16, use_safetensors=True
),
]
vae = AutoencoderKL.from_pretrained("madebyollin/sdxl-vae-fp16-fix", torch_dtype=torch.float16, use_safetensors=True)
pipe = StableDiffusionXLControlNetPipeline.from_pretrained(
"stabilityai/stable-diffusion-xl-base-1.0", controlnet=controlnets, vae=vae, torch_dtype=torch.float16, use_safetensors=True
)
pipe.scheduler = UniPCMultistepScheduler.from_config(pipe.scheduler.config)
pipe.enable_model_cpu_offload()
```
Now you can pass your prompt (an optional negative prompt if you're using one), canny image, and pose image to the pipeline:
```py
prompt = "a giant standing in a fantasy landscape, best quality"
negative_prompt = "monochrome, lowres, bad anatomy, worst quality, low quality"
generator = torch.manual_seed(1)
images = [openpose_image.resize((1024, 1024)), canny_image.resize((1024, 1024))]
images = pipe(
prompt,
image=images,
num_inference_steps=25,
generator=generator,
negative_prompt=negative_prompt,
num_images_per_prompt=3,
controlnet_conditioning_scale=[1.0, 0.8],
).images
make_image_grid([original_image, canny_image, openpose_image,
images[0].resize((512, 512)), images[1].resize((512, 512)), images[2].resize((512, 512))], rows=2, cols=3)
```
# T2I-Adapter
[T2I-Adapter](https://hf.co/papers/2302.08453) is a lightweight adapter for controlling and providing more accurate
structure guidance for text-to-image models. It works by learning an alignment between the internal knowledge of the
text-to-image model and an external control signal, such as edge detection or depth estimation.
The T2I-Adapter design is simple, the condition is passed to four feature extraction blocks and three downsample
blocks. This makes it fast and easy to train different adapters for different conditions which can be plugged into the
text-to-image model. T2I-Adapter is similar to [ControlNet](controlnet) except it is smaller (~77M parameters) and
faster because it only runs once during the diffusion process. The downside is that performance may be slightly worse
than ControlNet.
This guide will show you how to use T2I-Adapter with different Stable Diffusion models and how you can compose multiple
T2I-Adapters to impose more than one condition.
> [!TIP]
> There are several T2I-Adapters available for different conditions, such as color palette, depth, sketch, pose, and
> segmentation. Check out the [TencentARC](https://hf.co/TencentARC) repository to try them out!
Before you begin, make sure you have the following libraries installed.
```py
# uncomment to install the necessary libraries in Colab
#!pip install -q diffusers accelerate controlnet-aux==0.0.7
```
## Text-to-image
Text-to-image models rely on a prompt to generate an image, but sometimes, text alone may not be enough to provide more
accurate structural guidance. T2I-Adapter allows you to provide an additional control image to guide the generation
process. For example, you can provide a canny image (a white outline of an image on a black background) to guide the
model to generate an image with a similar structure.
Create a canny image with the [opencv-library](https://github.com/opencv/opencv-python).
```py
import cv2
import numpy as np
from PIL import Image
from diffusers.utils import load_image
image = load_image("https://huggingface.co/datasets/hf-internal-testing/diffusers-images/resolve/main/sd_controlnet/hf-logo.png")
image = np.array(image)
low_threshold = 100
high_threshold = 200
image = cv2.Canny(image, low_threshold, high_threshold)
image = Image.fromarray(image)
```
Now load a T2I-Adapter conditioned on [canny images](https://hf.co/TencentARC/t2iadapter_canny_sd15v2) and pass it to
the [StableDiffusionAdapterPipeline](/docs/diffusers/main/en/api/pipelines/stable_diffusion/adapter#diffusers.StableDiffusionAdapterPipeline).
```py
import torch
from diffusers import StableDiffusionAdapterPipeline, T2IAdapter
adapter = T2IAdapter.from_pretrained("TencentARC/t2iadapter_canny_sd15v2", torch_dtype=torch.float16)
pipeline = StableDiffusionAdapterPipeline.from_pretrained(
"stable-diffusion-v1-5/stable-diffusion-v1-5",
adapter=adapter,
torch_dtype=torch.float16,
)
pipeline.to("cuda")
```
Finally, pass your prompt and control image to the pipeline.
```py
generator = torch.Generator("cuda").manual_seed(0)
image = pipeline(
prompt="cinematic photo of a plush and soft midcentury style rug on a wooden floor, 35mm photograph, film, professional, 4k, highly detailed",
image=image,
generator=generator,
).images[0]
image
```
Create a canny image with the [controlnet-aux](https://github.com/huggingface/controlnet_aux) library.
```py
from controlnet_aux.canny import CannyDetector
from diffusers.utils import load_image
canny_detector = CannyDetector()
image = load_image("https://huggingface.co/datasets/hf-internal-testing/diffusers-images/resolve/main/sd_controlnet/hf-logo.png")
image = canny_detector(image, detect_resolution=384, image_resolution=1024)
```
Now load a T2I-Adapter conditioned on [canny images](https://hf.co/TencentARC/t2i-adapter-canny-sdxl-1.0) and pass it
to the [StableDiffusionXLAdapterPipeline](/docs/diffusers/main/en/api/pipelines/stable_diffusion/adapter#diffusers.StableDiffusionXLAdapterPipeline).
```py
import torch
from diffusers import StableDiffusionXLAdapterPipeline, T2IAdapter, EulerAncestralDiscreteScheduler, AutoencoderKL
scheduler = EulerAncestralDiscreteScheduler.from_pretrained("stabilityai/stable-diffusion-xl-base-1.0", subfolder="scheduler")
vae = AutoencoderKL.from_pretrained("madebyollin/sdxl-vae-fp16-fix", torch_dtype=torch.float16)
adapter = T2IAdapter.from_pretrained("TencentARC/t2i-adapter-canny-sdxl-1.0", torch_dtype=torch.float16)
pipeline = StableDiffusionXLAdapterPipeline.from_pretrained(
"stabilityai/stable-diffusion-xl-base-1.0",
adapter=adapter,
vae=vae,
scheduler=scheduler,
torch_dtype=torch.float16,
variant="fp16",
)
pipeline.to("cuda")
```
Finally, pass your prompt and control image to the pipeline.
```py
generator = torch.Generator("cuda").manual_seed(0)
image = pipeline(
prompt="cinematic photo of a plush and soft midcentury style rug on a wooden floor, 35mm photograph, film, professional, 4k, highly detailed",
image=image,
generator=generator,
).images[0]
image
```
## MultiAdapter
T2I-Adapters are also composable, allowing you to use more than one adapter to impose multiple control conditions on an
image. For example, you can use a pose map to provide structural control and a depth map for depth control. This is
enabled by the `MultiAdapter` class.
Let's condition a text-to-image model with a pose and depth adapter. Create and place your depth and pose image and in a list.
```py
from diffusers.utils import load_image
pose_image = load_image(
"https://huggingface.co/datasets/diffusers/docs-images/resolve/main/t2i-adapter/keypose_sample_input.png"
)
depth_image = load_image(
"https://huggingface.co/datasets/diffusers/docs-images/resolve/main/t2i-adapter/depth_sample_input.png"
)
cond = [pose_image, depth_image]
prompt = ["Santa Claus walking into an office room with a beautiful city view"]
```
depth image
pose image
Load the corresponding pose and depth adapters as a list in the `MultiAdapter` class.
```py
import torch
from diffusers import StableDiffusionAdapterPipeline, MultiAdapter, T2IAdapter
adapters = MultiAdapter(
[
T2IAdapter.from_pretrained("TencentARC/t2iadapter_keypose_sd14v1"),
T2IAdapter.from_pretrained("TencentARC/t2iadapter_depth_sd14v1"),
]
)
adapters = adapters.to(torch.float16)
```
Finally, load a [StableDiffusionAdapterPipeline](/docs/diffusers/main/en/api/pipelines/stable_diffusion/adapter#diffusers.StableDiffusionAdapterPipeline) with the adapters, and pass your prompt and conditioned images to
it. Use the `adapter_conditioning_scale` to adjust the weight of each adapter on the image.
```py
pipeline = StableDiffusionAdapterPipeline.from_pretrained(
"CompVis/stable-diffusion-v1-4",
torch_dtype=torch.float16,
adapter=adapters,
).to("cuda")
image = pipeline(prompt, cond, adapter_conditioning_scale=[0.7, 0.7]).images[0]
image
```
# Pipeline callbacks
The denoising loop of a pipeline can be modified with custom defined functions using the `callback_on_step_end` parameter. The callback function is executed at the end of each step, and modifies the pipeline attributes and variables for the next step. This is really useful for *dynamically* adjusting certain pipeline attributes or modifying tensor variables. This versatility allows for interesting use cases such as changing the prompt embeddings at each timestep, assigning different weights to the prompt embeddings, and editing the guidance scale. With callbacks, you can implement new features without modifying the underlying code!
> [!TIP]
> 🤗 Diffusers currently only supports `callback_on_step_end`, but feel free to open a [feature request](https://github.com/huggingface/diffusers/issues/new/choose) if you have a cool use-case and require a callback function with a different execution point!
This guide will demonstrate how callbacks work by a few features you can implement with them.
## Official callbacks
We provide a list of callbacks you can plug into an existing pipeline and modify the denoising loop. This is the current list of official callbacks:
- `SDCFGCutoffCallback`: Disables the CFG after a certain number of steps for all SD 1.5 pipelines, including text-to-image, image-to-image, inpaint, and controlnet.
- `SDXLCFGCutoffCallback`: Disables the CFG after a certain number of steps for all SDXL pipelines, including text-to-image, image-to-image, inpaint, and controlnet.
- `IPAdapterScaleCutoffCallback`: Disables the IP Adapter after a certain number of steps for all pipelines supporting IP-Adapter.
> [!TIP]
> If you want to add a new official callback, feel free to open a [feature request](https://github.com/huggingface/diffusers/issues/new/choose) or [submit a PR](https://huggingface.co/docs/diffusers/main/en/conceptual/contribution#how-to-open-a-pr).
To set up a callback, you need to specify the number of denoising steps after which the callback comes into effect. You can do so by using either one of these two arguments
- `cutoff_step_ratio`: Float number with the ratio of the steps.
- `cutoff_step_index`: Integer number with the exact number of the step.
```python
import torch
from diffusers import DPMSolverMultistepScheduler, StableDiffusionXLPipeline
from diffusers.callbacks import SDXLCFGCutoffCallback
callback = SDXLCFGCutoffCallback(cutoff_step_ratio=0.4)
# can also be used with cutoff_step_index
# callback = SDXLCFGCutoffCallback(cutoff_step_ratio=None, cutoff_step_index=10)
pipeline = StableDiffusionXLPipeline.from_pretrained(
"stabilityai/stable-diffusion-xl-base-1.0",
torch_dtype=torch.float16,
variant="fp16",
).to("cuda")
pipeline.scheduler = DPMSolverMultistepScheduler.from_config(pipeline.scheduler.config, use_karras_sigmas=True)
prompt = "a sports car at the road, best quality, high quality, high detail, 8k resolution"
generator = torch.Generator(device="cpu").manual_seed(2628670641)
out = pipeline(
prompt=prompt,
negative_prompt="",
guidance_scale=6.5,
num_inference_steps=25,
generator=generator,
callback_on_step_end=callback,
)
out.images[0].save("official_callback.png")
```
without SDXLCFGCutoffCallback
with SDXLCFGCutoffCallback
## Dynamic classifier-free guidance
Dynamic classifier-free guidance (CFG) is a feature that allows you to disable CFG after a certain number of inference steps which can help you save compute with minimal cost to performance. The callback function for this should have the following arguments:
- `pipeline` (or the pipeline instance) provides access to important properties such as `num_timesteps` and `guidance_scale`. You can modify these properties by updating the underlying attributes. For this example, you'll disable CFG by setting `pipeline._guidance_scale=0.0`.
- `step_index` and `timestep` tell you where you are in the denoising loop. Use `step_index` to turn off CFG after reaching 40% of `num_timesteps`.
- `callback_kwargs` is a dict that contains tensor variables you can modify during the denoising loop. It only includes variables specified in the `callback_on_step_end_tensor_inputs` argument, which is passed to the pipeline's `__call__` method. Different pipelines may use different sets of variables, so please check a pipeline's `_callback_tensor_inputs` attribute for the list of variables you can modify. Some common variables include `latents` and `prompt_embeds`. For this function, change the batch size of `prompt_embeds` after setting `guidance_scale=0.0` in order for it to work properly.
Your callback function should look something like this:
```python
def callback_dynamic_cfg(pipe, step_index, timestep, callback_kwargs):
# adjust the batch_size of prompt_embeds according to guidance_scale
if step_index == int(pipeline.num_timesteps * 0.4):
prompt_embeds = callback_kwargs["prompt_embeds"]
prompt_embeds = prompt_embeds.chunk(2)[-1]
# update guidance_scale and prompt_embeds
pipeline._guidance_scale = 0.0
callback_kwargs["prompt_embeds"] = prompt_embeds
return callback_kwargs
```
Now, you can pass the callback function to the `callback_on_step_end` parameter and the `prompt_embeds` to `callback_on_step_end_tensor_inputs`.
```py
import torch
from diffusers import StableDiffusionPipeline
pipeline = StableDiffusionPipeline.from_pretrained("stable-diffusion-v1-5/stable-diffusion-v1-5", torch_dtype=torch.float16)
pipeline = pipeline.to("cuda")
prompt = "a photo of an astronaut riding a horse on mars"
generator = torch.Generator(device="cuda").manual_seed(1)
out = pipeline(
prompt,
generator=generator,
callback_on_step_end=callback_dynamic_cfg,
callback_on_step_end_tensor_inputs=['prompt_embeds']
)
out.images[0].save("out_custom_cfg.png")
```
## Interrupt the diffusion process
> [!TIP]
> The interruption callback is supported for text-to-image, image-to-image, and inpainting for the [StableDiffusionPipeline](../api/pipelines/stable_diffusion/overview) and [StableDiffusionXLPipeline](../api/pipelines/stable_diffusion/stable_diffusion_xl).
Stopping the diffusion process early is useful when building UIs that work with Diffusers because it allows users to stop the generation process if they're unhappy with the intermediate results. You can incorporate this into your pipeline with a callback.
This callback function should take the following arguments: `pipeline`, `i`, `t`, and `callback_kwargs` (this must be returned). Set the pipeline's `_interrupt` attribute to `True` to stop the diffusion process after a certain number of steps. You are also free to implement your own custom stopping logic inside the callback.
In this example, the diffusion process is stopped after 10 steps even though `num_inference_steps` is set to 50.
```python
from diffusers import StableDiffusionPipeline
pipeline = StableDiffusionPipeline.from_pretrained("stable-diffusion-v1-5/stable-diffusion-v1-5")
pipeline.enable_model_cpu_offload()
num_inference_steps = 50
def interrupt_callback(pipeline, i, t, callback_kwargs):
stop_idx = 10
if i == stop_idx:
pipeline._interrupt = True
return callback_kwargs
pipeline(
"A photo of a cat",
num_inference_steps=num_inference_steps,
callback_on_step_end=interrupt_callback,
)
```
## Display image after each generation step
> [!TIP]
> This tip was contributed by [asomoza](https://github.com/asomoza).
Display an image after each generation step by accessing and converting the latents after each step into an image. The latent space is compressed to 128x128, so the images are also 128x128 which is useful for a quick preview.
1. Use the function below to convert the SDXL latents (4 channels) to RGB tensors (3 channels) as explained in the [Explaining the SDXL latent space](https://huggingface.co/blog/TimothyAlexisVass/explaining-the-sdxl-latent-space) blog post.
```py
def latents_to_rgb(latents):
weights = (
(60, -60, 25, -70),
(60, -5, 15, -50),
(60, 10, -5, -35),
)
weights_tensor = torch.t(torch.tensor(weights, dtype=latents.dtype).to(latents.device))
biases_tensor = torch.tensor((150, 140, 130), dtype=latents.dtype).to(latents.device)
rgb_tensor = torch.einsum("...lxy,lr -> ...rxy", latents, weights_tensor) + biases_tensor.unsqueeze(-1).unsqueeze(-1)
image_array = rgb_tensor.clamp(0, 255).byte().cpu().numpy().transpose(1, 2, 0)
return Image.fromarray(image_array)
```
2. Create a function to decode and save the latents into an image.
```py
def decode_tensors(pipe, step, timestep, callback_kwargs):
latents = callback_kwargs["latents"]
image = latents_to_rgb(latents[0])
image.save(f"{step}.png")
return callback_kwargs
```
3. Pass the `decode_tensors` function to the `callback_on_step_end` parameter to decode the tensors after each step. You also need to specify what you want to modify in the `callback_on_step_end_tensor_inputs` parameter, which in this case are the latents.
```py
from diffusers import AutoPipelineForText2Image
import torch
from PIL import Image
pipeline = AutoPipelineForText2Image.from_pretrained(
"stabilityai/stable-diffusion-xl-base-1.0",
torch_dtype=torch.float16,
variant="fp16",
use_safetensors=True
).to("cuda")
image = pipeline(
prompt="A croissant shaped like a cute bear.",
negative_prompt="Deformed, ugly, bad anatomy",
callback_on_step_end=decode_tensors,
callback_on_step_end_tensor_inputs=["latents"],
).images[0]
```
step 0
step 19
step 29
step 39
step 49
# Load community pipelines and components
## Community pipelines
> [!TIP] Take a look at GitHub Issue [#841](https://github.com/huggingface/diffusers/issues/841) for more context about why we're adding community pipelines to help everyone easily share their work without being slowed down.
Community pipelines are any [DiffusionPipeline](/docs/diffusers/main/en/api/pipelines/overview#diffusers.DiffusionPipeline) class that are different from the original paper implementation (for example, the [StableDiffusionControlNetPipeline](/docs/diffusers/main/en/api/pipelines/controlnet#diffusers.StableDiffusionControlNetPipeline) corresponds to the [Text-to-Image Generation with ControlNet Conditioning](https://arxiv.org/abs/2302.05543) paper). They provide additional functionality or extend the original implementation of a pipeline.
There are many cool community pipelines like [Marigold Depth Estimation](https://github.com/huggingface/diffusers/tree/main/examples/community#marigold-depth-estimation) or [InstantID](https://github.com/huggingface/diffusers/tree/main/examples/community#instantid-pipeline), and you can find all the official community pipelines [here](https://github.com/huggingface/diffusers/tree/main/examples/community).
There are two types of community pipelines, those stored on the Hugging Face Hub and those stored on Diffusers GitHub repository. Hub pipelines are completely customizable (scheduler, models, pipeline code, etc.) while Diffusers GitHub pipelines are only limited to custom pipeline code.
| | GitHub community pipeline | HF Hub community pipeline |
|----------------|------------------------------------------------------------------------------------------------------------------|-------------------------------------------------------------------------------------------|
| usage | same | same |
| review process | open a Pull Request on GitHub and undergo a review process from the Diffusers team before merging; may be slower | upload directly to a Hub repository without any review; this is the fastest workflow |
| visibility | included in the official Diffusers repository and documentation | included on your HF Hub profile and relies on your own usage/promotion to gain visibility |
### Load from a local file
Community pipelines can also be loaded from a local file if you pass a file path instead. The path to the passed directory must contain a pipeline.py file that contains the pipeline class.
```py
pipeline = DiffusionPipeline.from_pretrained(
"stable-diffusion-v1-5/stable-diffusion-v1-5",
custom_pipeline="./path/to/pipeline_directory/",
clip_model=clip_model,
feature_extractor=feature_extractor,
use_safetensors=True,
)
```
### Load from a specific version
By default, community pipelines are loaded from the latest stable version of Diffusers. To load a community pipeline from another version, use the `custom_revision` parameter.
For example, to load from the main branch:
```py
pipeline = DiffusionPipeline.from_pretrained(
"stable-diffusion-v1-5/stable-diffusion-v1-5",
custom_pipeline="clip_guided_stable_diffusion",
custom_revision="main",
clip_model=clip_model,
feature_extractor=feature_extractor,
use_safetensors=True,
)
```
For example, to load from a previous version of Diffusers like v0.25.0:
```py
pipeline = DiffusionPipeline.from_pretrained(
"stable-diffusion-v1-5/stable-diffusion-v1-5",
custom_pipeline="clip_guided_stable_diffusion",
custom_revision="v0.25.0",
clip_model=clip_model,
feature_extractor=feature_extractor,
use_safetensors=True,
)
```
### Load with from_pipe
Community pipelines can also be loaded with the [from_pipe()](/docs/diffusers/main/en/api/pipelines/overview#diffusers.DiffusionPipeline.from_pipe) method which allows you to load and reuse multiple pipelines without any additional memory overhead (learn more in the [Reuse a pipeline](./loading#reuse-a-pipeline) guide). The memory requirement is determined by the largest single pipeline loaded.
For example, let's load a community pipeline that supports [long prompts with weighting](https://github.com/huggingface/diffusers/tree/main/examples/community#long-prompt-weighting-stable-diffusion) from a Stable Diffusion pipeline.
```py
import torch
from diffusers import DiffusionPipeline
pipe_sd = DiffusionPipeline.from_pretrained("emilianJR/CyberRealistic_V3", torch_dtype=torch.float16)
pipe_sd.to("cuda")
# load long prompt weighting pipeline
pipe_lpw = DiffusionPipeline.from_pipe(
pipe_sd,
custom_pipeline="lpw_stable_diffusion",
).to("cuda")
prompt = "cat, hiding in the leaves, ((rain)), zazie rainyday, beautiful eyes, macro shot, colorful details, natural lighting, amazing composition, subsurface scattering, amazing textures, filmic, soft light, ultra-detailed eyes, intricate details, detailed texture, light source contrast, dramatic shadows, cinematic light, depth of field, film grain, noise, dark background, hyperrealistic dslr film still, dim volumetric cinematic lighting"
neg_prompt = "(deformed iris, deformed pupils, semi-realistic, cgi, 3d, render, sketch, cartoon, drawing, anime, mutated hands and fingers:1.4), (deformed, distorted, disfigured:1.3), poorly drawn, bad anatomy, wrong anatomy, extra limb, missing limb, floating limbs, disconnected limbs, mutation, mutated, ugly, disgusting, amputation"
generator = torch.Generator(device="cpu").manual_seed(20)
out_lpw = pipe_lpw(
prompt,
negative_prompt=neg_prompt,
width=512,
height=512,
max_embeddings_multiples=3,
num_inference_steps=50,
generator=generator,
).images[0]
out_lpw
```
Stable Diffusion with long prompt weighting
Stable Diffusion
## Example community pipelines
Community pipelines are a really fun and creative way to extend the capabilities of the original pipeline with new and unique features. You can find all community pipelines in the [diffusers/examples/community](https://github.com/huggingface/diffusers/tree/main/examples/community) folder with inference and training examples for how to use them.
This section showcases a couple of the community pipelines and hopefully it'll inspire you to create your own (feel free to open a PR for your community pipeline and ping us for a review)!
> [!TIP]
> The [from_pipe()](/docs/diffusers/main/en/api/pipelines/overview#diffusers.DiffusionPipeline.from_pipe) method is particularly useful for loading community pipelines because many of them don't have pretrained weights and add a feature on top of an existing pipeline like Stable Diffusion or Stable Diffusion XL. You can learn more about the [from_pipe()](/docs/diffusers/main/en/api/pipelines/overview#diffusers.DiffusionPipeline.from_pipe) method in the [Load with from_pipe](custom_pipeline_overview#load-with-from_pipe) section.
## Community components
Community components allow users to build pipelines that may have customized components that are not a part of Diffusers. If your pipeline has custom components that Diffusers doesn't already support, you need to provide their implementations as Python modules. These customized components could be a VAE, UNet, and scheduler. In most cases, the text encoder is imported from the Transformers library. The pipeline code itself can also be customized.
This section shows how users should use community components to build a community pipeline.
You'll use the [showlab/show-1-base](https://huggingface.co/showlab/show-1-base) pipeline checkpoint as an example.
1. Import and load the text encoder from Transformers:
```python
from transformers import T5Tokenizer, T5EncoderModel
pipe_id = "showlab/show-1-base"
tokenizer = T5Tokenizer.from_pretrained(pipe_id, subfolder="tokenizer")
text_encoder = T5EncoderModel.from_pretrained(pipe_id, subfolder="text_encoder")
```
2. Load a scheduler:
```python
from diffusers import DPMSolverMultistepScheduler
scheduler = DPMSolverMultistepScheduler.from_pretrained(pipe_id, subfolder="scheduler")
```
3. Load an image processor:
```python
from transformers import CLIPImageProcessor
feature_extractor = CLIPImageProcessor.from_pretrained(pipe_id, subfolder="feature_extractor")
```
In steps 4 and 5, the custom [UNet](https://github.com/showlab/Show-1/blob/main/showone/models/unet_3d_condition.py) and [pipeline](https://huggingface.co/sayakpaul/show-1-base-with-code/blob/main/unet/showone_unet_3d_condition.py) implementation must match the format shown in their files for this example to work.
4. Now you'll load a [custom UNet](https://github.com/showlab/Show-1/blob/main/showone/models/unet_3d_condition.py), which in this example, has already been implemented in [showone_unet_3d_condition.py](https://huggingface.co/sayakpaul/show-1-base-with-code/blob/main/unet/showone_unet_3d_condition.py) for your convenience. You'll notice the [UNet3DConditionModel](/docs/diffusers/main/en/api/models/unet3d-cond#diffusers.UNet3DConditionModel) class name is changed to `ShowOneUNet3DConditionModel` because [UNet3DConditionModel](/docs/diffusers/main/en/api/models/unet3d-cond#diffusers.UNet3DConditionModel) already exists in Diffusers. Any components needed for the `ShowOneUNet3DConditionModel` class should be placed in showone_unet_3d_condition.py.
Once this is done, you can initialize the UNet:
```python
from showone_unet_3d_condition import ShowOneUNet3DConditionModel
unet = ShowOneUNet3DConditionModel.from_pretrained(pipe_id, subfolder="unet")
```
5. Finally, you'll load the custom pipeline code. For this example, it has already been created for you in [pipeline_t2v_base_pixel.py](https://huggingface.co/sayakpaul/show-1-base-with-code/blob/main/pipeline_t2v_base_pixel.py). This script contains a custom `TextToVideoIFPipeline` class for generating videos from text. Just like the custom UNet, any code needed for the custom pipeline to work should go in pipeline_t2v_base_pixel.py.
Once everything is in place, you can initialize the `TextToVideoIFPipeline` with the `ShowOneUNet3DConditionModel`:
```python
from pipeline_t2v_base_pixel import TextToVideoIFPipeline
import torch
pipeline = TextToVideoIFPipeline(
unet=unet,
text_encoder=text_encoder,
tokenizer=tokenizer,
scheduler=scheduler,
feature_extractor=feature_extractor
)
pipeline = pipeline.to(device="cuda")
pipeline.torch_dtype = torch.float16
```
Push the pipeline to the Hub to share with the community!
```python
pipeline.push_to_hub("custom-t2v-pipeline")
```
After the pipeline is successfully pushed, you need to make a few changes:
1. Change the `_class_name` attribute in [model_index.json](https://huggingface.co/sayakpaul/show-1-base-with-code/blob/main/model_index.json#L2) to `"pipeline_t2v_base_pixel"` and `"TextToVideoIFPipeline"`.
2. Upload `showone_unet_3d_condition.py` to the [unet](https://huggingface.co/sayakpaul/show-1-base-with-code/blob/main/unet/showone_unet_3d_condition.py) subfolder.
3. Upload `pipeline_t2v_base_pixel.py` to the pipeline [repository](https://huggingface.co/sayakpaul/show-1-base-with-code/tree/main).
To run inference, add the `trust_remote_code` argument while initializing the pipeline to handle all the "magic" behind the scenes.
> [!WARNING]
> As an additional precaution with `trust_remote_code=True`, we strongly encourage you to pass a commit hash to the `revision` parameter in [from_pretrained()](/docs/diffusers/main/en/api/pipelines/overview#diffusers.DiffusionPipeline.from_pretrained) to make sure the code hasn't been updated with some malicious new lines of code (unless you fully trust the model owners).
```python
from diffusers import DiffusionPipeline
import torch
pipeline = DiffusionPipeline.from_pretrained(
"/", trust_remote_code=True, torch_dtype=torch.float16
).to("cuda")
prompt = "hello"
# Text embeds
prompt_embeds, negative_embeds = pipeline.encode_prompt(prompt)
# Keyframes generation (8x64x40, 2fps)
video_frames = pipeline(
prompt_embeds=prompt_embeds,
negative_prompt_embeds=negative_embeds,
num_frames=8,
height=40,
width=64,
num_inference_steps=2,
guidance_scale=9.0,
output_type="pt"
).frames
```
As an additional reference, take a look at the repository structure of [stabilityai/japanese-stable-diffusion-xl](https://huggingface.co/stabilityai/japanese-stable-diffusion-xl/) which also uses the `trust_remote_code` feature.
```python
from diffusers import DiffusionPipeline
import torch
pipeline = DiffusionPipeline.from_pretrained(
"stabilityai/japanese-stable-diffusion-xl", trust_remote_code=True
)
pipeline.to("cuda")
```
# Shap-E
Shap-E is a conditional model for generating 3D assets which could be used for video game development, interior design, and architecture. It is trained on a large dataset of 3D assets, and post-processed to render more views of each object and produce 16K instead of 4K point clouds. The Shap-E model is trained in two steps:
1. an encoder accepts the point clouds and rendered views of a 3D asset and outputs the parameters of implicit functions that represent the asset
2. a diffusion model is trained on the latents produced by the encoder to generate either neural radiance fields (NeRFs) or a textured 3D mesh, making it easier to render and use the 3D asset in downstream applications
This guide will show you how to use Shap-E to start generating your own 3D assets!
Before you begin, make sure you have the following libraries installed:
```py
# uncomment to install the necessary libraries in Colab
#!pip install -q diffusers transformers accelerate trimesh
```
## Text-to-3D
To generate a gif of a 3D object, pass a text prompt to the [ShapEPipeline](/docs/diffusers/main/en/api/pipelines/shap_e#diffusers.ShapEPipeline). The pipeline generates a list of image frames which are used to create the 3D object.
```py
import torch
from diffusers import ShapEPipeline
device = torch.device("cuda" if torch.cuda.is_available() else "cpu")
pipe = ShapEPipeline.from_pretrained("openai/shap-e", torch_dtype=torch.float16, variant="fp16")
pipe = pipe.to(device)
guidance_scale = 15.0
prompt = ["A firecracker", "A birthday cupcake"]
images = pipe(
prompt,
guidance_scale=guidance_scale,
num_inference_steps=64,
frame_size=256,
).images
```
이제 [export_to_gif()](/docs/diffusers/main/en/api/utilities#diffusers.utils.export_to_gif) 함수를 사용해 이미지 프레임 리스트를 3D 오브젝트의 gif로 변환합니다.
```py
from diffusers.utils import export_to_gif
export_to_gif(images[0], "firecracker_3d.gif")
export_to_gif(images[1], "cake_3d.gif")
```
prompt = "A firecracker"
prompt = "A birthday cupcake"
## Image-to-3D
To generate a 3D object from another image, use the [ShapEImg2ImgPipeline](/docs/diffusers/main/en/api/pipelines/shap_e#diffusers.ShapEImg2ImgPipeline). You can use an existing image or generate an entirely new one. Let's use the [Kandinsky 2.1](../api/pipelines/kandinsky) model to generate a new image.
```py
from diffusers import DiffusionPipeline
import torch
prior_pipeline = DiffusionPipeline.from_pretrained("kandinsky-community/kandinsky-2-1-prior", torch_dtype=torch.float16, use_safetensors=True).to("cuda")
pipeline = DiffusionPipeline.from_pretrained("kandinsky-community/kandinsky-2-1", torch_dtype=torch.float16, use_safetensors=True).to("cuda")
prompt = "A cheeseburger, white background"
image_embeds, negative_image_embeds = prior_pipeline(prompt, guidance_scale=1.0).to_tuple()
image = pipeline(
prompt,
image_embeds=image_embeds,
negative_image_embeds=negative_image_embeds,
).images[0]
image.save("burger.png")
```
Pass the cheeseburger to the [ShapEImg2ImgPipeline](/docs/diffusers/main/en/api/pipelines/shap_e#diffusers.ShapEImg2ImgPipeline) to generate a 3D representation of it.
```py
from PIL import Image
from diffusers import ShapEImg2ImgPipeline
from diffusers.utils import export_to_gif
pipe = ShapEImg2ImgPipeline.from_pretrained("openai/shap-e-img2img", torch_dtype=torch.float16, variant="fp16").to("cuda")
guidance_scale = 3.0
image = Image.open("burger.png").resize((256, 256))
images = pipe(
image,
guidance_scale=guidance_scale,
num_inference_steps=64,
frame_size=256,
).images
gif_path = export_to_gif(images[0], "burger_3d.gif")
```
cheeseburger
3D cheeseburger
## Generate mesh
Shap-E is a flexible model that can also generate textured mesh outputs to be rendered for downstream applications. In this example, you'll convert the output into a `glb` file because the 🤗 Datasets library supports mesh visualization of `glb` files which can be rendered by the [Dataset viewer](https://huggingface.co/docs/hub/datasets-viewer#dataset-preview).
You can generate mesh outputs for both the [ShapEPipeline](/docs/diffusers/main/en/api/pipelines/shap_e#diffusers.ShapEPipeline) and [ShapEImg2ImgPipeline](/docs/diffusers/main/en/api/pipelines/shap_e#diffusers.ShapEImg2ImgPipeline) by specifying the `output_type` parameter as `"mesh"`:
```py
import torch
from diffusers import ShapEPipeline
device = torch.device("cuda" if torch.cuda.is_available() else "cpu")
pipe = ShapEPipeline.from_pretrained("openai/shap-e", torch_dtype=torch.float16, variant="fp16")
pipe = pipe.to(device)
guidance_scale = 15.0
prompt = "A birthday cupcake"
images = pipe(prompt, guidance_scale=guidance_scale, num_inference_steps=64, frame_size=256, output_type="mesh").images
```
Use the `export_to_ply()` function to save the mesh output as a `ply` file:
You can optionally save the mesh output as an `obj` file with the `export_to_obj()` function. The ability to save the mesh output in a variety of formats makes it more flexible for downstream usage!
```py
from diffusers.utils import export_to_ply
ply_path = export_to_ply(images[0], "3d_cake.ply")
print(f"Saved to folder: {ply_path}")
```
Then you can convert the `ply` file to a `glb` file with the trimesh library:
```py
import trimesh
mesh = trimesh.load("3d_cake.ply")
mesh_export = mesh.export("3d_cake.glb", file_type="glb")
```
By default, the mesh output is focused from the bottom viewpoint but you can change the default viewpoint by applying a rotation transform:
```py
import trimesh
import numpy as np
mesh = trimesh.load("3d_cake.ply")
rot = trimesh.transformations.rotation_matrix(-np.pi / 2, [1, 0, 0])
mesh = mesh.apply_transform(rot)
mesh_export = mesh.export("3d_cake.glb", file_type="glb")
```
Upload the mesh file to your dataset repository to visualize it with the Dataset viewer!
# Stable Video Diffusion
[Stable Video Diffusion (SVD)](https://huggingface.co/papers/2311.15127) is a powerful image-to-video generation model that can generate 2-4 second high resolution (576x1024) videos conditioned on an input image.
This guide will show you how to use SVD to generate short videos from images.
Before you begin, make sure you have the following libraries installed:
```py
# Colab에서 필요한 라이브러리를 설치하기 위해 주석을 제외하세요
!pip install -q -U diffusers transformers accelerate
```
The are two variants of this model, [SVD](https://huggingface.co/stabilityai/stable-video-diffusion-img2vid) and [SVD-XT](https://huggingface.co/stabilityai/stable-video-diffusion-img2vid-xt). The SVD checkpoint is trained to generate 14 frames and the SVD-XT checkpoint is further finetuned to generate 25 frames.
You'll use the SVD-XT checkpoint for this guide.
```python
import torch
from diffusers import StableVideoDiffusionPipeline
from diffusers.utils import load_image, export_to_video
pipe = StableVideoDiffusionPipeline.from_pretrained(
"stabilityai/stable-video-diffusion-img2vid-xt", torch_dtype=torch.float16, variant="fp16"
)
pipe.enable_model_cpu_offload()
# Load the conditioning image
image = load_image("https://huggingface.co/datasets/huggingface/documentation-images/resolve/main/diffusers/svd/rocket.png")
image = image.resize((1024, 576))
generator = torch.manual_seed(42)
frames = pipe(image, decode_chunk_size=8, generator=generator).frames[0]
export_to_video(frames, "generated.mp4", fps=7)
```
"source image of a rocket"
"generated video from source image"
## torch.compile
You can gain a 20-25% speedup at the expense of slightly increased memory by [compiling](../optimization/torch2.0#torchcompile) the UNet.
```diff
- pipe.enable_model_cpu_offload()
+ pipe.to("cuda")
+ pipe.unet = torch.compile(pipe.unet, mode="reduce-overhead", fullgraph=True)
```
## Reduce memory usage
Video generation is very memory intensive because you're essentially generating `num_frames` all at once, similar to text-to-image generation with a high batch size. To reduce the memory requirement, there are multiple options that trade-off inference speed for lower memory requirement:
- enable model offloading: each component of the pipeline is offloaded to the CPU once it's not needed anymore.
- enable feed-forward chunking: the feed-forward layer runs in a loop instead of running a single feed-forward with a huge batch size.
- reduce `decode_chunk_size`: the VAE decodes frames in chunks instead of decoding them all together. Setting `decode_chunk_size=1` decodes one frame at a time and uses the least amount of memory (we recommend adjusting this value based on your GPU memory) but the video might have some flickering.
```diff
- pipe.enable_model_cpu_offload()
- frames = pipe(image, decode_chunk_size=8, generator=generator).frames[0]
+ pipe.enable_model_cpu_offload()
+ pipe.unet.enable_forward_chunking()
+ frames = pipe(image, decode_chunk_size=2, generator=generator, num_frames=25).frames[0]
```
Using all these tricks together should lower the memory requirement to less than 8GB VRAM.
## Micro-conditioning
Stable Diffusion Video also accepts micro-conditioning, in addition to the conditioning image, which allows more control over the generated video:
- `fps`: the frames per second of the generated video.
- `motion_bucket_id`: the motion bucket id to use for the generated video. This can be used to control the motion of the generated video. Increasing the motion bucket id increases the motion of the generated video.
- `noise_aug_strength`: the amount of noise added to the conditioning image. The higher the values the less the video resembles the conditioning image. Increasing this value also increases the motion of the generated video.
For example, to generate a video with more motion, use the `motion_bucket_id` and `noise_aug_strength` micro-conditioning parameters:
```python
import torch
from diffusers import StableVideoDiffusionPipeline
from diffusers.utils import load_image, export_to_video
pipe = StableVideoDiffusionPipeline.from_pretrained(
"stabilityai/stable-video-diffusion-img2vid-xt", torch_dtype=torch.float16, variant="fp16"
)
pipe.enable_model_cpu_offload()
# Load the conditioning image
image = load_image("https://huggingface.co/datasets/huggingface/documentation-images/resolve/main/diffusers/svd/rocket.png")
image = image.resize((1024, 576))
generator = torch.manual_seed(42)
frames = pipe(image, decode_chunk_size=8, generator=generator, motion_bucket_id=180, noise_aug_strength=0.1).frames[0]
export_to_video(frames, "generated.mp4", fps=7)
```
![](https://huggingface.co/datasets/huggingface/documentation-images/resolve/main/diffusers/svd/output_rocket_with_conditions.gif)
# Load schedulers and models
Diffusion pipelines are a collection of interchangeable schedulers and models that can be mixed and matched to tailor a pipeline to a specific use case. The scheduler encapsulates the entire denoising process such as the number of denoising steps and the algorithm for finding the denoised sample. A scheduler is not parameterized or trained so they don't take very much memory. The model is usually only concerned with the forward pass of going from a noisy input to a less noisy sample.
This guide will show you how to load schedulers and models to customize a pipeline. You'll use the [stable-diffusion-v1-5/stable-diffusion-v1-5](https://hf.co/stable-diffusion-v1-5/stable-diffusion-v1-5) checkpoint throughout this guide, so let's load it first.
```py
import torch
from diffusers import DiffusionPipeline
pipeline = DiffusionPipeline.from_pretrained(
"stable-diffusion-v1-5/stable-diffusion-v1-5", torch_dtype=torch.float16, use_safetensors=True
).to("cuda")
```
You can see what scheduler this pipeline uses with the `pipeline.scheduler` attribute.
```py
pipeline.scheduler
PNDMScheduler {
"_class_name": "PNDMScheduler",
"_diffusers_version": "0.21.4",
"beta_end": 0.012,
"beta_schedule": "scaled_linear",
"beta_start": 0.00085,
"clip_sample": false,
"num_train_timesteps": 1000,
"set_alpha_to_one": false,
"skip_prk_steps": true,
"steps_offset": 1,
"timestep_spacing": "leading",
"trained_betas": null
}
```
## Load a scheduler
Schedulers are defined by a configuration file that can be used by a variety of schedulers. Load a scheduler with the [SchedulerMixin.from_pretrained()](/docs/diffusers/main/en/api/schedulers/overview#diffusers.SchedulerMixin.from_pretrained) method, and specify the `subfolder` parameter to load the configuration file into the correct subfolder of the pipeline repository.
For example, to load the [DDIMScheduler](/docs/diffusers/main/en/api/schedulers/ddim#diffusers.DDIMScheduler):
```py
from diffusers import DDIMScheduler, DiffusionPipeline
ddim = DDIMScheduler.from_pretrained("stable-diffusion-v1-5/stable-diffusion-v1-5", subfolder="scheduler")
```
Then you can pass the newly loaded scheduler to the pipeline.
```python
pipeline = DiffusionPipeline.from_pretrained(
"stable-diffusion-v1-5/stable-diffusion-v1-5", scheduler=ddim, torch_dtype=torch.float16, use_safetensors=True
).to("cuda")
```
## Compare schedulers
Schedulers have their own unique strengths and weaknesses, making it difficult to quantitatively compare which scheduler works best for a pipeline. You typically have to make a trade-off between denoising speed and denoising quality. We recommend trying out different schedulers to find one that works best for your use case. Call the `pipeline.scheduler.compatibles` attribute to see what schedulers are compatible with a pipeline.
Let's compare the [LMSDiscreteScheduler](/docs/diffusers/main/en/api/schedulers/lms_discrete#diffusers.LMSDiscreteScheduler), [EulerDiscreteScheduler](/docs/diffusers/main/en/api/schedulers/euler#diffusers.EulerDiscreteScheduler), [EulerAncestralDiscreteScheduler](/docs/diffusers/main/en/api/schedulers/euler_ancestral#diffusers.EulerAncestralDiscreteScheduler), and the [DPMSolverMultistepScheduler](/docs/diffusers/main/en/api/schedulers/multistep_dpm_solver#diffusers.DPMSolverMultistepScheduler) on the following prompt and seed.
```py
import torch
from diffusers import DiffusionPipeline
pipeline = DiffusionPipeline.from_pretrained(
"stable-diffusion-v1-5/stable-diffusion-v1-5", torch_dtype=torch.float16, use_safetensors=True
).to("cuda")
prompt = "A photograph of an astronaut riding a horse on Mars, high resolution, high definition."
generator = torch.Generator(device="cuda").manual_seed(8)
```
To change the pipelines scheduler, use the [from_config()](/docs/diffusers/main/en/api/configuration#diffusers.ConfigMixin.from_config) method to load a different scheduler's `pipeline.scheduler.config` into the pipeline.
[LMSDiscreteScheduler](/docs/diffusers/main/en/api/schedulers/lms_discrete#diffusers.LMSDiscreteScheduler) typically generates higher quality images than the default scheduler.
```py
from diffusers import LMSDiscreteScheduler
pipeline.scheduler = LMSDiscreteScheduler.from_config(pipeline.scheduler.config)
image = pipeline(prompt, generator=generator).images[0]
image
```
[EulerDiscreteScheduler](/docs/diffusers/main/en/api/schedulers/euler#diffusers.EulerDiscreteScheduler) can generate higher quality images in just 30 steps.
```py
from diffusers import EulerDiscreteScheduler
pipeline.scheduler = EulerDiscreteScheduler.from_config(pipeline.scheduler.config)
image = pipeline(prompt, generator=generator).images[0]
image
```
[EulerAncestralDiscreteScheduler](/docs/diffusers/main/en/api/schedulers/euler_ancestral#diffusers.EulerAncestralDiscreteScheduler) can generate higher quality images in just 30 steps.
```py
from diffusers import EulerAncestralDiscreteScheduler
pipeline.scheduler = EulerAncestralDiscreteScheduler.from_config(pipeline.scheduler.config)
image = pipeline(prompt, generator=generator).images[0]
image
```
[DPMSolverMultistepScheduler](/docs/diffusers/main/en/api/schedulers/multistep_dpm_solver#diffusers.DPMSolverMultistepScheduler) provides a balance between speed and quality and can generate higher quality images in just 20 steps.
```py
from diffusers import DPMSolverMultistepScheduler
pipeline.scheduler = DPMSolverMultistepScheduler.from_config(pipeline.scheduler.config)
image = pipeline(prompt, generator=generator).images[0]
image
```
LMSDiscreteScheduler
EulerDiscreteScheduler
EulerAncestralDiscreteScheduler
DPMSolverMultistepScheduler
Most images look very similar and are comparable in quality. Again, it often comes down to your specific use case so a good approach is to run multiple different schedulers and compare the results.
### Flax schedulers
To compare Flax schedulers, you need to additionally load the scheduler state into the model parameters. For example, let's change the default scheduler in [FlaxStableDiffusionPipeline](/docs/diffusers/main/en/api/pipelines/stable_diffusion/text2img#diffusers.FlaxStableDiffusionPipeline) to use the super fast `FlaxDPMSolverMultistepScheduler`.
> [!WARNING]
> The `FlaxLMSDiscreteScheduler` and `FlaxDDPMScheduler` are not compatible with the [FlaxStableDiffusionPipeline](/docs/diffusers/main/en/api/pipelines/stable_diffusion/text2img#diffusers.FlaxStableDiffusionPipeline) yet.
```py
import jax
import numpy as np
from flax.jax_utils import replicate
from flax.training.common_utils import shard
from diffusers import FlaxStableDiffusionPipeline, FlaxDPMSolverMultistepScheduler
scheduler, scheduler_state = FlaxDPMSolverMultistepScheduler.from_pretrained(
"stable-diffusion-v1-5/stable-diffusion-v1-5",
subfolder="scheduler"
)
pipeline, params = FlaxStableDiffusionPipeline.from_pretrained(
"stable-diffusion-v1-5/stable-diffusion-v1-5",
scheduler=scheduler,
variant="bf16",
dtype=jax.numpy.bfloat16,
)
params["scheduler"] = scheduler_state
```
Then you can take advantage of Flax's compatibility with TPUs to generate a number of images in parallel. You'll need to make a copy of the model parameters for each available device and then split the inputs across them to generate your desired number of images.
```py
# Generate 1 image per parallel device (8 on TPUv2-8 or TPUv3-8)
prompt = "A photograph of an astronaut riding a horse on Mars, high resolution, high definition."
num_samples = jax.device_count()
prompt_ids = pipeline.prepare_inputs([prompt] * num_samples)
prng_seed = jax.random.PRNGKey(0)
num_inference_steps = 25
# shard inputs and rng
params = replicate(params)
prng_seed = jax.random.split(prng_seed, jax.device_count())
prompt_ids = shard(prompt_ids)
images = pipeline(prompt_ids, params, prng_seed, num_inference_steps, jit=True).images
images = pipeline.numpy_to_pil(np.asarray(images.reshape((num_samples,) + images.shape[-3:])))
```
## Models
Models are loaded from the [ModelMixin.from_pretrained()](/docs/diffusers/main/en/api/models/overview#diffusers.ModelMixin.from_pretrained) method, which downloads and caches the latest version of the model weights and configurations. If the latest files are available in the local cache, [from_pretrained()](/docs/diffusers/main/en/api/models/overview#diffusers.ModelMixin.from_pretrained) reuses files in the cache instead of re-downloading them.
Models can be loaded from a subfolder with the `subfolder` argument. For example, the model weights for [stable-diffusion-v1-5/stable-diffusion-v1-5](https://hf.co/stable-diffusion-v1-5/stable-diffusion-v1-5) are stored in the [unet](https://hf.co/stable-diffusion-v1-5/stable-diffusion-v1-5/tree/main/unet) subfolder.
```python
from diffusers import UNet2DConditionModel
unet = UNet2DConditionModel.from_pretrained("stable-diffusion-v1-5/stable-diffusion-v1-5", subfolder="unet", use_safetensors=True)
```
They can also be directly loaded from a [repository](https://huggingface.co/google/ddpm-cifar10-32/tree/main).
```python
from diffusers import UNet2DModel
unet = UNet2DModel.from_pretrained("google/ddpm-cifar10-32", use_safetensors=True)
```
To load and save model variants, specify the `variant` argument in [ModelMixin.from_pretrained()](/docs/diffusers/main/en/api/models/overview#diffusers.ModelMixin.from_pretrained) and [ModelMixin.save_pretrained()](/docs/diffusers/main/en/api/models/overview#diffusers.ModelMixin.save_pretrained).
```python
from diffusers import UNet2DConditionModel
unet = UNet2DConditionModel.from_pretrained(
"stable-diffusion-v1-5/stable-diffusion-v1-5", subfolder="unet", variant="non_ema", use_safetensors=True
)
unet.save_pretrained("./local-unet", variant="non_ema")
```
# Kandinsky
The Kandinsky models are a series of multilingual text-to-image generation models. The Kandinsky 2.0 model uses two multilingual text encoders and concatenates those results for the UNet.
[Kandinsky 2.1](../api/pipelines/kandinsky) changes the architecture to include an image prior model ([`CLIP`](https://huggingface.co/docs/transformers/model_doc/clip)) to generate a mapping between text and image embeddings. The mapping provides better text-image alignment and it is used with the text embeddings during training, leading to higher quality results. Finally, Kandinsky 2.1 uses a [Modulating Quantized Vectors (MoVQ)](https://huggingface.co/papers/2209.09002) decoder - which adds a spatial conditional normalization layer to increase photorealism - to decode the latents into images.
[Kandinsky 2.2](../api/pipelines/kandinsky_v22) improves on the previous model by replacing the image encoder of the image prior model with a larger CLIP-ViT-G model to improve quality. The image prior model was also retrained on images with different resolutions and aspect ratios to generate higher-resolution images and different image sizes.
[Kandinsky 3](../api/pipelines/kandinsky3) simplifies the architecture and shifts away from the two-stage generation process involving the prior model and diffusion model. Instead, Kandinsky 3 uses [Flan-UL2](https://huggingface.co/google/flan-ul2) to encode text, a UNet with [BigGan-deep](https://hf.co/papers/1809.11096) blocks, and [Sber-MoVQGAN](https://github.com/ai-forever/MoVQGAN) to decode the latents into images. Text understanding and generated image quality are primarily achieved by using a larger text encoder and UNet.
This guide will show you how to use the Kandinsky models for text-to-image, image-to-image, inpainting, interpolation, and more.
Before you begin, make sure you have the following libraries installed:
```py
# uncomment to install the necessary libraries in Colab
#!pip install -q diffusers transformers accelerate
```
Kandinsky 2.1 and 2.2 usage is very similar! The only difference is Kandinsky 2.2 doesn't accept `prompt` as an input when decoding the latents. Instead, Kandinsky 2.2 only accepts `image_embeds` during decoding.
Kandinsky 3 has a more concise architecture and it doesn't require a prior model. This means it's usage is identical to other diffusion models like [Stable Diffusion XL](sdxl).
## Text-to-image
To use the Kandinsky models for any task, you always start by setting up the prior pipeline to encode the prompt and generate the image embeddings. The prior pipeline also generates `negative_image_embeds` that correspond to the negative prompt `""`. For better results, you can pass an actual `negative_prompt` to the prior pipeline, but this'll increase the effective batch size of the prior pipeline by 2x.
```py
from diffusers import KandinskyPriorPipeline, KandinskyPipeline
import torch
prior_pipeline = KandinskyPriorPipeline.from_pretrained("kandinsky-community/kandinsky-2-1-prior", torch_dtype=torch.float16).to("cuda")
pipeline = KandinskyPipeline.from_pretrained("kandinsky-community/kandinsky-2-1", torch_dtype=torch.float16).to("cuda")
prompt = "A alien cheeseburger creature eating itself, claymation, cinematic, moody lighting"
negative_prompt = "low quality, bad quality" # optional to include a negative prompt, but results are usually better
image_embeds, negative_image_embeds = prior_pipeline(prompt, negative_prompt, guidance_scale=1.0).to_tuple()
```
Now pass all the prompts and embeddings to the [KandinskyPipeline](/docs/diffusers/main/en/api/pipelines/kandinsky#diffusers.KandinskyPipeline) to generate an image:
```py
image = pipeline(prompt, image_embeds=image_embeds, negative_prompt=negative_prompt, negative_image_embeds=negative_image_embeds, height=768, width=768).images[0]
image
```
```py
from diffusers import KandinskyV22PriorPipeline, KandinskyV22Pipeline
import torch
prior_pipeline = KandinskyV22PriorPipeline.from_pretrained("kandinsky-community/kandinsky-2-2-prior", torch_dtype=torch.float16).to("cuda")
pipeline = KandinskyV22Pipeline.from_pretrained("kandinsky-community/kandinsky-2-2-decoder", torch_dtype=torch.float16).to("cuda")
prompt = "A alien cheeseburger creature eating itself, claymation, cinematic, moody lighting"
negative_prompt = "low quality, bad quality" # optional to include a negative prompt, but results are usually better
image_embeds, negative_image_embeds = prior_pipeline(prompt, guidance_scale=1.0).to_tuple()
```
Pass the `image_embeds` and `negative_image_embeds` to the [KandinskyV22Pipeline](/docs/diffusers/main/en/api/pipelines/kandinsky_v22#diffusers.KandinskyV22Pipeline) to generate an image:
```py
image = pipeline(image_embeds=image_embeds, negative_image_embeds=negative_image_embeds, height=768, width=768).images[0]
image
```
Kandinsky 3 doesn't require a prior model so you can directly load the [Kandinsky3Pipeline](/docs/diffusers/main/en/api/pipelines/kandinsky3#diffusers.Kandinsky3Pipeline) and pass a prompt to generate an image:
```py
from diffusers import Kandinsky3Pipeline
import torch
pipeline = Kandinsky3Pipeline.from_pretrained("kandinsky-community/kandinsky-3", variant="fp16", torch_dtype=torch.float16)
pipeline.enable_model_cpu_offload()
prompt = "A alien cheeseburger creature eating itself, claymation, cinematic, moody lighting"
image = pipeline(prompt).images[0]
image
```
🤗 Diffusers also provides an end-to-end API with the [KandinskyCombinedPipeline](/docs/diffusers/main/en/api/pipelines/kandinsky#diffusers.KandinskyCombinedPipeline) and [KandinskyV22CombinedPipeline](/docs/diffusers/main/en/api/pipelines/kandinsky_v22#diffusers.KandinskyV22CombinedPipeline), meaning you don't have to separately load the prior and text-to-image pipeline. The combined pipeline automatically loads both the prior model and the decoder. You can still set different values for the prior pipeline with the `prior_guidance_scale` and `prior_num_inference_steps` parameters if you want.
Use the [AutoPipelineForText2Image](/docs/diffusers/main/en/api/pipelines/auto_pipeline#diffusers.AutoPipelineForText2Image) to automatically call the combined pipelines under the hood:
```py
from diffusers import AutoPipelineForText2Image
import torch
pipeline = AutoPipelineForText2Image.from_pretrained("kandinsky-community/kandinsky-2-1", torch_dtype=torch.float16)
pipeline.enable_model_cpu_offload()
prompt = "A alien cheeseburger creature eating itself, claymation, cinematic, moody lighting"
negative_prompt = "low quality, bad quality"
image = pipeline(prompt=prompt, negative_prompt=negative_prompt, prior_guidance_scale=1.0, guidance_scale=4.0, height=768, width=768).images[0]
image
```
```py
from diffusers import AutoPipelineForText2Image
import torch
pipeline = AutoPipelineForText2Image.from_pretrained("kandinsky-community/kandinsky-2-2-decoder", torch_dtype=torch.float16)
pipeline.enable_model_cpu_offload()
prompt = "A alien cheeseburger creature eating itself, claymation, cinematic, moody lighting"
negative_prompt = "low quality, bad quality"
image = pipeline(prompt=prompt, negative_prompt=negative_prompt, prior_guidance_scale=1.0, guidance_scale=4.0, height=768, width=768).images[0]
image
```
## Image-to-image
For image-to-image, pass the initial image and text prompt to condition the image to the pipeline. Start by loading the prior pipeline:
```py
import torch
from diffusers import KandinskyImg2ImgPipeline, KandinskyPriorPipeline
prior_pipeline = KandinskyPriorPipeline.from_pretrained("kandinsky-community/kandinsky-2-1-prior", torch_dtype=torch.float16, use_safetensors=True).to("cuda")
pipeline = KandinskyImg2ImgPipeline.from_pretrained("kandinsky-community/kandinsky-2-1", torch_dtype=torch.float16, use_safetensors=True).to("cuda")
```
```py
import torch
from diffusers import KandinskyV22Img2ImgPipeline, KandinskyPriorPipeline
prior_pipeline = KandinskyPriorPipeline.from_pretrained("kandinsky-community/kandinsky-2-2-prior", torch_dtype=torch.float16, use_safetensors=True).to("cuda")
pipeline = KandinskyV22Img2ImgPipeline.from_pretrained("kandinsky-community/kandinsky-2-2-decoder", torch_dtype=torch.float16, use_safetensors=True).to("cuda")
```
Kandinsky 3 doesn't require a prior model so you can directly load the image-to-image pipeline:
```py
from diffusers import Kandinsky3Img2ImgPipeline
from diffusers.utils import load_image
import torch
pipeline = Kandinsky3Img2ImgPipeline.from_pretrained("kandinsky-community/kandinsky-3", variant="fp16", torch_dtype=torch.float16)
pipeline.enable_model_cpu_offload()
```
Download an image to condition on:
```py
from diffusers.utils import load_image
# download image
url = "https://raw.githubusercontent.com/CompVis/stable-diffusion/main/assets/stable-samples/img2img/sketch-mountains-input.jpg"
original_image = load_image(url)
original_image = original_image.resize((768, 512))
```
Generate the `image_embeds` and `negative_image_embeds` with the prior pipeline:
```py
prompt = "A fantasy landscape, Cinematic lighting"
negative_prompt = "low quality, bad quality"
image_embeds, negative_image_embeds = prior_pipeline(prompt, negative_prompt).to_tuple()
```
Now pass the original image, and all the prompts and embeddings to the pipeline to generate an image:
```py
from diffusers.utils import make_image_grid
image = pipeline(prompt, negative_prompt=negative_prompt, image=original_image, image_embeds=image_embeds, negative_image_embeds=negative_image_embeds, height=768, width=768, strength=0.3).images[0]
make_image_grid([original_image.resize((512, 512)), image.resize((512, 512))], rows=1, cols=2)
```
```py
from diffusers.utils import make_image_grid
image = pipeline(image=original_image, image_embeds=image_embeds, negative_image_embeds=negative_image_embeds, height=768, width=768, strength=0.3).images[0]
make_image_grid([original_image.resize((512, 512)), image.resize((512, 512))], rows=1, cols=2)
```
```py
image = pipeline(prompt, negative_prompt=negative_prompt, image=image, strength=0.75, num_inference_steps=25).images[0]
image
```
🤗 Diffusers also provides an end-to-end API with the [KandinskyImg2ImgCombinedPipeline](/docs/diffusers/main/en/api/pipelines/kandinsky#diffusers.KandinskyImg2ImgCombinedPipeline) and [KandinskyV22Img2ImgCombinedPipeline](/docs/diffusers/main/en/api/pipelines/kandinsky_v22#diffusers.KandinskyV22Img2ImgCombinedPipeline), meaning you don't have to separately load the prior and image-to-image pipeline. The combined pipeline automatically loads both the prior model and the decoder. You can still set different values for the prior pipeline with the `prior_guidance_scale` and `prior_num_inference_steps` parameters if you want.
Use the [AutoPipelineForImage2Image](/docs/diffusers/main/en/api/pipelines/auto_pipeline#diffusers.AutoPipelineForImage2Image) to automatically call the combined pipelines under the hood:
```py
from diffusers import AutoPipelineForImage2Image
from diffusers.utils import make_image_grid, load_image
import torch
pipeline = AutoPipelineForImage2Image.from_pretrained("kandinsky-community/kandinsky-2-1", torch_dtype=torch.float16, use_safetensors=True)
pipeline.enable_model_cpu_offload()
prompt = "A fantasy landscape, Cinematic lighting"
negative_prompt = "low quality, bad quality"
url = "https://raw.githubusercontent.com/CompVis/stable-diffusion/main/assets/stable-samples/img2img/sketch-mountains-input.jpg"
original_image = load_image(url)
original_image.thumbnail((768, 768))
image = pipeline(prompt=prompt, negative_prompt=negative_prompt, image=original_image, strength=0.3).images[0]
make_image_grid([original_image.resize((512, 512)), image.resize((512, 512))], rows=1, cols=2)
```
```py
from diffusers import AutoPipelineForImage2Image
from diffusers.utils import make_image_grid, load_image
import torch
pipeline = AutoPipelineForImage2Image.from_pretrained("kandinsky-community/kandinsky-2-2-decoder", torch_dtype=torch.float16)
pipeline.enable_model_cpu_offload()
prompt = "A fantasy landscape, Cinematic lighting"
negative_prompt = "low quality, bad quality"
url = "https://raw.githubusercontent.com/CompVis/stable-diffusion/main/assets/stable-samples/img2img/sketch-mountains-input.jpg"
original_image = load_image(url)
original_image.thumbnail((768, 768))
image = pipeline(prompt=prompt, negative_prompt=negative_prompt, image=original_image, strength=0.3).images[0]
make_image_grid([original_image.resize((512, 512)), image.resize((512, 512))], rows=1, cols=2)
```
## Inpainting
⚠️ The Kandinsky models use ⬜️ **white pixels** to represent the masked area now instead of black pixels. If you are using [KandinskyInpaintPipeline](/docs/diffusers/main/en/api/pipelines/kandinsky#diffusers.KandinskyInpaintPipeline) in production, you need to change the mask to use white pixels:
```py
# For PIL input
import PIL.ImageOps
mask = PIL.ImageOps.invert(mask)
# For PyTorch and NumPy input
mask = 1 - mask
```
For inpainting, you'll need the original image, a mask of the area to replace in the original image, and a text prompt of what to inpaint. Load the prior pipeline:
```py
from diffusers import KandinskyInpaintPipeline, KandinskyPriorPipeline
from diffusers.utils import load_image, make_image_grid
import torch
import numpy as np
from PIL import Image
prior_pipeline = KandinskyPriorPipeline.from_pretrained("kandinsky-community/kandinsky-2-1-prior", torch_dtype=torch.float16, use_safetensors=True).to("cuda")
pipeline = KandinskyInpaintPipeline.from_pretrained("kandinsky-community/kandinsky-2-1-inpaint", torch_dtype=torch.float16, use_safetensors=True).to("cuda")
```
```py
from diffusers import KandinskyV22InpaintPipeline, KandinskyV22PriorPipeline
from diffusers.utils import load_image, make_image_grid
import torch
import numpy as np
from PIL import Image
prior_pipeline = KandinskyV22PriorPipeline.from_pretrained("kandinsky-community/kandinsky-2-2-prior", torch_dtype=torch.float16, use_safetensors=True).to("cuda")
pipeline = KandinskyV22InpaintPipeline.from_pretrained("kandinsky-community/kandinsky-2-2-decoder-inpaint", torch_dtype=torch.float16, use_safetensors=True).to("cuda")
```
Load an initial image and create a mask:
```py
init_image = load_image("https://huggingface.co/datasets/hf-internal-testing/diffusers-images/resolve/main/kandinsky/cat.png")
mask = np.zeros((768, 768), dtype=np.float32)
# mask area above cat's head
mask[:250, 250:-250] = 1
```
Generate the embeddings with the prior pipeline:
```py
prompt = "a hat"
prior_output = prior_pipeline(prompt)
```
Now pass the initial image, mask, and prompt and embeddings to the pipeline to generate an image:
```py
output_image = pipeline(prompt, image=init_image, mask_image=mask, **prior_output, height=768, width=768, num_inference_steps=150).images[0]
mask = Image.fromarray((mask*255).astype('uint8'), 'L')
make_image_grid([init_image, mask, output_image], rows=1, cols=3)
```
```py
output_image = pipeline(image=init_image, mask_image=mask, **prior_output, height=768, width=768, num_inference_steps=150).images[0]
mask = Image.fromarray((mask*255).astype('uint8'), 'L')
make_image_grid([init_image, mask, output_image], rows=1, cols=3)
```
You can also use the end-to-end [KandinskyInpaintCombinedPipeline](/docs/diffusers/main/en/api/pipelines/kandinsky#diffusers.KandinskyInpaintCombinedPipeline) and [KandinskyV22InpaintCombinedPipeline](/docs/diffusers/main/en/api/pipelines/kandinsky_v22#diffusers.KandinskyV22InpaintCombinedPipeline) to call the prior and decoder pipelines together under the hood. Use the [AutoPipelineForInpainting](/docs/diffusers/main/en/api/pipelines/auto_pipeline#diffusers.AutoPipelineForInpainting) for this:
```py
import torch
import numpy as np
from PIL import Image
from diffusers import AutoPipelineForInpainting
from diffusers.utils import load_image, make_image_grid
pipe = AutoPipelineForInpainting.from_pretrained("kandinsky-community/kandinsky-2-1-inpaint", torch_dtype=torch.float16)
pipe.enable_model_cpu_offload()
init_image = load_image("https://huggingface.co/datasets/hf-internal-testing/diffusers-images/resolve/main/kandinsky/cat.png")
mask = np.zeros((768, 768), dtype=np.float32)
# mask area above cat's head
mask[:250, 250:-250] = 1
prompt = "a hat"
output_image = pipe(prompt=prompt, image=init_image, mask_image=mask).images[0]
mask = Image.fromarray((mask*255).astype('uint8'), 'L')
make_image_grid([init_image, mask, output_image], rows=1, cols=3)
```
```py
import torch
import numpy as np
from PIL import Image
from diffusers import AutoPipelineForInpainting
from diffusers.utils import load_image, make_image_grid
pipe = AutoPipelineForInpainting.from_pretrained("kandinsky-community/kandinsky-2-2-decoder-inpaint", torch_dtype=torch.float16)
pipe.enable_model_cpu_offload()
init_image = load_image("https://huggingface.co/datasets/hf-internal-testing/diffusers-images/resolve/main/kandinsky/cat.png")
mask = np.zeros((768, 768), dtype=np.float32)
# mask area above cat's head
mask[:250, 250:-250] = 1
prompt = "a hat"
output_image = pipe(prompt=prompt, image=original_image, mask_image=mask).images[0]
mask = Image.fromarray((mask*255).astype('uint8'), 'L')
make_image_grid([init_image, mask, output_image], rows=1, cols=3)
```
## Interpolation
Interpolation allows you to explore the latent space between the image and text embeddings which is a cool way to see some of the prior model's intermediate outputs. Load the prior pipeline and two images you'd like to interpolate:
```py
from diffusers import KandinskyPriorPipeline, KandinskyPipeline
from diffusers.utils import load_image, make_image_grid
import torch
prior_pipeline = KandinskyPriorPipeline.from_pretrained("kandinsky-community/kandinsky-2-1-prior", torch_dtype=torch.float16, use_safetensors=True).to("cuda")
img_1 = load_image("https://huggingface.co/datasets/hf-internal-testing/diffusers-images/resolve/main/kandinsky/cat.png")
img_2 = load_image("https://huggingface.co/datasets/hf-internal-testing/diffusers-images/resolve/main/kandinsky/starry_night.jpeg")
make_image_grid([img_1.resize((512,512)), img_2.resize((512,512))], rows=1, cols=2)
```
```py
from diffusers import KandinskyV22PriorPipeline, KandinskyV22Pipeline
from diffusers.utils import load_image, make_image_grid
import torch
prior_pipeline = KandinskyV22PriorPipeline.from_pretrained("kandinsky-community/kandinsky-2-2-prior", torch_dtype=torch.float16, use_safetensors=True).to("cuda")
img_1 = load_image("https://huggingface.co/datasets/hf-internal-testing/diffusers-images/resolve/main/kandinsky/cat.png")
img_2 = load_image("https://huggingface.co/datasets/hf-internal-testing/diffusers-images/resolve/main/kandinsky/starry_night.jpeg")
make_image_grid([img_1.resize((512,512)), img_2.resize((512,512))], rows=1, cols=2)
```
a cat
Van Gogh's Starry Night painting
Specify the text or images to interpolate, and set the weights for each text or image. Experiment with the weights to see how they affect the interpolation!
```py
images_texts = ["a cat", img_1, img_2]
weights = [0.3, 0.3, 0.4]
```
Call the `interpolate` function to generate the embeddings, and then pass them to the pipeline to generate the image:
```py
# prompt can be left empty
prompt = ""
prior_out = prior_pipeline.interpolate(images_texts, weights)
pipeline = KandinskyPipeline.from_pretrained("kandinsky-community/kandinsky-2-1", torch_dtype=torch.float16, use_safetensors=True).to("cuda")
image = pipeline(prompt, **prior_out, height=768, width=768).images[0]
image
```
```py
# prompt can be left empty
prompt = ""
prior_out = prior_pipeline.interpolate(images_texts, weights)
pipeline = KandinskyV22Pipeline.from_pretrained("kandinsky-community/kandinsky-2-2-decoder", torch_dtype=torch.float16, use_safetensors=True).to("cuda")
image = pipeline(prompt, **prior_out, height=768, width=768).images[0]
image
```
## ControlNet
⚠️ ControlNet is only supported for Kandinsky 2.2!
ControlNet enables conditioning large pretrained diffusion models with additional inputs such as a depth map or edge detection. For example, you can condition Kandinsky 2.2 with a depth map so the model understands and preserves the structure of the depth image.
Let's load an image and extract it's depth map:
```py
from diffusers.utils import load_image
img = load_image(
"https://huggingface.co/datasets/hf-internal-testing/diffusers-images/resolve/main/kandinskyv22/cat.png"
).resize((768, 768))
img
```
Then you can use the `depth-estimation` [Pipeline](https://huggingface.co/docs/transformers/main/en/main_classes/pipelines#transformers.Pipeline) from 🤗 Transformers to process the image and retrieve the depth map:
```py
import torch
import numpy as np
from transformers import pipeline
def make_hint(image, depth_estimator):
image = depth_estimator(image)["depth"]
image = np.array(image)
image = image[:, :, None]
image = np.concatenate([image, image, image], axis=2)
detected_map = torch.from_numpy(image).float() / 255.0
hint = detected_map.permute(2, 0, 1)
return hint
depth_estimator = pipeline("depth-estimation")
hint = make_hint(img, depth_estimator).unsqueeze(0).half().to("cuda")
```
### Text-to-image [[controlnet-text-to-image]]
Load the prior pipeline and the [KandinskyV22ControlnetPipeline](/docs/diffusers/main/en/api/pipelines/kandinsky_v22#diffusers.KandinskyV22ControlnetPipeline):
```py
from diffusers import KandinskyV22PriorPipeline, KandinskyV22ControlnetPipeline
prior_pipeline = KandinskyV22PriorPipeline.from_pretrained(
"kandinsky-community/kandinsky-2-2-prior", torch_dtype=torch.float16, use_safetensors=True
).to("cuda")
pipeline = KandinskyV22ControlnetPipeline.from_pretrained(
"kandinsky-community/kandinsky-2-2-controlnet-depth", torch_dtype=torch.float16
).to("cuda")
```
Generate the image embeddings from a prompt and negative prompt:
```py
prompt = "A robot, 4k photo"
negative_prior_prompt = "lowres, text, error, cropped, worst quality, low quality, jpeg artifacts, ugly, duplicate, morbid, mutilated, out of frame, extra fingers, mutated hands, poorly drawn hands, poorly drawn face, mutation, deformed, blurry, dehydrated, bad anatomy, bad proportions, extra limbs, cloned face, disfigured, gross proportions, malformed limbs, missing arms, missing legs, extra arms, extra legs, fused fingers, too many fingers, long neck, username, watermark, signature"
generator = torch.Generator(device="cuda").manual_seed(43)
image_emb, zero_image_emb = prior_pipeline(
prompt=prompt, negative_prompt=negative_prior_prompt, generator=generator
).to_tuple()
```
Finally, pass the image embeddings and the depth image to the [KandinskyV22ControlnetPipeline](/docs/diffusers/main/en/api/pipelines/kandinsky_v22#diffusers.KandinskyV22ControlnetPipeline) to generate an image:
```py
image = pipeline(image_embeds=image_emb, negative_image_embeds=zero_image_emb, hint=hint, num_inference_steps=50, generator=generator, height=768, width=768).images[0]
image
```
### Image-to-image [[controlnet-image-to-image]]
For image-to-image with ControlNet, you'll need to use the:
- [KandinskyV22PriorEmb2EmbPipeline](/docs/diffusers/main/en/api/pipelines/kandinsky_v22#diffusers.KandinskyV22PriorEmb2EmbPipeline) to generate the image embeddings from a text prompt and an image
- [KandinskyV22ControlnetImg2ImgPipeline](/docs/diffusers/main/en/api/pipelines/kandinsky_v22#diffusers.KandinskyV22ControlnetImg2ImgPipeline) to generate an image from the initial image and the image embeddings
Process and extract a depth map of an initial image of a cat with the `depth-estimation` [Pipeline](https://huggingface.co/docs/transformers/main/en/main_classes/pipelines#transformers.Pipeline) from 🤗 Transformers:
```py
import torch
import numpy as np
from diffusers import KandinskyV22PriorEmb2EmbPipeline, KandinskyV22ControlnetImg2ImgPipeline
from diffusers.utils import load_image
from transformers import pipeline
img = load_image(
"https://huggingface.co/datasets/hf-internal-testing/diffusers-images/resolve/main/kandinskyv22/cat.png"
).resize((768, 768))
def make_hint(image, depth_estimator):
image = depth_estimator(image)["depth"]
image = np.array(image)
image = image[:, :, None]
image = np.concatenate([image, image, image], axis=2)
detected_map = torch.from_numpy(image).float() / 255.0
hint = detected_map.permute(2, 0, 1)
return hint
depth_estimator = pipeline("depth-estimation")
hint = make_hint(img, depth_estimator).unsqueeze(0).half().to("cuda")
```
Load the prior pipeline and the [KandinskyV22ControlnetImg2ImgPipeline](/docs/diffusers/main/en/api/pipelines/kandinsky_v22#diffusers.KandinskyV22ControlnetImg2ImgPipeline):
```py
prior_pipeline = KandinskyV22PriorEmb2EmbPipeline.from_pretrained(
"kandinsky-community/kandinsky-2-2-prior", torch_dtype=torch.float16, use_safetensors=True
).to("cuda")
pipeline = KandinskyV22ControlnetImg2ImgPipeline.from_pretrained(
"kandinsky-community/kandinsky-2-2-controlnet-depth", torch_dtype=torch.float16
).to("cuda")
```
Pass a text prompt and the initial image to the prior pipeline to generate the image embeddings:
```py
prompt = "A robot, 4k photo"
negative_prior_prompt = "lowres, text, error, cropped, worst quality, low quality, jpeg artifacts, ugly, duplicate, morbid, mutilated, out of frame, extra fingers, mutated hands, poorly drawn hands, poorly drawn face, mutation, deformed, blurry, dehydrated, bad anatomy, bad proportions, extra limbs, cloned face, disfigured, gross proportions, malformed limbs, missing arms, missing legs, extra arms, extra legs, fused fingers, too many fingers, long neck, username, watermark, signature"
generator = torch.Generator(device="cuda").manual_seed(43)
img_emb = prior_pipeline(prompt=prompt, image=img, strength=0.85, generator=generator)
negative_emb = prior_pipeline(prompt=negative_prior_prompt, image=img, strength=1, generator=generator)
```
Now you can run the [KandinskyV22ControlnetImg2ImgPipeline](/docs/diffusers/main/en/api/pipelines/kandinsky_v22#diffusers.KandinskyV22ControlnetImg2ImgPipeline) to generate an image from the initial image and the image embeddings:
```py
image = pipeline(image=img, strength=0.5, image_embeds=img_emb.image_embeds, negative_image_embeds=negative_emb.image_embeds, hint=hint, num_inference_steps=50, generator=generator, height=768, width=768).images[0]
make_image_grid([img.resize((512, 512)), image.resize((512, 512))], rows=1, cols=2)
```
## Optimizations
Kandinsky is unique because it requires a prior pipeline to generate the mappings, and a second pipeline to decode the latents into an image. Optimization efforts should be focused on the second pipeline because that is where the bulk of the computation is done. Here are some tips to improve Kandinsky during inference.
1. Enable [xFormers](../optimization/xformers) if you're using PyTorch < 2.0:
```diff
from diffusers import DiffusionPipeline
import torch
pipe = DiffusionPipeline.from_pretrained("kandinsky-community/kandinsky-2-1", torch_dtype=torch.float16)
+ pipe.enable_xformers_memory_efficient_attention()
```
2. Enable `torch.compile` if you're using PyTorch >= 2.0 to automatically use scaled dot-product attention (SDPA):
```diff
pipe.unet.to(memory_format=torch.channels_last)
+ pipe.unet = torch.compile(pipe.unet, mode="reduce-overhead", fullgraph=True)
```
This is the same as explicitly setting the attention processor to use [AttnAddedKVProcessor2_0](/docs/diffusers/main/en/api/attnprocessor#diffusers.models.attention_processor.AttnAddedKVProcessor2_0):
```py
from diffusers.models.attention_processor import AttnAddedKVProcessor2_0
pipe.unet.set_attn_processor(AttnAddedKVProcessor2_0())
```
3. Offload the model to the CPU with [enable_model_cpu_offload()](/docs/diffusers/main/en/api/pipelines/overview#diffusers.DiffusionPipeline.enable_model_cpu_offload) to avoid out-of-memory errors:
```diff
from diffusers import DiffusionPipeline
import torch
pipe = DiffusionPipeline.from_pretrained("kandinsky-community/kandinsky-2-1", torch_dtype=torch.float16)
+ pipe.enable_model_cpu_offload()
```
4. By default, the text-to-image pipeline uses the [DDIMScheduler](/docs/diffusers/main/en/api/schedulers/ddim#diffusers.DDIMScheduler) but you can replace it with another scheduler like [DDPMScheduler](/docs/diffusers/main/en/api/schedulers/ddpm#diffusers.DDPMScheduler) to see how that affects the tradeoff between inference speed and image quality:
```py
from diffusers import DDPMScheduler
from diffusers import DiffusionPipeline
scheduler = DDPMScheduler.from_pretrained("kandinsky-community/kandinsky-2-1", subfolder="ddpm_scheduler")
pipe = DiffusionPipeline.from_pretrained("kandinsky-community/kandinsky-2-1", scheduler=scheduler, torch_dtype=torch.float16, use_safetensors=True).to("cuda")
```
# Scheduler features
The scheduler is an important component of any diffusion model because it controls the entire denoising (or sampling) process. There are many types of schedulers, some are optimized for speed and some for quality. With Diffusers, you can modify the scheduler configuration to use custom noise schedules, sigmas, and rescale the noise schedule. Changing these parameters can have profound effects on inference quality and speed.
This guide will demonstrate how to use these features to improve inference quality.
> [!TIP]
> Diffusers currently only supports the `timesteps` and `sigmas` parameters for a select list of schedulers and pipelines. Feel free to open a [feature request](https://github.com/huggingface/diffusers/issues/new/choose) if you want to extend these parameters to a scheduler and pipeline that does not currently support it!
## Timestep schedules
The timestep or noise schedule determines the amount of noise at each sampling step. The scheduler uses this to generate an image with the corresponding amount of noise at each step. The timestep schedule is generated from the scheduler's default configuration, but you can customize the scheduler to use new and optimized sampling schedules that aren't in Diffusers yet.
For example, [Align Your Steps (AYS)](https://research.nvidia.com/labs/toronto-ai/AlignYourSteps/) is a method for optimizing a sampling schedule to generate a high-quality image in as little as 10 steps. The optimal [10-step schedule](https://github.com/huggingface/diffusers/blob/a7bf77fc284810483f1e60afe34d1d27ad91ce2e/src/diffusers/schedulers/scheduling_utils.py#L51) for Stable Diffusion XL is:
```py
from diffusers.schedulers import AysSchedules
sampling_schedule = AysSchedules["StableDiffusionXLTimesteps"]
print(sampling_schedule)
"[999, 845, 730, 587, 443, 310, 193, 116, 53, 13]"
```
You can use the AYS sampling schedule in a pipeline by passing it to the `timesteps` parameter.
```py
pipeline = StableDiffusionXLPipeline.from_pretrained(
"SG161222/RealVisXL_V4.0",
torch_dtype=torch.float16,
variant="fp16",
).to("cuda")
pipeline.scheduler = DPMSolverMultistepScheduler.from_config(pipeline.scheduler.config, algorithm_type="sde-dpmsolver++")
prompt = "A cinematic shot of a cute little rabbit wearing a jacket and doing a thumbs up"
generator = torch.Generator(device="cpu").manual_seed(2487854446)
image = pipeline(
prompt=prompt,
negative_prompt="",
generator=generator,
timesteps=sampling_schedule,
).images[0]
```
AYS timestep schedule 10 steps
Linearly-spaced timestep schedule 10 steps
Linearly-spaced timestep schedule 25 steps
## Timestep spacing
The way sample steps are selected in the schedule can affect the quality of the generated image, especially with respect to [rescaling the noise schedule](#rescale-noise-schedule), which can enable a model to generate much brighter or darker images. Diffusers provides three timestep spacing methods:
- `leading` creates evenly spaced steps
- `linspace` includes the first and last steps and evenly selects the remaining intermediate steps
- `trailing` only includes the last step and evenly selects the remaining intermediate steps starting from the end
It is recommended to use the `trailing` spacing method because it generates higher quality images with more details when there are fewer sample steps. But the difference in quality is not as obvious for more standard sample step values.
```py
import torch
from diffusers import StableDiffusionXLPipeline, DPMSolverMultistepScheduler
pipeline = StableDiffusionXLPipeline.from_pretrained(
"SG161222/RealVisXL_V4.0",
torch_dtype=torch.float16,
variant="fp16",
).to("cuda")
pipeline.scheduler = DPMSolverMultistepScheduler.from_config(pipeline.scheduler.config, timestep_spacing="trailing")
prompt = "A cinematic shot of a cute little black cat sitting on a pumpkin at night"
generator = torch.Generator(device="cpu").manual_seed(2487854446)
image = pipeline(
prompt=prompt,
negative_prompt="",
generator=generator,
num_inference_steps=5,
).images[0]
image
```
trailing spacing after 5 steps
leading spacing after 5 steps
## Sigmas
The `sigmas` parameter is the amount of noise added at each timestep according to the timestep schedule. Like the `timesteps` parameter, you can customize the `sigmas` parameter to control how much noise is added at each step. When you use a custom `sigmas` value, the `timesteps` are calculated from the custom `sigmas` value and the default scheduler configuration is ignored.
For example, you can manually pass the [sigmas](https://github.com/huggingface/diffusers/blob/6529ee67ec02fcf58d2fd9242164ea002b351d75/src/diffusers/schedulers/scheduling_utils.py#L55) for something like the 10-step AYS schedule from before to the pipeline.
```py
import torch
from diffusers import DiffusionPipeline, EulerDiscreteScheduler
model_id = "stabilityai/stable-diffusion-xl-base-1.0"
pipeline = DiffusionPipeline.from_pretrained(
"stabilityai/stable-diffusion-xl-base-1.0",
torch_dtype=torch.float16,
variant="fp16",
).to("cuda")
pipeline.scheduler = EulerDiscreteScheduler.from_config(pipeline.scheduler.config)
sigmas = [14.615, 6.315, 3.771, 2.181, 1.342, 0.862, 0.555, 0.380, 0.234, 0.113, 0.0]
prompt = "anthropomorphic capybara wearing a suit and working with a computer"
generator = torch.Generator(device='cuda').manual_seed(123)
image = pipeline(
prompt=prompt,
num_inference_steps=10,
sigmas=sigmas,
generator=generator
).images[0]
```
When you take a look at the scheduler's `timesteps` parameter, you'll see that it is the same as the AYS timestep schedule because the `timestep` schedule is calculated from the `sigmas`.
```py
print(f" timesteps: {pipe.scheduler.timesteps}")
"timesteps: tensor([999., 845., 730., 587., 443., 310., 193., 116., 53., 13.], device='cuda:0')"
```
### Karras sigmas
> [!TIP]
> Refer to the scheduler API [overview](../api/schedulers/overview) for a list of schedulers that support Karras sigmas.
>
> Karras sigmas should not be used for models that weren't trained with them. For example, the base Stable Diffusion XL model shouldn't use Karras sigmas but the [DreamShaperXL](https://hf.co/Lykon/dreamshaper-xl-1-0) model can since they are trained with Karras sigmas.
Karras scheduler's use the timestep schedule and sigmas from the [Elucidating the Design Space of Diffusion-Based Generative Models](https://hf.co/papers/2206.00364) paper. This scheduler variant applies a smaller amount of noise per step as it approaches the end of the sampling process compared to other schedulers, and can increase the level of details in the generated image.
Enable Karras sigmas by setting `use_karras_sigmas=True` in the scheduler.
```py
import torch
from diffusers import StableDiffusionXLPipeline, DPMSolverMultistepScheduler
pipeline = StableDiffusionXLPipeline.from_pretrained(
"SG161222/RealVisXL_V4.0",
torch_dtype=torch.float16,
variant="fp16",
).to("cuda")
pipeline.scheduler = DPMSolverMultistepScheduler.from_config(pipeline.scheduler.config, algorithm_type="sde-dpmsolver++", use_karras_sigmas=True)
prompt = "A cinematic shot of a cute little rabbit wearing a jacket and doing a thumbs up"
generator = torch.Generator(device="cpu").manual_seed(2487854446)
image = pipeline(
prompt=prompt,
negative_prompt="",
generator=generator,
).images[0]
```
Karras sigmas enabled
Karras sigmas disabled
## Rescale noise schedule
In the [Common Diffusion Noise Schedules and Sample Steps are Flawed](https://hf.co/papers/2305.08891) paper, the authors discovered that common noise schedules allowed some signal to leak into the last timestep. This signal leakage at inference can cause models to only generate images with medium brightness. By enforcing a zero signal-to-noise ratio (SNR) for the timstep schedule and sampling from the last timestep, the model can be improved to generate very bright or dark images.
> [!TIP]
> For inference, you need a model that has been trained with *v_prediction*. To train your own model with *v_prediction*, add the following flag to the [train_text_to_image.py](https://github.com/huggingface/diffusers/blob/main/examples/text_to_image/train_text_to_image.py) or [train_text_to_image_lora.py](https://github.com/huggingface/diffusers/blob/main/examples/text_to_image/train_text_to_image_lora.py) scripts.
>
> ```bash
> --prediction_type="v_prediction"
> ```
For example, load the [ptx0/pseudo-journey-v2](https://hf.co/ptx0/pseudo-journey-v2) checkpoint which was trained with `v_prediction` and the [DDIMScheduler](/docs/diffusers/main/en/api/schedulers/ddim#diffusers.DDIMScheduler). Configure the following parameters in the [DDIMScheduler](/docs/diffusers/main/en/api/schedulers/ddim#diffusers.DDIMScheduler):
* `rescale_betas_zero_snr=True` to rescale the noise schedule to zero SNR
* `timestep_spacing="trailing"` to start sampling from the last timestep
Set `guidance_rescale` in the pipeline to prevent over-exposure. A lower value increases brightness but some of the details may appear washed out.
```py
from diffusers import DiffusionPipeline, DDIMScheduler
pipeline = DiffusionPipeline.from_pretrained("ptx0/pseudo-journey-v2", use_safetensors=True)
pipeline.scheduler = DDIMScheduler.from_config(
pipeline.scheduler.config, rescale_betas_zero_snr=True, timestep_spacing="trailing"
)
pipeline.to("cuda")
prompt = "cinematic photo of a snowy mountain at night with the northern lights aurora borealis overhead, 35mm photograph, film, professional, 4k, highly detailed"
generator = torch.Generator(device="cpu").manual_seed(23)
image = pipeline(prompt, guidance_rescale=0.7, generator=generator).images[0]
image
```
default Stable Diffusion v2-1 image
image with zero SNR and trailing timestep spacing enabled
# Prompt techniques
Prompts are important because they describe what you want a diffusion model to generate. The best prompts are detailed, specific, and well-structured to help the model realize your vision. But crafting a great prompt takes time and effort and sometimes it may not be enough because language and words can be imprecise. This is where you need to boost your prompt with other techniques, such as prompt enhancing and prompt weighting, to get the results you want.
This guide will show you how you can use these prompt techniques to generate high-quality images with lower effort and adjust the weight of certain keywords in a prompt.
## Prompt engineering
> [!TIP]
> This is not an exhaustive guide on prompt engineering, but it will help you understand the necessary parts of a good prompt. We encourage you to continue experimenting with different prompts and combine them in new ways to see what works best. As you write more prompts, you'll develop an intuition for what works and what doesn't!
New diffusion models do a pretty good job of generating high-quality images from a basic prompt, but it is still important to create a well-written prompt to get the best results. Here are a few tips for writing a good prompt:
1. What is the image *medium*? Is it a photo, a painting, a 3D illustration, or something else?
2. What is the image *subject*? Is it a person, animal, object, or scene?
3. What *details* would you like to see in the image? This is where you can get really creative and have a lot of fun experimenting with different words to bring your image to life. For example, what is the lighting like? What is the vibe and aesthetic? What kind of art or illustration style are you looking for? The more specific and precise words you use, the better the model will understand what you want to generate.
"A photo of a banana-shaped couch in a living room"
"A vibrant yellow banana-shaped couch sits in a cozy living room, its curve cradling a pile of colorful cushions. on the wooden floor, a patterned rug adds a touch of eclectic charm, and a potted plant sits in the corner, reaching towards the sunlight filtering through the windows"
## Prompt enhancing with GPT2
Prompt enhancing is a technique for quickly improving prompt quality without spending too much effort constructing one. It uses a model like GPT2 pretrained on Stable Diffusion text prompts to automatically enrich a prompt with additional important keywords to generate high-quality images.
The technique works by curating a list of specific keywords and forcing the model to generate those words to enhance the original prompt. This way, your prompt can be "a cat" and GPT2 can enhance the prompt to "cinematic film still of a cat basking in the sun on a roof in Turkey, highly detailed, high budget hollywood movie, cinemascope, moody, epic, gorgeous, film grain quality sharp focus beautiful detailed intricate stunning amazing epic".
> [!TIP]
> You should also use a [*offset noise*](https://www.crosslabs.org//blog/diffusion-with-offset-noise) LoRA to improve the contrast in bright and dark images and create better lighting overall. This [LoRA](https://hf.co/stabilityai/stable-diffusion-xl-base-1.0/blob/main/sd_xl_offset_example-lora_1.0.safetensors) is available from [stabilityai/stable-diffusion-xl-base-1.0](https://hf.co/stabilityai/stable-diffusion-xl-base-1.0).
Start by defining certain styles and a list of words (you can check out a more comprehensive list of [words](https://hf.co/LykosAI/GPT-Prompt-Expansion-Fooocus-v2/blob/main/positive.txt) and [styles](https://github.com/lllyasviel/Fooocus/tree/main/sdxl_styles) used by Fooocus) to enhance a prompt with.
```py
import torch
from transformers import GenerationConfig, GPT2LMHeadModel, GPT2Tokenizer, LogitsProcessor, LogitsProcessorList
from diffusers import StableDiffusionXLPipeline
styles = {
"cinematic": "cinematic film still of {prompt}, highly detailed, high budget hollywood movie, cinemascope, moody, epic, gorgeous, film grain",
"anime": "anime artwork of {prompt}, anime style, key visual, vibrant, studio anime, highly detailed",
"photographic": "cinematic photo of {prompt}, 35mm photograph, film, professional, 4k, highly detailed",
"comic": "comic of {prompt}, graphic illustration, comic art, graphic novel art, vibrant, highly detailed",
"lineart": "line art drawing {prompt}, professional, sleek, modern, minimalist, graphic, line art, vector graphics",
"pixelart": " pixel-art {prompt}, low-res, blocky, pixel art style, 8-bit graphics",
}
words = [
"aesthetic", "astonishing", "beautiful", "breathtaking", "composition", "contrasted", "epic", "moody", "enhanced",
"exceptional", "fascinating", "flawless", "glamorous", "glorious", "illumination", "impressive", "improved",
"inspirational", "magnificent", "majestic", "hyperrealistic", "smooth", "sharp", "focus", "stunning", "detailed",
"intricate", "dramatic", "high", "quality", "perfect", "light", "ultra", "highly", "radiant", "satisfying",
"soothing", "sophisticated", "stylish", "sublime", "terrific", "touching", "timeless", "wonderful", "unbelievable",
"elegant", "awesome", "amazing", "dynamic", "trendy",
]
```
You may have noticed in the `words` list, there are certain words that can be paired together to create something more meaningful. For example, the words "high" and "quality" can be combined to create "high quality". Let's pair these words together and remove the words that can't be paired.
```py
word_pairs = ["highly detailed", "high quality", "enhanced quality", "perfect composition", "dynamic light"]
def find_and_order_pairs(s, pairs):
words = s.split()
found_pairs = []
for pair in pairs:
pair_words = pair.split()
if pair_words[0] in words and pair_words[1] in words:
found_pairs.append(pair)
words.remove(pair_words[0])
words.remove(pair_words[1])
for word in words[:]:
for pair in pairs:
if word in pair.split():
words.remove(word)
break
ordered_pairs = ", ".join(found_pairs)
remaining_s = ", ".join(words)
return ordered_pairs, remaining_s
```
Next, implement a custom [LogitsProcessor](https://huggingface.co/docs/transformers/main/en/internal/generation_utils#transformers.LogitsProcessor) class that assigns tokens in the `words` list a value of 0 and assigns tokens not in the `words` list a negative value so they aren't picked during generation. This way, generation is biased towards words in the `words` list. After a word from the list is used, it is also assigned a negative value so it isn't picked again.
```py
class CustomLogitsProcessor(LogitsProcessor):
def __init__(self, bias):
super().__init__()
self.bias = bias
def __call__(self, input_ids, scores):
if len(input_ids.shape) == 2:
last_token_id = input_ids[0, -1]
self.bias[last_token_id] = -1e10
return scores + self.bias
word_ids = [tokenizer.encode(word, add_prefix_space=True)[0] for word in words]
bias = torch.full((tokenizer.vocab_size,), -float("Inf")).to("cuda")
bias[word_ids] = 0
processor = CustomLogitsProcessor(bias)
processor_list = LogitsProcessorList([processor])
```
Combine the prompt and the `cinematic` style prompt defined in the `styles` dictionary earlier.
```py
prompt = "a cat basking in the sun on a roof in Turkey"
style = "cinematic"
prompt = styles[style].format(prompt=prompt)
prompt
"cinematic film still of a cat basking in the sun on a roof in Turkey, highly detailed, high budget hollywood movie, cinemascope, moody, epic, gorgeous, film grain"
```
Load a GPT2 tokenizer and model from the [Gustavosta/MagicPrompt-Stable-Diffusion](https://huggingface.co/Gustavosta/MagicPrompt-Stable-Diffusion) checkpoint (this specific checkpoint is trained to generate prompts) to enhance the prompt.
```py
tokenizer = GPT2Tokenizer.from_pretrained("Gustavosta/MagicPrompt-Stable-Diffusion")
model = GPT2LMHeadModel.from_pretrained("Gustavosta/MagicPrompt-Stable-Diffusion", torch_dtype=torch.float16).to(
"cuda"
)
model.eval()
inputs = tokenizer(prompt, return_tensors="pt").to("cuda")
token_count = inputs["input_ids"].shape[1]
max_new_tokens = 50 - token_count
generation_config = GenerationConfig(
penalty_alpha=0.7,
top_k=50,
eos_token_id=model.config.eos_token_id,
pad_token_id=model.config.eos_token_id,
pad_token=model.config.pad_token_id,
do_sample=True,
)
with torch.no_grad():
generated_ids = model.generate(
input_ids=inputs["input_ids"],
attention_mask=inputs["attention_mask"],
max_new_tokens=max_new_tokens,
generation_config=generation_config,
logits_processor=proccesor_list,
)
```
Then you can combine the input prompt and the generated prompt. Feel free to take a look at what the generated prompt (`generated_part`) is, the word pairs that were found (`pairs`), and the remaining words (`words`). This is all packed together in the `enhanced_prompt`.
```py
output_tokens = [tokenizer.decode(generated_id, skip_special_tokens=True) for generated_id in generated_ids]
input_part, generated_part = output_tokens[0][: len(prompt)], output_tokens[0][len(prompt) :]
pairs, words = find_and_order_pairs(generated_part, word_pairs)
formatted_generated_part = pairs + ", " + words
enhanced_prompt = input_part + ", " + formatted_generated_part
enhanced_prompt
["cinematic film still of a cat basking in the sun on a roof in Turkey, highly detailed, high budget hollywood movie, cinemascope, moody, epic, gorgeous, film grain quality sharp focus beautiful detailed intricate stunning amazing epic"]
```
Finally, load a pipeline and the offset noise LoRA with a *low weight* to generate an image with the enhanced prompt.
```py
pipeline = StableDiffusionXLPipeline.from_pretrained(
"RunDiffusion/Juggernaut-XL-v9", torch_dtype=torch.float16, variant="fp16"
).to("cuda")
pipeline.load_lora_weights(
"stabilityai/stable-diffusion-xl-base-1.0",
weight_name="sd_xl_offset_example-lora_1.0.safetensors",
adapter_name="offset",
)
pipeline.set_adapters(["offset"], adapter_weights=[0.2])
image = pipeline(
enhanced_prompt,
width=1152,
height=896,
guidance_scale=7.5,
num_inference_steps=25,
).images[0]
image
```
"a cat basking in the sun on a roof in Turkey"
"cinematic film still of a cat basking in the sun on a roof in Turkey, highly detailed, high budget hollywood movie, cinemascope, moody, epic, gorgeous, film grain"
## Prompt weighting
Prompt weighting provides a way to emphasize or de-emphasize certain parts of a prompt, allowing for more control over the generated image. A prompt can include several concepts, which gets turned into contextualized text embeddings. The embeddings are used by the model to condition its cross-attention layers to generate an image (read the Stable Diffusion [blog post](https://huggingface.co/blog/stable_diffusion) to learn more about how it works).
Prompt weighting works by increasing or decreasing the scale of the text embedding vector that corresponds to its concept in the prompt because you may not necessarily want the model to focus on all concepts equally. The easiest way to prepare the prompt-weighted embeddings is to use [Compel](https://github.com/damian0815/compel), a text prompt-weighting and blending library. Once you have the prompt-weighted embeddings, you can pass them to any pipeline that has a [`prompt_embeds`](https://huggingface.co/docs/diffusers/en/api/pipelines/stable_diffusion/text2img#diffusers.StableDiffusionPipeline.__call__.prompt_embeds) (and optionally [`negative_prompt_embeds`](https://huggingface.co/docs/diffusers/en/api/pipelines/stable_diffusion/text2img#diffusers.StableDiffusionPipeline.__call__.negative_prompt_embeds)) parameter, such as [StableDiffusionPipeline](/docs/diffusers/main/en/api/pipelines/stable_diffusion/text2img#diffusers.StableDiffusionPipeline), [StableDiffusionControlNetPipeline](/docs/diffusers/main/en/api/pipelines/controlnet#diffusers.StableDiffusionControlNetPipeline), and [StableDiffusionXLPipeline](/docs/diffusers/main/en/api/pipelines/stable_diffusion/stable_diffusion_xl#diffusers.StableDiffusionXLPipeline).
If your favorite pipeline doesn't have a `prompt_embeds` parameter, please open an [issue](https://github.com/huggingface/diffusers/issues/new/choose) so we can add it!
This guide will show you how to weight and blend your prompts with Compel in 🤗 Diffusers.
Before you begin, make sure you have the latest version of Compel installed:
```py
# uncomment to install in Colab
#!pip install compel --upgrade
```
For this guide, let's generate an image with the prompt `"a red cat playing with a ball"` using the [StableDiffusionPipeline](/docs/diffusers/main/en/api/pipelines/stable_diffusion/text2img#diffusers.StableDiffusionPipeline):
```py
from diffusers import StableDiffusionPipeline, UniPCMultistepScheduler
import torch
pipe = StableDiffusionPipeline.from_pretrained("CompVis/stable-diffusion-v1-4", use_safetensors=True)
pipe.scheduler = UniPCMultistepScheduler.from_config(pipe.scheduler.config)
pipe.to("cuda")
prompt = "a red cat playing with a ball"
generator = torch.Generator(device="cpu").manual_seed(33)
image = pipe(prompt, generator=generator, num_inference_steps=20).images[0]
image
```
### Weighting
You'll notice there is no "ball" in the image! Let's use compel to upweight the concept of "ball" in the prompt. Create a [`Compel`](https://github.com/damian0815/compel/blob/main/doc/compel.md#compel-objects) object, and pass it a tokenizer and text encoder:
```py
from compel import Compel
compel_proc = Compel(tokenizer=pipe.tokenizer, text_encoder=pipe.text_encoder)
```
compel uses `+` or `-` to increase or decrease the weight of a word in the prompt. To increase the weight of "ball":
`+` corresponds to the value `1.1`, `++` corresponds to `1.1^2`, and so on. Similarly, `-` corresponds to `0.9` and `--` corresponds to `0.9^2`. Feel free to experiment with adding more `+` or `-` in your prompt!
```py
prompt = "a red cat playing with a ball++"
```
Pass the prompt to `compel_proc` to create the new prompt embeddings which are passed to the pipeline:
```py
prompt_embeds = compel_proc(prompt)
generator = torch.manual_seed(33)
image = pipe(prompt_embeds=prompt_embeds, generator=generator, num_inference_steps=20).images[0]
image
```
To downweight parts of the prompt, use the `-` suffix:
```py
prompt = "a red------- cat playing with a ball"
prompt_embeds = compel_proc(prompt)
generator = torch.manual_seed(33)
image = pipe(prompt_embeds=prompt_embeds, generator=generator, num_inference_steps=20).images[0]
image
```
You can even up or downweight multiple concepts in the same prompt:
```py
prompt = "a red cat++ playing with a ball----"
prompt_embeds = compel_proc(prompt)
generator = torch.manual_seed(33)
image = pipe(prompt_embeds=prompt_embeds, generator=generator, num_inference_steps=20).images[0]
image
```
### Blending
You can also create a weighted *blend* of prompts by adding `.blend()` to a list of prompts and passing it some weights. Your blend may not always produce the result you expect because it breaks some assumptions about how the text encoder functions, so just have fun and experiment with it!
```py
prompt_embeds = compel_proc('("a red cat playing with a ball", "jungle").blend(0.7, 0.8)')
generator = torch.Generator(device="cuda").manual_seed(33)
image = pipe(prompt_embeds=prompt_embeds, generator=generator, num_inference_steps=20).images[0]
image
```
### Conjunction
A conjunction diffuses each prompt independently and concatenates their results by their weighted sum. Add `.and()` to the end of a list of prompts to create a conjunction:
```py
prompt_embeds = compel_proc('["a red cat", "playing with a", "ball"].and()')
generator = torch.Generator(device="cuda").manual_seed(55)
image = pipe(prompt_embeds=prompt_embeds, generator=generator, num_inference_steps=20).images[0]
image
```
### Textual inversion
[Textual inversion](../training/text_inversion) is a technique for learning a specific concept from some images which you can use to generate new images conditioned on that concept.
Create a pipeline and use the [load_textual_inversion()](/docs/diffusers/main/en/api/loaders/textual_inversion#diffusers.loaders.TextualInversionLoaderMixin.load_textual_inversion) function to load the textual inversion embeddings (feel free to browse the [Stable Diffusion Conceptualizer](https://huggingface.co/spaces/sd-concepts-library/stable-diffusion-conceptualizer) for 100+ trained concepts):
```py
import torch
from diffusers import StableDiffusionPipeline
from compel import Compel, DiffusersTextualInversionManager
pipe = StableDiffusionPipeline.from_pretrained(
"stable-diffusion-v1-5/stable-diffusion-v1-5", torch_dtype=torch.float16,
use_safetensors=True, variant="fp16").to("cuda")
pipe.load_textual_inversion("sd-concepts-library/midjourney-style")
```
Compel provides a `DiffusersTextualInversionManager` class to simplify prompt weighting with textual inversion. Instantiate `DiffusersTextualInversionManager` and pass it to the `Compel` class:
```py
textual_inversion_manager = DiffusersTextualInversionManager(pipe)
compel_proc = Compel(
tokenizer=pipe.tokenizer,
text_encoder=pipe.text_encoder,
textual_inversion_manager=textual_inversion_manager)
```
Incorporate the concept to condition a prompt with using the `` syntax:
```py
prompt_embeds = compel_proc('("A red cat++ playing with a ball ")')
image = pipe(prompt_embeds=prompt_embeds).images[0]
image
```
### DreamBooth
[DreamBooth](../training/dreambooth) is a technique for generating contextualized images of a subject given just a few images of the subject to train on. It is similar to textual inversion, but DreamBooth trains the full model whereas textual inversion only fine-tunes the text embeddings. This means you should use [from_pretrained()](/docs/diffusers/main/en/api/pipelines/overview#diffusers.DiffusionPipeline.from_pretrained) to load the DreamBooth model (feel free to browse the [Stable Diffusion Dreambooth Concepts Library](https://huggingface.co/sd-dreambooth-library) for 100+ trained models):
```py
import torch
from diffusers import DiffusionPipeline, UniPCMultistepScheduler
from compel import Compel
pipe = DiffusionPipeline.from_pretrained("sd-dreambooth-library/dndcoverart-v1", torch_dtype=torch.float16).to("cuda")
pipe.scheduler = UniPCMultistepScheduler.from_config(pipe.scheduler.config)
```
Create a `Compel` class with a tokenizer and text encoder, and pass your prompt to it. Depending on the model you use, you'll need to incorporate the model's unique identifier into your prompt. For example, the `dndcoverart-v1` model uses the identifier `dndcoverart`:
```py
compel_proc = Compel(tokenizer=pipe.tokenizer, text_encoder=pipe.text_encoder)
prompt_embeds = compel_proc('("magazine cover of a dndcoverart dragon, high quality, intricate details, larry elmore art style").and()')
image = pipe(prompt_embeds=prompt_embeds).images[0]
image
```
### Stable Diffusion XL
Stable Diffusion XL (SDXL) has two tokenizers and text encoders so it's usage is a bit different. To address this, you should pass both tokenizers and encoders to the `Compel` class:
```py
from compel import Compel, ReturnedEmbeddingsType
from diffusers import DiffusionPipeline
from diffusers.utils import make_image_grid
import torch
pipeline = DiffusionPipeline.from_pretrained(
"stabilityai/stable-diffusion-xl-base-1.0",
variant="fp16",
use_safetensors=True,
torch_dtype=torch.float16
).to("cuda")
compel = Compel(
tokenizer=[pipeline.tokenizer, pipeline.tokenizer_2] ,
text_encoder=[pipeline.text_encoder, pipeline.text_encoder_2],
returned_embeddings_type=ReturnedEmbeddingsType.PENULTIMATE_HIDDEN_STATES_NON_NORMALIZED,
requires_pooled=[False, True]
)
```
This time, let's upweight "ball" by a factor of 1.5 for the first prompt, and downweight "ball" by 0.6 for the second prompt. The [StableDiffusionXLPipeline](/docs/diffusers/main/en/api/pipelines/stable_diffusion/stable_diffusion_xl#diffusers.StableDiffusionXLPipeline) also requires [`pooled_prompt_embeds`](https://huggingface.co/docs/diffusers/en/api/pipelines/stable_diffusion/stable_diffusion_xl#diffusers.StableDiffusionXLInpaintPipeline.__call__.pooled_prompt_embeds) (and optionally [`negative_pooled_prompt_embeds`](https://huggingface.co/docs/diffusers/en/api/pipelines/stable_diffusion/stable_diffusion_xl#diffusers.StableDiffusionXLInpaintPipeline.__call__.negative_pooled_prompt_embeds)) so you should pass those to the pipeline along with the conditioning tensors:
```py
# apply weights
prompt = ["a red cat playing with a (ball)1.5", "a red cat playing with a (ball)0.6"]
conditioning, pooled = compel(prompt)
# generate image
generator = [torch.Generator().manual_seed(33) for _ in range(len(prompt))]
images = pipeline(prompt_embeds=conditioning, pooled_prompt_embeds=pooled, generator=generator, num_inference_steps=30).images
make_image_grid(images, rows=1, cols=2)
```
"a red cat playing with a (ball)1.5"
"a red cat playing with a (ball)0.6"
# Load pipelines
Diffusion systems consist of multiple components like parameterized models and schedulers that interact in complex ways. That is why we designed the [DiffusionPipeline](/docs/diffusers/main/en/api/pipelines/overview#diffusers.DiffusionPipeline) to wrap the complexity of the entire diffusion system into an easy-to-use API. At the same time, the [DiffusionPipeline](/docs/diffusers/main/en/api/pipelines/overview#diffusers.DiffusionPipeline) is entirely customizable so you can modify each component to build a diffusion system for your use case.
This guide will show you how to load:
- pipelines from the Hub and locally
- different components into a pipeline
- multiple pipelines without increasing memory usage
- checkpoint variants such as different floating point types or non-exponential mean averaged (EMA) weights
## Load a pipeline
> [!TIP]
> Skip to the [DiffusionPipeline explained](#diffusionpipeline-explained) section if you're interested in an explanation about how the [DiffusionPipeline](/docs/diffusers/main/en/api/pipelines/overview#diffusers.DiffusionPipeline) class works.
There are two ways to load a pipeline for a task:
1. Load the generic [DiffusionPipeline](/docs/diffusers/main/en/api/pipelines/overview#diffusers.DiffusionPipeline) class and allow it to automatically detect the correct pipeline class from the checkpoint.
2. Load a specific pipeline class for a specific task.
The [DiffusionPipeline](/docs/diffusers/main/en/api/pipelines/overview#diffusers.DiffusionPipeline) class is a simple and generic way to load the latest trending diffusion model from the [Hub](https://huggingface.co/models?library=diffusers&sort=trending). It uses the [from_pretrained()](/docs/diffusers/main/en/api/pipelines/overview#diffusers.DiffusionPipeline.from_pretrained) method to automatically detect the correct pipeline class for a task from the checkpoint, downloads and caches all the required configuration and weight files, and returns a pipeline ready for inference.
```python
from diffusers import DiffusionPipeline
pipeline = DiffusionPipeline.from_pretrained("stable-diffusion-v1-5/stable-diffusion-v1-5", use_safetensors=True)
```
This same checkpoint can also be used for an image-to-image task. The [DiffusionPipeline](/docs/diffusers/main/en/api/pipelines/overview#diffusers.DiffusionPipeline) class can handle any task as long as you provide the appropriate inputs. For example, for an image-to-image task, you need to pass an initial image to the pipeline.
```py
from diffusers import DiffusionPipeline
pipeline = DiffusionPipeline.from_pretrained("stable-diffusion-v1-5/stable-diffusion-v1-5", use_safetensors=True)
init_image = load_image("https://huggingface.co/datasets/huggingface/documentation-images/resolve/main/diffusers/img2img-init.png")
prompt = "Astronaut in a jungle, cold color palette, muted colors, detailed, 8k"
image = pipeline("Astronaut in a jungle, cold color palette, muted colors, detailed, 8k", image=init_image).images[0]
```
Checkpoints can be loaded by their specific pipeline class if you already know it. For example, to load a Stable Diffusion model, use the [StableDiffusionPipeline](/docs/diffusers/main/en/api/pipelines/stable_diffusion/text2img#diffusers.StableDiffusionPipeline) class.
```python
from diffusers import StableDiffusionPipeline
pipeline = StableDiffusionPipeline.from_pretrained("stable-diffusion-v1-5/stable-diffusion-v1-5", use_safetensors=True)
```
This same checkpoint may also be used for another task like image-to-image. To differentiate what task you want to use the checkpoint for, you have to use the corresponding task-specific pipeline class. For example, to use the same checkpoint for image-to-image, use the [StableDiffusionImg2ImgPipeline](/docs/diffusers/main/en/api/pipelines/stable_diffusion/img2img#diffusers.StableDiffusionImg2ImgPipeline) class.
```py
from diffusers import StableDiffusionImg2ImgPipeline
pipeline = StableDiffusionImg2ImgPipeline.from_pretrained("stable-diffusion-v1-5/stable-diffusion-v1-5", use_safetensors=True)
```
Use the Space below to gauge a pipeline's memory requirements before you download and load it to see if it runs on your hardware.
### Local pipeline
To load a pipeline locally, use [git-lfs](https://git-lfs.github.com/) to manually download a checkpoint to your local disk.
```bash
git-lfs install
git clone https://huggingface.co/stable-diffusion-v1-5/stable-diffusion-v1-5
```
This creates a local folder, ./stable-diffusion-v1-5, on your disk and you should pass its path to [from_pretrained()](/docs/diffusers/main/en/api/pipelines/overview#diffusers.DiffusionPipeline.from_pretrained).
```python
from diffusers import DiffusionPipeline
stable_diffusion = DiffusionPipeline.from_pretrained("./stable-diffusion-v1-5", use_safetensors=True)
```
The [from_pretrained()](/docs/diffusers/main/en/api/pipelines/overview#diffusers.DiffusionPipeline.from_pretrained) method won't download files from the Hub when it detects a local path, but this also means it won't download and cache the latest changes to a checkpoint.
## Customize a pipeline
You can customize a pipeline by loading different components into it. This is important because you can:
- change to a scheduler with faster generation speed or higher generation quality depending on your needs (call the `scheduler.compatibles` method on your pipeline to see compatible schedulers)
- change a default pipeline component to a newer and better performing one
For example, let's customize the default [stabilityai/stable-diffusion-xl-base-1.0](https://hf.co/stabilityai/stable-diffusion-xl-base-1.0) checkpoint with:
- The [HeunDiscreteScheduler](/docs/diffusers/main/en/api/schedulers/heun#diffusers.HeunDiscreteScheduler) to generate higher quality images at the expense of slower generation speed. You must pass the `subfolder="scheduler"` parameter in [from_pretrained()](/docs/diffusers/main/en/api/schedulers/overview#diffusers.SchedulerMixin.from_pretrained) to load the scheduler configuration into the correct [subfolder](https://hf.co/stabilityai/stable-diffusion-xl-base-1.0/tree/main/scheduler) of the pipeline repository.
- A more stable VAE that runs in fp16.
```py
from diffusers import StableDiffusionXLPipeline, HeunDiscreteScheduler, AutoencoderKL
import torch
scheduler = HeunDiscreteScheduler.from_pretrained("stabilityai/stable-diffusion-xl-base-1.0", subfolder="scheduler")
vae = AutoencoderKL.from_pretrained("madebyollin/sdxl-vae-fp16-fix", torch_dtype=torch.float16, use_safetensors=True)
```
Now pass the new scheduler and VAE to the [StableDiffusionXLPipeline](/docs/diffusers/main/en/api/pipelines/stable_diffusion/stable_diffusion_xl#diffusers.StableDiffusionXLPipeline).
```py
pipeline = StableDiffusionXLPipeline.from_pretrained(
"stabilityai/stable-diffusion-xl-base-1.0",
scheduler=scheduler,
vae=vae,
torch_dtype=torch.float16,
variant="fp16",
use_safetensors=True
).to("cuda")
```
## Reuse a pipeline
When you load multiple pipelines that share the same model components, it makes sense to reuse the shared components instead of reloading everything into memory again, especially if your hardware is memory-constrained. For example:
1. You generated an image with the [StableDiffusionPipeline](/docs/diffusers/main/en/api/pipelines/stable_diffusion/text2img#diffusers.StableDiffusionPipeline) but you want to improve its quality with the [StableDiffusionSAGPipeline](/docs/diffusers/main/en/api/pipelines/self_attention_guidance#diffusers.StableDiffusionSAGPipeline). Both of these pipelines share the same pretrained model, so it'd be a waste of memory to load the same model twice.
2. You want to add a model component, like a [`MotionAdapter`](../api/pipelines/animatediff#animatediffpipeline), to [AnimateDiffPipeline](/docs/diffusers/main/en/api/pipelines/animatediff#diffusers.AnimateDiffPipeline) which was instantiated from an existing [StableDiffusionPipeline](/docs/diffusers/main/en/api/pipelines/stable_diffusion/text2img#diffusers.StableDiffusionPipeline). Again, both pipelines share the same pretrained model, so it'd be a waste of memory to load an entirely new pipeline again.
With the [DiffusionPipeline.from_pipe()](/docs/diffusers/main/en/api/pipelines/overview#diffusers.DiffusionPipeline.from_pipe) API, you can switch between multiple pipelines to take advantage of their different features without increasing memory-usage. It is similar to turning on and off a feature in your pipeline.
> [!TIP]
> To switch between tasks (rather than features), use the [from_pipe()](/docs/diffusers/main/en/api/pipelines/overview#diffusers.DiffusionPipeline.from_pipe) method with the [AutoPipeline](../api/pipelines/auto_pipeline) class, which automatically identifies the pipeline class based on the task (learn more in the [AutoPipeline](../tutorials/autopipeline) tutorial).
Let's start with a [StableDiffusionPipeline](/docs/diffusers/main/en/api/pipelines/stable_diffusion/text2img#diffusers.StableDiffusionPipeline) and then reuse the loaded model components to create a [StableDiffusionSAGPipeline](/docs/diffusers/main/en/api/pipelines/self_attention_guidance#diffusers.StableDiffusionSAGPipeline) to increase generation quality. You'll use the [StableDiffusionPipeline](/docs/diffusers/main/en/api/pipelines/stable_diffusion/text2img#diffusers.StableDiffusionPipeline) with an [IP-Adapter](./ip_adapter) to generate a bear eating pizza.
```python
from diffusers import DiffusionPipeline, StableDiffusionSAGPipeline
import torch
import gc
from diffusers.utils import load_image
from accelerate.utils import compute_module_sizes
image = load_image("https://huggingface.co/datasets/huggingface/documentation-images/resolve/main/diffusers/load_neg_embed.png")
pipe_sd = DiffusionPipeline.from_pretrained("SG161222/Realistic_Vision_V6.0_B1_noVAE", torch_dtype=torch.float16)
pipe_sd.load_ip_adapter("h94/IP-Adapter", subfolder="models", weight_name="ip-adapter_sd15.bin")
pipe_sd.set_ip_adapter_scale(0.6)
pipe_sd.to("cuda")
generator = torch.Generator(device="cpu").manual_seed(33)
out_sd = pipe_sd(
prompt="bear eats pizza",
negative_prompt="wrong white balance, dark, sketches,worst quality,low quality",
ip_adapter_image=image,
num_inference_steps=50,
generator=generator,
).images[0]
out_sd
```
For reference, you can check how much memory this process consumed.
```python
def bytes_to_giga_bytes(bytes):
return bytes / 1024 / 1024 / 1024
print(f"Max memory allocated: {bytes_to_giga_bytes(torch.cuda.max_memory_allocated())} GB")
"Max memory allocated: 4.406213283538818 GB"
```
Now, reuse the same pipeline components from [StableDiffusionPipeline](/docs/diffusers/main/en/api/pipelines/stable_diffusion/text2img#diffusers.StableDiffusionPipeline) in [StableDiffusionSAGPipeline](/docs/diffusers/main/en/api/pipelines/self_attention_guidance#diffusers.StableDiffusionSAGPipeline) with the [from_pipe()](/docs/diffusers/main/en/api/pipelines/overview#diffusers.DiffusionPipeline.from_pipe) method.
> [!WARNING]
> Some pipeline methods may not function properly on new pipelines created with [from_pipe()](/docs/diffusers/main/en/api/pipelines/overview#diffusers.DiffusionPipeline.from_pipe). For instance, the [enable_model_cpu_offload()](/docs/diffusers/main/en/api/pipelines/overview#diffusers.DiffusionPipeline.enable_model_cpu_offload) method installs hooks on the model components based on a unique offloading sequence for each pipeline. If the models are executed in a different order in the new pipeline, the CPU offloading may not work correctly.
>
> To ensure everything works as expected, we recommend re-applying a pipeline method on a new pipeline created with [from_pipe()](/docs/diffusers/main/en/api/pipelines/overview#diffusers.DiffusionPipeline.from_pipe).
```python
pipe_sag = StableDiffusionSAGPipeline.from_pipe(
pipe_sd
)
generator = torch.Generator(device="cpu").manual_seed(33)
out_sag = pipe_sag(
prompt="bear eats pizza",
negative_prompt="wrong white balance, dark, sketches,worst quality,low quality",
ip_adapter_image=image,
num_inference_steps=50,
generator=generator,
guidance_scale=1.0,
sag_scale=0.75
).images[0]
out_sag
```
If you check the memory usage, you'll see it remains the same as before because [StableDiffusionPipeline](/docs/diffusers/main/en/api/pipelines/stable_diffusion/text2img#diffusers.StableDiffusionPipeline) and [StableDiffusionSAGPipeline](/docs/diffusers/main/en/api/pipelines/self_attention_guidance#diffusers.StableDiffusionSAGPipeline) are sharing the same pipeline components. This allows you to use them interchangeably without any additional memory overhead.
```py
print(f"Max memory allocated: {bytes_to_giga_bytes(torch.cuda.max_memory_allocated())} GB")
"Max memory allocated: 4.406213283538818 GB"
```
Let's animate the image with the [AnimateDiffPipeline](/docs/diffusers/main/en/api/pipelines/animatediff#diffusers.AnimateDiffPipeline) and also add a `MotionAdapter` module to the pipeline. For the [AnimateDiffPipeline](/docs/diffusers/main/en/api/pipelines/animatediff#diffusers.AnimateDiffPipeline), you need to unload the IP-Adapter first and reload it *after* you've created your new pipeline (this only applies to the [AnimateDiffPipeline](/docs/diffusers/main/en/api/pipelines/animatediff#diffusers.AnimateDiffPipeline)).
```py
from diffusers import AnimateDiffPipeline, MotionAdapter, DDIMScheduler
from diffusers.utils import export_to_gif
pipe_sag.unload_ip_adapter()
adapter = MotionAdapter.from_pretrained("guoyww/animatediff-motion-adapter-v1-5-2", torch_dtype=torch.float16)
pipe_animate = AnimateDiffPipeline.from_pipe(pipe_sd, motion_adapter=adapter)
pipe_animate.scheduler = DDIMScheduler.from_config(pipe_animate.scheduler.config, beta_schedule="linear")
# load IP-Adapter and LoRA weights again
pipe_animate.load_ip_adapter("h94/IP-Adapter", subfolder="models", weight_name="ip-adapter_sd15.bin")
pipe_animate.load_lora_weights("guoyww/animatediff-motion-lora-zoom-out", adapter_name="zoom-out")
pipe_animate.to("cuda")
generator = torch.Generator(device="cpu").manual_seed(33)
pipe_animate.set_adapters("zoom-out", adapter_weights=0.75)
out = pipe_animate(
prompt="bear eats pizza",
num_frames=16,
num_inference_steps=50,
ip_adapter_image=image,
generator=generator,
).frames[0]
export_to_gif(out, "out_animate.gif")
```
The [AnimateDiffPipeline](/docs/diffusers/main/en/api/pipelines/animatediff#diffusers.AnimateDiffPipeline) is more memory-intensive and consumes 15GB of memory (see the [Memory-usage of from_pipe](#memory-usage-of-from_pipe) section to learn what this means for your memory-usage).
```py
print(f"Max memory allocated: {bytes_to_giga_bytes(torch.cuda.max_memory_allocated())} GB")
"Max memory allocated: 15.178664207458496 GB"
```
### Modify from_pipe components
Pipelines loaded with [from_pipe()](/docs/diffusers/main/en/api/pipelines/overview#diffusers.DiffusionPipeline.from_pipe) can be customized with different model components or methods. However, whenever you modify the *state* of the model components, it affects all the other pipelines that share the same components. For example, if you call [unload_ip_adapter()](/docs/diffusers/main/en/api/loaders/ip_adapter#diffusers.loaders.IPAdapterMixin.unload_ip_adapter) on the [StableDiffusionSAGPipeline](/docs/diffusers/main/en/api/pipelines/self_attention_guidance#diffusers.StableDiffusionSAGPipeline), you won't be able to use IP-Adapter with the [StableDiffusionPipeline](/docs/diffusers/main/en/api/pipelines/stable_diffusion/text2img#diffusers.StableDiffusionPipeline) because it's been removed from their shared components.
```py
pipe.sag_unload_ip_adapter()
generator = torch.Generator(device="cpu").manual_seed(33)
out_sd = pipe_sd(
prompt="bear eats pizza",
negative_prompt="wrong white balance, dark, sketches,worst quality,low quality",
ip_adapter_image=image,
num_inference_steps=50,
generator=generator,
).images[0]
"AttributeError: 'NoneType' object has no attribute 'image_projection_layers'"
```
### Memory usage of from_pipe
The memory requirement of loading multiple pipelines with [from_pipe()](/docs/diffusers/main/en/api/pipelines/overview#diffusers.DiffusionPipeline.from_pipe) is determined by the pipeline with the highest memory-usage regardless of the number of pipelines you create.
| Pipeline | Memory usage (GB) |
|---|---|
| StableDiffusionPipeline | 4.400 |
| StableDiffusionSAGPipeline | 4.400 |
| AnimateDiffPipeline | 15.178 |
The [AnimateDiffPipeline](/docs/diffusers/main/en/api/pipelines/animatediff#diffusers.AnimateDiffPipeline) has the highest memory requirement, so the *total memory-usage* is based only on the [AnimateDiffPipeline](/docs/diffusers/main/en/api/pipelines/animatediff#diffusers.AnimateDiffPipeline). Your memory-usage will not increase if you create additional pipelines as long as their memory requirements doesn't exceed that of the [AnimateDiffPipeline](/docs/diffusers/main/en/api/pipelines/animatediff#diffusers.AnimateDiffPipeline). Each pipeline can be used interchangeably without any additional memory overhead.
## Safety checker
Diffusers implements a [safety checker](https://github.com/huggingface/diffusers/blob/main/src/diffusers/pipelines/stable_diffusion/safety_checker.py) for Stable Diffusion models which can generate harmful content. The safety checker screens the generated output against known hardcoded not-safe-for-work (NSFW) content. If for whatever reason you'd like to disable the safety checker, pass `safety_checker=None` to the [from_pretrained()](/docs/diffusers/main/en/api/pipelines/overview#diffusers.DiffusionPipeline.from_pretrained) method.
```python
from diffusers import DiffusionPipeline
pipeline = DiffusionPipeline.from_pretrained("stable-diffusion-v1-5/stable-diffusion-v1-5", safety_checker=None, use_safetensors=True)
"""
You have disabled the safety checker for by passing `safety_checker=None`. Ensure that you abide by the conditions of the Stable Diffusion license and do not expose unfiltered results in services or applications open to the public. Both the diffusers team and Hugging Face strongly recommend keeping the safety filter enabled in all public-facing circumstances, disabling it only for use cases that involve analyzing network behavior or auditing its results. For more information, please have a look at https://github.com/huggingface/diffusers/pull/254 .
"""
```
## Checkpoint variants
A checkpoint variant is usually a checkpoint whose weights are:
- Stored in a different floating point type, such as [torch.float16](https://pytorch.org/docs/stable/tensors.html#data-types), because it only requires half the bandwidth and storage to download. You can't use this variant if you're continuing training or using a CPU.
- Non-exponential mean averaged (EMA) weights which shouldn't be used for inference. You should use this variant to continue finetuning a model.
> [!TIP]
> When the checkpoints have identical model structures, but they were trained on different datasets and with a different training setup, they should be stored in separate repositories. For example, [stabilityai/stable-diffusion-2](https://hf.co/stabilityai/stable-diffusion-2) and [stabilityai/stable-diffusion-2-1](https://hf.co/stabilityai/stable-diffusion-2-1) are stored in separate repositories.
Otherwise, a variant is **identical** to the original checkpoint. They have exactly the same serialization format (like [safetensors](./using_safetensors)), model structure, and their weights have identical tensor shapes.
| **checkpoint type** | **weight name** | **argument for loading weights** |
|---------------------|---------------------------------------------|----------------------------------|
| original | diffusion_pytorch_model.safetensors | |
| floating point | diffusion_pytorch_model.fp16.safetensors | `variant`, `torch_dtype` |
| non-EMA | diffusion_pytorch_model.non_ema.safetensors | `variant` |
There are two important arguments for loading variants:
- `torch_dtype` specifies the floating point precision of the loaded checkpoint. For example, if you want to save bandwidth by loading a fp16 variant, you should set `variant="fp16"` and `torch_dtype=torch.float16` to *convert the weights* to fp16. Otherwise, the fp16 weights are converted to the default fp32 precision.
If you only set `torch_dtype=torch.float16`, the default fp32 weights are downloaded first and then converted to fp16.
- `variant` specifies which files should be loaded from the repository. For example, if you want to load a non-EMA variant of a UNet from [stable-diffusion-v1-5/stable-diffusion-v1-5](https://hf.co/stable-diffusion-v1-5/stable-diffusion-v1-5/tree/main/unet), set `variant="non_ema"` to download the `non_ema` file.
```py
from diffusers import DiffusionPipeline
import torch
pipeline = DiffusionPipeline.from_pretrained(
"stable-diffusion-v1-5/stable-diffusion-v1-5", variant="fp16", torch_dtype=torch.float16, use_safetensors=True
)
```
```py
pipeline = DiffusionPipeline.from_pretrained(
"stable-diffusion-v1-5/stable-diffusion-v1-5", variant="non_ema", use_safetensors=True
)
```
Use the `variant` parameter in the [DiffusionPipeline.save_pretrained()](/docs/diffusers/main/en/api/pipelines/overview#diffusers.DiffusionPipeline.save_pretrained) method to save a checkpoint as a different floating point type or as a non-EMA variant. You should try save a variant to the same folder as the original checkpoint, so you have the option of loading both from the same folder.
```python
from diffusers import DiffusionPipeline
pipeline.save_pretrained("stable-diffusion-v1-5/stable-diffusion-v1-5", variant="fp16")
```
```py
pipeline.save_pretrained("stable-diffusion-v1-5/stable-diffusion-v1-5", variant="non_ema")
```
If you don't save the variant to an existing folder, you must specify the `variant` argument otherwise it'll throw an `Exception` because it can't find the original checkpoint.
```python
# 👎 this won't work
pipeline = DiffusionPipeline.from_pretrained(
"./stable-diffusion-v1-5", torch_dtype=torch.float16, use_safetensors=True
)
# 👍 this works
pipeline = DiffusionPipeline.from_pretrained(
"./stable-diffusion-v1-5", variant="fp16", torch_dtype=torch.float16, use_safetensors=True
)
```
## DiffusionPipeline explained
As a class method, [DiffusionPipeline.from_pretrained()](/docs/diffusers/main/en/api/pipelines/overview#diffusers.DiffusionPipeline.from_pretrained) is responsible for two things:
- Download the latest version of the folder structure required for inference and cache it. If the latest folder structure is available in the local cache, [DiffusionPipeline.from_pretrained()](/docs/diffusers/main/en/api/pipelines/overview#diffusers.DiffusionPipeline.from_pretrained) reuses the cache and won't redownload the files.
- Load the cached weights into the correct pipeline [class](../api/pipelines/overview#diffusers-summary) - retrieved from the `model_index.json` file - and return an instance of it.
The pipelines' underlying folder structure corresponds directly with their class instances. For example, the [StableDiffusionPipeline](/docs/diffusers/main/en/api/pipelines/stable_diffusion/text2img#diffusers.StableDiffusionPipeline) corresponds to the folder structure in [`stable-diffusion-v1-5/stable-diffusion-v1-5`](https://huggingface.co/stable-diffusion-v1-5/stable-diffusion-v1-5).
```python
from diffusers import DiffusionPipeline
repo_id = "stable-diffusion-v1-5/stable-diffusion-v1-5"
pipeline = DiffusionPipeline.from_pretrained(repo_id, use_safetensors=True)
print(pipeline)
```
You'll see pipeline is an instance of [StableDiffusionPipeline](/docs/diffusers/main/en/api/pipelines/stable_diffusion/text2img#diffusers.StableDiffusionPipeline), which consists of seven components:
- `"feature_extractor"`: a [CLIPImageProcessor](https://huggingface.co/docs/transformers/main/en/model_doc/clip#transformers.CLIPImageProcessor) from 🤗 Transformers.
- `"safety_checker"`: a [component](https://github.com/huggingface/diffusers/blob/e55687e1e15407f60f32242027b7bb8170e58266/src/diffusers/pipelines/stable_diffusion/safety_checker.py#L32) for screening against harmful content.
- `"scheduler"`: an instance of [PNDMScheduler](/docs/diffusers/main/en/api/schedulers/pndm#diffusers.PNDMScheduler).
- `"text_encoder"`: a [CLIPTextModel](https://huggingface.co/docs/transformers/main/en/model_doc/clip#transformers.CLIPTextModel) from 🤗 Transformers.
- `"tokenizer"`: a [CLIPTokenizer](https://huggingface.co/docs/transformers/main/en/model_doc/clip#transformers.CLIPTokenizer) from 🤗 Transformers.
- `"unet"`: an instance of [UNet2DConditionModel](/docs/diffusers/main/en/api/models/unet2d-cond#diffusers.UNet2DConditionModel).
- `"vae"`: an instance of [AutoencoderKL](/docs/diffusers/main/en/api/models/autoencoderkl#diffusers.AutoencoderKL).
```json
StableDiffusionPipeline {
"feature_extractor": [
"transformers",
"CLIPImageProcessor"
],
"safety_checker": [
"stable_diffusion",
"StableDiffusionSafetyChecker"
],
"scheduler": [
"diffusers",
"PNDMScheduler"
],
"text_encoder": [
"transformers",
"CLIPTextModel"
],
"tokenizer": [
"transformers",
"CLIPTokenizer"
],
"unet": [
"diffusers",
"UNet2DConditionModel"
],
"vae": [
"diffusers",
"AutoencoderKL"
]
}
```
Compare the components of the pipeline instance to the [`stable-diffusion-v1-5/stable-diffusion-v1-5`](https://huggingface.co/stable-diffusion-v1-5/stable-diffusion-v1-5/tree/main) folder structure, and you'll see there is a separate folder for each of the components in the repository:
```
.
├── feature_extractor
│ └── preprocessor_config.json
├── model_index.json
├── safety_checker
│ ├── config.json
| ├── model.fp16.safetensors
│ ├── model.safetensors
│ ├── pytorch_model.bin
| └── pytorch_model.fp16.bin
├── scheduler
│ └── scheduler_config.json
├── text_encoder
│ ├── config.json
| ├── model.fp16.safetensors
│ ├── model.safetensors
│ |── pytorch_model.bin
| └── pytorch_model.fp16.bin
├── tokenizer
│ ├── merges.txt
│ ├── special_tokens_map.json
│ ├── tokenizer_config.json
│ └── vocab.json
├── unet
│ ├── config.json
│ ├── diffusion_pytorch_model.bin
| |── diffusion_pytorch_model.fp16.bin
│ |── diffusion_pytorch_model.f16.safetensors
│ |── diffusion_pytorch_model.non_ema.bin
│ |── diffusion_pytorch_model.non_ema.safetensors
│ └── diffusion_pytorch_model.safetensors
|── vae
. ├── config.json
. ├── diffusion_pytorch_model.bin
├── diffusion_pytorch_model.fp16.bin
├── diffusion_pytorch_model.fp16.safetensors
└── diffusion_pytorch_model.safetensors
```
You can access each of the components of the pipeline as an attribute to view its configuration:
```py
pipeline.tokenizer
CLIPTokenizer(
name_or_path="/root/.cache/huggingface/hub/models--runwayml--stable-diffusion-v1-5/snapshots/39593d5650112b4cc580433f6b0435385882d819/tokenizer",
vocab_size=49408,
model_max_length=77,
is_fast=False,
padding_side="right",
truncation_side="right",
special_tokens={
"bos_token": AddedToken("<|startoftext|>", rstrip=False, lstrip=False, single_word=False, normalized=True),
"eos_token": AddedToken("<|endoftext|>", rstrip=False, lstrip=False, single_word=False, normalized=True),
"unk_token": AddedToken("<|endoftext|>", rstrip=False, lstrip=False, single_word=False, normalized=True),
"pad_token": "<|endoftext|>",
},
clean_up_tokenization_spaces=True
)
```
Every pipeline expects a [`model_index.json`](https://huggingface.co/stable-diffusion-v1-5/stable-diffusion-v1-5/blob/main/model_index.json) file that tells the [DiffusionPipeline](/docs/diffusers/main/en/api/pipelines/overview#diffusers.DiffusionPipeline):
- which pipeline class to load from `_class_name`
- which version of 🧨 Diffusers was used to create the model in `_diffusers_version`
- what components from which library are stored in the subfolders (`name` corresponds to the component and subfolder name, `library` corresponds to the name of the library to load the class from, and `class` corresponds to the class name)
```json
{
"_class_name": "StableDiffusionPipeline",
"_diffusers_version": "0.6.0",
"feature_extractor": [
"transformers",
"CLIPImageProcessor"
],
"safety_checker": [
"stable_diffusion",
"StableDiffusionSafetyChecker"
],
"scheduler": [
"diffusers",
"PNDMScheduler"
],
"text_encoder": [
"transformers",
"CLIPTextModel"
],
"tokenizer": [
"transformers",
"CLIPTokenizer"
],
"unet": [
"diffusers",
"UNet2DConditionModel"
],
"vae": [
"diffusers",
"AutoencoderKL"
]
}
```
# Controlling image quality
The components of a diffusion model, like the UNet and scheduler, can be optimized to improve the quality of generated images leading to better details. These techniques are especially useful if you don't have the resources to simply use a larger model for inference. You can enable these techniques during inference without any additional training.
This guide will show you how to turn these techniques on in your pipeline and how to configure them to improve the quality of your generated images.
## Details
[FreeU](https://hf.co/papers/2309.11497) improves image details by rebalancing the UNet's backbone and skip connection weights. The skip connections can cause the model to overlook some of the backbone semantics which may lead to unnatural image details in the generated image. This technique does not require any additional training and can be applied on the fly during inference for tasks like image-to-image and text-to-video.
Use the [enable_freeu()](/docs/diffusers/main/en/api/pipelines/overview#diffusers.StableDiffusionMixin.enable_freeu) method on your pipeline and configure the scaling factors for the backbone (`b1` and `b2`) and skip connections (`s1` and `s2`). The number after each scaling factor corresponds to the stage in the UNet where the factor is applied. Take a look at the [FreeU](https://github.com/ChenyangSi/FreeU#parameters) repository for reference hyperparameters for different models.
```py
import torch
from diffusers import DiffusionPipeline
pipeline = DiffusionPipeline.from_pretrained(
"stable-diffusion-v1-5/stable-diffusion-v1-5", torch_dtype=torch.float16, safety_checker=None
).to("cuda")
pipeline.enable_freeu(s1=0.9, s2=0.2, b1=1.5, b2=1.6)
generator = torch.Generator(device="cpu").manual_seed(33)
prompt = ""
image = pipeline(prompt, generator=generator).images[0]
image
```
FreeU disabled
FreeU enabled
```py
import torch
from diffusers import DiffusionPipeline
pipeline = DiffusionPipeline.from_pretrained(
"stabilityai/stable-diffusion-2-1", torch_dtype=torch.float16, safety_checker=None
).to("cuda")
pipeline.enable_freeu(s1=0.9, s2=0.2, b1=1.4, b2=1.6)
generator = torch.Generator(device="cpu").manual_seed(80)
prompt = "A squirrel eating a burger"
image = pipeline(prompt, generator=generator).images[0]
image
```
FreeU disabled
FreeU enabled
```py
import torch
from diffusers import DiffusionPipeline
pipeline = DiffusionPipeline.from_pretrained(
"stabilityai/stable-diffusion-xl-base-1.0", torch_dtype=torch.float16,
).to("cuda")
pipeline.enable_freeu(s1=0.9, s2=0.2, b1=1.3, b2=1.4)
generator = torch.Generator(device="cpu").manual_seed(13)
prompt = "A squirrel eating a burger"
image = pipeline(prompt, generator=generator).images[0]
image
```
FreeU disabled
FreeU enabled
```py
import torch
from diffusers import DiffusionPipeline
from diffusers.utils import export_to_video
pipeline = DiffusionPipeline.from_pretrained(
"damo-vilab/text-to-video-ms-1.7b", torch_dtype=torch.float16
).to("cuda")
# values come from https://github.com/lyn-rgb/FreeU_Diffusers#video-pipelines
pipeline.enable_freeu(b1=1.2, b2=1.4, s1=0.9, s2=0.2)
prompt = "Confident teddy bear surfer rides the wave in the tropics"
generator = torch.Generator(device="cpu").manual_seed(47)
video_frames = pipeline(prompt, generator=generator).frames[0]
export_to_video(video_frames, "teddy_bear.mp4", fps=10)
```
FreeU disabled
FreeU enabled
Call the [pipelines.StableDiffusionMixin.disable_freeu()](/docs/diffusers/main/en/api/pipelines/overview#diffusers.StableDiffusionMixin.disable_freeu) method to disable FreeU.
```py
pipeline.disable_freeu()
```
# Reproducible pipelines
Diffusion models are inherently random which is what allows it to generate different outputs every time it is run. But there are certain times when you want to generate the same output every time, like when you're testing, replicating results, and even [improving image quality](#deterministic-batch-generation). While you can't expect to get identical results across platforms, you can expect reproducible results across releases and platforms within a certain tolerance range (though even this may vary).
This guide will show you how to control randomness for deterministic generation on a CPU and GPU.
> [!TIP]
> We strongly recommend reading PyTorch's [statement about reproducibility](https://pytorch.org/docs/stable/notes/randomness.html):
>
> "Completely reproducible results are not guaranteed across PyTorch releases, individual commits, or different platforms. Furthermore, results may not be reproducible between CPU and GPU executions, even when using identical seeds."
## Control randomness
During inference, pipelines rely heavily on random sampling operations which include creating the
Gaussian noise tensors to denoise and adding noise to the scheduling step.
Take a look at the tensor values in the [DDIMPipeline](/docs/diffusers/main/en/api/pipelines/ddim#diffusers.DDIMPipeline) after two inference steps.
```python
from diffusers import DDIMPipeline
import numpy as np
ddim = DDIMPipeline.from_pretrained( "google/ddpm-cifar10-32", use_safetensors=True)
image = ddim(num_inference_steps=2, output_type="np").images
print(np.abs(image).sum())
```
Running the code above prints one value, but if you run it again you get a different value.
Each time the pipeline is run, [torch.randn](https://pytorch.org/docs/stable/generated/torch.randn.html) uses a different random seed to create the Gaussian noise tensors. This leads to a different result each time it is run and enables the diffusion pipeline to generate a different random image each time.
But if you need to reliably generate the same image, that depends on whether you're running the pipeline on a CPU or GPU.
> [!TIP]
> It might seem unintuitive to pass `Generator` objects to a pipeline instead of the integer value representing the seed. However, this is the recommended design when working with probabilistic models in PyTorch because a `Generator` is a *random state* that can be passed to multiple pipelines in a sequence. As soon as the `Generator` is consumed, the *state* is changed in place which means even if you passed the same `Generator` to a different pipeline, it won't produce the same result because the state is already changed.
To generate reproducible results on a CPU, you'll need to use a PyTorch [Generator](https://pytorch.org/docs/stable/generated/torch.Generator.html) and set a seed. Now when you run the code, it always prints a value of `1491.1711` because the `Generator` object with the seed is passed to all the random functions in the pipeline. You should get a similar, if not the same, result on whatever hardware and PyTorch version you're using.
```python
import torch
import numpy as np
from diffusers import DDIMPipeline
ddim = DDIMPipeline.from_pretrained("google/ddpm-cifar10-32", use_safetensors=True)
generator = torch.Generator(device="cpu").manual_seed(0)
image = ddim(num_inference_steps=2, output_type="np", generator=generator).images
print(np.abs(image).sum())
```
Writing a reproducible pipeline on a GPU is a bit trickier, and full reproducibility across different hardware is not guaranteed because matrix multiplication - which diffusion pipelines require a lot of - is less deterministic on a GPU than a CPU. For example, if you run the same code example from the CPU example, you'll get a different result even though the seed is identical. This is because the GPU uses a different random number generator than the CPU.
```python
import torch
import numpy as np
from diffusers import DDIMPipeline
ddim = DDIMPipeline.from_pretrained("google/ddpm-cifar10-32", use_safetensors=True)
ddim.to("cuda")
generator = torch.Generator(device="cuda").manual_seed(0)
image = ddim(num_inference_steps=2, output_type="np", generator=generator).images
print(np.abs(image).sum())
```
To avoid this issue, Diffusers has a [randn_tensor()](/docs/diffusers/main/en/api/utilities#diffusers.utils.torch_utils.randn_tensor) function for creating random noise on the CPU, and then moving the tensor to a GPU if necessary. The [randn_tensor()](/docs/diffusers/main/en/api/utilities#diffusers.utils.torch_utils.randn_tensor) function is used everywhere inside the pipeline. Now you can call [torch.manual_seed](https://pytorch.org/docs/stable/generated/torch.manual_seed.html) which automatically creates a CPU `Generator` that can be passed to the pipeline even if it is being run on a GPU.
```python
import torch
import numpy as np
from diffusers import DDIMPipeline
ddim = DDIMPipeline.from_pretrained("google/ddpm-cifar10-32", use_safetensors=True)
ddim.to("cuda")
generator = torch.manual_seed(0)
image = ddim(num_inference_steps=2, output_type="np", generator=generator).images
print(np.abs(image).sum())
```
> [!TIP]
> If reproducibility is important to your use case, we recommend always passing a CPU `Generator`. The performance loss is often negligible and you'll generate more similar values than if the pipeline had been run on a GPU.
Finally, more complex pipelines such as [UnCLIPPipeline](/docs/diffusers/main/en/api/pipelines/unclip#diffusers.UnCLIPPipeline), are often extremely
susceptible to precision error propagation. You'll need to use
exactly the same hardware and PyTorch version for full reproducibility.
## Deterministic algorithms
You can also configure PyTorch to use deterministic algorithms to create a reproducible pipeline. The downside is that deterministic algorithms may be slower than non-deterministic ones and you may observe a decrease in performance.
Non-deterministic behavior occurs when operations are launched in more than one CUDA stream. To avoid this, set the environment variable [CUBLAS_WORKSPACE_CONFIG](https://docs.nvidia.com/cuda/cublas/index.html#results-reproducibility) to `:16:8` to only use one buffer size during runtime.
PyTorch typically benchmarks multiple algorithms to select the fastest one, but if you want reproducibility, you should disable this feature because the benchmark may select different algorithms each time. Set Diffusers [enable_full_determinism](https://github.com/huggingface/diffusers/blob/142f353e1c638ff1d20bd798402b68f72c1ebbdd/src/diffusers/utils/testing_utils.py#L861) to enable deterministic algorithms.
```py
enable_full_determinism()
```
Now when you run the same pipeline twice, you'll get identical results.
```py
import torch
from diffusers import DDIMScheduler, StableDiffusionPipeline
pipe = StableDiffusionPipeline.from_pretrained("stable-diffusion-v1-5/stable-diffusion-v1-5", use_safetensors=True).to("cuda")
pipe.scheduler = DDIMScheduler.from_config(pipe.scheduler.config)
g = torch.Generator(device="cuda")
prompt = "A bear is playing a guitar on Times Square"
g.manual_seed(0)
result1 = pipe(prompt=prompt, num_inference_steps=50, generator=g, output_type="latent").images
g.manual_seed(0)
result2 = pipe(prompt=prompt, num_inference_steps=50, generator=g, output_type="latent").images
print("L_inf dist =", abs(result1 - result2).max())
"L_inf dist = tensor(0., device='cuda:0')"
```
## Deterministic batch generation
A practical application of creating reproducible pipelines is *deterministic batch generation*. You generate a batch of images and select one image to improve with a more detailed prompt. The main idea is to pass a list of [Generator's](https://pytorch.org/docs/stable/generated/torch.Generator.html) to the pipeline and tie each `Generator` to a seed so you can reuse it.
Let's use the [stable-diffusion-v1-5/stable-diffusion-v1-5](https://huggingface.co/stable-diffusion-v1-5/stable-diffusion-v1-5) checkpoint and generate a batch of images.
```py
import torch
from diffusers import DiffusionPipeline
from diffusers.utils import make_image_grid
pipeline = DiffusionPipeline.from_pretrained(
"stable-diffusion-v1-5/stable-diffusion-v1-5", torch_dtype=torch.float16, use_safetensors=True
)
pipeline = pipeline.to("cuda")
```
Define four different `Generator`s and assign each `Generator` a seed (`0` to `3`). Then generate a batch of images and pick one to iterate on.
> [!WARNING]
> Use a list comprehension that iterates over the batch size specified in `range()` to create a unique `Generator` object for each image in the batch. If you multiply the `Generator` by the batch size integer, it only creates *one* `Generator` object that is used sequentially for each image in the batch.
>
> ```py
> [torch.Generator().manual_seed(seed)] * 4
> ```
```python
generator = [torch.Generator(device="cuda").manual_seed(i) for i in range(4)]
prompt = "Labrador in the style of Vermeer"
images = pipeline(prompt, generator=generator, num_images_per_prompt=4).images[0]
make_image_grid(images, rows=2, cols=2)
```
Let's improve the first image (you can choose any image you want) which corresponds to the `Generator` with seed `0`. Add some additional text to your prompt and then make sure you reuse the same `Generator` with seed `0`. All the generated images should resemble the first image.
```python
prompt = [prompt + t for t in [", highly realistic", ", artsy", ", trending", ", colorful"]]
generator = [torch.Generator(device="cuda").manual_seed(0) for i in range(4)]
images = pipeline(prompt, generator=generator).images
make_image_grid(images, rows=2, cols=2)
```
# Overview
The inference pipeline supports and enables a wide range of techniques that are divided into two categories:
* Pipeline functionality: these techniques modify the pipeline or extend it for other applications. For example, pipeline callbacks add new features to a pipeline and a pipeline can also be extended for distributed inference.
* Improve inference quality: these techniques increase the visual quality of the generated images. For example, you can enhance your prompts with GPT2 to create better images with lower effort.
# Image-to-image
Image-to-image is similar to [text-to-image](conditional_image_generation), but in addition to a prompt, you can also pass an initial image as a starting point for the diffusion process. The initial image is encoded to latent space and noise is added to it. Then the latent diffusion model takes a prompt and the noisy latent image, predicts the added noise, and removes the predicted noise from the initial latent image to get the new latent image. Lastly, a decoder decodes the new latent image back into an image.
With 🤗 Diffusers, this is as easy as 1-2-3:
1. Load a checkpoint into the [AutoPipelineForImage2Image](/docs/diffusers/main/en/api/pipelines/auto_pipeline#diffusers.AutoPipelineForImage2Image) class; this pipeline automatically handles loading the correct pipeline class based on the checkpoint:
```py
import torch
from diffusers import AutoPipelineForImage2Image
from diffusers.utils import load_image, make_image_grid
pipeline = AutoPipelineForImage2Image.from_pretrained(
"kandinsky-community/kandinsky-2-2-decoder", torch_dtype=torch.float16, use_safetensors=True
)
pipeline.enable_model_cpu_offload()
# remove following line if xFormers is not installed or you have PyTorch 2.0 or higher installed
pipeline.enable_xformers_memory_efficient_attention()
```
You'll notice throughout the guide, we use [enable_model_cpu_offload()](/docs/diffusers/main/en/api/pipelines/overview#diffusers.DiffusionPipeline.enable_model_cpu_offload) and [enable_xformers_memory_efficient_attention()](/docs/diffusers/main/en/api/pipelines/overview#diffusers.DiffusionPipeline.enable_xformers_memory_efficient_attention), to save memory and increase inference speed. If you're using PyTorch 2.0, then you don't need to call [enable_xformers_memory_efficient_attention()](/docs/diffusers/main/en/api/pipelines/overview#diffusers.DiffusionPipeline.enable_xformers_memory_efficient_attention) on your pipeline because it'll already be using PyTorch 2.0's native [scaled-dot product attention](../optimization/torch2.0#scaled-dot-product-attention).
2. Load an image to pass to the pipeline:
```py
init_image = load_image("https://huggingface.co/datasets/huggingface/documentation-images/resolve/main/diffusers/cat.png")
```
3. Pass a prompt and image to the pipeline to generate an image:
```py
prompt = "cat wizard, gandalf, lord of the rings, detailed, fantasy, cute, adorable, Pixar, Disney, 8k"
image = pipeline(prompt, image=init_image).images[0]
make_image_grid([init_image, image], rows=1, cols=2)
```
initial image
generated image
## Popular models
The most popular image-to-image models are [Stable Diffusion v1.5](https://huggingface.co/stable-diffusion-v1-5/stable-diffusion-v1-5), [Stable Diffusion XL (SDXL)](https://huggingface.co/stabilityai/stable-diffusion-xl-base-1.0), and [Kandinsky 2.2](https://huggingface.co/kandinsky-community/kandinsky-2-2-decoder). The results from the Stable Diffusion and Kandinsky models vary due to their architecture differences and training process; you can generally expect SDXL to produce higher quality images than Stable Diffusion v1.5. Let's take a quick look at how to use each of these models and compare their results.
### Stable Diffusion v1.5
Stable Diffusion v1.5 is a latent diffusion model initialized from an earlier checkpoint, and further finetuned for 595K steps on 512x512 images. To use this pipeline for image-to-image, you'll need to prepare an initial image to pass to the pipeline. Then you can pass a prompt and the image to the pipeline to generate a new image:
```py
import torch
from diffusers import AutoPipelineForImage2Image
from diffusers.utils import make_image_grid, load_image
pipeline = AutoPipelineForImage2Image.from_pretrained(
"stable-diffusion-v1-5/stable-diffusion-v1-5", torch_dtype=torch.float16, variant="fp16", use_safetensors=True
)
pipeline.enable_model_cpu_offload()
# remove following line if xFormers is not installed or you have PyTorch 2.0 or higher installed
pipeline.enable_xformers_memory_efficient_attention()
# prepare image
url = "https://huggingface.co/datasets/huggingface/documentation-images/resolve/main/diffusers/img2img-init.png"
init_image = load_image(url)
prompt = "Astronaut in a jungle, cold color palette, muted colors, detailed, 8k"
# pass prompt and image to pipeline
image = pipeline(prompt, image=init_image).images[0]
make_image_grid([init_image, image], rows=1, cols=2)
```
initial image
generated image
### Stable Diffusion XL (SDXL)
SDXL is a more powerful version of the Stable Diffusion model. It uses a larger base model, and an additional refiner model to increase the quality of the base model's output. Read the [SDXL](sdxl) guide for a more detailed walkthrough of how to use this model, and other techniques it uses to produce high quality images.
```py
import torch
from diffusers import AutoPipelineForImage2Image
from diffusers.utils import make_image_grid, load_image
pipeline = AutoPipelineForImage2Image.from_pretrained(
"stabilityai/stable-diffusion-xl-refiner-1.0", torch_dtype=torch.float16, variant="fp16", use_safetensors=True
)
pipeline.enable_model_cpu_offload()
# remove following line if xFormers is not installed or you have PyTorch 2.0 or higher installed
pipeline.enable_xformers_memory_efficient_attention()
# prepare image
url = "https://huggingface.co/datasets/huggingface/documentation-images/resolve/main/diffusers/img2img-sdxl-init.png"
init_image = load_image(url)
prompt = "Astronaut in a jungle, cold color palette, muted colors, detailed, 8k"
# pass prompt and image to pipeline
image = pipeline(prompt, image=init_image, strength=0.5).images[0]
make_image_grid([init_image, image], rows=1, cols=2)
```
initial image
generated image
### Kandinsky 2.2
The Kandinsky model is different from the Stable Diffusion models because it uses an image prior model to create image embeddings. The embeddings help create a better alignment between text and images, allowing the latent diffusion model to generate better images.
The simplest way to use Kandinsky 2.2 is:
```py
import torch
from diffusers import AutoPipelineForImage2Image
from diffusers.utils import make_image_grid, load_image
pipeline = AutoPipelineForImage2Image.from_pretrained(
"kandinsky-community/kandinsky-2-2-decoder", torch_dtype=torch.float16, use_safetensors=True
)
pipeline.enable_model_cpu_offload()
# remove following line if xFormers is not installed or you have PyTorch 2.0 or higher installed
pipeline.enable_xformers_memory_efficient_attention()
# prepare image
url = "https://huggingface.co/datasets/huggingface/documentation-images/resolve/main/diffusers/img2img-init.png"
init_image = load_image(url)
prompt = "Astronaut in a jungle, cold color palette, muted colors, detailed, 8k"
# pass prompt and image to pipeline
image = pipeline(prompt, image=init_image).images[0]
make_image_grid([init_image, image], rows=1, cols=2)
```
initial image
generated image
## Configure pipeline parameters
There are several important parameters you can configure in the pipeline that'll affect the image generation process and image quality. Let's take a closer look at what these parameters do and how changing them affects the output.
### Strength
`strength` is one of the most important parameters to consider and it'll have a huge impact on your generated image. It determines how much the generated image resembles the initial image. In other words:
- 📈 a higher `strength` value gives the model more "creativity" to generate an image that's different from the initial image; a `strength` value of 1.0 means the initial image is more or less ignored
- 📉 a lower `strength` value means the generated image is more similar to the initial image
The `strength` and `num_inference_steps` parameters are related because `strength` determines the number of noise steps to add. For example, if the `num_inference_steps` is 50 and `strength` is 0.8, then this means adding 40 (50 * 0.8) steps of noise to the initial image and then denoising for 40 steps to get the newly generated image.
```py
import torch
from diffusers import AutoPipelineForImage2Image
from diffusers.utils import make_image_grid, load_image
pipeline = AutoPipelineForImage2Image.from_pretrained(
"stable-diffusion-v1-5/stable-diffusion-v1-5", torch_dtype=torch.float16, variant="fp16", use_safetensors=True
)
pipeline.enable_model_cpu_offload()
# remove following line if xFormers is not installed or you have PyTorch 2.0 or higher installed
pipeline.enable_xformers_memory_efficient_attention()
# prepare image
url = "https://huggingface.co/datasets/huggingface/documentation-images/resolve/main/diffusers/img2img-init.png"
init_image = load_image(url)
prompt = "Astronaut in a jungle, cold color palette, muted colors, detailed, 8k"
# pass prompt and image to pipeline
image = pipeline(prompt, image=init_image, strength=0.8).images[0]
make_image_grid([init_image, image], rows=1, cols=2)
```
strength = 0.4
strength = 0.6
strength = 1.0
### Guidance scale
The `guidance_scale` parameter is used to control how closely aligned the generated image and text prompt are. A higher `guidance_scale` value means your generated image is more aligned with the prompt, while a lower `guidance_scale` value means your generated image has more space to deviate from the prompt.
You can combine `guidance_scale` with `strength` for even more precise control over how expressive the model is. For example, combine a high `strength + guidance_scale` for maximum creativity or use a combination of low `strength` and low `guidance_scale` to generate an image that resembles the initial image but is not as strictly bound to the prompt.
```py
import torch
from diffusers import AutoPipelineForImage2Image
from diffusers.utils import make_image_grid, load_image
pipeline = AutoPipelineForImage2Image.from_pretrained(
"stable-diffusion-v1-5/stable-diffusion-v1-5", torch_dtype=torch.float16, variant="fp16", use_safetensors=True
)
pipeline.enable_model_cpu_offload()
# remove following line if xFormers is not installed or you have PyTorch 2.0 or higher installed
pipeline.enable_xformers_memory_efficient_attention()
# prepare image
url = "https://huggingface.co/datasets/huggingface/documentation-images/resolve/main/diffusers/img2img-init.png"
init_image = load_image(url)
prompt = "Astronaut in a jungle, cold color palette, muted colors, detailed, 8k"
# pass prompt and image to pipeline
image = pipeline(prompt, image=init_image, guidance_scale=8.0).images[0]
make_image_grid([init_image, image], rows=1, cols=2)
```
guidance_scale = 0.1
guidance_scale = 5.0
guidance_scale = 10.0
### Negative prompt
A negative prompt conditions the model to *not* include things in an image, and it can be used to improve image quality or modify an image. For example, you can improve image quality by including negative prompts like "poor details" or "blurry" to encourage the model to generate a higher quality image. Or you can modify an image by specifying things to exclude from an image.
```py
import torch
from diffusers import AutoPipelineForImage2Image
from diffusers.utils import make_image_grid, load_image
pipeline = AutoPipelineForImage2Image.from_pretrained(
"stabilityai/stable-diffusion-xl-refiner-1.0", torch_dtype=torch.float16, variant="fp16", use_safetensors=True
)
pipeline.enable_model_cpu_offload()
# remove following line if xFormers is not installed or you have PyTorch 2.0 or higher installed
pipeline.enable_xformers_memory_efficient_attention()
# prepare image
url = "https://huggingface.co/datasets/huggingface/documentation-images/resolve/main/diffusers/img2img-init.png"
init_image = load_image(url)
prompt = "Astronaut in a jungle, cold color palette, muted colors, detailed, 8k"
negative_prompt = "ugly, deformed, disfigured, poor details, bad anatomy"
# pass prompt and image to pipeline
image = pipeline(prompt, negative_prompt=negative_prompt, image=init_image).images[0]
make_image_grid([init_image, image], rows=1, cols=2)
```
negative_prompt = "ugly, deformed, disfigured, poor details, bad anatomy"
negative_prompt = "jungle"
## Chained image-to-image pipelines
There are some other interesting ways you can use an image-to-image pipeline aside from just generating an image (although that is pretty cool too). You can take it a step further and chain it with other pipelines.
### Text-to-image-to-image
Chaining a text-to-image and image-to-image pipeline allows you to generate an image from text and use the generated image as the initial image for the image-to-image pipeline. This is useful if you want to generate an image entirely from scratch. For example, let's chain a Stable Diffusion and a Kandinsky model.
Start by generating an image with the text-to-image pipeline:
```py
from diffusers import AutoPipelineForText2Image, AutoPipelineForImage2Image
import torch
from diffusers.utils import make_image_grid
pipeline = AutoPipelineForText2Image.from_pretrained(
"stable-diffusion-v1-5/stable-diffusion-v1-5", torch_dtype=torch.float16, variant="fp16", use_safetensors=True
)
pipeline.enable_model_cpu_offload()
# remove following line if xFormers is not installed or you have PyTorch 2.0 or higher installed
pipeline.enable_xformers_memory_efficient_attention()
text2image = pipeline("Astronaut in a jungle, cold color palette, muted colors, detailed, 8k").images[0]
text2image
```
Now you can pass this generated image to the image-to-image pipeline:
```py
pipeline = AutoPipelineForImage2Image.from_pretrained(
"kandinsky-community/kandinsky-2-2-decoder", torch_dtype=torch.float16, use_safetensors=True
)
pipeline.enable_model_cpu_offload()
# remove following line if xFormers is not installed or you have PyTorch 2.0 or higher installed
pipeline.enable_xformers_memory_efficient_attention()
image2image = pipeline("Astronaut in a jungle, cold color palette, muted colors, detailed, 8k", image=text2image).images[0]
make_image_grid([text2image, image2image], rows=1, cols=2)
```
### Image-to-image-to-image
You can also chain multiple image-to-image pipelines together to create more interesting images. This can be useful for iteratively performing style transfer on an image, generating short GIFs, restoring color to an image, or restoring missing areas of an image.
Start by generating an image:
```py
import torch
from diffusers import AutoPipelineForImage2Image
from diffusers.utils import make_image_grid, load_image
pipeline = AutoPipelineForImage2Image.from_pretrained(
"stable-diffusion-v1-5/stable-diffusion-v1-5", torch_dtype=torch.float16, variant="fp16", use_safetensors=True
)
pipeline.enable_model_cpu_offload()
# remove following line if xFormers is not installed or you have PyTorch 2.0 or higher installed
pipeline.enable_xformers_memory_efficient_attention()
# prepare image
url = "https://huggingface.co/datasets/huggingface/documentation-images/resolve/main/diffusers/img2img-init.png"
init_image = load_image(url)
prompt = "Astronaut in a jungle, cold color palette, muted colors, detailed, 8k"
# pass prompt and image to pipeline
image = pipeline(prompt, image=init_image, output_type="latent").images[0]
```
It is important to specify `output_type="latent"` in the pipeline to keep all the outputs in latent space to avoid an unnecessary decode-encode step. This only works if the chained pipelines are using the same VAE.
Pass the latent output from this pipeline to the next pipeline to generate an image in a [comic book art style](https://huggingface.co/ogkalu/Comic-Diffusion):
```py
pipeline = AutoPipelineForImage2Image.from_pretrained(
"ogkalu/Comic-Diffusion", torch_dtype=torch.float16
)
pipeline.enable_model_cpu_offload()
# remove following line if xFormers is not installed or you have PyTorch 2.0 or higher installed
pipeline.enable_xformers_memory_efficient_attention()
# need to include the token "charliebo artstyle" in the prompt to use this checkpoint
image = pipeline("Astronaut in a jungle, charliebo artstyle", image=image, output_type="latent").images[0]
```
Repeat one more time to generate the final image in a [pixel art style](https://huggingface.co/kohbanye/pixel-art-style):
```py
pipeline = AutoPipelineForImage2Image.from_pretrained(
"kohbanye/pixel-art-style", torch_dtype=torch.float16
)
pipeline.enable_model_cpu_offload()
# remove following line if xFormers is not installed or you have PyTorch 2.0 or higher installed
pipeline.enable_xformers_memory_efficient_attention()
# need to include the token "pixelartstyle" in the prompt to use this checkpoint
image = pipeline("Astronaut in a jungle, pixelartstyle", image=image).images[0]
make_image_grid([init_image, image], rows=1, cols=2)
```
### Image-to-upscaler-to-super-resolution
Another way you can chain your image-to-image pipeline is with an upscaler and super-resolution pipeline to really increase the level of details in an image.
Start with an image-to-image pipeline:
```py
import torch
from diffusers import AutoPipelineForImage2Image
from diffusers.utils import make_image_grid, load_image
pipeline = AutoPipelineForImage2Image.from_pretrained(
"stable-diffusion-v1-5/stable-diffusion-v1-5", torch_dtype=torch.float16, variant="fp16", use_safetensors=True
)
pipeline.enable_model_cpu_offload()
# remove following line if xFormers is not installed or you have PyTorch 2.0 or higher installed
pipeline.enable_xformers_memory_efficient_attention()
# prepare image
url = "https://huggingface.co/datasets/huggingface/documentation-images/resolve/main/diffusers/img2img-init.png"
init_image = load_image(url)
prompt = "Astronaut in a jungle, cold color palette, muted colors, detailed, 8k"
# pass prompt and image to pipeline
image_1 = pipeline(prompt, image=init_image, output_type="latent").images[0]
```
It is important to specify `output_type="latent"` in the pipeline to keep all the outputs in *latent* space to avoid an unnecessary decode-encode step. This only works if the chained pipelines are using the same VAE.
Chain it to an upscaler pipeline to increase the image resolution:
```py
from diffusers import StableDiffusionLatentUpscalePipeline
upscaler = StableDiffusionLatentUpscalePipeline.from_pretrained(
"stabilityai/sd-x2-latent-upscaler", torch_dtype=torch.float16, variant="fp16", use_safetensors=True
)
upscaler.enable_model_cpu_offload()
upscaler.enable_xformers_memory_efficient_attention()
image_2 = upscaler(prompt, image=image_1, output_type="latent").images[0]
```
Finally, chain it to a super-resolution pipeline to further enhance the resolution:
```py
from diffusers import StableDiffusionUpscalePipeline
super_res = StableDiffusionUpscalePipeline.from_pretrained(
"stabilityai/stable-diffusion-x4-upscaler", torch_dtype=torch.float16, variant="fp16", use_safetensors=True
)
super_res.enable_model_cpu_offload()
super_res.enable_xformers_memory_efficient_attention()
image_3 = super_res(prompt, image=image_2).images[0]
make_image_grid([init_image, image_3.resize((512, 512))], rows=1, cols=2)
```
## Control image generation
Trying to generate an image that looks exactly the way you want can be difficult, which is why controlled generation techniques and models are so useful. While you can use the `negative_prompt` to partially control image generation, there are more robust methods like prompt weighting and ControlNets.
### Prompt weighting
Prompt weighting allows you to scale the representation of each concept in a prompt. For example, in a prompt like "Astronaut in a jungle, cold color palette, muted colors, detailed, 8k", you can choose to increase or decrease the embeddings of "astronaut" and "jungle". The [Compel](https://github.com/damian0815/compel) library provides a simple syntax for adjusting prompt weights and generating the embeddings. You can learn how to create the embeddings in the [Prompt weighting](weighted_prompts) guide.
[AutoPipelineForImage2Image](/docs/diffusers/main/en/api/pipelines/auto_pipeline#diffusers.AutoPipelineForImage2Image) has a `prompt_embeds` (and `negative_prompt_embeds` if you're using a negative prompt) parameter where you can pass the embeddings which replaces the `prompt` parameter.
```py
from diffusers import AutoPipelineForImage2Image
import torch
pipeline = AutoPipelineForImage2Image.from_pretrained(
"stable-diffusion-v1-5/stable-diffusion-v1-5", torch_dtype=torch.float16, variant="fp16", use_safetensors=True
)
pipeline.enable_model_cpu_offload()
# remove following line if xFormers is not installed or you have PyTorch 2.0 or higher installed
pipeline.enable_xformers_memory_efficient_attention()
image = pipeline(prompt_embeds=prompt_embeds, # generated from Compel
negative_prompt_embeds=negative_prompt_embeds, # generated from Compel
image=init_image,
).images[0]
```
### ControlNet
ControlNets provide a more flexible and accurate way to control image generation because you can use an additional conditioning image. The conditioning image can be a canny image, depth map, image segmentation, and even scribbles! Whatever type of conditioning image you choose, the ControlNet generates an image that preserves the information in it.
For example, let's condition an image with a depth map to keep the spatial information in the image.
```py
from diffusers.utils import load_image, make_image_grid
# prepare image
url = "https://huggingface.co/datasets/huggingface/documentation-images/resolve/main/diffusers/img2img-init.png"
init_image = load_image(url)
init_image = init_image.resize((958, 960)) # resize to depth image dimensions
depth_image = load_image("https://huggingface.co/lllyasviel/control_v11f1p_sd15_depth/resolve/main/images/control.png")
make_image_grid([init_image, depth_image], rows=1, cols=2)
```
Load a ControlNet model conditioned on depth maps and the [AutoPipelineForImage2Image](/docs/diffusers/main/en/api/pipelines/auto_pipeline#diffusers.AutoPipelineForImage2Image):
```py
from diffusers import ControlNetModel, AutoPipelineForImage2Image
import torch
controlnet = ControlNetModel.from_pretrained("lllyasviel/control_v11f1p_sd15_depth", torch_dtype=torch.float16, variant="fp16", use_safetensors=True)
pipeline = AutoPipelineForImage2Image.from_pretrained(
"stable-diffusion-v1-5/stable-diffusion-v1-5", controlnet=controlnet, torch_dtype=torch.float16, variant="fp16", use_safetensors=True
)
pipeline.enable_model_cpu_offload()
# remove following line if xFormers is not installed or you have PyTorch 2.0 or higher installed
pipeline.enable_xformers_memory_efficient_attention()
```
Now generate a new image conditioned on the depth map, initial image, and prompt:
```py
prompt = "Astronaut in a jungle, cold color palette, muted colors, detailed, 8k"
image_control_net = pipeline(prompt, image=init_image, control_image=depth_image).images[0]
make_image_grid([init_image, depth_image, image_control_net], rows=1, cols=3)
```
initial image
depth image
ControlNet image
Let's apply a new [style](https://huggingface.co/nitrosocke/elden-ring-diffusion) to the image generated from the ControlNet by chaining it with an image-to-image pipeline:
```py
pipeline = AutoPipelineForImage2Image.from_pretrained(
"nitrosocke/elden-ring-diffusion", torch_dtype=torch.float16,
)
pipeline.enable_model_cpu_offload()
# remove following line if xFormers is not installed or you have PyTorch 2.0 or higher installed
pipeline.enable_xformers_memory_efficient_attention()
prompt = "elden ring style astronaut in a jungle" # include the token "elden ring style" in the prompt
negative_prompt = "ugly, deformed, disfigured, poor details, bad anatomy"
image_elden_ring = pipeline(prompt, negative_prompt=negative_prompt, image=image_control_net, strength=0.45, guidance_scale=10.5).images[0]
make_image_grid([init_image, depth_image, image_control_net, image_elden_ring], rows=2, cols=2)
```
## Optimize
Running diffusion models is computationally expensive and intensive, but with a few optimization tricks, it is entirely possible to run them on consumer and free-tier GPUs. For example, you can use a more memory-efficient form of attention such as PyTorch 2.0's [scaled-dot product attention](../optimization/torch2.0#scaled-dot-product-attention) or [xFormers](../optimization/xformers) (you can use one or the other, but there's no need to use both). You can also offload the model to the GPU while the other pipeline components wait on the CPU.
```diff
+ pipeline.enable_model_cpu_offload()
+ pipeline.enable_xformers_memory_efficient_attention()
```
With [`torch.compile`](../optimization/torch2.0#torchcompile), you can boost your inference speed even more by wrapping your UNet with it:
```py
pipeline.unet = torch.compile(pipeline.unet, mode="reduce-overhead", fullgraph=True)
```
To learn more, take a look at the [Reduce memory usage](../optimization/memory) and [Torch 2.0](../optimization/torch2.0) guides.
# Stable Diffusion XL
[Stable Diffusion XL](https://huggingface.co/papers/2307.01952) (SDXL) is a powerful text-to-image generation model that iterates on the previous Stable Diffusion models in three key ways:
1. the UNet is 3x larger and SDXL combines a second text encoder (OpenCLIP ViT-bigG/14) with the original text encoder to significantly increase the number of parameters
2. introduces size and crop-conditioning to preserve training data from being discarded and gain more control over how a generated image should be cropped
3. introduces a two-stage model process; the *base* model (can also be run as a standalone model) generates an image as an input to the *refiner* model which adds additional high-quality details
This guide will show you how to use SDXL for text-to-image, image-to-image, and inpainting.
Before you begin, make sure you have the following libraries installed:
```py
# uncomment to install the necessary libraries in Colab
#!pip install -q diffusers transformers accelerate invisible-watermark>=0.2.0
```
We recommend installing the [invisible-watermark](https://pypi.org/project/invisible-watermark/) library to help identify images that are generated. If the invisible-watermark library is installed, it is used by default. To disable the watermarker:
```py
pipeline = StableDiffusionXLPipeline.from_pretrained(..., add_watermarker=False)
```
## Load model checkpoints
Model weights may be stored in separate subfolders on the Hub or locally, in which case, you should use the [from_pretrained()](/docs/diffusers/main/en/api/pipelines/overview#diffusers.DiffusionPipeline.from_pretrained) method:
```py
from diffusers import StableDiffusionXLPipeline, StableDiffusionXLImg2ImgPipeline
import torch
pipeline = StableDiffusionXLPipeline.from_pretrained(
"stabilityai/stable-diffusion-xl-base-1.0", torch_dtype=torch.float16, variant="fp16", use_safetensors=True
).to("cuda")
refiner = StableDiffusionXLImg2ImgPipeline.from_pretrained(
"stabilityai/stable-diffusion-xl-refiner-1.0", torch_dtype=torch.float16, use_safetensors=True, variant="fp16"
).to("cuda")
```
You can also use the [from_single_file()](/docs/diffusers/main/en/api/loaders/single_file#diffusers.loaders.FromSingleFileMixin.from_single_file) method to load a model checkpoint stored in a single file format (`.ckpt` or `.safetensors`) from the Hub or locally:
```py
from diffusers import StableDiffusionXLPipeline, StableDiffusionXLImg2ImgPipeline
import torch
pipeline = StableDiffusionXLPipeline.from_single_file(
"https://huggingface.co/stabilityai/stable-diffusion-xl-base-1.0/blob/main/sd_xl_base_1.0.safetensors",
torch_dtype=torch.float16
).to("cuda")
refiner = StableDiffusionXLImg2ImgPipeline.from_single_file(
"https://huggingface.co/stabilityai/stable-diffusion-xl-refiner-1.0/blob/main/sd_xl_refiner_1.0.safetensors", torch_dtype=torch.float16
).to("cuda")
```
## Text-to-image
For text-to-image, pass a text prompt. By default, SDXL generates a 1024x1024 image for the best results. You can try setting the `height` and `width` parameters to 768x768 or 512x512, but anything below 512x512 is not likely to work.
```py
from diffusers import AutoPipelineForText2Image
import torch
pipeline_text2image = AutoPipelineForText2Image.from_pretrained(
"stabilityai/stable-diffusion-xl-base-1.0", torch_dtype=torch.float16, variant="fp16", use_safetensors=True
).to("cuda")
prompt = "Astronaut in a jungle, cold color palette, muted colors, detailed, 8k"
image = pipeline_text2image(prompt=prompt).images[0]
image
```
## Image-to-image
For image-to-image, SDXL works especially well with image sizes between 768x768 and 1024x1024. Pass an initial image, and a text prompt to condition the image with:
```py
from diffusers import AutoPipelineForImage2Image
from diffusers.utils import load_image, make_image_grid
# use from_pipe to avoid consuming additional memory when loading a checkpoint
pipeline = AutoPipelineForImage2Image.from_pipe(pipeline_text2image).to("cuda")
url = "https://huggingface.co/datasets/huggingface/documentation-images/resolve/main/diffusers/sdxl-text2img.png"
init_image = load_image(url)
prompt = "a dog catching a frisbee in the jungle"
image = pipeline(prompt, image=init_image, strength=0.8, guidance_scale=10.5).images[0]
make_image_grid([init_image, image], rows=1, cols=2)
```
## Inpainting
For inpainting, you'll need the original image and a mask of what you want to replace in the original image. Create a prompt to describe what you want to replace the masked area with.
```py
from diffusers import AutoPipelineForInpainting
from diffusers.utils import load_image, make_image_grid
# use from_pipe to avoid consuming additional memory when loading a checkpoint
pipeline = AutoPipelineForInpainting.from_pipe(pipeline_text2image).to("cuda")
img_url = "https://huggingface.co/datasets/huggingface/documentation-images/resolve/main/diffusers/sdxl-text2img.png"
mask_url = "https://huggingface.co/datasets/huggingface/documentation-images/resolve/main/diffusers/sdxl-inpaint-mask.png"
init_image = load_image(img_url)
mask_image = load_image(mask_url)
prompt = "A deep sea diver floating"
image = pipeline(prompt=prompt, image=init_image, mask_image=mask_image, strength=0.85, guidance_scale=12.5).images[0]
make_image_grid([init_image, mask_image, image], rows=1, cols=3)
```
## Refine image quality
SDXL includes a [refiner model](https://huggingface.co/stabilityai/stable-diffusion-xl-refiner-1.0) specialized in denoising low-noise stage images to generate higher-quality images from the base model. There are two ways to use the refiner:
1. use the base and refiner models together to produce a refined image
2. use the base model to produce an image, and subsequently use the refiner model to add more details to the image (this is how SDXL was originally trained)
### Base + refiner model
When you use the base and refiner model together to generate an image, this is known as an [*ensemble of expert denoisers*](https://research.nvidia.com/labs/dir/eDiff-I/). The ensemble of expert denoisers approach requires fewer overall denoising steps versus passing the base model's output to the refiner model, so it should be significantly faster to run. However, you won't be able to inspect the base model's output because it still contains a large amount of noise.
As an ensemble of expert denoisers, the base model serves as the expert during the high-noise diffusion stage and the refiner model serves as the expert during the low-noise diffusion stage. Load the base and refiner model:
```py
from diffusers import DiffusionPipeline
import torch
base = DiffusionPipeline.from_pretrained(
"stabilityai/stable-diffusion-xl-base-1.0", torch_dtype=torch.float16, variant="fp16", use_safetensors=True
).to("cuda")
refiner = DiffusionPipeline.from_pretrained(
"stabilityai/stable-diffusion-xl-refiner-1.0",
text_encoder_2=base.text_encoder_2,
vae=base.vae,
torch_dtype=torch.float16,
use_safetensors=True,
variant="fp16",
).to("cuda")
```
To use this approach, you need to define the number of timesteps for each model to run through their respective stages. For the base model, this is controlled by the [`denoising_end`](https://huggingface.co/docs/diffusers/main/en/api/pipelines/stable_diffusion/stable_diffusion_xl#diffusers.StableDiffusionXLPipeline.__call__.denoising_end) parameter and for the refiner model, it is controlled by the [`denoising_start`](https://huggingface.co/docs/diffusers/main/en/api/pipelines/stable_diffusion/stable_diffusion_xl#diffusers.StableDiffusionXLImg2ImgPipeline.__call__.denoising_start) parameter.
The `denoising_end` and `denoising_start` parameters should be a float between 0 and 1. These parameters are represented as a proportion of discrete timesteps as defined by the scheduler. If you're also using the `strength` parameter, it'll be ignored because the number of denoising steps is determined by the discrete timesteps the model is trained on and the declared fractional cutoff.
Let's set `denoising_end=0.8` so the base model performs the first 80% of denoising the **high-noise** timesteps and set `denoising_start=0.8` so the refiner model performs the last 20% of denoising the **low-noise** timesteps. The base model output should be in **latent** space instead of a PIL image.
```py
prompt = "A majestic lion jumping from a big stone at night"
image = base(
prompt=prompt,
num_inference_steps=40,
denoising_end=0.8,
output_type="latent",
).images
image = refiner(
prompt=prompt,
num_inference_steps=40,
denoising_start=0.8,
image=image,
).images[0]
image
```
default base model
ensemble of expert denoisers
The refiner model can also be used for inpainting in the [StableDiffusionXLInpaintPipeline](/docs/diffusers/main/en/api/pipelines/stable_diffusion/stable_diffusion_xl#diffusers.StableDiffusionXLInpaintPipeline):
```py
from diffusers import StableDiffusionXLInpaintPipeline
from diffusers.utils import load_image, make_image_grid
import torch
base = StableDiffusionXLInpaintPipeline.from_pretrained(
"stabilityai/stable-diffusion-xl-base-1.0", torch_dtype=torch.float16, variant="fp16", use_safetensors=True
).to("cuda")
refiner = StableDiffusionXLInpaintPipeline.from_pretrained(
"stabilityai/stable-diffusion-xl-refiner-1.0",
text_encoder_2=base.text_encoder_2,
vae=base.vae,
torch_dtype=torch.float16,
use_safetensors=True,
variant="fp16",
).to("cuda")
img_url = "https://raw.githubusercontent.com/CompVis/latent-diffusion/main/data/inpainting_examples/overture-creations-5sI6fQgYIuo.png"
mask_url = "https://raw.githubusercontent.com/CompVis/latent-diffusion/main/data/inpainting_examples/overture-creations-5sI6fQgYIuo_mask.png"
init_image = load_image(img_url)
mask_image = load_image(mask_url)
prompt = "A majestic tiger sitting on a bench"
num_inference_steps = 75
high_noise_frac = 0.7
image = base(
prompt=prompt,
image=init_image,
mask_image=mask_image,
num_inference_steps=num_inference_steps,
denoising_end=high_noise_frac,
output_type="latent",
).images
image = refiner(
prompt=prompt,
image=image,
mask_image=mask_image,
num_inference_steps=num_inference_steps,
denoising_start=high_noise_frac,
).images[0]
make_image_grid([init_image, mask_image, image.resize((512, 512))], rows=1, cols=3)
```
This ensemble of expert denoisers method works well for all available schedulers!
### Base to refiner model
SDXL gets a boost in image quality by using the refiner model to add additional high-quality details to the fully-denoised image from the base model, in an image-to-image setting.
Load the base and refiner models:
```py
from diffusers import DiffusionPipeline
import torch
base = DiffusionPipeline.from_pretrained(
"stabilityai/stable-diffusion-xl-base-1.0", torch_dtype=torch.float16, variant="fp16", use_safetensors=True
).to("cuda")
refiner = DiffusionPipeline.from_pretrained(
"stabilityai/stable-diffusion-xl-refiner-1.0",
text_encoder_2=base.text_encoder_2,
vae=base.vae,
torch_dtype=torch.float16,
use_safetensors=True,
variant="fp16",
).to("cuda")
```
You can use SDXL refiner with a different base model. For example, you can use the [Hunyuan-DiT](../../api/pipelines/hunyuandit) or [PixArt-Sigma](../../api/pipelines/pixart_sigma) pipelines to generate images with better prompt adherence. Once you have generated an image, you can pass it to the SDXL refiner model to enhance final generation quality.
Generate an image from the base model, and set the model output to **latent** space:
```py
prompt = "Astronaut in a jungle, cold color palette, muted colors, detailed, 8k"
image = base(prompt=prompt, output_type="latent").images[0]
```
Pass the generated image to the refiner model:
```py
image = refiner(prompt=prompt, image=image[None, :]).images[0]
```
base model
base model + refiner model
For inpainting, load the base and the refiner model in the [StableDiffusionXLInpaintPipeline](/docs/diffusers/main/en/api/pipelines/stable_diffusion/stable_diffusion_xl#diffusers.StableDiffusionXLInpaintPipeline), remove the `denoising_end` and `denoising_start` parameters, and choose a smaller number of inference steps for the refiner.
## Micro-conditioning
SDXL training involves several additional conditioning techniques, which are referred to as *micro-conditioning*. These include original image size, target image size, and cropping parameters. The micro-conditionings can be used at inference time to create high-quality, centered images.
You can use both micro-conditioning and negative micro-conditioning parameters thanks to classifier-free guidance. They are available in the [StableDiffusionXLPipeline](/docs/diffusers/main/en/api/pipelines/stable_diffusion/stable_diffusion_xl#diffusers.StableDiffusionXLPipeline), [StableDiffusionXLImg2ImgPipeline](/docs/diffusers/main/en/api/pipelines/stable_diffusion/stable_diffusion_xl#diffusers.StableDiffusionXLImg2ImgPipeline), [StableDiffusionXLInpaintPipeline](/docs/diffusers/main/en/api/pipelines/stable_diffusion/stable_diffusion_xl#diffusers.StableDiffusionXLInpaintPipeline), and [StableDiffusionXLControlNetPipeline](/docs/diffusers/main/en/api/pipelines/controlnet_sdxl#diffusers.StableDiffusionXLControlNetPipeline).
### Size conditioning
There are two types of size conditioning:
- [`original_size`](https://huggingface.co/docs/diffusers/main/en/api/pipelines/stable_diffusion/stable_diffusion_xl#diffusers.StableDiffusionXLPipeline.__call__.original_size) conditioning comes from upscaled images in the training batch (because it would be wasteful to discard the smaller images which make up almost 40% of the total training data). This way, SDXL learns that upscaling artifacts are not supposed to be present in high-resolution images. During inference, you can use `original_size` to indicate the original image resolution. Using the default value of `(1024, 1024)` produces higher-quality images that resemble the 1024x1024 images in the dataset. If you choose to use a lower resolution, such as `(256, 256)`, the model still generates 1024x1024 images, but they'll look like the low resolution images (simpler patterns, blurring) in the dataset.
- [`target_size`](https://huggingface.co/docs/diffusers/main/en/api/pipelines/stable_diffusion/stable_diffusion_xl#diffusers.StableDiffusionXLPipeline.__call__.target_size) conditioning comes from finetuning SDXL to support different image aspect ratios. During inference, if you use the default value of `(1024, 1024)`, you'll get an image that resembles the composition of square images in the dataset. We recommend using the same value for `target_size` and `original_size`, but feel free to experiment with other options!
🤗 Diffusers also lets you specify negative conditions about an image's size to steer generation away from certain image resolutions:
```py
from diffusers import StableDiffusionXLPipeline
import torch
pipe = StableDiffusionXLPipeline.from_pretrained(
"stabilityai/stable-diffusion-xl-base-1.0", torch_dtype=torch.float16, variant="fp16", use_safetensors=True
).to("cuda")
prompt = "Astronaut in a jungle, cold color palette, muted colors, detailed, 8k"
image = pipe(
prompt=prompt,
negative_original_size=(512, 512),
negative_target_size=(1024, 1024),
).images[0]
```
Images negatively conditioned on image resolutions of (128, 128), (256, 256), and (512, 512).
### Crop conditioning
Images generated by previous Stable Diffusion models may sometimes appear to be cropped. This is because images are actually cropped during training so that all the images in a batch have the same size. By conditioning on crop coordinates, SDXL *learns* that no cropping - coordinates `(0, 0)` - usually correlates with centered subjects and complete faces (this is the default value in 🤗 Diffusers). You can experiment with different coordinates if you want to generate off-centered compositions!
```py
from diffusers import StableDiffusionXLPipeline
import torch
pipeline = StableDiffusionXLPipeline.from_pretrained(
"stabilityai/stable-diffusion-xl-base-1.0", torch_dtype=torch.float16, variant="fp16", use_safetensors=True
).to("cuda")
prompt = "Astronaut in a jungle, cold color palette, muted colors, detailed, 8k"
image = pipeline(prompt=prompt, crops_coords_top_left=(256, 0)).images[0]
image
```
You can also specify negative cropping coordinates to steer generation away from certain cropping parameters:
```py
from diffusers import StableDiffusionXLPipeline
import torch
pipe = StableDiffusionXLPipeline.from_pretrained(
"stabilityai/stable-diffusion-xl-base-1.0", torch_dtype=torch.float16, variant="fp16", use_safetensors=True
).to("cuda")
prompt = "Astronaut in a jungle, cold color palette, muted colors, detailed, 8k"
image = pipe(
prompt=prompt,
negative_original_size=(512, 512),
negative_crops_coords_top_left=(0, 0),
negative_target_size=(1024, 1024),
).images[0]
image
```
## Use a different prompt for each text-encoder
SDXL uses two text-encoders, so it is possible to pass a different prompt to each text-encoder, which can [improve quality](https://github.com/huggingface/diffusers/issues/4004#issuecomment-1627764201). Pass your original prompt to `prompt` and the second prompt to `prompt_2` (use `negative_prompt` and `negative_prompt_2` if you're using negative prompts):
```py
from diffusers import StableDiffusionXLPipeline
import torch
pipeline = StableDiffusionXLPipeline.from_pretrained(
"stabilityai/stable-diffusion-xl-base-1.0", torch_dtype=torch.float16, variant="fp16", use_safetensors=True
).to("cuda")
# prompt is passed to OAI CLIP-ViT/L-14
prompt = "Astronaut in a jungle, cold color palette, muted colors, detailed, 8k"
# prompt_2 is passed to OpenCLIP-ViT/bigG-14
prompt_2 = "Van Gogh painting"
image = pipeline(prompt=prompt, prompt_2=prompt_2).images[0]
image
```
The dual text-encoders also support textual inversion embeddings that need to be loaded separately as explained in the [SDXL textual inversion](textual_inversion_inference#stable-diffusion-xl) section.
## Optimizations
SDXL is a large model, and you may need to optimize memory to get it to run on your hardware. Here are some tips to save memory and speed up inference.
1. Offload the model to the CPU with [enable_model_cpu_offload()](/docs/diffusers/main/en/api/pipelines/overview#diffusers.DiffusionPipeline.enable_model_cpu_offload) for out-of-memory errors:
```diff
- base.to("cuda")
- refiner.to("cuda")
+ base.enable_model_cpu_offload()
+ refiner.enable_model_cpu_offload()
```
2. Use `torch.compile` for ~20% speed-up (you need `torch>=2.0`):
```diff
+ base.unet = torch.compile(base.unet, mode="reduce-overhead", fullgraph=True)
+ refiner.unet = torch.compile(refiner.unet, mode="reduce-overhead", fullgraph=True)
```
3. Enable [xFormers](../optimization/xformers) to run SDXL if `torch<2.0`:
```diff
+ base.enable_xformers_memory_efficient_attention()
+ refiner.enable_xformers_memory_efficient_attention()
```
## Other resources
If you're interested in experimenting with a minimal version of the [UNet2DConditionModel](/docs/diffusers/main/en/api/models/unet2d-cond#diffusers.UNet2DConditionModel) used in SDXL, take a look at the [minSDXL](https://github.com/cloneofsimo/minSDXL) implementation which is written in PyTorch and directly compatible with 🤗 Diffusers.
# Marigold Pipelines for Computer Vision Tasks
[Marigold](../api/pipelines/marigold) is a novel diffusion-based dense prediction approach, and a set of pipelines for various computer vision tasks, such as monocular depth estimation.
This guide will show you how to use Marigold to obtain fast and high-quality predictions for images and videos.
Each pipeline supports one Computer Vision task, which takes an input RGB image as input and produces a *prediction* of the modality of interest, such as a depth map of the input image.
Currently, the following tasks are implemented:
| Pipeline | Predicted Modalities | Demos |
|---------------------------------------------------------------------------------------------------------------------------------------------|------------------------------------------------------------------------------------------------------------------|:--------------------------------------------------------------------------------------------------------------------------------------------------:|
| [MarigoldDepthPipeline](https://github.com/huggingface/diffusers/blob/main/src/diffusers/pipelines/marigold/pipeline_marigold_depth.py) | [Depth](https://en.wikipedia.org/wiki/Depth_map), [Disparity](https://en.wikipedia.org/wiki/Binocular_disparity) | [Fast Demo (LCM)](https://huggingface.co/spaces/prs-eth/marigold-lcm), [Slow Original Demo (DDIM)](https://huggingface.co/spaces/prs-eth/marigold) |
| [MarigoldNormalsPipeline](https://github.com/huggingface/diffusers/blob/main/src/diffusers/pipelines/marigold/pipeline_marigold_normals.py) | [Surface normals](https://en.wikipedia.org/wiki/Normal_mapping) | [Fast Demo (LCM)](https://huggingface.co/spaces/prs-eth/marigold-normals-lcm) |
The original checkpoints can be found under the [PRS-ETH](https://huggingface.co/prs-eth/) Hugging Face organization.
These checkpoints are meant to work with diffusers pipelines and the [original codebase](https://github.com/prs-eth/marigold).
The original code can also be used to train new checkpoints.
| Checkpoint | Modality | Comment |
|-----------------------------------------------------------------------------------------------|----------|--------------------------------------------------------------------------------------------------------------------------------------------------------------------------------------------------------------------------------------------------------------------------------------------------------------------------------------------------------------------------------------------------------------------------------------------------------------------------------------------------------------------------------------------------------------------------------------------------------|
| [prs-eth/marigold-v1-0](https://huggingface.co/prs-eth/marigold-v1-0) | Depth | The first Marigold Depth checkpoint, which predicts *affine-invariant depth* maps. The performance of this checkpoint in benchmarks was studied in the original [paper](https://huggingface.co/papers/2312.02145). Designed to be used with the `DDIMScheduler` at inference, it requires at least 10 steps to get reliable predictions. Affine-invariant depth prediction has a range of values in each pixel between 0 (near plane) and 1 (far plane); both planes are chosen by the model as part of the inference process. See the `MarigoldImageProcessor` reference for visualization utilities. |
| [prs-eth/marigold-depth-lcm-v1-0](https://huggingface.co/prs-eth/marigold-depth-lcm-v1-0) | Depth | The fast Marigold Depth checkpoint, fine-tuned from `prs-eth/marigold-v1-0`. Designed to be used with the `LCMScheduler` at inference, it requires as little as 1 step to get reliable predictions. The prediction reliability saturates at 4 steps and declines after that. |
| [prs-eth/marigold-normals-v0-1](https://huggingface.co/prs-eth/marigold-normals-v0-1) | Normals | A preview checkpoint for the Marigold Normals pipeline. Designed to be used with the `DDIMScheduler` at inference, it requires at least 10 steps to get reliable predictions. The surface normals predictions are unit-length 3D vectors with values in the range from -1 to 1. *This checkpoint will be phased out after the release of `v1-0` version.* |
| [prs-eth/marigold-normals-lcm-v0-1](https://huggingface.co/prs-eth/marigold-normals-lcm-v0-1) | Normals | The fast Marigold Normals checkpoint, fine-tuned from `prs-eth/marigold-normals-v0-1`. Designed to be used with the `LCMScheduler` at inference, it requires as little as 1 step to get reliable predictions. The prediction reliability saturates at 4 steps and declines after that. *This checkpoint will be phased out after the release of `v1-0` version.* |
The examples below are mostly given for depth prediction, but they can be universally applied with other supported modalities.
We showcase the predictions using the same input image of Albert Einstein generated by Midjourney.
This makes it easier to compare visualizations of the predictions across various modalities and checkpoints.
Example input image for all Marigold pipelines
### Depth Prediction Quick Start
To get the first depth prediction, load `prs-eth/marigold-depth-lcm-v1-0` checkpoint into `MarigoldDepthPipeline` pipeline, put the image through the pipeline, and save the predictions:
```python
import diffusers
import torch
pipe = diffusers.MarigoldDepthPipeline.from_pretrained(
"prs-eth/marigold-depth-lcm-v1-0", variant="fp16", torch_dtype=torch.float16
).to("cuda")
image = diffusers.utils.load_image("https://marigoldmonodepth.github.io/images/einstein.jpg")
depth = pipe(image)
vis = pipe.image_processor.visualize_depth(depth.prediction)
vis[0].save("einstein_depth.png")
depth_16bit = pipe.image_processor.export_depth_to_16bit_png(depth.prediction)
depth_16bit[0].save("einstein_depth_16bit.png")
```
The visualization function for depth `visualize_depth()` applies one of [matplotlib's colormaps](https://matplotlib.org/stable/users/explain/colors/colormaps.html) (`Spectral` by default) to map the predicted pixel values from a single-channel `[0, 1]` depth range into an RGB image.
With the `Spectral` colormap, pixels with near depth are painted red, and far pixels are assigned blue color.
The 16-bit PNG file stores the single channel values mapped linearly from the `[0, 1]` range into `[0, 65535]`.
Below are the raw and the visualized predictions; as can be seen, dark areas (mustache) are easier to distinguish in the visualization:
Predicted depth (16-bit PNG)
Predicted depth visualization (Spectral)
### Surface Normals Prediction Quick Start
Load `prs-eth/marigold-normals-lcm-v0-1` checkpoint into `MarigoldNormalsPipeline` pipeline, put the image through the pipeline, and save the predictions:
```python
import diffusers
import torch
pipe = diffusers.MarigoldNormalsPipeline.from_pretrained(
"prs-eth/marigold-normals-lcm-v0-1", variant="fp16", torch_dtype=torch.float16
).to("cuda")
image = diffusers.utils.load_image("https://marigoldmonodepth.github.io/images/einstein.jpg")
normals = pipe(image)
vis = pipe.image_processor.visualize_normals(normals.prediction)
vis[0].save("einstein_normals.png")
```
The visualization function for normals `visualize_normals()` maps the three-dimensional prediction with pixel values in the range `[-1, 1]` into an RGB image.
The visualization function supports flipping surface normals axes to make the visualization compatible with other choices of the frame of reference.
Conceptually, each pixel is painted according to the surface normal vector in the frame of reference, where `X` axis points right, `Y` axis points up, and `Z` axis points at the viewer.
Below is the visualized prediction:
Predicted surface normals visualization
In this example, the nose tip almost certainly has a point on the surface, in which the surface normal vector points straight at the viewer, meaning that its coordinates are `[0, 0, 1]`.
This vector maps to the RGB `[128, 128, 255]`, which corresponds to the violet-blue color.
Similarly, a surface normal on the cheek in the right part of the image has a large `X` component, which increases the red hue.
Points on the shoulders pointing up with a large `Y` promote green color.
### Speeding up inference
The above quick start snippets are already optimized for speed: they load the LCM checkpoint, use the `fp16` variant of weights and computation, and perform just one denoising diffusion step.
The `pipe(image)` call completes in 280ms on RTX 3090 GPU.
Internally, the input image is encoded with the Stable Diffusion VAE encoder, then the U-Net performs one denoising step, and finally, the prediction latent is decoded with the VAE decoder into pixel space.
In this case, two out of three module calls are dedicated to converting between pixel and latent space of LDM.
Because Marigold's latent space is compatible with the base Stable Diffusion, it is possible to speed up the pipeline call by more than 3x (85ms on RTX 3090) by using a [lightweight replacement of the SD VAE](../api/models/autoencoder_tiny):
```diff
import diffusers
import torch
pipe = diffusers.MarigoldDepthPipeline.from_pretrained(
"prs-eth/marigold-depth-lcm-v1-0", variant="fp16", torch_dtype=torch.float16
).to("cuda")
+ pipe.vae = diffusers.AutoencoderTiny.from_pretrained(
+ "madebyollin/taesd", torch_dtype=torch.float16
+ ).cuda()
image = diffusers.utils.load_image("https://marigoldmonodepth.github.io/images/einstein.jpg")
depth = pipe(image)
```
As suggested in [Optimizations](../optimization/torch2.0#torch.compile), adding `torch.compile` may squeeze extra performance depending on the target hardware:
```diff
import diffusers
import torch
pipe = diffusers.MarigoldDepthPipeline.from_pretrained(
"prs-eth/marigold-depth-lcm-v1-0", variant="fp16", torch_dtype=torch.float16
).to("cuda")
+ pipe.unet = torch.compile(pipe.unet, mode="reduce-overhead", fullgraph=True)
image = diffusers.utils.load_image("https://marigoldmonodepth.github.io/images/einstein.jpg")
depth = pipe(image)
```
## Qualitative Comparison with Depth Anything
With the above speed optimizations, Marigold delivers predictions with more details and faster than [Depth Anything](https://huggingface.co/docs/transformers/main/en/model_doc/depth_anything) with the largest checkpoint [LiheYoung/depth-anything-large-hf](https://huggingface.co/LiheYoung/depth-anything-large-hf):
Marigold LCM fp16 with Tiny AutoEncoder
Depth Anything Large
## Maximizing Precision and Ensembling
Marigold pipelines have a built-in ensembling mechanism combining multiple predictions from different random latents.
This is a brute-force way of improving the precision of predictions, capitalizing on the generative nature of diffusion.
The ensembling path is activated automatically when the `ensemble_size` argument is set greater than `1`.
When aiming for maximum precision, it makes sense to adjust `num_inference_steps` simultaneously with `ensemble_size`.
The recommended values vary across checkpoints but primarily depend on the scheduler type.
The effect of ensembling is particularly well-seen with surface normals:
```python
import diffusers
model_path = "prs-eth/marigold-normals-v1-0"
model_paper_kwargs = {
diffusers.schedulers.DDIMScheduler: {
"num_inference_steps": 10,
"ensemble_size": 10,
},
diffusers.schedulers.LCMScheduler: {
"num_inference_steps": 4,
"ensemble_size": 5,
},
}
image = diffusers.utils.load_image("https://marigoldmonodepth.github.io/images/einstein.jpg")
pipe = diffusers.MarigoldNormalsPipeline.from_pretrained(model_path).to("cuda")
pipe_kwargs = model_paper_kwargs[type(pipe.scheduler)]
depth = pipe(image, **pipe_kwargs)
vis = pipe.image_processor.visualize_normals(depth.prediction)
vis[0].save("einstein_normals.png")
```
Surface normals, no ensembling
Surface normals, with ensembling
As can be seen, all areas with fine-grained structurers, such as hair, got more conservative and on average more correct predictions.
Such a result is more suitable for precision-sensitive downstream tasks, such as 3D reconstruction.
## Quantitative Evaluation
To evaluate Marigold quantitatively in standard leaderboards and benchmarks (such as NYU, KITTI, and other datasets), follow the evaluation protocol outlined in the paper: load the full precision fp32 model and use appropriate values for `num_inference_steps` and `ensemble_size`.
Optionally seed randomness to ensure reproducibility. Maximizing `batch_size` will deliver maximum device utilization.
```python
import diffusers
import torch
device = "cuda"
seed = 2024
model_path = "prs-eth/marigold-v1-0"
model_paper_kwargs = {
diffusers.schedulers.DDIMScheduler: {
"num_inference_steps": 50,
"ensemble_size": 10,
},
diffusers.schedulers.LCMScheduler: {
"num_inference_steps": 4,
"ensemble_size": 10,
},
}
image = diffusers.utils.load_image("https://marigoldmonodepth.github.io/images/einstein.jpg")
generator = torch.Generator(device=device).manual_seed(seed)
pipe = diffusers.MarigoldDepthPipeline.from_pretrained(model_path).to(device)
pipe_kwargs = model_paper_kwargs[type(pipe.scheduler)]
depth = pipe(image, generator=generator, **pipe_kwargs)
# evaluate metrics
```
## Using Predictive Uncertainty
The ensembling mechanism built into Marigold pipelines combines multiple predictions obtained from different random latents.
As a side effect, it can be used to quantify epistemic (model) uncertainty; simply specify `ensemble_size` greater than 1 and set `output_uncertainty=True`.
The resulting uncertainty will be available in the `uncertainty` field of the output.
It can be visualized as follows:
```python
import diffusers
import torch
pipe = diffusers.MarigoldDepthPipeline.from_pretrained(
"prs-eth/marigold-depth-lcm-v1-0", variant="fp16", torch_dtype=torch.float16
).to("cuda")
image = diffusers.utils.load_image("https://marigoldmonodepth.github.io/images/einstein.jpg")
depth = pipe(
image,
ensemble_size=10, # any number greater than 1; higher values yield higher precision
output_uncertainty=True,
)
uncertainty = pipe.image_processor.visualize_uncertainty(depth.uncertainty)
uncertainty[0].save("einstein_depth_uncertainty.png")
```
Depth uncertainty
Surface normals uncertainty
The interpretation of uncertainty is easy: higher values (white) correspond to pixels, where the model struggles to make consistent predictions.
Evidently, the depth model is the least confident around edges with discontinuity, where the object depth changes drastically.
The surface normals model is the least confident in fine-grained structures, such as hair, and dark areas, such as the collar.
## Frame-by-frame Video Processing with Temporal Consistency
Due to Marigold's generative nature, each prediction is unique and defined by the random noise sampled for the latent initialization.
This becomes an obvious drawback compared to traditional end-to-end dense regression networks, as exemplified in the following videos:
Input video
Marigold Depth applied to input video frames independently
To address this issue, it is possible to pass `latents` argument to the pipelines, which defines the starting point of diffusion.
Empirically, we found that a convex combination of the very same starting point noise latent and the latent corresponding to the previous frame prediction give sufficiently smooth results, as implemented in the snippet below:
```python
import imageio
from PIL import Image
from tqdm import tqdm
import diffusers
import torch
device = "cuda"
path_in = "obama.mp4"
path_out = "obama_depth.gif"
pipe = diffusers.MarigoldDepthPipeline.from_pretrained(
"prs-eth/marigold-depth-lcm-v1-0", variant="fp16", torch_dtype=torch.float16
).to(device)
pipe.vae = diffusers.AutoencoderTiny.from_pretrained(
"madebyollin/taesd", torch_dtype=torch.float16
).to(device)
pipe.set_progress_bar_config(disable=True)
with imageio.get_reader(path_in) as reader:
size = reader.get_meta_data()['size']
last_frame_latent = None
latent_common = torch.randn(
(1, 4, 768 * size[1] // (8 * max(size)), 768 * size[0] // (8 * max(size)))
).to(device=device, dtype=torch.float16)
out = []
for frame_id, frame in tqdm(enumerate(reader), desc="Processing Video"):
frame = Image.fromarray(frame)
latents = latent_common
if last_frame_latent is not None:
latents = 0.9 * latents + 0.1 * last_frame_latent
depth = pipe(
frame, match_input_resolution=False, latents=latents, output_latent=True
)
last_frame_latent = depth.latent
out.append(pipe.image_processor.visualize_depth(depth.prediction)[0])
diffusers.utils.export_to_gif(out, path_out, fps=reader.get_meta_data()['fps'])
```
Here, the diffusion process starts from the given computed latent.
The pipeline sets `output_latent=True` to access `out.latent` and computes its contribution to the next frame's latent initialization.
The result is much more stable now:
Marigold Depth applied to input video frames independently
Marigold Depth with forced latents initialization
## Marigold for ControlNet
A very common application for depth prediction with diffusion models comes in conjunction with ControlNet.
Depth crispness plays a crucial role in obtaining high-quality results from ControlNet.
As seen in comparisons with other methods above, Marigold excels at that task.
The snippet below demonstrates how to load an image, compute depth, and pass it into ControlNet in a compatible format:
```python
import torch
import diffusers
device = "cuda"
generator = torch.Generator(device=device).manual_seed(2024)
image = diffusers.utils.load_image(
"https://huggingface.co/datasets/huggingface/documentation-images/resolve/main/diffusers/controlnet_depth_source.png"
)
pipe = diffusers.MarigoldDepthPipeline.from_pretrained(
"prs-eth/marigold-depth-lcm-v1-0", torch_dtype=torch.float16, variant="fp16"
).to(device)
depth_image = pipe(image, generator=generator).prediction
depth_image = pipe.image_processor.visualize_depth(depth_image, color_map="binary")
depth_image[0].save("motorcycle_controlnet_depth.png")
controlnet = diffusers.ControlNetModel.from_pretrained(
"diffusers/controlnet-depth-sdxl-1.0", torch_dtype=torch.float16, variant="fp16"
).to(device)
pipe = diffusers.StableDiffusionXLControlNetPipeline.from_pretrained(
"SG161222/RealVisXL_V4.0", torch_dtype=torch.float16, variant="fp16", controlnet=controlnet
).to(device)
pipe.scheduler = diffusers.DPMSolverMultistepScheduler.from_config(pipe.scheduler.config, use_karras_sigmas=True)
controlnet_out = pipe(
prompt="high quality photo of a sports bike, city",
negative_prompt="",
guidance_scale=6.5,
num_inference_steps=25,
image=depth_image,
controlnet_conditioning_scale=0.7,
control_guidance_end=0.7,
generator=generator,
).images
controlnet_out[0].save("motorcycle_controlnet_out.png")
```
Input image
Depth in the format compatible with ControlNet
ControlNet generation, conditioned on depth and prompt: "high quality photo of a sports bike, city"
Hopefully, you will find Marigold useful for solving your downstream tasks, be it a part of a more broad generative workflow, or a perception task, such as 3D reconstruction.
# JAX/Flax
🤗 Diffusers supports Flax for super fast inference on Google TPUs, such as those available in Colab, Kaggle or Google Cloud Platform. This guide shows you how to run inference with Stable Diffusion using JAX/Flax.
Before you begin, make sure you have the necessary libraries installed:
```py
# uncomment to install the necessary libraries in Colab
#!pip install -q jax==0.3.25 jaxlib==0.3.25 flax transformers ftfy
#!pip install -q diffusers
```
You should also make sure you're using a TPU backend. While JAX does not run exclusively on TPUs, you'll get the best performance on a TPU because each server has 8 TPU accelerators working in parallel.
If you are running this guide in Colab, select *Runtime* in the menu above, select the option *Change runtime type*, and then select *TPU* under the *Hardware accelerator* setting. Import JAX and quickly check whether you're using a TPU:
```python
import jax
import jax.tools.colab_tpu
jax.tools.colab_tpu.setup_tpu()
num_devices = jax.device_count()
device_type = jax.devices()[0].device_kind
print(f"Found {num_devices} JAX devices of type {device_type}.")
assert (
"TPU" in device_type,
"Available device is not a TPU, please select TPU from Runtime > Change runtime type > Hardware accelerator"
)
# Found 8 JAX devices of type Cloud TPU.
```
Great, now you can import the rest of the dependencies you'll need:
```python
import jax.numpy as jnp
from jax import pmap
from flax.jax_utils import replicate
from flax.training.common_utils import shard
from diffusers import FlaxStableDiffusionPipeline
```
## Load a model
Flax is a functional framework, so models are stateless and parameters are stored outside of them. Loading a pretrained Flax pipeline returns *both* the pipeline and the model weights (or parameters). In this guide, you'll use `bfloat16`, a more efficient half-float type that is supported by TPUs (you can also use `float32` for full precision if you want).
```python
dtype = jnp.bfloat16
pipeline, params = FlaxStableDiffusionPipeline.from_pretrained(
"CompVis/stable-diffusion-v1-4",
variant="bf16",
dtype=dtype,
)
```
## Inference
TPUs usually have 8 devices working in parallel, so let's use the same prompt for each device. This means you can perform inference on 8 devices at once, with each device generating one image. As a result, you'll get 8 images in the same amount of time it takes for one chip to generate a single image!
Learn more details in the [How does parallelization work?](#how-does-parallelization-work) section.
After replicating the prompt, get the tokenized text ids by calling the `prepare_inputs` function on the pipeline. The length of the tokenized text is set to 77 tokens as required by the configuration of the underlying CLIP text model.
```python
prompt = "A cinematic film still of Morgan Freeman starring as Jimi Hendrix, portrait, 40mm lens, shallow depth of field, close up, split lighting, cinematic"
prompt = [prompt] * jax.device_count()
prompt_ids = pipeline.prepare_inputs(prompt)
prompt_ids.shape
# (8, 77)
```
Model parameters and inputs have to be replicated across the 8 parallel devices. The parameters dictionary is replicated with [`flax.jax_utils.replicate`](https://flax.readthedocs.io/en/latest/api_reference/flax.jax_utils.html#flax.jax_utils.replicate) which traverses the dictionary and changes the shape of the weights so they are repeated 8 times. Arrays are replicated using `shard`.
```python
# parameters
p_params = replicate(params)
# arrays
prompt_ids = shard(prompt_ids)
prompt_ids.shape
# (8, 1, 77)
```
This shape means each one of the 8 devices receives as an input a `jnp` array with shape `(1, 77)`, where `1` is the batch size per device. On TPUs with sufficient memory, you could have a batch size larger than `1` if you want to generate multiple images (per chip) at once.
Next, create a random number generator to pass to the generation function. This is standard procedure in Flax, which is very serious and opinionated about random numbers. All functions that deal with random numbers are expected to receive a generator to ensure reproducibility, even when you're training across multiple distributed devices.
The helper function below uses a seed to initialize a random number generator. As long as you use the same seed, you'll get the exact same results. Feel free to use different seeds when exploring results later in the guide.
```python
def create_key(seed=0):
return jax.random.PRNGKey(seed)
```
The helper function, or `rng`, is split 8 times so each device receives a different generator and generates a different image.
```python
rng = create_key(0)
rng = jax.random.split(rng, jax.device_count())
```
To take advantage of JAX's optimized speed on a TPU, pass `jit=True` to the pipeline to compile the JAX code into an efficient representation and to ensure the model runs in parallel across the 8 devices.
You need to ensure all your inputs have the same shape in subsequent calls, otherwise JAX will need to recompile the code which is slower.
The first inference run takes more time because it needs to compile the code, but subsequent calls (even with different inputs) are much faster. For example, it took more than a minute to compile on a TPU v2-8, but then it takes about **7s** on a future inference run!
```py
%%time
images = pipeline(prompt_ids, p_params, rng, jit=True)[0]
# CPU times: user 56.2 s, sys: 42.5 s, total: 1min 38s
# Wall time: 1min 29s
```
The returned array has shape `(8, 1, 512, 512, 3)` which should be reshaped to remove the second dimension and get 8 images of `512 × 512 × 3`. Then you can use the [numpy_to_pil()](/docs/diffusers/main/en/api/utilities#diffusers.utils.numpy_to_pil) function to convert the arrays into images.
```python
from diffusers.utils import make_image_grid
images = images.reshape((images.shape[0] * images.shape[1],) + images.shape[-3:])
images = pipeline.numpy_to_pil(images)
make_image_grid(images, rows=2, cols=4)
```
![img](https://huggingface.co/datasets/YiYiXu/test-doc-assets/resolve/main/stable_diffusion_jax_how_to_cell_38_output_0.jpeg)
## Using different prompts
You don't necessarily have to use the same prompt on all devices. For example, to generate 8 different prompts:
```python
prompts = [
"Labrador in the style of Hokusai",
"Painting of a squirrel skating in New York",
"HAL-9000 in the style of Van Gogh",
"Times Square under water, with fish and a dolphin swimming around",
"Ancient Roman fresco showing a man working on his laptop",
"Close-up photograph of young black woman against urban background, high quality, bokeh",
"Armchair in the shape of an avocado",
"Clown astronaut in space, with Earth in the background",
]
prompt_ids = pipeline.prepare_inputs(prompts)
prompt_ids = shard(prompt_ids)
images = pipeline(prompt_ids, p_params, rng, jit=True).images
images = images.reshape((images.shape[0] * images.shape[1],) + images.shape[-3:])
images = pipeline.numpy_to_pil(images)
make_image_grid(images, 2, 4)
```
![img](https://huggingface.co/datasets/YiYiXu/test-doc-assets/resolve/main/stable_diffusion_jax_how_to_cell_43_output_0.jpeg)
## How does parallelization work?
The Flax pipeline in 🤗 Diffusers automatically compiles the model and runs it in parallel on all available devices. Let's take a closer look at how that process works.
JAX parallelization can be done in multiple ways. The easiest one revolves around using the [`jax.pmap`](https://jax.readthedocs.io/en/latest/_autosummary/jax.pmap.html) function to achieve single-program multiple-data (SPMD) parallelization. It means running several copies of the same code, each on different data inputs. More sophisticated approaches are possible, and you can go over to the JAX [documentation](https://jax.readthedocs.io/en/latest/index.html) to explore this topic in more detail if you are interested!
`jax.pmap` does two things:
1. Compiles (or "`jit`s") the code which is similar to `jax.jit()`. This does not happen when you call `pmap`, and only the first time the `pmap`ped function is called.
2. Ensures the compiled code runs in parallel on all available devices.
To demonstrate, call `pmap` on the pipeline's `_generate` method (this is a private method that generates images and may be renamed or removed in future releases of 🤗 Diffusers):
```python
p_generate = pmap(pipeline._generate)
```
After calling `pmap`, the prepared function `p_generate` will:
1. Make a copy of the underlying function, `pipeline._generate`, on each device.
2. Send each device a different portion of the input arguments (this is why it's necessary to call the *shard* function). In this case, `prompt_ids` has shape `(8, 1, 77, 768)` so the array is split into 8 and each copy of `_generate` receives an input with shape `(1, 77, 768)`.
The most important thing to pay attention to here is the batch size (1 in this example), and the input dimensions that make sense for your code. You don't have to change anything else to make the code work in parallel.
The first time you call the pipeline takes more time, but the calls afterward are much faster. The `block_until_ready` function is used to correctly measure inference time because JAX uses asynchronous dispatch and returns control to the Python loop as soon as it can. You don't need to use that in your code; blocking occurs automatically when you want to use the result of a computation that has not yet been materialized.
```py
%%time
images = p_generate(prompt_ids, p_params, rng)
images = images.block_until_ready()
# CPU times: user 1min 15s, sys: 18.2 s, total: 1min 34s
# Wall time: 1min 15s
```
Check your image dimensions to see if they're correct:
```python
images.shape
# (8, 1, 512, 512, 3)
```
## Resources
To learn more about how JAX works with Stable Diffusion, you may be interested in reading:
* [Accelerating Stable Diffusion XL Inference with JAX on Cloud TPU v5e](https://hf.co/blog/sdxl_jax)
# Load adapters
There are several [training](../training/overview) techniques for personalizing diffusion models to generate images of a specific subject or images in certain styles. Each of these training methods produces a different type of adapter. Some of the adapters generate an entirely new model, while other adapters only modify a smaller set of embeddings or weights. This means the loading process for each adapter is also different.
This guide will show you how to load DreamBooth, textual inversion, and LoRA weights.
Feel free to browse the [Stable Diffusion Conceptualizer](https://huggingface.co/spaces/sd-concepts-library/stable-diffusion-conceptualizer), [LoRA the Explorer](https://huggingface.co/spaces/multimodalart/LoraTheExplorer), and the [Diffusers Models Gallery](https://huggingface.co/spaces/huggingface-projects/diffusers-gallery) for checkpoints and embeddings to use.
## DreamBooth
[DreamBooth](https://dreambooth.github.io/) finetunes an *entire diffusion model* on just several images of a subject to generate images of that subject in new styles and settings. This method works by using a special word in the prompt that the model learns to associate with the subject image. Of all the training methods, DreamBooth produces the largest file size (usually a few GBs) because it is a full checkpoint model.
Let's load the [herge_style](https://huggingface.co/sd-dreambooth-library/herge-style) checkpoint, which is trained on just 10 images drawn by Hergé, to generate images in that style. For it to work, you need to include the special word `herge_style` in your prompt to trigger the checkpoint:
```py
from diffusers import AutoPipelineForText2Image
import torch
pipeline = AutoPipelineForText2Image.from_pretrained("sd-dreambooth-library/herge-style", torch_dtype=torch.float16).to("cuda")
prompt = "A cute herge_style brown bear eating a slice of pizza, stunning color scheme, masterpiece, illustration"
image = pipeline(prompt).images[0]
image
```
## Textual inversion
[Textual inversion](https://textual-inversion.github.io/) is very similar to DreamBooth and it can also personalize a diffusion model to generate certain concepts (styles, objects) from just a few images. This method works by training and finding new embeddings that represent the images you provide with a special word in the prompt. As a result, the diffusion model weights stay the same and the training process produces a relatively tiny (a few KBs) file.
Because textual inversion creates embeddings, it cannot be used on its own like DreamBooth and requires another model.
```py
from diffusers import AutoPipelineForText2Image
import torch
pipeline = AutoPipelineForText2Image.from_pretrained("stable-diffusion-v1-5/stable-diffusion-v1-5", torch_dtype=torch.float16).to("cuda")
```
Now you can load the textual inversion embeddings with the [load_textual_inversion()](/docs/diffusers/main/en/api/loaders/textual_inversion#diffusers.loaders.TextualInversionLoaderMixin.load_textual_inversion) method and generate some images. Let's load the [sd-concepts-library/gta5-artwork](https://huggingface.co/sd-concepts-library/gta5-artwork) embeddings and you'll need to include the special word `` in your prompt to trigger it:
```py
pipeline.load_textual_inversion("sd-concepts-library/gta5-artwork")
prompt = "A cute brown bear eating a slice of pizza, stunning color scheme, masterpiece, illustration, style"
image = pipeline(prompt).images[0]
image
```
Textual inversion can also be trained on undesirable things to create *negative embeddings* to discourage a model from generating images with those undesirable things like blurry images or extra fingers on a hand. This can be an easy way to quickly improve your prompt. You'll also load the embeddings with [load_textual_inversion()](/docs/diffusers/main/en/api/loaders/textual_inversion#diffusers.loaders.TextualInversionLoaderMixin.load_textual_inversion), but this time, you'll need two more parameters:
- `weight_name`: specifies the weight file to load if the file was saved in the 🤗 Diffusers format with a specific name or if the file is stored in the A1111 format
- `token`: specifies the special word to use in the prompt to trigger the embeddings
Let's load the [sayakpaul/EasyNegative-test](https://huggingface.co/sayakpaul/EasyNegative-test) embeddings:
```py
pipeline.load_textual_inversion(
"sayakpaul/EasyNegative-test", weight_name="EasyNegative.safetensors", token="EasyNegative"
)
```
Now you can use the `token` to generate an image with the negative embeddings:
```py
prompt = "A cute brown bear eating a slice of pizza, stunning color scheme, masterpiece, illustration, EasyNegative"
negative_prompt = "EasyNegative"
image = pipeline(prompt, negative_prompt=negative_prompt, num_inference_steps=50).images[0]
image
```
## LoRA
[Low-Rank Adaptation (LoRA)](https://huggingface.co/papers/2106.09685) is a popular training technique because it is fast and generates smaller file sizes (a couple hundred MBs). Like the other methods in this guide, LoRA can train a model to learn new styles from just a few images. It works by inserting new weights into the diffusion model and then only the new weights are trained instead of the entire model. This makes LoRAs faster to train and easier to store.
LoRA is a very general training technique that can be used with other training methods. For example, it is common to train a model with DreamBooth and LoRA. It is also increasingly common to load and merge multiple LoRAs to create new and unique images. You can learn more about it in the in-depth [Merge LoRAs](merge_loras) guide since merging is outside the scope of this loading guide.
LoRAs also need to be used with another model:
```py
from diffusers import AutoPipelineForText2Image
import torch
pipeline = AutoPipelineForText2Image.from_pretrained("stabilityai/stable-diffusion-xl-base-1.0", torch_dtype=torch.float16).to("cuda")
```
Then use the [load_lora_weights()](/docs/diffusers/main/en/api/loaders/lora#diffusers.loaders.StableDiffusionLoraLoaderMixin.load_lora_weights) method to load the [ostris/super-cereal-sdxl-lora](https://huggingface.co/ostris/super-cereal-sdxl-lora) weights and specify the weights filename from the repository:
```py
pipeline.load_lora_weights("ostris/super-cereal-sdxl-lora", weight_name="cereal_box_sdxl_v1.safetensors")
prompt = "bears, pizza bites"
image = pipeline(prompt).images[0]
image
```
The [load_lora_weights()](/docs/diffusers/main/en/api/loaders/lora#diffusers.loaders.StableDiffusionLoraLoaderMixin.load_lora_weights) method loads LoRA weights into both the UNet and text encoder. It is the preferred way for loading LoRAs because it can handle cases where:
- the LoRA weights don't have separate identifiers for the UNet and text encoder
- the LoRA weights have separate identifiers for the UNet and text encoder
But if you only need to load LoRA weights into the UNet, then you can use the [load_attn_procs()](/docs/diffusers/main/en/api/loaders/unet#diffusers.loaders.UNet2DConditionLoadersMixin.load_attn_procs) method. Let's load the [jbilcke-hf/sdxl-cinematic-1](https://huggingface.co/jbilcke-hf/sdxl-cinematic-1) LoRA:
```py
from diffusers import AutoPipelineForText2Image
import torch
pipeline = AutoPipelineForText2Image.from_pretrained("stabilityai/stable-diffusion-xl-base-1.0", torch_dtype=torch.float16).to("cuda")
pipeline.unet.load_attn_procs("jbilcke-hf/sdxl-cinematic-1", weight_name="pytorch_lora_weights.safetensors")
# use cnmt in the prompt to trigger the LoRA
prompt = "A cute cnmt eating a slice of pizza, stunning color scheme, masterpiece, illustration"
image = pipeline(prompt).images[0]
image
```
To unload the LoRA weights, use the [unload_lora_weights()](/docs/diffusers/main/en/api/loaders/lora#diffusers.loaders.lora_base.LoraBaseMixin.unload_lora_weights) method to discard the LoRA weights and restore the model to its original weights:
```py
pipeline.unload_lora_weights()
```
### Adjust LoRA weight scale
For both [load_lora_weights()](/docs/diffusers/main/en/api/loaders/lora#diffusers.loaders.StableDiffusionLoraLoaderMixin.load_lora_weights) and [load_attn_procs()](/docs/diffusers/main/en/api/loaders/unet#diffusers.loaders.UNet2DConditionLoadersMixin.load_attn_procs), you can pass the `cross_attention_kwargs={"scale": 0.5}` parameter to adjust how much of the LoRA weights to use. A value of `0` is the same as only using the base model weights, and a value of `1` is equivalent to using the fully finetuned LoRA.
For more granular control on the amount of LoRA weights used per layer, you can use `set_adapters()` and pass a dictionary specifying by how much to scale the weights in each layer by.
```python
pipe = ... # create pipeline
pipe.load_lora_weights(..., adapter_name="my_adapter")
scales = {
"text_encoder": 0.5,
"text_encoder_2": 0.5, # only usable if pipe has a 2nd text encoder
"unet": {
"down": 0.9, # all transformers in the down-part will use scale 0.9
# "mid" # in this example "mid" is not given, therefore all transformers in the mid part will use the default scale 1.0
"up": {
"block_0": 0.6, # all 3 transformers in the 0th block in the up-part will use scale 0.6
"block_1": [0.4, 0.8, 1.0], # the 3 transformers in the 1st block in the up-part will use scales 0.4, 0.8 and 1.0 respectively
}
}
}
pipe.set_adapters("my_adapter", scales)
```
This also works with multiple adapters - see [this guide](https://huggingface.co/docs/diffusers/tutorials/using_peft_for_inference#customize-adapters-strength) for how to do it.
Currently, `set_adapters()` only supports scaling attention weights. If a LoRA has other parts (e.g., resnets or down-/upsamplers), they will keep a scale of 1.0.
### Kohya and TheLastBen
Other popular LoRA trainers from the community include those by [Kohya](https://github.com/kohya-ss/sd-scripts/) and [TheLastBen](https://github.com/TheLastBen/fast-stable-diffusion). These trainers create different LoRA checkpoints than those trained by 🤗 Diffusers, but they can still be loaded in the same way.
To load a Kohya LoRA, let's download the [Blueprintify SD XL 1.0](https://civitai.com/models/150986/blueprintify-sd-xl-10) checkpoint from [Civitai](https://civitai.com/) as an example:
```sh
!wget https://civitai.com/api/download/models/168776 -O blueprintify-sd-xl-10.safetensors
```
Load the LoRA checkpoint with the [load_lora_weights()](/docs/diffusers/main/en/api/loaders/lora#diffusers.loaders.StableDiffusionLoraLoaderMixin.load_lora_weights) method, and specify the filename in the `weight_name` parameter:
```py
from diffusers import AutoPipelineForText2Image
import torch
pipeline = AutoPipelineForText2Image.from_pretrained("stabilityai/stable-diffusion-xl-base-1.0", torch_dtype=torch.float16).to("cuda")
pipeline.load_lora_weights("path/to/weights", weight_name="blueprintify-sd-xl-10.safetensors")
```
Generate an image:
```py
# use bl3uprint in the prompt to trigger the LoRA
prompt = "bl3uprint, a highly detailed blueprint of the eiffel tower, explaining how to build all parts, many txt, blueprint grid backdrop"
image = pipeline(prompt).images[0]
image
```
Some limitations of using Kohya LoRAs with 🤗 Diffusers include:
- Images may not look like those generated by UIs - like ComfyUI - for multiple reasons, which are explained [here](https://github.com/huggingface/diffusers/pull/4287/#issuecomment-1655110736).
- [LyCORIS checkpoints](https://github.com/KohakuBlueleaf/LyCORIS) aren't fully supported. The [load_lora_weights()](/docs/diffusers/main/en/api/loaders/lora#diffusers.loaders.StableDiffusionLoraLoaderMixin.load_lora_weights) method loads LyCORIS checkpoints with LoRA and LoCon modules, but Hada and LoKR are not supported.
Loading a checkpoint from TheLastBen is very similar. For example, to load the [TheLastBen/William_Eggleston_Style_SDXL](https://huggingface.co/TheLastBen/William_Eggleston_Style_SDXL) checkpoint:
```py
from diffusers import AutoPipelineForText2Image
import torch
pipeline = AutoPipelineForText2Image.from_pretrained("stabilityai/stable-diffusion-xl-base-1.0", torch_dtype=torch.float16).to("cuda")
pipeline.load_lora_weights("TheLastBen/William_Eggleston_Style_SDXL", weight_name="wegg.safetensors")
# use by william eggleston in the prompt to trigger the LoRA
prompt = "a house by william eggleston, sunrays, beautiful, sunlight, sunrays, beautiful"
image = pipeline(prompt=prompt).images[0]
image
```
## IP-Adapter
[IP-Adapter](https://ip-adapter.github.io/) is a lightweight adapter that enables image prompting for any diffusion model. This adapter works by decoupling the cross-attention layers of the image and text features. All the other model components are frozen and only the embedded image features in the UNet are trained. As a result, IP-Adapter files are typically only ~100MBs.
You can learn more about how to use IP-Adapter for different tasks and specific use cases in the [IP-Adapter](../using-diffusers/ip_adapter) guide.
> [!TIP]
> Diffusers currently only supports IP-Adapter for some of the most popular pipelines. Feel free to open a feature request if you have a cool use case and want to integrate IP-Adapter with an unsupported pipeline!
> Official IP-Adapter checkpoints are available from [h94/IP-Adapter](https://huggingface.co/h94/IP-Adapter).
To start, load a Stable Diffusion checkpoint.
```py
from diffusers import AutoPipelineForText2Image
import torch
from diffusers.utils import load_image
pipeline = AutoPipelineForText2Image.from_pretrained("stable-diffusion-v1-5/stable-diffusion-v1-5", torch_dtype=torch.float16).to("cuda")
```
Then load the IP-Adapter weights and add it to the pipeline with the [load_ip_adapter()](/docs/diffusers/main/en/api/loaders/ip_adapter#diffusers.loaders.IPAdapterMixin.load_ip_adapter) method.
```py
pipeline.load_ip_adapter("h94/IP-Adapter", subfolder="models", weight_name="ip-adapter_sd15.bin")
```
Once loaded, you can use the pipeline with an image and text prompt to guide the image generation process.
```py
image = load_image("https://huggingface.co/datasets/huggingface/documentation-images/resolve/main/diffusers/load_neg_embed.png")
generator = torch.Generator(device="cpu").manual_seed(33)
images = pipeline(
prompt='best quality, high quality, wearing sunglasses',
ip_adapter_image=image,
negative_prompt="monochrome, lowres, bad anatomy, worst quality, low quality",
num_inference_steps=50,
generator=generator,
).images[0]
images
```
### IP-Adapter Plus
IP-Adapter relies on an image encoder to generate image features. If the IP-Adapter repository contains an `image_encoder` subfolder, the image encoder is automatically loaded and registered to the pipeline. Otherwise, you'll need to explicitly load the image encoder with a [CLIPVisionModelWithProjection](https://huggingface.co/docs/transformers/main/en/model_doc/clip#transformers.CLIPVisionModelWithProjection) model and pass it to the pipeline.
This is the case for *IP-Adapter Plus* checkpoints which use the ViT-H image encoder.
```py
from transformers import CLIPVisionModelWithProjection
image_encoder = CLIPVisionModelWithProjection.from_pretrained(
"h94/IP-Adapter",
subfolder="models/image_encoder",
torch_dtype=torch.float16
)
pipeline = AutoPipelineForText2Image.from_pretrained(
"stabilityai/stable-diffusion-xl-base-1.0",
image_encoder=image_encoder,
torch_dtype=torch.float16
).to("cuda")
pipeline.load_ip_adapter("h94/IP-Adapter", subfolder="sdxl_models", weight_name="ip-adapter-plus_sdxl_vit-h.safetensors")
```
### IP-Adapter Face ID models
The IP-Adapter FaceID models are experimental IP Adapters that use image embeddings generated by `insightface` instead of CLIP image embeddings. Some of these models also use LoRA to improve ID consistency.
You need to install `insightface` and all its requirements to use these models.
As InsightFace pretrained models are available for non-commercial research purposes, IP-Adapter-FaceID models are released exclusively for research purposes and are not intended for commercial use.
```py
pipeline = AutoPipelineForText2Image.from_pretrained(
"stabilityai/stable-diffusion-xl-base-1.0",
torch_dtype=torch.float16
).to("cuda")
pipeline.load_ip_adapter("h94/IP-Adapter-FaceID", subfolder=None, weight_name="ip-adapter-faceid_sdxl.bin", image_encoder_folder=None)
```
If you want to use one of the two IP-Adapter FaceID Plus models, you must also load the CLIP image encoder, as this models use both `insightface` and CLIP image embeddings to achieve better photorealism.
```py
from transformers import CLIPVisionModelWithProjection
image_encoder = CLIPVisionModelWithProjection.from_pretrained(
"laion/CLIP-ViT-H-14-laion2B-s32B-b79K",
torch_dtype=torch.float16,
)
pipeline = AutoPipelineForText2Image.from_pretrained(
"stable-diffusion-v1-5/stable-diffusion-v1-5",
image_encoder=image_encoder,
torch_dtype=torch.float16
).to("cuda")
pipeline.load_ip_adapter("h94/IP-Adapter-FaceID", subfolder=None, weight_name="ip-adapter-faceid-plus_sd15.bin")
```
# Inpainting
Inpainting replaces or edits specific areas of an image. This makes it a useful tool for image restoration like removing defects and artifacts, or even replacing an image area with something entirely new. Inpainting relies on a mask to determine which regions of an image to fill in; the area to inpaint is represented by white pixels and the area to keep is represented by black pixels. The white pixels are filled in by the prompt.
With 🤗 Diffusers, here is how you can do inpainting:
1. Load an inpainting checkpoint with the [AutoPipelineForInpainting](/docs/diffusers/main/en/api/pipelines/auto_pipeline#diffusers.AutoPipelineForInpainting) class. This'll automatically detect the appropriate pipeline class to load based on the checkpoint:
```py
import torch
from diffusers import AutoPipelineForInpainting
from diffusers.utils import load_image, make_image_grid
pipeline = AutoPipelineForInpainting.from_pretrained(
"kandinsky-community/kandinsky-2-2-decoder-inpaint", torch_dtype=torch.float16
)
pipeline.enable_model_cpu_offload()
# remove following line if xFormers is not installed or you have PyTorch 2.0 or higher installed
pipeline.enable_xformers_memory_efficient_attention()
```
You'll notice throughout the guide, we use [enable_model_cpu_offload()](/docs/diffusers/main/en/api/pipelines/overview#diffusers.DiffusionPipeline.enable_model_cpu_offload) and [enable_xformers_memory_efficient_attention()](/docs/diffusers/main/en/api/pipelines/overview#diffusers.DiffusionPipeline.enable_xformers_memory_efficient_attention), to save memory and increase inference speed. If you're using PyTorch 2.0, it's not necessary to call [enable_xformers_memory_efficient_attention()](/docs/diffusers/main/en/api/pipelines/overview#diffusers.DiffusionPipeline.enable_xformers_memory_efficient_attention) on your pipeline because it'll already be using PyTorch 2.0's native [scaled-dot product attention](../optimization/torch2.0#scaled-dot-product-attention).
2. Load the base and mask images:
```py
init_image = load_image("https://huggingface.co/datasets/huggingface/documentation-images/resolve/main/diffusers/inpaint.png")
mask_image = load_image("https://huggingface.co/datasets/huggingface/documentation-images/resolve/main/diffusers/inpaint_mask.png")
```
3. Create a prompt to inpaint the image with and pass it to the pipeline with the base and mask images:
```py
prompt = "a black cat with glowing eyes, cute, adorable, disney, pixar, highly detailed, 8k"
negative_prompt = "bad anatomy, deformed, ugly, disfigured"
image = pipeline(prompt=prompt, negative_prompt=negative_prompt, image=init_image, mask_image=mask_image).images[0]
make_image_grid([init_image, mask_image, image], rows=1, cols=3)
```
base image
mask image
generated image
## Create a mask image
Throughout this guide, the mask image is provided in all of the code examples for convenience. You can inpaint on your own images, but you'll need to create a mask image for it. Use the Space below to easily create a mask image.
Upload a base image to inpaint on and use the sketch tool to draw a mask. Once you're done, click **Run** to generate and download the mask image.
### Mask blur
The `~VaeImageProcessor.blur` method provides an option for how to blend the original image and inpaint area. The amount of blur is determined by the `blur_factor` parameter. Increasing the `blur_factor` increases the amount of blur applied to the mask edges, softening the transition between the original image and inpaint area. A low or zero `blur_factor` preserves the sharper edges of the mask.
To use this, create a blurred mask with the image processor.
```py
import torch
from diffusers import AutoPipelineForInpainting
from diffusers.utils import load_image
from PIL import Image
pipeline = AutoPipelineForInpainting.from_pretrained("stable-diffusion-v1-5/stable-diffusion-v1-5", torch_dtype=torch.float16).to('cuda')
mask = load_image("https://huggingface.co/datasets/YiYiXu/testing-images/resolve/main/seashore_mask.png")
blurred_mask = pipeline.mask_processor.blur(mask, blur_factor=33)
blurred_mask
```
mask with no blur
mask with blur applied
## Popular models
[Stable Diffusion Inpainting](https://huggingface.co/runwayml/stable-diffusion-inpainting), [Stable Diffusion XL (SDXL) Inpainting](https://huggingface.co/diffusers/stable-diffusion-xl-1.0-inpainting-0.1), and [Kandinsky 2.2 Inpainting](https://huggingface.co/kandinsky-community/kandinsky-2-2-decoder-inpaint) are among the most popular models for inpainting. SDXL typically produces higher resolution images than Stable Diffusion v1.5, and Kandinsky 2.2 is also capable of generating high-quality images.
### Stable Diffusion Inpainting
Stable Diffusion Inpainting is a latent diffusion model finetuned on 512x512 images on inpainting. It is a good starting point because it is relatively fast and generates good quality images. To use this model for inpainting, you'll need to pass a prompt, base and mask image to the pipeline:
```py
import torch
from diffusers import AutoPipelineForInpainting
from diffusers.utils import load_image, make_image_grid
pipeline = AutoPipelineForInpainting.from_pretrained(
"runwayml/stable-diffusion-inpainting", torch_dtype=torch.float16, variant="fp16"
)
pipeline.enable_model_cpu_offload()
# remove following line if xFormers is not installed or you have PyTorch 2.0 or higher installed
pipeline.enable_xformers_memory_efficient_attention()
# load base and mask image
init_image = load_image("https://huggingface.co/datasets/huggingface/documentation-images/resolve/main/diffusers/inpaint.png")
mask_image = load_image("https://huggingface.co/datasets/huggingface/documentation-images/resolve/main/diffusers/inpaint_mask.png")
generator = torch.Generator("cuda").manual_seed(92)
prompt = "concept art digital painting of an elven castle, inspired by lord of the rings, highly detailed, 8k"
image = pipeline(prompt=prompt, image=init_image, mask_image=mask_image, generator=generator).images[0]
make_image_grid([init_image, mask_image, image], rows=1, cols=3)
```
### Stable Diffusion XL (SDXL) Inpainting
SDXL is a larger and more powerful version of Stable Diffusion v1.5. This model can follow a two-stage model process (though each model can also be used alone); the base model generates an image, and a refiner model takes that image and further enhances its details and quality. Take a look at the [SDXL](sdxl) guide for a more comprehensive guide on how to use SDXL and configure it's parameters.
```py
import torch
from diffusers import AutoPipelineForInpainting
from diffusers.utils import load_image, make_image_grid
pipeline = AutoPipelineForInpainting.from_pretrained(
"diffusers/stable-diffusion-xl-1.0-inpainting-0.1", torch_dtype=torch.float16, variant="fp16"
)
pipeline.enable_model_cpu_offload()
# remove following line if xFormers is not installed or you have PyTorch 2.0 or higher installed
pipeline.enable_xformers_memory_efficient_attention()
# load base and mask image
init_image = load_image("https://huggingface.co/datasets/huggingface/documentation-images/resolve/main/diffusers/inpaint.png")
mask_image = load_image("https://huggingface.co/datasets/huggingface/documentation-images/resolve/main/diffusers/inpaint_mask.png")
generator = torch.Generator("cuda").manual_seed(92)
prompt = "concept art digital painting of an elven castle, inspired by lord of the rings, highly detailed, 8k"
image = pipeline(prompt=prompt, image=init_image, mask_image=mask_image, generator=generator).images[0]
make_image_grid([init_image, mask_image, image], rows=1, cols=3)
```
### Kandinsky 2.2 Inpainting
The Kandinsky model family is similar to SDXL because it uses two models as well; the image prior model creates image embeddings, and the diffusion model generates images from them. You can load the image prior and diffusion model separately, but the easiest way to use Kandinsky 2.2 is to load it into the [AutoPipelineForInpainting](/docs/diffusers/main/en/api/pipelines/auto_pipeline#diffusers.AutoPipelineForInpainting) class which uses the [KandinskyV22InpaintCombinedPipeline](/docs/diffusers/main/en/api/pipelines/kandinsky_v22#diffusers.KandinskyV22InpaintCombinedPipeline) under the hood.
```py
import torch
from diffusers import AutoPipelineForInpainting
from diffusers.utils import load_image, make_image_grid
pipeline = AutoPipelineForInpainting.from_pretrained(
"kandinsky-community/kandinsky-2-2-decoder-inpaint", torch_dtype=torch.float16
)
pipeline.enable_model_cpu_offload()
# remove following line if xFormers is not installed or you have PyTorch 2.0 or higher installed
pipeline.enable_xformers_memory_efficient_attention()
# load base and mask image
init_image = load_image("https://huggingface.co/datasets/huggingface/documentation-images/resolve/main/diffusers/inpaint.png")
mask_image = load_image("https://huggingface.co/datasets/huggingface/documentation-images/resolve/main/diffusers/inpaint_mask.png")
generator = torch.Generator("cuda").manual_seed(92)
prompt = "concept art digital painting of an elven castle, inspired by lord of the rings, highly detailed, 8k"
image = pipeline(prompt=prompt, image=init_image, mask_image=mask_image, generator=generator).images[0]
make_image_grid([init_image, mask_image, image], rows=1, cols=3)
```
base image
Stable Diffusion Inpainting
Stable Diffusion XL Inpainting
Kandinsky 2.2 Inpainting
## Non-inpaint specific checkpoints
So far, this guide has used inpaint specific checkpoints such as [stable-diffusion-v1-5/stable-diffusion-inpainting](https://huggingface.co/stable-diffusion-v1-5/stable-diffusion-inpainting). But you can also use regular checkpoints like [stable-diffusion-v1-5/stable-diffusion-v1-5](https://huggingface.co/stable-diffusion-v1-5/stable-diffusion-v1-5). Let's compare the results of the two checkpoints.
The image on the left is generated from a regular checkpoint, and the image on the right is from an inpaint checkpoint. You'll immediately notice the image on the left is not as clean, and you can still see the outline of the area the model is supposed to inpaint. The image on the right is much cleaner and the inpainted area appears more natural.
```py
import torch
from diffusers import AutoPipelineForInpainting
from diffusers.utils import load_image, make_image_grid
pipeline = AutoPipelineForInpainting.from_pretrained(
"stable-diffusion-v1-5/stable-diffusion-v1-5", torch_dtype=torch.float16, variant="fp16"
)
pipeline.enable_model_cpu_offload()
# remove following line if xFormers is not installed or you have PyTorch 2.0 or higher installed
pipeline.enable_xformers_memory_efficient_attention()
# load base and mask image
init_image = load_image("https://huggingface.co/datasets/huggingface/documentation-images/resolve/main/diffusers/inpaint.png")
mask_image = load_image("https://huggingface.co/datasets/huggingface/documentation-images/resolve/main/diffusers/inpaint_mask.png")
generator = torch.Generator("cuda").manual_seed(92)
prompt = "concept art digital painting of an elven castle, inspired by lord of the rings, highly detailed, 8k"
image = pipeline(prompt=prompt, image=init_image, mask_image=mask_image, generator=generator).images[0]
make_image_grid([init_image, image], rows=1, cols=2)
```
```py
import torch
from diffusers import AutoPipelineForInpainting
from diffusers.utils import load_image, make_image_grid
pipeline = AutoPipelineForInpainting.from_pretrained(
"runwayml/stable-diffusion-inpainting", torch_dtype=torch.float16, variant="fp16"
)
pipeline.enable_model_cpu_offload()
# remove following line if xFormers is not installed or you have PyTorch 2.0 or higher installed
pipeline.enable_xformers_memory_efficient_attention()
# load base and mask image
init_image = load_image("https://huggingface.co/datasets/huggingface/documentation-images/resolve/main/diffusers/inpaint.png")
mask_image = load_image("https://huggingface.co/datasets/huggingface/documentation-images/resolve/main/diffusers/inpaint_mask.png")
generator = torch.Generator("cuda").manual_seed(92)
prompt = "concept art digital painting of an elven castle, inspired by lord of the rings, highly detailed, 8k"
image = pipeline(prompt=prompt, image=init_image, mask_image=mask_image, generator=generator).images[0]
make_image_grid([init_image, image], rows=1, cols=2)
```
stable-diffusion-v1-5/stable-diffusion-v1-5
runwayml/stable-diffusion-inpainting
However, for more basic tasks like erasing an object from an image (like the rocks in the road for example), a regular checkpoint yields pretty good results. There isn't as noticeable of difference between the regular and inpaint checkpoint.
```py
import torch
from diffusers import AutoPipelineForInpainting
from diffusers.utils import load_image, make_image_grid
pipeline = AutoPipelineForInpainting.from_pretrained(
"stable-diffusion-v1-5/stable-diffusion-v1-5", torch_dtype=torch.float16, variant="fp16"
)
pipeline.enable_model_cpu_offload()
# remove following line if xFormers is not installed or you have PyTorch 2.0 or higher installed
pipeline.enable_xformers_memory_efficient_attention()
# load base and mask image
init_image = load_image("https://huggingface.co/datasets/huggingface/documentation-images/resolve/main/diffusers/inpaint.png")
mask_image = load_image("https://huggingface.co/datasets/huggingface/documentation-images/resolve/main/diffusers/road-mask.png")
image = pipeline(prompt="road", image=init_image, mask_image=mask_image).images[0]
make_image_grid([init_image, image], rows=1, cols=2)
```
```py
import torch
from diffusers import AutoPipelineForInpainting
from diffusers.utils import load_image, make_image_grid
pipeline = AutoPipelineForInpainting.from_pretrained(
"runwayml/stable-diffusion-inpainting", torch_dtype=torch.float16, variant="fp16"
)
pipeline.enable_model_cpu_offload()
# remove following line if xFormers is not installed or you have PyTorch 2.0 or higher installed
pipeline.enable_xformers_memory_efficient_attention()
# load base and mask image
init_image = load_image("https://huggingface.co/datasets/huggingface/documentation-images/resolve/main/diffusers/inpaint.png")
mask_image = load_image("https://huggingface.co/datasets/huggingface/documentation-images/resolve/main/diffusers/road-mask.png")
image = pipeline(prompt="road", image=init_image, mask_image=mask_image).images[0]
make_image_grid([init_image, image], rows=1, cols=2)
```
stable-diffusion-v1-5/stable-diffusion-v1-5
runwayml/stable-diffusion-inpainting
The trade-off of using a non-inpaint specific checkpoint is the overall image quality may be lower, but it generally tends to preserve the mask area (that is why you can see the mask outline). The inpaint specific checkpoints are intentionally trained to generate higher quality inpainted images, and that includes creating a more natural transition between the masked and unmasked areas. As a result, these checkpoints are more likely to change your unmasked area.
If preserving the unmasked area is important for your task, you can use the `VaeImageProcessor.apply_overlay` method to force the unmasked area of an image to remain the same at the expense of some more unnatural transitions between the masked and unmasked areas.
```py
import PIL
import numpy as np
import torch
from diffusers import AutoPipelineForInpainting
from diffusers.utils import load_image, make_image_grid
device = "cuda"
pipeline = AutoPipelineForInpainting.from_pretrained(
"runwayml/stable-diffusion-inpainting",
torch_dtype=torch.float16,
)
pipeline = pipeline.to(device)
img_url = "https://raw.githubusercontent.com/CompVis/latent-diffusion/main/data/inpainting_examples/overture-creations-5sI6fQgYIuo.png"
mask_url = "https://raw.githubusercontent.com/CompVis/latent-diffusion/main/data/inpainting_examples/overture-creations-5sI6fQgYIuo_mask.png"
init_image = load_image(img_url).resize((512, 512))
mask_image = load_image(mask_url).resize((512, 512))
prompt = "Face of a yellow cat, high resolution, sitting on a park bench"
repainted_image = pipeline(prompt=prompt, image=init_image, mask_image=mask_image).images[0]
repainted_image.save("repainted_image.png")
unmasked_unchanged_image = pipeline.image_processor.apply_overlay(mask_image, init_image, repainted_image)
unmasked_unchanged_image.save("force_unmasked_unchanged.png")
make_image_grid([init_image, mask_image, repainted_image, unmasked_unchanged_image], rows=2, cols=2)
```
## Configure pipeline parameters
Image features - like quality and "creativity" - are dependent on pipeline parameters. Knowing what these parameters do is important for getting the results you want. Let's take a look at the most important parameters and see how changing them affects the output.
### Strength
`strength` is a measure of how much noise is added to the base image, which influences how similar the output is to the base image.
* 📈 a high `strength` value means more noise is added to an image and the denoising process takes longer, but you'll get higher quality images that are more different from the base image
* 📉 a low `strength` value means less noise is added to an image and the denoising process is faster, but the image quality may not be as great and the generated image resembles the base image more
```py
import torch
from diffusers import AutoPipelineForInpainting
from diffusers.utils import load_image, make_image_grid
pipeline = AutoPipelineForInpainting.from_pretrained(
"runwayml/stable-diffusion-inpainting", torch_dtype=torch.float16, variant="fp16"
)
pipeline.enable_model_cpu_offload()
# remove following line if xFormers is not installed or you have PyTorch 2.0 or higher installed
pipeline.enable_xformers_memory_efficient_attention()
# load base and mask image
init_image = load_image("https://huggingface.co/datasets/huggingface/documentation-images/resolve/main/diffusers/inpaint.png")
mask_image = load_image("https://huggingface.co/datasets/huggingface/documentation-images/resolve/main/diffusers/inpaint_mask.png")
prompt = "concept art digital painting of an elven castle, inspired by lord of the rings, highly detailed, 8k"
image = pipeline(prompt=prompt, image=init_image, mask_image=mask_image, strength=0.6).images[0]
make_image_grid([init_image, mask_image, image], rows=1, cols=3)
```
strength = 0.6
strength = 0.8
strength = 1.0
### Guidance scale
`guidance_scale` affects how aligned the text prompt and generated image are.
* 📈 a high `guidance_scale` value means the prompt and generated image are closely aligned, so the output is a stricter interpretation of the prompt
* 📉 a low `guidance_scale` value means the prompt and generated image are more loosely aligned, so the output may be more varied from the prompt
You can use `strength` and `guidance_scale` together for more control over how expressive the model is. For example, a combination high `strength` and `guidance_scale` values gives the model the most creative freedom.
```py
import torch
from diffusers import AutoPipelineForInpainting
from diffusers.utils import load_image, make_image_grid
pipeline = AutoPipelineForInpainting.from_pretrained(
"runwayml/stable-diffusion-inpainting", torch_dtype=torch.float16, variant="fp16"
)
pipeline.enable_model_cpu_offload()
# remove following line if xFormers is not installed or you have PyTorch 2.0 or higher installed
pipeline.enable_xformers_memory_efficient_attention()
# load base and mask image
init_image = load_image("https://huggingface.co/datasets/huggingface/documentation-images/resolve/main/diffusers/inpaint.png")
mask_image = load_image("https://huggingface.co/datasets/huggingface/documentation-images/resolve/main/diffusers/inpaint_mask.png")
prompt = "concept art digital painting of an elven castle, inspired by lord of the rings, highly detailed, 8k"
image = pipeline(prompt=prompt, image=init_image, mask_image=mask_image, guidance_scale=2.5).images[0]
make_image_grid([init_image, mask_image, image], rows=1, cols=3)
```
guidance_scale = 2.5
guidance_scale = 7.5
guidance_scale = 12.5
### Negative prompt
A negative prompt assumes the opposite role of a prompt; it guides the model away from generating certain things in an image. This is useful for quickly improving image quality and preventing the model from generating things you don't want.
```py
import torch
from diffusers import AutoPipelineForInpainting
from diffusers.utils import load_image, make_image_grid
pipeline = AutoPipelineForInpainting.from_pretrained(
"runwayml/stable-diffusion-inpainting", torch_dtype=torch.float16, variant="fp16"
)
pipeline.enable_model_cpu_offload()
# remove following line if xFormers is not installed or you have PyTorch 2.0 or higher installed
pipeline.enable_xformers_memory_efficient_attention()
# load base and mask image
init_image = load_image("https://huggingface.co/datasets/huggingface/documentation-images/resolve/main/diffusers/inpaint.png")
mask_image = load_image("https://huggingface.co/datasets/huggingface/documentation-images/resolve/main/diffusers/inpaint_mask.png")
prompt = "concept art digital painting of an elven castle, inspired by lord of the rings, highly detailed, 8k"
negative_prompt = "bad architecture, unstable, poor details, blurry"
image = pipeline(prompt=prompt, negative_prompt=negative_prompt, image=init_image, mask_image=mask_image).images[0]
make_image_grid([init_image, mask_image, image], rows=1, cols=3)
```
negative_prompt = "bad architecture, unstable, poor details, blurry"
### Padding mask crop
A method for increasing the inpainting image quality is to use the [`padding_mask_crop`](https://huggingface.co/docs/diffusers/v0.25.0/en/api/pipelines/stable_diffusion/inpaint#diffusers.StableDiffusionInpaintPipeline.__call__.padding_mask_crop) parameter. When enabled, this option crops the masked area with some user-specified padding and it'll also crop the same area from the original image. Both the image and mask are upscaled to a higher resolution for inpainting, and then overlaid on the original image. This is a quick and easy way to improve image quality without using a separate pipeline like [StableDiffusionUpscalePipeline](/docs/diffusers/main/en/api/pipelines/stable_diffusion/upscale#diffusers.StableDiffusionUpscalePipeline).
Add the `padding_mask_crop` parameter to the pipeline call and set it to the desired padding value.
```py
import torch
from diffusers import AutoPipelineForInpainting
from diffusers.utils import load_image
from PIL import Image
generator = torch.Generator(device='cuda').manual_seed(0)
pipeline = AutoPipelineForInpainting.from_pretrained("stable-diffusion-v1-5/stable-diffusion-v1-5", torch_dtype=torch.float16).to('cuda')
base = load_image("https://huggingface.co/datasets/YiYiXu/testing-images/resolve/main/seashore.png")
mask = load_image("https://huggingface.co/datasets/YiYiXu/testing-images/resolve/main/seashore_mask.png")
image = pipeline("boat", image=base, mask_image=mask, strength=0.75, generator=generator, padding_mask_crop=32).images[0]
image
```
default inpaint image
inpaint image with `padding_mask_crop` enabled
## Chained inpainting pipelines
[AutoPipelineForInpainting](/docs/diffusers/main/en/api/pipelines/auto_pipeline#diffusers.AutoPipelineForInpainting) can be chained with other 🤗 Diffusers pipelines to edit their outputs. This is often useful for improving the output quality from your other diffusion pipelines, and if you're using multiple pipelines, it can be more memory-efficient to chain them together to keep the outputs in latent space and reuse the same pipeline components.
### Text-to-image-to-inpaint
Chaining a text-to-image and inpainting pipeline allows you to inpaint the generated image, and you don't have to provide a base image to begin with. This makes it convenient to edit your favorite text-to-image outputs without having to generate an entirely new image.
Start with the text-to-image pipeline to create a castle:
```py
import torch
from diffusers import AutoPipelineForText2Image, AutoPipelineForInpainting
from diffusers.utils import load_image, make_image_grid
pipeline = AutoPipelineForText2Image.from_pretrained(
"stable-diffusion-v1-5/stable-diffusion-v1-5", torch_dtype=torch.float16, variant="fp16", use_safetensors=True
)
pipeline.enable_model_cpu_offload()
# remove following line if xFormers is not installed or you have PyTorch 2.0 or higher installed
pipeline.enable_xformers_memory_efficient_attention()
text2image = pipeline("concept art digital painting of an elven castle, inspired by lord of the rings, highly detailed, 8k").images[0]
```
Load the mask image of the output from above:
```py
mask_image = load_image("https://huggingface.co/datasets/huggingface/documentation-images/resolve/main/diffusers/inpaint_text-chain-mask.png")
```
And let's inpaint the masked area with a waterfall:
```py
pipeline = AutoPipelineForInpainting.from_pretrained(
"kandinsky-community/kandinsky-2-2-decoder-inpaint", torch_dtype=torch.float16
)
pipeline.enable_model_cpu_offload()
# remove following line if xFormers is not installed or you have PyTorch 2.0 or higher installed
pipeline.enable_xformers_memory_efficient_attention()
prompt = "digital painting of a fantasy waterfall, cloudy"
image = pipeline(prompt=prompt, image=text2image, mask_image=mask_image).images[0]
make_image_grid([text2image, mask_image, image], rows=1, cols=3)
```
text-to-image
inpaint
### Inpaint-to-image-to-image
You can also chain an inpainting pipeline before another pipeline like image-to-image or an upscaler to improve the quality.
Begin by inpainting an image:
```py
import torch
from diffusers import AutoPipelineForInpainting, AutoPipelineForImage2Image
from diffusers.utils import load_image, make_image_grid
pipeline = AutoPipelineForInpainting.from_pretrained(
"runwayml/stable-diffusion-inpainting", torch_dtype=torch.float16, variant="fp16"
)
pipeline.enable_model_cpu_offload()
# remove following line if xFormers is not installed or you have PyTorch 2.0 or higher installed
pipeline.enable_xformers_memory_efficient_attention()
# load base and mask image
init_image = load_image("https://huggingface.co/datasets/huggingface/documentation-images/resolve/main/diffusers/inpaint.png")
mask_image = load_image("https://huggingface.co/datasets/huggingface/documentation-images/resolve/main/diffusers/inpaint_mask.png")
prompt = "concept art digital painting of an elven castle, inspired by lord of the rings, highly detailed, 8k"
image_inpainting = pipeline(prompt=prompt, image=init_image, mask_image=mask_image).images[0]
# resize image to 1024x1024 for SDXL
image_inpainting = image_inpainting.resize((1024, 1024))
```
Now let's pass the image to another inpainting pipeline with SDXL's refiner model to enhance the image details and quality:
```py
pipeline = AutoPipelineForInpainting.from_pretrained(
"stabilityai/stable-diffusion-xl-refiner-1.0", torch_dtype=torch.float16, variant="fp16"
)
pipeline.enable_model_cpu_offload()
# remove following line if xFormers is not installed or you have PyTorch 2.0 or higher installed
pipeline.enable_xformers_memory_efficient_attention()
image = pipeline(prompt=prompt, image=image_inpainting, mask_image=mask_image, output_type="latent").images[0]
```
It is important to specify `output_type="latent"` in the pipeline to keep all the outputs in latent space to avoid an unnecessary decode-encode step. This only works if the chained pipelines are using the same VAE. For example, in the [Text-to-image-to-inpaint](#text-to-image-to-inpaint) section, Kandinsky 2.2 uses a different VAE class than the Stable Diffusion model so it won't work. But if you use Stable Diffusion v1.5 for both pipelines, then you can keep everything in latent space because they both use [AutoencoderKL](/docs/diffusers/main/en/api/models/autoencoderkl#diffusers.AutoencoderKL).
Finally, you can pass this image to an image-to-image pipeline to put the finishing touches on it. It is more efficient to use the [from_pipe()](/docs/diffusers/main/en/api/pipelines/auto_pipeline#diffusers.AutoPipelineForImage2Image.from_pipe) method to reuse the existing pipeline components, and avoid unnecessarily loading all the pipeline components into memory again.
```py
pipeline = AutoPipelineForImage2Image.from_pipe(pipeline)
# remove following line if xFormers is not installed or you have PyTorch 2.0 or higher installed
pipeline.enable_xformers_memory_efficient_attention()
image = pipeline(prompt=prompt, image=image).images[0]
make_image_grid([init_image, mask_image, image_inpainting, image], rows=2, cols=2)
```
initial image
inpaint
image-to-image
Image-to-image and inpainting are actually very similar tasks. Image-to-image generates a new image that resembles the existing provided image. Inpainting does the same thing, but it only transforms the image area defined by the mask and the rest of the image is unchanged. You can think of inpainting as a more precise tool for making specific changes and image-to-image has a broader scope for making more sweeping changes.
## Control image generation
Getting an image to look exactly the way you want is challenging because the denoising process is random. While you can control certain aspects of generation by configuring parameters like `negative_prompt`, there are better and more efficient methods for controlling image generation.
### Prompt weighting
Prompt weighting provides a quantifiable way to scale the representation of concepts in a prompt. You can use it to increase or decrease the magnitude of the text embedding vector for each concept in the prompt, which subsequently determines how much of each concept is generated. The [Compel](https://github.com/damian0815/compel) library offers an intuitive syntax for scaling the prompt weights and generating the embeddings. Learn how to create the embeddings in the [Prompt weighting](../using-diffusers/weighted_prompts) guide.
Once you've generated the embeddings, pass them to the `prompt_embeds` (and `negative_prompt_embeds` if you're using a negative prompt) parameter in the [AutoPipelineForInpainting](/docs/diffusers/main/en/api/pipelines/auto_pipeline#diffusers.AutoPipelineForInpainting). The embeddings replace the `prompt` parameter:
```py
import torch
from diffusers import AutoPipelineForInpainting
from diffusers.utils import make_image_grid
pipeline = AutoPipelineForInpainting.from_pretrained(
"runwayml/stable-diffusion-inpainting", torch_dtype=torch.float16,
)
pipeline.enable_model_cpu_offload()
# remove following line if xFormers is not installed or you have PyTorch 2.0 or higher installed
pipeline.enable_xformers_memory_efficient_attention()
image = pipeline(prompt_embeds=prompt_embeds, # generated from Compel
negative_prompt_embeds=negative_prompt_embeds, # generated from Compel
image=init_image,
mask_image=mask_image
).images[0]
make_image_grid([init_image, mask_image, image], rows=1, cols=3)
```
### ControlNet
ControlNet models are used with other diffusion models like Stable Diffusion, and they provide an even more flexible and accurate way to control how an image is generated. A ControlNet accepts an additional conditioning image input that guides the diffusion model to preserve the features in it.
For example, let's condition an image with a ControlNet pretrained on inpaint images:
```py
import torch
import numpy as np
from diffusers import ControlNetModel, StableDiffusionControlNetInpaintPipeline
from diffusers.utils import load_image, make_image_grid
# load ControlNet
controlnet = ControlNetModel.from_pretrained("lllyasviel/control_v11p_sd15_inpaint", torch_dtype=torch.float16, variant="fp16")
# pass ControlNet to the pipeline
pipeline = StableDiffusionControlNetInpaintPipeline.from_pretrained(
"runwayml/stable-diffusion-inpainting", controlnet=controlnet, torch_dtype=torch.float16, variant="fp16"
)
pipeline.enable_model_cpu_offload()
# remove following line if xFormers is not installed or you have PyTorch 2.0 or higher installed
pipeline.enable_xformers_memory_efficient_attention()
# load base and mask image
init_image = load_image("https://huggingface.co/datasets/huggingface/documentation-images/resolve/main/diffusers/inpaint.png")
mask_image = load_image("https://huggingface.co/datasets/huggingface/documentation-images/resolve/main/diffusers/inpaint_mask.png")
# prepare control image
def make_inpaint_condition(init_image, mask_image):
init_image = np.array(init_image.convert("RGB")).astype(np.float32) / 255.0
mask_image = np.array(mask_image.convert("L")).astype(np.float32) / 255.0
assert init_image.shape[0:1] == mask_image.shape[0:1], "image and image_mask must have the same image size"
init_image[mask_image > 0.5] = -1.0 # set as masked pixel
init_image = np.expand_dims(init_image, 0).transpose(0, 3, 1, 2)
init_image = torch.from_numpy(init_image)
return init_image
control_image = make_inpaint_condition(init_image, mask_image)
```
Now generate an image from the base, mask and control images. You'll notice features of the base image are strongly preserved in the generated image.
```py
prompt = "concept art digital painting of an elven castle, inspired by lord of the rings, highly detailed, 8k"
image = pipeline(prompt=prompt, image=init_image, mask_image=mask_image, control_image=control_image).images[0]
make_image_grid([init_image, mask_image, PIL.Image.fromarray(np.uint8(control_image[0][0])).convert('RGB'), image], rows=2, cols=2)
```
You can take this a step further and chain it with an image-to-image pipeline to apply a new [style](https://huggingface.co/nitrosocke/elden-ring-diffusion):
```py
from diffusers import AutoPipelineForImage2Image
pipeline = AutoPipelineForImage2Image.from_pretrained(
"nitrosocke/elden-ring-diffusion", torch_dtype=torch.float16,
)
pipeline.enable_model_cpu_offload()
# remove following line if xFormers is not installed or you have PyTorch 2.0 or higher installed
pipeline.enable_xformers_memory_efficient_attention()
prompt = "elden ring style castle" # include the token "elden ring style" in the prompt
negative_prompt = "bad architecture, deformed, disfigured, poor details"
image_elden_ring = pipeline(prompt, negative_prompt=negative_prompt, image=image).images[0]
make_image_grid([init_image, mask_image, image, image_elden_ring], rows=2, cols=2)
```
initial image
ControlNet inpaint
image-to-image
## Optimize
It can be difficult and slow to run diffusion models if you're resource constrained, but it doesn't have to be with a few optimization tricks. One of the biggest (and easiest) optimizations you can enable is switching to memory-efficient attention. If you're using PyTorch 2.0, [scaled-dot product attention](../optimization/torch2.0#scaled-dot-product-attention) is automatically enabled and you don't need to do anything else. For non-PyTorch 2.0 users, you can install and use [xFormers](../optimization/xformers)'s implementation of memory-efficient attention. Both options reduce memory usage and accelerate inference.
You can also offload the model to the CPU to save even more memory:
```diff
+ pipeline.enable_xformers_memory_efficient_attention()
+ pipeline.enable_model_cpu_offload()
```
To speed-up your inference code even more, use [`torch_compile`](../optimization/torch2.0#torchcompile). You should wrap `torch.compile` around the most intensive component in the pipeline which is typically the UNet:
```py
pipeline.unet = torch.compile(pipeline.unet, mode="reduce-overhead", fullgraph=True)
```
Learn more in the [Reduce memory usage](../optimization/memory) and [Torch 2.0](../optimization/torch2.0) guides.
# Latent Consistency Model
[Latent Consistency Models (LCMs)](https://hf.co/papers/2310.04378) enable fast high-quality image generation by directly predicting the reverse diffusion process in the latent rather than pixel space. In other words, LCMs try to predict the noiseless image from the noisy image in contrast to typical diffusion models that iteratively remove noise from the noisy image. By avoiding the iterative sampling process, LCMs are able to generate high-quality images in 2-4 steps instead of 20-30 steps.
LCMs are distilled from pretrained models which requires ~32 hours of A100 compute. To speed this up, [LCM-LoRAs](https://hf.co/papers/2311.05556) train a [LoRA adapter](https://huggingface.co/docs/peft/conceptual_guides/adapter#low-rank-adaptation-lora) which have much fewer parameters to train compared to the full model. The LCM-LoRA can be plugged into a diffusion model once it has been trained.
This guide will show you how to use LCMs and LCM-LoRAs for fast inference on tasks and how to use them with other adapters like ControlNet or T2I-Adapter.
> [!TIP]
> LCMs and LCM-LoRAs are available for Stable Diffusion v1.5, Stable Diffusion XL, and the SSD-1B model. You can find their checkpoints on the [Latent Consistency](https://hf.co/collections/latent-consistency/latent-consistency-models-weights-654ce61a95edd6dffccef6a8) Collections.
## Text-to-image
To use LCMs, you need to load the LCM checkpoint for your supported model into [UNet2DConditionModel](/docs/diffusers/main/en/api/models/unet2d-cond#diffusers.UNet2DConditionModel) and replace the scheduler with the [LCMScheduler](/docs/diffusers/main/en/api/schedulers/lcm#diffusers.LCMScheduler). Then you can use the pipeline as usual, and pass a text prompt to generate an image in just 4 steps.
A couple of notes to keep in mind when using LCMs are:
* Typically, batch size is doubled inside the pipeline for classifier-free guidance. But LCM applies guidance with guidance embeddings and doesn't need to double the batch size, which leads to faster inference. The downside is that negative prompts don't work with LCM because they don't have any effect on the denoising process.
* The ideal range for `guidance_scale` is [3., 13.] because that is what the UNet was trained with. However, disabling `guidance_scale` with a value of 1.0 is also effective in most cases.
```python
from diffusers import StableDiffusionXLPipeline, UNet2DConditionModel, LCMScheduler
import torch
unet = UNet2DConditionModel.from_pretrained(
"latent-consistency/lcm-sdxl",
torch_dtype=torch.float16,
variant="fp16",
)
pipe = StableDiffusionXLPipeline.from_pretrained(
"stabilityai/stable-diffusion-xl-base-1.0", unet=unet, torch_dtype=torch.float16, variant="fp16",
).to("cuda")
pipe.scheduler = LCMScheduler.from_config(pipe.scheduler.config)
prompt = "Self-portrait oil painting, a beautiful cyborg with golden hair, 8k"
generator = torch.manual_seed(0)
image = pipe(
prompt=prompt, num_inference_steps=4, generator=generator, guidance_scale=8.0
).images[0]
image
```
To use LCM-LoRAs, you need to replace the scheduler with the [LCMScheduler](/docs/diffusers/main/en/api/schedulers/lcm#diffusers.LCMScheduler) and load the LCM-LoRA weights with the [load_lora_weights()](/docs/diffusers/main/en/api/loaders/lora#diffusers.loaders.StableDiffusionLoraLoaderMixin.load_lora_weights) method. Then you can use the pipeline as usual, and pass a text prompt to generate an image in just 4 steps.
A couple of notes to keep in mind when using LCM-LoRAs are:
* Typically, batch size is doubled inside the pipeline for classifier-free guidance. But LCM applies guidance with guidance embeddings and doesn't need to double the batch size, which leads to faster inference. The downside is that negative prompts don't work with LCM because they don't have any effect on the denoising process.
* You could use guidance with LCM-LoRAs, but it is very sensitive to high `guidance_scale` values and can lead to artifacts in the generated image. The best values we've found are between [1.0, 2.0].
* Replace [stabilityai/stable-diffusion-xl-base-1.0](https://hf.co/stabilityai/stable-diffusion-xl-base-1.0) with any finetuned model. For example, try using the [animagine-xl](https://huggingface.co/Linaqruf/animagine-xl) checkpoint to generate anime images with SDXL.
```py
import torch
from diffusers import DiffusionPipeline, LCMScheduler
pipe = DiffusionPipeline.from_pretrained(
"stabilityai/stable-diffusion-xl-base-1.0",
variant="fp16",
torch_dtype=torch.float16
).to("cuda")
pipe.scheduler = LCMScheduler.from_config(pipe.scheduler.config)
pipe.load_lora_weights("latent-consistency/lcm-lora-sdxl")
prompt = "Self-portrait oil painting, a beautiful cyborg with golden hair, 8k"
generator = torch.manual_seed(42)
image = pipe(
prompt=prompt, num_inference_steps=4, generator=generator, guidance_scale=1.0
).images[0]
image
```
## Image-to-image
To use LCMs for image-to-image, you need to load the LCM checkpoint for your supported model into [UNet2DConditionModel](/docs/diffusers/main/en/api/models/unet2d-cond#diffusers.UNet2DConditionModel) and replace the scheduler with the [LCMScheduler](/docs/diffusers/main/en/api/schedulers/lcm#diffusers.LCMScheduler). Then you can use the pipeline as usual, and pass a text prompt and initial image to generate an image in just 4 steps.
> [!TIP]
> Experiment with different values for `num_inference_steps`, `strength`, and `guidance_scale` to get the best results.
```python
import torch
from diffusers import AutoPipelineForImage2Image, UNet2DConditionModel, LCMScheduler
from diffusers.utils import load_image
unet = UNet2DConditionModel.from_pretrained(
"SimianLuo/LCM_Dreamshaper_v7",
subfolder="unet",
torch_dtype=torch.float16,
)
pipe = AutoPipelineForImage2Image.from_pretrained(
"Lykon/dreamshaper-7",
unet=unet,
torch_dtype=torch.float16,
variant="fp16",
).to("cuda")
pipe.scheduler = LCMScheduler.from_config(pipe.scheduler.config)
init_image = load_image("https://huggingface.co/datasets/huggingface/documentation-images/resolve/main/diffusers/img2img-init.png")
prompt = "Astronauts in a jungle, cold color palette, muted colors, detailed, 8k"
generator = torch.manual_seed(0)
image = pipe(
prompt,
image=init_image,
num_inference_steps=4,
guidance_scale=7.5,
strength=0.5,
generator=generator
).images[0]
image
```
initial image
generated image
To use LCM-LoRAs for image-to-image, you need to replace the scheduler with the [LCMScheduler](/docs/diffusers/main/en/api/schedulers/lcm#diffusers.LCMScheduler) and load the LCM-LoRA weights with the [load_lora_weights()](/docs/diffusers/main/en/api/loaders/lora#diffusers.loaders.StableDiffusionLoraLoaderMixin.load_lora_weights) method. Then you can use the pipeline as usual, and pass a text prompt and initial image to generate an image in just 4 steps.
> [!TIP]
> Experiment with different values for `num_inference_steps`, `strength`, and `guidance_scale` to get the best results.
```py
import torch
from diffusers import AutoPipelineForImage2Image, LCMScheduler
from diffusers.utils import make_image_grid, load_image
pipe = AutoPipelineForImage2Image.from_pretrained(
"Lykon/dreamshaper-7",
torch_dtype=torch.float16,
variant="fp16",
).to("cuda")
pipe.scheduler = LCMScheduler.from_config(pipe.scheduler.config)
pipe.load_lora_weights("latent-consistency/lcm-lora-sdv1-5")
init_image = load_image("https://huggingface.co/datasets/huggingface/documentation-images/resolve/main/diffusers/img2img-init.png")
prompt = "Astronauts in a jungle, cold color palette, muted colors, detailed, 8k"
generator = torch.manual_seed(0)
image = pipe(
prompt,
image=init_image,
num_inference_steps=4,
guidance_scale=1,
strength=0.6,
generator=generator
).images[0]
image
```
initial image
generated image
## Inpainting
To use LCM-LoRAs for inpainting, you need to replace the scheduler with the [LCMScheduler](/docs/diffusers/main/en/api/schedulers/lcm#diffusers.LCMScheduler) and load the LCM-LoRA weights with the [load_lora_weights()](/docs/diffusers/main/en/api/loaders/lora#diffusers.loaders.StableDiffusionLoraLoaderMixin.load_lora_weights) method. Then you can use the pipeline as usual, and pass a text prompt, initial image, and mask image to generate an image in just 4 steps.
```py
import torch
from diffusers import AutoPipelineForInpainting, LCMScheduler
from diffusers.utils import load_image, make_image_grid
pipe = AutoPipelineForInpainting.from_pretrained(
"runwayml/stable-diffusion-inpainting",
torch_dtype=torch.float16,
variant="fp16",
).to("cuda")
pipe.scheduler = LCMScheduler.from_config(pipe.scheduler.config)
pipe.load_lora_weights("latent-consistency/lcm-lora-sdv1-5")
init_image = load_image("https://huggingface.co/datasets/huggingface/documentation-images/resolve/main/diffusers/inpaint.png")
mask_image = load_image("https://huggingface.co/datasets/huggingface/documentation-images/resolve/main/diffusers/inpaint_mask.png")
prompt = "concept art digital painting of an elven castle, inspired by lord of the rings, highly detailed, 8k"
generator = torch.manual_seed(0)
image = pipe(
prompt=prompt,
image=init_image,
mask_image=mask_image,
generator=generator,
num_inference_steps=4,
guidance_scale=4,
).images[0]
image
```
initial image
generated image
## Adapters
LCMs are compatible with adapters like LoRA, ControlNet, T2I-Adapter, and AnimateDiff. You can bring the speed of LCMs to these adapters to generate images in a certain style or condition the model on another input like a canny image.
### LoRA
[LoRA](../using-diffusers/loading_adapters#lora) adapters can be rapidly finetuned to learn a new style from just a few images and plugged into a pretrained model to generate images in that style.
Load the LCM checkpoint for your supported model into [UNet2DConditionModel](/docs/diffusers/main/en/api/models/unet2d-cond#diffusers.UNet2DConditionModel) and replace the scheduler with the [LCMScheduler](/docs/diffusers/main/en/api/schedulers/lcm#diffusers.LCMScheduler). Then you can use the [load_lora_weights()](/docs/diffusers/main/en/api/loaders/lora#diffusers.loaders.StableDiffusionLoraLoaderMixin.load_lora_weights) method to load the LoRA weights into the LCM and generate a styled image in a few steps.
```python
from diffusers import StableDiffusionXLPipeline, UNet2DConditionModel, LCMScheduler
import torch
unet = UNet2DConditionModel.from_pretrained(
"latent-consistency/lcm-sdxl",
torch_dtype=torch.float16,
variant="fp16",
)
pipe = StableDiffusionXLPipeline.from_pretrained(
"stabilityai/stable-diffusion-xl-base-1.0", unet=unet, torch_dtype=torch.float16, variant="fp16",
).to("cuda")
pipe.scheduler = LCMScheduler.from_config(pipe.scheduler.config)
pipe.load_lora_weights("TheLastBen/Papercut_SDXL", weight_name="papercut.safetensors", adapter_name="papercut")
prompt = "papercut, a cute fox"
generator = torch.manual_seed(0)
image = pipe(
prompt=prompt, num_inference_steps=4, generator=generator, guidance_scale=8.0
).images[0]
image
```
Replace the scheduler with the [LCMScheduler](/docs/diffusers/main/en/api/schedulers/lcm#diffusers.LCMScheduler). Then you can use the [load_lora_weights()](/docs/diffusers/main/en/api/loaders/lora#diffusers.loaders.StableDiffusionLoraLoaderMixin.load_lora_weights) method to load the LCM-LoRA weights and the style LoRA you want to use. Combine both LoRA adapters with the `~loaders.UNet2DConditionLoadersMixin.set_adapters` method and generate a styled image in a few steps.
```py
import torch
from diffusers import DiffusionPipeline, LCMScheduler
pipe = DiffusionPipeline.from_pretrained(
"stabilityai/stable-diffusion-xl-base-1.0",
variant="fp16",
torch_dtype=torch.float16
).to("cuda")
pipe.scheduler = LCMScheduler.from_config(pipe.scheduler.config)
pipe.load_lora_weights("latent-consistency/lcm-lora-sdxl", adapter_name="lcm")
pipe.load_lora_weights("TheLastBen/Papercut_SDXL", weight_name="papercut.safetensors", adapter_name="papercut")
pipe.set_adapters(["lcm", "papercut"], adapter_weights=[1.0, 0.8])
prompt = "papercut, a cute fox"
generator = torch.manual_seed(0)
image = pipe(prompt, num_inference_steps=4, guidance_scale=1, generator=generator).images[0]
image
```
### ControlNet
[ControlNet](./controlnet) are adapters that can be trained on a variety of inputs like canny edge, pose estimation, or depth. The ControlNet can be inserted into the pipeline to provide additional conditioning and control to the model for more accurate generation.
You can find additional ControlNet models trained on other inputs in [lllyasviel's](https://hf.co/lllyasviel) repository.
Load a ControlNet model trained on canny images and pass it to the [ControlNetModel](/docs/diffusers/main/en/api/models/controlnet#diffusers.ControlNetModel). Then you can load a LCM model into [StableDiffusionControlNetPipeline](/docs/diffusers/main/en/api/pipelines/controlnet#diffusers.StableDiffusionControlNetPipeline) and replace the scheduler with the [LCMScheduler](/docs/diffusers/main/en/api/schedulers/lcm#diffusers.LCMScheduler). Now pass the canny image to the pipeline and generate an image.
> [!TIP]
> Experiment with different values for `num_inference_steps`, `controlnet_conditioning_scale`, `cross_attention_kwargs`, and `guidance_scale` to get the best results.
```python
import torch
import cv2
import numpy as np
from PIL import Image
from diffusers import StableDiffusionControlNetPipeline, ControlNetModel, LCMScheduler
from diffusers.utils import load_image, make_image_grid
image = load_image(
"https://hf.co/datasets/huggingface/documentation-images/resolve/main/diffusers/input_image_vermeer.png"
).resize((512, 512))
image = np.array(image)
low_threshold = 100
high_threshold = 200
image = cv2.Canny(image, low_threshold, high_threshold)
image = image[:, :, None]
image = np.concatenate([image, image, image], axis=2)
canny_image = Image.fromarray(image)
controlnet = ControlNetModel.from_pretrained("lllyasviel/sd-controlnet-canny", torch_dtype=torch.float16)
pipe = StableDiffusionControlNetPipeline.from_pretrained(
"SimianLuo/LCM_Dreamshaper_v7",
controlnet=controlnet,
torch_dtype=torch.float16,
safety_checker=None,
).to("cuda")
pipe.scheduler = LCMScheduler.from_config(pipe.scheduler.config)
generator = torch.manual_seed(0)
image = pipe(
"the mona lisa",
image=canny_image,
num_inference_steps=4,
generator=generator,
).images[0]
make_image_grid([canny_image, image], rows=1, cols=2)
```
Load a ControlNet model trained on canny images and pass it to the [ControlNetModel](/docs/diffusers/main/en/api/models/controlnet#diffusers.ControlNetModel). Then you can load a Stable Diffusion v1.5 model into [StableDiffusionControlNetPipeline](/docs/diffusers/main/en/api/pipelines/controlnet#diffusers.StableDiffusionControlNetPipeline) and replace the scheduler with the [LCMScheduler](/docs/diffusers/main/en/api/schedulers/lcm#diffusers.LCMScheduler). Use the [load_lora_weights()](/docs/diffusers/main/en/api/loaders/lora#diffusers.loaders.StableDiffusionLoraLoaderMixin.load_lora_weights) method to load the LCM-LoRA weights, and pass the canny image to the pipeline and generate an image.
> [!TIP]
> Experiment with different values for `num_inference_steps`, `controlnet_conditioning_scale`, `cross_attention_kwargs`, and `guidance_scale` to get the best results.
```py
import torch
import cv2
import numpy as np
from PIL import Image
from diffusers import StableDiffusionControlNetPipeline, ControlNetModel, LCMScheduler
from diffusers.utils import load_image
image = load_image(
"https://hf.co/datasets/huggingface/documentation-images/resolve/main/diffusers/input_image_vermeer.png"
).resize((512, 512))
image = np.array(image)
low_threshold = 100
high_threshold = 200
image = cv2.Canny(image, low_threshold, high_threshold)
image = image[:, :, None]
image = np.concatenate([image, image, image], axis=2)
canny_image = Image.fromarray(image)
controlnet = ControlNetModel.from_pretrained("lllyasviel/sd-controlnet-canny", torch_dtype=torch.float16)
pipe = StableDiffusionControlNetPipeline.from_pretrained(
"stable-diffusion-v1-5/stable-diffusion-v1-5",
controlnet=controlnet,
torch_dtype=torch.float16,
safety_checker=None,
variant="fp16"
).to("cuda")
pipe.scheduler = LCMScheduler.from_config(pipe.scheduler.config)
pipe.load_lora_weights("latent-consistency/lcm-lora-sdv1-5")
generator = torch.manual_seed(0)
image = pipe(
"the mona lisa",
image=canny_image,
num_inference_steps=4,
guidance_scale=1.5,
controlnet_conditioning_scale=0.8,
cross_attention_kwargs={"scale": 1},
generator=generator,
).images[0]
image
```
### T2I-Adapter
[T2I-Adapter](./t2i_adapter) is an even more lightweight adapter than ControlNet, that provides an additional input to condition a pretrained model with. It is faster than ControlNet but the results may be slightly worse.
You can find additional T2I-Adapter checkpoints trained on other inputs in [TencentArc's](https://hf.co/TencentARC) repository.
Load a T2IAdapter trained on canny images and pass it to the [StableDiffusionXLAdapterPipeline](/docs/diffusers/main/en/api/pipelines/stable_diffusion/adapter#diffusers.StableDiffusionXLAdapterPipeline). Then load a LCM checkpoint into [UNet2DConditionModel](/docs/diffusers/main/en/api/models/unet2d-cond#diffusers.UNet2DConditionModel) and replace the scheduler with the [LCMScheduler](/docs/diffusers/main/en/api/schedulers/lcm#diffusers.LCMScheduler). Now pass the canny image to the pipeline and generate an image.
```python
import torch
import cv2
import numpy as np
from PIL import Image
from diffusers import StableDiffusionXLAdapterPipeline, UNet2DConditionModel, T2IAdapter, LCMScheduler
from diffusers.utils import load_image, make_image_grid
# detect the canny map in low resolution to avoid high-frequency details
image = load_image(
"https://hf.co/datasets/huggingface/documentation-images/resolve/main/diffusers/input_image_vermeer.png"
).resize((384, 384))
image = np.array(image)
low_threshold = 100
high_threshold = 200
image = cv2.Canny(image, low_threshold, high_threshold)
image = image[:, :, None]
image = np.concatenate([image, image, image], axis=2)
canny_image = Image.fromarray(image).resize((1024, 1216))
adapter = T2IAdapter.from_pretrained("TencentARC/t2i-adapter-canny-sdxl-1.0", torch_dtype=torch.float16, varient="fp16").to("cuda")
unet = UNet2DConditionModel.from_pretrained(
"latent-consistency/lcm-sdxl",
torch_dtype=torch.float16,
variant="fp16",
)
pipe = StableDiffusionXLAdapterPipeline.from_pretrained(
"stabilityai/stable-diffusion-xl-base-1.0",
unet=unet,
adapter=adapter,
torch_dtype=torch.float16,
variant="fp16",
).to("cuda")
pipe.scheduler = LCMScheduler.from_config(pipe.scheduler.config)
prompt = "the mona lisa, 4k picture, high quality"
negative_prompt = "extra digit, fewer digits, cropped, worst quality, low quality, glitch, deformed, mutated, ugly, disfigured"
generator = torch.manual_seed(0)
image = pipe(
prompt=prompt,
negative_prompt=negative_prompt,
image=canny_image,
num_inference_steps=4,
guidance_scale=5,
adapter_conditioning_scale=0.8,
adapter_conditioning_factor=1,
generator=generator,
).images[0]
```
Load a T2IAdapter trained on canny images and pass it to the [StableDiffusionXLAdapterPipeline](/docs/diffusers/main/en/api/pipelines/stable_diffusion/adapter#diffusers.StableDiffusionXLAdapterPipeline). Replace the scheduler with the [LCMScheduler](/docs/diffusers/main/en/api/schedulers/lcm#diffusers.LCMScheduler), and use the [load_lora_weights()](/docs/diffusers/main/en/api/loaders/lora#diffusers.loaders.StableDiffusionLoraLoaderMixin.load_lora_weights) method to load the LCM-LoRA weights. Pass the canny image to the pipeline and generate an image.
```py
import torch
import cv2
import numpy as np
from PIL import Image
from diffusers import StableDiffusionXLAdapterPipeline, UNet2DConditionModel, T2IAdapter, LCMScheduler
from diffusers.utils import load_image, make_image_grid
# detect the canny map in low resolution to avoid high-frequency details
image = load_image(
"https://hf.co/datasets/huggingface/documentation-images/resolve/main/diffusers/input_image_vermeer.png"
).resize((384, 384))
image = np.array(image)
low_threshold = 100
high_threshold = 200
image = cv2.Canny(image, low_threshold, high_threshold)
image = image[:, :, None]
image = np.concatenate([image, image, image], axis=2)
canny_image = Image.fromarray(image).resize((1024, 1024))
adapter = T2IAdapter.from_pretrained("TencentARC/t2i-adapter-canny-sdxl-1.0", torch_dtype=torch.float16, varient="fp16").to("cuda")
pipe = StableDiffusionXLAdapterPipeline.from_pretrained(
"stabilityai/stable-diffusion-xl-base-1.0",
adapter=adapter,
torch_dtype=torch.float16,
variant="fp16",
).to("cuda")
pipe.scheduler = LCMScheduler.from_config(pipe.scheduler.config)
pipe.load_lora_weights("latent-consistency/lcm-lora-sdxl")
prompt = "the mona lisa, 4k picture, high quality"
negative_prompt = "extra digit, fewer digits, cropped, worst quality, low quality, glitch, deformed, mutated, ugly, disfigured"
generator = torch.manual_seed(0)
image = pipe(
prompt=prompt,
negative_prompt=negative_prompt,
image=canny_image,
num_inference_steps=4,
guidance_scale=1.5,
adapter_conditioning_scale=0.8,
adapter_conditioning_factor=1,
generator=generator,
).images[0]
```
### AnimateDiff
[AnimateDiff](../api/pipelines/animatediff) is an adapter that adds motion to an image. It can be used with most Stable Diffusion models, effectively turning them into "video generation" models. Generating good results with a video model usually requires generating multiple frames (16-24), which can be very slow with a regular Stable Diffusion model. LCM-LoRA can speed up this process by only taking 4-8 steps for each frame.
Load a [AnimateDiffPipeline](/docs/diffusers/main/en/api/pipelines/animatediff#diffusers.AnimateDiffPipeline) and pass a `MotionAdapter` to it. Then replace the scheduler with the [LCMScheduler](/docs/diffusers/main/en/api/schedulers/lcm#diffusers.LCMScheduler), and combine both LoRA adapters with the `~loaders.UNet2DConditionLoadersMixin.set_adapters` method. Now you can pass a prompt to the pipeline and generate an animated image.
```py
import torch
from diffusers import MotionAdapter, AnimateDiffPipeline, DDIMScheduler, LCMScheduler
from diffusers.utils import export_to_gif
adapter = MotionAdapter.from_pretrained("guoyww/animatediff-motion-adapter-v1-5")
pipe = AnimateDiffPipeline.from_pretrained(
"frankjoshua/toonyou_beta6",
motion_adapter=adapter,
).to("cuda")
# set scheduler
pipe.scheduler = LCMScheduler.from_config(pipe.scheduler.config)
# load LCM-LoRA
pipe.load_lora_weights("latent-consistency/lcm-lora-sdv1-5", adapter_name="lcm")
pipe.load_lora_weights("guoyww/animatediff-motion-lora-zoom-in", weight_name="diffusion_pytorch_model.safetensors", adapter_name="motion-lora")
pipe.set_adapters(["lcm", "motion-lora"], adapter_weights=[0.55, 1.2])
prompt = "best quality, masterpiece, 1girl, looking at viewer, blurry background, upper body, contemporary, dress"
generator = torch.manual_seed(0)
frames = pipe(
prompt=prompt,
num_inference_steps=5,
guidance_scale=1.25,
cross_attention_kwargs={"scale": 1},
num_frames=24,
generator=generator
).frames[0]
export_to_gif(frames, "animation.gif")
```
# Understanding pipelines, models and schedulers
🧨 Diffusers is designed to be a user-friendly and flexible toolbox for building diffusion systems tailored to your use-case. At the core of the toolbox are models and schedulers. While the [DiffusionPipeline](/docs/diffusers/main/en/api/pipelines/overview#diffusers.DiffusionPipeline) bundles these components together for convenience, you can also unbundle the pipeline and use the models and schedulers separately to create new diffusion systems.
In this tutorial, you'll learn how to use models and schedulers to assemble a diffusion system for inference, starting with a basic pipeline and then progressing to the Stable Diffusion pipeline.
## Deconstruct a basic pipeline
A pipeline is a quick and easy way to run a model for inference, requiring no more than four lines of code to generate an image:
```py
>>> from diffusers import DDPMPipeline
>>> ddpm = DDPMPipeline.from_pretrained("google/ddpm-cat-256", use_safetensors=True).to("cuda")
>>> image = ddpm(num_inference_steps=25).images[0]
>>> image
```
That was super easy, but how did the pipeline do that? Let's breakdown the pipeline and take a look at what's happening under the hood.
In the example above, the pipeline contains a [UNet2DModel](/docs/diffusers/main/en/api/models/unet2d#diffusers.UNet2DModel) model and a [DDPMScheduler](/docs/diffusers/main/en/api/schedulers/ddpm#diffusers.DDPMScheduler). The pipeline denoises an image by taking random noise the size of the desired output and passing it through the model several times. At each timestep, the model predicts the *noise residual* and the scheduler uses it to predict a less noisy image. The pipeline repeats this process until it reaches the end of the specified number of inference steps.
To recreate the pipeline with the model and scheduler separately, let's write our own denoising process.
1. Load the model and scheduler:
```py
>>> from diffusers import DDPMScheduler, UNet2DModel
>>> scheduler = DDPMScheduler.from_pretrained("google/ddpm-cat-256")
>>> model = UNet2DModel.from_pretrained("google/ddpm-cat-256", use_safetensors=True).to("cuda")
```
2. Set the number of timesteps to run the denoising process for:
```py
>>> scheduler.set_timesteps(50)
```
3. Setting the scheduler timesteps creates a tensor with evenly spaced elements in it, 50 in this example. Each element corresponds to a timestep at which the model denoises an image. When you create the denoising loop later, you'll iterate over this tensor to denoise an image:
```py
>>> scheduler.timesteps
tensor([980, 960, 940, 920, 900, 880, 860, 840, 820, 800, 780, 760, 740, 720,
700, 680, 660, 640, 620, 600, 580, 560, 540, 520, 500, 480, 460, 440,
420, 400, 380, 360, 340, 320, 300, 280, 260, 240, 220, 200, 180, 160,
140, 120, 100, 80, 60, 40, 20, 0])
```
4. Create some random noise with the same shape as the desired output:
```py
>>> import torch
>>> sample_size = model.config.sample_size
>>> noise = torch.randn((1, 3, sample_size, sample_size), device="cuda")
```
5. Now write a loop to iterate over the timesteps. At each timestep, the model does a [UNet2DModel.forward()](/docs/diffusers/main/en/api/models/unet2d#diffusers.UNet2DModel.forward) pass and returns the noisy residual. The scheduler's [step()](/docs/diffusers/main/en/api/schedulers/ddpm#diffusers.DDPMScheduler.step) method takes the noisy residual, timestep, and input and it predicts the image at the previous timestep. This output becomes the next input to the model in the denoising loop, and it'll repeat until it reaches the end of the `timesteps` array.
```py
>>> input = noise
>>> for t in scheduler.timesteps:
... with torch.no_grad():
... noisy_residual = model(input, t).sample
... previous_noisy_sample = scheduler.step(noisy_residual, t, input).prev_sample
... input = previous_noisy_sample
```
This is the entire denoising process, and you can use this same pattern to write any diffusion system.
6. The last step is to convert the denoised output into an image:
```py
>>> from PIL import Image
>>> import numpy as np
>>> image = (input / 2 + 0.5).clamp(0, 1).squeeze()
>>> image = (image.permute(1, 2, 0) * 255).round().to(torch.uint8).cpu().numpy()
>>> image = Image.fromarray(image)
>>> image
```
In the next section, you'll put your skills to the test and breakdown the more complex Stable Diffusion pipeline. The steps are more or less the same. You'll initialize the necessary components, and set the number of timesteps to create a `timestep` array. The `timestep` array is used in the denoising loop, and for each element in this array, the model predicts a less noisy image. The denoising loop iterates over the `timestep`'s, and at each timestep, it outputs a noisy residual and the scheduler uses it to predict a less noisy image at the previous timestep. This process is repeated until you reach the end of the `timestep` array.
Let's try it out!
## Deconstruct the Stable Diffusion pipeline
Stable Diffusion is a text-to-image *latent diffusion* model. It is called a latent diffusion model because it works with a lower-dimensional representation of the image instead of the actual pixel space, which makes it more memory efficient. The encoder compresses the image into a smaller representation, and a decoder to convert the compressed representation back into an image. For text-to-image models, you'll need a tokenizer and an encoder to generate text embeddings. From the previous example, you already know you need a UNet model and a scheduler.
As you can see, this is already more complex than the DDPM pipeline which only contains a UNet model. The Stable Diffusion model has three separate pretrained models.
💡 Read the [How does Stable Diffusion work?](https://huggingface.co/blog/stable_diffusion#how-does-stable-diffusion-work) blog for more details about how the VAE, UNet, and text encoder models work.
Now that you know what you need for the Stable Diffusion pipeline, load all these components with the [from_pretrained()](/docs/diffusers/main/en/api/models/overview#diffusers.ModelMixin.from_pretrained) method. You can find them in the pretrained [`stable-diffusion-v1-5/stable-diffusion-v1-5`](https://huggingface.co/stable-diffusion-v1-5/stable-diffusion-v1-5) checkpoint, and each component is stored in a separate subfolder:
```py
>>> from PIL import Image
>>> import torch
>>> from transformers import CLIPTextModel, CLIPTokenizer
>>> from diffusers import AutoencoderKL, UNet2DConditionModel, PNDMScheduler
>>> vae = AutoencoderKL.from_pretrained("CompVis/stable-diffusion-v1-4", subfolder="vae", use_safetensors=True)
>>> tokenizer = CLIPTokenizer.from_pretrained("CompVis/stable-diffusion-v1-4", subfolder="tokenizer")
>>> text_encoder = CLIPTextModel.from_pretrained(
... "CompVis/stable-diffusion-v1-4", subfolder="text_encoder", use_safetensors=True
... )
>>> unet = UNet2DConditionModel.from_pretrained(
... "CompVis/stable-diffusion-v1-4", subfolder="unet", use_safetensors=True
... )
```
Instead of the default [PNDMScheduler](/docs/diffusers/main/en/api/schedulers/pndm#diffusers.PNDMScheduler), exchange it for the [UniPCMultistepScheduler](/docs/diffusers/main/en/api/schedulers/unipc#diffusers.UniPCMultistepScheduler) to see how easy it is to plug a different scheduler in:
```py
>>> from diffusers import UniPCMultistepScheduler
>>> scheduler = UniPCMultistepScheduler.from_pretrained("CompVis/stable-diffusion-v1-4", subfolder="scheduler")
```
To speed up inference, move the models to a GPU since, unlike the scheduler, they have trainable weights:
```py
>>> torch_device = "cuda"
>>> vae.to(torch_device)
>>> text_encoder.to(torch_device)
>>> unet.to(torch_device)
```
### Create text embeddings
The next step is to tokenize the text to generate embeddings. The text is used to condition the UNet model and steer the diffusion process towards something that resembles the input prompt.
💡 The `guidance_scale` parameter determines how much weight should be given to the prompt when generating an image.
Feel free to choose any prompt you like if you want to generate something else!
```py
>>> prompt = ["a photograph of an astronaut riding a horse"]
>>> height = 512 # default height of Stable Diffusion
>>> width = 512 # default width of Stable Diffusion
>>> num_inference_steps = 25 # Number of denoising steps
>>> guidance_scale = 7.5 # Scale for classifier-free guidance
>>> generator = torch.manual_seed(0) # Seed generator to create the initial latent noise
>>> batch_size = len(prompt)
```
Tokenize the text and generate the embeddings from the prompt:
```py
>>> text_input = tokenizer(
... prompt, padding="max_length", max_length=tokenizer.model_max_length, truncation=True, return_tensors="pt"
... )
>>> with torch.no_grad():
... text_embeddings = text_encoder(text_input.input_ids.to(torch_device))[0]
```
You'll also need to generate the *unconditional text embeddings* which are the embeddings for the padding token. These need to have the same shape (`batch_size` and `seq_length`) as the conditional `text_embeddings`:
```py
>>> max_length = text_input.input_ids.shape[-1]
>>> uncond_input = tokenizer([""] * batch_size, padding="max_length", max_length=max_length, return_tensors="pt")
>>> uncond_embeddings = text_encoder(uncond_input.input_ids.to(torch_device))[0]
```
Let's concatenate the conditional and unconditional embeddings into a batch to avoid doing two forward passes:
```py
>>> text_embeddings = torch.cat([uncond_embeddings, text_embeddings])
```
### Create random noise
Next, generate some initial random noise as a starting point for the diffusion process. This is the latent representation of the image, and it'll be gradually denoised. At this point, the `latent` image is smaller than the final image size but that's okay though because the model will transform it into the final 512x512 image dimensions later.
💡 The height and width are divided by 8 because the `vae` model has 3 down-sampling layers. You can check by running the following:
```py
2 ** (len(vae.config.block_out_channels) - 1) == 8
```
```py
>>> latents = torch.randn(
... (batch_size, unet.config.in_channels, height // 8, width // 8),
... generator=generator,
... device=torch_device,
... )
```
### Denoise the image
Start by scaling the input with the initial noise distribution, *sigma*, the noise scale value, which is required for improved schedulers like [UniPCMultistepScheduler](/docs/diffusers/main/en/api/schedulers/unipc#diffusers.UniPCMultistepScheduler):
```py
>>> latents = latents * scheduler.init_noise_sigma
```
The last step is to create the denoising loop that'll progressively transform the pure noise in `latents` to an image described by your prompt. Remember, the denoising loop needs to do three things:
1. Set the scheduler's timesteps to use during denoising.
2. Iterate over the timesteps.
3. At each timestep, call the UNet model to predict the noise residual and pass it to the scheduler to compute the previous noisy sample.
```py
>>> from tqdm.auto import tqdm
>>> scheduler.set_timesteps(num_inference_steps)
>>> for t in tqdm(scheduler.timesteps):
... # expand the latents if we are doing classifier-free guidance to avoid doing two forward passes.
... latent_model_input = torch.cat([latents] * 2)
... latent_model_input = scheduler.scale_model_input(latent_model_input, timestep=t)
... # predict the noise residual
... with torch.no_grad():
... noise_pred = unet(latent_model_input, t, encoder_hidden_states=text_embeddings).sample
... # perform guidance
... noise_pred_uncond, noise_pred_text = noise_pred.chunk(2)
... noise_pred = noise_pred_uncond + guidance_scale * (noise_pred_text - noise_pred_uncond)
... # compute the previous noisy sample x_t -> x_t-1
... latents = scheduler.step(noise_pred, t, latents).prev_sample
```
### Decode the image
The final step is to use the `vae` to decode the latent representation into an image and get the decoded output with `sample`:
```py
# scale and decode the image latents with vae
latents = 1 / 0.18215 * latents
with torch.no_grad():
image = vae.decode(latents).sample
```
Lastly, convert the image to a `PIL.Image` to see your generated image!
```py
>>> image = (image / 2 + 0.5).clamp(0, 1).squeeze()
>>> image = (image.permute(1, 2, 0) * 255).to(torch.uint8).cpu().numpy()
>>> image = Image.fromarray(image)
>>> image
```
## Next steps
From basic to complex pipelines, you've seen that all you really need to write your own diffusion system is a denoising loop. The loop should set the scheduler's timesteps, iterate over them, and alternate between calling the UNet model to predict the noise residual and passing it to the scheduler to compute the previous noisy sample.
This is really what 🧨 Diffusers is designed for: to make it intuitive and easy to write your own diffusion system using models and schedulers.
For your next steps, feel free to:
* Learn how to [build and contribute a pipeline](../using-diffusers/contribute_pipeline) to 🧨 Diffusers. We can't wait and see what you'll come up with!
* Explore [existing pipelines](../api/pipelines/overview) in the library, and see if you can deconstruct and build a pipeline from scratch using the models and schedulers separately.
# Textual inversion
The [StableDiffusionPipeline](/docs/diffusers/main/en/api/pipelines/stable_diffusion/text2img#diffusers.StableDiffusionPipeline) supports textual inversion, a technique that enables a model like Stable Diffusion to learn a new concept from just a few sample images. This gives you more control over the generated images and allows you to tailor the model towards specific concepts. You can get started quickly with a collection of community created concepts in the [Stable Diffusion Conceptualizer](https://huggingface.co/spaces/sd-concepts-library/stable-diffusion-conceptualizer).
This guide will show you how to run inference with textual inversion using a pre-learned concept from the Stable Diffusion Conceptualizer. If you're interested in teaching a model new concepts with textual inversion, take a look at the [Textual Inversion](../training/text_inversion) training guide.
Import the necessary libraries:
```py
import torch
from diffusers import StableDiffusionPipeline
from diffusers.utils import make_image_grid
```
## Stable Diffusion 1 and 2
Pick a Stable Diffusion checkpoint and a pre-learned concept from the [Stable Diffusion Conceptualizer](https://huggingface.co/spaces/sd-concepts-library/stable-diffusion-conceptualizer):
```py
pretrained_model_name_or_path = "stable-diffusion-v1-5/stable-diffusion-v1-5"
repo_id_embeds = "sd-concepts-library/cat-toy"
```
Now you can load a pipeline, and pass the pre-learned concept to it:
```py
pipeline = StableDiffusionPipeline.from_pretrained(
pretrained_model_name_or_path, torch_dtype=torch.float16, use_safetensors=True
).to("cuda")
pipeline.load_textual_inversion(repo_id_embeds)
```
Create a prompt with the pre-learned concept by using the special placeholder token ``, and choose the number of samples and rows of images you'd like to generate:
```py
prompt = "a grafitti in a favela wall with a on it"
num_samples_per_row = 2
num_rows = 2
```
Then run the pipeline (feel free to adjust the parameters like `num_inference_steps` and `guidance_scale` to see how they affect image quality), save the generated images and visualize them with the helper function you created at the beginning:
```py
all_images = []
for _ in range(num_rows):
images = pipeline(prompt, num_images_per_prompt=num_samples_per_row, num_inference_steps=50, guidance_scale=7.5).images
all_images.extend(images)
grid = make_image_grid(all_images, num_rows, num_samples_per_row)
grid
```
## Stable Diffusion XL
Stable Diffusion XL (SDXL) can also use textual inversion vectors for inference. In contrast to Stable Diffusion 1 and 2, SDXL has two text encoders so you'll need two textual inversion embeddings - one for each text encoder model.
Let's download the SDXL textual inversion embeddings and have a closer look at it's structure:
```py
from huggingface_hub import hf_hub_download
from safetensors.torch import load_file
file = hf_hub_download("dn118/unaestheticXL", filename="unaestheticXLv31.safetensors")
state_dict = load_file(file)
state_dict
```
```
{'clip_g': tensor([[ 0.0077, -0.0112, 0.0065, ..., 0.0195, 0.0159, 0.0275],
...,
[-0.0170, 0.0213, 0.0143, ..., -0.0302, -0.0240, -0.0362]],
'clip_l': tensor([[ 0.0023, 0.0192, 0.0213, ..., -0.0385, 0.0048, -0.0011],
...,
[ 0.0475, -0.0508, -0.0145, ..., 0.0070, -0.0089, -0.0163]],
```
There are two tensors, `"clip_g"` and `"clip_l"`.
`"clip_g"` corresponds to the bigger text encoder in SDXL and refers to
`pipe.text_encoder_2` and `"clip_l"` refers to `pipe.text_encoder`.
Now you can load each tensor separately by passing them along with the correct text encoder and tokenizer
to [load_textual_inversion()](/docs/diffusers/main/en/api/loaders/textual_inversion#diffusers.loaders.TextualInversionLoaderMixin.load_textual_inversion):
```py
from diffusers import AutoPipelineForText2Image
import torch
pipe = AutoPipelineForText2Image.from_pretrained("stabilityai/stable-diffusion-xl-base-1.0", variant="fp16", torch_dtype=torch.float16)
pipe.to("cuda")
pipe.load_textual_inversion(state_dict["clip_g"], token="unaestheticXLv31", text_encoder=pipe.text_encoder_2, tokenizer=pipe.tokenizer_2)
pipe.load_textual_inversion(state_dict["clip_l"], token="unaestheticXLv31", text_encoder=pipe.text_encoder, tokenizer=pipe.tokenizer)
# the embedding should be used as a negative embedding, so we pass it as a negative prompt
generator = torch.Generator().manual_seed(33)
image = pipe("a woman standing in front of a mountain", negative_prompt="unaestheticXLv31", generator=generator).images[0]
image
```
# DiffEdit
Image editing typically requires providing a mask of the area to be edited. DiffEdit automatically generates the mask for you based on a text query, making it easier overall to create a mask without image editing software. The DiffEdit algorithm works in three steps:
1. the diffusion model denoises an image conditioned on some query text and reference text which produces different noise estimates for different areas of the image; the difference is used to infer a mask to identify which area of the image needs to be changed to match the query text
2. the input image is encoded into latent space with DDIM
3. the latents are decoded with the diffusion model conditioned on the text query, using the mask as a guide such that pixels outside the mask remain the same as in the input image
This guide will show you how to use DiffEdit to edit images without manually creating a mask.
Before you begin, make sure you have the following libraries installed:
```py
# uncomment to install the necessary libraries in Colab
#!pip install -q diffusers transformers accelerate
```
The [StableDiffusionDiffEditPipeline](/docs/diffusers/main/en/api/pipelines/diffedit#diffusers.StableDiffusionDiffEditPipeline) requires an image mask and a set of partially inverted latents. The image mask is generated from the [generate_mask()](/docs/diffusers/main/en/api/pipelines/diffedit#diffusers.StableDiffusionDiffEditPipeline.generate_mask) function, and includes two parameters, `source_prompt` and `target_prompt`. These parameters determine what to edit in the image. For example, if you want to change a bowl of *fruits* to a bowl of *pears*, then:
```py
source_prompt = "a bowl of fruits"
target_prompt = "a bowl of pears"
```
The partially inverted latents are generated from the [invert()](/docs/diffusers/main/en/api/pipelines/diffedit#diffusers.StableDiffusionDiffEditPipeline.invert) function, and it is generally a good idea to include a `prompt` or *caption* describing the image to help guide the inverse latent sampling process. The caption can often be your `source_prompt`, but feel free to experiment with other text descriptions!
Let's load the pipeline, scheduler, inverse scheduler, and enable some optimizations to reduce memory usage:
```py
import torch
from diffusers import DDIMScheduler, DDIMInverseScheduler, StableDiffusionDiffEditPipeline
pipeline = StableDiffusionDiffEditPipeline.from_pretrained(
"stabilityai/stable-diffusion-2-1",
torch_dtype=torch.float16,
safety_checker=None,
use_safetensors=True,
)
pipeline.scheduler = DDIMScheduler.from_config(pipeline.scheduler.config)
pipeline.inverse_scheduler = DDIMInverseScheduler.from_config(pipeline.scheduler.config)
pipeline.enable_model_cpu_offload()
pipeline.enable_vae_slicing()
```
Load the image to edit:
```py
from diffusers.utils import load_image, make_image_grid
img_url = "https://github.com/Xiang-cd/DiffEdit-stable-diffusion/raw/main/assets/origin.png"
raw_image = load_image(img_url).resize((768, 768))
raw_image
```
Use the [generate_mask()](/docs/diffusers/main/en/api/pipelines/diffedit#diffusers.StableDiffusionDiffEditPipeline.generate_mask) function to generate the image mask. You'll need to pass it the `source_prompt` and `target_prompt` to specify what to edit in the image:
```py
from PIL import Image
source_prompt = "a bowl of fruits"
target_prompt = "a basket of pears"
mask_image = pipeline.generate_mask(
image=raw_image,
source_prompt=source_prompt,
target_prompt=target_prompt,
)
Image.fromarray((mask_image.squeeze()*255).astype("uint8"), "L").resize((768, 768))
```
Next, create the inverted latents and pass it a caption describing the image:
```py
inv_latents = pipeline.invert(prompt=source_prompt, image=raw_image).latents
```
Finally, pass the image mask and inverted latents to the pipeline. The `target_prompt` becomes the `prompt` now, and the `source_prompt` is used as the `negative_prompt`:
```py
output_image = pipeline(
prompt=target_prompt,
mask_image=mask_image,
image_latents=inv_latents,
negative_prompt=source_prompt,
).images[0]
mask_image = Image.fromarray((mask_image.squeeze()*255).astype("uint8"), "L").resize((768, 768))
make_image_grid([raw_image, mask_image, output_image], rows=1, cols=3)
```
original image
edited image
## Generate source and target embeddings
The source and target embeddings can be automatically generated with the [Flan-T5](https://huggingface.co/docs/transformers/model_doc/flan-t5) model instead of creating them manually.
Load the Flan-T5 model and tokenizer from the 🤗 Transformers library:
```py
import torch
from transformers import AutoTokenizer, T5ForConditionalGeneration
tokenizer = AutoTokenizer.from_pretrained("google/flan-t5-large")
model = T5ForConditionalGeneration.from_pretrained("google/flan-t5-large", device_map="auto", torch_dtype=torch.float16)
```
Provide some initial text to prompt the model to generate the source and target prompts.
```py
source_concept = "bowl"
target_concept = "basket"
source_text = f"Provide a caption for images containing a {source_concept}. "
"The captions should be in English and should be no longer than 150 characters."
target_text = f"Provide a caption for images containing a {target_concept}. "
"The captions should be in English and should be no longer than 150 characters."
```
Next, create a utility function to generate the prompts:
```py
@torch.no_grad()
def generate_prompts(input_prompt):
input_ids = tokenizer(input_prompt, return_tensors="pt").input_ids.to("cuda")
outputs = model.generate(
input_ids, temperature=0.8, num_return_sequences=16, do_sample=True, max_new_tokens=128, top_k=10
)
return tokenizer.batch_decode(outputs, skip_special_tokens=True)
source_prompts = generate_prompts(source_text)
target_prompts = generate_prompts(target_text)
print(source_prompts)
print(target_prompts)
```
Check out the [generation strategy](https://huggingface.co/docs/transformers/main/en/generation_strategies) guide if you're interested in learning more about strategies for generating different quality text.
Load the text encoder model used by the [StableDiffusionDiffEditPipeline](/docs/diffusers/main/en/api/pipelines/diffedit#diffusers.StableDiffusionDiffEditPipeline) to encode the text. You'll use the text encoder to compute the text embeddings:
```py
import torch
from diffusers import StableDiffusionDiffEditPipeline
pipeline = StableDiffusionDiffEditPipeline.from_pretrained(
"stabilityai/stable-diffusion-2-1", torch_dtype=torch.float16, use_safetensors=True
)
pipeline.enable_model_cpu_offload()
pipeline.enable_vae_slicing()
@torch.no_grad()
def embed_prompts(sentences, tokenizer, text_encoder, device="cuda"):
embeddings = []
for sent in sentences:
text_inputs = tokenizer(
sent,
padding="max_length",
max_length=tokenizer.model_max_length,
truncation=True,
return_tensors="pt",
)
text_input_ids = text_inputs.input_ids
prompt_embeds = text_encoder(text_input_ids.to(device), attention_mask=None)[0]
embeddings.append(prompt_embeds)
return torch.concatenate(embeddings, dim=0).mean(dim=0).unsqueeze(0)
source_embeds = embed_prompts(source_prompts, pipeline.tokenizer, pipeline.text_encoder)
target_embeds = embed_prompts(target_prompts, pipeline.tokenizer, pipeline.text_encoder)
```
Finally, pass the embeddings to the [generate_mask()](/docs/diffusers/main/en/api/pipelines/diffedit#diffusers.StableDiffusionDiffEditPipeline.generate_mask) and [invert()](/docs/diffusers/main/en/api/pipelines/diffedit#diffusers.StableDiffusionDiffEditPipeline.invert) functions, and pipeline to generate the image:
```diff
from diffusers import DDIMInverseScheduler, DDIMScheduler
from diffusers.utils import load_image, make_image_grid
from PIL import Image
pipeline.scheduler = DDIMScheduler.from_config(pipeline.scheduler.config)
pipeline.inverse_scheduler = DDIMInverseScheduler.from_config(pipeline.scheduler.config)
img_url = "https://github.com/Xiang-cd/DiffEdit-stable-diffusion/raw/main/assets/origin.png"
raw_image = load_image(img_url).resize((768, 768))
mask_image = pipeline.generate_mask(
image=raw_image,
- source_prompt=source_prompt,
- target_prompt=target_prompt,
+ source_prompt_embeds=source_embeds,
+ target_prompt_embeds=target_embeds,
)
inv_latents = pipeline.invert(
- prompt=source_prompt,
+ prompt_embeds=source_embeds,
image=raw_image,
).latents
output_image = pipeline(
mask_image=mask_image,
image_latents=inv_latents,
- prompt=target_prompt,
- negative_prompt=source_prompt,
+ prompt_embeds=target_embeds,
+ negative_prompt_embeds=source_embeds,
).images[0]
mask_image = Image.fromarray((mask_image.squeeze()*255).astype("uint8"), "L")
make_image_grid([raw_image, mask_image, output_image], rows=1, cols=3)
```
## Generate a caption for inversion
While you can use the `source_prompt` as a caption to help generate the partially inverted latents, you can also use the [BLIP](https://huggingface.co/docs/transformers/model_doc/blip) model to automatically generate a caption.
Load the BLIP model and processor from the 🤗 Transformers library:
```py
import torch
from transformers import BlipForConditionalGeneration, BlipProcessor
processor = BlipProcessor.from_pretrained("Salesforce/blip-image-captioning-base")
model = BlipForConditionalGeneration.from_pretrained("Salesforce/blip-image-captioning-base", torch_dtype=torch.float16, low_cpu_mem_usage=True)
```
Create a utility function to generate a caption from the input image:
```py
@torch.no_grad()
def generate_caption(images, caption_generator, caption_processor):
text = "a photograph of"
inputs = caption_processor(images, text, return_tensors="pt").to(device="cuda", dtype=caption_generator.dtype)
caption_generator.to("cuda")
outputs = caption_generator.generate(**inputs, max_new_tokens=128)
# offload caption generator
caption_generator.to("cpu")
caption = caption_processor.batch_decode(outputs, skip_special_tokens=True)[0]
return caption
```
Load an input image and generate a caption for it using the `generate_caption` function:
```py
from diffusers.utils import load_image
img_url = "https://github.com/Xiang-cd/DiffEdit-stable-diffusion/raw/main/assets/origin.png"
raw_image = load_image(img_url).resize((768, 768))
caption = generate_caption(raw_image, model, processor)
```
generated caption: "a photograph of a bowl of fruit on a table"
Now you can drop the caption into the [invert()](/docs/diffusers/main/en/api/pipelines/diffedit#diffusers.StableDiffusionDiffEditPipeline.invert) function to generate the partially inverted latents!
# Unconditional image generation
Unconditional image generation generates images that look like a random sample from the training data the model was trained on because the denoising process is not guided by any additional context like text or image.
To get started, use the [DiffusionPipeline](/docs/diffusers/main/en/api/pipelines/overview#diffusers.DiffusionPipeline) to load the [anton-l/ddpm-butterflies-128](https://huggingface.co/anton-l/ddpm-butterflies-128) checkpoint to generate images of butterflies. The [DiffusionPipeline](/docs/diffusers/main/en/api/pipelines/overview#diffusers.DiffusionPipeline) downloads and caches all the model components required to generate an image.
```py
from diffusers import DiffusionPipeline
generator = DiffusionPipeline.from_pretrained("anton-l/ddpm-butterflies-128").to("cuda")
image = generator().images[0]
image
```
Want to generate images of something else? Take a look at the training [guide](../training/unconditional_training) to learn how to train a model to generate your own images.
The output image is a [`PIL.Image`](https://pillow.readthedocs.io/en/stable/reference/Image.html?highlight=image#the-image-class) object that can be saved:
```py
image.save("generated_image.png")
```
You can also try experimenting with the `num_inference_steps` parameter, which controls the number of denoising steps. More denoising steps typically produce higher quality images, but it'll take longer to generate. Feel free to play around with this parameter to see how it affects the image quality.
```py
image = generator(num_inference_steps=100).images[0]
image
```
Try out the Space below to generate an image of a butterfly!
# Evaluating Diffusion Models
Evaluation of generative models like [Stable Diffusion](https://huggingface.co/docs/diffusers/stable_diffusion) is subjective in nature. But as practitioners and researchers, we often have to make careful choices amongst many different possibilities. So, when working with different generative models (like GANs, Diffusion, etc.), how do we choose one over the other?
Qualitative evaluation of such models can be error-prone and might incorrectly influence a decision.
However, quantitative metrics don't necessarily correspond to image quality. So, usually, a combination
of both qualitative and quantitative evaluations provides a stronger signal when choosing one model
over the other.
In this document, we provide a non-exhaustive overview of qualitative and quantitative methods to evaluate Diffusion models. For quantitative methods, we specifically focus on how to implement them alongside `diffusers`.
The methods shown in this document can also be used to evaluate different [noise schedulers](https://huggingface.co/docs/diffusers/main/en/api/schedulers/overview) keeping the underlying generation model fixed.
## Scenarios
We cover Diffusion models with the following pipelines:
- Text-guided image generation (such as the [`StableDiffusionPipeline`](https://huggingface.co/docs/diffusers/main/en/api/pipelines/stable_diffusion/text2img)).
- Text-guided image generation, additionally conditioned on an input image (such as the [`StableDiffusionImg2ImgPipeline`](https://huggingface.co/docs/diffusers/main/en/api/pipelines/stable_diffusion/img2img) and [`StableDiffusionInstructPix2PixPipeline`](https://huggingface.co/docs/diffusers/main/en/api/pipelines/pix2pix)).
- Class-conditioned image generation models (such as the [`DiTPipeline`](https://huggingface.co/docs/diffusers/main/en/api/pipelines/dit)).
## Qualitative Evaluation
Qualitative evaluation typically involves human assessment of generated images. Quality is measured across aspects such as compositionality, image-text alignment, and spatial relations. Common prompts provide a degree of uniformity for subjective metrics.
DrawBench and PartiPrompts are prompt datasets used for qualitative benchmarking. DrawBench and PartiPrompts were introduced by [Imagen](https://imagen.research.google/) and [Parti](https://parti.research.google/) respectively.
From the [official Parti website](https://parti.research.google/):
> PartiPrompts (P2) is a rich set of over 1600 prompts in English that we release as part of this work. P2 can be used to measure model capabilities across various categories and challenge aspects.
![parti-prompts](https://huggingface.co/datasets/diffusers/docs-images/resolve/main/evaluation_diffusion_models/parti-prompts.png)
PartiPrompts has the following columns:
- Prompt
- Category of the prompt (such as “Abstract”, “World Knowledge”, etc.)
- Challenge reflecting the difficulty (such as “Basic”, “Complex”, “Writing & Symbols”, etc.)
These benchmarks allow for side-by-side human evaluation of different image generation models.
For this, the 🧨 Diffusers team has built **Open Parti Prompts**, which is a community-driven qualitative benchmark based on Parti Prompts to compare state-of-the-art open-source diffusion models:
- [Open Parti Prompts Game](https://huggingface.co/spaces/OpenGenAI/open-parti-prompts): For 10 parti prompts, 4 generated images are shown and the user selects the image that suits the prompt best.
- [Open Parti Prompts Leaderboard](https://huggingface.co/spaces/OpenGenAI/parti-prompts-leaderboard): The leaderboard comparing the currently best open-sourced diffusion models to each other.
To manually compare images, let’s see how we can use `diffusers` on a couple of PartiPrompts.
Below we show some prompts sampled across different challenges: Basic, Complex, Linguistic Structures, Imagination, and Writing & Symbols. Here we are using PartiPrompts as a [dataset](https://huggingface.co/datasets/nateraw/parti-prompts).
```python
from datasets import load_dataset
# prompts = load_dataset("nateraw/parti-prompts", split="train")
# prompts = prompts.shuffle()
# sample_prompts = [prompts[i]["Prompt"] for i in range(5)]
# Fixing these sample prompts in the interest of reproducibility.
sample_prompts = [
"a corgi",
"a hot air balloon with a yin-yang symbol, with the moon visible in the daytime sky",
"a car with no windows",
"a cube made of porcupine",
'The saying "BE EXCELLENT TO EACH OTHER" written on a red brick wall with a graffiti image of a green alien wearing a tuxedo. A yellow fire hydrant is on a sidewalk in the foreground.',
]
```
Now we can use these prompts to generate some images using Stable Diffusion ([v1-4 checkpoint](https://huggingface.co/CompVis/stable-diffusion-v1-4)):
```python
import torch
seed = 0
generator = torch.manual_seed(seed)
images = sd_pipeline(sample_prompts, num_images_per_prompt=1, generator=generator).images
```
![parti-prompts-14](https://huggingface.co/datasets/diffusers/docs-images/resolve/main/evaluation_diffusion_models/parti-prompts-14.png)
We can also set `num_images_per_prompt` accordingly to compare different images for the same prompt. Running the same pipeline but with a different checkpoint ([v1-5](https://huggingface.co/stable-diffusion-v1-5/stable-diffusion-v1-5)), yields:
![parti-prompts-15](https://huggingface.co/datasets/diffusers/docs-images/resolve/main/evaluation_diffusion_models/parti-prompts-15.png)
Once several images are generated from all the prompts using multiple models (under evaluation), these results are presented to human evaluators for scoring. For
more details on the DrawBench and PartiPrompts benchmarks, refer to their respective papers.
It is useful to look at some inference samples while a model is training to measure the
training progress. In our [training scripts](https://github.com/huggingface/diffusers/tree/main/examples/), we support this utility with additional support for
logging to TensorBoard and Weights & Biases.
## Quantitative Evaluation
In this section, we will walk you through how to evaluate three different diffusion pipelines using:
- CLIP score
- CLIP directional similarity
- FID
### Text-guided image generation
[CLIP score](https://arxiv.org/abs/2104.08718) measures the compatibility of image-caption pairs. Higher CLIP scores imply higher compatibility 🔼. The CLIP score is a quantitative measurement of the qualitative concept "compatibility". Image-caption pair compatibility can also be thought of as the semantic similarity between the image and the caption. CLIP score was found to have high correlation with human judgement.
Let's first load a [StableDiffusionPipeline](/docs/diffusers/main/en/api/pipelines/stable_diffusion/text2img#diffusers.StableDiffusionPipeline):
```python
from diffusers import StableDiffusionPipeline
import torch
model_ckpt = "CompVis/stable-diffusion-v1-4"
sd_pipeline = StableDiffusionPipeline.from_pretrained(model_ckpt, torch_dtype=torch.float16).to("cuda")
```
Generate some images with multiple prompts:
```python
prompts = [
"a photo of an astronaut riding a horse on mars",
"A high tech solarpunk utopia in the Amazon rainforest",
"A pikachu fine dining with a view to the Eiffel Tower",
"A mecha robot in a favela in expressionist style",
"an insect robot preparing a delicious meal",
"A small cabin on top of a snowy mountain in the style of Disney, artstation",
]
images = sd_pipeline(prompts, num_images_per_prompt=1, output_type="np").images
print(images.shape)
# (6, 512, 512, 3)
```
And then, we calculate the CLIP score.
```python
from torchmetrics.functional.multimodal import clip_score
from functools import partial
clip_score_fn = partial(clip_score, model_name_or_path="openai/clip-vit-base-patch16")
def calculate_clip_score(images, prompts):
images_int = (images * 255).astype("uint8")
clip_score = clip_score_fn(torch.from_numpy(images_int).permute(0, 3, 1, 2), prompts).detach()
return round(float(clip_score), 4)
sd_clip_score = calculate_clip_score(images, prompts)
print(f"CLIP score: {sd_clip_score}")
# CLIP score: 35.7038
```
In the above example, we generated one image per prompt. If we generated multiple images per prompt, we would have to take the average score from the generated images per prompt.
Now, if we wanted to compare two checkpoints compatible with the [StableDiffusionPipeline](/docs/diffusers/main/en/api/pipelines/stable_diffusion/text2img#diffusers.StableDiffusionPipeline) we should pass a generator while calling the pipeline. First, we generate images with a
fixed seed with the [v1-4 Stable Diffusion checkpoint](https://huggingface.co/CompVis/stable-diffusion-v1-4):
```python
seed = 0
generator = torch.manual_seed(seed)
images = sd_pipeline(prompts, num_images_per_prompt=1, generator=generator, output_type="np").images
```
Then we load the [v1-5 checkpoint](https://huggingface.co/stable-diffusion-v1-5/stable-diffusion-v1-5) to generate images:
```python
model_ckpt_1_5 = "stable-diffusion-v1-5/stable-diffusion-v1-5"
sd_pipeline_1_5 = StableDiffusionPipeline.from_pretrained(model_ckpt_1_5, torch_dtype=weight_dtype).to(device)
images_1_5 = sd_pipeline_1_5(prompts, num_images_per_prompt=1, generator=generator, output_type="np").images
```
And finally, we compare their CLIP scores:
```python
sd_clip_score_1_4 = calculate_clip_score(images, prompts)
print(f"CLIP Score with v-1-4: {sd_clip_score_1_4}")
# CLIP Score with v-1-4: 34.9102
sd_clip_score_1_5 = calculate_clip_score(images_1_5, prompts)
print(f"CLIP Score with v-1-5: {sd_clip_score_1_5}")
# CLIP Score with v-1-5: 36.2137
```
It seems like the [v1-5](https://huggingface.co/stable-diffusion-v1-5/stable-diffusion-v1-5) checkpoint performs better than its predecessor. Note, however, that the number of prompts we used to compute the CLIP scores is quite low. For a more practical evaluation, this number should be way higher, and the prompts should be diverse.
By construction, there are some limitations in this score. The captions in the training dataset
were crawled from the web and extracted from `alt` and similar tags associated an image on the internet.
They are not necessarily representative of what a human being would use to describe an image. Hence we
had to "engineer" some prompts here.
### Image-conditioned text-to-image generation
In this case, we condition the generation pipeline with an input image as well as a text prompt. Let's take the [StableDiffusionInstructPix2PixPipeline](/docs/diffusers/main/en/api/pipelines/pix2pix#diffusers.StableDiffusionInstructPix2PixPipeline), as an example. It takes an edit instruction as an input prompt and an input image to be edited.
Here is one example:
![edit-instruction](https://huggingface.co/datasets/diffusers/docs-images/resolve/main/evaluation_diffusion_models/edit-instruction.png)
One strategy to evaluate such a model is to measure the consistency of the change between the two images (in [CLIP](https://huggingface.co/docs/transformers/model_doc/clip) space) with the change between the two image captions (as shown in [CLIP-Guided Domain Adaptation of Image Generators](https://arxiv.org/abs/2108.00946)). This is referred to as the "**CLIP directional similarity**".
- Caption 1 corresponds to the input image (image 1) that is to be edited.
- Caption 2 corresponds to the edited image (image 2). It should reflect the edit instruction.
Following is a pictorial overview:
![edit-consistency](https://huggingface.co/datasets/diffusers/docs-images/resolve/main/evaluation_diffusion_models/edit-consistency.png)
We have prepared a mini dataset to implement this metric. Let's first load the dataset.
```python
from datasets import load_dataset
dataset = load_dataset("sayakpaul/instructpix2pix-demo", split="train")
dataset.features
```
```bash
{'input': Value(dtype='string', id=None),
'edit': Value(dtype='string', id=None),
'output': Value(dtype='string', id=None),
'image': Image(decode=True, id=None)}
```
Here we have:
- `input` is a caption corresponding to the `image`.
- `edit` denotes the edit instruction.
- `output` denotes the modified caption reflecting the `edit` instruction.
Let's take a look at a sample.
```python
idx = 0
print(f"Original caption: {dataset[idx]['input']}")
print(f"Edit instruction: {dataset[idx]['edit']}")
print(f"Modified caption: {dataset[idx]['output']}")
```
```bash
Original caption: 2. FAROE ISLANDS: An archipelago of 18 mountainous isles in the North Atlantic Ocean between Norway and Iceland, the Faroe Islands has 'everything you could hope for', according to Big 7 Travel. It boasts 'crystal clear waterfalls, rocky cliffs that seem to jut out of nowhere and velvety green hills'
Edit instruction: make the isles all white marble
Modified caption: 2. WHITE MARBLE ISLANDS: An archipelago of 18 mountainous white marble isles in the North Atlantic Ocean between Norway and Iceland, the White Marble Islands has 'everything you could hope for', according to Big 7 Travel. It boasts 'crystal clear waterfalls, rocky cliffs that seem to jut out of nowhere and velvety green hills'
```
And here is the image:
```python
dataset[idx]["image"]
```
![edit-dataset](https://huggingface.co/datasets/diffusers/docs-images/resolve/main/evaluation_diffusion_models/edit-dataset.png)
We will first edit the images of our dataset with the edit instruction and compute the directional similarity.
Let's first load the [StableDiffusionInstructPix2PixPipeline](/docs/diffusers/main/en/api/pipelines/pix2pix#diffusers.StableDiffusionInstructPix2PixPipeline):
```python
from diffusers import StableDiffusionInstructPix2PixPipeline
instruct_pix2pix_pipeline = StableDiffusionInstructPix2PixPipeline.from_pretrained(
"timbrooks/instruct-pix2pix", torch_dtype=torch.float16
).to(device)
```
Now, we perform the edits:
```python
import numpy as np
def edit_image(input_image, instruction):
image = instruct_pix2pix_pipeline(
instruction,
image=input_image,
output_type="np",
generator=generator,
).images[0]
return image
input_images = []
original_captions = []
modified_captions = []
edited_images = []
for idx in range(len(dataset)):
input_image = dataset[idx]["image"]
edit_instruction = dataset[idx]["edit"]
edited_image = edit_image(input_image, edit_instruction)
input_images.append(np.array(input_image))
original_captions.append(dataset[idx]["input"])
modified_captions.append(dataset[idx]["output"])
edited_images.append(edited_image)
```
To measure the directional similarity, we first load CLIP's image and text encoders:
```python
from transformers import (
CLIPTokenizer,
CLIPTextModelWithProjection,
CLIPVisionModelWithProjection,
CLIPImageProcessor,
)
clip_id = "openai/clip-vit-large-patch14"
tokenizer = CLIPTokenizer.from_pretrained(clip_id)
text_encoder = CLIPTextModelWithProjection.from_pretrained(clip_id).to(device)
image_processor = CLIPImageProcessor.from_pretrained(clip_id)
image_encoder = CLIPVisionModelWithProjection.from_pretrained(clip_id).to(device)
```
Notice that we are using a particular CLIP checkpoint, i.e., `openai/clip-vit-large-patch14`. This is because the Stable Diffusion pre-training was performed with this CLIP variant. For more details, refer to the [documentation](https://huggingface.co/docs/transformers/model_doc/clip).
Next, we prepare a PyTorch `nn.Module` to compute directional similarity:
```python
import torch.nn as nn
import torch.nn.functional as F
class DirectionalSimilarity(nn.Module):
def __init__(self, tokenizer, text_encoder, image_processor, image_encoder):
super().__init__()
self.tokenizer = tokenizer
self.text_encoder = text_encoder
self.image_processor = image_processor
self.image_encoder = image_encoder
def preprocess_image(self, image):
image = self.image_processor(image, return_tensors="pt")["pixel_values"]
return {"pixel_values": image.to(device)}
def tokenize_text(self, text):
inputs = self.tokenizer(
text,
max_length=self.tokenizer.model_max_length,
padding="max_length",
truncation=True,
return_tensors="pt",
)
return {"input_ids": inputs.input_ids.to(device)}
def encode_image(self, image):
preprocessed_image = self.preprocess_image(image)
image_features = self.image_encoder(**preprocessed_image).image_embeds
image_features = image_features / image_features.norm(dim=1, keepdim=True)
return image_features
def encode_text(self, text):
tokenized_text = self.tokenize_text(text)
text_features = self.text_encoder(**tokenized_text).text_embeds
text_features = text_features / text_features.norm(dim=1, keepdim=True)
return text_features
def compute_directional_similarity(self, img_feat_one, img_feat_two, text_feat_one, text_feat_two):
sim_direction = F.cosine_similarity(img_feat_two - img_feat_one, text_feat_two - text_feat_one)
return sim_direction
def forward(self, image_one, image_two, caption_one, caption_two):
img_feat_one = self.encode_image(image_one)
img_feat_two = self.encode_image(image_two)
text_feat_one = self.encode_text(caption_one)
text_feat_two = self.encode_text(caption_two)
directional_similarity = self.compute_directional_similarity(
img_feat_one, img_feat_two, text_feat_one, text_feat_two
)
return directional_similarity
```
Let's put `DirectionalSimilarity` to use now.
```python
dir_similarity = DirectionalSimilarity(tokenizer, text_encoder, image_processor, image_encoder)
scores = []
for i in range(len(input_images)):
original_image = input_images[i]
original_caption = original_captions[i]
edited_image = edited_images[i]
modified_caption = modified_captions[i]
similarity_score = dir_similarity(original_image, edited_image, original_caption, modified_caption)
scores.append(float(similarity_score.detach().cpu()))
print(f"CLIP directional similarity: {np.mean(scores)}")
# CLIP directional similarity: 0.0797976553440094
```
Like the CLIP Score, the higher the CLIP directional similarity, the better it is.
It should be noted that the `StableDiffusionInstructPix2PixPipeline` exposes two arguments, namely, `image_guidance_scale` and `guidance_scale` that let you control the quality of the final edited image. We encourage you to experiment with these two arguments and see the impact of that on the directional similarity.
We can extend the idea of this metric to measure how similar the original image and edited version are. To do that, we can just do `F.cosine_similarity(img_feat_two, img_feat_one)`. For these kinds of edits, we would still want the primary semantics of the images to be preserved as much as possible, i.e., a high similarity score.
We can use these metrics for similar pipelines such as the [`StableDiffusionPix2PixZeroPipeline`](https://huggingface.co/docs/diffusers/main/en/api/pipelines/pix2pix_zero#diffusers.StableDiffusionPix2PixZeroPipeline).
Both CLIP score and CLIP direction similarity rely on the CLIP model, which can make the evaluations biased.
***Extending metrics like IS, FID (discussed later), or KID can be difficult*** when the model under evaluation was pre-trained on a large image-captioning dataset (such as the [LAION-5B dataset](https://laion.ai/blog/laion-5b/)). This is because underlying these metrics is an InceptionNet (pre-trained on the ImageNet-1k dataset) used for extracting intermediate image features. The pre-training dataset of Stable Diffusion may have limited overlap with the pre-training dataset of InceptionNet, so it is not a good candidate here for feature extraction.
***Using the above metrics helps evaluate models that are class-conditioned. For example, [DiT](https://huggingface.co/docs/diffusers/main/en/api/pipelines/dit). It was pre-trained being conditioned on the ImageNet-1k classes.***
### Class-conditioned image generation
Class-conditioned generative models are usually pre-trained on a class-labeled dataset such as [ImageNet-1k](https://huggingface.co/datasets/imagenet-1k). Popular metrics for evaluating these models include Fréchet Inception Distance (FID), Kernel Inception Distance (KID), and Inception Score (IS). In this document, we focus on FID ([Heusel et al.](https://arxiv.org/abs/1706.08500)). We show how to compute it with the [`DiTPipeline`](https://huggingface.co/docs/diffusers/api/pipelines/dit), which uses the [DiT model](https://arxiv.org/abs/2212.09748) under the hood.
FID aims to measure how similar are two datasets of images. As per [this resource](https://mmgeneration.readthedocs.io/en/latest/quick_run.html#fid):
> Fréchet Inception Distance is a measure of similarity between two datasets of images. It was shown to correlate well with the human judgment of visual quality and is most often used to evaluate the quality of samples of Generative Adversarial Networks. FID is calculated by computing the Fréchet distance between two Gaussians fitted to feature representations of the Inception network.
These two datasets are essentially the dataset of real images and the dataset of fake images (generated images in our case). FID is usually calculated with two large datasets. However, for this document, we will work with two mini datasets.
Let's first download a few images from the ImageNet-1k training set:
```python
from zipfile import ZipFile
import requests
def download(url, local_filepath):
r = requests.get(url)
with open(local_filepath, "wb") as f:
f.write(r.content)
return local_filepath
dummy_dataset_url = "https://hf.co/datasets/sayakpaul/sample-datasets/resolve/main/sample-imagenet-images.zip"
local_filepath = download(dummy_dataset_url, dummy_dataset_url.split("/")[-1])
with ZipFile(local_filepath, "r") as zipper:
zipper.extractall(".")
```
```python
from PIL import Image
import os
dataset_path = "sample-imagenet-images"
image_paths = sorted([os.path.join(dataset_path, x) for x in os.listdir(dataset_path)])
real_images = [np.array(Image.open(path).convert("RGB")) for path in image_paths]
```
These are 10 images from the following ImageNet-1k classes: "cassette_player", "chain_saw" (x2), "church", "gas_pump" (x3), "parachute" (x2), and "tench".
Real images.
Now that the images are loaded, let's apply some lightweight pre-processing on them to use them for FID calculation.
```python
from torchvision.transforms import functional as F
def preprocess_image(image):
image = torch.tensor(image).unsqueeze(0)
image = image.permute(0, 3, 1, 2) / 255.0
return F.center_crop(image, (256, 256))
real_images = torch.cat([preprocess_image(image) for image in real_images])
print(real_images.shape)
# torch.Size([10, 3, 256, 256])
```
We now load the [`DiTPipeline`](https://huggingface.co/docs/diffusers/api/pipelines/dit) to generate images conditioned on the above-mentioned classes.
```python
from diffusers import DiTPipeline, DPMSolverMultistepScheduler
dit_pipeline = DiTPipeline.from_pretrained("facebook/DiT-XL-2-256", torch_dtype=torch.float16)
dit_pipeline.scheduler = DPMSolverMultistepScheduler.from_config(dit_pipeline.scheduler.config)
dit_pipeline = dit_pipeline.to("cuda")
words = [
"cassette player",
"chainsaw",
"chainsaw",
"church",
"gas pump",
"gas pump",
"gas pump",
"parachute",
"parachute",
"tench",
]
class_ids = dit_pipeline.get_label_ids(words)
output = dit_pipeline(class_labels=class_ids, generator=generator, output_type="np")
fake_images = output.images
fake_images = torch.tensor(fake_images)
fake_images = fake_images.permute(0, 3, 1, 2)
print(fake_images.shape)
# torch.Size([10, 3, 256, 256])
```
Now, we can compute the FID using [`torchmetrics`](https://torchmetrics.readthedocs.io/).
```python
from torchmetrics.image.fid import FrechetInceptionDistance
fid = FrechetInceptionDistance(normalize=True)
fid.update(real_images, real=True)
fid.update(fake_images, real=False)
print(f"FID: {float(fid.compute())}")
# FID: 177.7147216796875
```
The lower the FID, the better it is. Several things can influence FID here:
- Number of images (both real and fake)
- Randomness induced in the diffusion process
- Number of inference steps in the diffusion process
- The scheduler being used in the diffusion process
For the last two points, it is, therefore, a good practice to run the evaluation across different seeds and inference steps, and then report an average result.
FID results tend to be fragile as they depend on a lot of factors:
* The specific Inception model used during computation.
* The implementation accuracy of the computation.
* The image format (not the same if we start from PNGs vs JPGs).
Keeping that in mind, FID is often most useful when comparing similar runs, but it is
hard to reproduce paper results unless the authors carefully disclose the FID
measurement code.
These points apply to other related metrics too, such as KID and IS.
As a final step, let's visually inspect the `fake_images`.
Fake images.
# Philosophy
🧨 Diffusers provides **state-of-the-art** pretrained diffusion models across multiple modalities.
Its purpose is to serve as a **modular toolbox** for both inference and training.
We aim at building a library that stands the test of time and therefore take API design very seriously.
In a nutshell, Diffusers is built to be a natural extension of PyTorch. Therefore, most of our design choices are based on [PyTorch's Design Principles](https://pytorch.org/docs/stable/community/design.html#pytorch-design-philosophy). Let's go over the most important ones:
## Usability over Performance
- While Diffusers has many built-in performance-enhancing features (see [Memory and Speed](https://huggingface.co/docs/diffusers/optimization/fp16)), models are always loaded with the highest precision and lowest optimization. Therefore, by default diffusion pipelines are always instantiated on CPU with float32 precision if not otherwise defined by the user. This ensures usability across different platforms and accelerators and means that no complex installations are required to run the library.
- Diffusers aims to be a **light-weight** package and therefore has very few required dependencies, but many soft dependencies that can improve performance (such as `accelerate`, `safetensors`, `onnx`, etc...). We strive to keep the library as lightweight as possible so that it can be added without much concern as a dependency on other packages.
- Diffusers prefers simple, self-explainable code over condensed, magic code. This means that short-hand code syntaxes such as lambda functions, and advanced PyTorch operators are often not desired.
## Simple over easy
As PyTorch states, **explicit is better than implicit** and **simple is better than complex**. This design philosophy is reflected in multiple parts of the library:
- We follow PyTorch's API with methods like [`DiffusionPipeline.to`](https://huggingface.co/docs/diffusers/main/en/api/diffusion_pipeline#diffusers.DiffusionPipeline.to) to let the user handle device management.
- Raising concise error messages is preferred to silently correct erroneous input. Diffusers aims at teaching the user, rather than making the library as easy to use as possible.
- Complex model vs. scheduler logic is exposed instead of magically handled inside. Schedulers/Samplers are separated from diffusion models with minimal dependencies on each other. This forces the user to write the unrolled denoising loop. However, the separation allows for easier debugging and gives the user more control over adapting the denoising process or switching out diffusion models or schedulers.
- Separately trained components of the diffusion pipeline, *e.g.* the text encoder, the unet, and the variational autoencoder, each have their own model class. This forces the user to handle the interaction between the different model components, and the serialization format separates the model components into different files. However, this allows for easier debugging and customization. DreamBooth or Textual Inversion training
is very simple thanks to Diffusers' ability to separate single components of the diffusion pipeline.
## Tweakable, contributor-friendly over abstraction
For large parts of the library, Diffusers adopts an important design principle of the [Transformers library](https://github.com/huggingface/transformers), which is to prefer copy-pasted code over hasty abstractions. This design principle is very opinionated and stands in stark contrast to popular design principles such as [Don't repeat yourself (DRY)](https://en.wikipedia.org/wiki/Don%27t_repeat_yourself).
In short, just like Transformers does for modeling files, Diffusers prefers to keep an extremely low level of abstraction and very self-contained code for pipelines and schedulers.
Functions, long code blocks, and even classes can be copied across multiple files which at first can look like a bad, sloppy design choice that makes the library unmaintainable.
**However**, this design has proven to be extremely successful for Transformers and makes a lot of sense for community-driven, open-source machine learning libraries because:
- Machine Learning is an extremely fast-moving field in which paradigms, model architectures, and algorithms are changing rapidly, which therefore makes it very difficult to define long-lasting code abstractions.
- Machine Learning practitioners like to be able to quickly tweak existing code for ideation and research and therefore prefer self-contained code over one that contains many abstractions.
- Open-source libraries rely on community contributions and therefore must build a library that is easy to contribute to. The more abstract the code, the more dependencies, the harder to read, and the harder to contribute to. Contributors simply stop contributing to very abstract libraries out of fear of breaking vital functionality. If contributing to a library cannot break other fundamental code, not only is it more inviting for potential new contributors, but it is also easier to review and contribute to multiple parts in parallel.
At Hugging Face, we call this design the **single-file policy** which means that almost all of the code of a certain class should be written in a single, self-contained file. To read more about the philosophy, you can have a look
at [this blog post](https://huggingface.co/blog/transformers-design-philosophy).
In Diffusers, we follow this philosophy for both pipelines and schedulers, but only partly for diffusion models. The reason we don't follow this design fully for diffusion models is because almost all diffusion pipelines, such
as [DDPM](https://huggingface.co/docs/diffusers/api/pipelines/ddpm), [Stable Diffusion](https://huggingface.co/docs/diffusers/api/pipelines/stable_diffusion/overview#stable-diffusion-pipelines), [unCLIP (DALL·E 2)](https://huggingface.co/docs/diffusers/api/pipelines/unclip) and [Imagen](https://imagen.research.google/) all rely on the same diffusion model, the [UNet](https://huggingface.co/docs/diffusers/api/models/unet2d-cond).
Great, now you should have generally understood why 🧨 Diffusers is designed the way it is 🤗.
We try to apply these design principles consistently across the library. Nevertheless, there are some minor exceptions to the philosophy or some unlucky design choices. If you have feedback regarding the design, we would ❤️ to hear it [directly on GitHub](https://github.com/huggingface/diffusers/issues/new?assignees=&labels=&template=feedback.md&title=).
## Design Philosophy in Details
Now, let's look a bit into the nitty-gritty details of the design philosophy. Diffusers essentially consists of three major classes: [pipelines](https://github.com/huggingface/diffusers/tree/main/src/diffusers/pipelines), [models](https://github.com/huggingface/diffusers/tree/main/src/diffusers/models), and [schedulers](https://github.com/huggingface/diffusers/tree/main/src/diffusers/schedulers).
Let's walk through more in-detail design decisions for each class.
### Pipelines
Pipelines are designed to be easy to use (therefore do not follow [*Simple over easy*](#simple-over-easy) 100%), are not feature complete, and should loosely be seen as examples of how to use [models](#models) and [schedulers](#schedulers) for inference.
The following design principles are followed:
- Pipelines follow the single-file policy. All pipelines can be found in individual directories under src/diffusers/pipelines. One pipeline folder corresponds to one diffusion paper/project/release. Multiple pipeline files can be gathered in one pipeline folder, as it’s done for [`src/diffusers/pipelines/stable-diffusion`](https://github.com/huggingface/diffusers/tree/main/src/diffusers/pipelines/stable_diffusion). If pipelines share similar functionality, one can make use of the [# Copied from mechanism](https://github.com/huggingface/diffusers/blob/125d783076e5bd9785beb05367a2d2566843a271/src/diffusers/pipelines/stable_diffusion/pipeline_stable_diffusion_img2img.py#L251).
- Pipelines all inherit from [DiffusionPipeline](/docs/diffusers/main/en/api/pipelines/overview#diffusers.DiffusionPipeline).
- Every pipeline consists of different model and scheduler components, that are documented in the [`model_index.json` file](https://huggingface.co/stable-diffusion-v1-5/stable-diffusion-v1-5/blob/main/model_index.json), are accessible under the same name as attributes of the pipeline and can be shared between pipelines with [`DiffusionPipeline.components`](https://huggingface.co/docs/diffusers/main/en/api/diffusion_pipeline#diffusers.DiffusionPipeline.components) function.
- Every pipeline should be loadable via the [`DiffusionPipeline.from_pretrained`](https://huggingface.co/docs/diffusers/main/en/api/diffusion_pipeline#diffusers.DiffusionPipeline.from_pretrained) function.
- Pipelines should be used **only** for inference.
- Pipelines should be very readable, self-explanatory, and easy to tweak.
- Pipelines should be designed to build on top of each other and be easy to integrate into higher-level APIs.
- Pipelines are **not** intended to be feature-complete user interfaces. For feature-complete user interfaces one should rather have a look at [InvokeAI](https://github.com/invoke-ai/InvokeAI), [Diffuzers](https://github.com/abhishekkrthakur/diffuzers), and [lama-cleaner](https://github.com/Sanster/lama-cleaner).
- Every pipeline should have one and only one way to run it via a `__call__` method. The naming of the `__call__` arguments should be shared across all pipelines.
- Pipelines should be named after the task they are intended to solve.
- In almost all cases, novel diffusion pipelines shall be implemented in a new pipeline folder/file.
### Models
Models are designed as configurable toolboxes that are natural extensions of [PyTorch's Module class](https://pytorch.org/docs/stable/generated/torch.nn.Module.html). They only partly follow the **single-file policy**.
The following design principles are followed:
- Models correspond to **a type of model architecture**. *E.g.* the [UNet2DConditionModel](/docs/diffusers/main/en/api/models/unet2d-cond#diffusers.UNet2DConditionModel) class is used for all UNet variations that expect 2D image inputs and are conditioned on some context.
- All models can be found in [`src/diffusers/models`](https://github.com/huggingface/diffusers/tree/main/src/diffusers/models) and every model architecture shall be defined in its file, e.g. [`unets/unet_2d_condition.py`](https://github.com/huggingface/diffusers/blob/main/src/diffusers/models/unets/unet_2d_condition.py), [`transformers/transformer_2d.py`](https://github.com/huggingface/diffusers/blob/main/src/diffusers/models/transformers/transformer_2d.py), etc...
- Models **do not** follow the single-file policy and should make use of smaller model building blocks, such as [`attention.py`](https://github.com/huggingface/diffusers/blob/main/src/diffusers/models/attention.py), [`resnet.py`](https://github.com/huggingface/diffusers/blob/main/src/diffusers/models/resnet.py), [`embeddings.py`](https://github.com/huggingface/diffusers/blob/main/src/diffusers/models/embeddings.py), etc... **Note**: This is in stark contrast to Transformers' modeling files and shows that models do not really follow the single-file policy.
- Models intend to expose complexity, just like PyTorch's `Module` class, and give clear error messages.
- Models all inherit from `ModelMixin` and `ConfigMixin`.
- Models can be optimized for performance when it doesn’t demand major code changes, keeps backward compatibility, and gives significant memory or compute gain.
- Models should by default have the highest precision and lowest performance setting.
- To integrate new model checkpoints whose general architecture can be classified as an architecture that already exists in Diffusers, the existing model architecture shall be adapted to make it work with the new checkpoint. One should only create a new file if the model architecture is fundamentally different.
- Models should be designed to be easily extendable to future changes. This can be achieved by limiting public function arguments, configuration arguments, and "foreseeing" future changes, *e.g.* it is usually better to add `string` "...type" arguments that can easily be extended to new future types instead of boolean `is_..._type` arguments. Only the minimum amount of changes shall be made to existing architectures to make a new model checkpoint work.
- The model design is a difficult trade-off between keeping code readable and concise and supporting many model checkpoints. For most parts of the modeling code, classes shall be adapted for new model checkpoints, while there are some exceptions where it is preferred to add new classes to make sure the code is kept concise and
readable long-term, such as [UNet blocks](https://github.com/huggingface/diffusers/blob/main/src/diffusers/models/unets/unet_2d_blocks.py) and [Attention processors](https://github.com/huggingface/diffusers/blob/main/src/diffusers/models/attention_processor.py).
### Schedulers
Schedulers are responsible to guide the denoising process for inference as well as to define a noise schedule for training. They are designed as individual classes with loadable configuration files and strongly follow the **single-file policy**.
The following design principles are followed:
- All schedulers are found in [`src/diffusers/schedulers`](https://github.com/huggingface/diffusers/tree/main/src/diffusers/schedulers).
- Schedulers are **not** allowed to import from large utils files and shall be kept very self-contained.
- One scheduler Python file corresponds to one scheduler algorithm (as might be defined in a paper).
- If schedulers share similar functionalities, we can make use of the `# Copied from` mechanism.
- Schedulers all inherit from `SchedulerMixin` and `ConfigMixin`.
- Schedulers can be easily swapped out with the [`ConfigMixin.from_config`](https://huggingface.co/docs/diffusers/main/en/api/configuration#diffusers.ConfigMixin.from_config) method as explained in detail [here](../using-diffusers/schedulers).
- Every scheduler has to have a `set_num_inference_steps`, and a `step` function. `set_num_inference_steps(...)` has to be called before every denoising process, *i.e.* before `step(...)` is called.
- Every scheduler exposes the timesteps to be "looped over" via a `timesteps` attribute, which is an array of timesteps the model will be called upon.
- The `step(...)` function takes a predicted model output and the "current" sample (x_t) and returns the "previous", slightly more denoised sample (x_t-1).
- Given the complexity of diffusion schedulers, the `step` function does not expose all the complexity and can be a bit of a "black box".
- In almost all cases, novel schedulers shall be implemented in a new scheduling file.
# 🧨 Diffusers’ Ethical Guidelines
## Preamble
[Diffusers](https://huggingface.co/docs/diffusers/index) provides pre-trained diffusion models and serves as a modular toolbox for inference and training.
Given its real case applications in the world and potential negative impacts on society, we think it is important to provide the project with ethical guidelines to guide the development, users’ contributions, and usage of the Diffusers library.
The risks associated with using this technology are still being examined, but to name a few: copyrights issues for artists; deep-fake exploitation; sexual content generation in inappropriate contexts; non-consensual impersonation; harmful social biases perpetuating the oppression of marginalized groups.
We will keep tracking risks and adapt the following guidelines based on the community's responsiveness and valuable feedback.
## Scope
The Diffusers community will apply the following ethical guidelines to the project’s development and help coordinate how the community will integrate the contributions, especially concerning sensitive topics related to ethical concerns.
## Ethical guidelines
The following ethical guidelines apply generally, but we will primarily implement them when dealing with ethically sensitive issues while making a technical choice. Furthermore, we commit to adapting those ethical principles over time following emerging harms related to the state of the art of the technology in question.
- **Transparency**: we are committed to being transparent in managing PRs, explaining our choices to users, and making technical decisions.
- **Consistency**: we are committed to guaranteeing our users the same level of attention in project management, keeping it technically stable and consistent.
- **Simplicity**: with a desire to make it easy to use and exploit the Diffusers library, we are committed to keeping the project’s goals lean and coherent.
- **Accessibility**: the Diffusers project helps lower the entry bar for contributors who can help run it even without technical expertise. Doing so makes research artifacts more accessible to the community.
- **Reproducibility**: we aim to be transparent about the reproducibility of upstream code, models, and datasets when made available through the Diffusers library.
- **Responsibility**: as a community and through teamwork, we hold a collective responsibility to our users by anticipating and mitigating this technology's potential risks and dangers.
## Examples of implementations: Safety features and Mechanisms
The team works daily to make the technical and non-technical tools available to deal with the potential ethical and social risks associated with diffusion technology. Moreover, the community's input is invaluable in ensuring these features' implementation and raising awareness with us.
- [**Community tab**](https://huggingface.co/docs/hub/repositories-pull-requests-discussions): it enables the community to discuss and better collaborate on a project.
- **Bias exploration and evaluation**: the Hugging Face team provides a [space](https://huggingface.co/spaces/society-ethics/DiffusionBiasExplorer) to demonstrate the biases in Stable Diffusion interactively. In this sense, we support and encourage bias explorers and evaluations.
- **Encouraging safety in deployment**
- [**Safe Stable Diffusion**](https://huggingface.co/docs/diffusers/main/en/api/pipelines/stable_diffusion/stable_diffusion_safe): It mitigates the well-known issue that models, like Stable Diffusion, that are trained on unfiltered, web-crawled datasets tend to suffer from inappropriate degeneration. Related paper: [Safe Latent Diffusion: Mitigating Inappropriate Degeneration in Diffusion Models](https://arxiv.org/abs/2211.05105).
- [**Safety Checker**](https://github.com/huggingface/diffusers/blob/main/src/diffusers/pipelines/stable_diffusion/safety_checker.py): It checks and compares the class probability of a set of hard-coded harmful concepts in the embedding space against an image after it has been generated. The harmful concepts are intentionally hidden to prevent reverse engineering of the checker.
- **Staged released on the Hub**: in particularly sensitive situations, access to some repositories should be restricted. This staged release is an intermediary step that allows the repository’s authors to have more control over its use.
- **Licensing**: [OpenRAILs](https://huggingface.co/blog/open_rail), a new type of licensing, allow us to ensure free access while having a set of restrictions that ensure more responsible use.
# How to contribute to Diffusers 🧨
We ❤️ contributions from the open-source community! Everyone is welcome, and all types of participation –not just code– are valued and appreciated. Answering questions, helping others, reaching out, and improving the documentation are all immensely valuable to the community, so don't be afraid and get involved if you're up for it!
Everyone is encouraged to start by saying 👋 in our public Discord channel. We discuss the latest trends in diffusion models, ask questions, show off personal projects, help each other with contributions, or just hang out ☕.
Whichever way you choose to contribute, we strive to be part of an open, welcoming, and kind community. Please, read our [code of conduct](https://github.com/huggingface/diffusers/blob/main/CODE_OF_CONDUCT.md) and be mindful to respect it during your interactions. We also recommend you become familiar with the [ethical guidelines](https://huggingface.co/docs/diffusers/conceptual/ethical_guidelines) that guide our project and ask you to adhere to the same principles of transparency and responsibility.
We enormously value feedback from the community, so please do not be afraid to speak up if you believe you have valuable feedback that can help improve the library - every message, comment, issue, and pull request (PR) is read and considered.
## Overview
You can contribute in many ways ranging from answering questions on issues and discussions to adding new diffusion models to the core library.
In the following, we give an overview of different ways to contribute, ranked by difficulty in ascending order. All of them are valuable to the community.
* 1. Asking and answering questions on [the Diffusers discussion forum](https://discuss.huggingface.co/c/discussion-related-to-httpsgithubcomhuggingfacediffusers) or on [Discord](https://discord.gg/G7tWnz98XR).
* 2. Opening new issues on [the GitHub Issues tab](https://github.com/huggingface/diffusers/issues/new/choose) or new discussions on [the GitHub Discussions tab](https://github.com/huggingface/diffusers/discussions/new/choose).
* 3. Answering issues on [the GitHub Issues tab](https://github.com/huggingface/diffusers/issues) or discussions on [the GitHub Discussions tab](https://github.com/huggingface/diffusers/discussions).
* 4. Fix a simple issue, marked by the "Good first issue" label, see [here](https://github.com/huggingface/diffusers/issues?q=is%3Aopen+is%3Aissue+label%3A%22good+first+issue%22).
* 5. Contribute to the [documentation](https://github.com/huggingface/diffusers/tree/main/docs/source).
* 6. Contribute a [Community Pipeline](https://github.com/huggingface/diffusers/issues?q=is%3Aopen+is%3Aissue+label%3Acommunity-examples).
* 7. Contribute to the [examples](https://github.com/huggingface/diffusers/tree/main/examples).
* 8. Fix a more difficult issue, marked by the "Good second issue" label, see [here](https://github.com/huggingface/diffusers/issues?q=is%3Aopen+is%3Aissue+label%3A%22Good+second+issue%22).
* 9. Add a new pipeline, model, or scheduler, see ["New Pipeline/Model"](https://github.com/huggingface/diffusers/issues?q=is%3Aopen+is%3Aissue+label%3A%22New+pipeline%2Fmodel%22) and ["New scheduler"](https://github.com/huggingface/diffusers/issues?q=is%3Aopen+is%3Aissue+label%3A%22New+scheduler%22) issues. For this contribution, please have a look at [Design Philosophy](https://github.com/huggingface/diffusers/blob/main/PHILOSOPHY.md).
As said before, **all contributions are valuable to the community**.
In the following, we will explain each contribution a bit more in detail.
For all contributions 4 - 9, you will need to open a PR. It is explained in detail how to do so in [Opening a pull request](#how-to-open-a-pr).
### 1. Asking and answering questions on the Diffusers discussion forum or on the Diffusers Discord
Any question or comment related to the Diffusers library can be asked on the [discussion forum](https://discuss.huggingface.co/c/discussion-related-to-httpsgithubcomhuggingfacediffusers/) or on [Discord](https://discord.gg/G7tWnz98XR). Such questions and comments include (but are not limited to):
- Reports of training or inference experiments in an attempt to share knowledge
- Presentation of personal projects
- Questions to non-official training examples
- Project proposals
- General feedback
- Paper summaries
- Asking for help on personal projects that build on top of the Diffusers library
- General questions
- Ethical questions regarding diffusion models
- ...
Every question that is asked on the forum or on Discord actively encourages the community to publicly
share knowledge and might very well help a beginner in the future who has the same question you're
having. Please do pose any questions you might have.
In the same spirit, you are of immense help to the community by answering such questions because this way you are publicly documenting knowledge for everybody to learn from.
**Please** keep in mind that the more effort you put into asking or answering a question, the higher
the quality of the publicly documented knowledge. In the same way, well-posed and well-answered questions create a high-quality knowledge database accessible to everybody, while badly posed questions or answers reduce the overall quality of the public knowledge database.
In short, a high quality question or answer is *precise*, *concise*, *relevant*, *easy-to-understand*, *accessible*, and *well-formatted/well-posed*. For more information, please have a look through the [How to write a good issue](#how-to-write-a-good-issue) section.
**NOTE about channels**:
[*The forum*](https://discuss.huggingface.co/c/discussion-related-to-httpsgithubcomhuggingfacediffusers/63) is much better indexed by search engines, such as Google. Posts are ranked by popularity rather than chronologically. Hence, it's easier to look up questions and answers that we posted some time ago.
In addition, questions and answers posted in the forum can easily be linked to.
In contrast, *Discord* has a chat-like format that invites fast back-and-forth communication.
While it will most likely take less time for you to get an answer to your question on Discord, your
question won't be visible anymore over time. Also, it's much harder to find information that was posted a while back on Discord. We therefore strongly recommend using the forum for high-quality questions and answers in an attempt to create long-lasting knowledge for the community. If discussions on Discord lead to very interesting answers and conclusions, we recommend posting the results on the forum to make the information more available for future readers.
### 2. Opening new issues on the GitHub issues tab
The 🧨 Diffusers library is robust and reliable thanks to the users who notify us of
the problems they encounter. So thank you for reporting an issue.
Remember, GitHub issues are reserved for technical questions directly related to the Diffusers library, bug reports, feature requests, or feedback on the library design.
In a nutshell, this means that everything that is **not** related to the **code of the Diffusers library** (including the documentation) should **not** be asked on GitHub, but rather on either the [forum](https://discuss.huggingface.co/c/discussion-related-to-httpsgithubcomhuggingfacediffusers/63) or [Discord](https://discord.gg/G7tWnz98XR).
**Please consider the following guidelines when opening a new issue**:
- Make sure you have searched whether your issue has already been asked before (use the search bar on GitHub under Issues).
- Please never report a new issue on another (related) issue. If another issue is highly related, please
open a new issue nevertheless and link to the related issue.
- Make sure your issue is written in English. Please use one of the great, free online translation services, such as [DeepL](https://www.deepl.com/translator) to translate from your native language to English if you are not comfortable in English.
- Check whether your issue might be solved by updating to the newest Diffusers version. Before posting your issue, please make sure that `python -c "import diffusers; print(diffusers.__version__)"` is higher or matches the latest Diffusers version.
- Remember that the more effort you put into opening a new issue, the higher the quality of your answer will be and the better the overall quality of the Diffusers issues.
New issues usually include the following.
#### 2.1. Reproducible, minimal bug reports
A bug report should always have a reproducible code snippet and be as minimal and concise as possible.
This means in more detail:
- Narrow the bug down as much as you can, **do not just dump your whole code file**.
- Format your code.
- Do not include any external libraries except for Diffusers depending on them.
- **Always** provide all necessary information about your environment; for this, you can run: `diffusers-cli env` in your shell and copy-paste the displayed information to the issue.
- Explain the issue. If the reader doesn't know what the issue is and why it is an issue, (s)he cannot solve it.
- **Always** make sure the reader can reproduce your issue with as little effort as possible. If your code snippet cannot be run because of missing libraries or undefined variables, the reader cannot help you. Make sure your reproducible code snippet is as minimal as possible and can be copy-pasted into a simple Python shell.
- If in order to reproduce your issue a model and/or dataset is required, make sure the reader has access to that model or dataset. You can always upload your model or dataset to the [Hub](https://huggingface.co) to make it easily downloadable. Try to keep your model and dataset as small as possible, to make the reproduction of your issue as effortless as possible.
For more information, please have a look through the [How to write a good issue](#how-to-write-a-good-issue) section.
You can open a bug report [here](https://github.com/huggingface/diffusers/issues/new?assignees=&labels=bug&projects=&template=bug-report.yml).
#### 2.2. Feature requests
A world-class feature request addresses the following points:
1. Motivation first:
* Is it related to a problem/frustration with the library? If so, please explain
why. Providing a code snippet that demonstrates the problem is best.
* Is it related to something you would need for a project? We'd love to hear
about it!
* Is it something you worked on and think could benefit the community?
Awesome! Tell us what problem it solved for you.
2. Write a *full paragraph* describing the feature;
3. Provide a **code snippet** that demonstrates its future use;
4. In case this is related to a paper, please attach a link;
5. Attach any additional information (drawings, screenshots, etc.) you think may help.
You can open a feature request [here](https://github.com/huggingface/diffusers/issues/new?assignees=&labels=&template=feature_request.md&title=).
#### 2.3 Feedback
Feedback about the library design and why it is good or not good helps the core maintainers immensely to build a user-friendly library. To understand the philosophy behind the current design philosophy, please have a look [here](https://huggingface.co/docs/diffusers/conceptual/philosophy). If you feel like a certain design choice does not fit with the current design philosophy, please explain why and how it should be changed. If a certain design choice follows the design philosophy too much, hence restricting use cases, explain why and how it should be changed.
If a certain design choice is very useful for you, please also leave a note as this is great feedback for future design decisions.
You can open an issue about feedback [here](https://github.com/huggingface/diffusers/issues/new?assignees=&labels=&template=feedback.md&title=).
#### 2.4 Technical questions
Technical questions are mainly about why certain code of the library was written in a certain way, or what a certain part of the code does. Please make sure to link to the code in question and please provide details on
why this part of the code is difficult to understand.
You can open an issue about a technical question [here](https://github.com/huggingface/diffusers/issues/new?assignees=&labels=bug&template=bug-report.yml).
#### 2.5 Proposal to add a new model, scheduler, or pipeline
If the diffusion model community released a new model, pipeline, or scheduler that you would like to see in the Diffusers library, please provide the following information:
* Short description of the diffusion pipeline, model, or scheduler and link to the paper or public release.
* Link to any of its open-source implementation(s).
* Link to the model weights if they are available.
If you are willing to contribute to the model yourself, let us know so we can best guide you. Also, don't forget
to tag the original author of the component (model, scheduler, pipeline, etc.) by GitHub handle if you can find it.
You can open a request for a model/pipeline/scheduler [here](https://github.com/huggingface/diffusers/issues/new?assignees=&labels=New+model%2Fpipeline%2Fscheduler&template=new-model-addition.yml).
### 3. Answering issues on the GitHub issues tab
Answering issues on GitHub might require some technical knowledge of Diffusers, but we encourage everybody to give it a try even if you are not 100% certain that your answer is correct.
Some tips to give a high-quality answer to an issue:
- Be as concise and minimal as possible.
- Stay on topic. An answer to the issue should concern the issue and only the issue.
- Provide links to code, papers, or other sources that prove or encourage your point.
- Answer in code. If a simple code snippet is the answer to the issue or shows how the issue can be solved, please provide a fully reproducible code snippet.
Also, many issues tend to be simply off-topic, duplicates of other issues, or irrelevant. It is of great
help to the maintainers if you can answer such issues, encouraging the author of the issue to be
more precise, provide the link to a duplicated issue or redirect them to [the forum](https://discuss.huggingface.co/c/discussion-related-to-httpsgithubcomhuggingfacediffusers/63) or [Discord](https://discord.gg/G7tWnz98XR).
If you have verified that the issued bug report is correct and requires a correction in the source code,
please have a look at the next sections.
For all of the following contributions, you will need to open a PR. It is explained in detail how to do so in the [Opening a pull request](#how-to-open-a-pr) section.
### 4. Fixing a "Good first issue"
*Good first issues* are marked by the [Good first issue](https://github.com/huggingface/diffusers/issues?q=is%3Aopen+is%3Aissue+label%3A%22good+first+issue%22) label. Usually, the issue already
explains how a potential solution should look so that it is easier to fix.
If the issue hasn't been closed and you would like to try to fix this issue, you can just leave a message "I would like to try this issue.". There are usually three scenarios:
- a.) The issue description already proposes a fix. In this case and if the solution makes sense to you, you can open a PR or draft PR to fix it.
- b.) The issue description does not propose a fix. In this case, you can ask what a proposed fix could look like and someone from the Diffusers team should answer shortly. If you have a good idea of how to fix it, feel free to directly open a PR.
- c.) There is already an open PR to fix the issue, but the issue hasn't been closed yet. If the PR has gone stale, you can simply open a new PR and link to the stale PR. PRs often go stale if the original contributor who wanted to fix the issue suddenly cannot find the time anymore to proceed. This often happens in open-source and is very normal. In this case, the community will be very happy if you give it a new try and leverage the knowledge of the existing PR. If there is already a PR and it is active, you can help the author by giving suggestions, reviewing the PR or even asking whether you can contribute to the PR.
### 5. Contribute to the documentation
A good library **always** has good documentation! The official documentation is often one of the first points of contact for new users of the library, and therefore contributing to the documentation is a **highly
valuable contribution**.
Contributing to the library can have many forms:
- Correcting spelling or grammatical errors.
- Correct incorrect formatting of the docstring. If you see that the official documentation is weirdly displayed or a link is broken, we would be very happy if you take some time to correct it.
- Correct the shape or dimensions of a docstring input or output tensor.
- Clarify documentation that is hard to understand or incorrect.
- Update outdated code examples.
- Translating the documentation to another language.
Anything displayed on [the official Diffusers doc page](https://huggingface.co/docs/diffusers/index) is part of the official documentation and can be corrected, adjusted in the respective [documentation source](https://github.com/huggingface/diffusers/tree/main/docs/source).
Please have a look at [this page](https://github.com/huggingface/diffusers/tree/main/docs) on how to verify changes made to the documentation locally.
### 6. Contribute a community pipeline
> [!TIP]
> Read the [Community pipelines](../using-diffusers/custom_pipeline_overview#community-pipelines) guide to learn more about the difference between a GitHub and Hugging Face Hub community pipeline. If you're interested in why we have community pipelines, take a look at GitHub Issue [#841](https://github.com/huggingface/diffusers/issues/841) (basically, we can't maintain all the possible ways diffusion models can be used for inference but we also don't want to prevent the community from building them).
Contributing a community pipeline is a great way to share your creativity and work with the community. It lets you build on top of the [DiffusionPipeline](/docs/diffusers/main/en/api/pipelines/overview#diffusers.DiffusionPipeline) so that anyone can load and use it by setting the `custom_pipeline` parameter. This section will walk you through how to create a simple pipeline where the UNet only does a single forward pass and calls the scheduler once (a "one-step" pipeline).
1. Create a one_step_unet.py file for your community pipeline. This file can contain whatever package you want to use as long as it's installed by the user. Make sure you only have one pipeline class that inherits from [DiffusionPipeline](/docs/diffusers/main/en/api/pipelines/overview#diffusers.DiffusionPipeline) to load model weights and the scheduler configuration from the Hub. Add a UNet and scheduler to the `__init__` function.
You should also add the `register_modules` function to ensure your pipeline and its components can be saved with [save_pretrained()](/docs/diffusers/main/en/api/pipelines/overview#diffusers.DiffusionPipeline.save_pretrained).
```py
from diffusers import DiffusionPipeline
import torch
class UnetSchedulerOneForwardPipeline(DiffusionPipeline):
def __init__(self, unet, scheduler):
super().__init__()
self.register_modules(unet=unet, scheduler=scheduler)
```
1. In the forward pass (which we recommend defining as `__call__`), you can add any feature you'd like. For the "one-step" pipeline, create a random image and call the UNet and scheduler once by setting `timestep=1`.
```py
from diffusers import DiffusionPipeline
import torch
class UnetSchedulerOneForwardPipeline(DiffusionPipeline):
def __init__(self, unet, scheduler):
super().__init__()
self.register_modules(unet=unet, scheduler=scheduler)
def __call__(self):
image = torch.randn(
(1, self.unet.config.in_channels, self.unet.config.sample_size, self.unet.config.sample_size),
)
timestep = 1
model_output = self.unet(image, timestep).sample
scheduler_output = self.scheduler.step(model_output, timestep, image).prev_sample
return scheduler_output
```
Now you can run the pipeline by passing a UNet and scheduler to it or load pretrained weights if the pipeline structure is identical.
```py
from diffusers import DDPMScheduler, UNet2DModel
scheduler = DDPMScheduler()
unet = UNet2DModel()
pipeline = UnetSchedulerOneForwardPipeline(unet=unet, scheduler=scheduler)
output = pipeline()
# load pretrained weights
pipeline = UnetSchedulerOneForwardPipeline.from_pretrained("google/ddpm-cifar10-32", use_safetensors=True)
output = pipeline()
```
You can either share your pipeline as a GitHub community pipeline or Hub community pipeline.
Share your GitHub pipeline by opening a pull request on the Diffusers [repository](https://github.com/huggingface/diffusers) and add the one_step_unet.py file to the [examples/community](https://github.com/huggingface/diffusers/tree/main/examples/community) subfolder.
Share your Hub pipeline by creating a model repository on the Hub and uploading the one_step_unet.py file to it.
### 7. Contribute to training examples
Diffusers examples are a collection of training scripts that reside in [examples](https://github.com/huggingface/diffusers/tree/main/examples).
We support two types of training examples:
- Official training examples
- Research training examples
Research training examples are located in [examples/research_projects](https://github.com/huggingface/diffusers/tree/main/examples/research_projects) whereas official training examples include all folders under [examples](https://github.com/huggingface/diffusers/tree/main/examples) except the `research_projects` and `community` folders.
The official training examples are maintained by the Diffusers' core maintainers whereas the research training examples are maintained by the community.
This is because of the same reasons put forward in [6. Contribute a community pipeline](#6-contribute-a-community-pipeline) for official pipelines vs. community pipelines: It is not feasible for the core maintainers to maintain all possible training methods for diffusion models.
If the Diffusers core maintainers and the community consider a certain training paradigm to be too experimental or not popular enough, the corresponding training code should be put in the `research_projects` folder and maintained by the author.
Both official training and research examples consist of a directory that contains one or more training scripts, a `requirements.txt` file, and a `README.md` file. In order for the user to make use of the
training examples, it is required to clone the repository:
```bash
git clone https://github.com/huggingface/diffusers
```
as well as to install all additional dependencies required for training:
```bash
cd diffusers
pip install -r examples//requirements.txt
```
Therefore when adding an example, the `requirements.txt` file shall define all pip dependencies required for your training example so that once all those are installed, the user can run the example's training script. See, for example, the [DreamBooth `requirements.txt` file](https://github.com/huggingface/diffusers/blob/main/examples/dreambooth/requirements.txt).
Training examples of the Diffusers library should adhere to the following philosophy:
- All the code necessary to run the examples should be found in a single Python file.
- One should be able to run the example from the command line with `python .py --args`.
- Examples should be kept simple and serve as **an example** on how to use Diffusers for training. The purpose of example scripts is **not** to create state-of-the-art diffusion models, but rather to reproduce known training schemes without adding too much custom logic. As a byproduct of this point, our examples also strive to serve as good educational materials.
To contribute an example, it is highly recommended to look at already existing examples such as [dreambooth](https://github.com/huggingface/diffusers/blob/main/examples/dreambooth/train_dreambooth.py) to get an idea of how they should look like.
We strongly advise contributors to make use of the [Accelerate library](https://github.com/huggingface/accelerate) as it's tightly integrated
with Diffusers.
Once an example script works, please make sure to add a comprehensive `README.md` that states how to use the example exactly. This README should include:
- An example command on how to run the example script as shown [here](https://github.com/huggingface/diffusers/tree/main/examples/dreambooth#running-locally-with-pytorch).
- A link to some training results (logs, models, etc.) that show what the user can expect as shown [here](https://api.wandb.ai/report/patrickvonplaten/xm6cd5q5).
- If you are adding a non-official/research training example, **please don't forget** to add a sentence that you are maintaining this training example which includes your git handle as shown [here](https://github.com/huggingface/diffusers/tree/main/examples/research_projects/intel_opts#diffusers-examples-with-intel-optimizations).
If you are contributing to the official training examples, please also make sure to add a test to its folder such as [examples/dreambooth/test_dreambooth.py](https://github.com/huggingface/diffusers/blob/main/examples/dreambooth/test_dreambooth.py). This is not necessary for non-official training examples.
### 8. Fixing a "Good second issue"
*Good second issues* are marked by the [Good second issue](https://github.com/huggingface/diffusers/issues?q=is%3Aopen+is%3Aissue+label%3A%22Good+second+issue%22) label. Good second issues are
usually more complicated to solve than [Good first issues](https://github.com/huggingface/diffusers/issues?q=is%3Aopen+is%3Aissue+label%3A%22good+first+issue%22).
The issue description usually gives less guidance on how to fix the issue and requires
a decent understanding of the library by the interested contributor.
If you are interested in tackling a good second issue, feel free to open a PR to fix it and link the PR to the issue. If you see that a PR has already been opened for this issue but did not get merged, have a look to understand why it wasn't merged and try to open an improved PR.
Good second issues are usually more difficult to get merged compared to good first issues, so don't hesitate to ask for help from the core maintainers. If your PR is almost finished the core maintainers can also jump into your PR and commit to it in order to get it merged.
### 9. Adding pipelines, models, schedulers
Pipelines, models, and schedulers are the most important pieces of the Diffusers library.
They provide easy access to state-of-the-art diffusion technologies and thus allow the community to
build powerful generative AI applications.
By adding a new model, pipeline, or scheduler you might enable a new powerful use case for any of the user interfaces relying on Diffusers which can be of immense value for the whole generative AI ecosystem.
Diffusers has a couple of open feature requests for all three components - feel free to gloss over them
if you don't know yet what specific component you would like to add:
- [Model or pipeline](https://github.com/huggingface/diffusers/issues?q=is%3Aopen+is%3Aissue+label%3A%22New+pipeline%2Fmodel%22)
- [Scheduler](https://github.com/huggingface/diffusers/issues?q=is%3Aopen+is%3Aissue+label%3A%22New+scheduler%22)
Before adding any of the three components, it is strongly recommended that you give the [Philosophy guide](philosophy) a read to better understand the design of any of the three components. Please be aware that we cannot merge model, scheduler, or pipeline additions that strongly diverge from our design philosophy
as it will lead to API inconsistencies. If you fundamentally disagree with a design choice, please open a [Feedback issue](https://github.com/huggingface/diffusers/issues/new?assignees=&labels=&template=feedback.md&title=) instead so that it can be discussed whether a certain design pattern/design choice shall be changed everywhere in the library and whether we shall update our design philosophy. Consistency across the library is very important for us.
Please make sure to add links to the original codebase/paper to the PR and ideally also ping the original author directly on the PR so that they can follow the progress and potentially help with questions.
If you are unsure or stuck in the PR, don't hesitate to leave a message to ask for a first review or help.
#### Copied from mechanism
A unique and important feature to understand when adding any pipeline, model or scheduler code is the `# Copied from` mechanism. You'll see this all over the Diffusers codebase, and the reason we use it is to keep the codebase easy to understand and maintain. Marking code with the `# Copied from` mechanism forces the marked code to be identical to the code it was copied from. This makes it easy to update and propagate changes across many files whenever you run `make fix-copies`.
For example, in the code example below, [StableDiffusionPipelineOutput](/docs/diffusers/main/en/api/pipelines/stable_diffusion/inpaint#diffusers.pipelines.stable_diffusion.StableDiffusionPipelineOutput) is the original code and `AltDiffusionPipelineOutput` uses the `# Copied from` mechanism to copy it. The only difference is changing the class prefix from `Stable` to `Alt`.
```py
# Copied from diffusers.pipelines.stable_diffusion.pipeline_output.StableDiffusionPipelineOutput with Stable->Alt
class AltDiffusionPipelineOutput(BaseOutput):
"""
Output class for Alt Diffusion pipelines.
Args:
images (`List[PIL.Image.Image]` or `np.ndarray`)
List of denoised PIL images of length `batch_size` or NumPy array of shape `(batch_size, height, width,
num_channels)`.
nsfw_content_detected (`List[bool]`)
List indicating whether the corresponding generated image contains "not-safe-for-work" (nsfw) content or
`None` if safety checking could not be performed.
"""
```
To learn more, read this section of the [~Don't~ Repeat Yourself*](https://huggingface.co/blog/transformers-design-philosophy#4-machine-learning-models-are-static) blog post.
## How to write a good issue
**The better your issue is written, the higher the chances that it will be quickly resolved.**
1. Make sure that you've used the correct template for your issue. You can pick between *Bug Report*, *Feature Request*, *Feedback about API Design*, *New model/pipeline/scheduler addition*, *Forum*, or a blank issue. Make sure to pick the correct one when opening [a new issue](https://github.com/huggingface/diffusers/issues/new/choose).
2. **Be precise**: Give your issue a fitting title. Try to formulate your issue description as simple as possible. The more precise you are when submitting an issue, the less time it takes to understand the issue and potentially solve it. Make sure to open an issue for one issue only and not for multiple issues. If you found multiple issues, simply open multiple issues. If your issue is a bug, try to be as precise as possible about what bug it is - you should not just write "Error in diffusers".
3. **Reproducibility**: No reproducible code snippet == no solution. If you encounter a bug, maintainers **have to be able to reproduce** it. Make sure that you include a code snippet that can be copy-pasted into a Python interpreter to reproduce the issue. Make sure that your code snippet works, *i.e.* that there are no missing imports or missing links to images, ... Your issue should contain an error message **and** a code snippet that can be copy-pasted without any changes to reproduce the exact same error message. If your issue is using local model weights or local data that cannot be accessed by the reader, the issue cannot be solved. If you cannot share your data or model, try to make a dummy model or dummy data.
4. **Minimalistic**: Try to help the reader as much as you can to understand the issue as quickly as possible by staying as concise as possible. Remove all code / all information that is irrelevant to the issue. If you have found a bug, try to create the easiest code example you can to demonstrate your issue, do not just dump your whole workflow into the issue as soon as you have found a bug. E.g., if you train a model and get an error at some point during the training, you should first try to understand what part of the training code is responsible for the error and try to reproduce it with a couple of lines. Try to use dummy data instead of full datasets.
5. Add links. If you are referring to a certain naming, method, or model make sure to provide a link so that the reader can better understand what you mean. If you are referring to a specific PR or issue, make sure to link it to your issue. Do not assume that the reader knows what you are talking about. The more links you add to your issue the better.
6. Formatting. Make sure to nicely format your issue by formatting code into Python code syntax, and error messages into normal code syntax. See the [official GitHub formatting docs](https://docs.github.com/en/get-started/writing-on-github/getting-started-with-writing-and-formatting-on-github/basic-writing-and-formatting-syntax) for more information.
7. Think of your issue not as a ticket to be solved, but rather as a beautiful entry to a well-written encyclopedia. Every added issue is a contribution to publicly available knowledge. By adding a nicely written issue you not only make it easier for maintainers to solve your issue, but you are helping the whole community to better understand a certain aspect of the library.
## How to write a good PR
1. Be a chameleon. Understand existing design patterns and syntax and make sure your code additions flow seamlessly into the existing code base. Pull requests that significantly diverge from existing design patterns or user interfaces will not be merged.
2. Be laser focused. A pull request should solve one problem and one problem only. Make sure to not fall into the trap of "also fixing another problem while we're adding it". It is much more difficult to review pull requests that solve multiple, unrelated problems at once.
3. If helpful, try to add a code snippet that displays an example of how your addition can be used.
4. The title of your pull request should be a summary of its contribution.
5. If your pull request addresses an issue, please mention the issue number in
the pull request description to make sure they are linked (and people
consulting the issue know you are working on it);
6. To indicate a work in progress please prefix the title with `[WIP]`. These
are useful to avoid duplicated work, and to differentiate it from PRs ready
to be merged;
7. Try to formulate and format your text as explained in [How to write a good issue](#how-to-write-a-good-issue).
8. Make sure existing tests pass;
9. Add high-coverage tests. No quality testing = no merge.
- If you are adding new `@slow` tests, make sure they pass using
`RUN_SLOW=1 python -m pytest tests/test_my_new_model.py`.
CircleCI does not run the slow tests, but GitHub Actions does every night!
10. All public methods must have informative docstrings that work nicely with markdown. See [`pipeline_latent_diffusion.py`](https://github.com/huggingface/diffusers/blob/main/src/diffusers/pipelines/latent_diffusion/pipeline_latent_diffusion.py) for an example.
11. Due to the rapidly growing repository, it is important to make sure that no files that would significantly weigh down the repository are added. This includes images, videos, and other non-text files. We prefer to leverage a hf.co hosted `dataset` like
[`hf-internal-testing`](https://huggingface.co/hf-internal-testing) or [huggingface/documentation-images](https://huggingface.co/datasets/huggingface/documentation-images) to place these files.
If an external contribution, feel free to add the images to your PR and ask a Hugging Face member to migrate your images
to this dataset.
## How to open a PR
Before writing code, we strongly advise you to search through the existing PRs or
issues to make sure that nobody is already working on the same thing. If you are
unsure, it is always a good idea to open an issue to get some feedback.
You will need basic `git` proficiency to be able to contribute to
🧨 Diffusers. `git` is not the easiest tool to use but it has the greatest
manual. Type `git --help` in a shell and enjoy. If you prefer books, [Pro
Git](https://git-scm.com/book/en/v2) is a very good reference.
Follow these steps to start contributing ([supported Python versions](https://github.com/huggingface/diffusers/blob/83bc6c94eaeb6f7704a2a428931cf2d9ad973ae9/setup.py#L270)):
1. Fork the [repository](https://github.com/huggingface/diffusers) by
clicking on the 'Fork' button on the repository's page. This creates a copy of the code
under your GitHub user account.
2. Clone your fork to your local disk, and add the base repository as a remote:
```bash
$ git clone git@github.com:/diffusers.git
$ cd diffusers
$ git remote add upstream https://github.com/huggingface/diffusers.git
```
3. Create a new branch to hold your development changes:
```bash
$ git checkout -b a-descriptive-name-for-my-changes
```
**Do not** work on the `main` branch.
4. Set up a development environment by running the following command in a virtual environment:
```bash
$ pip install -e ".[dev]"
```
If you have already cloned the repo, you might need to `git pull` to get the most recent changes in the
library.
5. Develop the features on your branch.
As you work on the features, you should make sure that the test suite
passes. You should run the tests impacted by your changes like this:
```bash
$ pytest tests/.py
```
Before you run the tests, please make sure you install the dependencies required for testing. You can do so
with this command:
```bash
$ pip install -e ".[test]"
```
You can also run the full test suite with the following command, but it takes
a beefy machine to produce a result in a decent amount of time now that
Diffusers has grown a lot. Here is the command for it:
```bash
$ make test
```
🧨 Diffusers relies on `black` and `isort` to format its source code
consistently. After you make changes, apply automatic style corrections and code verifications
that can't be automated in one go with:
```bash
$ make style
```
🧨 Diffusers also uses `ruff` and a few custom scripts to check for coding mistakes. Quality
control runs in CI, however, you can also run the same checks with:
```bash
$ make quality
```
Once you're happy with your changes, add changed files using `git add` and
make a commit with `git commit` to record your changes locally:
```bash
$ git add modified_file.py
$ git commit -m "A descriptive message about your changes."
```
It is a good idea to sync your copy of the code with the original
repository regularly. This way you can quickly account for changes:
```bash
$ git pull upstream main
```
Push the changes to your account using:
```bash
$ git push -u origin a-descriptive-name-for-my-changes
```
6. Once you are satisfied, go to the
webpage of your fork on GitHub. Click on 'Pull request' to send your changes
to the project maintainers for review.
7. It's OK if maintainers ask you for changes. It happens to core contributors
too! So everyone can see the changes in the Pull request, work in your local
branch and push the changes to your fork. They will automatically appear in
the pull request.
### Tests
An extensive test suite is included to test the library behavior and several examples. Library tests can be found in
the [tests folder](https://github.com/huggingface/diffusers/tree/main/tests).
We like `pytest` and `pytest-xdist` because it's faster. From the root of the
repository, here's how to run tests with `pytest` for the library:
```bash
$ python -m pytest -n auto --dist=loadfile -s -v ./tests/
```
In fact, that's how `make test` is implemented!
You can specify a smaller set of tests in order to test only the feature
you're working on.
By default, slow tests are skipped. Set the `RUN_SLOW` environment variable to
`yes` to run them. This will download many gigabytes of models — make sure you
have enough disk space and a good Internet connection, or a lot of patience!
```bash
$ RUN_SLOW=yes python -m pytest -n auto --dist=loadfile -s -v ./tests/
```
`unittest` is fully supported, here's how to run tests with it:
```bash
$ python -m unittest discover -s tests -t . -v
$ python -m unittest discover -s examples -t examples -v
```
### Syncing forked main with upstream (HuggingFace) main
To avoid pinging the upstream repository which adds reference notes to each upstream PR and sends unnecessary notifications to the developers involved in these PRs,
when syncing the main branch of a forked repository, please, follow these steps:
1. When possible, avoid syncing with the upstream using a branch and PR on the forked repository. Instead, merge directly into the forked main.
2. If a PR is absolutely necessary, use the following steps after checking out your branch:
```bash
$ git checkout -b your-branch-for-syncing
$ git pull --squash --no-commit upstream main
$ git commit -m ''
$ git push --set-upstream origin your-branch-for-syncing
```
### Style guide
For documentation strings, 🧨 Diffusers follows the [Google style](https://google.github.io/styleguide/pyguide.html).